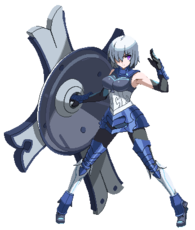
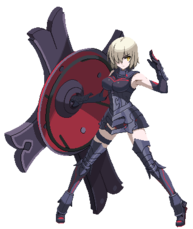
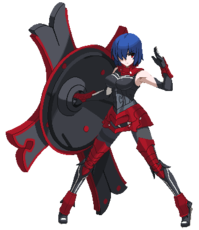
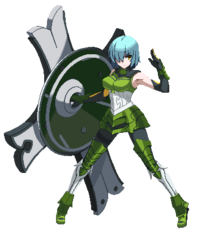
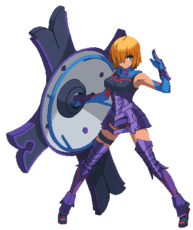
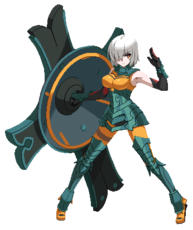
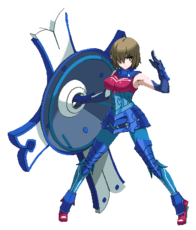
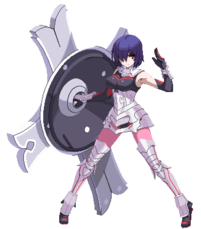
Melty Blood/MBTL/Mash Kyrielight
Gameplay
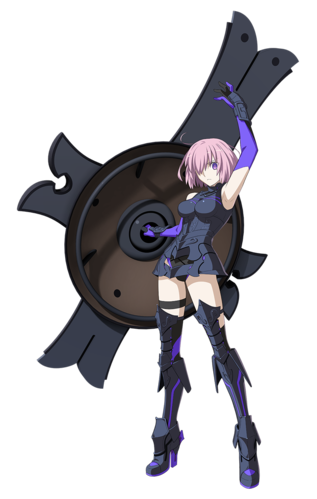
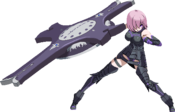
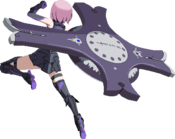
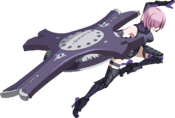
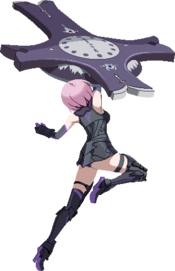
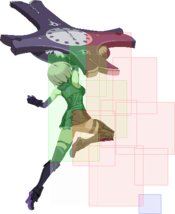
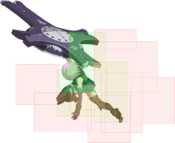
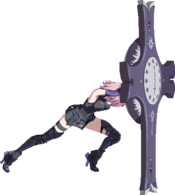
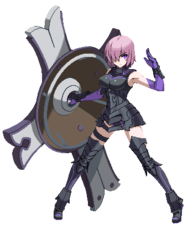
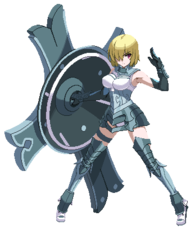
Mash Kyrielight is a new character to Melty Blood, released as free DLC alongside Neco-Arc on August 19, 2022. She is a straightforward melee rushdown character with high forward movement and simple midrange tools. Mash's strongest points lie in the movement options provided by her special moves, like Buster Swing (236X), Quick Strike (214X), and High-Angle Transfer (j.236X), as they allow her to convert stray hits into damage very well while also helping her control the close and mid-range space. Her normals compliment this in close- to mid-range and help stabilize her conversions.
Her main flaws are her small selection of ranged moves, limited mostly to her Bunker Shot (22X) projectiles and her Arc Drive, as well as the risks of overcommiting to her special moves; they're relatively unsafe and will leave her open if they're used recklessly.
| Pick if you like | Avoid if you dislike |
|---|---|
|
|
A pure hearted Demi-servant who encountered an unknown U.M.A. by chance on a journey to restore humanity
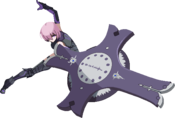
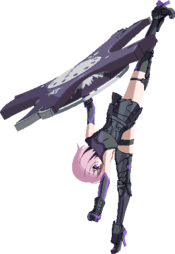
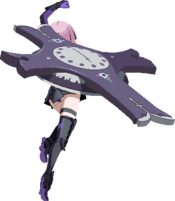
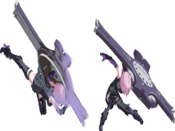
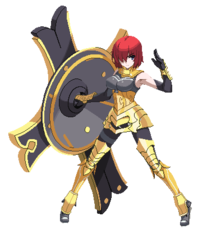
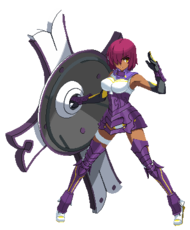
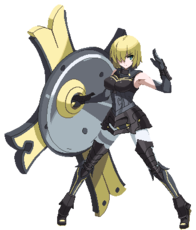
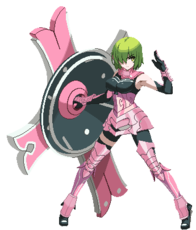
A girl summoned from a parallel world. A member of the Security Organization for the Preservation of Humanity, Finis Chaldea, Mash is a being known as a demi-servant: a successful fusion of a human body with a Heroic Spirit. Her Servant Class is Shielder. Her role is to jump to the point in spacetime of a problem in human history and resolve it, using the technology known as Rayshift.
Her hairstyle covering one eye is a key part of her fashion style, she also has a cute face, forthright personality, and honest, trusting character.
Mash has learned about concepts like good and evil, and the purpose and significance of human life over the journey toward restoring humanity.
In combat, she is excellent on defense and agile, using an immense shield much larger than she is. She also has strikes and throws using her shield, as well as techniques like kicks that launch her entire body from her shield.
In this title, the error of unknown origins during Rayshifting brings her to an unintended destination, into a next of mysterious creatures in a world she knows nothing about.
Main Weapon/Skill
Round Table Shield, Noble Phantasm: Lord Camelot
Basic Info
Height: 158cm
Weight: 46kg
Blood Type: Unknown
Birthday: Unknown
Voiced by: Rie Takahashi
Character Summary
- Moon Skills
- 6B+C - Buster Swing
- 3B+C - Art Strike
- 4B+C - Quick Assault
- 2B+C - Bunker Shot
- j.6B+C - High-Angle Transfer
- j.4B+C - Here's A Heavy One!
- Special Attacks
- 236A/B/C (EX OK) - Buster Swing
- 623A/B/C (EX OK) - Art Strike
- 214A/B/C (EX OK) - Quick Assault
- 22A/B/C (EX OK) - Bunker Shot
- j.236A/B/C (EX OK) - High-Angle Transfer
- j.214A/B/C (EX OK) - Here's A Heavy One!
- Arc Drive
- 236B+C - EX:Punishment
- Last Arc
- A+B+C+D / Successful Shield in Blood Heat - Tactical Decision: Around My Master
- Unique Attacks
- 6C, 3C
- Blowback Edge Moves
- 5[C], 6[C], j.[C], 236[B], 236[B+C]
HP Value: 11,700 (Average)
Backdash:
  - 1-14 Full Invul
  - 1-12 Strike Invul
  - 13-17 Projectile/Air Invul
  - 6-20 Airborne
  - 29 Total
Dash startup: 6
Dash actionable: 5
Jump startup: 4
Jump airtime: 37
}}
Move Analysis
Normal Moves
Standing Normals
5A
| Damage | Guard | Cancel | Property | Cost | Attribute |
|---|---|---|---|---|---|
| 160 | LH | - | - | - | - |
| First Active | Active | Recovery | Overall | Advantage | Invul |
| 5 | 2 | 11 | 17 | -1 | - |
- Cancels into itself 3 times.
- 5A and 2A have the same whiff duration.
5B
| Damage | Guard | Cancel | Property | Cost | Attribute |
|---|---|---|---|---|---|
| 480 | LH | - | - | - | - |
| First Active | Active | Recovery | Overall | Advantage | Invul |
| 8 | 3 | 17 | 27 | -5 | - |
5C
| Damage | Guard | Cancel | Property | Cost | Attribute |
|---|---|---|---|---|---|
| 610 | LH | - | - | - | - |
| First Active | Active | Recovery | Overall | Advantage | Invul |
| 10 ~ 16 | 4 | 18 | 31 ~ 37 | -5 | - |
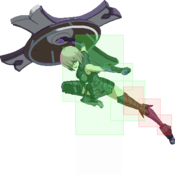
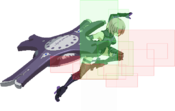
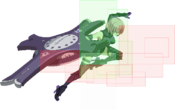
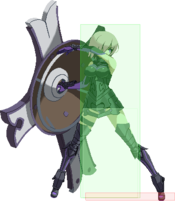
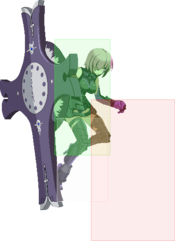
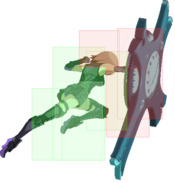
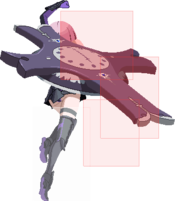
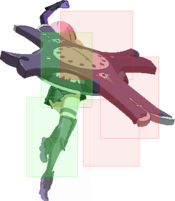
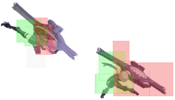
Mash swings her shield forward, creating a slash effect. It's a big poke and leads to decent damage on hit.
| Damage | Guard | Cancel | Property | Cost | Attribute |
|---|---|---|---|---|---|
| 910 | LH | - | - | - | - |
| First Active | Active | Recovery | Overall | Advantage | Invul |
| 22 | 4 | 18 | 43 | -5 | 16-21 Clash |
- Will fatal counter low shield.
- Gains clash frames.
Crouching Normals
2A
| Damage | Guard | Cancel | Property | Cost | Attribute |
|---|---|---|---|---|---|
| 140 | L | - | - | - | - |
| First Active | Active | Recovery | Overall | Advantage | Invul |
| 6 | 2 | 10 | 17 | 0 | - |
- Gatlings into itself 3 times.
2B
| Damage | Guard | Cancel | Property | Cost | Attribute |
|---|---|---|---|---|---|
| 420 | L | - | - | - | - |
| First Active | Active | Recovery | Overall | Advantage | Invul |
| 9 | 5 | 15 | 28 | -5 | - |
- Hits LOW
2C
| Damage | Guard | Cancel | Property | Cost | Attribute |
|---|---|---|---|---|---|
| 620 | L | - | - | - | - |
| First Active | Active | Recovery | Overall | Advantage | Invul |
| 10 | 4 | 24 | 37 | -11 | - |
- Knocks down on hit.
Jumping Normals
j.A
| Damage | Guard | Cancel | Property | Cost | Attribute |
|---|---|---|---|---|---|
| 130 | HA | - | - | - | - |
| First Active | Active | Recovery | Overall | Advantage | Invul |
| 6 | 4 | 11+2L | 20 | - | - |
- Gatlings into itself 3 times.
Downward angled kick which is good for jumping in or as a rising button against opponents trapped in blockstun after 4BC, not dissimilar to an F-Shiki. Doing this lets you connect at least two more gapless overheads on block. Due to it hitting downwards, it's very poor as an air-to-air button unless your opponent is below you in the air.
j.B
| Damage | Guard | Cancel | Property | Cost | Attribute |
|---|---|---|---|---|---|
| 400 | HA | - | - | - | - |
| First Active | Active | Recovery | Overall | Advantage | Invul |
| 8 | 5 | Until L+2 | - | - | - |
j.C
| Damage | Guard | Cancel | Property | Cost | Attribute |
|---|---|---|---|---|---|
| 560 | HA | - | - | - | - |
| First Active | Active | Recovery | Overall | Advantage | Invul |
| 10 | 4 | Until L+2 | - | - | - |
Her primary "cross-up" air button that can hit on both sides of her. Her best button to hit an opponent after an IAD or super jump in most scenarios.
| Damage | Guard | Cancel | Property | Cost | Attribute |
|---|---|---|---|---|---|
| 900 | HA | - | - | - | - |
| First Active | Active | Recovery | Overall | Advantage | Invul |
| 20 | 6 | Until L+6 | - | - | 16-19 Clash |
- Gains clash frames.
- Ground bounces on hit.
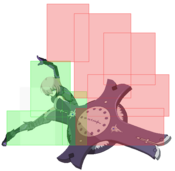
Somewhat like a welfare version of Saber's j.[C]. It has similar uses as a big normal that just covers a lot of space and can randomly clash with anti-airs, though it has less range and clash frames compared to her servant competition. You can also use it to fake out an overhead by using the startup flash as a distraction.
This is a primary staple in all of her combos so get used to buffering a j.[C] from 623A.Command Normals
6C
| Damage | Guard | Cancel | Property | Cost | Attribute |
|---|---|---|---|---|---|
| 700 | LH | - | - | - | - |
| First Active | Active | Recovery | Overall | Advantage | Invul |
| 16 | 3 | 24 | 42 | -10 | - |
- Ground bounces on hit.
- Cannot reverse beat.
Useful as a blockstring tool and for stabilizing combos thanks to its ground bounce. 6C has long reach but is very negative on block and can only be cancelled into special moves, limiting its usage in neutral.
| Damage | Guard | Cancel | Property | Cost | Attribute |
|---|---|---|---|---|---|
| 950 | H | - | - | - | - |
| First Active | Active | Recovery | Overall | Advantage | Invul |
| 27 | 3 | 26 | 55 | -12 | 20-27 Clash |
- Hits overhead.
Universal Mechanics
Rapid Beat 1
| Damage | Guard | Cancel | Property | Cost | Attribute |
|---|---|---|---|---|---|
| 230×2 (414) | LH | - | - | - | - |
| First Active | Active | Recovery | Overall | Advantage | Invul |
| 9 | 2(6)2 | 24 | 42 | -10 | - |
- 2 hits.
- Advances very far forwards.
3C / Rapid Beat 2
| Damage | Guard | Cancel | Property | Cost | Attribute |
|---|---|---|---|---|---|
| 700 | LH | - | - | - | - |
| First Active | Active | Recovery | Overall | Advantage | Invul |
| 10 | 3 | 25 | 37 | -11 | 5-12 Air |
- Standard cinematic launcher.
Ground Throw
| Damage | Guard | Cancel | Property | Cost | Attribute |
|---|---|---|---|---|---|
| 1500 | U | - | - | - | - |
| First Active | Active | Recovery | Overall | Advantage | Invul |
| 4 | 3 | 21 | 27 | +50 | - |
Air Throw
| Damage | Guard | Cancel | Property | Cost | Attribute |
|---|---|---|---|---|---|
| 1200 | U | - | - | - | - |
| First Active | Active | Recovery | Overall | Advantage | Invul |
| 1 | 3 | Until L+12 | - | - | - |
- Gives better oki with double jump available.
Special Moves
Buster Swing
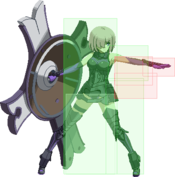
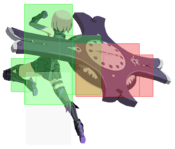
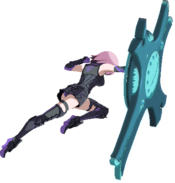
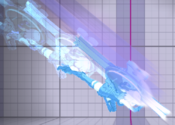
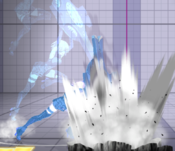
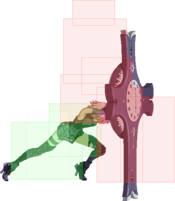
Mash's grounded shield rush. It can act to combo, condition, or even clash through some attacks when the spacing is handled correctly.
| Damage | Guard | Cancel | Property | Cost | Attribute |
|---|---|---|---|---|---|
| 1100 | LH | - | - | - | - |
| First Active | Active | Recovery | Overall | Advantage | Invul |
| 15 | 5 | 16 | 35 | -4 ~ +0 | - |
- Travels about 1/3 of the screen.
This move becomes barely minus if not 0 on block at max range, which can allow Mash to steal a turn if she conditions her opponent to block after. 236A does not lead to a meterless combo against grounded opponents at any range, but has tons of untech time against airborne opponents.
| Damage | Guard | Cancel | Property | Cost | Attribute |
|---|---|---|---|---|---|
| 800, 400 (1178) | LH | - | - | - | - |
| First Active | Active | Recovery | Overall | Advantage | Invul |
| 18 | 5 | 16 | 38 | -4 ~ +0 | - |
- Travels farther than 236A, about half the screen.
236B can be spaced much like 236A, but comes with an additional strike that ground bounces if it hits the opponent. Much easier to combo after than 236A but uses a ground bounce to do so, which may limit combo options.
| Damage | Guard | Cancel | Property | Cost | Attribute |
|---|---|---|---|---|---|
| 350×3, 750 (1543) | LH | - | - | - | - |
| First Active | Active | Recovery | Overall | Advantage | Invul |
| 24 | 3×3 | 22 | 54 | -4 | 12-23 Clash |
- 236B with clash frames.
The automatic follow-up will send the opponent flying away from her forcing Mash to use meter (ex. 214C) or Moon Drive to follow up with a combo. However, it's very useful as a pressure tool, as Mash can vary the timing she charges in between 236A, 236B, and 236[B] (very similarly to another French Bread shield user). Mash can also use this to bulldoze through neutral. If it whiffs, it is still cancelable into EX moves and MD. It is notable that the clash interactions follow similarly to Moon Skill clashes (can clash with normals, moon skills, EXs, DPs, but not arc drives).
| Damage | Guard | Cancel | Property | Cost | Attribute |
|---|---|---|---|---|---|
| 300×10 (2262) | LH | - | - | 1 Magic Circuit | - |
| First Active | Active | Recovery | Overall | Advantage | Invul |
| 4+6 | 2×9 | 21 | 48 | 0 | - |
- Wallbounces on hit.
Buster Swing (Moon Skill)
| Damage | Guard | Cancel | Property | Cost | Attribute |
|---|---|---|---|---|---|
| 330×3, 450 | LH | - | - | 3 moon icons | - |
| First Active | Active | Recovery | Overall | Advantage | Invul |
| 11 | 3×3 | 22 | 41 | -4 ~ -2 | 1-9 MD Clash |
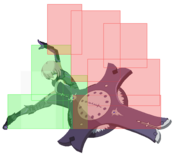
- Gains clash frames in Moon Drive.
Improved version of 236[B] when in moon drive. The ground bounce of the second strike allows for a combo extension anywhere at the cost of needing Moon Drive to truly bulldoze through anything.
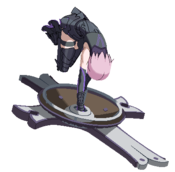
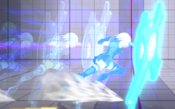
Outside of Moon Drive, it is still the fastest shield charge option so it will have use as a mid-range punish and approach tool. For comparison, this version is faster than Shiki's 236A/B and same speed as Roa's 6BC!Art Strike
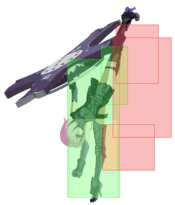
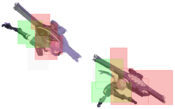
Mash's anti-air shield strike. The B and C versions are the ones used for reversals, while the A version's jumpcancel point makes it largely a combo tool as a complement to her 214X.
| Damage | Guard | Cancel | Property | Cost | Attribute |
|---|---|---|---|---|---|
| 620×2 (1159) | LH | - | - | - | - |
| First Active | Active | Recovery | Overall | Advantage | Invul |
| 5 | 3×2 | 24+12L | 45 | -21 | - |
- Jump cancelable on hit.
Good combo tool but has no invulnerability. As such, it is cancelable into supers and Moon Drive where the B version is not. When used in combos, the usual followup is j.[C]. This is a pretty large move for 5f startup so it's usable as just as a punish option in situations where 5A isn't far reaching enough (example if you block someone's Shield A follow up). It's still whiff cancellable should you miss your punish chance.
| Damage | Guard | Cancel | Property | Cost | Attribute |
|---|---|---|---|---|---|
| 370×4 (1282) | LH | - | - | - | - |
| First Active | Active | Recovery | Overall | Advantage | Invul |
| 8 | 3×4 | 29+15L | 63 | -33 / -36 | 1-13 All |
- Mash's meterless reversal.
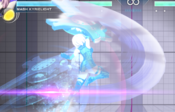
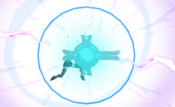
The reason why she's called Mash is because you will be mashing this a lot. Having a reversal is always good as it's another thing your opponent has to think about on their offense. If this hits against a grounded opponent, you can easily cancel the last hit of the DP into j.214C and net a full combo which makes it well worth the risk.
| Damage | Guard | Cancel | Property | Cost | Attribute |
|---|---|---|---|---|---|
| 200×6, 230×8 (2265) | LH | - | - | 1 Magic Circuit | - |
| First Active | Active | Recovery | Overall | Advantage | Invul |
| 4+1 | 4×3(15)3×3 | 20+16L | 76 | -12 | - |
- Vacuums opponents on hit. Any extended hurtboxes will get clipped by the full super.
It's the fastest possible reversal option she has which can be used to beat certain setups if you know your opponent can't cover a 5f or faster reversal. Also noticeably it will always connect in heavily scaled combos after j.236A in situations where any other super will drop. Use this cancel when you are aiming for a kill.
If this fatal counters an airborne opponent, the last hit will be untechable until they hit the ground. You can link a 623A or 5A anywhere on screen if you manage to land this.Art Strike (Moon Skill)
| Damage | Guard | Cancel | Property | Cost | Attribute |
|---|---|---|---|---|---|
| 290×5 | LH | - | - | 3 moon icons | - |
| First Active | Active | Recovery | Overall | Advantage | Invul |
| 8 | 3×5 | 26+15L | 63 (35) | -33 (-36) [-5 (-8)] | 1-6 MD Clash |
- Gains clash frames in Moon Drive.
- Jump cancelable on hit, block, and whiff.
Quick Assault
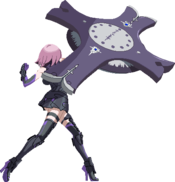
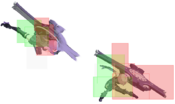
Mash's "rekka" type move. A jumping shield strike that works great as a juggle combo starter thanks to its additional attack.
| Damage | Guard | Cancel | Property | Cost | Attribute |
|---|---|---|---|---|---|
| 340×2 (656) | LHA | - | - | - | - |
| First Active | Active | Recovery | Overall | Advantage | Invul |
| 10 | 2×2 | 17+12L | 42 | -14 | - |
- Mash leaps a short distance forward before swinging her shield.
Used in some stylish combos without SMP kicking in. As of right now, 214B seems to be more useful in combos.
| Damage | Guard | Cancel | Property | Cost | Attribute |
|---|---|---|---|---|---|
| 390×2 (748) | LHA | - | - | - | - |
| First Active | Active | Recovery | Overall | Advantage | Invul |
| 11 | 2×2 | 23+12L | 49 | -20 | - |
- Mash leaps a greater distance forward. Covering a larger space in front of her.
Mainly seen in combos with follow-up, lower damage than 623A routes but 214B still connects at the maximum range of 6C. Delaying the follow-up correctly can leave you up to 0 on block, making it a useful tool in pressure or frame traps. You can also follow with 5C/2C if done correctly. Can act as a surprisingly effective low crush option or anti-air depending on the situation.
| Damage | Guard | Cancel | Property | Cost | Attribute |
|---|---|---|---|---|---|
| 640 | LHA | - | - | - | - |
| First Active | Active | Recovery | Overall | Advantage | Invul |
| 12 | 3 | Until L+18 | - | - | - |
| Damage | Guard | Cancel | Property | Cost | Attribute |
|---|---|---|---|---|---|
| 700 | LHA | - | - | - | - |
| First Active | Active | Recovery | Overall | Advantage | Invul |
| 15 | 3 | Until L+16 | - | - | - |
- Follow-up attack doable after 214A/B.
Delaying the follow-up is useful in combos as you can convert off it or make the rekka safer on block. Delaying this follow up will make a gap between both hits of the rekka which your opponent may reversal or mash through. Alternate your timings accordingly to your opponent's responses.
| Damage | Guard | Cancel | Property | Cost | Attribute |
|---|---|---|---|---|---|
| 670*4 (2264) | LHA | - | - | 1 Magic Circuit | - |
| First Active | Active | Recovery | Overall | Advantage | Invul |
| 4+6 | 3,2,2(9)5 | 3 + 17L | 51 | -4 | - |
- Jump cancellable on hit.
- Leads to HKD.
By far one of Mash's best EX moves and probably the main use for your meter. Useful as an EX ender to combos for high damage and good okizeme setups. All extremely useful as an all purpose combo extender and hitconfirm tool. It is worth noting that even the most scaled combos possible will still allow you to connect additional hits after 214C.
The second hit of this EX is an overhead which can be combo'd after on hit with a jump cancel j.A. But most opponents will not get hit by the overhead unless they have never played against Mash before.Quick Assault (Moon Skill)
| Damage | Guard | Cancel | Property | Cost | Attribute |
|---|---|---|---|---|---|
| 500×3 | LHA, HA | - | - | 3 moon icons | - |
| First Active | Active | Recovery | Overall | Advantage | Invul |
| 13 | 5 (9) 4 | 16L | 47 (27) | -4 (+15) | 1-11 MD Clash |
- Third hit is an overhead.
This is easily Mash's best moon skill which has all the best properties of her 214X. Excellent in scrambles, great in combos, amazing as a pressure tool. Reserving some moon gauge to use this move is important to success as a Mash player.
As a pressure tool, 4BC is jump cancelable on block which by extension allows her to jump cancel at any point in her pressure at the low cost of one moon skill use. jc.A is the best initial follow-up after 4BC is blocked, and from there she can go for additional air normals to extend her pressure while mixing in j.214X or air dashes.Bunker Shot
A set of powerful, mid-range attacks that covers space largely in front of Mash. Aside from her Arc Drive, these are the longest-range moves she's got that don't involve moving herself, but can't quite be used as easily as a traditional projectile--however, they are a fair hand at helping Mash maintain grounded pressure if used carefully. Should they trade with other fireballs, they trade very poorly for Mash.
| Damage | Guard | Cancel | Property | Cost | Attribute |
|---|---|---|---|---|---|
| 480, 490×2 (1293) | LH, LHA | - | - | - | - |
| First Active | Active | Recovery | Overall | Advantage | Invul |
| 13 | 2(2)2×2 | 25 | 45 | -2 | - |
- Projectile has two hits.
- Has an additional hit up close.
- Hits about half screen.
- Mash can cancel after the first hit with Moon Drive and the projectile will still come out.
- Will wall bounce if you are opponents are near a corner
Mash slams at the ground and creates a shockwave projectile. Opponents can jump over it up close, but Mash shouldn't be using it there anyway. Best used to keep opponents from running in from full screen or as a safe blockstring ender. 22X also functions as an important part of corner combos for netting extra damage.
| Damage | Guard | Cancel | Property | Cost | Attribute |
|---|---|---|---|---|---|
| 480, 490×2 (1293) | LH, LHA | - | - | - | - |
| First Active | Active | Recovery | Overall | Advantage | Invul |
| 22 | 2(2)2×2 | 19 | 48 | +4 | - |
- Plus on block.
Slower version of 22A, but better as a pressure tool. It's plus enough that Mash can win any 5A mash contest afterward, but she has to condition her opponent to block before she can use it effectively due to its speed.
| Damage | Guard | Cancel | Property | Cost | Attribute |
|---|---|---|---|---|---|
| 720, 550×3 (1869) | LH, LHA | - | - | 1 Magic Circuit | - |
| First Active | Active | Recovery | Overall | Advantage | Invul |
| 4+5 | 2(2)5,5,7 | 15 | 41 | +12 | - |
- Projectile hits three times instead of two.
- Wallbounces on hit.
Bunker Shot (Moon Skill)
| Damage | Guard | Cancel | Property | Cost | Attribute |
|---|---|---|---|---|---|
| 480, 380×3 | LH, LHA | - | - | 3 moon icons | - |
| First Active | Active | Recovery | Overall | Advantage | Invul |
| 15 | 2(2)4×3 | 15 | 45 | +4 | 1-11 MD Clash |
High-Angle Transfer
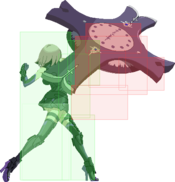
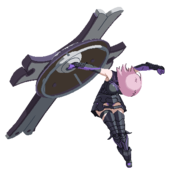
Aerial diagonal shield-dive series. Excellent for punishing whiffed attacks from far out if used wisely, as they descend relatively faster than j.214X does. As of ver 1.43 the shockwave in front of her also is part of the hitbox. Making it easier to connect with your opponent.
| Damage | Guard | Cancel | Property | Cost | Attribute |
|---|---|---|---|---|---|
| 640×2 (1171) | LHA | - | - | - | - |
| First Active | Active | Recovery | Overall | Advantage | Invul |
| 12 | Until L,3 | 23 | - | -10 | - |
- Mash dives at a 40 degree angle downwards.
Requires meter or MD to continue a combo after. Very unsafe on block if not cancelled so do not use without some sort of resource to save yourself. This is your most important tool for bringing an airborne opponent back to the ground during launcher combos.
| Damage | Guard | Cancel | Property | Cost | Attribute |
|---|---|---|---|---|---|
| 670×2 (1226) | LHA | - | - | - | - |
| First Active | Active | Recovery | Overall | Advantage | Invul |
| 19 | Until L,3 | 18 | - | -4 | - |
- Mash dives at a 50 degree angle downwards.
- Slightly slower and more damaging than j.236A.
- Ground bounces on hit
Slower but more safe version of her dive kick. Mash will be able to confirm a combo on hit without the use of any resources if you land this version. You can use this early in combos to bring your opponent back to the ground and continue without spending too many resources.
| Damage | Guard | Cancel | Property | Cost | Attribute |
|---|---|---|---|---|---|
| 260×3, 1300 | LHA | - | - | 1 Magic Circut | - |
| First Active | Active | Recovery | Overall | Advantage | Invul |
| 4+2 | Until L,3 | 16 | - | -2 | - |
- Gives HKD.
High-Angle Transfer (Moon Skill)
| Damage | Guard | Cancel | Property | Cost | Attribute |
|---|---|---|---|---|---|
| 690×2 | LHA | - | - | 3 moon icons | - |
| First Active | Active | Recovery | Overall | Advantage | Invul |
| 13 | Until L, 3 | 17 | - | -4 | - |
Here's A Heavy One!
A more vertical shield dive as compared to j.236X and is always plus on block. Hits overhead and slightly stalls Mash's momentum, making it a tricky but potential answer for baiting AAs in limited circumstances, and works as a good challenge to lows or low shields when TK'd. Use this cautiously in neutral, but if you're looking for a conversion from 623B, the C version of this move works excellently for that. In terms of movement, Mash will start moving forward first before coming down. In most cases, Mash will attempt to track her opponent and land in front but there are cases where she may end up behind them unexpectedly if you have too much forward momentum or do it from too high up. Startup listed is for lowest possible height from the ground.
| Damage | Guard | Cancel | Property | Cost | Attribute |
|---|---|---|---|---|---|
| 1300 | HA | - | - | - | - |
| First Active | Active | Recovery | Overall | Advantage | Invul |
| 23 (fastest) | 2 | 19 | - | +1 | - |
- Overhead.
- Bounces opponents into the air on block.
This can beat low abare and throws if TK'd but will lose to high shield. If your opponent air-blocked the slam you can immediately cancel into 214C to air unblockable them.
| Damage | Guard | Cancel | Property | Cost | Attribute |
|---|---|---|---|---|---|
| 1300 | HA | - | - | - | - |
| First Active | Active | Recovery | Overall | Advantage | Invul |
| 25 (fastest) | 2 | 19 | - | +1 | - |
- Similar on-block properties to j.214A.
Slower but travels farther forwards. Has a higher chance of going behind the opponent by accident if you use it from too close.
| Damage | Guard | Cancel | Property | Cost | Attribute |
|---|---|---|---|---|---|
| 2000 | HA | - | - | 1 Magic Circut | - |
| First Active | Active | Recovery | Overall | Advantage | Invul |
| 3+6 (fastest) | 2 | 18 | - | +1 | - |
- Can pass over grounded opponents (!!!). Highly unsafe if this happens.
The EX version and the Moon Drive version are the only ones that are plus on block. As stated before, this is the best move to use for converting from a wakeup DP (623B) into a full combo.
Notably if you make a mistake with 214XX you can cancel into this while airborne to keep yourself safe.Here's A Heavy One! (Moon Skill)
| Damage | Guard | Cancel | Property | Cost | Attribute |
|---|---|---|---|---|---|
| 1400 | HA | - | - | 3 moon icons | - |
| First Active | Active | Recovery | Overall | Advantage | Invul |
| Until L | 2 | 18 | - | +1 | - |
Does NOT gain clash frames in Moon Drive. Goes the same distance as the B version, however is a lot faster, does slightly more damage, and is +1 on block.
Will travel through the air very quickly, if done as a TK off the ground it can travel half screen distance faster than a super jump or IAD. Useful for calling out grounded pokes or projectiles (ex. Vlov 22X)Super Moves
EX:Punishment
| Damage | Guard | Cancel | Property | Cost | Attribute |
|---|---|---|---|---|---|
| 300×4, 500, 1800 (3500) [Min: 1400 (40%)] |
LHA, LH | - | - | 3 Magic Circuit | - |
| First Active | Active | Recovery | Overall | Advantage | Invul |
| 1+8 | X(36)4 | 48 | 96 | -15 | 1-17 All |
- Mash throws her shield before charging forward with a rush punch. Even if the shield is blocked, Mash will still charge forward.
- If the shield toss is blocked or whiffed, Mash will loses all invincibility before she punches. If the first hit connects, however, she will regain her invincibility.
- Hitting the punch will guarantee the cinematic will trigger for the last hit.
- Blows the opponent full-screen on hit.
Mash's strongest combo ender at the cost of being the most expensive. Can also be used as a yolo move against projectiles--however, it is possible for the first hit to trade with a projectile full screen.
| Damage | Guard | Cancel | Property | Cost | Attribute |
|---|---|---|---|---|---|
| 300×4, 500, 1800 (3500) [Min: 1400 (40%)] |
LHA, H | - | - | 3 Magic Circuit | - |
| First Active | Active | Recovery | Overall | Advantage | Invul |
| 1+8 | X(49)4 | 48 | 109 | -15 | 1-17 All, 44-49 Clash |
- Charging Arc Drive causes the rush punch to become an overhead and she will gain additional clash frames.
- Knocks the opponent into the air if blocked.
The charge effect will only happen if the shield toss gets blocked. It will cause no changes to the move if it hits. Entirely useless move as there is a billion ways to avoid getting hit by the overhead including just shielding the overhead and getting a guaranteed A follow up, hitting a reversal between the gap, throwing the gap, blocking the overhead and jump cancelling the knockback into a fast air move and punishing her anyway, etc.
This is purely a knowledge check move. If for some reason your opponent is unaware and doesn't attempt to do anything but block the overhead, it will send them far away enough where Mash will be safe from a punish attempt.Tactical Decision: Around My Master
| Damage | Guard | Cancel | Property | Cost | Attribute |
|---|---|---|---|---|---|
| 4800 [Min: 1800 (37.5%)] |
LH | - | - | 4 Magic Circuit | - |
| First Active | Active | Recovery | Overall | Advantage | Invul |
| 1+21 | 4 | 26 | 53 | -14 | 14-25 All |
- Usable with 4 full Magic Circuit gauges, at any time in Blood Heat, or with a successful Shield while in Blood Heat.
- Damage in Blood Heat scales with amount of Heat Gauge remaining on activate.
- Uses the animation of the follow-up attack from 236B if done manually with 4 magic circuits.
Reverse Beats
| Attack | Chain | Advantage |
|---|---|---|
| 5B/2B | 5A/2A | -3 |
| 5C/2C/5[C] | 5A/2A | -1 |
| Attack | Chain | Frame Gap |
|---|---|---|
| 2C | 5[C] | 6 |
| 5B/2B | 5[C] | 8 |
Customization
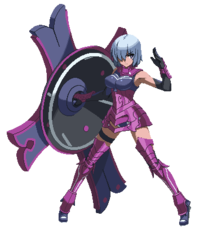
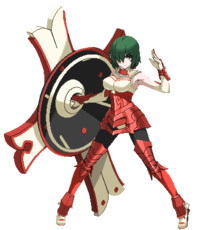
Palette options
Mash Kyrielight Roadmap
| 50% complete | ||
|
|
| Page | Completed | To-do | Score |
|---|---|---|---|
|
Started |
15/25 | ||
| Strategy |
Started |
10/25 | |
| Combos |
Started |
15/25 | |
| Matchups |
Started, basic matchup notes completed |
10/25 |
