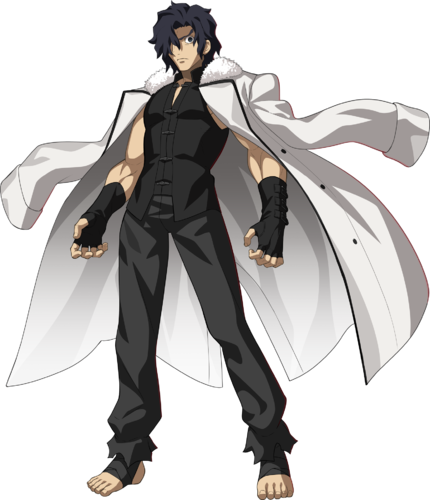
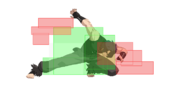
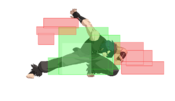
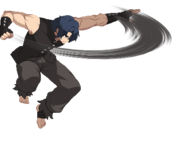
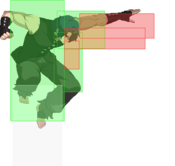
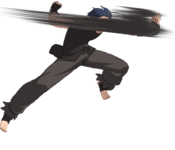
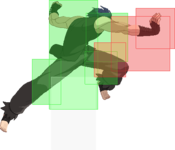
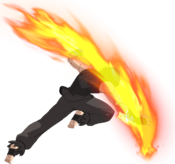
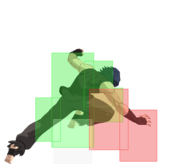
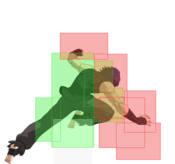
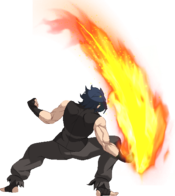
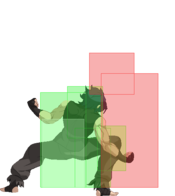
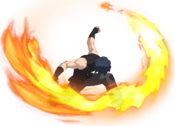
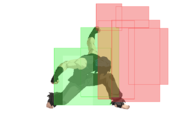
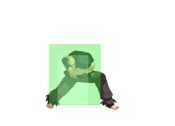
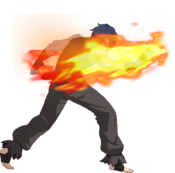
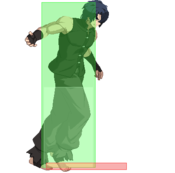
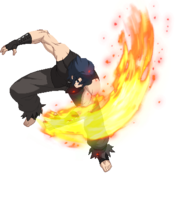
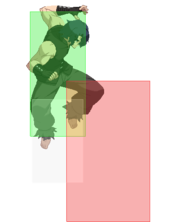
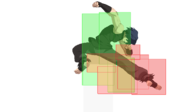
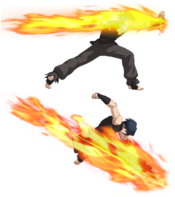
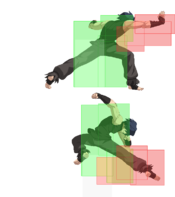
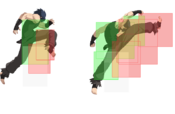
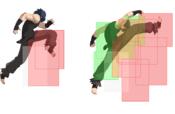
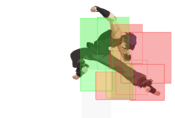
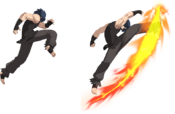
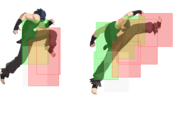
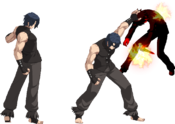
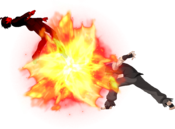
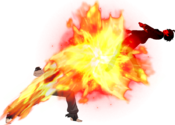
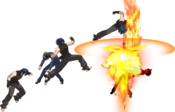
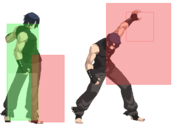
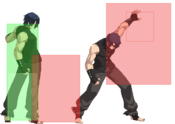
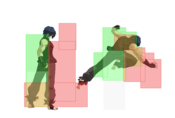
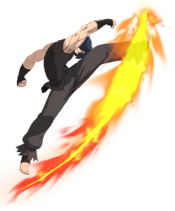
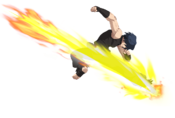
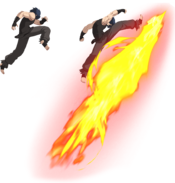
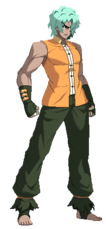
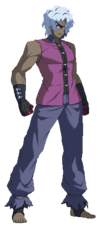
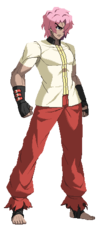
Melty Blood/MBTL/Kouma Kishima
Gameplay
Kouma is a defensive brawler/grappler with armor that excels at punishing aggressive opponents
A hard-hitting character who boasts many options once he's near the opponent, with his signature command grab series Crushing Blow to scare overly defensive opponents, a meterless DP reversal Double Comet to bruteforce his way out of unfavorable situations, and various armored normals and specials that allow him to take hits and still lands high damage punishes in ways most other characters can only dream of.
His air game, on the other hand, is quite limited; he can't chain his air normal attacks together and he loses more traditional air options after whiffing a j.A. With no reliable ranged tools in the air, he has to stand his ground and fish for the opponent's mistakes in neutral in order to approach. Thankfully, he has a strong suite of counterpokes that can consistently convert into knockdown/corner carry thanks to his vast array of combo tools at his disposal. His damage output per hit is also top-notch, turning the tide of battle on a good read with an explosive combo.
Aspiring Kouma players who take the time to learn his matchups and the fighting game concept of conditioning will be richly rewarded.
| Pick if you like | Avoid if you dislike |
|---|---|
|
|
Masterwork of the Kishima clan, both merciful and relentless
Head of the Kishima clan, a branch of the Tohno family. He is half demon. Even among mixed-bloods, his demon blood is strong, making him only barely human.
Under the orders of Makihisa, previous head of the Tohno family, he participated in the extermination of the Nanaya clan and killed Kiri, Shiki's real father. As a result, Shiki sees Kouma as an embodiment of death.
Usually very quiet, he chooses to live as a hermit in a remote area of the mountains where he seeks to achieve spiritual enlightenment. Because of this, he often speaks of worldly ties and spirituality.
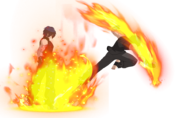
His demeanor in battle, however, reflects his innate strength and demon blood. His ability to use Scorching Heat means those in his way are often burned to ash.
Main Weapon/Skill
Unicorn, Crushing Arm, Flame Prison
Basic Info
Height: 175cm
Weight: 80kg
Blood Type: A
Birthday: October (exact date unknown)
Voiced by: Daiki Hamano
Armor
A large amount of Kouma's moves apply temporary Armor to Kouma. While armored, Kouma will not flinch or get interrupted when hit by most moves, allowing him to strike through attacks.
Armor does not prevent the damage, hitstop or cancel options of the connecting move. It also does not prevent Kouma from being KO'd. Armor can also be broken, and Kouma hit as usual, by attacks with the "Armor Break" trait.
These attacks are:
- EX/Super Moves
- Shield Counters
- Arc Drives/Last Arcs
- Heat Activation
In addition, Kouma can still be grabbed as usual while armored. Being grabbed or being hit by an "Armor Break" attack will both remove any remaining Armor on Kouma.
Limited Air Options
Kouma cannot jump cancel his air attacks, nor is he able to cancel them into each other on hit. His only options after hitting a move in the air are his aerial specials and airthrow. He also does not retain access to aerial movement options after j.A.
Character Summary
- Moon Skill
- 6B+C - Triple Comet
- 3B+C - Double Comet
- 4B+C - Crushing Blow
- 2B+C - Godly Armor
- j.6B+C - Double Comet
- Special Attacks
- 236A/B/C (EX OK) - Triple Comet
- > A/B/C - Additional input 1
- > 4A/B/C - Additional input 2
- > A/B/C - Additional input 3
- > 4A/B/C - Additional input 4
- 623A/B/C (EX OK) - Double Comet
- > A/B/C - Additional input 1
- 214A/B/C (EX OK) - Crushing Blow
- > 4A/B/C - Crushing Blow - Wandering Monk
- > 236C/214C (EX-Only) - Unicorn - Purifying Flame
- 22A/B/C (EX OK) - Godly Armor
- j.236A/B/C (EX OK) - Double Comet
- > A/B/C - Additional input
- Arc Drive
- 236B+C - Unicorn - Flame Waltz
- Last Arc
- A+B+C+D / D in Blood Heat - Judgement of Yama
- Unique Attacks
- 3C
- Blowback Edge Moves
- 5[C], 2[C], j.[C], 236[B]
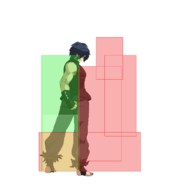
HP Value: 12,300 (Very High)
Backdash:
  - 1-10 Full Invul
  - 1-14 Strike Invul
  - 15-19 Projectile/Air Invul
  - 8-19 Airborne
  - 31 Total
Dash startup: 6
Dash actionable: 5
Jump startup: 5
Jump airtime: 37
Bread and Butter:
(jC) > 2A > 2C > 5C > 5B > 236A~A~A > 2B > 2C > 5C > RB1 > 214A
3C/2B Starter:
(2B) > 3C > jB > j6B+C > 236A~4A~4A > 2A > 2C > 5C > RB1 > 214A
Shield Counter A:
D > A > jB > j6B+C > 236A~4A~4A > 2A > 2C > 5C > RB1 > 214A
j.[C] Starter:
j.[C] > 2B+C > 236B~4B~4B > 2A > 2C > 5C > RB1 > 214A
Moon Skill Starter:
2B+C/6B+C/j.6B+C/4B+C > (dl) 5A > 5C > 236A-A-A > 2B > 2C > 5C > RB1 > 214A
3BC Starter:
3B+C > jc > dl j.[C] > (2B+C) > 236A-4A-4A > 2A > 2C > 5C > RB1 > 214A
Shield Lunge:
D > B+C > dj.[C] > 2B+C > 236B-4B-4B > 2A > 2C > 5C > RB1 > 214A
- 214A can be replaced with 236BC or 214C for additional damage
- Combos listed not optimal; focus in ease of execution while maintaining respectable damage
Move Analysis
Normal Moves
Standing Normals
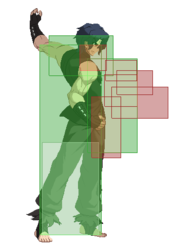
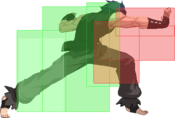
5A
| Damage | Guard | Cancel | Property | Cost | Attribute |
|---|---|---|---|---|---|
| 190 | LH | N, SP, EX, MD | - | - | Whiff OK |
| First Active | Active | Recovery | Overall | Advantage | Invul |
| 5 | 2 | 11 | 17 | -1 | - |
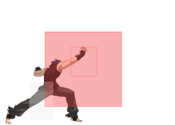
- Mid-hitting "E-Sports" 5A.
- Cancellable into itself up to 2 times by either holding 4 or using different Rapid Beat options.
- Whiff cancels available from frame 10 onwards (frame 10 is the first frame of the whiff cancelled move).
Kouma swats the air directly in front of him for his 5A. It is no different from the typical 5A: 5f startup, whiff cancellable, -1 on block, and short overall frames. This button is versatile in that it is able to perform the bare minimum of rebeat whiffs, close range staggers, and acting as a close range pickup option for certain combos. It also have the added benefit of having higher base damage than typical 5As, making it overall deal more damage in combos than the rest of the cast.
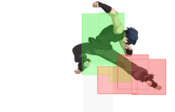
However, it shines when it comes to its vertical hitbox, making it a great option to quickly swat people coming to or from the air in proximity (hence the E-Sports tag). Thus, it's a normal you'll see more often in staggers or tick throws specifically to catch people attempting to (fuzzy) jump out of Kouma's command grab. It's also great as a quick abare option for the same reasons. Overall, a great normal to have in Kouma's kit.
5B
| Damage | Guard | Cancel | Property | Cost | Attribute |
|---|---|---|---|---|---|
| 510 | LH | N, SP, EX, MD | - | - | - |
| First Active | Active | Recovery | Overall | Advantage | Invul |
| 11 | 4 | 17 | 31 | -6 | - |
- Mid-hitting horizontal strike.
- Kouma's slowest non-BE normal, and one of the slowest in the game.
- Causes a fail shield state on crouching shield.
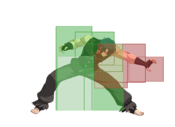
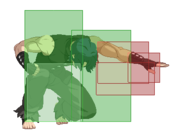
Kouma extends for long palm strike. The slowest normal in Kouma's kit at 11 frames, extending even past his C normals. However, this move is by no means bad. While its overall speed is hindered by its startup, it still recovers like a standard B normal; and does some extra damage on top of that. It is also one of few moves that moves Kouma forward any significant amount, which can help for certain pressure strings or setups. Due to its angle and startup, it is not as well versed as an abare tool when compared to other options in Kouma's kit. Still, it is a functioning normal that does see its use from time to time.
5C
| Damage | Guard | Cancel | Property | Cost | Attribute |
|---|---|---|---|---|---|
| 680 | LH | N, SP, EX, MD | - | - | - |
| First Active | Active | Recovery | Overall | Advantage | Invul |
| 9 ~ 19 | 8 | 22 | 38 ~ 48 | -13 | - |
- Mid-hitting palm strike: Fire Edition.
- Surprisingly active.
- Can be microcharged to extend startup without going into 5[C].
- Causes a fail shield state on crouching shield.
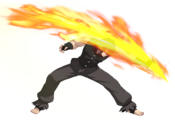
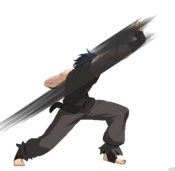
Kouma does a similar palm strike than his 5B, but covers his arm in fire and angles it downward. Ironically faster than the former, alongside dealing more damage and boasting more active frames. In turn, it has higher recovery frames, slightly shorter range, and moves less forward. 5C itself is a very versatile button, as it's range and speed combined make it useful in most situations. It can also be used in neutral to preemptively stuff approaches or whiff punish bad approaches with a very potent combo. 5C is a very nice and well-rounded normal within Kouma's kit.
| Damage | Guard | Cancel | Property | Cost | Attribute |
|---|---|---|---|---|---|
| 1767 | U | - | WB, SK | - | - |
| First Active | Active | Recovery | Overall | Advantage | Invul |
| 28 | 4 | 26 | 57 | N/A | 18-28 Armor |
- Charged unblockable "Hitgrab."
- Grants Super Armor instead of Clash Frames.
- Leads into a techable knockdown or a wallbounce on hit.
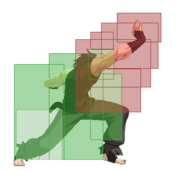
Kouma charges up and instead of just striking, grabs and throws his opponent behind him. Despite the hitgrab description, this move can still be shielded high like any other standing unblockable. Not doing so, however, will allow Kouma to land the move. Depending on his position, this could lead to a comboable wallbounce, or a simple fullscreen reset. Kouma notably also gets super armor instead of clash frames during startup, making it harder to brute force before the move comes out.
While it's theoretically a great option to have, the positioning required for 5[C] to be helpful is not great and is outshined by a regular 214X wallthrow. 5[C] requires Kouma to not be directly in the corner and, if he can convert, requires a different button for a variety of different ranges, making it harder to use compared to 214X. Still, it can serve as a great round closer with it's great upfront damage and can be useful for knowledge checking.
Crouching Normals
2A
| Damage | Guard | Cancel | Property | Cost | Attribute |
|---|---|---|---|---|---|
| 180 | L | N, SP, EX, MD | - | - | Whiff OK |
| First Active | Active | Recovery | Overall | Advantage | Invul |
| 5 | 2 | 11 | 17 | -1 | - |
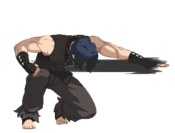
A quick, crouching low strike.
- Tied with 5A for Kouma's fastest normal, but deals slightly less damage
- Similar to 5A, great Rebeat and stagger pressure normal
- Unlike 5A however, hits low, making it a very important part of Kouma's pressure
- Will catch jumps and backdash attempts, since both of these actions require the opponent to stop holding down back.
- Whiff cancels available from frame 10 onwards (frame 10 is the first frame of the whiff cancelled move)
2B
| Damage | Guard | Cancel | Property | Cost | Attribute |
|---|---|---|---|---|---|
| 460 | LH | N, SP, EX, MD | - | - | - |
| First Active | Active | Recovery | Overall | Advantage | Invul |
| 7 | 4 | 16 | 26 | -5 | Air 5-10 |
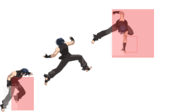
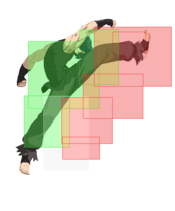
Kouma crouches down, leans forward and performs a diagonal, upwards reaching palm strike.
- Powerful anti-air with a low hurtbox, fast startup and recovery
- Invulnerable against aerial attacks frames 5-10, a privilege typically reserved to 3Cs
- Strong, disjointed hitbox that either forces favorable ground-to-air clashes or directly intercepts foes, netting good reward and making this move extremely hard to punish as result
- The lack of hitboxes above and behind Kouma means that, while rare, this normal can be directly punished by well-placed jump-ins that can either crossup and have good vertical range (e.g. Ciel j.B, Akiha j.B)
- Also extremely useful as a grounded footsies button because of its speed and (for its speed) far-reaching hitboxes
- Highly vulnerable to sweeps and other low hurtbox moves, as it can easily be low profiled
- Solid presence in combos for juggling opponents to optimal 236A/B-Series height
- Against stand shield, opponent enters a special guard state in which they suffer significant chip damage instead of shielding the move
2C
| Damage | Guard | Cancel | Property | Cost | Attribute |
|---|---|---|---|---|---|
| 680 | L | N, SP, EX, MD | HK, L | - | - |
| First Active | Active | Recovery | Overall | Advantage | Invul |
| 10 ~ 16 | 5 | 21 | 35 ~ 41 | -9 | - |
| Damage | Guard | Cancel | Property | Cost | Attribute |
|---|---|---|---|---|---|
| 1000 | L | N, SP, EX, MD | HK, L | - | - |
| First Active | Active | Recovery | Overall | Advantage | Invul |
| 24 | 6 | 18 | 47 | -7 | 15-24 Armor |
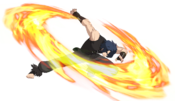
Kouma performs a fiery sweep in a crouching position.
- Uncharged, is a standard sweep
- Moves Kouma forwards and is generally great for combos
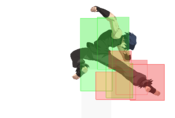
- Inexplicably has a hitbox behind Kouma, which allows this move to be used as a ghetto anti-air
- Prime neutral footsies button due to its solid balance between startup, hitbox and recovery and good conversions off it from stray hits
- Can be half charged for stagger purposes, with its long range making it good at catching backdashes
- Charged version has longer startup but is generally more powerful in every way
- gains Armor frames and moves Kouma forward further, increasing the move's range
- deals significantly more damage
- has slightly less recovery, making it less unsafe on block and is slightly more active
- can be used to brute force your way through neutral, but should be used with great care due to how reactable the startup is
Jumping Normals
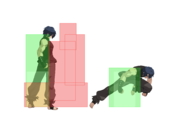
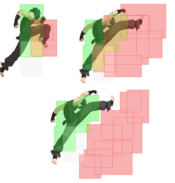
Kouma's Air normals can not be chained together. Any Attack Button after the initial one will result in Air Throw. It's possible for the Air Throw to whiff due to Kouma's Air Normals having longer range and hitting higher than the Air Throw Range. Additionally, he cannot jump cancel any of his air normals. Because of his inability to create air blockstrings and hitconfirms, he can't really threaten the opponent the same way other characters can and will be forced to either just take the air throw ender, commit to j.6B+C, or rely on getting air Counter Hits. Despite this, Kouma has access to some strong Air Normals to poke with or create a wall of Hitboxes to make it difficult to go through.
j.A
| Damage | Guard | Cancel | Property | Cost | Attribute |
|---|---|---|---|---|---|
| 370 | HA | SP, EX, MD, TH | - | - | - |
| First Active | Active | Recovery | Overall | Advantage | Invul |
| 5 | 4 | 20 | 28 | - | - |
Quick horizontal chop.
- Fastest air normal, with much longer range than usual for a jA move
- Go-to normal to "snipe" opponents above him and fish for Counterhits
- High hitbox relative to Kouma means this move will whiff on most crouchers unless performed very close to the ground
- Whiff cancels available from frame 20 onwards (frame 20 being the first frame of the whiff cancelled move)
- Kouma will not be able to use movement options such as jump or airdash, but can perform anything else (air specials, Moon Drive, airthrow)
j.B
| Damage | Guard | Cancel | Property | Cost | Attribute |
|---|---|---|---|---|---|
| 510 | HA | SP, EX, MD, TH | - | - | - |
| First Active | Active | Recovery | Overall | Advantage | Invul |
| 6 | 6 | 24 | 35 | - | - |
Kouma performs a horizontal palm strike in the air.
- Fast air poke with lots of active frames
- Ideal to "wall out" opponents horizontally
- Slightly longer reaching than jA
j.C
| Damage | Guard | Cancel | Property | Cost | Attribute |
|---|---|---|---|---|---|
| 650 | HA | SP, EX, MD, TH | - | - | - |
| First Active | Active | Recovery | Overall | Advantage | Invul |
| 11 ~ 17 | 6 | 22 | 38 ~ 44 | - | - |
| Damage | Guard | Cancel | Property | Cost | Attribute |
|---|---|---|---|---|---|
| 1300 | HA | SP, EX, MD, TH | GB, L | - | - |
| First Active | Active | Recovery | Overall | Advantage | Invul |
| 20 | 6 | 22 | 47 | - | 15-20 Armor |
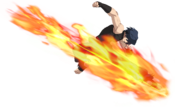
Burning strike aimed diagonally dowards.
- Uncharged is the standard IAD and jump-in normal
- Somewhat slow, but powerful and reaching hitbox
- Leaves more than enough hitstun vs. grounded opponents to convert into a combo even when hitting very high up
- Can be half-charged for stagger pressure purposes
- Charged is more powerful in every way at the cost of extra startup
- Armor, larger hitbox and more damage
- Ground Bounces on hit, allowing for a high damage Combo conversion
- Can command a lot of presence with this move, but careless use will get punished by wary opponents exploiting the weaknesses to Armor
- Mixing and using this move in combination with the Uncharged variant and other air normals can give Kouma a very linear, but effective air game
Universal Mechanics
Rapid Beat 1
| Damage | Guard | Cancel | Property | Cost | Attribute |
|---|---|---|---|---|---|
| 400 | LH | - | GB, L | - | - |
| First Active | Active | Recovery | Overall | Advantage | Invul |
| 9 | 3 | 23 | 34 | -10 | - |
Kouma performs a burning strike downwards.
- Average Rapid Beat normal
- Greatly moves Kouma forwards, giving it use to close distance in blockstrings and for tick throws
- Ground Bounces
- Has a high hitbox, allowing you to catch very high up opponents
- Mostly Combo/Blockstring filler
3C / Rapid Beat 2
| Damage | Guard | Cancel | Property | Cost | Attribute |
|---|---|---|---|---|---|
| 780 | LH | - | LR | - | - |
| First Active | Active | Recovery | Overall | Advantage | Invul |
| 10 | 3 | 24 | 36 | -10 | Air 5-12 |
Kouma performs a burning strike in a wide arc, aimed forwards and upwards.
- Launches the opponent with Kouma performing a follow-up jump right after on hit
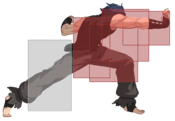
- Moves Kouma forwards and is the longest reaching of Kouma's uncharged normals, only losing to 2[C] but being more than twice as fast
- Hitbox is large, and for Kouma standards, very disjointed
- Slightly lower hurtbox on frames 5-9
- Head Invulnerable(Air Attack Invulnerable) on frames 5-12
- One of Kouma's most important moves in his kit - catches IADs and any jump attempts in neutral and pressure situations from ranges your other normals can't reach
- Using this move in conjunction with 2C can make the space in front of Kouma a very threatening place to be, and enables Kouma to be very oppressing if he gets close enough
- Special cancelable on block, can use 22A if close enough to be safe or cancel into 236X series to continue the pressure from further away. Very unsafe on block otherwise
- Being a command normal, ground-to-air clashes with it can net volatile results if MD isn't available, as rebeating into 5A is not possible. Special canceling after the clash is generally good and recommended, but still risky nonetheless
- As far as usage as an Anti-Air goes, generally not prefered over the likes of 2B, but does a good job at that, too
- In combos, generally sees little use as Kouma prefers to end his Combos with his 214X series. But it is seen in certain routes to optimize damage, where it will not launch the opponent and still allows for a 214X ender
- In blockstrings, sees use as a gap-closer thanks to its large forward movement in case kouma starts his pressure from, for example, max 2C range.
Ground Throw
| Damage | Guard | Cancel | Property | Cost | Attribute |
|---|---|---|---|---|---|
| 1500/1875 | N/A | - | HK | - | - |
| First Active | Active | Recovery | Overall | Advantage | Invul |
| 4 | 3 | 19 | 25 | +55 | - |
Kouma grabs the opponent, holds them high up, and then blows them up with a fiery explosion.
- Standard throw with hard knockdown
- Drops the opponent right in front and close to Kouma
- Has a little run-up unlike Kouma's 214X series if Kouma is too far away for the grab to connect normally
- Slightly less committal and faster than Kouma's usual Command Grab, but due to its lesser reward, rarely sees use
Air Throw
| Damage | Guard | Cancel | Property | Cost | Attribute |
|---|---|---|---|---|---|
| 2000/2500 | U | J | HK | - | - |
| First Active | Active | Recovery | Overall | Advantage | Invul |
| 1 | 3 | 28 + 12L | 43 | - | - |
Kouma grabs the opponent mid-air and launches them directly downwards with an explosion.
- Standard Melty Air Throw, but deals significantly more damage than usual
- Does more damage when performed raw than in a combo
- The damage is further increased to an impressive 2500 if you Fatal Counter Hit grab the opponent (e.g. during the startup of an air attack)
- Throws the opponent straight down while Kouma gets launched backwards a bit
- The lower to the ground it connects, the better frame advantage Kouma gets afterwards
- Universal air combo ender, but grants poor okizeme afterwards
Special Moves
Triple Comet
Kouma's Rekka series. His primary combo tool. Proper use of Triple Comet will let Kouma deal high damage and loop back to his preferred combo ender of choice. The different versions of Triple Comet are mostly the same with the largest difference being the length they travel, with some small changes to frame data. Most combos use one of the two version depending on range and timing, and such things will be detailed in the combo section. The entire Rekka, regardless of what version is used, can be a true blockstring.
| Damage | Guard | Cancel | Property | Cost | Attribute |
|---|---|---|---|---|---|
| 1000 | LH | EX, MD | - | - | - |
| First Active | Active | Recovery | Overall | Advantage | Invul |
| 10 | 4 | 22 | 35 | -7 | - |
| Damage | Guard | Cancel | Property | Cost | Attribute |
|---|---|---|---|---|---|
| 1000 | LH | EX, MD | - | - | - |
| First Active | Active | Recovery | Overall | Advantage | Invul |
| 11 ~ 18 | 4 | 22 | 36 ~ 43 | -7 | - |
Rekka Starter: A burning, horizontal palm strike.
- Core part of Kouma's combos alongside the rest of the rekka series
- Also occassionally sees usage in pressure situations, especially with delayed timing
- Both the A and B version move Kouma forwards
- A version is the most common one being the fastest
- B version is 1 frame slower, but travels further, allowing Kouma to combo into it from ranges the A version does not reach
- B version can also be half-charged for stagger purposes
- Pressing any attack button will continue the rekka series on hit, block, or even whiff
| Damage | Guard | Cancel | Property | Cost | Attribute |
|---|---|---|---|---|---|
| 1300 | LH | EX, MD | WB, BS, L | - | - |
| First Active | Active | Recovery | Overall | Advantage | Invul |
| 21 | 4 | 19 | 43 | -4/+0 | 15-25 Armor |
Same animation as 236A/B, but much longer startup.
- Very different to the uncharged variant, as it cannot be cancelled into the rest of the rekka series
- Gains armor, damage, and moves Kouma further forwards, allowing it to hit at even roundstart distance
- Key part of Kouma's pressure and combos, primarily in the corner
- Wall bounces on hit if a wall is close enough
- On block, lifts the opponent from the ground and blows them a bit away
- If they decide to jump out, you are -4, but can deal with almost anything they can do from that point by performing 5A > whiff cancel 3C
- Otherwise, they will land and left neutral, +0
- Using this move in conjunction with 3C, as it still hits them at the distance 236[B] launches them, allows for very oppressing pressure
| Damage | Guard | Cancel | Property | Cost | Attribute |
|---|---|---|---|---|---|
| 1000 | LH | EX, MD | - | - | - |
| First Active | Active | Recovery | Overall | Advantage | Invul |
| 11 | 3 | 25 | 38 | -9 | - |
| Damage | Guard | Cancel | Property | Cost | Attribute |
|---|---|---|---|---|---|
| 1000 | LH | EX, MD | - | - | - |
| First Active | Active | Recovery | Overall | Advantage | Invul |
| 11 | 3 | 23 | 36 | -7 | - |
Rekka Extender: Burning, horizontal palm strike the second.
- No difference depending on what button is pressed
- Moves Kouma forwards
- 4(Hold back) version will move Kouma less distance and is ever so slightly faster to recover
- Knowing when to use the 4 version and by how much to delay this rekka part is key in performing Kouma's more optimized combos which rely on proper rekka juggling
- Delayed usage of this move also sees use when pressuring with rekka
- Extender with 236A as the starter is considered a different Extender to 236B as the starter in regard to SMP (Same move proration), despite both of these moves being identical
| Damage | Guard | Cancel | Property | Cost | Attribute |
|---|---|---|---|---|---|
| 1100 | H | EX, MD | GB, L | - | - |
| First Active | Active | Recovery | Overall | Advantage | Invul |
| 14 | 5 | A7 + 12L (19 Total) | 37 | -7 | - |
| Damage | Guard | Cancel | Property | Cost | Attribute |
|---|---|---|---|---|---|
| 1000 | H | EX, MD | GB, L | - | - |
| First Active | Active | Recovery | Overall | Advantage | Invul |
| 14 | 5 | A4 + 12L (16 Total) | 34 | -4 | - |
Rekka Ender: Kouma does a quick, short hop, and performs a flame kick from above.
- Ground-bouncing Overhead attack
- No difference depending on what button is pressed
- All versions move Kouma forwards
- Normal version sends the opponent far away on hit, but deals more damage
- Combos utilizing this version typically have Kouma travel under the opponent during this move, hitting them with the back part as late as possible ("meaty rekka") to cross-up and land behind them for a pick-up
- Failing to cross-up after this move will rarely result in a combo unless performed next to a wall, to prevent the opponent from flying too far away
- Unsafe on block, and leaves Kouma close enough to be easily punished
- 4(Hold back) version travels less distance and does not send the opponent nearly as far away, but deals less damage
- Used when crossing-up with the normal version isn't feasible, as it still allows for a pickup afterwards to continue the combo
- Less recovery than the normal version causes this move to be safer on block, making it the ideal ender in case they blocked the rekka series. Being -4, you will still lose your turn, though.
- Sees usage in stagger pressure when delayed - Kouma performs the hop quick enough that it allows him to even jump over some particularly low hitting moves
- Can cancel the rekka ender into j236C to be more safe on block
- On hit, the landing lag of all versions can be cancelled, typically into a high damage ender like 214C and Arc Drive
- Ender with 236A as the starter is considered a different Ender to 236B as the starter in regard to SMP (Same move proration), despite both of these moves being identical
| Damage | Guard | Cancel | Property | Cost | Attribute |
|---|---|---|---|---|---|
| 1080*3 (2602) | LH | AD, MD | WB+, BS, HK, L | 1 Magic Circuit | - |
| First Active | Active | Recovery | Overall | Advantage | Invul |
| 4+7 | 8 | 23 | 41 | -15/-10 | 3-15 Armor |
Kouma performs a very explosive advancing palm strike
- Moves Kouma a very far distance forwards
- Sends the opponent very far away, Wall bouncing if they make contact with a Wall for a pickup, and leaving them on the ground for a hard knockdown otherwise
- Similarily to 236[B]..
- has no rekka follow-ups available
- will lift opponents from the ground on block and launch them forwards.
- Is Armored, with the Armor starting as early as frame 3 - making this move very potent at brute forcing your way through predictable neutral, or small gaps in the opponent's pressure
- The frame 3 armor also allows Kouma to "RPS" after having a move blocked that leaves him -2~, as immediately doing 236C after will result in the opponent hitting the armor if they challenge (in the -2 example, it would beat any 5f A normal).
- Often seen in meter dump combos for its high damage
- Not safe on block - but punish not guaranteed due to how far away this move sends the opponent
| Damage | Guard | Cancel | Property | Cost | Attribute |
|---|---|---|---|---|---|
| 750*2 (1357) | LH, H | EX, MD | L, GB
(second hit) |
3 Moon Icons | - |
| First Active | Active | Recovery | Overall | Advantage | Invul |
| 15 | 5 (14) 5 | 5A + 12L (17 Total) | 55 | -3 | 1-11 MD Clash |
Kouma performs a palm strike swiftly followed up by a jumping, flaming kick.
- Moon skill version of the 236A/B series
- Last hit Ground Bounces
- Greatly and quickly advances Kouma forwards during the entire move, making this basically Kouma's only move that threatens the high mid range
- Useful for quick approaches, long range confirms, and intercepting run ups and jump ins
Double Comet
Kouma's DP. Mostly useful as a reversal but can be used as a high reaching anti-air.
| Damage | Guard | Cancel | Property | Cost | Attribute |
|---|---|---|---|---|---|
| 550*2 (1039) | LH | EX, MD | L | - | - |
| First Active | Active | Recovery | Overall | Advantage | Invul |
| 6 | 6 (2) 3 | 18A + 12L (30 Total) | 47 | -17 | - |
| Damage | Guard | Cancel | Property | Cost | Attribute |
|---|---|---|---|---|---|
| 700*2 (1302) | LH | EX, MD | L | - | - |
| First Active | Active | Recovery | Overall | Advantage | Invul |
| 6 | 6 (2) 3 | 27A + 12L (39 Total) | 55 | -25 | 1-13 All |
| Damage | Guard | Cancel | Property | Cost | Attribute |
|---|---|---|---|---|---|
| 850 | LHA | EX, MD | GB, L | - | - |
| First Active | Active | Recovery | Overall | Advantage | Invul |
| 12 | 2 | 10A ~ 16A + 12L (22 ~ 28 Total) | 35 ~ 41 | -7 ~ -13 | - |
Rising, flaming kick with the option to be followed up by another kick downwards.
- A version is an OK Anti-Air
- Can input A again for the follow-up kick on whiff, block or hit
- Lifts Kouma from the ground, but not by a lot
- Can confirm into a combo after the follow-up kick, even without a Counterhit vs. grounded and air opponents
- Occasionally used in Combos for max damage routes
- While the reward is pretty good, the long recovery and generally low height this move travels upwards while also being attached to a 623 input makes it rarely used in favor of Kouma's other anti airs
- B version is a fully invincible, traditional DP reversal
- Lifts Kouma much higher off the ground, allowing it to be used as a very committal, hard-callout high-range Anti-Air
- Has a very generous hitbox, often catching mistimed backdashes which were intended to bait out this very move in the first place
- Being a fully invincible, meterless reversal, has the usual obvious use cases on wakeup to punish players not safejumping you or generally not being cautious
- Has a very high recovery - if you whiff this, or the opponent blocks it, you will get punished
- Can only go into follow-up, MD and j.236C on hit; using the follow-up is recommended for hit confirming
- Follow-up is a standard downward kick
- Ground bounces
- The closer to the ground Kouma performs the follow-up, the easier and more likely it is for him to convert into a combo
- Canceling this follow-up into j.236C makes good conversions from 623A/B possible, giving Kouma good damage and okizeme for the cost of one bar
- Minus on block no matter the height, depending on the spacing, might result in Kouma getting punished
| Damage | Guard | Cancel | Property | Cost | Attribute |
|---|---|---|---|---|---|
| 640*7 (2098) | LH | MD | L, HK | 1 Magic Circuit | - |
| First Active | Active | Recovery | Overall | Advantage | Invul |
| 4+1 | 6 (2) 4 10 | 42A + 18L (60 Total) | 76 | -23 | 1-16 All |
Very high rising, flaming kick, leaving a burning stationary projectile in its wake.
- Fully invincible reversal
- Goes very high up, very quickly
- Leaves a stationary fire projectile below Kouma after the second kick, adding more damage
- Deals good damage and grants a hard knockdown, but is incredibly unsafe on block and whiff
- Being 1 frame faster than Kouma's usual reversal can mess with some safejump timings
- Does not have access to the follow-up kick under any circumstances
| Damage | Guard | Cancel | Property | Cost | Attribute |
|---|---|---|---|---|---|
| 640*2 (1196) | LHA | J, EX, MD | L | 3 Moon Icons | - |
| First Active | Active | Recovery | Overall | Advantage | Invul |
| 7 | 6 4 3 | - | - | - | 1-5 MD Clash |
Rising, burning kick.
- Moon skill version of 623A/B
- Jump cancellable on whiff/block and hit, making it very safe to throw out. Will have to wait until recovery frames to jump cancel it on whiff/block, though
- Unlike what you'd expect, is fully airblockable, limiting its use as an actual anti-air
- Does not have any invincibility - however, in Moon Drive, this move becomes a powerful reversal due to its frame 1 clash frames that is very difficult to deal with unless prepared
- Powerful combo starter thanks to the jump cancel, and also useful for certain max damage moonskill combos
Crushing Blow
Kouma's Command Grab series. This very well may be the most important special in his moveset. As always, it's a potent mix-up option, but finds new utility in this game as it can now grab opponents in hitstun, making it an important tool for combos. His command grabs can be used to break through the defense of respectful players, force its way through disrespectful ones, create strong okizeme situations, be used as a combo extender and ender, or as a defensive measure to punish gaps in pressure or unsafe moves. His command grabs also innately serve as one of his best ways to call out Shield attempts. All command throws grant a hard knockdown on their own. This move will be your BNB, even after you learn the BNB.
| Damage | Guard | Cancel | Property | Cost | Attribute |
|---|---|---|---|---|---|
| 1400/1540 | U | - | HK | - | - |
| First Active | Active | Recovery | Overall | Advantage | Invul |
| 5/6 | 1/1 | 25 | 31 | +65 | 1-6 Throw |
| Damage | Guard | Cancel | Property | Cost | Attribute |
|---|---|---|---|---|---|
| 1400/1540 | U | - | HK | - | - |
| First Active | Active | Recovery | Overall | Advantage | Invul |
| 21/22 | 1/1 | 23 | 45 | +65 | 1-22 Throw, 9-23 Armor |
Kouma grabs his opponent, holds them in the air and then proceeds to blow them up with his palm.
- Command grab series, the defining Kouma move
- All variants deal additional damage on Fatal Counterhit, caused by grabbing someone that is shielding
- Both variants result in the same damage and options right after
- Both variants are able to grab opponents in hitstun
- If no further input is made, both variants will drop the opponent directly in front of Kouma, while giving Kouma plenty of time to do whatever he wants, preferably setting up okizeme
- A version is quick, and the version you'll be usually using
- Kouma's Prime combo ender - deals alright damage, and most importantly, grants a hard knockdown directly in front of Kouma, giving him plenty of time to setup okizeme
- Prime version to actually grab people with, whether that be via. tickthrows, grabbing shields, or generally punishing players being too respectful and blocking too much
- Proper use and mastery of this move can cause opponents to make expensive mistakes on defense, allowing Kouma to snowball the round with his solid okizeme
- B version is delayed, but grants armor and has slightly longer range
- Easier to tick-throw with, as you will not have to mind the throw-protection window after blockstun/wakeup
- Also great for beating particularly mashy players
- Both versions can be followed up by 2 alternative moves instead of the hard knockdown in front of Kouma: 4A/B(back), and 214C/236C.
| Damage | Guard | Cancel | Property | Cost | Attribute |
|---|---|---|---|---|---|
| 1600/1760 | - | - | WB, SK | - | - |
| First Active | Active | Recovery | Overall | Advantage | Invul |
| 14 | 4 | 22 | 49 | +4 ~ Tech Option | - |
After having grabbed his opponent, Kouma launches them backwards, performing a sideswitch.
- Follow-up after grabbing someone with 214A/B, input via 4(back)A/B shortly after a successful grab
- Launches the opponent far behind Kouma for a techable knockdown, but deals additional damage
- Wall-bounces if thrown close enough to a wall, allowing Kouma to go into or continue a combo
- Typically only used if it will wall bounce and allow for an extension/combo, as the extra damage is not anywhere near worth not having a hard knockdown
| Damage | Guard | Cancel | Property | Cost | Attribute |
|---|---|---|---|---|---|
| 2000/2200 | MD | - | HK | - | - |
| First Active | Active | Recovery | Overall | Advantage | Invul |
| 10+24 | 3 | 34 | 70 | +66 | - |
After having grabbed his opponent, Kouma launches them forwards far away.
- is an EX move, will consume 1 Bar
- Launches opponents very far away for a hard knockdown and deals additional damage
- Can be Moon Drive Cancelled immediately after launch, allowing for damaging combos close to the corner
- Due to the extra damage being only an additional 600 and the far launch preventing Kouma's best okizeme, primarily used to close out rounds
| Damage | Guard | Cancel | Property | Cost | Attribute |
|---|---|---|---|---|---|
| 2300/2530 | U | MD | HK, GB | 1 Magic Circuit | - |
| First Active | Active | Recovery | Overall | Advantage | Invul |
| 4+1/2 | 1/1 | 32 | 38 | +55 | 1-6 All |
Kouma moves forwards, grabs, and then slam dunks the opponent into the ground with a massive explosion.
- Invincible Reversal grab with very solid damage
- Moves Kouma forwards and has the longest range of all his Command Grabs
- Grants a hard knockdown while pushing Kouma back a bit on successful dunk - he does not get as much time as from his normal Command Grab, but still enough for solid oki setups
- After Superflash, the opponent has a single frame to act before it grabs. This unfortunately means that its use as a true reversal is limited, since opponents will be able to enter jump start-up during that 1 frame window if they are actionable, causing the grab to miss and for Kouma to be most likely punished
- However, can still be used to great effect as a reversal if the opponent is not fully actionable on your wakeup by using particular okizeme setups, or to exploit gaps in your opponents pressure, especially during stagger pressure
- Also Kouma's go-to high damage combo ender, as it still gives Kouma good okizeme on hit
- Can be Moon Drive cancelled on successful dunk to extend/and or use it as a combo starter
- Also makes for a particularly strong answer to Moon Drive Activation wakeup, as you lose all throw invulnerability after activating Moon Drive and Kouma does not have to worry about getting grabbed in return
| Damage | Guard | Cancel | Property | Cost | Attribute |
|---|---|---|---|---|---|
| 1400/1540 | U | - | WB, HK | 3 Moon Icons | - |
| First Active | Active | Recovery | Overall | Advantage | Invul |
| 21/33 | 12/1 | 21 | 56 | +65 | 1-11 MD Clash, 18-36 Throw |
Kouma crouches down, then swiftly lunges at the opponent before grabbing them, launching them away with a fiery explosion.
- Moon skill version of 214A/B
- Swiftly advancing, delayed command grab
- Combo throw hitbox appears starting frame 23, the actual raw command grab hitbox appears on frame 33
- Combo throw hitbox only works on opponents who are both airborne and in histun
- On hit, launches the opponent far away for a hard knockdown
- A slow to come out grab combined with a large 18 frame gap when cancelled off your strong normals alongside an alright-but-not-so-great reward makes this a rare mixup at best when it comes to actually grabbing people
- Can be seen as a combo tool in corner, however, since it does deal pretty alright damage and the combo hitbox does appear significantly faster than the grab one
- Very gimmicky move when used as a pseudo-reversal while in Moon Drive due to the clash frames running out the moment Kouma starts moving - can do a number on people which are conditioned to immediately jump cancel shield after seeing a MD clash, however
Godly Armor
Kouma's armored anti-air. It retains the same uses it had in older games as an armored crossup anti-air, gimmicky command dash, and even more gimmicky armor. However, it has new use as a combo extender and semi-invincible reversal.
| Damage | Guard | Cancel | Property | Cost | Attribute |
|---|---|---|---|---|---|
| 1200 | LH | EX, MD | L, SK | - | - |
| First Active | Active | Recovery | Overall | Advantage | Invul |
| 10 | 4 | 24 | 37 | +1 | 8-17 Armor |
| Damage | Guard | Cancel | Property | Cost | Attribute |
|---|---|---|---|---|---|
| 1200 | LH | EX, MD | L, SK | - | - |
| First Active | Active | Recovery | Overall | Advantage | Invul |
| 10 | 4 | 28 | 41 | -3 | 8-37 Armor |
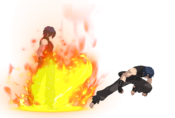
Kouma stomps, causing Fire to engulf him and the area in front.
- Armored, completely disjointed Anti-Air which covers the area directly in front of Kouma mostly vertically
- On hit, causes a special knockdown state which prevents the opponent from immediately teching once they hit the ground, allowing Kouma to perform an OTG combo
- This is not a hard knockdown - after a small amount of time on the ground, they will be able to tech out
- Both versions cause a large amount of blockstun on block and deal a lot of damage on hit
- Great starter on Counterhit that grants Kouma access to very damaging Combos
- Visually, both versions are the exact same until much later into the move
- A Version is just the stomp, powerful Anti-Air
- Can be used as a combo starter, but in midscreen a counterhit is required - without one, you can still get the OTG combo, though
- +1 on block, being Kouma's prime way of ending his blockstrings safely, if in range
- On Moon Drive Cancel is exceptionally plus, even granting enough time to setup an unescapable unblockable by immediately doing 5[C] afterwards
- Also seen in Kouma's corner combos as filler for extra damage
- B Version is the same stomp as A, but followed up with an almost fully armored command dash that covers a bit more than round start distance
- Smaller Hurtbox starting Frame 14, with the Dash itself starting Frame 19(Total Duration of dash being 23 Frames)
- When used as an Anti-Air, the added dash allows Kouma to convert into a combo even on non-Counterhit, provided the opponent was hit high enough
- Additionally, if mistimed too early, the added dash will often "automatically dodge" jump-in attacks due to its fast speed and armor, provided the opponent isn't anticipating it
- Unarmored window in which Kouma cannot act towards the Dash end is only 4 frames, but opponents anticipating this move will exploit the weaknesses of armor and blow you up for it. Using this move as a grounded movement tool should be done with care
- Is -3 on block, but moves Kouma directly into command grab range - due to this move looking visually the same to 22A until later, can be used to check your opponents reactions and push your offense if they keep respecting
- Also seen in corner combos as filler, or in rare cases where the 236X series cannot be applied
- Armor granted by both variants is a timed buff which will continue to run out while stuck in hitstop - this means if someone hits you, the armor will end "sooner" into the move's overall duration than anticipated.
- There are a few additional nuances to both variants when it comes to Moon Drive cancelling
- The Armor granted frame 8 is kept after Moon Drive Cancelling the move - particularly interesting with 22B as it grants Kouma roughly half a second of fully actionable armor
- Additionally, both variants are Moon Drive cancellable starting frame 8 - before the active frames. Due to both moves technically being projectiles (but not affected by projectile invulnerability) the moves will still come out while Kouma is activating Moon Drive - practical in a few anti-MD setups
| Damage | Guard | Cancel | Property | Cost | Attribute |
|---|---|---|---|---|---|
| 920*3 (2308) | LHA | AD, MD | L, HK | 1 Magic Circuit | - |
| First Active | Active | Recovery | Overall | Advantage | Invul |
| 4+19 | 8 | 23 | 53 | +0 | 1-12 All, 13-276 Armor |
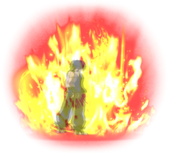
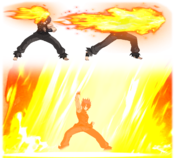
Kouma stomps and causes a massive eruption of flames, momentarily transcending as afterimages of himself move around him.
- Impractical Reversal and Armor Install stomp
- Large hitbox that completely engulfs Kouma and deals a lot of damage
- Grants Kouma fully actionable armor for 4 seconds, indicated by an orange glow
- Knowledge of Armor's weaknesses is vital for both using and fighting Kouma in his armored up state
- Naturally fills a lot of holes in Kouma's pressure and approach, forcing the opponent to make expensive and high commitment decisions to break the Armor or play defensively, allowing Kouma to make use of his wide range of Command Grabs, creating a threatening situation in Kouma's favor either way
- Best used when the opponent has their back against the wall, as many characters will be able to simply outrun and escape Kouma to wait the armor out
- Typically used in a blockstring by cancelling 22A/22B, which leaves no gap and allows for safe activation that even leaves you +0, or after a hard knockdown such as after 214X to pressure the opponent on their wakeup while armored
- Usage as a reversal is discouraged as the hitbox is slow enough to come out that opponents that are aware of this flaw and not stuck in highly committal attacks can easily grab you out of the startup, evade, or simply shield and land a guaranteed punish on you.
- By far the funniest move in the game
| Damage | Guard | Cancel | Property | Cost | Attribute |
|---|---|---|---|---|---|
| 700, 600 (1228) | LH, HA | EX, MD | L (both hits), GB (second hit) | 3 Moon Icons | - |
| First Active | Active | Recovery | Overall | Advantage | Invul |
| 11 | 4 (24) 6 | 1A + 12L | 57 | -2 | 1-11 MD Clash, 9-38 Armor |
Kouma stomps, causing Fire to engulf him and the area in front, then jumps towards the opponent with an overhead.
- Moon skill version of 22A/B
- The stomp retains most of the traits of 22A, such as being armored and causing a large amount of blockstun
- Inexplicably, however, has a smaller hitbox, making it a worse Anti-Air
- Follow-up overhead ground bounces on hit, leading to a combo
- While in Moon Drive, this move is very potent at winning "Clash Wars", due to the Moon Drive clash frames covering Kouma in the usually vulnerable timeframe before the armor, making this a very efficient move to cancel into after clashing with an opponent's Moon Drive clash frames
- Also seen in Moon skill combos for extra damage
Double Comet (air)
Unlike it's grounded counterpart, the air DP has no invincinbility on any version while retaining the same long recovery. However, both A and B can be whiff canceled. Mainly used as an air combo extender when you really need the extra damage to kill. j.236C however is a multi-use move that is integral to his pressure.
| Damage | Guard | Cancel | Property | Cost | Attribute |
|---|---|---|---|---|---|
| 690*2 (1283) | LHA | EX, MD | L | - | - |
| First Active | Active | Recovery | Overall | Advantage | Invul |
| 6 | 5 | 18A (TK) + 12L | 40 (TK) | -16 (TK) | - |
| Damage | Guard | Cancel | Property | Cost | Attribute |
|---|---|---|---|---|---|
| 710*2 (1313) | LHA | EX, MD | L | - | - |
| First Active | Active | Recovery | Overall | Advantage | Invul |
| 8 | 5 | 23A(TK) + 12L | 47(TK) | -21(TK) | - |
| Damage | Guard | Cancel | Property | Cost | Attribute |
|---|---|---|---|---|---|
| 1500 | LHA | EX, MD | L, SK | - | - |
| First Active | Active | Recovery | Overall | Advantage | Invul |
| 12 | 2 | 14A ~ N + 12L | 39 ~ N | -11 ~ -N | - |
Kouma does a flying kick, and optionally follows it up with a flying downwards kick.
- Launches Kouma a very short distance forwards and upwards
- A Version launches Kouma the least
- Is also the fastest, at the price of a small amount of damage
- B version launches Kouma slightly more, increasing its reach
- Is 2 frames slower, but deals slightly more damage
- Can perform the follow-up kick on whiff, hit, or block
- Follow-up kick sends opponents at an awkward angle, and due to the recovery of this move, does not allow for combos without spending resources via. Moon Drive cancelling it or using EX moves
- The kicks without the follow-up do not allow for a combo without resources either, the recovery is too long for that
- Follow-up kick does however cause a special downed state similar to 22A/B that prevents the opponent from immediately teching upon hitting the ground, allowing for an OTG string, especially in corner
- Long recovery also makes it terrible vs. block, being incredibly minus, and not even an overhead, gives it little practicality there either
- Overall rarely seen outside of optimized damage combos and rare mixups such as catching people off-guard after a whiffed jA
| Damage | Guard | Cancel | Property | Cost | Attribute |
|---|---|---|---|---|---|
| 640*7 (2132) | LHA | MD | L, HK | 1 Magic Circuit | - |
| First Active | Active | Recovery | Overall | Advantage | Invul |
| 4+3 | 2 (2) 3 (1) 10 | 21A(TK) + 12L | 46(TK) | +4(TK) | - |
Kouma does a flying kick, creating a giant flame beneath him
- Good hitbox and leaves a lingering, multi-hit projectile in its wake
- Kouma's prime EX move to make his unsafe or disadvantageous moves on block safe and advantageous
- Advantage gained off this move, however, depends on a variety of factors and can be slightly advantageous to neutral, to very advantageous
- Under the best circumstances, this move can be +16~ on block, achieved by landing a "sweetspot" where only the very edge of the move (and only a single hitbox) is connecting with the opponent's hurtbox
- Under normal circumstances where hitboxes overlap, advantage will range between -1 to +5 and depends on how close to the ground you performed the move at
- Also sees usage as a combo extender for situational starters such as 623B or the last hit of the 236A/B series
| Damage | Guard | Cancel | Property | Cost | Attribute |
|---|---|---|---|---|---|
| 1300 | LHA | EX, MD | L, GB | 3 Moon Icons | - |
| First Active | Active | Recovery | Overall | Advantage | Invul |
| 16 | 9 | 17L | - | -2 ~ -7 | - |
Kouma performs a quick hop before diagonally rushing downwards with a burning divekick.
- Essential part of Kouma's combos in which he is forced to launch the opponent (3C, Shield Counter A), as it is his only meterless means to return to the ground and extend the string
- Has no clash frames during moon drive
- After a small delay, covers a lot of ground very quickly, which can bait anti-airs and generally catch players off-guard
- Makes for a solid combo starter on hit
- Safety on block heavily depends on the height at which Kouma makes contact with the opponent - connect too high, and Kouma might not be able to block or act in time
- Cancelling the move into j236C close to the ground after the kick can reverse the situation and cause a favorable one for Kouma instead
- Alternatively, you can MD cancel on block and cause an ambiguous high/low 50/50
- Additionally, on hit or block, the first 8 frames of the long landing animation are cancellable, so you can also 236C to keep you safe and force respect
Super Moves
Unicorn - Flame Waltz
| Damage | Guard | Cancel | Property | Cost | Attribute |
|---|---|---|---|---|---|
| 3500/3850 | U | - | HK | 3 Magic Circuit | - |
| First Active | Active | Recovery | Overall | Advantage | Invul |
| 5+0 | 15 | 30 | 50 | +65 | 1-20 All, 21-27 Throw |
After a cinematic pause, Kouma rushes forwards to grab, lift, and burn his opponent in a massive pillar of fire.
- Fully invulnerable command grab that dashes forwards if it does not grab anyone up close, still with a grab hitbox active
- Grabs Frame 0 from superflash up close
- Implications of this are massive, as it means if the opponent wasn't already performing an action that makes them throw-invulnerable, such as being in jump startup, they will be caught in the grab
- Powerful reversal that breaks the norm and forces players to adapt specifically to it, such as immediately having to perform a throw-safe option after performing a safejump to be safe from it - its presence alone can cause a much more lenient offense from opponents with more holes to exploit for Kouma
- Dash goes roughly midscreen distance and is fully invulnerable, allowing Kouma to also use his arc-drive as a hard call-out against midscreen pokes, and especially projectiles if he is in range
- Powerful and easy to confirm into combo ender to add a large amount of extra damage
- After the cinematic, the opponent and Kouma will be roughly round start distance away from each other, while Kouma has plenty of time to setup further okizeme as the opponent is stuck in a hard knockdown
- Deals even more damage if it catches an opponent shielding
- If used against an opponent performing an invincible move, recovery is short enough to often just return to neutral instead of Kouma getting punished
- One of the best Arc Drives in the game
Judgement of Yama
| Damage | Guard | Cancel | Property | Cost | Attribute |
|---|---|---|---|---|---|
| 4800 | - | - | HK | 4 Magic Circuit | - |
| First Active | Active | Recovery | Overall | Advantage | Invul |
| 22 | 4 | 26 | 52 | -14 | 0-25 All |
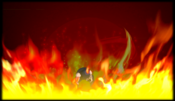
Kouma does his own version of the God Press, and then follows up on it by setting the screen ablaze.
- Can be performed by inputting A+B+C+D with 4 bars in neutral, or by Shielding an attack while in Blood Heat
- Damage in Blood Heat scales with amount of Heat Gauge remaining on activation
- It's a Last Arc, nothing unique to Kouma to note other than the Attack version has a relatively short range for a Last Arc.
- Various ways to confirm into it if you really want it, like 236C's wall bounce during Blood Heat, but you probably have better options
- If the opponent survives, both players are reset to the middle of the screen, with OK-ish okizeme for Kouma
Notable Rebeats, Gaps and Misc. Move information
| Attack | Chain | Advantage |
|---|---|---|
| 5B/2B | 5A/2A | -3 |
| 5C/2C | 5A/2A | -1 |
| Attack | Chain | Frame Gap |
|---|---|---|
| 2A/5A | 2[C] | 12F(4-12 Armored) |
| 2B/5B | 2[C] | 9F(Fully Armored) |
| 5C | 2[C] | 7F(Fully Armored) |
| 2A/5A | 5[C] | 16F(7-16 Armored) |
| 2B/5B | 5[C] | 13F(4-13 Armored) |
| 2C | 5[C] | 11F(2-11 Armored) |
| 2A/5A | 236[B] | 10F(5-10 Armored) |
| 2B/5B | 236[B] | 6F(Fully Armored) |
| 5C/2C/3C | 236[B] | 4F(Fully Armored) |
| 5A/2A | 214B | 10F(Fully Armored) |
| 22A/22B | 22C | 0F |
| 5C/2C | 4BC | 18F |
| Move | Cancel Window | Cancelable frames of recovery | Remaining Recovery | Blockstun | Adv. on MD | Notes |
|---|---|---|---|---|---|---|
| 5A/2A | 5 - 17 | 11 | 0 | 11 | +9 | Whiff cancels starting frame 10. |
| 5B | 11 - 20 | 5 | 12 | 14 | +12 | |
| 2B | 7 - 16 | 5 | 11 | 14 | +12 | |
| 5C | 9 - 21 | 5 | 17 | 16 | +14 | |
| 2C | 10 - 23 | 8 | 13 | 16 | +14 | |
| 2[C] | 24 - 39 | 9 | 9 | 16 | +14 | |
| 3C/Rapid Beat 2 | 10 - 22 | 9 | 15 | 16 | +14 | |
| jA | 5 - Until Landing | Until Landing | 0 | 11 | +6 | Whiff cancels starting frame 20, effective until landing. |
| jB | 6 - 20 | 9 | 15* | 14 | +12 | *Rest of Animation, actual Recovery until landing. |
| jC | 11 - 21 | 5 | 17* | 16 | +14 | *Rest of Animation, actual Recovery until landing. |
| j[C] | 20 - 30 | 5 | 17* | 16 | +14 | *Rest of Animation, actual Recovery until landing. |
| Rapid Beat 1 | 9 - 19 | 8 | 15 | 15 | +13 | |
| 236A | 10 - 24 | 11 | 11 | 18 | +16 | |
| 236B | 11 - 25 | 11 | 11 | 18 | +16 | |
| 236A/B~X | 11 - 26 | 13 | 12 | 18 | +16 | |
| 236A/B~4X | 11 - 25 | 12 | 11 | 18 | +16 | |
| 236A/B~X/4X~X | 14 - 26(Until Landing) | 7 | 12L | 16 | +14 | On Hit, can cancel Landing Animation(12F) from 1-9. |
| 236A/B~X/4X~4X | 14 - 23(Until Landing) | 4 | 12L | 16 | +14 | On Hit, can cancel Landing Animation(12F) from 1-9. |
| 236[B] | 21 - 35 | 11 | 8 | 18 | +16 | |
| 236C | 11 - 26 | 8 | 15 | 20/20/16 | +18/+18/+9 | If canceling the last hit ASAP, cancel will be delayed by 5 frames. |
| 623A | 6 - 11 14 - 24 | 8 | 10A + 12L | 16/16 | +14/+14 | |
| 623B | 6 - 11 14 - 24 | 8 | 19A + 12L | 16/16 | +14*/+14* | *Cannot MD Cancel this move on block |
| 623C | 5 - 10 13 - 26 | 10 | 32A + 18L | ? | ?* | *Cannot MD Cancel this move on block |
| 623A/B~X | 12 - 24 | 11 | 0A ~ 5A + 12L | 16 | +14 | |
| 214A/B | 8 - 44* | - | - | - | - | *Window to input follow-up. |
| 214A/B~214C/236C | 34 - 66 | 30 | 4 | - | +100* | Only Cancel available is MD. *Advantage on successful grab canceled with MD. |
| 214C | 51 - 76* | 13 | 6 | - | +106* | Only Cancel available is MD. *Advantage on successful grab canceled with MD. |
| 22A | 8 - 23 | 10 | 14 | 28 | +28 | Can cancel this move before the hitbox is out, with the hitbox still coming out later. |
| 22B | 8 - 25/(41*) | 12/(28*) | 16/(0*) | 28 | +28 | *On hit, can cancel recovery at any point. Also, same rule as above applies. |
| 22C | 23 - 45 | 15 | 8 | 30 | ?* | Cannot MD Cancel this move on block. |
| j236A | 7 - 19 | 8 | 10A(TK) + 12L | 16 | +14 | |
| j236B | 8 - 20 | 8 | 15A(TK) + 12L | 16 | +14 | |
| j236C | 7 - 8 11 - 21 | 8 | 13A(TK) + 12L | 16*/39 | +14*/+37 | *MD Canceling before the Projectile comes out cancels it. |
| j236A/B~X | 12 - 24 | 11 | 3A(TK j236A) + 12L | 16 | +14 | |
| 6BC | 15 - 19 34 - 42 | 0/4 | 12L | 20/18 | +18/+16 | |
| 3BC | 7 - 12 17 - 27 | 8 | - | 16/16 | +14/+14 | Jump cancelable starting frame 7 on hit, frame 28 on block/whiff. |
| 4BC | N/A | - | - | - | - | Cannot be cancelled at any point. |
| 2BC | 11 - 16 38 - 44 | 1A | 12L | 26/16 | +26/+14 | |
| j6BC | 16A - 28A (+8L) | 8L | 9L | 16 | +14 | Starting 8 Frames of Landing Recovery can be EX/MD/AD cancelled. |
| Usage Height | Advantage |
|---|---|
| 236A/B~X~X | +0 ~ +5 |
| 236A/B~X~4X Earliest | +2 ~ +5 |
| 6BC | +1 ~ +2 |
| j6BC High Sweetspot | +12/+13 |
| j6BC | +5 ~ -1 (Avg. +2) |
| 2BC | +4 ~ +1 |
Customization
Palette options
Kouma Kishima Wiki Roadmap
| 72% complete | ||
|
|
| Page | Completed | To-do | Score |
|---|---|---|---|
|
Mostly finished at the moment, just stuff that is generally universally missing left (such as movement data). |
Add data that hasn't been filled in yet. |
23/25 | |
| Strategy |
Slightly unfinished. Needs some more stuff added in order to be considered complete. |
Update/Review "Neutral", "Fundamental Strategy" and "Defense" Section to be in-line with the August Patch. Proper Writeup on how to fight Kouma. |
20/25 |
| Combos |
Finished. |
25/25 | |
| Matchups |
VERY unfinished. Needs proper work done for all matchups. |
Actually write something for most MUs, add new characters as slots. |
4/25 |
