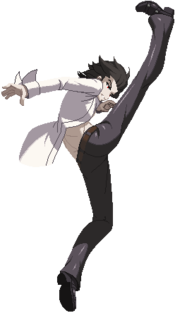
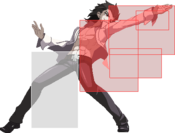
Melty Blood/MBTL/Michael Roa Valdamjong
Gameplay
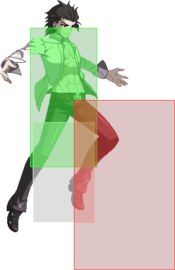
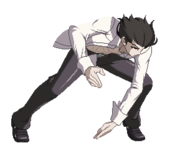
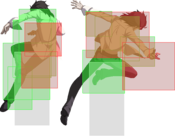
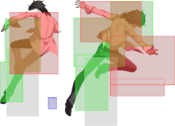
Roa excels at controlling the midrange with 214X lightning bolts and pressuring opponents up close with his strong rebeats.
The primary villain of original Tsukihime novel, Roa constantly frustrate opponents with fast and ambiguious normal and special attacks. Up close, many of his command normals has follow-up attacks to hit unsuspecting players with. From mid-screen, he has the choices of Thunderclap (236X) cross-up dash attacks and ranged hit-scan Thunder Needle (214X) series that can strike almost instantly from either ground level or from above, keeping the opponent under heavy pressure even from far away. Even when an opponent finally has him cornered, Roa has some of the most reliable reversals in the game like Rising Lightning (623X) as well has the shortest recovery backdash in the game to dodge frametraps and retaliate
Despite his advantages, Roa is a character who still primarily relies on strike throw to present a threat on offense, lacking any inherent grounded mixup potential outside of it (thus the nickname Mids Michael). His tools for dealing with air approach are also underwhelming for a character of his strengths; his air to air tools with the best coverage are often his most committal despite their range and reward. He wants to constantly win mind games over the game's systems and dominate neutral from the ground, requiring the player to get in their opponent's head and learning how to outwit Type Lumina's system mechanics with this snake's tricks
| Pick if you like | Avoid if you dislike |
|---|---|
|
|
Dead Apostle who manipulates lightning and chases eternity
A vampire seen as outside the 27 Dead Apostle Ancestors, known as the "Serpent of Akasha" or the "Infinite Reincarnator".
He developed a technique that allows his soul to attach itself to a baby with innate talent after he dies. Currently, he resides within the body of the original Shiki Tohno, Akiha's real brother.
Roa was originally a priest of the Holy Church, delving deeply into its secrets over the years. He eventually chose to become a Dead Apostle to continue his search for immortality. After tricking Arcueid into drinking his blood, he gained a portion of her power and fled.
His cycle of death and rebirth has continued for the past 800 years.
Main Weapon/Skill
Lightning
Basic Info *Height, weight, and birthday are those of current host Shiki Tohno
Height: 178cm
Weight: 65kg
Blood Type: n/a
Birthday: September 29th
Voiced by: Yohei Azakami
Character Summary
- Moon Skills
- 6B+C - Thunderclap
- 3B+C - Rising Lightning
- 4B+C - Thunder Needle
- j.6B+C - Brilliant Demon Strike
- Special Attacks
- 236A/B/C (EX OK) - Thunderclap
- 623A/B/C (EX OK) - Rising Lightning
- 214A - Thunder Needle
- > A/B/C - Timeless Thunder Needle
- 214B/C (EX OK) - Timeless Thunder Needle
- > A/B/C - Thunder Needle
- j.236A/B/C (EX OK) - Brilliant Demon Strike
- Arc Drive
- 236B+C - Celestial Strike
- Last Arc
- A+B+C+D / D in Blood Heat - Seventeenth Transmigration
- Unique Attacks
- 6C>C, 3C, 2C>2C
- Blowback Edge Moves
- 236[B], 214[B]
HP Value: 11,700 (Average)
Backdash:
  - 1-10 Full Invul
  - 1-12 Strike Invul
  - 13-17 Projectile/Air Invul
  - 6-18 Airborne
  - 27 Total
Dash startup: 5
Dash actionable: 5
Jump startup: 4
Jump airtime: 36
Coming soon.
Move Analysis
Normal Moves
Standing Normals
5A
| Damage | Guard | Cancel | Property | Cost | Attribute |
|---|---|---|---|---|---|
| 180 | L | -N-, -SE-, -SP-, -RB-, -EX-, -MD-, (J) | - | - | - |
| First Active | Active | Recovery | Overall | Advantage | Invul |
| 5 | 2 | 11 | 17 | -1 | - |
- Is now a low!
- Cancellable into itself up to 2 times by either holding 4 or using different Rapid Beat options.
- Whiff cancels available from frame 10 onwards (frame 10 is the first frame of the whiff cancelled move).
Typical kick to the shins, similar to ![]() Shiki's 5A. It has the usual: 5f startup, whiff cancellable, -1, etc. Just like your standard 5A, this is your prime rebeat and stagger button that can aid with Strike/Throw. Also serves the great purpose of easily picking up after 236A or j.2C rejumps and starting a j.2C rejump by doing 5A > tk j.236A.
Shiki's 5A. It has the usual: 5f startup, whiff cancellable, -1, etc. Just like your standard 5A, this is your prime rebeat and stagger button that can aid with Strike/Throw. Also serves the great purpose of easily picking up after 236A or j.2C rejumps and starting a j.2C rejump by doing 5A > tk j.236A.
Thanks to it's low hitting property, it can be used for tick throws similarly with 2A to catch attempts to jump or backdash. However, due to the moves hitbox placement, it cannot be used to effectively catch IADs like some other 5As can. It's generally worse as a starter than 2A as well, but is the preferred A normal mid combo thanks to the higher base damage.
5B
| Damage | Guard | Cancel | Property | Cost | Attribute |
|---|---|---|---|---|---|
| 480 | LH | N, SP, RB, EX, MD, (J) | - | - | - |
| First Active | Active | Recovery | Overall | Advantage | Invul |
| 9 | 3 | 17 | 28 | -5 | - |
- Low angled mid poke.
- Surprisingly disjointed.
- Causes a fail shield state on crouching shield.
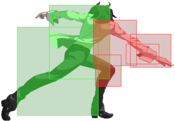
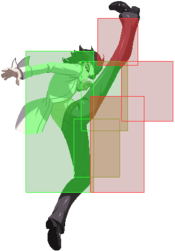
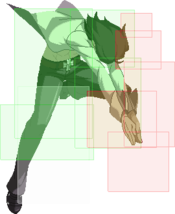
Roa takes a jab towards the stomach. Not the fastest button at 9 frames, but has a deceptively disjointed hitbox, not having any hurtbox on his extended arm. Thanks to its low angle, it isn't the greatest at snatching IADs or other anti airing purposes. Boasting the worse recovery and active frames, this move is generally delegated to combo/blockstring filler and is not as useful as a poke as something like 2B.
5C
| Damage | Guard | Cancel | Property | Cost | Attribute |
|---|---|---|---|---|---|
| 420*2 (806) | LH, LH | N, SP, RB, EX, MD, (J) | - | - | - |
| First Active | Active | Recovery | Overall | Advantage | Invul |
| 10 | 3 (11) 3 | 19 | 45 | -5 | - |
- High angled double mid attack.
- Significant forward movement.
- Cancellable from either the first or second hits.
- Gapless between the two hits on block.
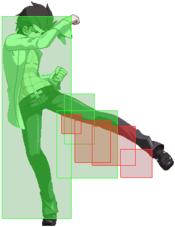
Roa stretches his legs and goes for a large, double legged high kick. This move advances Roa forward a lot for a normal, making it a powerful pressure tool that can keep him in range. Very useful in combos as it deals great damage between the two hits, but the gap makes it possible to whiff the 2nd hit during a combo, and the second hit could make the usually proceeding 6C whiff. In these cases, it may be better to do 5C(1), which is required in some combos.
Despite it's animation, the actual hitbox of 5C doesn't cover his legs nearly as high as they seem, making this move mediocre at anti airing. However, it is still good at catching airborne characters that are already in hitstun, and still hits from a fairly decent height. It can service as an IAD callout, but the high startup makes this more unfavorable than not.
Crouching Normals
2A
| Damage | Guard | Cancel | Property | Cost | Attribute |
|---|---|---|---|---|---|
| 150 | L | N, -SE-, -SP-, RB, -EX-, -MD-, (J) | - | - | - |
| First Active | Active | Recovery | Overall | Advantage | Invul |
| 5 | 2 | 11 | 17 | -1 | - |
- Crouching low attack.
- Identical frame data to 5A.
- Whiff cancels available from frame 10 onwards (frame 10 is the first frame of the whiff cancelled move).
The standard 2A, still identical to ![]() Shiki's. Similarly good at pressure, rebeats, staggers, and catching attempts to jump and/or backdash. Deals less damage than 5A like most others, but is better for starting off combos. Having the same framedata as 5A and being a low as well, it has practically the same function. However, since it's a better starter than 5A, you're more inclined to use 2A during pressure and such.
Shiki's. Similarly good at pressure, rebeats, staggers, and catching attempts to jump and/or backdash. Deals less damage than 5A like most others, but is better for starting off combos. Having the same framedata as 5A and being a low as well, it has practically the same function. However, since it's a better starter than 5A, you're more inclined to use 2A during pressure and such.
2B
| Damage | Guard | Cancel | Property | Cost | Attribute |
|---|---|---|---|---|---|
| 420 | L | N, SP, RB, EX, MD, (J) | - | - | - |
| First Active | Active | Recovery | Overall | Advantage | Invul |
| 7 | 5 | 16 | 27 | -6 | - |
- Low leg poke.
- Decently sized and frame 7.
- Doesn't move forward and can low profile sometimes.
Another low poke that is useful in a lot of aspects. Being a 7 frame button, it leaves an 8 frame window after a -1 rebeat, making it a great tool after resetting pressure. It can serve it's purpose as a close/mid range footsies and/or scramble button, and leads to good reward on hit regardless of position. It also works similar to 5A/2A for linking after 236A and/or jump cancelling into a tk j.236A. Otherwise, it can be a combo/blockstring filler like most other B normals
2C
| Damage | Guard | Cancel | Property | Cost | Attribute |
|---|---|---|---|---|---|
| 620 | L | N, CH, SP, RB, EX, MD, (J) | - | - | - |
| First Active | Active | Recovery | Overall | Advantage | Invul |
| 9 | 11 | 14 | 33 | -8 | - |
- Advancing low sweep.
- Has a wallbouncing followup attack.
- Highly active with deceptively short recovery.
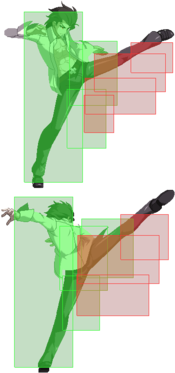
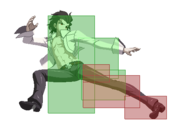
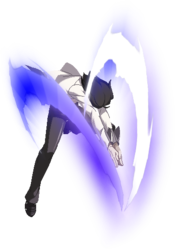
The low sweep that does everything a normal 2C could, and then some. It has average startup at frame 9, but is active for a whopping 11 frames and has the lowest recovery out of Roa's B and C normals. It has a deceptively high hitbox which, combined with the active frames, makes it super easy to catch falling airborne opponents with this move. Prime combo tool thanks to it's followup and plays a surprisingly good midrange footsies. It is also a potent starter, leading to immense damage from midscreen and corner.
Because of it's frame data and forward movement, 2C can do a lot of funky things during pressure. Being a standard C normal, it is already -1 on A button rebeat whiff. However, because of it's forward movement, it keeps Roa in deadly range and makes his Strike/Throw game even better alongside 5C. Thanks to its active frames, movement, and recovery, the move can go from being -8 at point blank to +0 at the perfect distance. Performing a perfect meaty (on wakeup, for example) makes it goes up to +2 on block, which can throw off unassuming opponents who respect his oki and lead to a dangerous guessing game.
2C ~ 2C
| Damage | Guard | Cancel | Property | Cost | Attribute |
|---|---|---|---|---|---|
| 740 | LH | N, SP, EX, MD, (J) | - | - | - |
| First Active | Active | Recovery | Overall | Advantage | Invul |
| 13 | 3 | 23 | 38 | -9 | - |
- Mid hitting followup for 2C.
- Even more forward advancing movement.
- Wallbounces in corner.
- Still normal cancellable.
Roa picks up his other leg and does an extended kick forward. When done midscreen, it sends far away to combo into 236A/B for an easy hitconfirm. When done in corner, it wallbounces and allows for a variety of other links while increasing damage. On block, it is still normal cancellable and can continue pressure without committing to a special. During pressure, the move moves Roa forward even more than his 5C and 2C alone. Being cancellable still, he can advance greatly and still be in range for an A normal rebeat and run his strike throw. Being a normal followup though, it cannot come out on 2C whiff, making it impossible to use in neutral. Great for combos, great for advancing pressure, the 2C followup is a very worthwhile tool.
Jumping Normals
j.A
| Damage | Guard | Cancel | Property | Cost | Attribute |
|---|---|---|---|---|---|
| 140 | HA | N, SP, RB, EX, MD, J | - | - | - |
| First Active | Active | Recovery | Overall | Advantage | Invul |
| 5 | 4 | 11 | 19 | - | - |
- Cancellable into air options on whiff.
- Whiff cancel from frame 20 onwards.
- Can chain into itself up to 2 times.
The quick air jab that can fish for fatals and play a decent air neutral. It doesn't hit as high as other j.As, but is still very serviceable in that regard. The move is quick enough that, in combination with his airdash, Roa can do a triple overhead from an IAD, although you are likely going to do j.BC anyways. Thanks to its blockstun, it can be used in tandem with his other air normals to create a quick strike/throw scenario (e.g IAD j.CA throw).
j.B
| Damage | Guard | Cancel | Property | Cost | Attribute |
|---|---|---|---|---|---|
| 400 | HA | N, SP, RB, EX, MD, J | - | - | - |
| First Active | Active | Recovery | Overall | Advantage | Invul |
| 7 | 4 | until landing | - | - | - |
- Upward swing kick.
- Hits in front of, above, and below Roa all at the same time.
The air footsies button. Unlike j.A, cannot do anything on whiff, but can fish for fatals for higher reward. It can be used both offensively and defensively thanks to its coverage. While it doesn't extend as far as his j.C, it covers space around him better, making it a great IAD button that can link into j.C on hit or block. Also serves it's purpose in tandem with j.C as combo filler if both buttons are used, but j.C is usually preferred if you have to choose.
j.C
| Damage | Guard | Cancel | Property | Cost | Attribute |
|---|---|---|---|---|---|
| 560 | HA | N, SP, RB, EX, MD, J | - | - | - |
| First Active | Active | Recovery | Overall | Advantage | Invul |
| 8 | 5 | until landing | - | - | - |
- Straight forward heavy kick.
- Longest and most active air normal.
- Primary safejump option.
Roa protrudes his leg outwards and does a kick. Having the highest damage and most generous hitbox, this is Roa's typical air button for jump-ins and other offensive utilities. Thanks to its range, it can used in the corner to outspace options like heat and fuzzy A normals, forcing people to respect his safejump more. It will also see often use in j.2C rejumps, assuming j.C was not already used earlier in the combo.
Command Normals
6C
| Damage | Guard | Cancel | Property | Cost | Attribute |
|---|---|---|---|---|---|
| 390*2 (744) | LHA | CH, SP, EX, MD | - | - | - |
| First Active | Active | Recovery | Overall | Advantage | Invul |
| 16 | 4 | 26 | 45 | -8 | - |
- Forward leaping swipe thats brings opponents down to the ground.
- Airborne frames 5-29
- Cancellable in the air and on the ground.
- Cannot airdash after a jump cancel.
Roa's closest thing to a standing overhead that despite looking like one, isn't one. Roa jumps into their air during this, meaning he can use this move to crush low attempts during pressure. However, this makes him liable to getting fatal countered, and combined with the startup makes it a poor anti air option. Slower startup allows for easy frametraps, but can true blockstring from C normals. Sees uses as a unique pressure reset by cancelling into j.236X on block before he lands, which can lead to either plus frames from j.236B or a delayed air string from j.236A.
Besides pressure usage, the move services as filler into an special move thanks to it stabilizing height and its followup hit. However, using the move in the middle of a combo will generally decrease damage, which is why it's delegated more as an ender or a starter. Also has a tendency to not connect if used in a highly prorated combo, usually requiring 5C(1) or omission of other normals.
| Damage | Guard | Cancel | Property | Cost | Attribute |
|---|---|---|---|---|---|
| 460 | LA | SP, EX, MD | - | - | - |
| First Active | Active | Recovery | Overall | Advantage | Invul |
| 6 | 4 | 31 | 40 | -18 | - |
- Followup sweep.
- Must be inputted before landing.
The followup attack that hits low. Air blockable, meaning he cannot AUB trap with it after an air blocked 6C. His options during pressure decrease drastically after landing from 6C, and even more so when he hits the followup. Being incredibly unsafe, Roa is forced to cancel into a special to remain safe or use 214C to continue pressure gaplessly. In combos, it serves a great use of giving Roa a much needed sweep outside of 2C incase you hit someone during a blockstring and you already used 2C.
J.2C
| Damage | Guard | Cancel | Property | Cost | Attribute |
|---|---|---|---|---|---|
| 390*2 (748) | HA | SP, EX, MD | - | - | - |
| First Active | Active | Recovery | Overall | Advantage | Invul |
| 13 | 3 | until landing | - | - | - |
- Two handed downward strike that sends down, similar to the last hit of his 623B/C
- Groundbounces, but doesn't launch.
- Special cancellable, but not jump or normal cancellable.
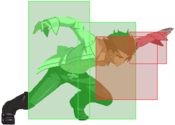
Quite possibly one of the best of the new moves added in the 1.3 patch, Roa gets a command normal in the air that lets him confirm off air hits more reliably and opens up his combo game further than before. With this move, Roa gets access to j.2C rejumps using j.236X to further increase his damage by a dramatic amount and giving him some of the highest damage in the game. Not only that, but it becomes significantly easier to confirm an air to air hit into a full combo since the move sends downwards and is faster than a typical j.[C] that would otherwise accomplish the same feat. Because of its startup, it can also be used with IAD as a fakeout to play another hard to see strike/throw scenario (e.g IAD j.B j.2C(w) throw).
Universal Mechanics
Rapid Beat 1
| Damage | Guard | Cancel | Property | Cost | Attribute |
|---|---|---|---|---|---|
| 230*2 (414) | LH | SP, RB, EX, MD | - | - | - |
| First Active | Active | Recovery | Overall | Advantage | Invul |
| 9 | 4 | 25 | 37 | -10 | - |
- Double hit electric swipe.
- Autocorrects on hit, but won't always.
- Only cancellable into specials or 3C.
A standard Rapid Beat filler. It can see use as an alternative to 6C if the combo is prorated too hard to connect it, but you lose out on damage. It has decent forward movement, but the frame advantage (or lack thereof) and lack of good cancel options makes this usually detrimental to you, forcing you to special reset for safety or spend bar to keep your turn. Decent blockstring or combo filler, and not much else.
3C / Rapid Beat 2
| Damage | Guard | Cancel | Property | Cost | Attribute |
|---|---|---|---|---|---|
| 700 | LH | SP, EX, MD, (J) | - | - | - |
| First Active | Active | Recovery | Overall | Advantage | Invul |
| 10 | 3 | 23 | 35 | -9 | Air 5-12 |
- Universal launcher and anti-air.
- Invulnerable to air attacks starting from frame 5.
Roa pokes the air with his hand in the form of the universal 3C/Rapid Beat launcher. Being invulnerable to air attacks makes this move a good anti air, but ends up being on the lower end of the other 3Cs in the game. Still, it possesses a solid range and can easily be made safe using a special cancel. It also serves purpose as a combo ender, both metered and meterless, as it can set up safejumps from anywhere on the screen and can even lead to a L/R if done correctly.
Ground Throw
| Damage | Guard | Cancel | Property | Cost | Attribute |
|---|---|---|---|---|---|
| 1500 | U | - | - | - | - |
| First Active | Active | Recovery | Overall | Advantage | Invul |
| 4 | 3 | 19 | 25 | +57 | - |
- Standard ground throw.
- Like most, has an autorun if not done point blank.
Roa grabs and then throws. It's an essential part of his kit as it puts the throw in Strike/Throw. It gives him good advantage on landing and doesn't place them too far away, leaving plenty of options for him to continue advantage. He gets a couple of setups off throw, notably: meaty 2A, a safejump, an ambiguous L/R, and a "burrito" OS that covers almost all reversal options. Can also set up meaty 2C plus frames easily from anywhere on the screen.
Air Throw
| Damage | Guard | Cancel | Property | Cost | Attribute |
|---|---|---|---|---|---|
| 1200 | U | (J) | - | - | - |
| First Active | Active | Recovery | Overall | Advantage | Invul |
| 1 | 3 | until landing + 12 | - | - | - |
- Standard air throw
- Retains air options if jump cancelled.
Roa grabs and then throws, in the air. His AT sends very far horizontally, so oki is limited afterwards. From a standard air string like j.ABC AT, he can do a safejump by doing IAD j.X. However, because the air normal started from an airdash, the setup is not safe to EX reversals. Instead, he can do IAD j.A(w) j.B to set up an EX-safe meaty, as the second j.B doesn't count as an airdash normal and thus gets the regular 2 frames of landing recovery. In corner, the safejump is significantly easier, only requiring a slightly delayed double jump to safejump. It is also possible to get a L/R by doing 3C dl AT IAD, but this setup is tricky. If done low to the ground (e.g IAD AT), he can land and do 236B to set up meaty plus frames that can beat a few meterless DPs and bait other options with 236[B].
Special Moves
Thunderclap
| Damage | Guard | Cancel | Property | Cost | Attribute |
|---|---|---|---|---|---|
| 1200 | LH | -EX-, -MD- | - | - | - |
| First Active | Active | Recovery | Overall | Advantage | Invul |
| 10 | 8 | 26 | 43 | -7 ~ 0 | - |
- Halfscreen lariat that moves quickly.
- Can be made safe at longer ranges, but does not guarantee advantage.
- Launches at a low angle, but can link off air hits.
Roa gets low to the ground and dashes forward with haste. 236A travels a decent distance and travels fast, making it a fairly useful move for whiff cancelling into 214C or MD to potentially skip neutral. Cannot start a combo on its own, but can easily do so with the aforementioned 214C or MD. Serves as a great combo filler as the move can be hit on its later active frames to grant more advantage, but is dependent on distance (only midscreen) and height. It is also the special you use to cancel into 623C, as it brings Roa in range unlike 214A. The move can also serve as a quick sideswitch during a blockstring if you cancel it and continue pressure on the opposite side. Otherwise, the move is generally ill advised during pressure.
| Damage | Guard | Cancel | Property | Cost | Attribute |
|---|---|---|---|---|---|
| 1400 | LH | -EX-, -MD- | - | - | - |
| First Active | Active | Recovery | Overall | Advantage | Invul |
| 20 | 8 | 21 | 48 | -2 ~ +5 | - |
- Further reaching lariant with more startup and less recovery.
- Almost always safe, and plus on block at further distances.
- Launches upwards for easy confirms.
Roa crouches a little longer and goes a little further. This move is the prime combo tool for Roa, as it provides great damage and allows for plentiful links. It can be used in a variety of ways, but must be performed after some sweeping move like 2C or 6CC. It can also serve as a great starter, however landing the move in neutral isn't the easiest. The move is also not as great during pressure. While better than 236A in that regard, it leaves a gap for the opponent and will never be plus off of a blockstring. It resets neutral at best which, while not a bad thing, is usually worse than continuing pressure normally. While it is plus at a distance, it is impossible to true string after as Roa is out of range of his A normals when the move is +5.
Like mentioned earlier, the move can be used as a unique oki tool after a low AT. The move would meaty with plus frames which, while not gapless, will frametrap mashing if Roa presses afterwards. It also has the ability to phase through some meterless DPs entirely, leading into a punish. While it isn't the best choice of oki, it's an extra option to mess around with from time to time.
| Damage | Guard | Cancel | Property | Cost | Attribute |
|---|---|---|---|---|---|
| - | - | - | - | - | - |
| First Active | Active | Recovery | Overall | Advantage | Invul |
| - | - | - | 34 | - | - |
- Roa crouches to the ground and does...nothing.
- Doesn't show the typical green BE effect.
A feint for an already slow move. Generally has no purpose as there isn't a real reason to be afraid of 236B in pressure, and the high recovery doesn't make for a great pressure reset. However, it can serve as an option during 236B oki, as you can avoid reversals and punish tap shield with 214A.
| Damage | Guard | Cancel | Property | Cost | Attribute |
|---|---|---|---|---|---|
| 170, 102*19 (2108) | LHA | - | - | - | - |
| First Active | Active | Recovery | Overall | Advantage | Invul |
| 4+10 | 80 | 44 | - | -25 | All 1 - recovery |
- Invincible EX that tracks fullscreen.
- Variable advantage on hit based on height.
- Can still counter MD if the opponent does MD.
Roa copies Ciel and does her ![]() EX Halo. Highly unsafe on block, and thus must be used with caution. While 2 frames slower, is still just as active and just as effective at counter zoning. Those active frames can outlast any reversal, including Arc Drives. Unlike Ciel's, Roa still has a little bit of travel time before he reaches his opponent, meaning that doing a counter MD early into the move will still leave Roa at a distance. Still, it can be a very threatening tool that forces zoners to be careful, especially without sufficient moon. The move is slow enough that it won't be effective as a wakeup option, however.
EX Halo. Highly unsafe on block, and thus must be used with caution. While 2 frames slower, is still just as active and just as effective at counter zoning. Those active frames can outlast any reversal, including Arc Drives. Unlike Ciel's, Roa still has a little bit of travel time before he reaches his opponent, meaning that doing a counter MD early into the move will still leave Roa at a distance. Still, it can be a very threatening tool that forces zoners to be careful, especially without sufficient moon. The move is slow enough that it won't be effective as a wakeup option, however.
| Damage | Guard | Cancel | Property | Cost | Attribute |
|---|---|---|---|---|---|
| 550*3 (1473) | LH | EX, MD | - | - | - |
| First Active | Active | Recovery | Overall | Advantage | Invul |
| 12 | 9 | 21 | 41 | -6 ~ 0 | Clash 1-10 (MD) |
- Moon skill lariant that hits 3 times.
- Quicker, bigger, and better on hit than both 236A and 236B.
- Still safe on block.
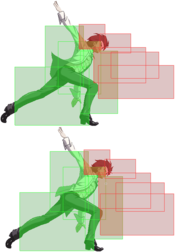
Roa combines the powers of his 236A and 236B to create a monster of a moon skill. It has slightly slower startup than 236A, but reaches farther than 236B and grants an amazing combo on hit, while still being amazing mid combo. While not entirely fullscreen, this move still covers around 75% of the screen. The move also carries the same safeness as 236A on block, and usually leaves him so far away that most characters aren't getting a punish. In MD, can be used as a cheap escape option from the corner thanks to clash frames and how far he travels in so little time. The move, thanks to having such a low to the ground hitbox, can also avoid jump cancel shield from clash entirely, leading to the person clashing to be punished heavily. Being a moonskill, it also grants amazing meter gain on hit.
Rising Lightning
| Damage | Guard | Cancel | Property | Cost | Attribute |
|---|---|---|---|---|---|
| 440*3 (1200) | LH | -EX-, -MD- | - | - | - |
| First Active | Active | Recovery | Overall | Advantage | Invul |
| 6 | 11 | 33 | 49 | -19 | - |
- Rising DP with no invul.
- Doesn't have a followup on hit or whiff.
- Whiff cancellable.
A standard A DP with little practicality. It has the potential to outclash jump-ins thanks to it's multi hit, but the chances of such an occurrence are against you. It works decently well as a starter, but requires the opponent being airborne in order to link off of it normally with an A button. Otherwise, cancelling into j.236C on hit works, and whiffing j.236C still let's you jump cancel. You generally will not use this move as an anti-air, nor will you see use of it much elsewhere.
| Damage | Guard | Cancel | Property | Cost | Attribute |
|---|---|---|---|---|---|
| 340*4, 450 (1544) | LH | (EX), (MD) | - | - | - |
| First Active | Active | Recovery | Overall | Advantage | Invul |
| 6 | 14 | 39 | 58 | -30 | 1-13 All |
- Bigger DP with frame 1 invul.
- Does an automatic followup on hit that soft knockdowns.
- Cancellable on hit before the followup.
A standard B DP that functions perfectly as intended. It's frame 6, which is one frame slower than his 623C, so it's only slightly worse than 623C in that regards. Thanks to it's forward movement and hitbox, Roa's 623B can reach further out than you might expect, even catching some grounded (standing) opponents at the apex of it's height. On hit, it leads to a decent soft knockdown that Roa can take advantage of using needle, 236B, or even run up 2C depending on the situation. What you're more inclined to do however, is cancel the 4th hit into j.236C and link into 2B to a standard combo with a knockdown of choice. Outside of reversal situations, 623B is one of your few moves that reaches decently high into the air and fast. It can service as a committal anti-air, especially with the invul, that covers an angle that Roa might struggle to challenge.
| Damage | Guard | Cancel | Property | Cost | Attribute |
|---|---|---|---|---|---|
| 300*6, 600 (2010) | LH | (MD) | - | - | - |
| First Active | Active | Recovery | Overall | Advantage | Invul |
| 4+1 | 22 | 36 | 62 | -35 | 1-16 All |
- Biggest DP with more invul.
- Always a hard knockdown.
A standard EX DP that does everything you need it to do. Like most EX reversals, it comes out at frame 5, making it a fast option when certain situations call for it. On hit, Roa does the same followup he does on 623B but ends on a hard knockdown instead of a soft. Using this guaranteed advantage on hit, Roa can run similar oki setups to the rest of the cast like safejumps or L/R's. Other than that, using 623C has the same risk as using most other EX reversals, and the superflash makes it more reactable than say 623B.
| Damage | Guard | Cancel | Property | Cost | Attribute |
|---|---|---|---|---|---|
| 340*4 (1216) | LHA | EX, -J- | - | - | - |
| First Active | Active | Recovery | Overall | Advantage | Invul |
| 7 | 14 | 25 | 45 | - | Clash 1-5 (MD) |
- Moon DP with no followup.
- Jump cancellable on hit, block, and whiff.
- Goes through non-MD clash frames as per every moon skill.
A standard Moon DP that acts as a reversal in MD and then some. Instead of having a followup like his B and C versions, his 3BC let's him jump cancel to either extend into a full combo or safely escape given the opponent blocks. 3BC as a starter is very potent, leading into high damage and meter gain thanks to it's moon skill properties. Being a moon skill, it also gets clash frames and becomes one frame faster, making it frame 6 alongside 623A and 623B. This can make 3BC a pseudo reversal, given the opponent doesn't respond to clash accordingly. Another property of moon skills is the ability to ignore non-MD clash frames, which can make 3BC an exceptional anti-air against j.[C] heavy characters given the right timing, especially given it's reward and general low risk. Of course, it also costs resources, which make it harder to use more liberally when you would likely want to use one of his other moon skills like 6BC or 4BC. Still, it serves it's purpose well.
Timeless Thunder Needle
| Damage | Guard | Cancel | Property | Cost | Attribute |
|---|---|---|---|---|---|
| 1000 | LHA | -CH-, -EX-, -MD- | - | - | - |
| First Active | Active | Recovery | Overall | Advantage | Invul |
| 12 | 3 | 24 | 38 | -4 | - |
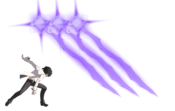
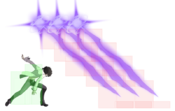
- Halfscreen horizontal lightning strike forma de C-Roa 236X.
- Has a normal and a charged followup, both of which can be performed on whiff.
- Hitscan; doesn't travel.
The neutral move of all time. Decently fast at frame 12, decently safe at -4, and infinite capacity to harass grounded opponents. On it's own, 214A is a decent poke in neutral and works as his best pre-EX special filler. However, where this move shines are in it's followups. Being cancellable on whiff, it can use it's followups to cover the airspace above him, potentially leading to a AUB jail setup if the opponent blocks. It also works fairly well on it's own, controlling the ground space in front of him and allowing him to easily hitconfirm with his followups. Thanks to being a hitscan projectile with no travel time, Roa can harass most characters even if they have projectiles given he is in the right range. If you are willing to spend the resources, 214A also serves as a great starter if you activate MD, since you cannot confirm into it regularly and converting in 214C limits the damage you can achieve afterward. You will see this move used a lot.
| Damage | Guard | Cancel | Property | Cost | Attribute |
|---|---|---|---|---|---|
| 700 | LHA | -EX-, -MD- | - | - | - |
| First Active | Active | Recovery | Overall | Advantage | Invul |
| 11 | 3 | 28 | 41 | -8 | - |
- Performs a follow-up similar to 214B.
- Slightly further reach than 214B.
- Whiffs against crouching opponents up close.
The followup. Covers bit of space above Roa which can cover people jumping carelessly over 214A, but can avoided. Can be delayed and/or partial charged after 214A to frametrap, but is significantly worse on block by itself. Still cancellable on whiff which can serve as an emergency measure if they avoided the first two needles, but your options are expectedly even more limited after. Otherwise, works as filler for combos or blockstrings for a little bit of extra damage before cancelling into 214C.
| Damage | Guard | Cancel | Property | Cost | Attribute |
|---|---|---|---|---|---|
| 380*3 (957) | LHA | -EX-, -MD- | - | - | - |
| First Active | Active | Recovery | Overall | Advantage | Invul |
| 23 | 3 (1) 3 (1) 3 | 31 | 64 | -17 ~ -9 | - |
- Performs a followup similar to 214[B].
- Extends past 214A range.
The newer followup. While it looks like 214[B], it is significantly less safe and does less damage. It can serve as an easier way to frametrap off 214A, but it's generally safer to delay the regular followup. This also works sometimes as an alternative special filler to normal 214A~X, but for most of Roa's good damage routes it stops working. Even if it does work, sometimes it can push opponents out of prime 214C range and cause some of the earlier lightning strikes to whiff. Otherwise, it can cover more space after already committing to 214A, but this can usually be accomplished with 214[B] in the first place.
| Damage | Guard | Cancel | Property | Cost | Attribute |
|---|---|---|---|---|---|
| 1000 | LHA | -CH-, -EX-, -MD- | - | - | - |
| First Active | Active | Recovery | Overall | Advantage | Invul |
| 16 | 3 | 25 | 43 | -5 | - |
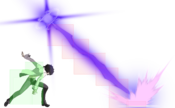
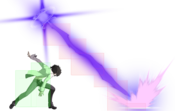
- Halfscreen diagonal lightning strike forma de H-Roa 214X.
- Still whiff cancellable, with only one followup.
- Still hitscan.
A similar lightning strike, only starting from the air and pointing downwards until it hits the ground. It has similar horizontal range to 214A with the added benefit of air coverage that can once again lead to an AUB jail when used in conjunction with 214C. Thanks to it's slower startup, it cannot always be used as a replacement for 214A as a combo ender, and you will usually have already used 214B/214[B] during the combo anyways. While 214A covers the ground, this move can discourage jumpers with the threat of AUB, so it's best to use together with his options.
| Damage | Guard | Cancel | Property | Cost | Attribute |
|---|---|---|---|---|---|
| 700 | LHA | -EX-, -MD- | - | - | - |
| First Active | Active | Recovery | Overall | Advantage | Invul |
| 12 | 4 | 25 | 40 | -6 | - |
- Performs a followup similar to 214A.
- Slightly further reach than than 214A.
- Less likely to whiff on hit or block.
The only followup. Can be used to check grounded opponents running up if they didn't jump into the first needle, especially given it's longer range. Usually this move will see less usage than 214A's followup since using it against an airborne opponent isn't the brightest idea. Can also work as combo filler in the corner as 214B~X in case 214[B] was not possible for some reason.
| Damage | Guard | Cancel | Property | Cost | Attribute |
|---|---|---|---|---|---|
| 480*3 (1185) | LHA | -EX-, -MD- | - | - | - |
| First Active | Active | Recovery | Overall | Advantage | Invul |
| 24 | 3 (1) 3 (1) 3 | 20 | 55 | -2 ~ +2 | - |
- Charges and releases 3 quick diagonal needles in succession.
- Plus on block at farther ranges, but only if the last needle connects.
- Can link afterwards in corner.
| Damage | Guard | Cancel | Property | Cost | Attribute |
|---|---|---|---|---|---|
| 440*8 (2105) | LHA | MD | - | - | - |
| First Active | Active | Recovery | Overall | Advantage | Invul |
| 4+6 | 4(3)*8 | - | 33 | +15 ~ +51 | - |
- Unleashes 8 diagonal needles in quick succession.
- Insanely plus given the right spacing.
- Highest damaging EX ender.
The EX move of all time. This move is capable of many offensive feats like easily converting off of stray specials, granting massive amounts of gapless plus frames, and most infamously jailing opponents blocking into the air for a free AUB setup. With the right spacing, this moves grants one of if the highest amount of plus frames granted by a singular move by itself. It also serves as the go-to ender for damage, giving you plenty of room to run up and 3C or AT. In the corner, you even get enough time to microcharge and then 3C, giving you a bit of extra meter. While not immediate, this move also covers a lot of space over time, essentially forcing most airborne opponents to shield it at some point. However good this move is, it still has a couple quirks that need working around. For example, this move is prone to missing later lightning hits on point blank crouching opponents. This means that, while still plus, you end up less advantageous than you might expect, forcing you to act quicker. This also, while less common, happens in combos where some hits can whiff given an awkward position. Still, being able to cancel into this move on whiffed specials make Roa able to cover a lot of space and quickly. A lot of your meter will be spent on this move, and for good reason.
| Damage | Guard | Cancel | Property | Cost | Attribute |
|---|---|---|---|---|---|
| 480*3 (1309) | LHA | EX, MD | - | - | - |
| First Active | Active | Recovery | Overall | Advantage | Invul |
| 18 | 4 | 26 | 47 | -3 | Clash 1-11 (MD) |
- Three-pronged lighting strike forma de C-Roa 236C.
- Huge; almost fullscreen and covering a large airspace further away from Roa.
- Wallbounces in corner and most positions midscreen bar point blank.
Another monster of a moon skill, this time as a projectile. Covering a massive cone in front of Roa, throwing this move out can threaten a huge amount of space and force people to be wary of Roa's reach. On hit, this move will wallbounce almost anywhere on the screen, leading to an easy hitconfirm on reaction with 236C or (better yet) 236A(w) 214C. On air fatal, the move still retains the same untech until grounded, meaning you can easily run up and press a button into a very high damage combo. In the corner however, this move can link like a normal wallbounce and lead to insane damage while being meter positive thanks to it's moon skill properties. There also exists a certain spacing where Roa can do a microdash 236A after a midscreen 4BC and lead to a similarly high damage combo without needing meter or hurting the scaling with 214C. The move is also not punishable with counterhit Shield B most of time, so punishing requires being close enough to A/BC counter. The move is also safe on block given it's range, making it hard to challenge once it has come out. Can also serve as the wallbounce in corner MD combos so that 2C can be saved later.
Brilliant Demon Strike
| Damage | Guard | Cancel | Property | Cost | Attribute |
|---|---|---|---|---|---|
| 900 | LHA | -EX-, -MD-, -J- | - | - | - |
| First Active | Active | Recovery | Overall | Advantage | Invul |
| 8 | 6 | 15L | - | -7 (TK) ~ -2 (lowest) | - |
| Damage | Guard | Cancel | Property | Cost | Attribute |
|---|---|---|---|---|---|
| 370*4 (1179) | LHA | -EX-, -MD-, -J- | - | - | - |
| First Active | Active | Recovery | Overall | Advantage | Invul |
| 19 | 14 | 15L | - | +2 (TK) ~ +7 (lowest) | - |
- Roa air stalls and surrounds himself with lightning.
- Jump cancellable on hit and whiff.
- No airdash on jump cancel (except in MD).
What was one of Roa's most unusable set of moves has now turned into a pivotal part of Roa's combo theory thanks to the introduction of j.2C. Both the A and B versions have different individual uses but both help boost Roa's damage to above average. It can also be used after a low 6C during a blockstring to create some interesting variety that the opponent will have to be aware of.
j.236A:
- One quick hit.
- -3 after IAD j.BC
The quick version that you're more likely to use. j.236A is much more versatile as you can easily use it by jump-cancelling a normal into tk (or Tiger Knee) j.236A to further extend a combo. However, the move will almost never link into something by letting it land, meaning you will always have to jump cancel into something else. It does less raw damage than j.236B, but the scaling is generally in j.236A's favor, making it deal more damage in the end. When used on block, it's still minus, but allows you to jump cancel and potentially stuff any mash attempts. However, not being able to airdash forces you to have a gap before you can hit them with a jump button.
j.236B:
- Slower, but with 4 hits.
- +6 after IAD j.BC.
- Multi-hit lingers after MD, reshield, etc.
The slower version that has it's uses here and there. Due to it's startup, the only realistic scenario you can land this move in a combo is after 2C~C 236B (given you have enough time to link), and generally performs less than j.236A in the first place. However, j.236B shines in pressure, where it can serve as meterless (with a gap) plus frames from a low 6C cancel. While this is prone to getting shielded as it's not an overhead, a funny quirk about j.236B is that the projectile will linger after an interruption. For example, if Roa's opponent shields and Roa reshields, j.236B will still be active. Doing this even punishes instant BC followup for the opponent, with little risk on Roa's end. This also occurs when Roa does MD mid-j.236B, which can be useful in some edge case MD combos.
| Damage | Guard | Cancel | Property | Cost | Attribute |
|---|---|---|---|---|---|
| 450*4, 600 (1868) | LHA | -MD-, -J- | - | - | - |
| First Active | Active | Recovery | Overall | Advantage | Invul |
| 4+4 | 14 | 15L | - | +2 (TK) ~ +7 (lowest) | - |
- Quick 4 strikes with an additional 5th strike on hit that sends downward.
- Land cancellable into Arc Drive.
- Still jump cancellable on whiff.
Roa does an air special that is as fast as j.236A and has the same multi-hit as j.236B and then some. The move is best used as a way to bring opponents down while Roa is in the air; most notably off his 623B. If done low enough to the ground, Roa is able to link off of it with a normal and continue with a regular combo. However, now that j.2C exists, it's advised not to use it after a regular air-to-air string unless j.2C is entirely impossible to land. A more realistic use of this 5th strike is during a MD combo dump. Because of the new land cancel into Arc Drive, Roa can do an air string after 3C into j.236C and then land into Arc Drive, which is key for getting the most meter out of his MD routes. Otherwise, it doesn't work well as an ender because most decent routes will have the opponent air tech before getting HKD'd.
| Damage | Guard | Cancel | Property | Cost | Attribute |
|---|---|---|---|---|---|
| 450*4 (1394) | LHA | EX, -J- | - | - | - |
| First Active | Active | Recovery | Overall | Advantage | Invul |
| 9 | 14 | 15L | - | +2 (TK) ~ +7 (lowest) | - |
- 4 hits, but blue and faster.
Roa combines the powers and does an air special that is as fast as j.236A and has the same multi-hit as j.236B while also dealing more damage and gaining more meter. It's equivalently plus on block as j.236B, meaning it can be used as gapless plus frames at the cost of some moon, although it's generally not recommended as such. Again, with j.2C being added, j.6BC can see uses in MD combos in lieu of it's non-moon counterparts. It also serves as the meter gain function, as Roa can do a launcher airstring into j.6BC repeated 3 times into j.236C, so he can then land cancel into Arc Drive for massive 200%+ meter gain combos.
Super Moves
Celestial Strike
| Damage | Guard | Cancel | Property | Cost | Attribute |
|---|---|---|---|---|---|
| 3500 | LH | - | - | - | - |
| First Active | Active | Recovery | Overall | Advantage | Invul |
| 1+9 | 3 | 29 | 42 | -15 | 1-12 All |
- Super that reaches across the screen.
- Air unblockable.
Roa extends his arm to do a Super Needle™️ that goes into a cinematic before knocking down. Fairly quick and fullscreen, meaning it can serve as a dramatic fullscreen punish option (although you have better options). Does the same 1400 minimum damage that most other Arc Drives do, and is fairly easy to combo into with regular needle. Being AUB, it can also serve as a funny way to punish people blocking air needle, as it's speed will still catch people in the air before they can land. They can still shield if you cancel a regular needle into AD, but 214C guarantees it if you have the meter for it. Because of it's range and recovery, the only way to punish it outside of BC range is to B counter, which won't counterhit into a full punish.
Seventeenth Transmigration
| Damage | Guard | Cancel | Property | Cost | Attribute |
|---|---|---|---|---|---|
| 4800 [4800 ~ 6960 in BH] | LH | - | - | - | - |
| First Active | Active | Recovery | Overall | Advantage | Invul |
| 1+21 | 4 | 27 | 50 | -14 | 1-25 All |
- Uses 3C's animation if done manually.
- Triggers automatically after shielding a move in Blood Heat.
- Damage scales with Blood Heat timer.
Roa summons snakes to attack his enemy in a cinematic before resetting the screen position and knocking down his opponent. Aside from startup animation, this move is no different from the other last arcs in the game. Generally, if you have the meter for it, it's better to do 214C into Arc Drive as it doesn't require MD or Blood Heat to perform feasibly into a regular combo. Roa can combo into his Last Arc without MD or Blood Heat by doing 2C~C 236B early in a combo, but this does significantly worse than a regular combo.
Reverse Beats
| Attack | Chain | Advantage |
|---|---|---|
| 5B/2B | 5A/2A | -3 |
| 5C/2C | 5A/2A | -1 |
| Attack | Chain | Frame Gap |
|---|---|---|
Customization
Palette options
Michael Roa Valdamjong Wiki Roadmap
| 58% complete | ||
|
|
| Page | Completed | To-do | Score |
|---|---|---|---|
|
All images and move descriptions added. Most framedata done |
Update descriptions and add missing framedata. Add updated hurtboxes for j.236X |
23/25 | |
| Strategy |
Has partially complete oki section, and outdated rough strategy page |
Needs more robust general strategy write up, fill holes of oki section |
15/25 |
| Combos |
Most post 1.3.1 patch combos added |
Either remove old routes, or specify new optimal routes over old ones. 623C route needed |
20/25 |
| Matchups |
None |
Everything |
0/25 |


