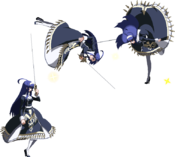
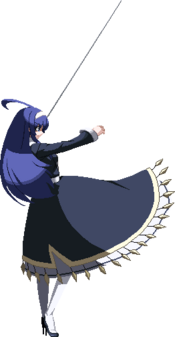
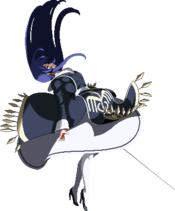
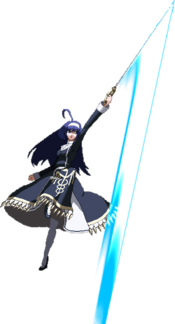
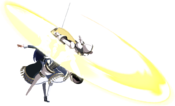
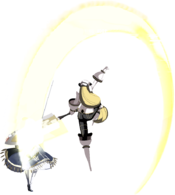
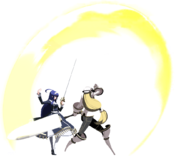
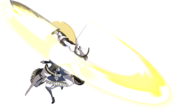
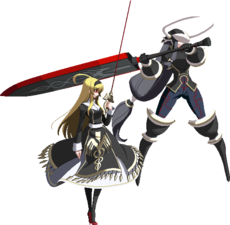
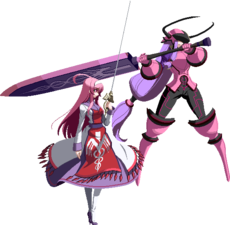
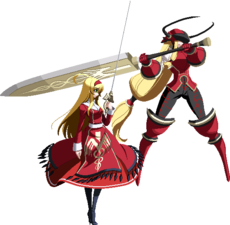
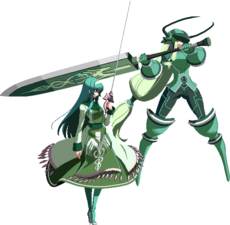
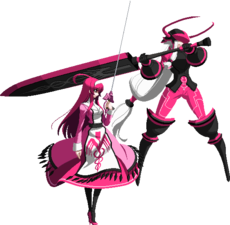
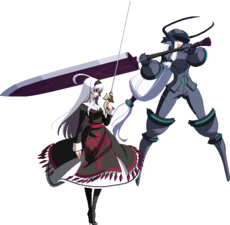
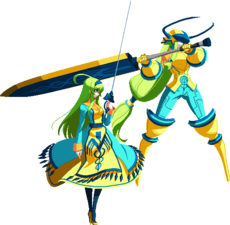
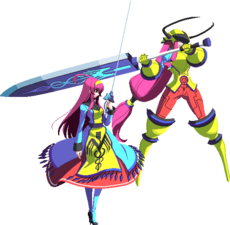
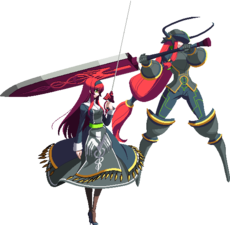
Under Night In-Birth/UNICLR/Orie
| “ |
She judges. And hopes that the heavy weight placed on her frail shoulders may one day be |
” |
Story
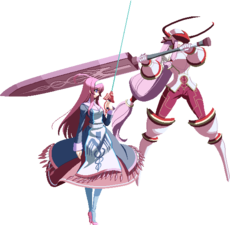
She is an execution officer of the Licht Kreis -- an organization with their minds set on annihilating the Voids, and maintaining the peace for mankind. Having lost her parents at a young age, she was raised with an institution of the organization. To repay her debt to society, and to ensure there are no more children who suffer the same fate she has, Orie takes a stand and fights. Tonight, on orders of the Licht Kreis, she travels to the metropolis to investigate the large surge in In-Births, and the movements of the ever-expanding Amnesia. All the while, she also searches for the "Void who speaks" -- the creature responsible for her parents' deaths.
| “ |
Strange... I will never forget what happened tonight, or about you. |
” |
Gameplay
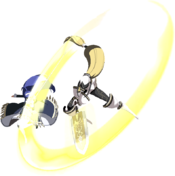
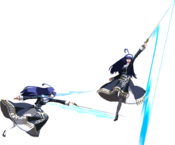
Orie is a very well-rounded character with a strong neutral game. With her signature move, Divine Thrust, she can easily tag opponents from almost any range. For pressure, many of her normals have large cancel windows which she can use to frametrap mashing opponents. With her Force Function, she can opt to apply some pressure from the air as well. Orie holds the title of fastest walk speed in the game, so she can quickly weave in and out of the opponent's range and strike while they're recovering.
Being a well-rounded character, Orie has very few cons. Though her backdash is long in both duration and distance, she can use to reset back to neutral in most situations where she excels. One thing Orie does lack is a meterless reversal.
| Strengths | Weaknesses |
|---|---|
|
|
Character Stats
| Health | Smart Steer Route | ||
|---|---|---|---|
| 10600 | 5A 5B 2C 4C 214B~4A 63214C | ||
| Forward Walk Speed | Backward Walk Speed | Jump Startup | Jump Duration |
| 1400 | -1100 | 4 | 42 |
| Dash Startup | Initial Dash Speed | Dash Acceleration | Max Dash Speed |
| 6 | 2500 | 200 | 3200 |
| Backdash Startup | Backdash Duration | Backdash Distance | Backdash Invul |
| 3 | 36 | -86716 | 1~8 Full 9~10 Throw |
| Throw Width (pixels) | Throw Range (pixels) | ||
| 200 | 100 | ||
| Unique Trait |
| ||
| Vorpal Trait |
| ||
| Frame Data Help | |
|---|---|
| Header | Tooltip |
| Damage | Damage done by this attack. (x) denotes combined damage [x] denotes minimum damage |
| Guard | The way this move must be blocked. High = Can block standing Low = Can block crouching Mid = Can block standing or crouching Air = Can block in the air Air Shield = Can block in the air while shielding Unblockable = Cannot be blocked |
| Cancel | Actions this move can be canceled into on hit or block, unless specially noted. N = Normal Cancelable SE = Self Cancelable SP = Special Cancelable EX = EX/IW Cancelable CS = Chain Shift UNQ = Unique (See description) TH = Throw Cancelable J = Jump Cancelable (Hit cancelable only by default) (X) = Hit cancelable only -X- = Can additionally be cancelled during whiff |
| Property | Special properties this move has. Click on the property to navigate to an explanation. |
| Cost | The resources this move costs to use. GRD = GRD Blocks EXS = EXS Meter Vorpal = Vorpal GRD Break = Causes GRD Break |
| Attribute | Attributes of the attack. Mostly used in situations involving invul. There are two sets of attributes: Strike/Throw and Head/Foot/Dive/Projectile Every move has a Strike/Throw attribute, but doesn't always have Head/Foot/Dive/Projectile attribute. --- Strike = Strike (Anything that isn't a Throw is a Strike) Throw = Throw --- Head = Head (Most jump normals) Foot = Foot Dive = Some air specials Projectile = Projectile |
| Startup | Frame when the first hitbox is present. + denotes the frames before and after super flash. |
| Active | The amount of frames that this move will have a hitbox. (x) denotes frame gaps where there are no hitboxes is present. Due to varied blockstuns, (x) frames are difficult to use to determine punish windows. Generally the larger the numbers, the more time you have to punish. |
| Recovery | Frames that this move has after the active frames if not canceled. |
| Overall | Frames that this move takes from start to finish before the character returns to neutral. |
| Advantage | The difference in frames where you can act before your opponent when this move is blocked (assuming the move isn't canceled and the first active frame is blocked). If the opponent uses a move with startup equal or less than this move's advantage, it will result in opponent hitting that move. ±x~±x denotes a possible range of advantage. The left value is when the active frames hit sooner (generally worse) and the right value is for when the active frames hit later (generally better). |
| Invul | The frames where this move cannot be hit by an attribute. Full = Fully invincible Strike = Strike invincible Throw = Throw invincible Head = Head invincible Foot = Foot invincible Dive = Dive invincible Projectile = Projectile invincible |
Normal Moves
Standing Normals
5A
| Damage | Guard | Cancel | Property | Cost | Attribute |
|---|---|---|---|---|---|
| 180 | Mid | N, SP, EX, CS | - | - | Strike |
| Startup | Active | Recovery | Overall | Advantage | Invul |
| 6 | 2 | 13 | 20 | -3 | - |
Fast angled poke with sword.
- Decent range and start-up speed make for an excellent poke in neutral, or pressure starter.
- Good cancel window for frame-trapping.
- Provides a variety of routing options that give good damage (see Combos).
- 8AA provides a great addition to pressure and space manipulation.
- Can still be out-ranged in some instances, especially if your opponent is knowledgeable of how useful this move is.
- At the tip of this move, it does not compliment well with most other normals, mainly common compliments such as 2C or 5C, therefore your options to combo further out become a bit more limited
- Does not have much verticality which makes it fairly easy to assault over.
5B
| Damage | Guard | Cancel | Property | Cost | Attribute |
|---|---|---|---|---|---|
| 480 | Mid | N, SP, EX, CS | - | - | Strike |
| Startup | Active | Recovery | Overall | Advantage | Invul |
| 9 | 2 | 19 | 29 | -4 | - |
Forward thrust with sword.
- A good poke button as a good midrange space control. It is very good at keeping opponents away.
- A good button for mashing out of blockstrings that reset outside of 5A's range but within 5B's range.
- High utility in hit-confirming with moves such as 214A~4B in the corner and J. 214A
- A bit risky if it whiffs, it doesn’t cover vertically all that well, it is more for preemptively catching opponent jump startup so a bit of planning should be considered.
- Not all that useful for blockstrings as it has a poor stagger window.
- Limited compatibility with other moves at the range you will likely use this move in neutral, at long range, usually 214A.
5C
| Damage | Guard | Cancel | Property | Cost | Attribute |
|---|---|---|---|---|---|
| 580 | Mid | N, SP, EX, CS | - | - | Strike |
| Startup | Active | Recovery | Overall | Advantage | Invul |
| 12 | 4 | 22 | 37 | -8 | - |
Orie steps forward and does a high reaching kick.
- Fairly fast startup and moves Orie forward.
- Orie's farthest reaching normal.
- Combos from 5A so you can skip 5B and go straight to this if you need the better spacing.
- The very lenient cancel window on this normal makes it a perfect tool for frame-trapping.
- Has a small gap during start-up making it an automatic frametrap from most normals.
- Forward movement keeps momentum in pressure strings allowing for oppressive sequences
- Sets up good frame traps off A normals and delayed B/C normals, but can also be made gapless with buttons such as 2C and 4C.
- Can cover up-backing.
- Not very compatible with connecting off the tip of common normals such as 5A or 2B.
Crouching Normals
2A
| Damage | Guard | Cancel | Property | Cost | Attribute |
|---|---|---|---|---|---|
| 140 | Low | N, SP, EX, CS | - | - | Strike, Foot |
| Startup | Active | Recovery | Overall | Advantage | Invul |
| 5 | 2 | 12 | 18 | -2 | - |
Short kick that hits low.
- This is her fastest ground normal.
- It has very short range so requires good spacing knowledge.
- Good cancel window that makes it easy to swap between gapless and frame-trap 2A’s.
- Very useful for blockstrings on both block and whiff.
2B
| Damage | Guard | Cancel | Property | Cost | Attribute |
|---|---|---|---|---|---|
| 420 | Mid | N, SP, EX, CS | - | - | Strike, Foot |
| Startup | Active | Recovery | Overall | Advantage | Invul |
| 8 | 3 | 17 | 27 | -5 | - |
Crouching stab similar to 5B, but despite appearances it does not hit low.
- Slightly smaller horizontal range than 5B.
- The hitbox is slightly disjointed from the hurtbox.
- Short total move duration makes this move hard to whiff punish.
- At further ranges, it does not compliment with other normals that well, limiting to moves such as 214A for confirming.
2C
| Damage | Guard | Cancel | Property | Cost | Attribute |
|---|---|---|---|---|---|
| 580 | Low | N, SP, EX, CS | Knockdown | - | Strike, Foot |
| Startup | Active | Recovery | Overall | Advantage | Invul |
| 9 | 5 | 20 | 34 | -7 | - |
Low-hitting sweep kick.
- Very fast with decent range.
- The long untechable time on counterhit makes it a perfect tool for catching those who don't respect your blockstrings.
- Quick and active.
- Benefits off trades usually.
- Easily make gapless or slight frame traps during pressure.
- Whiffing can be dangerous.
Air Normals
j.A
| Damage | Guard | Cancel | Property | Cost | Attribute |
|---|---|---|---|---|---|
| 140 | High, Air Shield | N, SP, EX, CS | - | - | Strike, Head |
| Startup | Active | Recovery | Overall | Advantage | Invul |
| 8 | 2 | 17 [2 on landing] |
26 | Varies | - |
Downward-angled stab.
- Very good downward hitbox that can hit opponents on the way up.
- It won't hit overhead if done whilse rising.
- Fast start-up for interrupts and doing j.A CS.
- Very commonly used in air strings.
- Punishable off an assault attempt that is blocked.
- Short range and angle makes it difficult to reliably use as a response.
- The sword hitbox is very narrow and can whiff at point-blank so make sure you space it well.
- When used closer to the ground the better the frame advantage/recovery.
j.B
| Damage | Guard | Cancel | Property | Cost | Attribute |
|---|---|---|---|---|---|
| 370 | High, Air Shield | N, SP, EX, CS | - | - | Strike, Head |
| Startup | Active | Recovery | Overall | Advantage | Invul |
| 9 | 3 | 18 [3 on landing] |
29 | Varies | - |
Upward kick that hits in front of and above Orie.
- Good for air-to-air.
- Limited range and angle
- Mostly used for combo fluff in aerial combo routes.
- When used closer to the ground the better the frame advantage/recovery.
j.C
| Damage | Guard | Cancel | Property | Cost | Attribute |
|---|---|---|---|---|---|
| 520 | High, Air Shield | N, SP, EX, CS | - | - | Strike, Head |
| Startup | Active | Recovery | Overall | Advantage | Invul |
| 12 | 6 | 12 [4 on landing] |
29 | Varies | - |
Downwards stab with a more horizontal angle than j.A.
- Has good forward range but a fairly narrow downwards hitbox so not so great for jump-in.
- Assault j.C is a very good approach tool and poke.
- Big area coverage.
- Reducing your lower hurtbox combined with neutral and back jumps to take advantage of its range makes it an effective option in neutral.
- Good reward and easy conversions on both air and grounded hits.
- Slower than other air normal options.
- When used closer to the ground the better the frame advantage/recovery.
Command Normals
6B
| Damage | Guard | Cancel | Property | Cost | Attribute |
|---|---|---|---|---|---|
| 480 | High | SP, EX, CS | Knockdown | - | Strike |
| Startup | Active | Recovery | Overall | Advantage | Invul |
| 26 | 4 | 20 | 49 | -7 | - |
Overhead kick.
- One of the fastest standing overheads in the game with a deceptive startup. Advances a long distance and can be special canceled on hit or block.
- Orie's only standing overhead.
- It can also be linked into 2A on hit, leading to pretty good damage regardless of screen position.
- Can be cancelled into 214A on hit and block, leading to a high-low block situation the opponent must perform.
- On the very rare occasion 6B hits an airborne opponent, it will cause a hard knockdown.
3B
| Damage | Guard | Cancel | Property | Cost | Attribute |
|---|---|---|---|---|---|
| 380 | Mid | N, SP, EX, CS | - | - | Strike |
| Startup | Active | Recovery | Overall | Advantage | Invul |
| 7 | 3 | 22 | 31 | -7 | 7~9 Head |
Diagonally-upward stab with sword.
- Orie's go-to anti-air poke.
- Hitbox is very disjoined from the hurtbox.
- Good head invul (from frame 7 to frame 9) makes it easy to use as an anti-air.
- Good cancel window allows delayed follow ups for confirming and when it is used on block for strings.
- On counterhit, it is completely untechable until the opponent hits the floor, allowing for CH 3B > 2A whiff > 2C to work (see possible combos in Combos).
- Possible to jump cancel on hit.
- Doesn’t have the best reach or angle sometimes, it can whiff in places you may be inclined to use it (i.e. directly overhead).
3C
| Damage | Guard | Cancel | Property | Cost | Attribute |
|---|---|---|---|---|---|
| 720 | Mid | - | Tumble on counter | - | Strike |
| Startup | Active | Recovery | Overall | Advantage | Invul |
| 16 | 4 | 11 | 30 | -3~0 | 8~19 Foot |
Floating spin kick that hits mid.
- Can low crush, sometimes anti-air.
- Goes over lows and high reward on hit.
- Minus on block and not cancellable at all, so your turn is potentially over after it's blocked. Any techniques such as whiffing, frame trapping, or using it as an anti-air are hard callouts that you have to commit to.
- Situationally good in pressure; used at maximum ranges the frame advantage can be reduced from -3 to -2 or -1, and to 0 if the absolute tip of 3C is blocked.
- Combos into various moves if used to juggle an airborne opponent, normally into 623A.
4C
| Damage | Guard | Cancel | Property | Cost | Attribute |
|---|---|---|---|---|---|
| 590 | Mid | N, SP, EX, CS | Launch | - | Strike |
| Startup | Active | Recovery | Overall | Advantage | Invul |
| 16 | 5 | 15 | 35 | -4 | - |
Upward launcher kick.
- Used in a lot of her combos and blockstrings because it launches the opponent. This allows for an easy (but high) reward on frame-traps.
- -4F on block is safe and has a good stagger window, so it's a good attack to reset pressure on.
- As a standalone button, it is difficult to use effectively, it needs to be supplemented by other buttons for use as its a bad button to whiff (slow recovery).
j.2C
| Damage | Guard | Cancel | Property | Cost | Attribute |
|---|---|---|---|---|---|
| 620 | Mid, Air Shield | SP, EX, CS | Knockdown | - | Strike, Head |
| Startup | Active | Recovery | Overall | Advantage | Invul |
| 14 | 7 | 16~7 [5 on landing] |
36~27 | -9~+2 | - |
Downwards axe kick.
- Halts Orie's momentum in midair, allowing it to hit grounded opponents quickly and safely.
- Note that this move does NOT hit overhead
- Has use as both an air combo ender and mid-combo extension due to its long ground untechable time.
- Can be TK'd: 9j.2C, 8j.2C, 7j.2C
- Frame advantage differs depending on use. TKj.2C achieves a frame advantage of Zero. However, a run-up, cross-up TKj.2C can achieve up to +2 against some characters.
Dash Moves
66B
66C
| Damage | Guard | Cancel | Property | Cost | Attribute |
|---|---|---|---|---|---|
| 978 | Mid | SP, EX, CS | - | - | Strike |
| Startup | Active | Recovery | Overall | Advantage | Invul |
| 11 | 24 | 23 | 57 | -6~-3 | - |
Rushes forward and stabs multiple times.
- Covers a good range forward and can chase down backdashes
- Usually forced to cancel into something to remain safe if blocked, with each option being punishable in some way.
- Frame advantage differs depending on proximity (i.e. if only the last hit are blocked the framea advantage becomes -3).
Universal Mechanics
Force Function
| Damage | Guard | Cancel | Property | Cost | Attribute |
|---|---|---|---|---|---|
| - | - | N, SP, EX, CS | - | 1 GRD | - |
| Startup | Active | Recovery | Overall | Advantage | Invul |
| - | - | 5 on landing | 48 | - | 1~6 Throw |
Orie flips forward while sparkling fabulously.
- Can do air actions after frame 27 on the way down.
- If she goes over the opponent, she will automatically turn around making this usable as a crossup (albeit a very obvious one).
- Can be used to "jump cancel" blockstrings or to escape pressure, but be careful since it doesn't actually have invul.
- Distance can be altered by forward (travels further) or backward (travels less) input.
| Damage | Guard | Cancel | Property | Cost | Attribute |
|---|---|---|---|---|---|
| - | - | N, SP, EX, CS | - | 0.5 GRD | - |
| Startup | Active | Recovery | Overall | Advantage | Invul |
| - | - | 5 on landing | 47 | - | 1~3 Throw |
Same as normal version.
- You can perform air actions earlier after frame 21.
| Damage | Guard | Cancel | Property | Cost | Attribute |
|---|---|---|---|---|---|
| - | - | N, SP, EX, CS | - | 1 GRD | - |
| Startup | Active | Recovery | Overall | Advantage | Invul |
| - | - | 5 on landing | 46 | - | - |
Similar to the grounded version, but cannot alter distance with forward or backwards input.
- Can perform air actions after frame 25.
| Damage | Guard | Cancel | Property | Cost | Attribute |
|---|---|---|---|---|---|
| - | - | N, SP, EX, CS | - | 0.5 GRD | - |
| Startup | Active | Recovery | Overall | Advantage | Invul |
| - | - | 5 on landing | 42 | - | - |
Similar to the grounded version, but cannot alter distance with forward or backwards input.
- You can perform air actions earlier after frame 19 and you can perform this version after the grounded version.
Throw
| Damage | Guard | Cancel | Property | Cost | Attribute |
|---|---|---|---|---|---|
| 1570 | Unblockable | - | Knockdown | - | Throw |
| Startup | Active | Recovery | Overall | Advantage | Invul |
| 4 | 1 | 22 | 26 | +37 on hit | - |
Kicks the opponent away.
- Returns to neutral when used midscreen.
- Midscreen throw knockdown can only be meatied using 22C.
- When throw is done with the opponent in the corner it becomes better, as the corner reduces the distance the opponent is thrown.
- Corner throw allows Orie to perform oki by running up or using 22A/B.
Guard Thrust
| Damage | Guard | Cancel | Property | Cost | Attribute |
|---|---|---|---|---|---|
| 0 | Mid | - | Launch | 100 EXS, GRD Break | Strike |
| Startup | Active | Recovery | Overall | Advantage | Invul |
| 15 | 5 | 26 | 45 | -12 | 1~15 Full, 16~45 Full on hit |
| Damage | Guard | Cancel | Property | Cost | Attribute |
|---|---|---|---|---|---|
| 0 | Mid | - | Launch | Vorpal | Strike |
| Startup | Active | Recovery | Overall | Advantage | Invul |
| 12 | 5 | 26 | 42 | -12 | 1~12 Full, 13~42 Full on hit |
Blows the opponent away on hit.
- Usable only during blockstun.
- Generally better to use while in Vorpal as it's faster and costs less resources.
Veil Off
| Damage | Guard | Cancel | Property | Cost | Attribute |
|---|---|---|---|---|---|
| 0 | Mid, Air | - | Launch | 100+ EXS | Strike |
| Startup | Active | Recovery | Overall | Advantage | Invul |
| 20 | 2 | 7 (3 on hit) on landing | 58 (53 on hit) | -13 | 1~30 Full |
| Damage | Guard | Cancel | Property | Cost | Attribute |
|---|---|---|---|---|---|
| 0 | Mid, Air | - | Launch | 100+ EXS | Strike |
| Startup | Active | Recovery | Overall | Advantage | Invul |
| 68 | 2 | 7 (2 on hit) on landing | 108 (103 on hit) | -14 | 1~91 Full |
Universal reversal that blows the opponent back on hit.
- Airborne: 1~52, Standing: 53~59.
- For Full Charge version: Airborne: 1~101, Standing: 102~108.
- Requires at least 100 meter and puts you in Veil Off state which grants 20% more damage, but drains your meter at a slow rate.
- Meter drains much slower when health is below 30% (orange health).
- You can hold down A+B+C to delay activation and gain a few extra benefits, but doing so is highly unrecommended unless trying to run the clock as this move already has a long start up as is.
| Damage | Guard | Cancel | Property | Cost | Attribute |
|---|---|---|---|---|---|
| 0 | Mid, Air | - | Launch | 100+ EXS | Strike |
| Startup | Active | Recovery | Overall | Advantage | Invul |
| 2 | 4 | 20 | 25 | +3 | 1~19 Full |
Cancels an action and launches the opponent high into the air on hit.
- Airborne: 1~25.
- CVO cancel is treated the same as EX cancel, you can only CVO when you can EX and the opponent is in hit/blockstun.
- Including in the air.
- Requires at least 100 meter and consumes vorpal state and drains meter at a fast rate.
- Has a lot of hitstun, making it easy to combo from.
- Grants an additional bounce if both have been used in the combo so far.
- If the opponent does end up hitting the ground during the combo, damage is prorated.
- Pressing A+B+C can be used for a shortcut for Infinite Worth.
- Used mostly as a way to tack on extra damage, or to reliably close out the round.
Special Moves
236X
| Damage | Guard | Cancel | Property | Cost | Attribute |
|---|---|---|---|---|---|
| 860 | Mid | EX [whiff OK], CS [whiff OK] | - | - | Strike |
| Startup | Active | Recovery | Overall | Advantage | Invul |
| 9 | 4 | 22 | 34 | -4~-1 | - |
Orie does a thrust while advancing forward.
- Provides a way to interrupt the opponent at a short range where the opponent may use their slightly longer range normals or dash in.
- Has a meterless, fairly high damage combo opportunity off an air counter hit.
- EX whiff cancellable, however it requires the player to learn when to buffer the EX move so the EX move doesn't come out on block.
- Usually requires meter to convert into a combo, usually: 236A > 236C.
- Needs proper spacing knowledge to utilize effectively in neutral.
| Damage | Guard | Cancel | Property | Cost | Attribute |
|---|---|---|---|---|---|
| 1250 | Mid | EX [whiff OK], CS [whiff OK] | Knockdown | - | Strike |
| Startup | Active | Recovery | Overall | Advantage | Invul |
| 13~21 | 7 | 23 | 42~50 | -6~0 | - |
B version goes further and knocks down on hit.
- Covers a good distance to allow greater interrupt range and whiff punishing opportunities.
- Very oppressive to deal with when backed by Chain Shift.
- EX cancellable even on whiff.
- Will wall bounce the opponent if they touch the wall before being knocked down, which gives good combo opportunities/extensions.
- Requires careful spacing, hitting the tip is the goal as it is much more safe but you also have to be more careful about getting it shielded as well (as shielding makes it more minus i.e. less safe and possibly punishable).
| Damage | Guard | Cancel | Property | Cost | Attribute |
|---|---|---|---|---|---|
| 1620 | Mid | EX, CS | No Collision, Launch | - | Strike |
| Startup | Active | Recovery | Overall | Advantage | Invul |
| 22 | 9 | 29 | 59 | -6~+2 | - |
Increased distance and safer if it hits at range.
- Goes through the opponent and floats, allowing follow-ups similar to the EX version.
- Very high damage and makes for a great combo starter.
- Covers a lot of space.
- Can be made plus at the tip
- EX cancellable even on whiff
- Completely shut down by characters with projectiles and other characters with zoning capabilities.
- The distance it will go to can be difficult to measure, and can whiff at very large distances.
| Damage | Guard | Cancel | Property | Cost | Attribute |
|---|---|---|---|---|---|
| 1395 | Mid | CS [whiff OK] | No Collision, Launch | 100 EXS | Strike |
| Startup | Active | Recovery | Overall | Advantage | Invul |
| 1+6 | 5 | 45 | 45 | -10 to -6 | 1~3 Throw |
Same distance as normal B-version.
- Goes through the opponent
- Hits multiple times and causes a long float allowing an easy follow-up.
- Lots of frequent combo utility allowing sideswaps and VO strips.
- Quickly covers thrust distance more than 236B.
- Doesn’t allow that much combo extension, even as a starter.
- Somewhat low minimum damage compared to her other EX specials.
623X
| Damage | Guard | Cancel | Property | Cost | Attribute |
|---|---|---|---|---|---|
| 1202 | Mid | EX [whiff OK], CS [whiff OK] | Launch | - | Strike |
| Startup | Active | Recovery | Overall | Advantage | Invul |
| 6 | 3 | 37 [8 on landing] |
45 | -20 | 1~4 Throw, 3~8 Head, 2~8 Dive |
Sword uppercut.
- Can be followed up with 5A if it hits the opponent high enough.
- Used a lot in Orie's combos follow up with a 5A or 2A: continuing the combo.
- EX cancellable on hit, block and whiff
- Head invulnerability makes it a decent anti-air
- Commonly used in combo-strings and picked up with 2a or 5a (depending on the height of the 623A).
- The angle is quite vertical so it might not be the best for anti-airing sometimes.
| Damage | Guard | Cancel | Property | Cost | Attribute |
|---|---|---|---|---|---|
| 1330 | Mid | CS [hit only] | Launch | - | Strike |
| Startup | Active | Recovery | Overall | Advantage | Invul |
| 5 | 6 | 49 [14 on landing] |
59 | -32 | 1~4 Throw, 1~ Head, 1~ Dive |
Stronger sword uppercut.
- Longer reach and faster version of 623A.
- Deals more damage than 623A.
- Unlike A version, it cannot be followed up with 5A.
- Not able to be EX cancelled on block or landing unlike 623A.
- Needs CS or VO to convert to a combo.
- The angle is quite vertical so it might not be the best for anti-airing sometimes.
| Damage | Guard | Cancel | Property | Cost | Attribute |
|---|---|---|---|---|---|
| 1872 | Mid | CS [hit only] | - | 100 EXS | Strike |
| Startup | Active | Recovery | Overall | Advantage | Invul |
| 1+5 | 7 | 49 | 61 | -32 | 1~4 Full, 5~12 Strike |
EX version sword uppercut.
- Unlike the meterless versions, this one actually has full invulnerability during startup.
- The angle is quite vertical so it might not be the best for anti-airing sometimes.
- Very similar damage to 41236C and 214C, and marginally faster than the first, so it's a good ender for damage, especially if the opponent is outside of 41236C's effective range.
214X
| Damage | Guard | Cancel | Property | Cost | Attribute |
|---|---|---|---|---|---|
| 777 | Low | EX [whiff OK], CS [whiff OK] | Knockdown | - | Strike, Foot |
| Startup | Active | Recovery | Overall | Advantage | Invul |
| 15 | 5 | 23 | 42 | -7 | - |
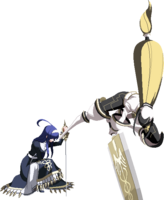
Orie summons Thanatos to attack with a low sword sweep.
- Long-reaching low that combos off most moves.
- Can be followed up with ~4A, ~4B, or ~4C.
- Far reaching, disjoint low move.
- Can do follow-ups on whiff.
- EX whiff cancellable.
- Need to accommodate for the start-up and be wary of jump ins so you don’t get interrupted.
| Damage | Guard | Cancel | Property | Cost | Attribute |
|---|---|---|---|---|---|
| 777 | Mid, Air | EX [whiff OK], CS [whiff OK] | Knockdown | - | Strike |
| Startup | Active | Recovery | Overall | Advantage | Invul |
| 19 | 3 | 13 | 34 | -5 | - |
Orie summons Thanatos to attack with a slower downward sword swing.
- On air hit or grounded counter hit, the opponent will be knocked down.
- Can combo afterward with 2C.
- A decent anti-air against some characters, however it is very slow.
- Very good tool to remove Byakuya web set-ups in neutral.
- Can be followed up with ~4A, ~4B, or ~4C.
- Can do follow-ups on whiff.
- Not the most reliable way to anti-air due to start-up.
| Damage | Guard | Cancel | Property | Cost | Attribute |
|---|---|---|---|---|---|
| 1625 | Mid, Air | CS [hit only] | Launch, Wall Bounce | 100 EXS | Strike |
| Startup | Active | Recovery | Overall | Advantage | Invul |
| 1+11 | 20 | 9 | 40 | +7 | 1~3 Throw |
Orie summons Thanatos to attack with a large upwards-arching sword swing.
- Will wallbounce the opponent which allows for extensions.
- Unlike the A and B versions, 214C cannot be followed up with ~4A, ~4B, or or ~4C.
- Can work as a blockstring extender as it is +7 on block.
- What you can do with the plus frames depends on how your opponent responds and respects it. You may have to dash in to be in range to pressure and lose out on some of the plus frames, for example.
- Following up with a combo off either is hit or miss depending on how the opponent got hit, there isn’t really a 100% consistent way to land a combo off them.
- Has the highest minimum damage of all of Orie's specials, but due to the difficulty in getting all 3 hits to connect late into a combo, it's preferable to use 41236C instead.
214X~4A
| Damage | Guard | Cancel | Property | Cost | Attribute |
|---|---|---|---|---|---|
| 1066 | Mid, Air | EX [whiff OK], CS [whiff OK] | Wall Bounce | - | Strike |
| Startup | Active | Recovery | Overall | Advantage | Invul |
| 16 | 3(7)2 | 13 | 41 | -11 (-2 on the last hit only) | - |
Thanatos swings her sword horizontally.
- Follow-up to 214A/214B.
- Spinning slash that wallbounces the opponent.
- Good as a combo ender for extra damage.
- Bad as a combo ender as it has bad oki positioning.
- 4A follow-up is minus on block and very punishable
214X~4B
| Damage | Guard | Cancel | Property | Cost | Attribute |
|---|---|---|---|---|---|
| 777 | Mid | EX [whiff OK], CS [whiff OK] | Launch | - | Strike |
| Startup | Active | Recovery | Overall | Advantage | Invul |
| 22 | 4 | 10 | 35 | +4 | - |
Thanatos swings her sword in overhead arc.
- Blows pretty far back so can be difficult to combo midscreen.
- Leads to extension combos in corner.
- Orie can combo into 236B from this move depending on the range.
- 4B is plus and provides a mixup/reset opportunity with 236X and the opponent’s responses.
- 214X~4B has a mash-able gap. 214A~4B has a 7 frame gap (with 214A on block).
214X~4C
| Damage | Guard | Cancel | Property | Cost | Attribute |
|---|---|---|---|---|---|
| 1076 | Mid, Air | EX [whiff OK], CS [whiff OK] | Launch | - | Strike |
| Startup | Active | Recovery | Overall | Advantage | Invul |
| 15 | 14 | 14 | 42 | -14 (-10 on the second hit only) | - |
- Frame advantage varies based on distance.
- 4C provides meterless combos off 214X starters and can frame trap those trying to punish the gap after 214X.
- 4C follow-up is -14 on block and very punishable.
Command Order (Air)
| Damage | Guard | Cancel | Property | Cost | Attribute |
|---|---|---|---|---|---|
| 777 | Mid, Air | UNQ, CS | Launch | - | Strike |
| Startup | Active | Recovery | Overall | Advantage | Invul |
| 17 | 4 | 36~7 [13 on landing] |
56~27 | -18~+11 | - |
Orie summons her Stand to attack in the air.
- Unlike the grounded version, j.214A hits mid.
- Can be cancelled into j.B+C on hit or block.
- Can only perform j.214x once per jump.
- great aerial option in neutral due to its large horizontal hitbox.
| Damage | Guard | Cancel | Property | Cost | Attribute |
|---|---|---|---|---|---|
| 999 | Mid, Air | UNQ, CS | Launch | - | Strike |
| Startup | Active | Recovery | Overall | Advantage | Invul |
| 22 | 5 | 31~2 [10 on landing] |
57~28 | -14~+15 | - |
Another airborne Stand swipe.
- Can be cancelled into j.B+C on hit or block.
- Can only perform j.214x once per jump.
- Really high damage combo starter.
- Has a really ambiguous animation that looks like it might
| Damage | Guard | Cancel | Property | Cost | Attribute |
|---|---|---|---|---|---|
| 1785 | Mid, Air | UNQ, CS | Launch | - | Strike |
| Startup | Active | Recovery | Overall | Advantage | Invul |
| 1+15 | 20 | 17~5 [13 on landing] |
52~40 | +22~+4 | - |
- EX version will wallbounce opponent allowing for extended followups and will always start from the ground, so can be used to combo grounded opponents from heights that normally wouldn't work.
- Can be cancelled into air actions (e.g normals and assault) while falling.
- Can be cancelled into j.B+C on hit or block.
- Can only perform j.214x once per jump.
- What you can do with the plus frames depends on how your opponent responds and respects it.
- Orie may have to dash in after the j.214C to be in range to pressure and lose out on some of the plus frames.
- j.214C pushes Orie backwards before appearing makes it viable to bait anti-airs.
- j.214C’s appearance has to be accounted for, it may end up spawning not exactly where you wanted and end up missing, so it require careful use.
- Following up with a combo off either is hit or miss depending on how the opponent got hit, there isn’t really a 100% consistent way to land a combo off j.214C.
- Decently easy to confirm into after using j.2C, and almost identical minimum damage as the other EX specials.
22X
| Damage | Guard | Cancel | Property | Cost | Attribute |
|---|---|---|---|---|---|
| 740 | Mid, Air | CS | Null Projectile, Launch | - | Strike |
| Startup | Active | Recovery | Overall | Advantage | Invul |
| 51 | 10 | - | 38 | +41 | 30~67 Projectile |
Orie summons Thanatos. Thanatos floats slightly in front of Orie and makes a big energy sphere after a short delay.
- Launches on hit and is extremely advantageous on block provided it doesn't get interrupted.
- Provides a way to “safe-jump” wakeups by meaty-ing the opponent and allowing you to block possible wake-up actions.
- Gives a good amount of plus frames for you to use for pressure.
- Can absorb projectiles.
- The startup for all variants are big and must be accounted for, making them require careful use for moves, movement or projectiles from the opponent that come out faster than anticipated.
- On the opponents wakeup, you have to account for their wakeup timing, as delayed wakeups can ruin typical 22X timings, it can be accounted for, but you have to make the guess.
| Damage | Guard | Cancel | Property | Cost | Attribute |
|---|---|---|---|---|---|
| 740 | Mid, Air | CS | Null Projectile, Launch | - | Strike |
| Startup | Active | Recovery | Overall | Advantage | Invul |
| 52 | 10 | - | 40 | +40 | 31~68 Projectile |
Orie summons Thanatos. Thanatos further in front of Orie compared to A version and makes a big energy sphere after a short delay.
- Launches on hit and is extremely advantageous on block provided it doesn't get interrupted.
- Provides a way to “safe-jump” wakeups by meaty-ing the opponent and allowing you to block possible wake-up actions.
- Gives a good amount of plus frames for you to use for pressure.
- Can absorb projectiles.
- The startup for all variants are big and must be accounted for, making them require careful use for moves, movement or projectiles from the opponent that come out faster than anticipated.
- On the opponents wakeup, you have to account for their wakeup timing, as delayed wakeups can ruin typical 22X timings, it can be accounted for, but you have to make the guess.
| Damage | Guard | Cancel | Property | Cost | Attribute |
|---|---|---|---|---|---|
| 1935 | Mid, Air | CS | Null Projectile, Launch | 100 EXS | Strike |
| Startup | Active | Recovery | Overall | Advantage | Invul |
| 53 | 58 | - | 34 | +102 | 1~3 Throw, 32~110 Projectile |
Orie summons Thanatos. Thanatos homes to the opponents location and makes a big energy sphere after a short delay.
- Hits multiple times.
- Using this for fullscreen oki will give you enough time to dash in and run a short mixup.
- Launches on hit and is extremely advantageous on block provided it doesn't get interrupted.
- Provides a way to “safe-jump” wakeups by meaty-ing the opponent and allowing you to block possible wake-up actions.
- Gives a good amount of plus frames for you to use for pressure.
- Can absorb projectiles.
- The startup for all variants are big and must be accounted for, making them require careful use for moves, movement or projectiles from the opponent that come out faster than anticipated.
- On the opponents wakeup, you have to account for their wakeup timing, as delayed wakeups can ruin typical 22X timings, it can be accounted for, but you have to make the guess.
- The lowest minimum damage of all of Orie's EX moves.
41236C
| Damage | Guard | Cancel | Property | Cost | Attribute |
|---|---|---|---|---|---|
| 2070 | Mid, Air | CS | - | 100 EXS | Strike |
| Startup | Active | Recovery | Overall | Advantage | Invul |
| 1+7 | 24(5)4 | 40 | 80 | -17 | 1~19 Full, 20~23 Throw |
Orie charges forward and does a stab combo ending in an upward thrust.
- Reversal.
- Isn't particularly fast and is super punishable on block.
- Preferred ender in high scaling combos due to having near identical minimum damage as 214C while also being much easier to confirm into.
Super Moves
Infinite Worth
| Damage | Guard | Cancel | Property | Cost | Attribute |
|---|---|---|---|---|---|
| 3150 | Mid, Air | - | - | - | Strike |
| Startup | Active | Recovery | Overall | Advantage | Invul |
| 1+11 | 2*12 | 61 | 78 | -29~-14 | 1~26 Full, 27~31 Throw |
Thanatos sends a giant multi-hitting wave across the entire stage.
- Does excellent damage as a combo ender.
- If this is hits while the opponent is cornered, both players will return to midscreen after the move ends.
Infinite Worth EXS
| Damage | Guard | Cancel | Property | Cost | Attribute |
|---|---|---|---|---|---|
| 3750 | Mid, Air | - | Knockdown | 200 EXS, Vorpal or GRD Break | Strike |
| Startup | Active | Recovery | Overall | Advantage | Invul |
| 1+15 | 6 | 46 | 67 | -25 | 1~26 Full |
Orie becomes surrounded by a pillar of light which goes into a cinematic on hit.
- Must have less than 30% health (orange health) to use.
- After the cinematic, characters will be moved to the middle of the stage, regardless of where they were positioned before.
- Due to the cost, it is usually not recommended to use this move unless it will kill the opponent.
Notable Rebeats and Gaps
| Attack | Chain | Advantage |
|---|---|---|
| 5C/2C/3B | 2A | -1 |
| 5B | 2A | -2 |
| 2B | 2A | -7 |
| Attack | Chain | Frame Gap |
|---|---|---|
| 5A/2A/2B | 5C | 1f |
| X | X | X |
| X | X | X |
Videos
External Links
- Orie Primer by NorseFTX and FrozenCore
- Frozen's Core Guide to Orie by FrozenCore
- Orie Match Video Finder by FrozenCore
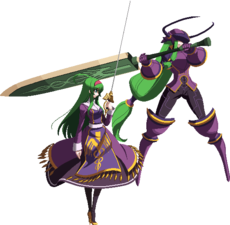
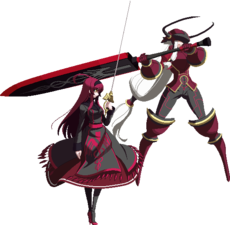
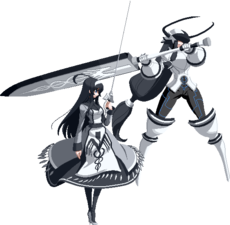
Colors
Default Unlocks
Customization Unlocks (2000 IP Each)
Orie Wiki Roadmap
Click here for the UNICLR roadmap.
Page last edited on: 2024-03-06 by Dimeq.
| 36% complete | ||
|
|
| Page | Completed | To-do | Score |
|---|---|---|---|
|
|
35/50 | |
| Strategy |
|
|
0/25 |
| Combos |
|
|
1/25 |


