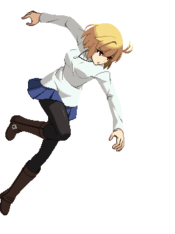
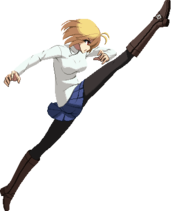
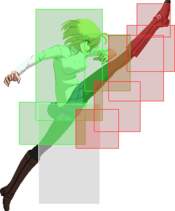
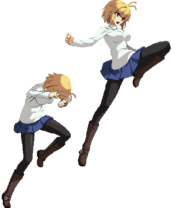
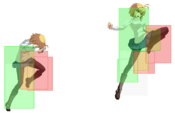
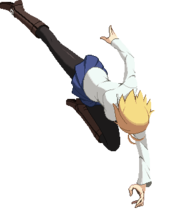
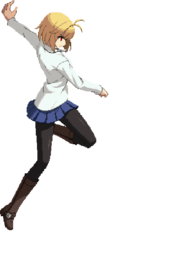
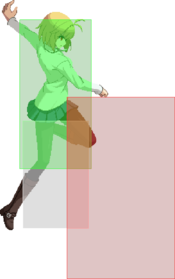
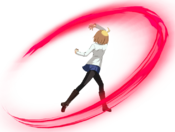
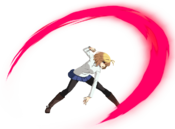
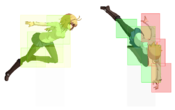
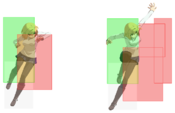
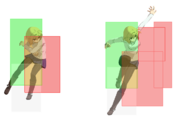
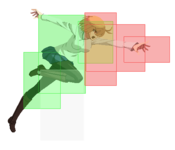
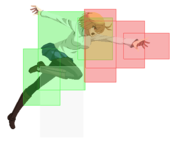
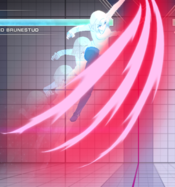
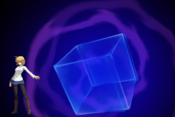
Melty Blood/MBTL/Arcueid Brunestud: Difference between revisions
mNo edit summary |
|||
| (99 intermediate revisions by 20 users not shown) | |||
| Line 1: | Line 1: | ||
{{MBTL Character Intro|char=Arcueid|short=AR|content= | {{MBTL Character Intro|char=Arcueid|db=arc|short=AR|content= | ||
== Gameplay == | == Gameplay == | ||
{{2 Column Flex|flex1=6|flex2=4 | {{2 Column Flex|flex1=6|flex2=4 | ||
| Line 8: | Line 6: | ||
'''Arcueid''' is a close-range bruiser who has every tool a rushdown character wants: a flexible neutral-game, high-reward blockstring gambles, a combo throw, unreactable mixups and the best corner carry in the game. | '''Arcueid''' is a close-range bruiser who has every tool a rushdown character wants: a flexible neutral-game, high-reward blockstring gambles, a combo throw, unreactable mixups and the best corner carry in the game. | ||
She boasts good range and coverage on most of her moves and good movement speed. She lacks any true ranged options against more dedicated zoners, and her unique mixup tools require either good reads on the opponent or precise and manually timed inputs. But once she gets in, she can easily push the opponent to the wall and seal their fate with great corner carry potential, strong | She boasts good range and coverage on most of her moves and good movement speed. She lacks any true ranged options against more dedicated zoners, and her unique mixup tools require either good reads on the opponent or precise and manually timed inputs. But once she gets in, she can easily push the opponent to the wall and seal their fate with great corner carry potential, strong hitboxes, high damage combos and dangerous corner okizeme. | ||
All in all, a straightforward yet effective 'gorilla' character that should appeal to both new and experienced players alike. | All in all, Arcueid is a straightforward yet effective 'gorilla' character that should appeal to both new and experienced players alike. | ||
{{ | {{CharacterPickReasons|width=100 | ||
|pros= | |pros= | ||
* | * '''Explosive Movement''': Arc has great movement speed in both the air and ground to navigate neutral and rush down her opponent from different angles | ||
* Excellent DP | * '''Excellent Defense''': With the strongest 22X DP in the game alongside having some of the highest health, she can easily tear through offense and take a lot of punishment | ||
* | * '''Oppressive Offense''': With several plus on block specials, a great rekka, combo throw, and high damage conversions, Arc can play a plethora of dangerous mindgames | ||
* Potent | * '''Potent Air Game''': Arc has terrifying air presence with normals like j.B and j.C that can reliably convert air exchanges into air unblockables | ||
* Powerful | * '''Powerful Mixups''': Strong left rights and high lows during pressure and okizeme can make her already oppressive offense feel insurmountable | ||
|cons= | |cons= | ||
* | * '''Little Proactive Meter Usage''': Outside of combos, Arc's metered tools mostly serve as defensive/punish options. Unlike some characters who can spend meter to gain enormous advantages in neutral or pressure, Arc mostly plays the same game with or without it. | ||
}} | }} | ||
}} | }} | ||
|content2= | |content2= | ||
{{Content Box|content= | {{Content Box|content= | ||
<center><youtube>https://youtu.be/rsAfzYB8EAY</youtube></center> | <center><youtube>https://youtu.be/rsAfzYB8EAY</youtube></center></br> | ||
<div class="toccolours mw-collapsible mw-collapsed" style="overflow:auto;"> | |||
<div style="font-weight:bold;line-height:1.6;">Story & Profile</div> | |||
<div class="mw-collapsible-content"> | |||
'''''The free-willed Princess of the True Ancestors'''''</br> | |||
A royal member of the vampire race known as the True Ancestors. After suffering through a traumatic event, a naively innocent side of her was somehow released. She now lives as a free-spirited, almost childish, princess. | |||
She is incredibly powerful and, despite being a vampire, is able to survive in direct sunlight. She has no desire to threaten human society, instead hunting other vampires known as Dead Apostles. | |||
When Roa, her greatest enemy, is reincarnated, he appears in Souya where Shiki lives. | |||
Although a fateful encounter awaits her and Shiki here, a story of an earlier possibility is about to unfold. | |||
'''Main Weapon/Skill'''</br> | |||
True Ancestor Strength, Claw-Based Slashes, Marble Phantasm | |||
'''Basic Info'''</br> | |||
Height: 167cm</br> | |||
Weight: 52kg</br> | |||
Blood Type: n/a</br> | |||
Birthday: December 25th (according to her)</br> | |||
Voiced by: [https://en.wikipedia.org/wiki/Ikumi_Hasegawa Ikumi Hasegawa] | |||
</div></div> | |||
}} | }} | ||
}} | }} | ||
| Line 61: | Line 78: | ||
|content2= | |content2= | ||
{{Content Box|header=Stats & vitals|content= | {{Content Box|header=Stats & vitals|content= | ||
Dash startup: | HP Value: 12,000 (High) | ||
Backdash: | |||
- 1-10 Full Invul | |||
- 1-12 Strike Invul | |||
- 13-17 Projectile/Air Invul | |||
- 6-22 Airborne | |||
- 32 Total | |||
Dash startup: 5 | |||
Dash actionable: | Dash actionable: 5 | ||
Jump startup: 4 | Jump startup: 4 | ||
| Line 91: | Line 117: | ||
| info = | | info = | ||
{{AttackDataCargo-MBTL/Query|arc_5a}} | {{AttackDataCargo-MBTL/Query|arc_5a}} | ||
High-hitting standing jab. | |||
* Best option for | * Strong vertical hitbox. | ||
* | ** Useful as a fast abare tool that can't be jumped over. | ||
** Best option for converting air-to-air blockstrings into air unblockables. | |||
* Can cancel into itself | * Most common rebeat tool since it hits mid unlike 2A. | ||
* Can cancel into itself up to three times in a row (must be inputted as 4A with standard Rapid Beat settings). | |||
* Whiff cancel available from frame 10, including into shield. | |||
}} | }} | ||
| Line 105: | Line 134: | ||
| images = | | images = | ||
{{MoveDataCargoImage|arc_5b|caption=Advancing blockstring tool}} | {{MoveDataCargoImage|arc_5b|caption=Advancing blockstring tool}} | ||
| hitboxes = | | hitboxes = | ||
{{MoveDataCargoImage|arc_5b|caption=|hitbox=yes}} | {{MoveDataCargoImage|arc_5b|caption=|hitbox=yes}} | ||
| Line 111: | Line 139: | ||
| info = | | info = | ||
{{AttackDataCargo-MBTL/Query|arc_5b}} | {{AttackDataCargo-MBTL/Query|arc_5b}} | ||
* Moves Arc forward | Advancing downward swipe. | ||
* Can be delayed slightly | * Moves Arc forward, letting her stay closer during pressure. | ||
* | ** Moves farther when cancelled later or no-cancelled. | ||
* Solid vertical hitbox, can catch jumpout attempts. | |||
* Can be delayed by charging the move slightly (usually noted as 5{B}). | |||
** Often used to mix up by faking the fully-charged overhead 5[B] and then cancelling into a low instead. | |||
* Slightly slow for its range, limiting its neutral utility somewhat. | |||
{{AttackDataCargo-MBTL/Query|arc_5[b]}} | {{AttackDataCargo-MBTL/Query|arc_5[b]}} | ||
* | Slower, charged version of the above. | ||
* | * Hits overhead. One of Arc's primary ways to beat preemptive low shield during pressure. | ||
* | * Quite slow. On reaction, can reliably be high shielded or even thrown at close range. | ||
* | * Very long range, major forward movement. | ||
* Gains clash frames halfway through the charge, protecting Arc from opponents' abare somewhat. | |||
* Knocks the opponent into the air on hit; strong combo starter. | |||
}} | }} | ||
| Line 129: | Line 162: | ||
| images = | | images = | ||
{{MoveDataCargoImage|arc_5c|caption=Advancing blockstring tool and combo filler}} | {{MoveDataCargoImage|arc_5c|caption=Advancing blockstring tool and combo filler}} | ||
| hitboxes = | | hitboxes = | ||
{{MoveDataCargoImage|arc_5c|caption=|hitbox=yes}} | {{MoveDataCargoImage|arc_5c|caption=|hitbox=yes}} | ||
| Line 135: | Line 167: | ||
| info = | | info = | ||
{{AttackDataCargo-MBTL/Query|arc_5c}} | {{AttackDataCargo-MBTL/Query|arc_5c}} | ||
Palm thrust which moves Arc forward slightly. | |||
* | * Useful blockstring and combo tool. Staple in hitconfirm strings. | ||
* Can be | * Can be partially charged by holding C for a short amount of time. | ||
* Can be | ** Significantly increases the forward movement. Very useful for staying close during blockstrings. | ||
** Delays the startup, creating a gap. | |||
** Can be used for a partial charge mixup by going low, similarly to 5B, albeit lower reward and higher risk. | |||
* Low-risk low-reward answer to low shield during pressure. | |||
* Not terribly unsafe on block even when no-cancelled. | |||
{{AttackDataCargo-MBTL/Query|arc_5[c]}} | {{AttackDataCargo-MBTL/Query|arc_5[c]}} | ||
Fully charged version of the above. | |||
* Unblockable. Must be shielded high | * Unblockable. Must be shielded high. | ||
* Easily reactable with shield. | ** High-risk medium-reward answer to low shield during pressure. | ||
* | * Soft knockdown on hit. Cannot be cancelled or comboed out of. | ||
* | * Very slow. | ||
* | ** Easily reactable with shield or even grab if the opponent is prepared for it. | ||
** Long recovery leads to an even larger disadvantage than usual when shielded. | |||
* Massive amount of clash frames. | |||
** Helps somewhat against mashing, but opponents can reliably win the clash interaction with DP, jump shield, or Moon Drive. | |||
* Huge range and forward movement. Can even catch many backdashes midscreen. | |||
}} | }} | ||
| Line 172: | Line 212: | ||
| input = {{#invoke:InputsMBTL|toIcons|2B}} | | input = {{#invoke:InputsMBTL|toIcons|2B}} | ||
| images = | | images = | ||
{{MoveDataCargoImage|arc_2b|caption=Fast low poke | {{MoveDataCargoImage|arc_2b|caption=Fast low poke}} | ||
| hitboxes = | | hitboxes = | ||
{{MoveDataCargoImage|arc_2b|caption=|hitbox=yes}} | {{MoveDataCargoImage|arc_2b|caption=|hitbox=yes}} | ||
| Line 178: | Line 218: | ||
{{AttackDataCargo-MBTL/Query|arc_2b}} | {{AttackDataCargo-MBTL/Query|arc_2b}} | ||
* Arc's | * Arc's general-purpose grounded poke. | ||
* | * Fast B normal at 7 frames. Quick recovery and great conversions. Moves Arc forward slightly. | ||
* Best antiair option when Arc is behind a falling opponent. | * Best antiair option when Arc is behind a falling opponent. | ||
* Low profile hurtbox (from the knees down) lets 2B win against many other 7f buttons like Kouma/Miyako 2B and even 5F 2A's at some ranges. This lets Arc press at slight frame disadvantage vs many characters and makes her pressure stronger. | * Low profile hurtbox (from the knees down) lets 2B win against many other 7f buttons like Kouma/Miyako 2B and even 5F 2A's at some ranges. This lets Arc press at slight frame disadvantage vs many characters and makes her pressure stronger. | ||
| Line 197: | Line 237: | ||
| info = | | info = | ||
{{AttackDataCargo-MBTL/Query|arc_2c}} | {{AttackDataCargo-MBTL/Query|arc_2c}} | ||
Large, far-reaching sweep. | |||
* | * Hits low. Great for catching high shield or jump attempts during pressure. | ||
* Excellent untech time | * Large vertical range, quite unusual for a sweep. | ||
** Catches most IADs, but only from a distance. | |||
* Excellent untech time; extremely valuable combo tool. | |||
* Large pushback on block and does not advance forward, unlike her other B/C normals. | |||
** One of Arc's only ways to create enough distance for 214A to be plus during blockstrings. | |||
* Not particularly fast for its range. | |||
* Relatively short recovery for a C normal, but still decently whiff punishable. | |||
}} | }} | ||
| Line 215: | Line 261: | ||
{{AttackDataCargo-MBTL/Query|arc_ja}} | {{AttackDataCargo-MBTL/Query|arc_ja}} | ||
* Standard, quick aerial jab. | * Standard, quick aerial jab. | ||
* | * Possible to act in the air after recovery, making this a fairly low-commitment option. | ||
* Low-angled hitbox, can hit standing opponents while rising. | |||
* Can cancel into itself for three total jA's by inputting j4A. Blocked air-to-airs should usually lead to an air unblockable or ground pressure situation. | * Can cancel into itself for three total jA's by inputting j4A. Blocked air-to-airs should usually lead to an air unblockable or ground pressure situation. | ||
}} | }} | ||
| Line 248: | Line 295: | ||
{{AttackDataCargo-MBTL/Query|arc_jc}} | {{AttackDataCargo-MBTL/Query|arc_jc}} | ||
* Big disjointed air normal. An exceptional air-to-air and air-to-ground attack. | * Big disjointed air normal. An exceptional air-to-air and air-to-ground attack. | ||
* Arc’s signature jump attack comes out almost as fast as j.B and has | * Arc’s signature jump attack, comes out almost as fast as j.B and has absurdly long active frames. | ||
* No clash frames but surprisingly large. Spacing Arc j.C out at the tip is crucial to the move's neutral utility. | * No clash frames but surprisingly large. Spacing Arc j.C out at the tip is crucial to the move's neutral utility. | ||
}} | }} | ||
==== Command Normals ==== | ==== Command Normals ==== | ||
===== 4C ===== | ===== 4C ===== | ||
{{MoveDataCargo | {{MoveDataCargo | ||
| Line 282: | Line 313: | ||
{{AttackDataCargo-MBTL/Query|arc_4c}} | {{AttackDataCargo-MBTL/Query|arc_4c}} | ||
* Arc jumps forward with a flying knee. Puts Arc airborne while also floating the opponent on hit. | * Arc jumps forward with a flying knee. Puts Arc airborne while also floating the opponent on hit. | ||
* First hit can be | * First hit can be cancelled into ground specials, second hit can be cancelled into air specials. | ||
* On hit only, 4C second hit cancels | * On hit only, 4C second hit cancels into air dash, double jump, or air normals. 4C air dash jC is an extremely useful combo route. | ||
* Second hit is extremely punishable on block | * Second hit is extremely punishable on block: care should be taken not to autopilot into 4C without properly confirming a hit. If 4C(2) is blocked, it must be cancelled to j.2BC or Moon Drive to avoid massive punishment. Neither of these are ideal. | ||
}} | }} | ||
| Line 296: | Line 327: | ||
| hitboxes = | | hitboxes = | ||
{{MoveDataCargoImage|arc_j2b|caption=|hitbox=yes}} | {{MoveDataCargoImage|arc_j2b|caption=|hitbox=yes}} | ||
{{MoveDataCargoImage|arc_j2b_be|caption=|hitbox=yes}} | |||
| info = | | info = | ||
{{AttackDataCargo-MBTL/Query|arc_j2b}} | {{AttackDataCargo-MBTL/Query|arc_j2b}} | ||
| Line 305: | Line 337: | ||
* Strong combo tool against airborne opponents. Typically cancelled into 214A or 214B and extended from there. | * Strong combo tool against airborne opponents. Typically cancelled into 214A or 214B and extended from there. | ||
* Has landing recovery, but the landing recovery can be cancelled into special moves on hit or on block. | * Has landing recovery, but the landing recovery can be cancelled into special moves on hit or on block. | ||
{{AttackDataCargo-MBTL/Query|arc_j2b_be}} | |||
* Charged version of Arcueid's diveclaw. | |||
* Becomes an overhead. | |||
* One of Arc's only tools to convert an air combo into a ground combo. Also very valuable for ending combos in the corner. | |||
* Can be plus on block if it hits very low, otherwise it's even or slightly minus. | |||
}} | }} | ||
| Line 313: | Line 351: | ||
| input = {{#invoke:InputsMBTL|toIcons|j}}{{#invoke:InputsMBTL|toIcons|2}}{{#invoke:InputsMBTL|toIcons|C}} | | input = {{#invoke:InputsMBTL|toIcons|j}}{{#invoke:InputsMBTL|toIcons|2}}{{#invoke:InputsMBTL|toIcons|C}} | ||
| images = | | images = | ||
{{MoveDataCargoImage|arc_j2c|caption=Combo filler}} | {{MoveDataCargoImage|arc_j2c|1|caption=}} | ||
{{MoveDataCargoImage|arc_j2c|2|caption=Combo filler}} | |||
| hitboxes = | | hitboxes = | ||
{{MoveDataCargoImage|arc_j2c|caption=|hitbox=yes}} | {{MoveDataCargoImage|arc_j2c|caption=|hitbox=yes}} | ||
| Line 319: | Line 358: | ||
{{AttackDataCargo-MBTL/Query|arc_j2c}} | {{AttackDataCargo-MBTL/Query|arc_j2c}} | ||
* Arc spins around before slamming the opponent to the ground. | * Arc spins around before slamming the opponent to the ground. | ||
* | * j.2C is both a combo tool to drag opponents down from high altitudes and a runaway mobility tool. | ||
* Ground-bounces if done close to the ground. Generally only used in corner combos because the pushback midscreen is very limiting to combo routes. | * Ground-bounces if done close to the ground. Generally only used in corner combos because the pushback midscreen is very limiting to combo routes. | ||
* Maintains the air momentum that Arc had before j2C. Because of this, j2C can be used as a movement tool after a forward or backwards airdash to gain more distance. This can be very useful eg. in the Kouma matchup where its important to refuse to engage in certain gamestates. However, Arc is punishable until landing, so it can be very punishable on whiff. | * Maintains the air momentum that Arc had before j2C. Because of this, j2C can be used as a movement tool after a forward or backwards airdash to gain more distance. This can be very useful eg. in the Kouma matchup where its important to refuse to engage in certain gamestates. However, Arc is punishable until landing, so it can be very punishable on whiff. | ||
| Line 325: | Line 364: | ||
=== Universal Mechanics === | === Universal Mechanics === | ||
===== Rapid Beat | ===== Rapid Beat 1 ===== | ||
{{MoveDataCargo | {{MoveDataCargo | ||
| title = Rapid Beat | | title = Rapid Beat 1 | ||
| subtitle = | | subtitle = | ||
| input = {{#invoke:InputsMBTL|toIcons|X}}{{#invoke:InputsMBTL|toIcons|X}} | | input = {{#invoke:InputsMBTL|toIcons|X}}{{#invoke:InputsMBTL|toIcons|X}} | ||
| images = | | images = | ||
{{MoveDataCargoImage| | {{MoveDataCargoImage|arc_rapid1|caption=Advances forward, but has terrible frame advantage}} | ||
| hitboxes = | | hitboxes = | ||
{{MoveDataCargoImage| | {{MoveDataCargoImage|arc_rapid1|caption=|hitbox=yes}} | ||
| info = | | info = | ||
{{AttackDataCargo-MBTL/Query| | {{AttackDataCargo-MBTL/Query|arc_rapid1}} | ||
* Good forward movement. | * Good forward movement. | ||
* Bad on both block and hit compared to other normals. Disadvantageous and only cancels into specials or Rapid | * Bad on both block and hit compared to other normals. Disadvantageous and only cancels into specials or Rapid Beat 2, which is still unsafe. | ||
* Low damage makes it unappealing early in combos. | * Low damage makes it unappealing early in combos. | ||
* Only useful at the end of long combos to avoid Same Move Proration. Good forward movement and high untech time makes Rapid Beat | * Only useful at the end of long combos to avoid Same Move Proration. Good forward movement and high untech time makes Rapid Beat 1 a strong way to end combos with 5AA > 236BBB. | ||
}} | }} | ||
===== Rapid Beat | ===== 3C / Rapid Beat 2 ===== | ||
{{MoveDataCargo | {{MoveDataCargo | ||
| title = Rapid Beat | | title = 3C / Rapid Beat 2 | ||
| subtitle = | | subtitle = | ||
| input = {{#invoke:InputsMBTL|toIcons|X}}{{#invoke:InputsMBTL|toIcons|X}}{{#invoke:InputsMBTL|toIcons|X}} | | input = {{#invoke:InputsMBTL|toIcons|3}}{{#invoke:InputsMBTL|toIcons|C}} | ||
or | |||
{{#invoke:InputsMBTL|toIcons|X}}{{#invoke:InputsMBTL|toIcons|X}}{{#invoke:InputsMBTL|toIcons|X}} | |||
| images = | | images = | ||
{{MoveDataCargoImage| | {{MoveDataCargoImage|arc_3c|caption=Universal launcher with auto jump cancel}} | ||
| hitboxes = | | hitboxes = | ||
{{MoveDataCargoImage| | {{MoveDataCargoImage|arc_3c|caption=|hitbox=yes}} | ||
| info = | | info = | ||
{{AttackDataCargo-MBTL/Query| | {{AttackDataCargo-MBTL/Query|arc_3c}} | ||
* | Standard universal launching attack with a short zoom-in/cinematic, followed by an automatic jump. | ||
* Unsafe on block | * Invulnerable to air attacks starting from frame 5. 3C can be used as a high-commit preemptive grounded anti-air. | ||
* | * Can be jump cancelled or special cancelled on clash, which can allow Arc to punish the opponent or keep herself safe. | ||
** Clashing with jump attacks leaves Arc at a slight frame advantage, often allowing jumpcancel airgrab or 22a to win. | |||
* High recovery, susceptible to whiff punishes. | |||
* Unsafe on block and cannot be reverse beaten; however, can still be special-cancelled. | |||
* Rapid Beat version has significant forward movement. | |||
}} | }} | ||
| Line 369: | Line 414: | ||
| hitboxes = | | hitboxes = | ||
{{MoveDataCargoImage|arc_throw|caption=|hitbox=yes}} | {{MoveDataCargoImage|arc_throw|caption=|hitbox=yes}} | ||
| info = | | info = | ||
{{AttackDataCargo-MBTL/Query|arc_throw}} | {{AttackDataCargo-MBTL/Query|arc_throw}} | ||
Arc tosses the opponent away. | |||
* Wall bounces in the corner, allowing for a combo. | |||
* Wall bounces in the corner. | ** Combo conversions will vary depending on distance from corner. | ||
* | * Can be air teched midscreen. | ||
{{AttackDataCargo-MBTL/Query|arc_altthrow}} | {{AttackDataCargo-MBTL/Query|arc_altthrow}} | ||
* Alternate | Arc slams the opponent to the ground. | ||
* Alternate throw, activated by pressing down during the throw animation. | |||
* | * Gives a hard knockdown midscreen, unlike normal throw. | ||
* Immediate empty forward jump is +5 on landing, which enables 2A Shield OS | ** Immediate empty forward jump is +5 on landing, which enables 2A Shield OS | ||
* Delayed forward jump jC can safe jump reversals. | ** Delayed forward jump jC can safe jump reversals. | ||
}} | }} | ||
| Line 400: | Line 444: | ||
* Airthrow doublejump > land: +3 on landing | * Airthrow doublejump > land: +3 on landing | ||
* Airthrow > perfect IAD jC(whiff): ~+8 on landing | * Airthrow > perfect IAD jC(whiff): ~+8 on landing | ||
* | * Midscreen, Arc gets ambiguous left-right oki via forward drift from delayed neutral double-jump. With proper timing it is possible to [https://youtu.be/D9EA-Dl9tKA cross up and still be plus]. | ||
* | * After a (super) double-jump in the corner, it's possible to safejump 6f or slower DPs via an extremely precise airdash timing. | ||
* [https://youtu.be/jt8NwfK-G9I High airdash falling jC] in the corner will automatically bait all meterless reversals in the game and many metered reversals. Exceptions include Ciel 22C and 236C. | * [https://youtu.be/jt8NwfK-G9I High airdash falling jC] in the corner will automatically bait all meterless reversals in the game and many metered reversals. Exceptions include Ciel 22C and 236C. | ||
* Air throw > super jump | * Air throw > super jump in the corner is not a safejump, but offers a double overhead vs. empty land low/throw mixup, as well as various other options such as delay airdash to deal with whatever the opponent chooses to do on wakeup. | ||
}} | }} | ||
| Line 417: | Line 459: | ||
| input = {{#invoke:InputsMBTL|toIcons|236X}} | | input = {{#invoke:InputsMBTL|toIcons|236X}} | ||
| images = | | images = | ||
{{MoveDataCargoImage|arc_236a|caption= | {{MoveDataCargoImage|arc_236a|caption=236X - Rekka starter}} | ||
{{MoveDataCargoImage|arc_236[a]|caption=236[A]- | {{MoveDataCargoImage|arc_236[a]|caption=236[A] - Plus, vacuums}} | ||
{{MoveDataCargoImage| | {{MoveDataCargoImage|arc_236xx|caption=236X~X - Longer followup}} | ||
{{MoveDataCargoImage| | {{MoveDataCargoImage|arc_236x4x|caption=236X~4X - Launching followup}} | ||
{{MoveDataCargoImage|arc_236xxx|caption=236XXX-Low}} | {{MoveDataCargoImage|arc_236xxx|caption=236XXX - Low ender}} | ||
{{MoveDataCargoImage|arc_236xx4x|caption=236XX4X-Overhead}} | {{MoveDataCargoImage|arc_236xx4x|caption=236XX4X - Overhead ender}} | ||
{{MoveDataCargoImage|arc_236c|caption=236C}} | {{MoveDataCargoImage|arc_236c|caption=236C}} | ||
| hitboxes = | | hitboxes = | ||
{{MoveDataCargoImage|arc_236a|caption=|hitbox=yes}} | {{MoveDataCargoImage|arc_236a|caption=236[A]|hitbox=yes}} | ||
{{MoveDataCargoImage| | {{MoveDataCargoImage|arc_236b|caption=236X|hitbox=yes}} | ||
{{MoveDataCargoImage| | {{MoveDataCargoImage|arc_236xx|caption=236X~X|hitbox=yes}} | ||
{{MoveDataCargoImage| | {{MoveDataCargoImage|arc_236x4x|caption=236X~4X|hitbox=yes}} | ||
{{MoveDataCargoImage|arc_236xxx|caption=|hitbox=yes}} | {{MoveDataCargoImage|arc_236xxx|caption=236XX~X|hitbox=yes}} | ||
{{MoveDataCargoImage|arc_236xx4x|caption=|hitbox=yes}} | {{MoveDataCargoImage|arc_236xx4x|caption=236XX~4X|hitbox=yes}} | ||
{{MoveDataCargoImage|arc_236c|caption=|hitbox=yes}} | {{MoveDataCargoImage|arc_236c|caption=236C|hitbox=yes}} | ||
| info = | | info = | ||
{{AttackDataCargo-MBTL/Query|arc_236a}} | {{AttackDataCargo-MBTL/Query|arc_236a}} | ||
{{AttackDataCargo-MBTL/Query|arc_236b}} | |||
* | Rekka series starter. Fairly long ranged forward-moving claw swipe. | ||
* | * A version has slower startup, but better frame advantage on block | ||
* | ** Safety on block and the threat of followups make it a potent pressure option | ||
* B version has faster startup, but worse frame advantage on block | |||
** Very fast for its range, making it useful in neutral or as a long-reaching abare option | |||
** 236BBB is used in all of Arc's most common metered combo enders | |||
* Long recovery on whiff, but long cancel window | |||
* Moon Drive cancellable on whiff to keep safe if necessary (as are all the followups) | |||
{{AttackDataCargo-MBTL/Query|arc_236[a]}} | {{AttackDataCargo-MBTL/Query|arc_236[a]}} | ||
* | Slower claw swipe with no forward movement. | ||
* + | * Advantageous on block and pulls the opponent in, making 236[A] a powerful tool for pressure resets | ||
* | ** +6 on block means 236[A] > 2A is a gapless blockstring | ||
* Leads to combo on hit or trade | * Cancelling into 236[A] from C normals leaves a 7f gap, which can be hard to challenge without shield because of spacing | ||
* Excellent combo tool due to the vacuum and high damage | * Leads to combo on hit or trade, further increasing the risk of contesting | ||
* Excellent combo tool due to the vacuum and high damage | |||
{{AttackDataCargo-MBTL/Query|arc_236xx}} | {{AttackDataCargo-MBTL/Query|arc_236xx}} | ||
{{AttackDataCargo-MBTL/Query|arc_236x4x}} | |||
* Worse on block than the first hit | Second rekka, only available as a follow-up to 236A/236B | ||
* Immediate timing is gapless from 236X, but can be delayed to leave very small gaps for anti-mash and anti-jump | * Worse on block than the first hit, can be punishable at some spacings if not cancelled | ||
* | * Immediate timing is gapless from 236X, but can be delayed to leave very small gaps for anti-mash and anti-jump | ||
* | * Can be used to beat attempts to punish whiffed 236X | ||
* ~X version is a bit longer, but doesn't lead to a combo | |||
** Connects from long ranged 236X, where 236X~4X doesn't | |||
** Long reach makes it better suited to catching opponents from a distance in neutral | |||
* ~4X version is a bit shorter, however launches the opponent for a full combo on hit | |||
** High vertical hitbox, can anti-air when opponents jump over 236X | |||
** Less forward movement than 236X~X and slightly better frame advantage, allowing for more ability to maintain safe spacing during rekka pressure | |||
{{AttackDataCargo-MBTL/Query|arc_236xxx}} | {{AttackDataCargo-MBTL/Query|arc_236xxx}} | ||
Rekka series ender. Hits low. | |||
* | * Can be delayed to catch attempts to mash or jump out after rekka 2 or to hit at the same time as the overhead ender 236XX4X, creating a mixup which can't be fuzzy blocked | ||
* At earlier timings, can catch people for attempting to input reversals after rekka 2 | |||
* Unsafe on block, but can be made safe on block or converted on hit with Moon Drive cancel or 214C. 236XXX should always be canceled whether on hit or block | |||
* Unsafe on block, but can be made safe on block or converted on hit with Moon Drive cancel or 214C. 236XXX should always be canceled whether on hit or block | |||
{{AttackDataCargo-MBTL/Query|arc_236xx4x}} | {{AttackDataCargo-MBTL/Query|arc_236xx4x}} | ||
Rekka series ender #2. Hits overhead. | |||
* | * Reactable, although the animation can be difficult to see | ||
* | * Has a 5 frame gap from earliest cancel, beating all mash or jump attempts. Will lose to invincible attacks unless used in conjunction with Moon Drive. | ||
* Unsafe on block, but can be made safe on block or converted on hit with Moon Drive cancel or 214C. 236XX4X should always be canceled whether on hit or block | * Unsafe on block, but can be made safe on block or converted on hit with Moon Drive cancel or 214C. 236XX4X should always be canceled whether on hit or block | ||
{{AttackDataCargo-MBTL/Query|arc_236c}} | {{AttackDataCargo-MBTL/Query|arc_236c}} | ||
Arc does all three rekkas for a good chunk of damage | |||
* Punishable on block | * Punishable on block | ||
* | * Gives a lot of corner carry, but doesn't knock down after long combos | ||
* Arc's only super that can cancel into Arc Drive | * Arc's only super that can cancel into Arc Drive, commonly used in Heat for this reason | ||
* | }} | ||
{{MoveDataCargo | |||
| title = Out Of My Way! | |||
| subtitle = | |||
| input = {{#invoke:InputsMBTL|toIcons|6B+C}} | |||
| images = | |||
{{MoveDataCargoImage|arc_6bc|caption=}} | |||
| hitboxes = | |||
{{MoveDataCargoImage|arc_6bc|caption=|hitbox=yes}} | |||
| info = | |||
{{AttackDataCargo-MBTL/Query|arc_6bc}} | |||
Arc slashes three times, similarly to 236BBB. | |||
* Phenomenal combination of speed and range. First hit is slightly longer than 236B. | |||
* Air unblockable, and second hit has a good antiair hitbox. | |||
* Safe on block and often leaves Arc at a somewhat favourable spacing. | |||
* Gives a strong combo on hit. | |||
* Very disjointed, which is actually relevant as Moon Skills do not hitbox clash with most attacks. | |||
* Has clash frames throughout all of startup during Moon Drive. | |||
* The third hit is a low. | |||
}} | }} | ||
| Line 480: | Line 547: | ||
| input = {{#invoke:InputsMBTL|toIcons|623X}} | | input = {{#invoke:InputsMBTL|toIcons|623X}} | ||
| images = | | images = | ||
{{MoveDataCargoImage|arc_623a|caption=}} | {{MoveDataCargoImage|arc_623a|caption= 623A - Faster and low}} | ||
{{MoveDataCargoImage|arc_623b|caption=}} | {{MoveDataCargoImage|arc_623b|caption= 623B - Bigger, slower, and plus}} | ||
{{MoveDataCargoImage|arc_623xx|caption= | {{MoveDataCargoImage|arc_623xx|caption=623X~X - Follow-up}} | ||
{{MoveDataCargoImage|arc_623c|caption= | {{MoveDataCargoImage|arc_623c|caption=623C - Cinematic launcher}} | ||
| hitboxes = | | hitboxes = | ||
{{MoveDataCargoImage|arc_623a|caption=|hitbox=yes}} | {{MoveDataCargoImage|arc_623a|caption=623A|hitbox=yes}} | ||
{{MoveDataCargoImage|arc_623b|caption=|hitbox=yes}} | {{MoveDataCargoImage|arc_623b|caption=623B|hitbox=yes}} | ||
{{MoveDataCargoImage|arc_623xx|caption=|hitbox=yes}} | {{MoveDataCargoImage|arc_623xx|caption=623X~X|hitbox=yes}} | ||
{{MoveDataCargoImage|arc_623c|caption=|hitbox=yes}} | {{MoveDataCargoImage|arc_623c|caption=623C|hitbox=yes}} | ||
| info = | | info = | ||
{{AttackDataCargo-MBTL/Query|arc_623a}} | {{AttackDataCargo-MBTL/Query|arc_623a}} | ||
* Hits once. A downwards swiping claw attack which is mainly used as combo filler. | * Hits once. A downwards swiping claw attack which is mainly used as combo filler. | ||
* | * Long range safe on block low. Leads to a combo on hit. | ||
* 623AA is one of Arcueids highest damage combo modules. | * 623AA is one of Arcueids highest damage combo modules. | ||
{{AttackDataCargo-MBTL/Query|arc_623b}} | {{AttackDataCargo-MBTL/Query|arc_623b}} | ||
* Hits thrice. | * Hits thrice. | ||
* Looks like a low, is '''not a low'''. | * Looks like a low, is '''not a low'''. | ||
* | * This move is a staple in Arcs pressure game. Keep in mind while it is +2, you are not in throw/A normal range. 5B will catch jump outs, and 2B will beat or clash with mashing(and Vlov jumping), 5A will beat mashing clean. | ||
{{AttackDataCargo-MBTL/Query|arc_623xx}} | {{AttackDataCargo-MBTL/Query|arc_623xx}} | ||
* Combo extender. A follow-up attack that wall bounces in the corner. | * Combo extender. A follow-up attack that wall bounces in the corner. | ||
* Can be jump canceled on hit unless you jump canceled earlier in combo. | * Can be jump canceled on hit unless you jump canceled earlier in combo. | ||
* Moves forward a lot when delayed from 623A/623B, which is useful in some midscreen-to-corner combos. | * Moves forward a lot when delayed from 623A/623B, which is useful in some midscreen-to-corner combos. | ||
* | * Safe on block, and can be delayed in order to frametrap. | ||
{{AttackDataCargo-MBTL/Query|arc_623c}} | {{AttackDataCargo-MBTL/Query|arc_623c}} | ||
| Line 509: | Line 575: | ||
* Used to extend certain hits into longer combos with air throw ender. Great use of meter from special moves like 214A, 236BB, and 236BBB. | * Used to extend certain hits into longer combos with air throw ender. Great use of meter from special moves like 214A, 236BB, and 236BBB. | ||
* If launch was already used in combo, 623C will knock down instead of launching. | * If launch was already used in combo, 623C will knock down instead of launching. | ||
}} | |||
{{MoveDataCargo | |||
| title = What're You Doing?! | |||
| subtitle = | |||
| input = {{#invoke:InputsMBTL|toIcons|3B+C}} | |||
| images = | |||
{{MoveDataCargoImage|arc_3bc|caption=}} | |||
| hitboxes = | |||
{{MoveDataCargoImage|arc_3bc|caption=|hitbox=yes}} | |||
| info = | |||
{{AttackDataCargo-MBTL/Query|arc_3bc}} | |||
Arc hops forward and dives down at the opponent with an attack resembling j.2B. | |||
* A fairly slow and reactable overhead with respectable range. | |||
* Can be used to call out low shield attempts, especially when 5[B] or 5[C] are not available. | |||
* Avoids low hitting moves and throws from early in the animation. | |||
* Safe on block, but can be high shielded on reaction for a guaranteed punish. | |||
* Gains clash frames in Moon Drive, but they end far before the attack comes out, allowing you to easily get fatal countered instead. | |||
}} | }} | ||
| Line 527: | Line 610: | ||
{{AttackDataCargo-MBTL/Query|arc_214a}} | {{AttackDataCargo-MBTL/Query|arc_214a}} | ||
* Dashing elbow thrust that is safe on block. | * Dashing elbow thrust that is safe on block. | ||
* | * Advantageous on block when spaced far enough. | ||
* Good combo filler tool. Has tons of untech time, letting Arc link after it | * Good combo filler tool. Has tons of untech time, letting Arc link after it even very late. | ||
* Looks extremely similar to 214B. Opponents that anticipate 214B and shield or reversal between hits can be baited with 214A instead. | * Looks extremely similar to 214B. Opponents that anticipate 214B and shield or reversal between hits can be baited with 214A instead. | ||
{{AttackDataCargo-MBTL/Query|arc_214b}} | {{AttackDataCargo-MBTL/Query|arc_214b}} | ||
* Dashing elbow thrust followed by a palm strike. | * Dashing elbow thrust followed by a palm strike. | ||
* The second hit wall-bounces, has excellent corner carry, and has high untechable time, making 214B an excellent combo filler tool. | * Knocks opponents into the air on block, allowing them to act before landing. | ||
** Possible to escape via doublejumping out, but Arc can cover this (e.g. with 3c). | |||
* The second hit wall-bounces, has excellent corner carry, and has high untechable time, making 214B an excellent combo filler tool. Can be used at the end of a combo to set up Heat safely. | |||
* 214B is plus on block and has a tiny gap between the two hits which also makes it a great knowledge check. Opponents that anticipate 214A can get hit trying to act between hits. | * 214B is plus on block and has a tiny gap between the two hits which also makes it a great knowledge check. Opponents that anticipate 214A can get hit trying to act between hits. | ||
* However, be careful of shield and invincible attacks against aware opponents. | * However, be careful of shield and invincible attacks against aware opponents. | ||
| Line 538: | Line 623: | ||
* Dashing elbow thrust which converts into an automatic combo sequence on hit. | * Dashing elbow thrust which converts into an automatic combo sequence on hit. | ||
* An excellent utility super. -1 on block up close, but puts Arc at an excellent range to 2B. | * An excellent utility super. -1 on block up close, but puts Arc at an excellent range to 2B. | ||
* | * Knocks opponents into the air on block, like 214B. Unlike 214B, it's often not that easy to keep them from jumping away. | ||
* Punishable on block in the corner against some specific characters (e.g Warc). | |||
* Crosses the screen incredibly fast. Useful for punishing certain moves from a distance. | |||
* Strong reactive cancel option vs people backdashing 214B and 236 series. | * Strong reactive cancel option vs people backdashing 214B and 236 series. | ||
* All of Arc's specials besides 22B cancel without gaps into 214C, making them just -1 on block at the cost of 1 Magic Cicuit. | * All of Arc's specials besides 22B cancel without gaps into 214C, making them just -1 on block at the cost of 1 Magic Cicuit. | ||
* | * Always knocks down, and leads to strong left/right or safejump okizeme. | ||
* '''214C > perfect IAD > fastest timing neutral jump > land''' leaves Arcueid at +4 and crosses up. Arc can drift back towards her original direction to fake the crossup. | * '''214C > perfect IAD > fastest timing neutral jump > land''' leaves Arcueid at +4 and crosses up. Arc can drift back towards her original direction to fake the crossup. | ||
* | ** At +4, 6 frame DPs can be OSed via 2A 2AD with perfect timing. | ||
}} | |||
{{MoveDataCargo | |||
| title = Ready, Go! | |||
| subtitle = | |||
| input = {{#invoke:InputsMBTL|toIcons|4B+C}} | |||
| images = | |||
{{MoveDataCargoImage|arc_4bc|caption=Cinematic launcher on hit, using 4C's animation}} | |||
| hitboxes = | |||
{{MoveDataCargoImage|arc_4bc|caption=|hitbox=yes}} | |||
| info = | |||
{{AttackDataCargo-MBTL/Query|arc_4bc}} | |||
An elbow thrust followed by an automatic launch on hit. | |||
* Fast and very long-ranged. Fantastic gap-closing tool. | |||
* Air-unblockable, with a decently tall hitbox. | |||
* Advantageous on block at long range (up to +3), allowing you to immediately turn a long-distance neutral situation into a pressure opportunity. | |||
* Leads to a full combo on hit with j.2BC(1) j.2[B], although the moon cost is substantial. | |||
* Gains clash frames during Moon Drive, but they end before the attack hits, making it less safe than 6BC or 2BC. | |||
* Slightly minus up close, being throw-punishable at worst. | |||
}} | }} | ||
| Line 590: | Line 694: | ||
* On hit, leads into an air tech situation. | * On hit, leads into an air tech situation. | ||
* Poor range and is several times more unsafe than 22B. If 22C hits at an awkward angle, the second swipe will whiff, leaving Arc at the mercy of the enemy. The opponent can tech and get a character specific punish on hit. | * Poor range and is several times more unsafe than 22B. If 22C hits at an awkward angle, the second swipe will whiff, leaving Arc at the mercy of the enemy. The opponent can tech and get a character specific punish on hit. | ||
}} | |||
{{MoveDataCargo | |||
| title = Shut Up And Fly! | |||
| subtitle = | |||
| input = {{#invoke:InputsMBTL|toIcons|2B+C}} | |||
| images = | |||
{{MoveDataCargoImage|arc_2bc|caption=No invul, but has clash frames and can be jump cancelled}} | |||
| hitboxes = | |||
{{MoveDataCargoImage|arc_2bc|caption=|hitbox=yes}} | |||
| info = | |||
{{AttackDataCargo-MBTL/Query|arc_2bc}} | |||
Rising slash, like her 22X moves. | |||
* Jump-cancellable on hit, block, or whiff, making it fairly low-risk. The jump-cancel window begins much earlier on hit. | |||
* Covers a lot of air space, but can be air blocked. | |||
* Being a moon skill, never clashes with air normals (including j.[C]s). Very useful property for an anti-air move. | |||
* Can lead to a strong grounded combo with j.2[B] or a falling j.B(1), but can sometimes be quite difficult to convert depending on the height and spacing. | |||
** Notably, 2BC is the most reliable way to combo from j.2B. | |||
* Gains clash frames throughout all of startup during Moon Drive. Arc's primary defensive Moon Skill. | |||
** Very difficult for opponents to successfully jump-cancel shield, given its 6f startup during Moon Drive. | |||
** Moon Drive's additional air options improve the situation after jump cancelling on block/whiff. | |||
* When shielded, the opponent has enough time to drop shield and get a major punish. | |||
}} | }} | ||
| Line 613: | Line 738: | ||
* '''Not''' a reversal. | * '''Not''' a reversal. | ||
* Combo filler. Leads into j22A~X or j22C | * Combo filler. Leads into j22A~X or j22C | ||
* Can lead to an airtight double overhead mixup when Moon Drive cancelled at a low height (e.g. from 4C) | |||
{{AttackDataCargo-MBTL/Query|arc_j22b}} | {{AttackDataCargo-MBTL/Query|arc_j22b}} | ||
* '''Not''' a reversal. Possesses no invincibility, unlike the grounded version. | * '''Not''' a reversal. Possesses no invincibility, unlike the grounded version. | ||
| Line 627: | Line 753: | ||
* Typically only used to close out rounds or to end some midscreen combos. | * Typically only used to close out rounds or to end some midscreen combos. | ||
}} | }} | ||
{{MoveDataCargo | {{MoveDataCargo | ||
| title = Shut Up And Fly! (Air) | | title = Shut Up And Fly! (Air) | ||
| Line 714: | Line 763: | ||
| info = | | info = | ||
{{AttackDataCargo-MBTL/Query|arc_j2bc}} | {{AttackDataCargo-MBTL/Query|arc_j2bc}} | ||
Rising claw swipe, very similar to the grounded version. | |||
* Cancels from | * Extremely useful to convert air hits or launcher starters into grounded combos via jump cancel > j.2[B]. Must have a double jump available. | ||
* | ** Can be fairly inconsistent depending on height and distance. Typically most reliable when jump cancelled after only the first hit. | ||
* If too high | ** Cancels from j.B and j.C to j.2BC can be delayed quite long to hit-confirm because j.2BC is so fast. | ||
** If too high for j.2[B] or an easier combo is preferred, delaying the jump cancel allows j.B j.C airthrow to land consistently. Immediate jump cancel will put Arc too high for a full conversion. | |||
* Jump cancellable on hit, block, or whiff, like the grounded version. | |||
* No clash frames during Moon Drive, like all airborne Moon Skills. | |||
}} | }} | ||
=== Super Moves === | === Super Moves === | ||
====== Melty Blood ====== | ====== Melty Blood ====== | ||
| Line 789: | Line 840: | ||
{{ColorGallery/Color|09| text=Color 9 (Linne, UNIB) }} | {{ColorGallery/Color|09| text=Color 9 (Linne, UNIB) }} | ||
{{ColorGallery/Color|10| text=Color 10 }} | {{ColorGallery/Color|10| text=Color 10 }} | ||
{{ColorGallery/Color|11| text=Color 11 }} | |||
{{ColorGallery/Color|12| text=Color 12 }} | |||
{{ColorGallery/Color|13| text=Color 13 }} | |||
{{ColorGallery/Color|14| text=Color 14 }} | |||
{{ColorGallery/Color|15| text=Color 15 }} | |||
{{ColorGallery/Color|16| text=[[Melty_Blood/MBTL/Customization#Unique_Colors|Color 16]] }} | |||
{{ColorGallery/Color|17| text=Color 17 }} | |||
{{ColorGallery/Color|18| text=Color 18 }} | |||
{{ColorGallery/Color|19| text=Color 19 }} | |||
{{ColorGallery/Color|20| text=Color 20 }} | |||
{{ColorGallery/Color|21| text=Color 21 }} | |||
{{ColorGallery/Color|22| text=Color 22 }} | |||
{{ColorGallery/Color|23| text=Color 23 }} | |||
{{ColorGallery/Color|24| text=Color 24 }} | |||
{{ColorGallery/Color|25| text=Color 25 }} | |||
}} | }} | ||
Latest revision as of 15:31, 23 January 2024
Gameplay
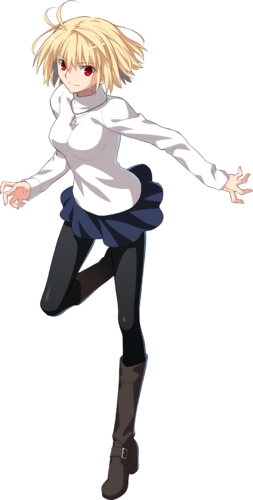
Arcueid is a close-range bruiser who has every tool a rushdown character wants: a flexible neutral-game, high-reward blockstring gambles, a combo throw, unreactable mixups and the best corner carry in the game.
She boasts good range and coverage on most of her moves and good movement speed. She lacks any true ranged options against more dedicated zoners, and her unique mixup tools require either good reads on the opponent or precise and manually timed inputs. But once she gets in, she can easily push the opponent to the wall and seal their fate with great corner carry potential, strong hitboxes, high damage combos and dangerous corner okizeme.
All in all, Arcueid is a straightforward yet effective 'gorilla' character that should appeal to both new and experienced players alike.
| Pick if you like | Avoid if you dislike |
|---|---|
|
|
The free-willed Princess of the True Ancestors
A royal member of the vampire race known as the True Ancestors. After suffering through a traumatic event, a naively innocent side of her was somehow released. She now lives as a free-spirited, almost childish, princess.
She is incredibly powerful and, despite being a vampire, is able to survive in direct sunlight. She has no desire to threaten human society, instead hunting other vampires known as Dead Apostles.
When Roa, her greatest enemy, is reincarnated, he appears in Souya where Shiki lives.
Although a fateful encounter awaits her and Shiki here, a story of an earlier possibility is about to unfold.
Main Weapon/Skill
True Ancestor Strength, Claw-Based Slashes, Marble Phantasm
Basic Info
Height: 167cm
Weight: 52kg
Blood Type: n/a
Birthday: December 25th (according to her)
Voiced by: Ikumi Hasegawa
Character Summary
- Moon Skills
- 6B+C - Out Of My Way!
- 3B+C - What're You Doing?!
- 4B+C - Ready, Go!
- 2B+C - Shut Up And Fly! (Air OK)
- Special Attacks
- 236A/B/C (EX OK) - Out Of My Way!
- > A/B/C - There!
- > A/B/C - You're Finished!
- > 4A/B/C - Submerge!
- > A/B/C - You're Finished!
- > A/B/C - There!
- 623A/B/C (EX OK) - What're You Doing?!
- > A/B/C - Additional input
- 214A/B/C (EX OK) - Ready, Go!
- 22A/B/C (EX OK) - Shut Up and Fly! (Air OK)
- > A/B/C - Shut Up and Disappear!
- > 66C (EX-Only) - Shut Up and Disappear!
- Arc Drive
- 236B+C - Melty Blood
- Last Arc
- A+B+C+D / Successful Shield in Blood Heat - Marble Phantasm - Seal
- Unique Attacks
- 2 while throwing, 3C, 4C, j.2B, j.2C
- Blowback Edge Moves
- 5[B], 5[C], 236[A]
HP Value: 12,000 (High)
Backdash:
  - 1-10 Full Invul
  - 1-12 Strike Invul
  - 13-17 Projectile/Air Invul
  - 6-22 Airborne
  - 32 Total
Dash startup: 5
Dash actionable: 5
Jump startup: 4
Jump airtime: 35
Coming soon.
Move Analysis
Normal Moves
Standing Normals
5A
| Damage | Guard | Cancel | Property | Cost | Attribute |
|---|---|---|---|---|---|
| 180 | LH | SE, N, SP, CH, EX, MD, (J) | - | - | - |
| First Active | Active | Recovery | Overall | Advantage | Invul |
| 5 | 2 | 11 | 17 | -1 | - |
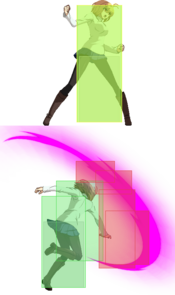
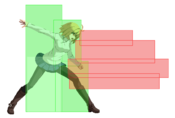
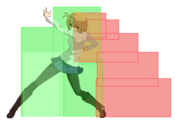
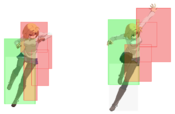
High-hitting standing jab.
- Strong vertical hitbox.
- Useful as a fast abare tool that can't be jumped over.
- Best option for converting air-to-air blockstrings into air unblockables.
- Most common rebeat tool since it hits mid unlike 2A.
- Can cancel into itself up to three times in a row (must be inputted as 4A with standard Rapid Beat settings).
- Whiff cancel available from frame 10, including into shield.
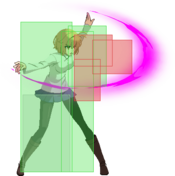
5B
| Damage | Guard | Cancel | Property | Cost | Attribute |
|---|---|---|---|---|---|
| 480 | LH | N, SP, CH, EX, MD, (J) | - | - | - |
| First Active | Active | Recovery | Overall | Advantage | Invul |
| 9 | 4 | 17 | 29 | -6 | - |
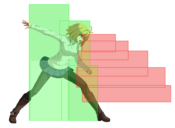
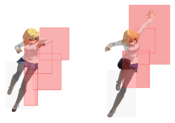
Advancing downward swipe.
- Moves Arc forward, letting her stay closer during pressure.
- Moves farther when cancelled later or no-cancelled.
- Solid vertical hitbox, can catch jumpout attempts.
- Can be delayed by charging the move slightly (usually noted as 5{B}).
- Often used to mix up by faking the fully-charged overhead 5[B] and then cancelling into a low instead.
- Slightly slow for its range, limiting its neutral utility somewhat.
| Damage | Guard | Cancel | Property | Cost | Attribute |
|---|---|---|---|---|---|
| 750 | H | N, SP, CH, EX, MD, (J) | - | - | - |
| First Active | Active | Recovery | Overall | Advantage | Invul |
| 29 | 4 | 24 | 56 | -11 | Clash 16-28 |
Slower, charged version of the above.
- Hits overhead. One of Arc's primary ways to beat preemptive low shield during pressure.
- Quite slow. On reaction, can reliably be high shielded or even thrown at close range.
- Very long range, major forward movement.
- Gains clash frames halfway through the charge, protecting Arc from opponents' abare somewhat.
- Knocks the opponent into the air on hit; strong combo starter.
5C
| Damage | Guard | Cancel | Property | Cost | Attribute |
|---|---|---|---|---|---|
| 610 | LH | N, SP, CH, EX, MD, (J) | - | - | - |
| First Active | Active | Recovery | Overall | Advantage | Invul |
| 10 | 4 | 20 | 33 | -7 | - |
Palm thrust which moves Arc forward slightly.
- Useful blockstring and combo tool. Staple in hitconfirm strings.
- Can be partially charged by holding C for a short amount of time.
- Significantly increases the forward movement. Very useful for staying close during blockstrings.
- Delays the startup, creating a gap.
- Can be used for a partial charge mixup by going low, similarly to 5B, albeit lower reward and higher risk.
- Low-risk low-reward answer to low shield during pressure.
- Not terribly unsafe on block even when no-cancelled.
| Damage | Guard | Cancel | Property | Cost | Attribute |
|---|---|---|---|---|---|
| 2000 | U | - | - | - | - |
| First Active | Active | Recovery | Overall | Advantage | Invul |
| 35 | 4 | 29 | 67 | +15~+33 +21 |
Clash 20-34 |
Fully charged version of the above.
- Unblockable. Must be shielded high.
- High-risk medium-reward answer to low shield during pressure.
- Soft knockdown on hit. Cannot be cancelled or comboed out of.
- Very slow.
- Easily reactable with shield or even grab if the opponent is prepared for it.
- Long recovery leads to an even larger disadvantage than usual when shielded.
- Massive amount of clash frames.
- Helps somewhat against mashing, but opponents can reliably win the clash interaction with DP, jump shield, or Moon Drive.
- Huge range and forward movement. Can even catch many backdashes midscreen.
Crouching Normals
2A
| Damage | Guard | Cancel | Property | Cost | Attribute |
|---|---|---|---|---|---|
| 150 | L | - | - | - | - |
| First Active | Active | Recovery | Overall | Advantage | Invul |
| 5 | 2 | 11 | 17 | -1 | - |
- Standard crouching jab.
- Whiff cancel shield/jab available from frame 10.
- Much better pressure option than 5A because 2A hits low.
- Can cancel into itself for three total 2A's. Useful for hit-confirming and pressure.
2B
| Damage | Guard | Cancel | Property | Cost | Attribute |
|---|---|---|---|---|---|
| 420 | L | - | - | - | - |
| First Active | Active | Recovery | Overall | Advantage | Invul |
| 7 | 4 | 15 | 25 | -4 | - |
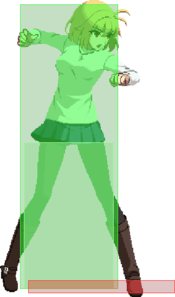
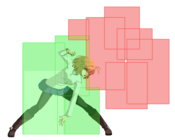
- Arc's general-purpose grounded poke.
- Fast B normal at 7 frames. Quick recovery and great conversions. Moves Arc forward slightly.
- Best antiair option when Arc is behind a falling opponent.
- Low profile hurtbox (from the knees down) lets 2B win against many other 7f buttons like Kouma/Miyako 2B and even 5F 2A's at some ranges. This lets Arc press at slight frame disadvantage vs many characters and makes her pressure stronger.
- Can still be whiff punished by opponent with excellent spacing
2C
| Damage | Guard | Cancel | Property | Cost | Attribute |
|---|---|---|---|---|---|
| 620 | L | - | - | - | - |
| First Active | Active | Recovery | Overall | Advantage | Invul |
| 10 | 3 | 21 | 33 | -7 | - |
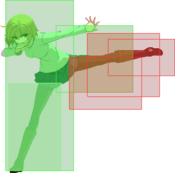
Large, far-reaching sweep.
- Hits low. Great for catching high shield or jump attempts during pressure.
- Large vertical range, quite unusual for a sweep.
- Catches most IADs, but only from a distance.
- Excellent untech time; extremely valuable combo tool.
- Large pushback on block and does not advance forward, unlike her other B/C normals.
- One of Arc's only ways to create enough distance for 214A to be plus during blockstrings.
- Not particularly fast for its range.
- Relatively short recovery for a C normal, but still decently whiff punishable.
Jumping Normals
j.A
| Damage | Guard | Cancel | Property | Cost | Attribute |
|---|---|---|---|---|---|
| 140 | H | - | - | - | - |
| First Active | Active | Recovery | Overall | Advantage | Invul |
| 5 | 4 | 11 | 19 | - | - |
- Standard, quick aerial jab.
- Possible to act in the air after recovery, making this a fairly low-commitment option.
- Low-angled hitbox, can hit standing opponents while rising.
- Can cancel into itself for three total jA's by inputting j4A. Blocked air-to-airs should usually lead to an air unblockable or ground pressure situation.
j.B
| Damage | Guard | Cancel | Property | Cost | Attribute |
|---|---|---|---|---|---|
| 240*2 (468) | H | - | - | - | - |
| First Active | Active | Recovery | Overall | Advantage | Invul |
| 6 | 2 (6) 4 | until landing | - | - | - |
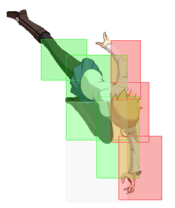
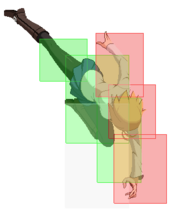
- Arc swings her arms around twice.
- Excellent air-to-air option with more horizontal range than both j.A and j.C. j.B is extremely fast at 6 frames!
- Very punishable on whiff due to the length of the two hits, but good reward on hit or block
- Fatal Counter on either hit leads to big grounded conversions
j.C
| Damage | Guard | Cancel | Property | Cost | Attribute |
|---|---|---|---|---|---|
| 560 | H | - | - | - | - |
| First Active | Active | Recovery | Overall | Advantage | Invul |
| 7 | 10 | until landing | - | - | - |
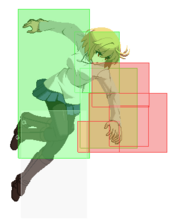
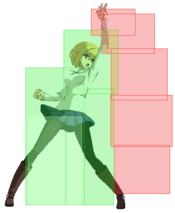
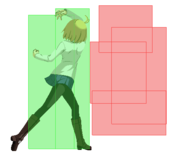
- Big disjointed air normal. An exceptional air-to-air and air-to-ground attack.
- Arc’s signature jump attack, comes out almost as fast as j.B and has absurdly long active frames.
- No clash frames but surprisingly large. Spacing Arc j.C out at the tip is crucial to the move's neutral utility.
Command Normals
4C
| Damage | Guard | Cancel | Property | Cost | Attribute |
|---|---|---|---|---|---|
| 500*2 (950) | LH | - | - | - | - |
| First Active | Active | Recovery | Overall | Advantage | Invul |
| 9 | 2 (3) 9 | 24 | 46 | -16 | - |
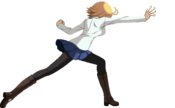
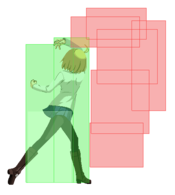
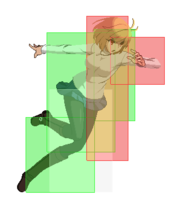
- Arc jumps forward with a flying knee. Puts Arc airborne while also floating the opponent on hit.
- First hit can be cancelled into ground specials, second hit can be cancelled into air specials.
- On hit only, 4C second hit cancels into air dash, double jump, or air normals. 4C air dash jC is an extremely useful combo route.
- Second hit is extremely punishable on block: care should be taken not to autopilot into 4C without properly confirming a hit. If 4C(2) is blocked, it must be cancelled to j.2BC or Moon Drive to avoid massive punishment. Neither of these are ideal.
j.2B
| Damage | Guard | Cancel | Property | Cost | Attribute |
|---|---|---|---|---|---|
| 600 | LHA | - | - | - | - |
| First Active | Active | Recovery | Overall | Advantage | Invul |
| 11 | 10 | until landing + 14 | - | -1 (TK) | - |
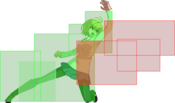
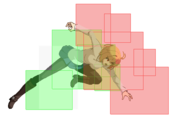
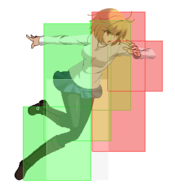
- A diveclaw that Arc downwards at a 45 degree angle.
- Not an overhead.
- Not active for very long.
- Reactively confirmable into 2BC, 236B, or 623A.
- Useful mobility option for landing in an unexpected location. Combined with universal Melty Blood air options and j2C, Arc has high control over when and where she chooses to land.
- Strong combo tool against airborne opponents. Typically cancelled into 214A or 214B and extended from there.
- Has landing recovery, but the landing recovery can be cancelled into special moves on hit or on block.
| Damage | Guard | Cancel | Property | Cost | Attribute |
|---|---|---|---|---|---|
| 820 | H | SP, EX, MD | - | - | - |
| First Active | Active | Recovery | Overall | Advantage | Invul |
| 24 | 10 | until landing + 14 | - | +1 (TK) | - |
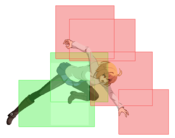
- Charged version of Arcueid's diveclaw.
- Becomes an overhead.
- One of Arc's only tools to convert an air combo into a ground combo. Also very valuable for ending combos in the corner.
- Can be plus on block if it hits very low, otherwise it's even or slightly minus.
j.2C
| Damage | Guard | Cancel | Property | Cost | Attribute |
|---|---|---|---|---|---|
| 400*2 (764) | LHA | - | - | - | - |
| First Active | Active | Recovery | Overall | Advantage | Invul |
| 7 | 3 (15) 3 | until landing + 6 | - | +1 (TK) | - |
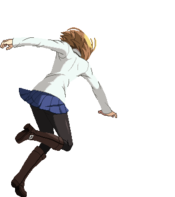
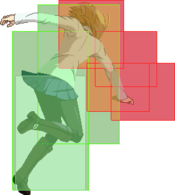
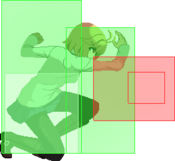
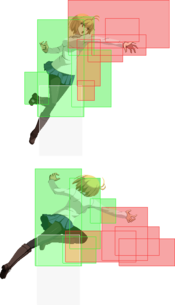
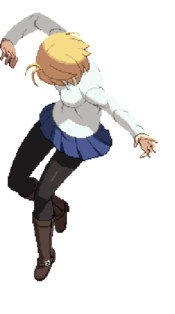
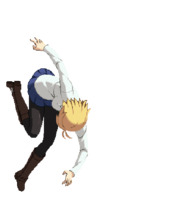
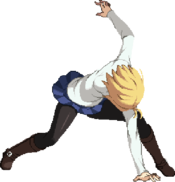
- Arc spins around before slamming the opponent to the ground.
- j.2C is both a combo tool to drag opponents down from high altitudes and a runaway mobility tool.
- Ground-bounces if done close to the ground. Generally only used in corner combos because the pushback midscreen is very limiting to combo routes.
- Maintains the air momentum that Arc had before j2C. Because of this, j2C can be used as a movement tool after a forward or backwards airdash to gain more distance. This can be very useful eg. in the Kouma matchup where its important to refuse to engage in certain gamestates. However, Arc is punishable until landing, so it can be very punishable on whiff.
Universal Mechanics
Rapid Beat 1
| Damage | Guard | Cancel | Property | Cost | Attribute |
|---|---|---|---|---|---|
| 400 | LH | SP, CH, EX, MD | - | - | - |
| First Active | Active | Recovery | Overall | Advantage | Invul |
| 9 | 3 | 23 | 34 | -10 | - |
- Good forward movement.
- Bad on both block and hit compared to other normals. Disadvantageous and only cancels into specials or Rapid Beat 2, which is still unsafe.
- Low damage makes it unappealing early in combos.
- Only useful at the end of long combos to avoid Same Move Proration. Good forward movement and high untech time makes Rapid Beat 1 a strong way to end combos with 5AA > 236BBB.
3C / Rapid Beat 2
| Damage | Guard | Cancel | Property | Cost | Attribute |
|---|---|---|---|---|---|
| 700 | LH | - | - | - | - |
| First Active | Active | Recovery | Overall | Advantage | Invul |
| 10 | 3 | 25 | 37 | -11 | Air 5-12 |
Standard universal launching attack with a short zoom-in/cinematic, followed by an automatic jump.
- Invulnerable to air attacks starting from frame 5. 3C can be used as a high-commit preemptive grounded anti-air.
- Can be jump cancelled or special cancelled on clash, which can allow Arc to punish the opponent or keep herself safe.
- Clashing with jump attacks leaves Arc at a slight frame advantage, often allowing jumpcancel airgrab or 22a to win.
- High recovery, susceptible to whiff punishes.
- Unsafe on block and cannot be reverse beaten; however, can still be special-cancelled.
- Rapid Beat version has significant forward movement.
Ground Throw
| Damage | Guard | Cancel | Property | Cost | Attribute |
|---|---|---|---|---|---|
| 1200 | - | - | - | - | - |
| First Active | Active | Recovery | Overall | Advantage | Invul |
| 4 (point blank) | 3 | 19 (whiff) | - | - | - |
Arc tosses the opponent away.
- Wall bounces in the corner, allowing for a combo.
- Combo conversions will vary depending on distance from corner.
- Can be air teched midscreen.
| Damage | Guard | Cancel | Property | Cost | Attribute |
|---|---|---|---|---|---|
| 1500 | - | - | - | - | - |
| First Active | Active | Recovery | Overall | Advantage | Invul |
| - | - | - | - | +44 | - |
Arc slams the opponent to the ground.
- Alternate throw, activated by pressing down during the throw animation.
- Gives a hard knockdown midscreen, unlike normal throw.
- Immediate empty forward jump is +5 on landing, which enables 2A Shield OS
- Delayed forward jump jC can safe jump reversals.
Air Throw
| Damage | Guard | Cancel | Property | Cost | Attribute |
|---|---|---|---|---|---|
| 1200 | - | - | - | - | - |
| First Active | Active | Recovery | Overall | Advantage | Invul |
| 1 | 3 | until landing + 12 | - | +37 (jump), +19 (land) | - |
- Dunks the opponent right in front of you. Arc gets decent pressure off her air throw regardless of air actions remaining.
- Jump cancelable from frame 43 after touching the ground.
- No cancel: ~+19
- Airthrow doublejump > land: +3 on landing
- Airthrow > perfect IAD jC(whiff): ~+8 on landing
- Midscreen, Arc gets ambiguous left-right oki via forward drift from delayed neutral double-jump. With proper timing it is possible to cross up and still be plus.
- After a (super) double-jump in the corner, it's possible to safejump 6f or slower DPs via an extremely precise airdash timing.
- High airdash falling jC in the corner will automatically bait all meterless reversals in the game and many metered reversals. Exceptions include Ciel 22C and 236C.
- Air throw > super jump in the corner is not a safejump, but offers a double overhead vs. empty land low/throw mixup, as well as various other options such as delay airdash to deal with whatever the opponent chooses to do on wakeup.
Special Moves
Out Of My Way!
| Damage | Guard | Cancel | Property | Cost | Attribute |
|---|---|---|---|---|---|
| 500*2 (945) | LH | - | - | - | - |
| First Active | Active | Recovery | Overall | Advantage | Invul |
| 13 | 5 | 21 | 38 | -4 | - |
| Damage | Guard | Cancel | Property | Cost | Attribute |
|---|---|---|---|---|---|
| 500*2 (945) | LH | - | - | - | - |
| First Active | Active | Recovery | Overall | Advantage | Invul |
| 10 | 5 | 24 | 38 | -7 | - |
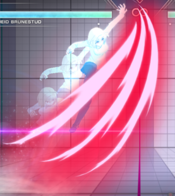
Rekka series starter. Fairly long ranged forward-moving claw swipe.
- A version has slower startup, but better frame advantage on block
- Safety on block and the threat of followups make it a potent pressure option
- B version has faster startup, but worse frame advantage on block
- Very fast for its range, making it useful in neutral or as a long-reaching abare option
- 236BBB is used in all of Arc's most common metered combo enders
- Long recovery on whiff, but long cancel window
- Moon Drive cancellable on whiff to keep safe if necessary (as are all the followups)
| Damage | Guard | Cancel | Property | Cost | Attribute |
|---|---|---|---|---|---|
| 1200 | LH | - | - | - | - |
| First Active | Active | Recovery | Overall | Advantage | Invul |
| 23 | 4 | 13 | 39 | +6 | - |
Slower claw swipe with no forward movement.
- Advantageous on block and pulls the opponent in, making 236[A] a powerful tool for pressure resets
- +6 on block means 236[A] > 2A is a gapless blockstring
- Cancelling into 236[A] from C normals leaves a 7f gap, which can be hard to challenge without shield because of spacing
- Leads to combo on hit or trade, further increasing the risk of contesting
- Excellent combo tool due to the vacuum and high damage
| Damage | Guard | Cancel | Property | Cost | Attribute |
|---|---|---|---|---|---|
| 450*2 (855) | LH | MD, EX | - | - | - |
| First Active | Active | Recovery | Overall | Advantage | Invul |
| 12 | 5 | 26 | 42 | -9 | - |
| Damage | Guard | Cancel | Property | Cost | Attribute |
|---|---|---|---|---|---|
| 450*2 (855) | LH | CH, EX+ | - | - | - |
| First Active | Active | Recovery | Overall | Advantage | Invul |
| 12 | 4 | 26 | 41 | -8 | - |
Second rekka, only available as a follow-up to 236A/236B
- Worse on block than the first hit, can be punishable at some spacings if not cancelled
- Immediate timing is gapless from 236X, but can be delayed to leave very small gaps for anti-mash and anti-jump
- Can be used to beat attempts to punish whiffed 236X
- ~X version is a bit longer, but doesn't lead to a combo
- Connects from long ranged 236X, where 236X~4X doesn't
- Long reach makes it better suited to catching opponents from a distance in neutral
- ~4X version is a bit shorter, however launches the opponent for a full combo on hit
- High vertical hitbox, can anti-air when opponents jump over 236X
- Less forward movement than 236X~X and slightly better frame advantage, allowing for more ability to maintain safe spacing during rekka pressure
| Damage | Guard | Cancel | Property | Cost | Attribute |
|---|---|---|---|---|---|
| 1300 | L | MD, EX | - | - | - |
| First Active | Active | Recovery | Overall | Advantage | Invul |
| 12 | 3 | 25 | 39 | -11 | - |
Rekka series ender. Hits low.
- Can be delayed to catch attempts to mash or jump out after rekka 2 or to hit at the same time as the overhead ender 236XX4X, creating a mixup which can't be fuzzy blocked
- At earlier timings, can catch people for attempting to input reversals after rekka 2
- Unsafe on block, but can be made safe on block or converted on hit with Moon Drive cancel or 214C. 236XXX should always be canceled whether on hit or block
| Damage | Guard | Cancel | Property | Cost | Attribute |
|---|---|---|---|---|---|
| 1200 | H | - | - | - | - |
| First Active | Active | Recovery | Overall | Advantage | Invul |
| 25 | 3 | 23 | 50 | -9 | - |
Rekka series ender #2. Hits overhead.
- Reactable, although the animation can be difficult to see
- Has a 5 frame gap from earliest cancel, beating all mash or jump attempts. Will lose to invincible attacks unless used in conjunction with Moon Drive.
- Unsafe on block, but can be made safe on block or converted on hit with Moon Drive cancel or 214C. 236XX4X should always be canceled whether on hit or block
| Damage | Guard | Cancel | Property | Cost | Attribute |
|---|---|---|---|---|---|
| 320*11 (2568) | LH | MD | - | 100% | - |
| First Active | Active | Recovery | Overall | Advantage | Invul |
| 4+7 | 60 (total) | 36 | 106 | -12 | 1-4 Throw |
Arc does all three rekkas for a good chunk of damage
- Punishable on block
- Gives a lot of corner carry, but doesn't knock down after long combos
- Arc's only super that can cancel into Arc Drive, commonly used in Heat for this reason
| Damage | Guard | Cancel | Property | Cost | Attribute |
|---|---|---|---|---|---|
| 650*3 (1702) | LH, LH, L | EX, MD | - | - | - |
| First Active | Active | Recovery | Overall | Advantage | Invul |
| 12 | 5(4)6(3)3 | 22 | 54 | -2 | Clash 1-10 (MD) |
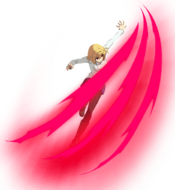
Arc slashes three times, similarly to 236BBB.
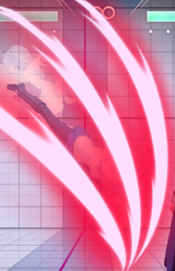
- Phenomenal combination of speed and range. First hit is slightly longer than 236B.
- Air unblockable, and second hit has a good antiair hitbox.
- Safe on block and often leaves Arc at a somewhat favourable spacing.
- Gives a strong combo on hit.
- Very disjointed, which is actually relevant as Moon Skills do not hitbox clash with most attacks.
- Has clash frames throughout all of startup during Moon Drive.
- The third hit is a low.
What're You Doing?!
| Damage | Guard | Cancel | Property | Cost | Attribute |
|---|---|---|---|---|---|
| 1100 | L | EX, MD | - | - | - |
| First Active | Active | Recovery | Overall | Advantage | Invul |
| 11 | 5 | 16 | 31 | -4 | - |
- Hits once. A downwards swiping claw attack which is mainly used as combo filler.
- Long range safe on block low. Leads to a combo on hit.
- 623AA is one of Arcueids highest damage combo modules.
| Damage | Guard | Cancel | Property | Cost | Attribute |
|---|---|---|---|---|---|
| 480*3 (1309) | LH | EX, MD | - | - | - |
| First Active | Active | Recovery | Overall | Advantage | Invul |
| 20 | 12 | 23 | 54 | +2 | - |
- Hits thrice.
- Looks like a low, is not a low.
- This move is a staple in Arcs pressure game. Keep in mind while it is +2, you are not in throw/A normal range. 5B will catch jump outs, and 2B will beat or clash with mashing(and Vlov jumping), 5A will beat mashing clean.
| Damage | Guard | Cancel | Property | Cost | Attribute |
|---|---|---|---|---|---|
| 1200 | LH | - | - | - | - |
| First Active | Active | Recovery | Overall | Advantage | Invul |
| 11 | 3 | 20 | 37 | -4 | - |
- Combo extender. A follow-up attack that wall bounces in the corner.
- Can be jump canceled on hit unless you jump canceled earlier in combo.
- Moves forward a lot when delayed from 623A/623B, which is useful in some midscreen-to-corner combos.
- Safe on block, and can be delayed in order to frametrap.
| Damage | Guard | Cancel | Property | Cost | Attribute |
|---|---|---|---|---|---|
| 270*8 (1855) | LH | MD | - | 100% | - |
| First Active | Active | Recovery | Overall | Advantage | Invul |
| 4+8 | 14 (15) 2 | 22 | 64 | -7 | 1-4 Throw |
- Downwards swiping claw attack followed by a launcher with automatic jump cancel.
- Used to extend certain hits into longer combos with air throw ender. Great use of meter from special moves like 214A, 236BB, and 236BBB.
- If launch was already used in combo, 623C will knock down instead of launching.
| Damage | Guard | Cancel | Property | Cost | Attribute |
|---|---|---|---|---|---|
| 1200 | HA | EX, MD | - | - | - |
| First Active | Active | Recovery | Overall | Advantage | Invul |
| 27 | 4 | 16 | 46 | -3 | Clash 1-10 (MD) |
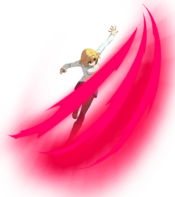
Arc hops forward and dives down at the opponent with an attack resembling j.2B.
- A fairly slow and reactable overhead with respectable range.
- Can be used to call out low shield attempts, especially when 5[B] or 5[C] are not available.
- Avoids low hitting moves and throws from early in the animation.
- Safe on block, but can be high shielded on reaction for a guaranteed punish.
- Gains clash frames in Moon Drive, but they end far before the attack comes out, allowing you to easily get fatal countered instead.
Ready, Go!
| Damage | Guard | Cancel | Property | Cost | Attribute |
|---|---|---|---|---|---|
| 1200 | LH | EX, MD | - | - | - |
| First Active | Active | Recovery | Overall | Advantage | Invul |
| 16 | 5 | 14 | 34 | -2 ~ +2 | - |
- Dashing elbow thrust that is safe on block.
- Advantageous on block when spaced far enough.
- Good combo filler tool. Has tons of untech time, letting Arc link after it even very late.
- Looks extremely similar to 214B. Opponents that anticipate 214B and shield or reversal between hits can be baited with 214A instead.
| Damage | Guard | Cancel | Property | Cost | Attribute |
|---|---|---|---|---|---|
| 700, 850 (1422) | LH | MD, EX | - | - | - |
| First Active | Active | Recovery | Overall | Advantage | Invul |
| 16 | 8 | 24 (whiff) | 47 (whiff) | +3 (air), +7 (ground) | - |
- Dashing elbow thrust followed by a palm strike.
- Knocks opponents into the air on block, allowing them to act before landing.
- Possible to escape via doublejumping out, but Arc can cover this (e.g. with 3c).
- The second hit wall-bounces, has excellent corner carry, and has high untechable time, making 214B an excellent combo filler tool. Can be used at the end of a combo to set up Heat safely.
- 214B is plus on block and has a tiny gap between the two hits which also makes it a great knowledge check. Opponents that anticipate 214A can get hit trying to act between hits.
- However, be careful of shield and invincible attacks against aware opponents.
| Damage | Guard | Cancel | Property | Cost | Attribute |
|---|---|---|---|---|---|
| 1200, 320*2, 576 (2384) | LH | MD, EX | - | 100% | - |
| First Active | Active | Recovery | Overall | Advantage | Invul |
| 4+4 | 8 | 22 | 37 | -6(air), -1(ground) | 1-4 Throw |
- Dashing elbow thrust which converts into an automatic combo sequence on hit.
- An excellent utility super. -1 on block up close, but puts Arc at an excellent range to 2B.
- Knocks opponents into the air on block, like 214B. Unlike 214B, it's often not that easy to keep them from jumping away.
- Punishable on block in the corner against some specific characters (e.g Warc).
- Crosses the screen incredibly fast. Useful for punishing certain moves from a distance.
- Strong reactive cancel option vs people backdashing 214B and 236 series.
- All of Arc's specials besides 22B cancel without gaps into 214C, making them just -1 on block at the cost of 1 Magic Cicuit.
- Always knocks down, and leads to strong left/right or safejump okizeme.
- 214C > perfect IAD > fastest timing neutral jump > land leaves Arcueid at +4 and crosses up. Arc can drift back towards her original direction to fake the crossup.
- At +4, 6 frame DPs can be OSed via 2A 2AD with perfect timing.
| Damage | Guard | Cancel | Property | Cost | Attribute |
|---|---|---|---|---|---|
| 1352 | LH | EX, MD | - | - | - |
| First Active | Active | Recovery | Overall | Advantage | Invul |
| 15 | 8 | 13 | 35 | -4 ~ +3 | Clash 1-11 (MD) |
An elbow thrust followed by an automatic launch on hit.
- Fast and very long-ranged. Fantastic gap-closing tool.
- Air-unblockable, with a decently tall hitbox.
- Advantageous on block at long range (up to +3), allowing you to immediately turn a long-distance neutral situation into a pressure opportunity.
- Leads to a full combo on hit with j.2BC(1) j.2[B], although the moon cost is substantial.
- Gains clash frames during Moon Drive, but they end before the attack hits, making it less safe than 6BC or 2BC.
- Slightly minus up close, being throw-punishable at worst.
Shut Up and Fly!
| Damage | Guard | Cancel | Property | Cost | Attribute |
|---|---|---|---|---|---|
| 550*2 (1039) | LH | (MD) | - | - | - |
| First Active | Active | Recovery | Overall | Advantage | Invul |
| 6 | 2(1)7 | 27 | 42 | -15 | - |
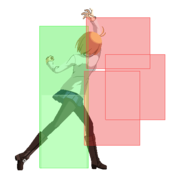
- Upwards angled attack with no invincibility but high outward lingering hitbox.
- First hit can be canceled into 236C or 236AB.
- Combo filler used when Arc is significantly below an opponent early in midscreen combos. 22A~X can extend certain corner juggles due to the wallbounce.
- Can be used in neutral as a more reliable anti-air than 3C, but the input and slow startup on the later hits makes this awkward.
| Damage | Guard | Cancel | Property | Cost | Attribute |
|---|---|---|---|---|---|
| 350*4 (1235) | LH | (MD) | - | - | - |
| First Active | Active | Recovery | Overall | Advantage | Invul |
| 6 | 3(1)7 | 42 | 58 | -26 | All 1-13 |
- Fully invincible reversal. Has an unfortunate dead spot directly above Arc, making this a weak anti-air against opponents with strong forward momentum.
- Can be moon drive canceled on hit only into a combo that leads to a knockdown.
- Can lead to a full combo in the corner with 22B~X wallbounce, but opponents will rarely pressure from the corner, so this situation is rather rare.
- Due to the 22 special move command, the opponent cannot cross up Arc to reverse her inputs, which makes 22B particularly strong against ambiguous left/right setups.
| Damage | Guard | Cancel | Property | Cost | Attribute |
|---|---|---|---|---|---|
| 1000 | LHA | - | - | - | - |
| First Active | Active | Recovery | Overall | Advantage | Invul |
| 12 | 5 | until landing + 12 | - | -4 (best) | - |
- Wallbounces in the corner to extend combo.
- Opponent can air tech midscreen.
- Can be used to set up safe heat activation midscreen.
| Damage | Guard | Cancel | Property | Cost | Attribute |
|---|---|---|---|---|---|
| 1800 | LHA | - | - | 100% | - |
| First Active | Active | Recovery | Overall | Advantage | Invul |
| 4+8 | 2 | until landing + 12 | - | -9 (best) | - |
- EX followup.
- Knocks down if done in very short combos. 22B~66C only knocks down if at least one hit of 22B whiffs.
- Deals more damage than the meterless follow-up, but almost never sees use. Meter is more efficiently spent ending combos 236C, 214C, or 236BC than extending with 22X~66C
| Damage | Guard | Cancel | Property | Cost | Attribute |
|---|---|---|---|---|---|
| 300*8 (1998) | LH | (MD) | - | 100% | - |
| First Active | Active | Recovery | Overall | Advantage | Invul |
| 4+1 | 37 (total) | 40 | 81 | -44 | All 1-15 |
- Fully invincible and exceptionally fast reversal
- One frame faster than 22B, which lets 22C beat certain safe jump setups that win against 22B.
- Loses to bait setups that involve hovering above Arc, just like 22B.
- Leads to a full combo on Fatal Counter against airborne opponents.
- On hit, leads into an air tech situation.
- Poor range and is several times more unsafe than 22B. If 22C hits at an awkward angle, the second swipe will whiff, leaving Arc at the mercy of the enemy. The opponent can tech and get a character specific punish on hit.
| Damage | Guard | Cancel | Property | Cost | Attribute |
|---|---|---|---|---|---|
| 470*3 (1282) | LHA | J, EX, MD | - | - | - |
| First Active | Active | Recovery | Overall | Advantage | Invul |
| 7 | 2(1)8 | - | - | - | Clash 1-5 (MD) |
Rising slash, like her 22X moves.
- Jump-cancellable on hit, block, or whiff, making it fairly low-risk. The jump-cancel window begins much earlier on hit.
- Covers a lot of air space, but can be air blocked.
- Being a moon skill, never clashes with air normals (including j.[C]s). Very useful property for an anti-air move.
- Can lead to a strong grounded combo with j.2[B] or a falling j.B(1), but can sometimes be quite difficult to convert depending on the height and spacing.
- Notably, 2BC is the most reliable way to combo from j.2B.
- Gains clash frames throughout all of startup during Moon Drive. Arc's primary defensive Moon Skill.
- Very difficult for opponents to successfully jump-cancel shield, given its 6f startup during Moon Drive.
- Moon Drive's additional air options improve the situation after jump cancelling on block/whiff.
- When shielded, the opponent has enough time to drop shield and get a major punish.
Shut Up and Fly! (air)
| Damage | Guard | Cancel | Property | Cost | Attribute |
|---|---|---|---|---|---|
| 400*3 (1104) | LHA | MD, EX | - | - | - |
| First Active | Active | Recovery | Overall | Advantage | Invul |
| 6 | 12 | - | - | - | - |
- Not a reversal.
- Combo filler. Leads into j22A~X or j22C
- Can lead to an airtight double overhead mixup when Moon Drive cancelled at a low height (e.g. from 4C)
| Damage | Guard | Cancel | Property | Cost | Attribute |
|---|---|---|---|---|---|
| 360*4 (1270) | LHA | MD, EX | - | - | - |
| First Active | Active | Recovery | Overall | Advantage | Invul |
| 7 | 12 | - | - | - | - |
- Not a reversal. Possesses no invincibility, unlike the grounded version.
- Combo filler. j22B is rarely used over the faster j22A due to lower damage per hit and the inability to cancel j22B to j22B~X until the second hit of j22B.
| Damage | Guard | Cancel | Property | Cost | Attribute |
|---|---|---|---|---|---|
| 1000 | LHA | - | - | - | - |
| First Active | Active | Recovery | Overall | Advantage | Invul |
| 12 | 5 | until landing + 12 | - | - | - |
- Wallbounces in the corner.
- Opponent can air tech midscreen. Can combo to j22C midscreen.
- Mainly used as combo filler in the corner, where aerial j.22A~X is a versatile combo tool.
| Damage | Guard | Cancel | Property | Cost | Attribute |
|---|---|---|---|---|---|
| 1800 | LHA | - | - | 100% | - |
| First Active | Active | Recovery | Overall | Advantage | Invul |
| 4+8 | 2 | until landing + 12 | - | - | 1-4 Throw |
- EX followup. Combo filler, but rarely used. 623C, 236C, and 214C are all better uses of meter.
| Damage | Guard | Cancel | Property | Cost | Attribute |
|---|---|---|---|---|---|
| 270*9 (1968) | LHA | MD | - | 100% | - |
| First Active | Active | Recovery | Overall | Advantage | Invul |
| 4+3 | - | - | - | - | 1-4 Throw |
- Not a reversal.
- Can be used to end air combos with additional damage in exchange for the air throw knockdown.
- Typically only used to close out rounds or to end some midscreen combos.
| Damage | Guard | Cancel | Property | Cost | Attribute |
|---|---|---|---|---|---|
| 350*4 (1252) | LHA | J, EX, MD | - | - | - |
| First Active | Active | Recovery | Overall | Advantage | Invul |
| 7 | 12 | - | - | - | - |
Rising claw swipe, very similar to the grounded version.
- Extremely useful to convert air hits or launcher starters into grounded combos via jump cancel > j.2[B]. Must have a double jump available.
- Can be fairly inconsistent depending on height and distance. Typically most reliable when jump cancelled after only the first hit.
- Cancels from j.B and j.C to j.2BC can be delayed quite long to hit-confirm because j.2BC is so fast.
- If too high for j.2[B] or an easier combo is preferred, delaying the jump cancel allows j.B j.C airthrow to land consistently. Immediate jump cancel will put Arc too high for a full conversion.
- Jump cancellable on hit, block, or whiff, like the grounded version.
- No clash frames during Moon Drive, like all airborne Moon Skills.
Super Moves
Melty Blood
| Damage | Guard | Cancel | Property | Cost | Attribute |
|---|---|---|---|---|---|
| 3500 | LH | - | - | - | - |
| First Active | Active | Recovery | Overall | Advantage | Invul |
| 1+11 | 5 | 47 | 63 | -35 | All 1-16 |
- Arc's super is a full-screen fast homing projectile, which makes it her only unique option to directly contest zoners.
- Excellent flexible combo tool with good frame advantage on hit to set up oki. All Heat combos can end in 236BC unless the opponent starts high in the air.
- Air unblockable, but not air un-Shieldable.
- Long invulnerability frames that start from frame 1, so can be used reactively vs many fullscreen projectiles. Especially useful in the Vlov/Red Arc/Ciel matchups; the opponent risks eating a lethal super anywhere on the screen when Arc has 3 Magic Circuit available. A terrifying option at low health, but be warned: the opponent can Moon Drive cancel their special attacks on reaction and Shield 236BC.
Marble Phantasm - Seal
| Damage | Guard | Cancel | Property | Cost | Attribute |
|---|---|---|---|---|---|
| 4800 [4800 ~ 6960 in BH] | LH | - | - | - | - |
| First Active | Active | Recovery | Overall | Advantage | Invul |
| 1+21 | 4 | 27 | 52 | -14 | All 1-25 |
- Similar startup animation to 5C.
- Almost no practical utility. Can combo from 214B in the corner if 214B hits high enough early in the combo.
Reverse Beats
| Attack | Chain | Advantage |
|---|---|---|
| 5B/2B | 5A/2A | -3 |
| 5C/2C | 5A/2A | -1 |
| Attack | Chain | Frame Gap |
|---|---|---|
Customization
Palette options
Arcueid Brunestud Wiki Roadmap
| 0% complete | |
|
|
| Page | Completed | To-do | Score |
|---|---|---|---|
| 0/25 | |||
| Strategy | 0/25 | ||
| Combos | 0/25 | ||
| Matchups | 0/25 |
