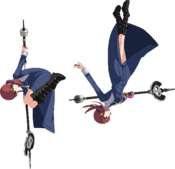
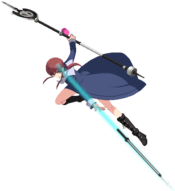
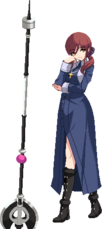
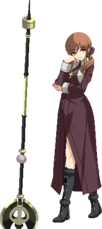
Melty Blood/MBTL/Noel: Difference between revisions
Spacemurine (talk | contribs) (updates and polish for 1.31) |
|||
| Line 10: | Line 10: | ||
'''Noel''' is a footsie rushdown character who relies on far pokes and huge sweeping attacks to get at the opponent. | '''Noel''' is a footsie rushdown character who relies on far pokes and huge sweeping attacks to get at the opponent. | ||
A new character from the remake of ''Tsukihime''. She is a simple character to play with, easily punishing opponent's mistakes in mid-range and converting into combos with her far-reaching and disjointed B/C normal attacks in addition to her sweeping ''Heavy Punishment'' (623X) leaping special move. If the opponent thinks they can just play patiently in neutral, she can pile on the pressure using follow-ups from ''Heavy Thrust'' (214X) and hidden ''Black Key'' (236X) projectiles | A new character from the remake of ''Tsukihime''. She is a simple character to play with, easily punishing opponent's mistakes in mid-range and converting into combos with her far-reaching and disjointed B/C normal attacks in addition to her sweeping ''Heavy Punishment'' (623X) leaping special move. If the opponent thinks they can just play patiently in neutral, she can pile on the pressure using follow-ups from ''Heavy Thrust'' (214X) and hidden ''Black Key'' (236X) projectiles with lots of frame advantage. | ||
These big normals come with big recovery, though - and while her Black Keys are strong, when they're gone, they're gone. (Until the next round, anyway). | |||
If you learn the frame data and effective use of [[Melty_Blood/MBTL/Offense#Reverse_Beat|Reverse Beat]], Noel can go far. | If you learn the frame data and effective use of [[Melty_Blood/MBTL/Offense#Reverse_Beat|Reverse Beat]], Noel can go far. | ||
| Line 75: | Line 75: | ||
|content3= | |content3= | ||
{{Content Box|header=Quick combo reference|content= | {{Content Box|header=Quick combo reference|content= | ||
Midscreen: | |||
2A 2B 2C 5C 214BB 214AA (236C/214C) | |||
''Can replace [2A 2B] with basically anything'' | |||
2B 2C 5C 623B 5B 214BB 214AA (236C/214C) | |||
''B or C starter route'' | |||
Corner: | |||
~2A 2C 6C 623B 5B 214BB 2B Rapid Beat 214A (236C/214C) | |||
''Can replace [2A 2B] with basically anything'' | |||
~2B 2C 6C 623B 5B 214BB 2B Rapid Beat 214AA (236C/214C) | |||
''B or C starter route'' | |||
}} | }} | ||
}} | }} | ||
| Line 108: | Line 124: | ||
| info = | | info = | ||
{{AttackDataCargo-MBTL/Query|no_5b}} | {{AttackDataCargo-MBTL/Query|no_5b}} | ||
* | * Decent vertical reach. | ||
Noel does an upwards kick. | Noel does an upwards kick. Useful combo tool, especially to stabilise air hits into follow-ups. 5B also makes for a good run-up button as it's not nearly as committal as 5C or 2C while also having a good upwards hitbox to potentially catch jumping opponents. | ||
}} | }} | ||
| Line 122: | Line 138: | ||
{{AttackDataCargo-MBTL/Query|no_5c}} | {{AttackDataCargo-MBTL/Query|no_5c}} | ||
* Vacuums opponents closer to Noel. | * Vacuums opponents closer to Noel. | ||
Very strong pressure tool in blockstrings, thanks to the vacuum. | |||
Really shines when used during pressure, for catching landings or as a whiff punish. The vacuum properties make it good for stabilizing combos and adjusting the opponent's position in blockstrings. It's only -1 on rebeat too, so you can ambiguously reset pressure while reeling them in. | |||
Keep in mind that this button hits low to the ground, so it can whiff against jumps, IADs, and low crushing moves. Has lots of recovery on whiff, so you need to be very sure that your opponent won't be in the air before you use this. | |||
}} | }} | ||
| Line 137: | Line 155: | ||
* 0 on block. | * 0 on block. | ||
* Whiff cancels available from frame 10 onwards (frame 10 is the first frame of the whiff cancelled move). | * Whiff cancels available from frame 10 onwards (frame 10 is the first frame of the whiff cancelled move). | ||
Amazing 2A with great range and frame advantage. Part of what makes her throw game so scary, | Amazing 2A with great range and frame advantage. Part of what makes her throw game so scary. It's neutral on block, so it's great for resetting pressure or frametrapping with a staggered button. | ||
}} | }} | ||
| Line 152: | Line 170: | ||
* Hits twice. | * Hits twice. | ||
* First hit is a mid, second hit is a low. | * First hit is a mid, second hit is a low. | ||
Big, two-hitting normal. The first hit is bigger vertically, and the second is bigger horizontally and scoots Noel slightly forwards. The first hit is a decent anti-air due to the angle it hits at, | Big, two-hitting normal. The first hit is bigger vertically, and the second is bigger horizontally and scoots Noel slightly forwards. The first hit is a decent anti-air due to the angle it hits at, especially good at hitting IADs. The second hit usually won't hit airborne opponents at all, so it's still a bit risky. | ||
The second hit has the longest range of all Noel's normals. At max range, 214X is needed to convert a hit into a combo. | |||
}} | }} | ||
| Line 165: | Line 184: | ||
{{AttackDataCargo-MBTL/Query|no_2c}} | {{AttackDataCargo-MBTL/Query|no_2c}} | ||
* Half-screen low sweep. | * Half-screen low sweep. | ||
One frame faster than 5C, but doesn't vacuum. Good for pushing opponents away from you or making Black Key throws more advantageous via spacing. Makes for a good dash-under anti-air thanks to its reach. Keep in mind that it hits very low to the ground, making it very vulnerable to jumps, IADs, and low crushing moves. Be very sure that your opponent won't be in the air before pressing this. | |||
}} | }} | ||
| Line 179: | Line 198: | ||
{{AttackDataCargo-MBTL/Query|no_ja}} | {{AttackDataCargo-MBTL/Query|no_ja}} | ||
* Excellent rising air-to-air for opponents right above you. | * Excellent rising air-to-air for opponents right above you. | ||
* Recovers in mid-air if used rising, allowing Noel to use other air actions (including other air normals) while falling. | * Recovers in mid-air if used rising, allowing Noel to use other air actions (including other air normals) while falling. it can also be whiff cancelled into a jump or special. | ||
If you're in the air and moving forwards, you're | If you're in the air and moving forwards, you're probably pressing this. Has very good range for a j.A, but still comes out at 5 frames. | ||
You often don't get much more than an airthrow on normal air hit, but on Fatal Counter you can land and pick up into a full combo. | |||
}} | }} | ||
| Line 194: | Line 214: | ||
* Air-to-air for opponents more in front of you. | * Air-to-air for opponents more in front of you. | ||
* Does not recover until landing, unlike j.A. | * Does not recover until landing, unlike j.A. | ||
Extends slightly behind Noel, so it can hit opponents behind you. It's mostly useful as air combo filler. | |||
}} | }} | ||
| Line 209: | Line 229: | ||
* Excellent retreating normal, covers tons of space. | * Excellent retreating normal, covers tons of space. | ||
* Hits very high above Noel, making IAD jC great at catching jump-outs in the corner. | * Hits very high above Noel, making IAD jC great at catching jump-outs in the corner. | ||
j.C is a little slow, but it's good as a jump-in or to generally cover space. It's also your go-to button for IAD pressure resets or safejumps. | |||
{{AttackDataCargo-MBTL/Query|no_j[c]}} | {{AttackDataCargo-MBTL/Query|no_j[c]}} | ||
* Jump-in and situational combo tool. | * Jump-in, clash tool and situational combo tool. | ||
Noel | Noel's j[C] doesn't have a ton of clash frames, but it's still pretty good for air exchanges or aggressive jump-ins. | ||
Useful combo filler for some high-damage routes too. | |||
}} | }} | ||
| Line 226: | Line 247: | ||
{{AttackDataCargo-MBTL/Query|no_3c}} | {{AttackDataCargo-MBTL/Query|no_3c}} | ||
* Enters a cinematic and automatically jump-cancels on hit. | * Enters a cinematic and automatically jump-cancels on hit. | ||
Noel's anti-air and launcher. | Noel's anti-air and launcher. Quicker and less committal than 623A or B, but usually clashes with air normals, so you need to be ready to cancel off the clash. | ||
}} | }} | ||
| Line 240: | Line 261: | ||
* Wallbounces on hit. | * Wallbounces on hit. | ||
* Corner combo filler. | * Corner combo filler. | ||
Good gap closer during offense. | Good gap closer and hitconfirm tool during offense, especially in the corner. Black Keys thrown afterwards are often difficult to challenge, letting you reset pressure with lots of frame advantage to work with. | ||
The wallbounce makes it easy to confirm any hit into a high-damage combo too. | |||
}} | }} | ||
| Line 255: | Line 277: | ||
{{AttackDataCargo-MBTL/Query|no_rapid2}} | {{AttackDataCargo-MBTL/Query|no_rapid2}} | ||
* 1st hit ground bounces, 2nd hit sends outwards. | * 1st hit ground bounces, 2nd hit sends outwards. | ||
Two-hit forward-moving Rapid Beat and a | * Cancellable only into special moves or Rapid Beat 3. | ||
Two-hit forward-moving Rapid Beat and a useful part of Noel's combo game. Guaranteed ground bounce that brings opponents into either 3C or 214B range from any height. Like all Rapid Beat 2s, scales combo damage hard, so avoid using early in a combo unless it is the only way to stabilize the combo. Especially useful towards the end of a route, when the proration doesn't matter so much. | |||
Can also be used as an advancing move in pressure, but 6C is generally a better option there. | |||
}} | }} | ||
| Line 268: | Line 292: | ||
{{AttackDataCargo-MBTL/Query|no_rapid3}} | {{AttackDataCargo-MBTL/Query|no_rapid3}} | ||
* Same animation as 3C | * Same animation as 3C | ||
* Special cancellable only on block - performs cinematic launch on hit. | |||
Pretty much just the same as 3C, except at the end of a Rapid Beat chain. Only really useful if you want/need to end a combo with airthrow. | |||
}} | }} | ||
| Line 279: | Line 305: | ||
| info = | | info = | ||
{{AttackDataCargo-MBTL/Query|no_throw}} | {{AttackDataCargo-MBTL/Query|no_throw}} | ||
* Sets up a safejump anywhere with | * Sets up a safejump anywhere with neutral jump j.C. | ||
Noel's throw game is better than average thanks to her incredible A normals. 5C > 5Aw is another excellent way to get opponents in throw range, but the star of the show is her 0 on block 2A. | Noel's throw game is better than average thanks to her incredible A normals. 5C > 5Aw is another excellent way to get opponents in throw range, but the star of the show is her 0 on block 2A. | ||
}} | }} | ||
| Line 293: | Line 319: | ||
{{AttackDataCargo-MBTL/Query|no_airthrow}} | {{AttackDataCargo-MBTL/Query|no_airthrow}} | ||
* Universal air combo ender. | * Universal air combo ender. | ||
Noel's airthrow leaves her fairly close to her opponent. From there it's easy enough to set up a simple 5A meaty, or do something fancy like IAD j.236A to switch sides (though it won't hit crossup) | |||
Generally, Noel will want to use metered enders over airthrow where possible though. | |||
}} | }} | ||
| Line 311: | Line 338: | ||
* Uses one Black Key. | * Uses one Black Key. | ||
* Bracketed advantage is advantage if dash cancelled. Advantage listed assumes point-blank range. | * Bracketed advantage is advantage if dash cancelled. Advantage listed assumes point-blank range. | ||
Noel steps back and throws a key. | Noel steps back and throws a key. Rarely a true blockstring off any normal, but is very plus on block and useful for pressure resets. The backwards movement often allows Noel to avoid mashed buttons entirely, netting her a full punish. If spaced at C normal range, dash cancelling this is more than +5 (5A is gapless), and at the same spacing without the dash cancel, it is advantageous enough to be safe against shield > B+C followup. | ||
''Note: for every version of this move, the Key counter is incremented very early in startup. If you get counterhit, the Key is counted as used.'' | ''Note: for every version of this move, the Key counter is incremented very early in startup. If you get counterhit, the Key is counted as used.'' | ||
| Line 318: | Line 345: | ||
* Uses one Black Key. | * Uses one Black Key. | ||
* Bracketed advantage is advantage if dash cancelled. Advantage listed assumes point-blank range. | * Bracketed advantage is advantage if dash cancelled. Advantage listed assumes point-blank range. | ||
Faster than the A version but also less advantageous. Less useful in pressure but slightly more useful in neutral. The backstep is extremely useful for antiairing opponents who have committed to a falling button from relatively far away, as with good | Faster than the A version but also less advantageous. Less useful in pressure but slightly more useful in neutral. The backstep is extremely useful for antiairing opponents who have committed to a falling button from relatively far away, as with good spacing, Noel's backstep will clear the air normal entirely and counterhit them out of the sky. In pressure, can be +1 on dash cancel from just beyond Noel's 2C range. | ||
{{AttackDataCargo-MBTL/Query|no_236xx}} | {{AttackDataCargo-MBTL/Query|no_236xx}} | ||
* Uses an additional Black Key. | * Uses an additional Black Key. | ||
Noel jumps forward and throws another key. This move forces Noel back in her opponent's face | Noel jumps forward and throws another key. This move forces Noel back in her opponent's face at slight frame advantage. There is often a gap on block between the two keys, though (especially if the first key was 236B). | ||
#The angle of the second key is a little different depending on which button you press - similar to j.236A and j.236B respectively. | |||
{{AttackDataCargo-MBTL/Query|no_236c}} | {{AttackDataCargo-MBTL/Query|no_236c}} | ||
* Dash cancelable. | * Dash cancelable. | ||
* Uses one Black Key. | * Uses one Black Key. | ||
Noel throws a large, explosive Black Key. | Noel throws a large, explosive Black Key. Highly versatile EX move - as a combo ender, allows Noel to set up a hard-to-see left/right mixup (see the Strategy page for details). Also be useful as a hitconfirm tool, giving a full combo from almost any distance (e.g. from a 236B hit in neutral). It's also plus on block, and if spaced out far enough, it's even plus on dash cancel! Do keep in mind this still costs you one Black Key, but it's definitely worth the cost. | ||
}} | }} | ||
| Line 340: | Line 368: | ||
{{AttackDataCargo-MBTL/Query|no_623a}} | {{AttackDataCargo-MBTL/Query|no_623a}} | ||
* Links into 5A on airborne opponents. | * Links into 5A on airborne opponents. | ||
Not an overhead, but actually a somewhat reliable anti-air if used preemptively. Gives a decent conversion on counterhit or high enough anti-air. | * Can avoid low-hitting moves during startup. | ||
Not an overhead, but actually a somewhat reliable anti-air if used preemptively. Can also be used as a hard callout against people jumping out of pressure. Gives a decent conversion on counterhit or high enough anti-air. Even though it's minus on block, the pushback makes it difficult if not impossible to punish. At worst your turn is over. | |||
{{AttackDataCargo-MBTL/Query|no_623b}} | {{AttackDataCargo-MBTL/Query|no_623b}} | ||
* Links into 5B on airborne opponents, and 5A on grounded opponents. | * Links into 5B on airborne opponents, and 5A on grounded opponents. | ||
* 1st hit only hits opponents in hitstun. Overhead hit startup is 31. | * 1st hit only hits opponents in hitstun. Overhead hit startup is 31. | ||
Noel's long-range overhead and core combo tool due to its ground bounce. Quite slow by itself, but allows for a combo on grounded normal hit where 623A would not. 623B is not useful as a mixup, but it's great to shut down jumps at a distance because it's air unblockable. | * Can avoid low-hitting moves during startup. | ||
Noel's long-range overhead and core combo tool due to its ground bounce. Quite slow by itself, but allows for a combo on grounded normal hit where 623A would not. 623B is not useful as a mixup, but it's great to shut down jumps at a distance because it's air unblockable. You can be Fatal Countered out of the hop during startup though! | |||
{{AttackDataCargo-MBTL/Query|no_623c}} | {{AttackDataCargo-MBTL/Query|no_623c}} | ||
* Combo ender. | * Combo ender. | ||
* Gives a basic safejump with 5A(whiff) microwalk | * Gives a basic safejump with 5A(whiff) microwalk 9 j.C. | ||
Highest-damage combo ender, and fairly stable at the end of long combos. Gives a safejump with 5A whiff, microwalk 9 j.C. | |||
}} | }} | ||
| Line 363: | Line 393: | ||
{{AttackDataCargo-MBTL/Query|no_214a}} | {{AttackDataCargo-MBTL/Query|no_214a}} | ||
* Restands airborne opponents. | * Restands airborne opponents. | ||
* Links into | * Links into A or B normals early in combos. | ||
* Noel can cancel this special into a 25f dash followup. | * Noel can cancel this special into a 25f dash followup. | ||
Restands opponents hit by the first hit, but not the second. Great range, slightly larger than Noel's C buttons. | Restands opponents hit by the first hit, but not the second. Great range, slightly larger than Noel's C buttons. Can also be used to confirm far hits (e.g. max range 2B) - it's possible to link 5A or 2B after the first hit and go into a full combo. Can also go for resets after this instead of finishing your combo if you're a chancer. | ||
{{AttackDataCargo-MBTL/Query|no_214ax}} | {{AttackDataCargo-MBTL/Query|no_214ax}} | ||
* Follow-ups are referred to as '''Rampaging Sister'''. | * Follow-ups are referred to as '''Rampaging Sister'''. | ||
* Soft knockdown, | * Soft knockdown, but can be EX cancelled. | ||
Useful combo filler - 214BB 214AA is a near-universal combo ender, and you can spend meter on the move of your choice afterwards. | |||
{{AttackDataCargo-MBTL/Query|no_214b}} | {{AttackDataCargo-MBTL/Query|no_214b}} | ||
* Restands airborne opponents. | * Restands airborne opponents. | ||
* Links into | * Links into any normal early in combos - usually links into B normals even late into routes. | ||
Slower than 214A but deals more damage. Follow-up also deals more damage. | Slower than 214A but deals more damage. Follow-up also deals more damage. Can be used as an alternative to 214A to confirm far hits, but is generally more prone to dropping, since it's slower. | ||
The dash cancel is still not really worth considering. | |||
{{AttackDataCargo-MBTL/Query|no_214bx}} | {{AttackDataCargo-MBTL/Query|no_214bx}} | ||
* Good damage and | * Good damage and EX cancellable. | ||
* Links into 214A midscreen | * Links into 214A midscreen, or normals in the corner. | ||
This is generally the move you want to route into | This is generally the move you want to route into - you can usually link 214A afterwards unless the combo is very scaled. | ||
The last hit is an overhead, which can catch people who don't know the matchup, but isn't especially threatening if your opponent knows about it. | |||
{{AttackDataCargo-MBTL/Query|no_214c}} | {{AttackDataCargo-MBTL/Query|no_214c}} | ||
* Wallbounces in the corner | * Wallbounces in the corner | ||
* Noel's fastest super, somewhat useful at high hitstun decay. | * Noel's fastest super, somewhat useful at high hitstun decay. | ||
Allows for an easy safejump setup in the corner - just hold 9 afterwards, then press jC at the end of the second jump. | |||
}} | }} | ||
| Line 395: | Line 428: | ||
{{AttackDataCargo-MBTL/Query|no_22a}} | {{AttackDataCargo-MBTL/Query|no_22a}} | ||
* Has some clash frames on startup. | * Has some clash frames on startup. | ||
Extremely niche use as a source of clash-frames or as an anti-air, but generally not very useful. | |||
{{AttackDataCargo-MBTL/Query|no_22[a]}} | {{AttackDataCargo-MBTL/Query|no_22[a]}} | ||
* | * Hits overhead on the second hit. | ||
* | * Very risky without resources for a cancel. | ||
Doesn't hit overhead until frame 28. Pretty slow, and very risky without resources. The first hit is a mid, which makes it bad at catching low shields unless it's spaced far out. Good way to check if your opponent is awake, but don't rely on this much. | |||
{{AttackDataCargo-MBTL/Query|no_22b}} | {{AttackDataCargo-MBTL/Query|no_22b}} | ||
* | * Invincible reversal. | ||
A solid DP with lots of forward range. The 22 input makes it useful against ambiguous crossups too. | |||
Gives fairly reliable confirms into a full combo on anti-air Fatal Counter. | |||
{{AttackDataCargo-MBTL/Query|no_22c}} | {{AttackDataCargo-MBTL/Query|no_22c}} | ||
* Noel's reversal | * Noel's EX reversal. | ||
Hits at about a 45 degree angle upwards with a lot of momentum. | Hits at about a 45 degree angle upwards with a lot of momentum. Generally, you can just use 22B instead, but this is useful when you really need an invincible EX cancel. (e.g. special move clashes). Doesn't give a hard knockdown or do much damage. | ||
}} | }} | ||
| Line 421: | Line 455: | ||
* Uses one Black Key. | * Uses one Black Key. | ||
* Noel throws the key at a steep angle downwards. | * Noel throws the key at a steep angle downwards. | ||
TK j.236A is not quite as plus as 236A, but it doesn't push Noel back as far. All air Black Keys are quite thin, which can lead to opponents running under you and punishing your landing recovery. Still a decent air-to-ground poke, but you'll usually need j.236C to get a full confirm. | |||
{{AttackDataCargo-MBTL/Query|no_j236b}} | {{AttackDataCargo-MBTL/Query|no_j236b}} | ||
* Uses one Black Key. | * Uses one Black Key. | ||
* Noel throws the key at a shallow angle downwards. | * Noel throws the key at a shallow angle downwards. | ||
Plus on block, but less so compared to TK j.236A. The angle makes it better as a poke than j.236A, | Plus on block, but less so compared to TK j.236A. The angle makes it better as a poke than j.236A, letting you catch people acting at the other side of the screen. | ||
{{AttackDataCargo-MBTL/Query|no_j236c}} | {{AttackDataCargo-MBTL/Query|no_j236c}} | ||
* Uses one Black Key. | * Uses one Black Key. | ||
Noel throws a large, explosive Black Key, thrown at a similar trajectory to j.236B. | Noel throws a large, explosive Black Key, thrown at a similar trajectory to j.236B. Has a ton of untech time - useful to confirm any stray air hit or air key into a full combo. It's also slightly plus on block. Not quite as versatile as the grounded version, but still pretty handy. | ||
}} | }} | ||
| Line 443: | Line 477: | ||
* Uses two Black Keys. | * Uses two Black Keys. | ||
* Unlike 236XX, there is no gap between the two keys. | * Unlike 236XX, there is no gap between the two keys. | ||
Uses some Moon Gauge as well as two Black Keys, | Uses some Moon Gauge as well as two Black Keys, so it's quite expensive. Mostly useful for high-damage corner combos, especially if you're going for the kill. | ||
}} | }} | ||
| Line 455: | Line 489: | ||
| info = | | info = | ||
{{AttackDataCargo-MBTL/Query|no_3bc}} | {{AttackDataCargo-MBTL/Query|no_3bc}} | ||
* Lots of clash frames. | * Lots of clash frames. | ||
* 2nd hit is an overhead. | * 2nd hit is an overhead. | ||
Excellent | Excellent in response to jumps, similar to 623B but faster. Plenty of pushback and only -4 on block makes this quite safe to go for as a midrange anti-air, though you're in real trouble if they shield. | ||
Note that the first hit is a mid, so this usually won't work as a callout against low shields. | |||
}} | }} | ||
| Line 472: | Line 506: | ||
* Recovers in the air, jump-cancellable on hit, block, and whiff. | * Recovers in the air, jump-cancellable on hit, block, and whiff. | ||
* Lots of clash frames. | * Lots of clash frames. | ||
Good for contesting grounded opponents, especially in Moon Drive. | Good for contesting grounded opponents, especially in Moon Drive, as it advances very quickly. Also useful for building meter at the end of a combo to secure the kill. | ||
}} | }} | ||
| Line 486: | Line 520: | ||
* Recovers in the air, jump-cancellable on hit, block, and whiff. | * Recovers in the air, jump-cancellable on hit, block, and whiff. | ||
* Lots of clash frames. | * Lots of clash frames. | ||
Has lots of clash frames in Moon Drive, and can net you a full combo if it hits. If your opponent Shields this, though, you lose all cancel options and will be left wide open. | |||
}} | }} | ||
| Line 499: | Line 533: | ||
{{AttackDataCargo-MBTL/Query|no_j6bc}} | {{AttackDataCargo-MBTL/Query|no_j6bc}} | ||
* Uses one Black Key. | * Uses one Black Key. | ||
Ground bounces on hit. | Ground bounces on hit. Useful to confirm air hits or cinematic launches into full ground combos. Can also be used as an easy, rewarding throw bait in point-blank strike/throw situations. | ||
}} | }} | ||
| Line 513: | Line 547: | ||
{{AttackDataCargo-MBTL/Query|no_236bc}} | {{AttackDataCargo-MBTL/Query|no_236bc}} | ||
* Great range, picks up off of any special move except 22X. | * Great range, picks up off of any special move except 22X. | ||
* Full invincibility gives it some niche use as an anti-zoning tool, if you have the meter. | |||
Excellent combo ender if you have the meter for it. Has enough advantage on hit that a quick 2AB framekill will set up an autotimed safejump, but that's by no means your only option. | Excellent combo ender if you have the meter for it. Has enough advantage on hit that a quick 2AB framekill will set up an autotimed safejump, but that's by no means your only option. | ||
}} | }} | ||
Revision as of 11:16, 29 August 2022
Under Construction
|
Story
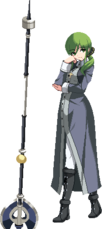
She recently transferred to Shiki's school as a new teacher. She metes out judgment to all blasphemers as an executor for the Holy Church. She may not have the battle experience Ciel does, but she's prepared to fight. Whenever faced with a weak opponent, she shows no mercy, claiming to be “weak against the strong, but overwhelmingly strong against the weak”.
Gameplay
Noel is a footsie rushdown character who relies on far pokes and huge sweeping attacks to get at the opponent.
A new character from the remake of Tsukihime. She is a simple character to play with, easily punishing opponent's mistakes in mid-range and converting into combos with her far-reaching and disjointed B/C normal attacks in addition to her sweeping Heavy Punishment (623X) leaping special move. If the opponent thinks they can just play patiently in neutral, she can pile on the pressure using follow-ups from Heavy Thrust (214X) and hidden Black Key (236X) projectiles with lots of frame advantage.
These big normals come with big recovery, though - and while her Black Keys are strong, when they're gone, they're gone. (Until the next round, anyway).
If you learn the frame data and effective use of Reverse Beat, Noel can go far.
| Strengths | Weaknesses |
|---|---|
|
|
Backdash: -
Movement Speed: -Character Summary
- Moon Skill
- 6B+C - Black Key (Simple) (Air OK)
- 3B+C - Heavy Punishment
- 4B+C - Heavy Thrust
- 2B+C - Noel Somersault
- Special Attacks
- 236A/B/C (EX OK) - Black Key (Simple): Projectile.
- > A/B/C - Additional input 1: Additional projectile.
- > 66 - Additional input 2: Ground dash-cancel.
- 623A/B/C (EX OK) - Heavy Punishment: Combo tool, anti-air, overhead (B and B+C ver. only).
- 214A/B/C (EX OK) - Heavy Thrust: Poke and combo tool.
- > A/B/C - Rampaging Sister: Follow-up attack.
- > 66 - Additional input 2: Ground dash-cancel.
- 22A/B/C (EX OK) - Noel Somersault: Anti-air, reversal (B and EX ver. only).
- j.236A/B/C (EX OK) - Black Key (Simple): Air projectile.
- Arc Drive
- 236B+C - Time to Repent: High damage invincible attack.
- Last Arc
- A+B+C+D / D in Blood Heat - Heavenly Trinity: Very high damage invincible attack.
- Unique Attacks
- 6C, 3C
- Blowback Edge Moves
- j.[C], 22[A]
Limited to 10 Black Key uses per round.
Dash actionable: 5
Jump startup: 4
Jump airtime: 34
Midscreen: 2A 2B 2C 5C 214BB 214AA (236C/214C)
Can replace [2A 2B] with basically anything
2B 2C 5C 623B 5B 214BB 214AA (236C/214C)
B or C starter route
Corner: ~2A 2C 6C 623B 5B 214BB 2B Rapid Beat 214A (236C/214C)
Can replace [2A 2B] with basically anything
~2B 2C 6C 623B 5B 214BB 2B Rapid Beat 214AA (236C/214C)
B or C starter route
Move Analysis
Normal Moves
Standing Normals
5A
| Damage | Guard | Cancel | Property | Cost | Attribute |
|---|---|---|---|---|---|
| 160 | LH | -N-, -SE-, -SP-, -RB-, -EX-, -MD-, (J) | - | - | - |
| First Active | Active | Recovery | Overall | Advantage | Invul |
| 5 | 2 | 11 | 17 | -1 | - |
- Fast startup and good frame advantage.
- Similar whiff data to 2A allows them to be used interchangeably.
- Whiff cancels available from frame 11 onwards (frame 11 is the first frame of the whiff cancelled move).
5B
| Damage | Guard | Cancel | Property | Cost | Attribute |
|---|---|---|---|---|---|
| 420 | LH | N, SP, RB, EX, MD, (J) | - | - | - |
| First Active | Active | Recovery | Overall | Advantage | Invul |
| 9 | 3 | 19 | 30 | -7 | - |
- Decent vertical reach.
5C
| Damage | Guard | Cancel | Property | Cost | Attribute |
|---|---|---|---|---|---|
| 610 | LH | N, SP, RB, EX, MD, (J) | - | - | - |
| First Active | Active | Recovery | Overall | Advantage | Invul |
| 10 | 4 | 25 | 38 | -12 | - |
- Vacuums opponents closer to Noel.
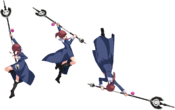
Very strong pressure tool in blockstrings, thanks to the vacuum. Really shines when used during pressure, for catching landings or as a whiff punish. The vacuum properties make it good for stabilizing combos and adjusting the opponent's position in blockstrings. It's only -1 on rebeat too, so you can ambiguously reset pressure while reeling them in.
Keep in mind that this button hits low to the ground, so it can whiff against jumps, IADs, and low crushing moves. Has lots of recovery on whiff, so you need to be very sure that your opponent won't be in the air before you use this.Crouching Normals
2A
| Damage | Guard | Cancel | Property | Cost | Attribute |
|---|---|---|---|---|---|
| 140 | L | N, -SE-, -SP-, RB, -EX-, -MD-, (J) | - | - | - |
| First Active | Active | Recovery | Overall | Advantage | Invul |
| 6 | 2 | 10 | 17 | 0 | - |
- 0 on block.
- Whiff cancels available from frame 10 onwards (frame 10 is the first frame of the whiff cancelled move).
2B
| Damage | Guard | Cancel | Property | Cost | Attribute |
|---|---|---|---|---|---|
| 240*2 (468) | LH, L | N, SP, RB, EX, MD, (J) | - | - | - |
| First Active | Active | Recovery | Overall | Advantage | Invul |
| 8 | 2 (5) 3 | 20 | 37 | -7 | - |
- Hits twice.
- First hit is a mid, second hit is a low.
Big, two-hitting normal. The first hit is bigger vertically, and the second is bigger horizontally and scoots Noel slightly forwards. The first hit is a decent anti-air due to the angle it hits at, especially good at hitting IADs. The second hit usually won't hit airborne opponents at all, so it's still a bit risky.
The second hit has the longest range of all Noel's normals. At max range, 214X is needed to convert a hit into a combo.2C
| Damage | Guard | Cancel | Property | Cost | Attribute |
|---|---|---|---|---|---|
| 620 | L | N, SP, RB, EX, MD, (J) | - | - | - |
| First Active | Active | Recovery | Overall | Advantage | Invul |
| 9 | 4 | 24 | 36 | -11 | - |
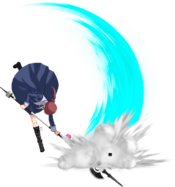
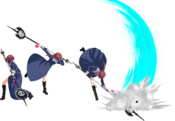
- Half-screen low sweep.
Jumping Normals
j.A
| Damage | Guard | Cancel | Property | Cost | Attribute |
|---|---|---|---|---|---|
| 130 | HA | N, SE, SP, RB, EX, MD, J | - | - | - |
| First Active | Active | Recovery | Overall | Advantage | Invul |
| 5 | 4 | - | - | - | - |
- Excellent rising air-to-air for opponents right above you.
- Recovers in mid-air if used rising, allowing Noel to use other air actions (including other air normals) while falling. it can also be whiff cancelled into a jump or special.
If you're in the air and moving forwards, you're probably pressing this. Has very good range for a j.A, but still comes out at 5 frames.
You often don't get much more than an airthrow on normal air hit, but on Fatal Counter you can land and pick up into a full combo.j.B
| Damage | Guard | Cancel | Property | Cost | Attribute |
|---|---|---|---|---|---|
| 400 | HA | N, SP, RB, EX, MD, J | - | - | - |
| First Active | Active | Recovery | Overall | Advantage | Invul |
| 8 | 4 | - | - | - | - |
- Air-to-air for opponents more in front of you.
- Does not recover until landing, unlike j.A.
j.C
| Damage | Guard | Cancel | Property | Cost | Attribute |
|---|---|---|---|---|---|
| 560 | HA | N, SP, RB, EX, MD, J | - | - | - |
| First Active | Active | Recovery | Overall | Advantage | Invul |
| 10 | 5 | - | - | - | - |
- Jump-in and used in safejumps.
- Excellent retreating normal, covers tons of space.
- Hits very high above Noel, making IAD jC great at catching jump-outs in the corner.
j.C is a little slow, but it's good as a jump-in or to generally cover space. It's also your go-to button for IAD pressure resets or safejumps.
| Damage | Guard | Cancel | Property | Cost | Attribute |
|---|---|---|---|---|---|
| 900 | HA | N, SP, RB, EX, MD, J | - | - | - |
| First Active | Active | Recovery | Overall | Advantage | Invul |
| 20 | 6 | - | - | - | 16-19 Clash |
- Jump-in, clash tool and situational combo tool.
Noel's j[C] doesn't have a ton of clash frames, but it's still pretty good for air exchanges or aggressive jump-ins.
Useful combo filler for some high-damage routes too.Command Normals
3C
| Damage | Guard | Cancel | Property | Cost | Attribute |
|---|---|---|---|---|---|
| 700 | LH | SP, EX, MD, (J) | - | - | - |
| First Active | Active | Recovery | Overall | Advantage | Invul |
| 10 | 3 | 25 | 37 | -11 | Air 5-12 |
- Enters a cinematic and automatically jump-cancels on hit.
6C
| Damage | Guard | Cancel | Property | Cost | Attribute |
|---|---|---|---|---|---|
| 700 | LH | SP, EX, MD | - | - | - |
| First Active | Active | Recovery | Overall | Advantage | Invul |
| 13 | 8 | 16 | 36 | -4~+3 | - |
- Wallbounces on hit.
- Corner combo filler.
Good gap closer and hitconfirm tool during offense, especially in the corner. Black Keys thrown afterwards are often difficult to challenge, letting you reset pressure with lots of frame advantage to work with.
The wallbounce makes it easy to confirm any hit into a high-damage combo too.Universal Mechanics
Rapid Beat 2
- 1st hit ground bounces, 2nd hit sends outwards.
- Cancellable only into special moves or Rapid Beat 3.
Two-hit forward-moving Rapid Beat and a useful part of Noel's combo game. Guaranteed ground bounce that brings opponents into either 3C or 214B range from any height. Like all Rapid Beat 2s, scales combo damage hard, so avoid using early in a combo unless it is the only way to stabilize the combo. Especially useful towards the end of a route, when the proration doesn't matter so much.
Can also be used as an advancing move in pressure, but 6C is generally a better option there.Rapid Beat 3
- Same animation as 3C
- Special cancellable only on block - performs cinematic launch on hit.
Ground Throw
| Damage | Guard | Cancel | Property | Cost | Attribute |
|---|---|---|---|---|---|
| 300, 600*2 (1500) | U | - | - | - | - |
| First Active | Active | Recovery | Overall | Advantage | Invul |
| 4 | 3 | 19 | 25 | +35 | - |
- Sets up a safejump anywhere with neutral jump j.C.
Air Throw
| Damage | Guard | Cancel | Property | Cost | Attribute |
|---|---|---|---|---|---|
| 1200 | U | - | - | - | - |
| First Active | Active | Recovery | Overall | Advantage | Invul |
| 1 | 3 | 31 | 34 | - | - |
- Universal air combo ender.
Noel's airthrow leaves her fairly close to her opponent. From there it's easy enough to set up a simple 5A meaty, or do something fancy like IAD j.236A to switch sides (though it won't hit crossup)
Generally, Noel will want to use metered enders over airthrow where possible though.Special Moves
Black Key (Simple)
| Damage | Guard | Cancel | Property | Cost | Attribute |
|---|---|---|---|---|---|
| 1000 | LHA | (CH), (EX), (MD) | - | 1 Black Key | - |
| First Active | Active | Recovery | Overall | Advantage | Invul |
| 13 | X | 19 | 31 | +13 [-3] | - |
- Cancelable into a 30f forward dash.
- Uses one Black Key.
- Bracketed advantage is advantage if dash cancelled. Advantage listed assumes point-blank range.
Noel steps back and throws a key. Rarely a true blockstring off any normal, but is very plus on block and useful for pressure resets. The backwards movement often allows Noel to avoid mashed buttons entirely, netting her a full punish. If spaced at C normal range, dash cancelling this is more than +5 (5A is gapless), and at the same spacing without the dash cancel, it is advantageous enough to be safe against shield > B+C followup.
Note: for every version of this move, the Key counter is incremented very early in startup. If you get counterhit, the Key is counted as used.
| Damage | Guard | Cancel | Property | Cost | Attribute |
|---|---|---|---|---|---|
| 1000 | LHA | (CH), (EX), (MD) | - | 1 Black Key | - |
| First Active | Active | Recovery | Overall | Advantage | Invul |
| 8 | X | 30 | 37 | +1 [-6] | - |
- Dash cancelable.
- Uses one Black Key.
- Bracketed advantage is advantage if dash cancelled. Advantage listed assumes point-blank range.
Faster than the A version but also less advantageous. Less useful in pressure but slightly more useful in neutral. The backstep is extremely useful for antiairing opponents who have committed to a falling button from relatively far away, as with good spacing, Noel's backstep will clear the air normal entirely and counterhit them out of the sky. In pressure, can be +1 on dash cancel from just beyond Noel's 2C range. No results
- Uses an additional Black Key.
Noel jumps forward and throws another key. This move forces Noel back in her opponent's face at slight frame advantage. There is often a gap on block between the two keys, though (especially if the first key was 236B).
- The angle of the second key is a little different depending on which button you press - similar to j.236A and j.236B respectively.
| Damage | Guard | Cancel | Property | Cost | Attribute |
|---|---|---|---|---|---|
| 880, 651 (1531) | LHA | - | - | 1 Black Key, 1 Magic Circuit | - |
| First Active | Active | Recovery | Overall | Advantage | Invul |
| 4+4 | X | 19 | 26 | +8 [-9] | - |
- Dash cancelable.
- Uses one Black Key.
Heavy Punishment
| Damage | Guard | Cancel | Property | Cost | Attribute |
|---|---|---|---|---|---|
| 1200 | LH | -EX-, -MD- | - | - | - |
| First Active | Active | Recovery | Overall | Advantage | Invul |
| 16 | 3 | 20 | 38 | -6 | - |
- Links into 5A on airborne opponents.
- Can avoid low-hitting moves during startup.
Not an overhead, but actually a somewhat reliable anti-air if used preemptively. Can also be used as a hard callout against people jumping out of pressure. Gives a decent conversion on counterhit or high enough anti-air. Even though it's minus on block, the pushback makes it difficult if not impossible to punish. At worst your turn is over.
| Damage | Guard | Cancel | Property | Cost | Attribute |
|---|---|---|---|---|---|
| 1350 | LH, H | -EX-, -MD- | - | - | - |
| First Active | Active | Recovery | Overall | Advantage | Invul |
| 9 | 15 (4) 3 | 19 | 49 | -5 | - |
- Links into 5B on airborne opponents, and 5A on grounded opponents.
- 1st hit only hits opponents in hitstun. Overhead hit startup is 31.
- Can avoid low-hitting moves during startup.
Noel's long-range overhead and core combo tool due to its ground bounce. Quite slow by itself, but allows for a combo on grounded normal hit where 623A would not. 623B is not useful as a mixup, but it's great to shut down jumps at a distance because it's air unblockable. You can be Fatal Countered out of the hop during startup though!
| Damage | Guard | Cancel | Property | Cost | Attribute |
|---|---|---|---|---|---|
| 700*4 (2324) | LH | MD | - | 1 Magic Circuit | - |
| First Active | Active | Recovery | Overall | Advantage | Invul |
| 4+4 | 17 | 27 | 51 | -1 | - |
- Combo ender.
- Gives a basic safejump with 5A(whiff) microwalk 9 j.C.
Heavy Thrust
| Damage | Guard | Cancel | Property | Cost | Attribute |
|---|---|---|---|---|---|
| 640, 556 (1196) | LH | -CH-, -EX-, -MD- | - | - | - |
| First Active | Active | Recovery | Overall | Advantage | Invul |
| 13 | 2 (9) 3 | 18 | 44 | -4 [-10] | - |
- Restands airborne opponents.
- Links into A or B normals early in combos.
- Noel can cancel this special into a 25f dash followup.
Restands opponents hit by the first hit, but not the second. Great range, slightly larger than Noel's C buttons. Can also be used to confirm far hits (e.g. max range 2B) - it's possible to link 5A or 2B after the first hit and go into a full combo. Can also go for resets after this instead of finishing your combo if you're a chancer.
| Damage | Guard | Cancel | Property | Cost | Attribute |
|---|---|---|---|---|---|
| 1000 | LH | -EX-, -MD- | - | - | - |
| First Active | Active | Recovery | Overall | Advantage | Invul |
| 13 | 3 | 20 | 35 | -6 | - |
- Follow-ups are referred to as Rampaging Sister.
- Soft knockdown, but can be EX cancelled.
Useful combo filler - 214BB 214AA is a near-universal combo ender, and you can spend meter on the move of your choice afterwards.
| Damage | Guard | Cancel | Property | Cost | Attribute |
|---|---|---|---|---|---|
| 680, 556 (1236) | LH | -CH-, -EX-, -MD- | - | - | - |
| First Active | Active | Recovery | Overall | Advantage | Invul |
| 16 | 2 (8) 3 | 18 | 46 | -4 [-10] | - |
- Restands airborne opponents.
- Links into any normal early in combos - usually links into B normals even late into routes.
Slower than 214A but deals more damage. Follow-up also deals more damage. Can be used as an alternative to 214A to confirm far hits, but is generally more prone to dropping, since it's slower. The dash cancel is still not really worth considering.
| Damage | Guard | Cancel | Property | Cost | Attribute |
|---|---|---|---|---|---|
| 430*3 (1186) | LH | -EX-, -MD- | - | - | - |
| First Active | Active | Recovery | Overall | Advantage | Invul |
| 10 | 11 (15) 3 | 20 | 58 | -6 | - |
- Good damage and EX cancellable.
- Links into 214A midscreen, or normals in the corner.
This is generally the move you want to route into - you can usually link 214A afterwards unless the combo is very scaled. The last hit is an overhead, which can catch people who don't know the matchup, but isn't especially threatening if your opponent knows about it.
| Damage | Guard | Cancel | Property | Cost | Attribute |
|---|---|---|---|---|---|
| 450*5, 600 (2340) | LH | MD | - | 1 Magic Circuit | - |
| First Active | Active | Recovery | Overall | Advantage | Invul |
| 4+5 | 2 (7) 2 (11) 10 (20) 2 (18) 3 | 23 | 105 | -4 | - |
- Wallbounces in the corner
- Noel's fastest super, somewhat useful at high hitstun decay.
Noel Somersault
| Damage | Guard | Cancel | Property | Cost | Attribute |
|---|---|---|---|---|---|
| 520, 400*2 (1200) | LH | -EX-, -MD- | - | - | - |
| First Active | Active | Recovery | Overall | Advantage | Invul |
| 6 | 5 (5) 4 | 35 | 54 | -16 | - |
- Has some clash frames on startup.
Extremely niche use as a source of clash-frames or as an anti-air, but generally not very useful.
| Damage | Guard | Cancel | Property | Cost | Attribute |
|---|---|---|---|---|---|
| 520*3 (1392) | LH, H, H | -EX-, -MD-, (J) | - | - | - |
| First Active | Active | Recovery | Overall | Advantage | Invul |
| 6 | 5 (17) 4 | 35 | 66 | -16 | - |
- Hits overhead on the second hit.
- Very risky without resources for a cancel.
Doesn't hit overhead until frame 28. Pretty slow, and very risky without resources. The first hit is a mid, which makes it bad at catching low shields unless it's spaced far out. Good way to check if your opponent is awake, but don't rely on this much.
| Damage | Guard | Cancel | Property | Cost | Attribute |
|---|---|---|---|---|---|
| 440*3 (1200) | LH | (EX), (MD) | - | - | - |
| First Active | Active | Recovery | Overall | Advantage | Invul |
| 6 | 12 | 37 | 54 | -18 | 1~13 All |
- Invincible reversal.
A solid DP with lots of forward range. The 22 input makes it useful against ambiguous crossups too. Gives fairly reliable confirms into a full combo on anti-air Fatal Counter.
| Damage | Guard | Cancel | Property | Cost | Attribute |
|---|---|---|---|---|---|
| 430*4 (1517) | LH | MD | - | 1 Magic Circuit | - |
| First Active | Active | Recovery | Overall | Advantage | Invul |
| 4+2 | 15 | 47 | 67 | -31 | 1-15 All |
- Noel's EX reversal.
Black Key (Simple) (air)
| Damage | Guard | Cancel | Property | Cost | Attribute |
|---|---|---|---|---|---|
| 1000 | LHA | -EX-, -MD- | - | 1 Black Key | - |
| First Active | Active | Recovery | Overall | Advantage | Invul |
| 15 | X | Until Landing + 7 | - | +10 (TK) | - |
- Uses one Black Key.
- Noel throws the key at a steep angle downwards.
TK j.236A is not quite as plus as 236A, but it doesn't push Noel back as far. All air Black Keys are quite thin, which can lead to opponents running under you and punishing your landing recovery. Still a decent air-to-ground poke, but you'll usually need j.236C to get a full confirm.
| Damage | Guard | Cancel | Property | Cost | Attribute |
|---|---|---|---|---|---|
| 1000 | LHA | -EX-, -MD- | - | 1 Black Key | - |
| First Active | Active | Recovery | Overall | Advantage | Invul |
| 12 | X | Until Landing + 7 | - | +4 (TK) | - |
- Uses one Black Key.
- Noel throws the key at a shallow angle downwards.
Plus on block, but less so compared to TK j.236A. The angle makes it better as a poke than j.236A, letting you catch people acting at the other side of the screen.
| Damage | Guard | Cancel | Property | Cost | Attribute |
|---|---|---|---|---|---|
| 880+651 (1531) | LHA | MD | - | 1 Black Key, 1 Magic Circuit | - |
| First Active | Active | Recovery | Overall | Advantage | Invul |
| 4+8 | X | Until Landing + 7 | - | +5 (TK) | - |
- Uses one Black Key.
Moon Skills
Black Key (Simple)
| Damage | Guard | Cancel | Property | Cost | Attribute |
|---|---|---|---|---|---|
| 700, 750 (1255) | LHA | EX, MD | - | 2 Black Keys, 3 Moon Icons | - |
| First Active | Active | Recovery | Overall | Advantage | Invul |
| 10, 31 | X | 29 | 59 | +2 | - |
- Uses two Black Keys.
- Unlike 236XX, there is no gap between the two keys.
Heavy Punishment
| Damage | Guard | Cancel | Property | Cost | Attribute |
|---|---|---|---|---|---|
| 350+1200 (1394) | LH, H | EX, MD | - | 3 Moon Icons | - |
| First Active | Active | Recovery | Overall | Advantage | Invul |
| 15 | 12, 3 | 18 | 47 | -4 | - |
- Lots of clash frames.
- 2nd hit is an overhead.
Excellent in response to jumps, similar to 623B but faster. Plenty of pushback and only -4 on block makes this quite safe to go for as a midrange anti-air, though you're in real trouble if they shield.
Note that the first hit is a mid, so this usually won't work as a callout against low shields.Heavy Thrust
| Damage | Guard | Cancel | Property | Cost | Attribute |
|---|---|---|---|---|---|
| 500*3 (1355) | LH | EX, MD, -J- | - | 3 Moon Icons | - |
| First Active | Active | Recovery | Overall | Advantage | Invul |
| 10 | 2 (5) 2 (11) 2 | 34 | 65 | -14 | - |
- Recovers in the air, jump-cancellable on hit, block, and whiff.
- Lots of clash frames.
Noel Somersault
| Damage | Guard | Cancel | Property | Cost | Attribute |
|---|---|---|---|---|---|
| 1200 | LHA | EX, MD, -J- | - | 3 Moon Icons | - |
| First Active | Active | Recovery | Overall | Advantage | Invul |
| 7 | 10 | 44 (13) | 60 (29) | -26 (+5) | - |
- Recovers in the air, jump-cancellable on hit, block, and whiff.
- Lots of clash frames.
Black Key Throw (Simple) (air)
| Damage | Guard | Cancel | Property | Cost | Attribute |
|---|---|---|---|---|---|
| 1100 | LHA | - | EX, MD | 1 Black Key, 3 Moon Icons | - |
| First Active | Active | Recovery | Overall | Advantage | Invul |
| 12 | X | Until Landing + 7 | - | +10 [TK] | - |
- Uses one Black Key.
Super Moves
Time to Repent
| Damage | Guard | Cancel | Property | Cost | Attribute |
|---|---|---|---|---|---|
| 3500 | LH | - | - | 3 Magic Circuit | - |
| First Active | Active | Recovery | Overall | Advantage | Invul |
| 1+9 | 3 | 31 | 45 ~ 55 | -18 | 1 - (End of Active) All |
- Great range, picks up off of any special move except 22X.
- Full invincibility gives it some niche use as an anti-zoning tool, if you have the meter.
Heavenly Trinity
| Damage | Guard | Cancel | Property | Cost | Attribute |
|---|---|---|---|---|---|
| 4800 [4800 ~ 6960 in BH] | LH | - | - | 4 Magic Circuit | - |
| First Active | Active | Recovery | Overall | Advantage | Invul |
| 1+21 | 4 | 27 | 52 | -14 | 1 - 13 All, 1 - 25 Throw |
- Usable with 4 full Magic Circuit gauges, at any time in Blood Heat, or with a successful Shield while in Blood Heat.
- Damage in Blood Heat scales with amount of Heat Gauge remaining on activate.
Reverse Beats
| Attack | Chain | Advantage |
|---|---|---|
| 5B/2B(1) | 5A/2A | -3 |
| 2B(2) | 5A/2A | -2 |
| 5C/2C | 5A/2A | -1 |
| Attack | Chain | Frame Gap |
|---|---|---|
Customization
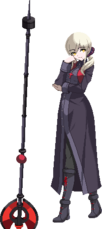
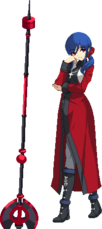
Palette options
Noel Wiki Roadmap
| 0% complete | |
|
|
| Page | Completed | To-do | Score |
|---|---|---|---|
| 0/25 | |||
| Strategy | 0/25 | ||
| Combos | 0/25 | ||
| Matchups | 0/25 |


