Bloody Roar Extreme/Stages: Difference between revisions
mNo edit summary |
No edit summary |
||
| Line 1: | Line 1: | ||
''Bloody Roar Extreme'' has a variety of stages to play on. Most of them vary in their size and shape, which can potentially affect the viability of some combos and certain matchups as a whole. | |||
==Stage 1: Asian Gate== | {{TOC limit|2}} | ||
{{Content Box | |||
< | |content= | ||
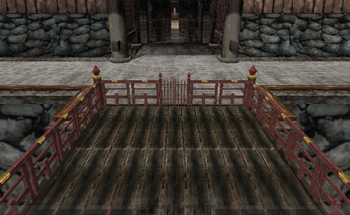
< | ==<center>Stage 1: Asian Gate</center>== | ||
'''Size: Average''' | <gallery class="center" mode="nolines" widths="350" heights="350"> | ||
<br> | BREX Stage 1.png | ||
</gallery> | |||
<center> | |||
'''Size: Average'''<br> | |||
'''Shape: Square''' | '''Shape: Square''' | ||
An average-sized stage whose walls are all destructible. | An average-sized stage whose walls are all destructible. | ||
< | </center> | ||
}} | |||
==Stage 2: Chinese Temple== | {{Content Box | ||
|content= | |||
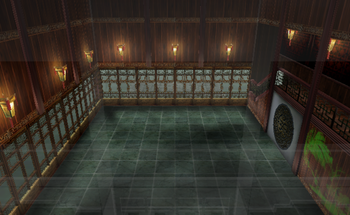
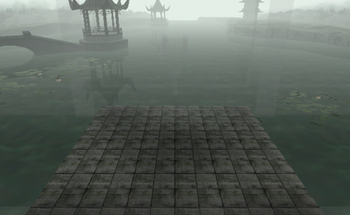
==<center>Stage 2: Chinese Temple</center>== | |||
< | <gallery class="center" mode="nolines" widths="350" heights="350"> | ||
< | BREX Stage 2 (1).png | ||
'''Size: Small''' (both) | BREX Stage 2 (2).png | ||
<br> | </gallery> | ||
<center> | |||
'''Size: Small''' (both)<br> | |||
'''Shape: Square''' (both) | '''Shape: Square''' (both) | ||
A small-sized stage whose walls are all destructible. | A small-sized stage whose walls are all destructible. | ||
The North wall (the wall on camera at the beginning of each round) features a stone platform; should a Ring Out occur in this direction, the next round onwards will be fought on it. Aside from the indestructible South wall, this platform has no walls. | The North wall (the wall on camera at the beginning of each round) features a stone platform; should a Ring Out occur in this direction, the next round onwards will be fought on it. Aside from the indestructible South wall, this platform has no walls. | ||
< | </center> | ||
}} | |||
==Stage 3: Freeway== | {{Content Box | ||
|content= | |||
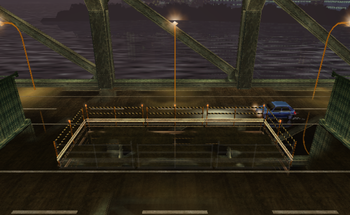
< | ==<center>Stage 3: Freeway</center>== | ||
< | <gallery class="center" mode="nolines" widths="350" heights="350"> | ||
'''Size: Long & Narrow''' | BREX Stage 3.png | ||
<br> | </gallery> | ||
<center> | |||
'''Size: Long & Narrow'''<br> | |||
'''Shape: Rectangle''' | '''Shape: Rectangle''' | ||
| Line 38: | Line 45: | ||
The vehicles on the North and South sides of the stage can hit fighters if a Ring Out occurs in their direction; rarely, they may cause the victim to bounce back into the stage, allowing them to continue the fight. | The vehicles on the North and South sides of the stage can hit fighters if a Ring Out occurs in their direction; rarely, they may cause the victim to bounce back into the stage, allowing them to continue the fight. | ||
< | </center> | ||
}} | |||
==Stage 4: Aircraft Carrier== | {{Content Box | ||
|content= | |||
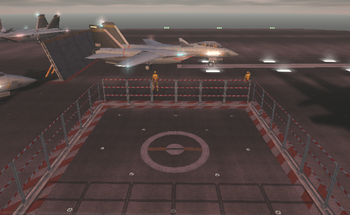
< | ==<center>Stage 4: Aircraft Carrier</center>== | ||
< | <gallery class="center" mode="nolines" widths="350" heights="350"> | ||
'''Size: Average''' | BREX Stage 4.png | ||
<br> | </gallery> | ||
<center> | |||
'''Size: Average'''<br> | |||
'''Shape: Square''' | '''Shape: Square''' | ||
An average-sized stage whose walls are all destructible. | An average-sized stage whose walls are all destructible. | ||
< | </center> | ||
}} | |||
==Stage 5: Midnight Rooftop== | {{Content Box | ||
|content= | |||
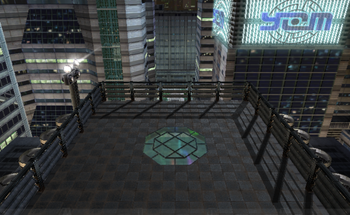
< | ==<center>Stage 5: Midnight Rooftop</center>== | ||
< | <gallery class="center" mode="nolines" widths="350" heights="350"> | ||
'''Size: Large''' | BREX Stage 5.png | ||
<br> | </gallery> | ||
<center> | |||
'''Size: Large'''<br> | |||
'''Shape: Square''' | '''Shape: Square''' | ||
An extremely large stage whose walls are all destructible. | |||
< | </center> | ||
}} | |||
==Stage 6: Back Alley== | {{Content Box | ||
|content= | |||
==<center>Stage 6: Back Alley</center>== | |||
< | <gallery class="center" mode="nolines" widths="350" heights="350"> | ||
< | BREX Stage 6 (1).png | ||
'''Size:''' '''Tiny''' (upper) / '''Average''' (lower) | BREX Stage 6 (2).png | ||
<br> | </gallery> | ||
<center> | |||
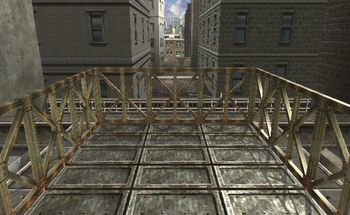
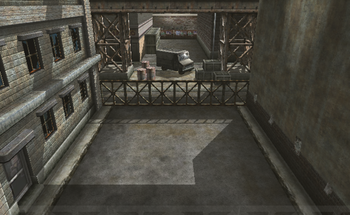
'''Size:''' '''Tiny''' (upper) / '''Average''' (lower)<br> | |||
'''Shape: Square''' (both) | '''Shape: Square''' (both) | ||
A stage with two portions, one above and one below. | A stage with two portions, one above and one below. | ||
The upper platform is the smallest stage in the game. After the walls or the ground | The upper platform is the smallest stage in the game. After characters have been slammed against the walls or the ground too many times, the floor will break and send fighters to the lower portion. | ||
For the lower portion, only the North and South walls can be destroyed. | For the lower portion, only the North and South walls can be destroyed. | ||
</center> | |||
}} | |||
==Stage 7: Aquarium== | {{Content Box | ||
|content= | |||
==<center>Stage 7: Aquarium</center>== | |||
< | <gallery class="center" mode="nolines" widths="350" heights="350"> | ||
< | BREX Stage 7 (1).png | ||
'''Size:''' '''Average''' (upper) / '''Large''' (lower) | BREX Stage 7 (2).png | ||
<br> | </gallery> | ||
<center> | |||
'''Size:''' '''Average''' (upper) / '''Large''' (lower)<br> | |||
'''Shape:''' '''Square''' (upper) / '''Circle''' (lower) | '''Shape:''' '''Square''' (upper) / '''Circle''' (lower) | ||
| Line 90: | Line 109: | ||
The North wall (the wall on camera at the beginning of each round) will cause a stage transition if a Ring Out occurs in this direction, but the round will continue as normal. In this alternate arena, walls are indestructible. | The North wall (the wall on camera at the beginning of each round) will cause a stage transition if a Ring Out occurs in this direction, but the round will continue as normal. In this alternate arena, walls are indestructible. | ||
</center> | |||
}} | |||
==Stage 8: Indian Palace== | {{Content Box | ||
|content= | |||
< | ==<center>Stage 8: Indian Palace</center>== | ||
< | <gallery class="center" mode="nolines" widths="350" heights="350"> | ||
'''Size:''' '''Small''' | BREX Stage 8.png | ||
<br> | </gallery> | ||
<center> | |||
'''Size:''' '''Small'''<br> | |||
'''Shape: Square''' | '''Shape: Square''' | ||
A small-sized stage whose walls are all destructible. | A small-sized stage whose walls are all destructible. | ||
</center> | |||
}} | |||
==Stage 9: Evil Laboratory / Stage 10: Chaos Laboratory== | {{Content Box | ||
|content= | |||
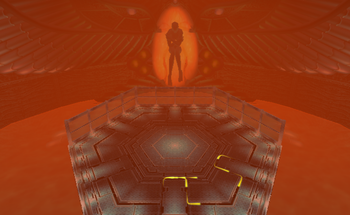
==<center>Stage 9: Evil Laboratory / Stage 10: Chaos Laboratory</center>== | |||
< | <gallery class="center" mode="nolines" widths="350" heights="350"> | ||
< | BREX Stage 9.png | ||
'''Size:''' '''Mid-Large''' | BREX Stage 10.png | ||
<br> | </gallery> | ||
<center> | |||
'''Size:''' '''Mid-Large'''<br> | |||
'''Shape: Hexagon''' | '''Shape: Hexagon''' | ||
| Line 113: | Line 140: | ||
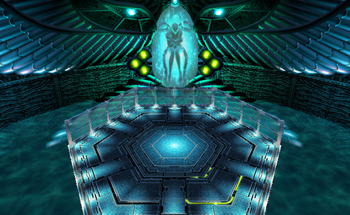
Stages 9 and 10 are identical aside from aesthetics. | Stages 9 and 10 are identical aside from aesthetics. | ||
</center> | |||
}} | |||
==Navigation== | ==Navigation== | ||
{{Navbox-BloodyRoarEX}} | {{Navbox-BloodyRoarEX}} | ||
[[Category:Bloody Roar Extreme]] | [[Category:Bloody Roar Extreme]] | ||
Latest revision as of 11:25, 5 June 2024
Bloody Roar Extreme has a variety of stages to play on. Most of them vary in their size and shape, which can potentially affect the viability of some combos and certain matchups as a whole.
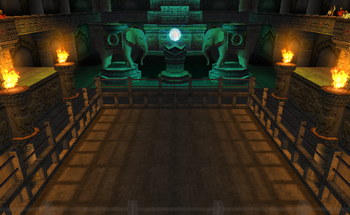
Stage 2: Chinese Temple
Size: Small (both)
Shape: Square (both)
A small-sized stage whose walls are all destructible.
The North wall (the wall on camera at the beginning of each round) features a stone platform; should a Ring Out occur in this direction, the next round onwards will be fought on it. Aside from the indestructible South wall, this platform has no walls.
Stage 3: Freeway
Size: Long & Narrow
Shape: Rectangle
A uniquely shaped stage whose walls are all destructible.
The vehicles on the North and South sides of the stage can hit fighters if a Ring Out occurs in their direction; rarely, they may cause the victim to bounce back into the stage, allowing them to continue the fight.
Stage 6: Back Alley
Size: Tiny (upper) / Average (lower)
Shape: Square (both)
A stage with two portions, one above and one below.
The upper platform is the smallest stage in the game. After characters have been slammed against the walls or the ground too many times, the floor will break and send fighters to the lower portion.
For the lower portion, only the North and South walls can be destroyed.
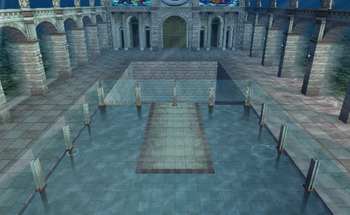
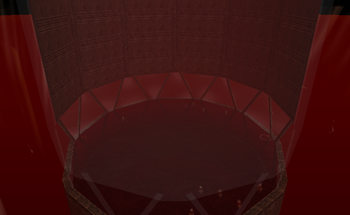
Stage 7: Aquarium
Size: Average (upper) / Large (lower)
Shape: Square (upper) / Circle (lower)
An average-sized stage whose walls are all destructible.
The North wall (the wall on camera at the beginning of each round) will cause a stage transition if a Ring Out occurs in this direction, but the round will continue as normal. In this alternate arena, walls are indestructible.
