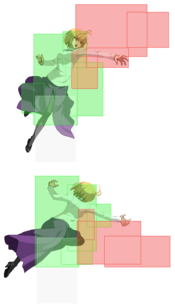
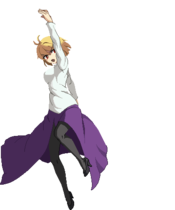
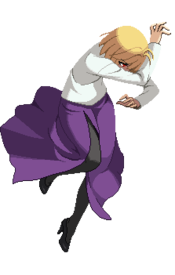
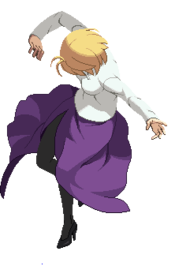
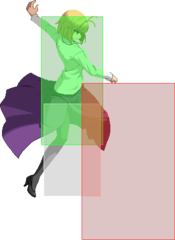
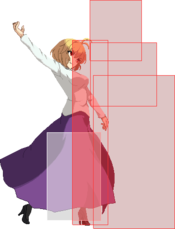
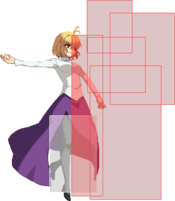
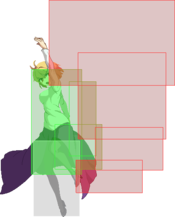
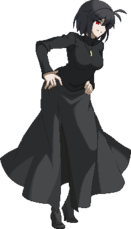
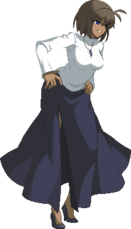
Melty Blood/MBTL/Red Arcueid
Story
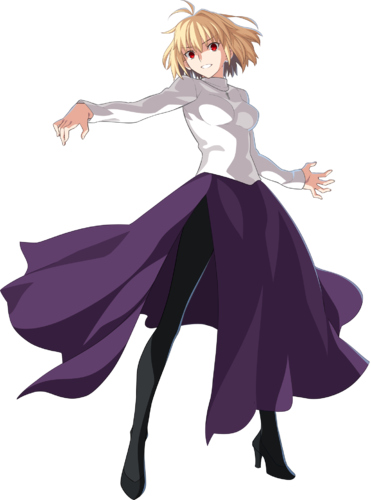
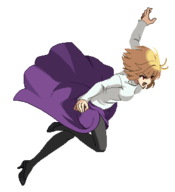
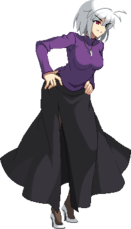
Due to the effects of coming back from a "certain accident," her vampiric impulses and overwhelming desires have taken over. Driven by instinct, she arrives in a lowly human city. Controlled by pure emotion, her actions and words are quite dangerous, but her underlying personality remains mostly unchanged. The only big difference is her increased selfishness and changed attitude toward humans.
Gameplay
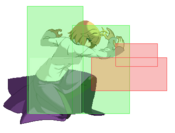
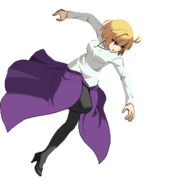
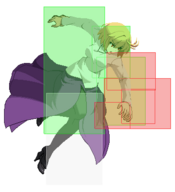
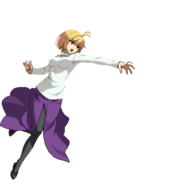
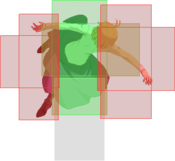
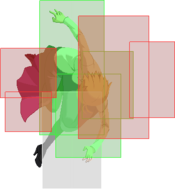
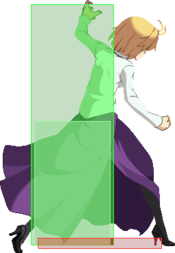
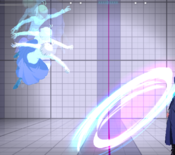
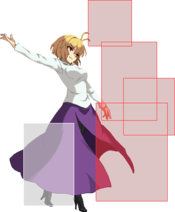
Red Arcueid, sometimes shortened to Warc, is a well rounded character with emphasis on mobility and neutral control. Her ring projectiles and strong air buttons control the neutral, while her fast dash and slippery teleports can slip right past the opponent to keep her safe and them off balance. Once in, her many forward moving buttons, corner throw combos, standing overhead, and armored charge normals make her a real threat in pressure.
| Strengths | Weaknesses |
|---|---|
|
|
Character Summary
- Moon Skills
- 6B+C - Alte Nagel: Anti-air/DP
- 3B+C - Weiss Katze: Teleport
- 4B+C - Alte Schule: Projectile
- j4B+C Alte Schule (air) Projectile
- Special Attacks
- 236A/B/C (EX OK) - Alte Nagel: Anti-air
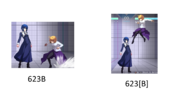
- 623A/B/C (EX OK) - Weiss Katze: Teleport
- 214A/B/C (EX OK) - Alte Schule: Projectile
- j.214A - Alte Schule: Air projectile
- j.214B/C (EX OK) - Alte Schule: Air projectile
- > A/B/C - Additional input
- Arc Drive
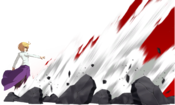
- 236B+C - Erde Seele Seufzer
- Last Arc
- A+B+C+D / D in Blood Heat - Shining Body
- Unique Attacks
- 6C, 3C, 2C>2C, j.2C
- Blowback Edge Moves
- 5[B], 5[C], j[C], 623[A], 623[B]
Dash startup: 6
Dash actionable: 9
Jump startup: 4
Jump airtime: 40
- 2AA 2C 5C 6C 236A 2C 236B jc j[C] AT
- 2AA 2C 5[C] IAD jC j214A 66 2B 5BBB jB jC AT
Move Analysis
Normal Moves
Standing Normals
5A
| Damage | Guard | Cancel | Property | Cost | Attribute |
|---|---|---|---|---|---|
| 180 | LH | -N-, -SE-, -SP-, -RB-, -EX-, -MD-, (J) | - | - | - |
| First Active | Active | Recovery | Overall | Advantage | Invul |
| 5 | 2 | 11 | 17 | -1 | - |
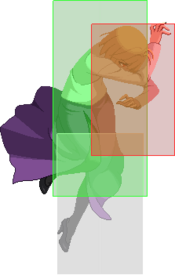
- Fairly standard 5A and fastest normal.
- Best option for rebeats, as it has the lowest total duration of all her moves.
- Can be used as an anti-air of last resort against IADs or bad jump-ins, to mash out of pressure if you're unafraid of lows, or as a low-commitment check in neutral.
- Can be repeated 3 times by holding 4 while pressing A.
5B
| Damage | Guard | Cancel | Property | Cost | Attribute |
|---|---|---|---|---|---|
| 480 | LH | N, SP, RB, EX, MD, (J) | - | - | - |
| First Active | Active | Recovery | Overall | Advantage | Invul |
| 9 ~ 13 | 4 | 17 | 29 ~ 33 | -6 | - |
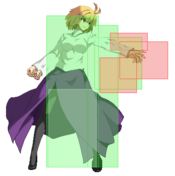
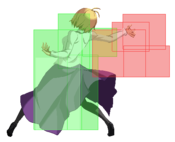
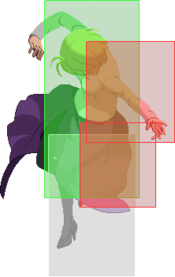
- Very limited range, mostly combo and blockstring filler, not great as a poke.
- Advances Warc forward a bit, but it's very stubby, so be careful about whiffing it.
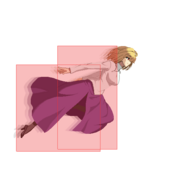
- Can only be charged a little bit (a few frames at most) without getting 5[B].
- It shares the same startup animation as the charged overhead version, so you can part-charge to try and make your opponent flinch, then catch them off-guard with 2A or 2B.
| Damage | Guard | Cancel | Property | Cost | Attribute |
|---|---|---|---|---|---|
| 400*2 (768) | H | N, SP, RB, EX, MD, (J) | Armor | - | - |
| First Active | Active | Recovery | Overall | Advantage | Invul |
| 29 | 4 | 22 | 54 | -10 | Armor 13-30 |
- Very powerful button; an advancing, armoured overhead which is fully rebeatable on block and leads to good damage on hit.
- Has two hits, but only one of them will hit overhead. If the first hit connects, the second will hit mid; but if only the second hit connects, it will hit overhead.
- Can be used as a sort of janky poke or anti-air in neutral by armouring through a button or jump-in and punishing the recovery.
- The armour will lose to EX moves and throws, but it will eat through meterless/moon-skill DPs without stopping.
- You will press this a lot, and your opponent will hate it. Even if they can consistently react to the overhead, the advancing property makes it useful in pressure anyway, and it makes mashing low shield very risky to boot.
5C
| Damage | Guard | Cancel | Property | Cost | Attribute |
|---|---|---|---|---|---|
| 610 | LH | N, SP, RB, EX, MD, (J) | - | - | - |
| First Active | Active | Recovery | Overall | Advantage | Invul |
| 10 ~ 17 | 4 | 23 | 36 ~ 43 | -10 | - |
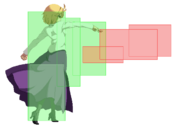
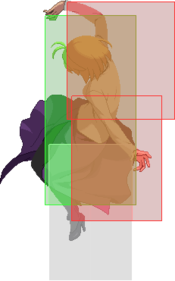
- 5C poke.
- Hits pretty far horizontally, so can be used as a way to mash out of pressure if they really push themselves far out.
- Especially good at catching IADs.
- Good for picking up after far fireball hits, too.
| Damage | Guard | Cancel | Property | Cost | Attribute |
|---|---|---|---|---|---|
| 550*2 (1045) | LH | N, SP, RB, EX, MD, (J) | Armor | - | - |
| First Active | Active | Recovery | Overall | Advantage | Invul |
| 21 | 4 | 22 | 46 | -8 | Armor 16-21 |
- Gains some range over the uncharged version, as well as advancing Warc forward a bit. It's also armoured like 5[B]!
- Very good combo tool as well, most high-damage routes will use it in some way.
- A strong frametrap option in pressure, given it's an advancing armoured move and all. However, some moves can low profile it.
- Armour does start up fairly late, and it can be easily jumped over, so it's not the strongest poke in neutral, but it's still pretty good.
Crouching Normals
2A
| Damage | Guard | Cancel | Property | Cost | Attribute |
|---|---|---|---|---|---|
| 150 | L | -N-, -SE-, -SP-, -RB-, -EX-, -MD-, (J) | - | - | - |
| First Active | Active | Recovery | Overall | Advantage | Invul |
| 6 | 2 | 11 | 18 | -1 | - |
- Fairly standard 2A low, though it is a little slower than average.
- Range is about the same as 5A, but obviously 2A hits lower to the ground.
- Generally your best option for starting off pressure strings after dashing in, for tick throws, or as a meaty.
2B
| Damage | Guard | Cancel | Property | Cost | Attribute |
|---|---|---|---|---|---|
| 420 | L | N, SP, RB, EX, MD, (J) | - | - | - |
| First Active | Active | Recovery | Overall | Advantage | Invul |
| 7 | 4 | 15 | 25 | -4 | - |
- Low kicking 2B, good range and low recovery.
- Advances Warc forward slightly, so the effective range is slightly more than it appears.
- Good for catching people after dashing under their jump, or mashing out of pressure at certain ranges.
- Can low-profile some things too.
- The stagger window on block is quite poor though.
2C
| Damage | Guard | Cancel | Property | Cost | Attribute |
|---|---|---|---|---|---|
| 620 | L | N, SP, RB, EX, MD, (J) | - | - | - |
| First Active | Active | Recovery | Overall | Advantage | Invul |
| 8 | 5 | 23 | 35 | -11 | - |
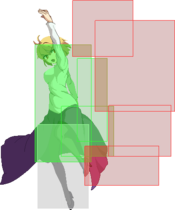
- Big sweep.
- Not quite as big as the particle effect indicates, the hitbox only reaches as far as the inner edge. Even so, it's still pretty big!
- Slightly bigger than 2B, but has quite a bit more recovery.
- Solid abare option at some ranges, but very weak to IADs.
- Strong combo filler, especially with the 2CC followup in the corner.
Jumping Normals
j.A
| Damage | Guard | Cancel | Property | Cost | Attribute |
|---|---|---|---|---|---|
| 140 | HA | -N-, -SP-, -RB-, -EX-, -MD-, -J- | - | - | - |
| First Active | Active | Recovery | Overall | Advantage | Invul |
| 5 | 4 | 11 | 19 | - | - |
- Standard jA poke.
- Can be repeated 3 times on hit/block if you hold 4, like 2A and 5A.
- A solid low-committal way to cover air-space. You can whiff cancel into j214A, airdash into jB, or jump cancel and retreat, depending on the situation.
- Hits overhead quickly out of IAD, but not much faster than jC.
- Rising jA is one of your more solid "anti-air" options as well, or at least one of your less committal ones. Welcome to Melty Blood!
j.B
| Damage | Guard | Cancel | Property | Cost | Attribute |
|---|---|---|---|---|---|
| 240*2 (470) | HA | N, SP, RB, EX, MD, J | - | - | - |
| First Active | Active | Recovery | Overall | Advantage | Invul |
| 5 | 3 (4) 3 | - | - | - | - |
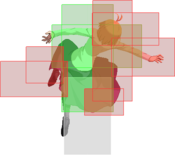
- Two hits, one above Warc and one below. As fast as jA, but much bigger!
- Very strong air space control option, but you can't act again until you land if it whiffs, so be careful about over-committing to it.
- IAD jB will usually whiff on crouchers, but it still reaches high diagonally in the air, so it's a good way to swat people out of the sky. IABD jB is a fairly safe way to protect the skies.
- Can be used as a double overhead option out of j[C] jump-ins or high IADs.
j.C
| Damage | Guard | Cancel | Property | Cost | Attribute |
|---|---|---|---|---|---|
| 560 | HA | N, SP, RB, EX, MD, J | - | - | - |
| First Active | Active | Recovery | Overall | Advantage | Invul |
| 10 ~ 17 | 5 | - | - | - | - |
- It doesn't reach that far below you, but still farther than the other air normals, so it's your strongest "standard" jump-in and best way to catch people running under you.
- Hits really high above Warc, so it's a great option for harassing people from below if they're jumping around a lot.
- Generally your best button to press out of IAD in pressure; it has the highest reward, and will occasionally catch jumpouts, letting you air-unblockable them with 5A.
| Damage | Guard | Cancel | Property | Cost | Attribute |
|---|---|---|---|---|---|
| 900 | HA | N, SP, RB, EX, MD, J | - | - | - |
| First Active | Active | Recovery | Overall | Advantage | Invul |
| 20 | 5 | - | - | - | Clash 16-19 |
- Gains a bunch of clash frames before active, like other charged j[C]s, so it can power through air normals and win air exchanges as long as you have time to charge it.
- Does lots of damage in combos, but usually requires specific routes to get it to connect.
- You don't have time to do this out of IAD, and the flash comes out too late to jumpscare people with. You do have time to charge it enough to flash after 623[A]/[B], but it still won't actually hit.
Command Normals
3C
| Damage | Guard | Cancel | Property | Cost | Attribute |
|---|---|---|---|---|---|
| 700 | LH | SP, EX, MD | LR | - | - |
| First Active | Active | Recovery | Overall | Advantage | Invul |
| 10 | 3 | 25 | 37 | -11 | Air 5-12 |
- Third hit of the autocombo string as a standalone button.
- Shifts your hurtbox to avoid air buttons, but it often clashes or loses outright, so don't rely on it too much.
- Decent option to beat Shield Counter B on reaction with, can work against IADs in pressure as well.
- Warc does at least get decent reward off raw 3C thanks to j2C routing.
6C
| Damage | Guard | Cancel | Property | Cost | Attribute |
|---|---|---|---|---|---|
| 700 | L | SP, EX, MD | - | - | - |
| First Active | Active | Recovery | Overall | Advantage | Invul |
| 23 | 4 | 20 | 46 | -7 | - |
- Briefly vanishes before lunging forward almost fullscreen. Warc will pass through the opponent and switch sides on hit or block as long as she's close enough. At max range, she'll stay in front.
- Does not hit as a crossup, can be blocked in either direction.
- Useful combo tool, especially if you want to side-swap. You can also use it in neutral to force your way in, or as a burst option to catch landing recovery from air normals or specials.
- Cancelling into 236A immediately is gapless and only -2 on block at a favourable spacing; immediate 236B has a gap, but will trade favourably with 5F normals and give you a combo while still only being -3 on block. If the 6C hits, though, 236A will let you convert but 236B usually will not.
2C~2C
| Damage | Guard | Cancel | Property | Cost | Attribute |
|---|---|---|---|---|---|
| 780 | LH | SP, EX, MD, (J) | - | - | - |
| First Active | Active | Recovery | Overall | Advantage | Invul |
| 12 | 3 | 22 | 36 | -8 | - |
- Followup to 2C, can only be done on block or hit, not whiff.
- Hits mid and advances Warc forward a bit.
- Mostly a filler for corner combos, as it wallbounces and lets you do a ton of damage. Or you can use it midscreen to gain a lot of corner carry.
- It's decent in pressure, as it's an extra frametrap option and it's only -1 on 5A rebeat, but it's nothing special. It does advance Warc forward a bit, but it also has a ton of pushback, so it doesn't make much difference.
j.2C
| Damage | Guard | Cancel | Property | Cost | Attribute |
|---|---|---|---|---|---|
| 260*6 (1332) | HA | - | Armor | - | - |
| First Active | Active | Recovery | Overall | Advantage | Invul |
| 5 | 8 (1) 2 (2) 2 (5) 2 | 10 | - | - | 13-25 Armor |
- Armoured air normal, best used as a combo extender. Does strange things to your air momentum.
- You can get a fairly low j2C with a 171C input, which can be used to punish throw attempts or as a reactionary anti-air/air counterpoke.
- The first hitbox is quite fast, but the armour doesn't kick in until later, so it can still lose in clashes and similar situations.
- Will almost always whiff on crouchers and is usually fairly unsafe if they block it on or near the ground. You have absolutely no cancel options until you hit the ground, too.
- Does not hard knockdown, and generally not a good combo ender. However, when it hits low to the ground, you can link 5A afterwards and continue your combo that way. This allows for much better routes off Shield Counter, 3C and 6BC, among other things.
Universal Mechanics
Rapid Beat 2
- Autocombo linker.
- Advancing normal with a decent hitbox, hits diagonally and can AA people occasionally, but it's nothing spectacular.
- Can't rebeat into other normals besides Rapid Beat 3, so it's not a great option in pressure. You can special cancel into 236A to become -2 instead of -10, and it will auto-confirm if the rapid beat hit.
- Does at least have a fairly good stagger window into Rapid 3 if you choose to go for it.
Rapid Beat 3
- Basically just 3C.
- You only really want to do this as a hitconfirm, not in a blockstring, but 236A or 214X can bail you out if you get it by accident.
Ground Throw
| Damage | Guard | Cancel | Property | Cost | Attribute |
|---|---|---|---|---|---|
| 300, 1000 (1300) | N/A | - | - | - | - |
| First Active | Active | Recovery | Overall | Advantage | Invul |
| 4 | 3 | - | - | - | - |
- Midscreen, flings them away and lets them air-tech afterwards. You can try to chase, but you usually essentially return to neutral.
- In the corner, however, you have time to 2B or 2C before they hit the ground, netting you a full confirm.
- If you're a little bit outside of the corner, you can occasionally pickup with 5CCC instead.
- Throw combos are super scaled, but EX moves still do quite a bit of damage. Meter dumping after a corner throw is a great way to close out rounds.
Air Throw
| Damage | Guard | Cancel | Property | Cost | Attribute |
|---|---|---|---|---|---|
| 1200 | - | - | - | - | - |
| First Active | Active | Recovery | Overall | Advantage | Invul |
| - | 3 | - | - | - | - |
- Universal air combo ender.
- Dunk-type airthrow, Warc brings them to the ground and lands next to them afterwards.
- Generally you'll want to save your double jump in combos to jump cancel your airthrow ender after you hit the ground.
- Midscreen you can set up a meaty j214A ring with a neutral jump or IAD back.
Special Moves
Alte Nagel
| Damage | Guard | Cancel | Property | Cost | Attribute |
|---|---|---|---|---|---|
| 640*2 (1196) | LH | -EX-, -MD- | - | - | - |
| First Active | Active | Recovery | Overall | Advantage | Invul |
| 9 | 3 (2) 9 | 20 | 42 | -2 | - |
- Air unblockable pillar.
- Mostly combo filler, but it's only -2 so you can use it in pressure after command normals that are normally unsafe.
- Alright as an antiair as well.
| Damage | Guard | Cancel | Property | Cost | Attribute |
|---|---|---|---|---|---|
| 420*4 (1456) | LH | -EX-, -MD-, (J) | - | - | - |
| First Active | Active | Recovery | Overall | Advantage | Invul |
| 21 | 13 | 21 | 54 | -1 ~ +4 | - |
- Bigger than 236A, more active and travels farther, but it's much slower.
- Jump-cancellable on hit, usually enables big damage followups in combos.
- Like 236A, has some use in blockstrings or as an anti-air, but it's not exceptional at either. Can be a little better than -3 if spaced out so only the late active frames hit.
| Damage | Guard | Cancel | Property | Cost | Attribute |
|---|---|---|---|---|---|
| 400*6 (1992) | LH | (MD) | Invincible, EX | - | - |
| First Active | Active | Recovery | Overall | Advantage | Invul |
| 4+5 | 13 | 47 | 68 | -34 | 1-14 All |
- Air unblockable DP, pretty big and has invincibility from frame 1
- Only gives KD on Fatal Counter and can be shielded on reaction to superflash in some situations, though.
- Good option to win clashes (e.g. after hitting moon-skills) with or on reaction to other superflashes, given the invulnerability.
- While it is air unblockable, if they're not doing anything in the air they can shield after flash and kill you for trying.
- You can use this after 214A/B whiffs in neutral to try punishing them for jumping in, but see above re: shielding.
Weiss Katze
| Damage | Guard | Cancel | Property | Cost | Attribute |
|---|---|---|---|---|---|
| - | - | -EX-, -MD- | - | - | - |
| First Active | Active | Recovery | Overall | Advantage | Invul |
| - | - | - | 32 | - | - |
- Teleport fakeout, leaves you in roughly the same spot as you started.
- If used while the opponent is ground-teching, can occasionally create confusing situations where it's unclear which side you're on.
| Damage | Guard | Cancel | Property | Cost | Attribute |
|---|---|---|---|---|---|
| - | - | -EX-, -MD- | - | - | - |
| First Active | Active | Recovery | Overall | Advantage | Invul |
| - | - | 11 | 37 | - | - |
- Disappears and reappears above opponent, as long as they're close enough. Will always try to make Warc appear in front of the opponent.
- If they're too far, Warc will just teleport into the air some distance away
- You can do an air normal on the way down, and you retain all your air options.
- However, if you don't do anything, you get bonus landing recovery.
| Damage | Guard | Cancel | Property | Cost | Attribute |
|---|---|---|---|---|---|
| - | - | -EX-, -MD- | - | - | - |
| First Active | Active | Recovery | Overall | Advantage | Invul |
| - | - | - | 32 | - | - |
- Disappears and then teleports about 3/4 screen. Can crossup, depending on spacing.
- Quite a bit of startup and no real invulnerability at any point, you can be hit while travelling or on startup if you're not careful.
| Damage | Guard | Cancel | Property | Cost | Attribute |
|---|---|---|---|---|---|
| - | - | -EX-, -MD- | - | - | - |
| First Active | Active | Recovery | Overall | Advantage | Invul |
| - | - | 11 | 37 | - | - |
- Disappears and then teleports above opponent.
- Will attempt to teleport Warc into the air behind the opponent, as long as they're close enough and they're not in the corner.
- As with 623[A], you retain all your air options but if you don't do anything you get bonus landing recovery, and if they're too far away Warc will just teleport into the air some distance away.
- Warc will usually turn around to face the opponent after re-appearing, so you can hit them crossup, but it can be a little unreliable near the max tracking range.
| Damage | Guard | Cancel | Property | Cost | Attribute |
|---|---|---|---|---|---|
| 1000, 1040 (2040) | LH | No | Invincible, EX | - | - |
| First Active | Active | Recovery | Overall | Advantage | Invul |
| 4+4 | 2 | 18 | 27 | -3 | 4-9 All |
- Nearly fullscreen teleport hitgrab that switches sides on hit.
- Not a true reversal, but invincible after the flash. You will probably die if you try this on wakeup. Takes the meter immediately, before the superflash, so you can just lose a bar for no reason if you're careless.
- Great for punishing projectiles, whiffs, Heats, etc, or for challenging pressure resets (rebeats, IADs, redashes).
- Wallbounces for combo extensions if they reach the corner.
- Air unblockable, can be used to guarantee a guard-break if they land onto the top of a 214X fireball without shielding.
- Can try to use this post-clash, but usually loses or clashes again rather than winning outright like 236C (generally) will.
- Midscreen, you need to use Moon Drive for an extension, but it will give you a fairly advantageous hard knockdown if you don't do anything, even as a combo ender.
Alte Schule
| Damage | Guard | Cancel | Property | Cost | Attribute |
|---|---|---|---|---|---|
| 1000 | LHA | -EX-, -MD- | - | - | - |
| First Active | Active | Recovery | Overall | Advantage | Invul |
| 13 | 24 | 7 | 43 | -4 ~ +19 | - |
- Single fireball. Travels pretty fast, not much recovery, it's pretty decent to throw out to keep your opponent on their toes.
- Usually you're safe even if they jump over near max range due to the reasonably low recovery. You can usually respond to Shield Counter B as well.
- Hits high enough to clip IADs sometimes too, but if they clear it, you might die without Moon Drive to keep you safe.
| Damage | Guard | Cancel | Property | Cost | Attribute |
|---|---|---|---|---|---|
| 700, 650 (1174) | LHA | -EX-, -MD- | - | - | - |
| First Active | Active | Recovery | Overall | Advantage | Invul |
| 11 | 24 (20) 24 | 7 | 61 | -4 ~ +19 | - |
- Double fireball.
- Second fireball is gapless on block after the first at some ranges, but has a gap in between when far away. The second fireball goes a little bit farther than the first.
- More committal than 214A; if they jump at you, you might die. It can catch people off-guard if they were expecting only one fireball though.
- However, you can EX cancel on whiff, so you can 236C or 623C on reaction to them jumping in (even 236BC, if you're willing to bet it all).
- You can also Moon Drive cancel, which is safer and lets you confirm the situation before you commit to anything.
| Damage | Guard | Cancel | Property | Cost | Attribute |
|---|---|---|---|---|---|
| 950*3 (2089) | LHA | MD, AD | - | - | - |
| First Active | Active | Recovery | Overall | Advantage | Invul |
| 4+9 | X | 25 | 73 | +2 ~ +20 | - |
- Triple fireball!
- Lets you convert stray fireball hits from nearly fullscreen, doing decent damage and getting you a hard knockdown.
- Good combo meter-spend option. In the corner, you can continue the combo afterwards; midscreen, it ends the combo but gets you lots of corner carry and a good hard knockdown.
- Technically the only source of guaranteed plus-frames in your grounded kit. It's not hugely advantageous, though, so be wary of overcomitting afterwards.
Alte Schule (air)
| Damage | Guard | Cancel | Property | Cost | Attribute |
|---|---|---|---|---|---|
| 1000 | LHA | -EX-, -MD- | - | - | - |
| First Active | Active | Recovery | Overall | Advantage | Invul |
| 8 | - | 18 | - | - | - |
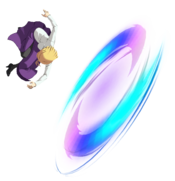
- Air onion ring fireball.
- A very solid neutral tool that covers a lot of space. Useful for running reversal safe pressure after knockdowns too.
- You roughly retain your air momentum from before throwing it, so you usually want to do this with airdash momentum or on the way down to make you plus or safe on block. Doing it while rising leaves you quite vulnerable.
- You can't act again until you reach the ground, and there's a bit of landing recovery, so be wary of people dashing under you.
- Good combo tool on top of everything else.
| Damage | Guard | Cancel | Property | Cost | Attribute |
|---|---|---|---|---|---|
| 1000 | LHA | -EX-, -MD- | - | - | - |
| First Active | Active | Recovery | Overall | Advantage | Invul |
| 18 | - | 18 | - | - | - |
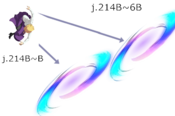
- Air fireball with an optional followup fireball.
- Covers a different, steeper angle than 214A, so may catch people unawares if they think they can move in.
- Stops Warc in place on startup, you still can't jump or move afterwards.
- Does tons of damage in combos, usually after j[C], or in the corner with an IAD.
- Very vulnerable to dash unders given the angle, so be wary.
| Damage | Guard | Cancel | Property | Cost | Attribute |
|---|---|---|---|---|---|
| 1000 | LHA | -EX-, -MD- | - | - | - |
| First Active | Active | Recovery | Overall | Advantage | Invul |
| 16 | - | 18 | - | - | - |
- Follow-up fireball, same trajectory as the first fireball.
- You can delay this second fireball a bit, but there is a lockout if you're too late.
- It's pretty rare to do 214B without also doing this follow-up.
- Can be whiff-cancelled into j214C but timing is tight
| Damage | Guard | Cancel | Property | Cost | Attribute |
|---|---|---|---|---|---|
| 500*5 (2115) | LHA | MD | EX | - | - |
| First Active | Active | Recovery | Overall | Advantage | Invul |
| 4+5 | - | 12 | - | - | - |
- EX fireball, very big and wide.
- Has 5 hits total, but occasionally some will miss and you'll lose damage. This is very sad.
- Often your go-to combo ender as it does lots of damage, is easy to route into, and gives a really good knockdown with a lot of corner carry.
- Also lets you convert stray j214A/j214BB hits that otherwise wouldn't lead to anything.
- As an ender, gives you enough frame advantage to run up and toss a meaty ring, or do funny 623[X] safejump pranks.
Moon Skills
Alte Nagel
| Damage | Guard | Cancel | Property | Cost | Attribute |
|---|---|---|---|---|---|
| 520*3 (1409) | LHA | EX, MD, -J- | - | - | - |
| First Active | Active | Recovery | Overall | Advantage | Invul |
| 7 | 13 | 35 | 54 ~ 28 | -25 ~ 0 | 1-5 Clash (MD) |
- Moon Skill DP.
- Outside of Moon Drive, it's mostly just an okay anti-air. It's pretty big, fast and tall for a 7f move, but it's air blockable and doesn't have any invulnerability or clash frames.
- In Moon Drive, however, it's really powerful, as it gains clash frames through most of the move, starting from the very first frame. It's a very strong reversal option as long as they don't shield it, if used at the right time you can clash right through their offence.
- Leads to a full confirm using j2C, dealing quite a bit of damage. Very scary option in Moon Drive overall.
- Jump-cancellable on hit, block or whiff whether you're in Moon Drive or not. However, if shielded, you lose the ability to jump-cancel so you will assuredly die.
Weiss Katze
| Damage | Guard | Cancel | Property | Cost | Attribute |
|---|---|---|---|---|---|
| - | - | - | - | - | - |
| First Active | Active | Recovery | Overall | Advantage | Invul |
| - | - | - | 27/26 | - | - |
- Similar to 623B, a teleport which travels about 3/4 of the screen and can side-switch.
- It's much faster and has less recovery than 623B, but unlike other grounded moonskills it doesn't gain clash frames in Moon Drive.
- It doesn't have any actual invulnerability, you may get clipped while travelling.
- Decent option to cross under your opponent while they're in the air, or ambush them with an unexpected approach or sideswitch though.
Alte Schule
| Damage | Guard | Cancel | Property | Cost | Attribute |
|---|---|---|---|---|---|
| 750*2 (1357) | LHA | EX, AD | - | - | - |
| First Active | Active | Recovery | Overall | Advantage | Invul |
| 9 | X | 31 | 39 | -2 ~ +21 | 1-7 Clash (MD) |
- Fireball that hits twice. Very very quick, can net a full confirm if you're in 2C range. If not, can easily be confirmed with 214C, 623C or Arc Drive to secure a knockdown, so long as you have the meter.
- Actually goes fullscreen, unlike 214A/B. Good way to whiff-punish, counter-zone or check fullscreen heats, and often catches people off guard in their dash or jump startup when they think they're safe to move.
- Also gains some clash frames in Moon Drive. Lets you clash through pressure from ranges where 6BC won't reach.
- It's slower than 6BC, though, and the clash frames don't last as long, so it tends to lose clash wars or to swift jump-cancel shields. It's a bit harder to punish on shield than 6BC, though.
- Especially scary if your opponent is at around 3000 life and you have 3 bars; you can easily close out rounds with a quick Arc Drive confirm from the other side of the screen.
| Damage | Guard | Cancel | Property | Cost | Attribute |
|---|---|---|---|---|---|
| 1100+700 (1576) | LHA | EX, J | - | - | - |
| First Active | Active | Recovery | Overall | Advantage | Invul |
| 9 | - | 18 | - | - | - |
- Double air fireball, both covering different angles. Effectively multiplies your current air momentum when input, so it's like j214A but juiced.
- Doesn't gain any clash frames in Moon Drive, but the angle on the fireballs changes a bit.
- If either fireball gets hit by or blocks one of the fireballs you gain the ability to jump-cancel. If the first fireball connects, you can even cancel the move before the second even comes out. If both fireballs whiff, though, you can't do anything until you hit the ground.
- Strong pressure reset and neutral control option, especially if you can make sure they block the first fireball. Also part of Warc's strongest ender, j4BC superjump j[C] j214BB j214C.
- Probably the strongest Moon Skill outside of Moon Drive, and pretty good move overall.
Super Moves
Erde Seele Seufzer
| Damage | Guard | Cancel | Property | Cost | Attribute |
|---|---|---|---|---|---|
| 3500 | LH | - | - | - | - |
| First Active | Active | Recovery | Overall | Advantage | Invul |
| 12 | 12 | - | 50 | -9 | 1~20 All |
- Giant full-screen wave.
- Air unblockable, but can be shielded on reaction to the flash, so don't get too wild with it.
- Strong full-screen whiff-punish option, or to convert off of far fireball hits, or as your big-money combo ender.
- Has invulnerability so you can use it as a reversal if you feel like dicerolling really hard (or after Moon Drive)
- Surprisingly hard to punish from any distance outside point-blank as well.
Shining Body
| Damage | Guard | Cancel | Property | Cost | Attribute |
|---|---|---|---|---|---|
| 4800 [4800 ~ 6960 in BH] | - | - | - | - | - |
| First Active | Active | Recovery | Overall | Advantage | Invul |
| 1+21 | 4 | 27 | 52 | -14 | 1-14 Strike,15-26 Throw |
- Usable with 4 full Magic Circuit gauges, at any time while in Blood Heat, or with a successful Shield while in Blood Heat.
- Damage in Blood Heat scales with amount of Heat Gauge remaining on activate.
- Can be comboed into with 236B Moon Drive ABCD if you're feeling flashy.
- It all returns to nothing
- It just keeps tumbling down
- Tumbling down, tumbling down
Reverse Beats
| Attack | Chain | Advantage |
|---|---|---|
| 5B/5[B]/2B | 5A | -3 |
| 5B/5[B]/2B | 2A | -4 |
| 5C/5[C]/2C/2CC | 5A | -1 |
| 5C/5[C]/2C/2CC | 2A | -2 |
| Attack | Chain | Frame Gap |
|---|---|---|
Customization
Palette options
Red Arcueid Wiki Roadmap
| 0% complete | |
|
|
| Page | Completed | To-do | Score |
|---|---|---|---|
| 0/25 | |||
| Strategy | 0/25 | ||
| Combos | 0/25 | ||
| Matchups | 0/25 |
