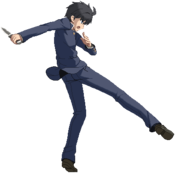
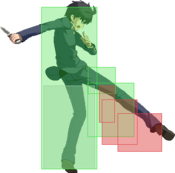
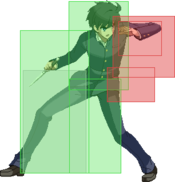
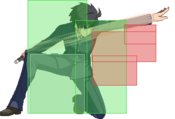
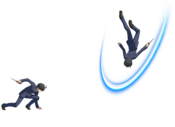
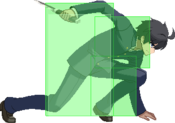
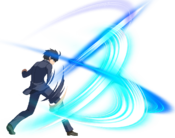
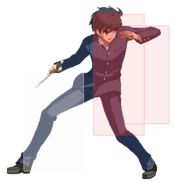
Melty Blood/MBTL/Shiki Tohno
Story
The eldest son of the historical Tohno family, he was raised for some time by the Arima branch family. However, he was called back to Souya to live in the Tohno estate shortly after his father passed away. A childhood injury left him with the Mystic Eyes of Death Perception, giving him the ability to see the death of all things in the form of lines and points. He wears special glasses which prevent his eyes from seeing these things all the time. He may be an ordinary student, but his ability to visualize death has altered his very perception of it. The aftereffects of his accident, combined with the toll his eyes take, has left him with chronic anemia. During battle, he removes his glasses to use his Mystic Eyes of Death Perception.
Gameplay
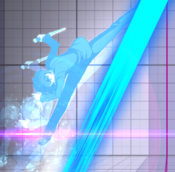
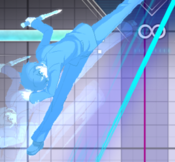
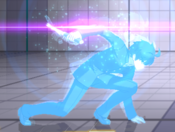
Shiki (often referred to as Tohno) is a melee rushdown fighter who punishes opponents with his fast normals and powerful advancing special attacks.
Shiki can easily tag opponents across the screen from surprising range with his high-movement special attacks, then work his offense at close range with many fast normal attacks, frametraps, safe on block moves, and possible pressure reset opportunities. Should opponents try to mash out, his backdash pulls him away a great distance where he's ready to start his pressure all over again. Landing his Boundary Peek Arc Drive (236B+C) will also enable the usage of his 22X series of specials for the rest of the round, expanding his options even further.
His strength in neutral comes with downsides; whiffing his powerful midrange pokes often leads to Shiki getting blown up due to their long recovery. His offensive game is also very linear, having limited options to open up an opponent or enforce a mix-up, even if he hasn't been predictable with his attack strings.
Shiki's strong and simple style is deeply suited for beginners to play and learn with, but a firm grasp of fighting game fundamentals is a must if one want to use him at high-level.
| Strengths | Weaknesses |
|---|---|
|
|
Backdash: -
Movement Speed: -Character Summary
- Moon Skills
- 6B+C - Flash Sheath - Single Strike
- 3B+C - Flash Run - Six Fish
- 4B+C - Flash Run - Double Strike
- j.6B+C - Flash Run - Six Fish
- 2B+C - (Boundary Peek activated) Flash Sheath - Eight Piercings
- Special Attacks
- 236A/B/C (EX OK) - Flash Sheath - Single Strike: Advancing slash
- 623A/B/C (EX OK) - Flash Run - Six Fish (Air OK): Anti-air, reversal (B/EX ver. only)
- 214A/B/C (EX OK) + Add. A/B/C - Flash Run - Double Strike: Sliding low kick
- 22A - (Boundary Peek activated) Flash Sheath - Eight Piercings: Teleporting overhead
- 22B - (Boundary Peek activated) Flash Sheath - Seven Nights: Fast dashing low
- 22C - (Boundary Peek activated) Flash Sheath - Eight Points: Multi-hit barrage
- Arc Drive
- 236B+C - Boundary Peek: High damage attack that unlocks 22X specials for the rest of the round when used
- Last Arc
- A+B+C+D / Successful Shield in Blood Heat - Testify - Seventeen Dissection: Very high damage attack
- Unique Attacks
- 44 > 44, 3C
- Blowback Edge Moves
- 5[C], j.[C], 236[B+C]
Health: 11700 (average)
Dash startup: 5
Dash actionable: 9
Jump startup: 4
Jump airtime: 37
Basic BNB (Meterless): 2A 2B 5C 2C 214BB j.[C] delay j.B, 5B (5BB) 3C j.4AAAB AT
Basic BNB (1 Bar): 2A 2B 5C 2C 214BB j.[C] delay j.B, land 5B (5BB) 236A 236C/623C
Corner BNB (1 Bar): 2A 2B 5C 2C 214BB j.[C] delay j.B, land 5B (5BB) 236A 236C 3C j.4AAAB AT
2C Starter BNB: 2C 5C 236B 2B(1) 214BB j.[C] delay j.B land 5B (5BB) 5BBB j.4AAAB AT
Move Analysis
Normal Moves
Standing Normals
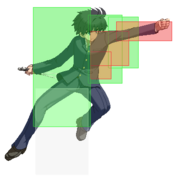
5A
| Damage | Guard | Cancel | Property | Cost | Attribute |
|---|---|---|---|---|---|
| 180 | L | -SE-, -N-, -SP-, -RB-, -EX-, -MD-, (J) | - | - | - |
| First Active | Active | Recovery | Overall | Advantage | Invul |
| 5 | 2 | 12 | 18 | -2 | - |
- Holding
 allows you to cancel
  into itself up to 2 times.
 - Whiff cancels available from frame 10 onwards (frame 10 is the first frame of the whiff cancelled move).
Shiki does a quick kick to the shins. As of the recent patch, it hits low, making it more ideal to start pressure than 2a due to its longer range. Obviously his fastest button alongside ![]() +
+![]() , as they both go active in 5F, so you can use this to mash out of situations on defense or in scrambles.
, as they both go active in 5F, so you can use this to mash out of situations on defense or in scrambles.
Very useful in pressure as it is only -1 both on block and as a rebeat whiff from ![]() normals, allowing Shiki a chance to reset pressure. Unlike most
normals, allowing Shiki a chance to reset pressure. Unlike most ![]() s, the hitbox placement on this move makes it unserviceable as an emergency anti-air against IADs.
s, the hitbox placement on this move makes it unserviceable as an emergency anti-air against IADs.
5B
| Damage | Guard | Cancel | Property | Cost | Attribute |
|---|---|---|---|---|---|
| 480 | LH | N, SP, RB, EX, MD, (J) | - | - | - |
| First Active | Active | Recovery | Overall | Advantage | Invul |
| 8 | 4 | 15 | 26 | -2 | - |
- High hitting normal that's good at hitting people out of IAD resets
- Essential combo filler that will occupy many of his rejump links
- Recovery and pushback make it ideal for checking guard cancel heats in blockstrings
5C
| Damage | Guard | Cancel | Property | Cost | Attribute |
|---|---|---|---|---|---|
| 680 | LH | N, SP, RB, EX, MD, (J) | CD | - | - |
| First Active | Active | Recovery | Overall | Advantage | Invul |
| 9 ~ 18 | 8 | 20 | 36 ~ 45 | -11 ~ -4 | - |
- Does chip damage on block
- Lunging stab. One of your footsies normals as it has a good hitbox and disjoint, and moves you forward. Useful in neutral and pressure because you can combo into both 236B and 214B if it hits at any range, or Reverse Beat into your slightly minus options so you can go for a pressure reset or recover and stab with another 5C.
| Damage | Guard | Cancel | Property | Cost | Attribute |
|---|---|---|---|---|---|
| 2000 | U | - | SK, AB, L | 2 Moon Icons | - |
| First Active | Active | Recovery | Overall | Advantage | Invul |
| 30 (26) | 4 | 24 | 58 (54) | +14 ~ +17 | 18-30 Clash (14-26 Clash) |
- Unblockable, but can be stand Shielded.
- Startup reduced by 4F during Moon Drive.
- Soft knockdown
- Shiki charges up his stab, making it unblockable. Does a surprisingly high amount of damage on its own and knocks the opponent down into a techable knockdown on hit. Due to your limited mix-up options outside of Boundary Peek, you may be inclined to use this often against respectful players, and it's also one of your unique options for beating low Shield
- Like most BE moves, you can half charge it into a low for a strong mixup, especially effective with Shiki's selection of powerful lows. Also contains a massive amount of clash frames that can stuff attempts to mash as well as all sorts of reversals (including most arc drives)
Crouching Normals
2A
| Damage | Guard | Cancel | Property | Cost | Attribute |
|---|---|---|---|---|---|
| 150 | L | -SE-, -N-, -SP-, RB, -EX-, -MD-, (J) | - | - | - |
| First Active | Active | Recovery | Overall | Advantage | Invul |
| 5 | 2 | 12 | 18 | -2 | - |
- Can chain into itself 2 times before going into Rapid Beat
- Whiff cancels available from frame 10 onwards (frame 10 is the first frame of the whiff cancelled move).
2B
| Damage | Guard | Cancel | Property | Cost | Attribute |
|---|---|---|---|---|---|
| 504 | L | N, SP, RB, EX, MD, (J) | CD | - | - |
| First Active | Active | Recovery | Overall | Advantage | Invul |
| 7 | 4 (2) 4 | 14 | 30 | -3 | - |
- Does chip damage on block
- A multi-hit low with a very high number of active frames, good range, and a long stagger window, making it a pressure staple
- The framedata combined with its pushback makes its an excellent way to reset or continue pressure
- Initial hitbox is angled high enough to tag most IADs, making it a solid defensive option as well
2C
| Damage | Guard | Cancel | Property | Cost | Attribute |
|---|---|---|---|---|---|
| 620 | L | N, SP, RB, EX, MD, (J) | HK, L | - | - |
| First Active | Active | Recovery | Overall | Advantage | Invul |
| 7 | 5 | 25 | 36 | -13 | - |
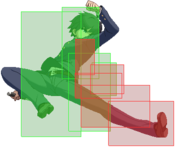
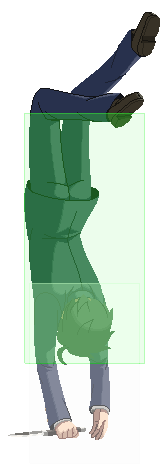
- Extends hurtbox throughout the whole leg during recovery
- Hard knockdown
Jumping Normals
j.A
| Damage | Guard | Cancel | Property | Cost | Attribute |
|---|---|---|---|---|---|
| 140 | HA | N, SP, RB, EX, MD, J | - | - | - |
| First Active | Active | Recovery | Overall | Advantage | Invul |
| 5 | 4 | 11 | 19 | - | - |
j.B
| Damage | Guard | Cancel | Property | Cost | Attribute |
|---|---|---|---|---|---|
| 392 | HA | N, SP, RB, EX, MD, J | CD | - | - |
| First Active | Active | Recovery | Overall | Advantage | Invul |
| 6 | 2,2 | - | - | - | - |
- Does chip damage on block
- Can only be cancelled (jump/chain/air throw) from the second hit, not the first
j.C
| Damage | Guard | Cancel | Property | Cost | Attribute |
|---|---|---|---|---|---|
| 560 | HA | N, SP, RB, EX, MD, J | - | - | - |
| First Active | Active | Recovery | Overall | Advantage | Invul |
| 10 | 7 | - | - | - | - |
- Strong defensive air normal with deceptively long range and nice active frames
- Mixed in with charged options makes approaching this button from below daunting
Command Normals
44 > 44
| Damage | Guard | Cancel | Property | Cost | Attribute |
|---|---|---|---|---|---|
| - | - | - | - | - | - |
| First Active | Active | Recovery | Overall | Advantage | Invul |
| - | - | - | - | - | - |
- By inputting backdash twice, Shiki gets access to a followup that extends his invul and moves him backwards almost fullscreen
Universal Mechanics
Rapid Beat 2
- Double hitting slash attack that you can perform after hitting any of the attack buttons twice in a row.
- Moves Shiki significantly closer to the opponent to set up for Rapid Beat 3 launcher
- As a result, some special cancels that might not have reached before are now much easier to connect depending on how the opponent got hit. (IE if the opponent is on the ground, you can cancel Rapid Beat 2 into


 +
+ and still have the combo connect, but if they were in the air you'll have to replace with

 +
+ )
)
3C/Rapid Beat 3
| Damage | Guard | Cancel | Property | Cost | Attribute |
|---|---|---|---|---|---|
| 700 | LH | SP, EX, MD, (J) | CD, LR | - | - |
| First Active | Active | Recovery | Overall | Advantage | Invul |
| 10 | 4 | 25 | 37 | -11 | 5-12 Air |
- Has head invulnerability
Generic anti-air / launcher normal. This normal is valuable as it gives Shiki an anti-air option far less committal than his 623X series and instant air throw. This move tends to clash though, so be prepared to buffer another move behind this in the event of one.
Can be comboed into on its own after Shiki's corner wall bounces from 236C / 4B+C if the scaling is too tight.Ground Throw
| Damage | Guard | Cancel | Property | Cost | Attribute |
|---|---|---|---|---|---|
| 1500 | U | - | HK | - | - |
| First Active | Active | Recovery | Overall | Advantage | Invul |
| 4 | 3 | 19 | 25 | +47 | - |
- Standard Throw
Air Throw
| Damage | Guard | Cancel | Property | Cost | Attribute |
|---|---|---|---|---|---|
| 1200 | U | - | HK | - | - |
| First Active | Active | Recovery | Overall | Advantage | Invul |
| 1 | 3 | - | - | - | - |
- Most common combo ender
Special Moves
Flash Sheath - Single Strike
Shiki's basic knife strike series. The A and B versions are very useful to his metagame, as they serve as strong neutral tools that can reap good reward on hit, a safe blockstring ender or frametrap option, or as staple optimized combo tool. The EX Edge version carries more use in combos, but does very well in that regard, giving him a solid and reliable option to dump meter into to get a conversion or extra damage.
B version takes longer to start up but hits 3 times and moves farther
| Damage | Guard | Cancel | Property | Cost | Attribute |
|---|---|---|---|---|---|
| 1200 | LH | -EX-, -MD- | C | - | - |
| First Active | Active | Recovery | Overall | Advantage | Invul |
| 12 | 3 | 20 | 34 | -4 | - |
- Quick knife slash
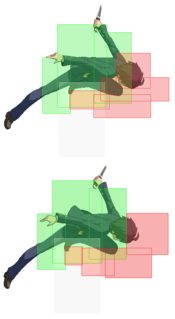
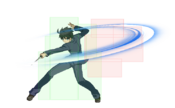
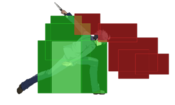
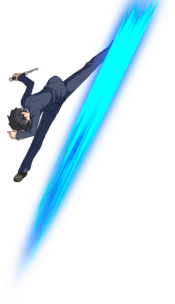
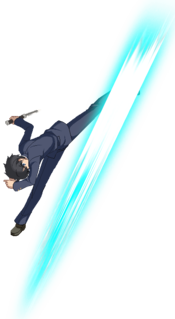
Shiki rushes forward and slashes in front of him. Very simple, yet very useful special move. It is primarily used as a mid-range harassment tool in neutral to hit the opponent at ranges they wouldn't expect, and its large, disjointed hitbox makes it perfect for that purpose. This special is air-unblockable, but although it is NOT a dedicated anti-air, it is still good for catching opponents who like to jump as you can hit their early airborne frames, landings, or pre-emptively stop IAD approaches.
In blockstrings, this move is safe to cancel into to end your pressure as it is only -4 on block. On ground hit, it now leaves the opponent in a crumpled state, allow you to get a full combo as long as you're in range for 2a, or opt for strong mixups otherwise.
It may situationally be a good combo tool for corner carry and damage. Otherwise, this move is mostly used towards the end of a combo in the sequence 5B~B > 236A > 623C, to squeeze a little extra damage and get close enough for both hits of 623C to connect.
| Damage | Guard | Cancel | Property | Cost | Attribute |
|---|---|---|---|---|---|
| 1377 | LH | -EX-, -MD- | GB(3), L(3) | - | - |
| First Active | Active | Recovery | Overall | Advantage | Invul |
| 18 | 2,2,2 | 17 | 40 | -2 | - |
Shiki runs further and slashes further in this version. Shiki's strongest special and helps define many aspects of his gameplan. Very similar fundamentally to 236A, but the primary draw of 236B is how its Ground Bounce property allows combos on any starter hit, guaranteed. This move will make your neutral scary, as one wrong move by the opponent can lead to them getting hit by a strong BNB anywhere.
On top of that, this move essentially gets you "in" if the opponent has to block it, with its even better frame advantage and positioning allowing you to stay close to the opponent and potentially start an offense. Even with the startup delay, immediately cancelling into this move from blocked normals will catch all attempts to jump out of pressure as well, and opponents who mash will end up eating a combo.
As stated before, 236B begins combos in any situation imaginable, although mid-combo it will often be used early on, as the startup and movement makes it tricky to use late into a combo. It is also well-suited to help with converting off of long-range hits, such as max range ![]() normals.
normals.
| Damage | Guard | Cancel | Property | Cost | Attribute |
|---|---|---|---|---|---|
| 2263 | LH | MD | HK, WB(4), L(4) | 1 Magic Circuit | - |
| First Active | Active | Recovery | Overall | Advantage | Invul |
| 4+4 | 6 (11) 4 | 26 | 54 | -9 | 1-4 Throw |
- Fastest and highest damage version
- NO invincibility
- Hard knoockdown
Shiki readies himself, then runs across a majority of the screen, slashing two times and launching the opponent away on hit. If the opponent is high in the air or your spacing is just plain off, the first hit has a tendency to whiff, but second slash always comes out even if the first one whiffs. A move used typically to end combos and to wallbounce into airthrow in the corner. Do not let the opponent block this, though, as it is punishable on block.
In combos, 236C grants massive corner carry on its own, even letting Shiki run the opponent even further into the corner after the move but before they wake up. It's also very easy to work this move into a combo where other options might not work, notably after a ![]() +
+![]() +
+![]() . Then, once the opponent is cornered, you can use the Wall Bounce property of 236C's second hit to turn it into a potent combo tool instead of just an ender, allowing you to continue the combo if you are close enough. This is very useful for improving Shiki's damage output in corner BNBs if you have the resources to do so.
. Then, once the opponent is cornered, you can use the Wall Bounce property of 236C's second hit to turn it into a potent combo tool instead of just an ender, allowing you to continue the combo if you are close enough. This is very useful for improving Shiki's damage output in corner BNBs if you have the resources to do so.
Flash Run - Six Fish
Dragon Kicks that even Shiki doesn't understand. These are one of his more committal ways of being able to deal with airborne opponents. All versions are very fast by being active in 5-6 frames, are air-unblockable, and result in a knockdown on hit. Most notably, the B and EX Edge versions also grant Shiki with reliable invincible reversals, which is important since his other EX Edge specials have no invincibility.
| Damage | Guard | Cancel | Property | Cost | Attribute |
|---|---|---|---|---|---|
| 1200 | LH | -EX-, -MD- | L, SK(3) | - | - |
| First Active | Active | Recovery | Overall | Advantage | Invul |
| 6 | 1 (2) 10 | 33 | 51 | -26 | - |
- Anti-air kick
- Lower hurtbox retracts slightly during startup
- Soft knockdown
Shiki does a fast Dragon Kick. Has no invincibility, but a good angle and strong active frames makes this move good for anti-airing careless air approaches. However, you're left very vulnerable in a clash situation. Goes into an automatic follow-up that gives a knockdown that can be teched by the opponent but is still advantageous. Absolutely terrible on whiff or block, so you have to be sure this move will hit, else use your other options to deal with air opponents.
Beware that this move's hitbox placement also makes it somewhat prone to getting crossed-up and attacking the wrong way if the opponent passes over your head while performing it.
Almost never used in combos as there are better ways to get to the better ender of Air Throw, but still notable is that it can be cancelled into grounded EX moves on the first hit, and can also be Moon Drive cancelled on a successful air hit for a good damage combo instead of the automatic follow-up.
| Damage | Guard | Cancel | Property | Cost | Attribute |
|---|---|---|---|---|---|
| 1200 | LH | (EX), (MD) | L, SK(3) | - | - |
| First Active | Active | Recovery | Overall | Advantage | Invul |
| 6 | 2 (2) 10 | 37 | 56 | -30 | 1-13 All |
- Invincible reversal kick
Shiki's invincible Dragon Kick. His primary reversal option, with amazing speed and vertical range. Very similar to the A version, the only differences being that it goes higher (takes longer to recover as a result), and is massively invincible. Use this to force your way out of frametraps or gaps in pressure, or to beat out specific okizeme situations
Has about as much use in combos as 623A, except this version will prorate the combo damage heavily if you use it as a starter via Moon Drive cancelling.
| Damage | Guard | Cancel | Property | Cost | Attribute |
|---|---|---|---|---|---|
| 1807 | LH | (MD) | L, HK | 1 Magic Circuit | - |
| First Active | Active | Recovery | Overall | Advantage | Invul |
| 4+1 | 3 (2) 10 | 37 | 56 | -30 | 1-16 All |
- Fastest kick
- Highest damaging kick
- Hard knockdown
EX Edge Dragon Kick, has more invincibility and active time than the B version and goes active 1 frame faster than the other two. This version also grants a hard knockdown, giving Shiki more advantage. The speed on this move is very important as it means that Shiki can punish certain safejump setups by hitting the opponent during their landing recovery, where he normally would not be able to.
Valuable combo ender, as the knockdown lets you get reliable okizeme setups off of any combo as long as he has meter with the string 5BB > 236A > 623C. Also has the same starter damage proration issues as 623B.Flash Run - Six Fish (air)
| Damage | Guard | Cancel | Property | Cost | Attribute |
|---|---|---|---|---|---|
| 1200 | LHA | -EX-, -MD- | L, SK(3) | - | - |
| First Active | Active | Recovery | Overall | Advantage | Invul |
| 6 | 1 (2) 10 | Until Landing+12 | - | - | - |
- Shiki's DP, but in the air.
- Most useful as an air combo ender when the opponent is too high for an air grab to reach but does less damage usually so not ideal if it can be avoided.
- Similarly to the grounded version, Activating Moon Drive during the first 2 hits will leave the opponent in a long period of untech (though if done in the air after a
 +
+ combo it won't be until they reach the ground, they will be able to tech in the air.)
| Damage | Guard | Cancel | Property | Cost | Attribute |
|---|---|---|---|---|---|
| 1200 | LHA | -EX-, -MD- | L, SK(3) | - | - |
| First Active | Active | Recovery | Overall | Advantage | Invul |
| 7 | 2 (2) 10 | Until Landing+12 | - | - | - |
- B version is largely the same as the A version
| Damage | Guard | Cancel | Property | Cost | Attribute |
|---|---|---|---|---|---|
| 1807 | LHA | MD | L, HK | 1 Magic Circuit | - |
| First Active | Active | Recovery | Overall | Advantage | Invul |
| 4+3 | 3 (2) 10 | Until Landing+12 | - | - | 1-4 Throw |
- EX Version with hard knockdown
- Shiki's best ender off air combos, providing great damage and okizeme after
- Useful for finishing many stray air confirms
Flash Run - Double Strike
Shiki's ground slide series. An offensive tool and a staple launcher in his combo game. The non-EX versions give him a safe special to cancel his pressure into, while the EX Edge version grants him a way to dump excess meter into knockdowns off of stray hits midscreen that can't be traditionally converted
| Damage | Guard | Cancel | Property | Cost | Attribute |
|---|---|---|---|---|---|
| 1200 | L | -EX-, -MD-, -CH- | L, SK | - | - |
| First Active | Active | Recovery | Overall | Advantage | Invul |
| 7 | 10 | 13 | 29 | -3 | - |
- Quickest slide
- Press any button on hit or block for a follow-up attack
- Always -3, as of the most recent patch, regardless of how late it connects
- Techable knockdown
Shiki's fast ground slide, is very useful in pressure to keep forcing your opponent to block low, and punishes up-backers and mashers handsomely by being able to go into a good combo on hit.
In combos, this can easily be used after ANY range button to convert into the main combo staple of 214X~X > j.[C]~B. It's also a common special to cancel into Boundary Peek from as there shouldn't be any possibility of the opponent being too high for the Arc Drive to reach using this move, as well as being the fastest and easiest special to do it from.
| Damage | Guard | Cancel | Property | Cost | Attribute |
|---|---|---|---|---|---|
| 1330 | L | -EX-, -MD-, -CH- | L, SK | - | - |
| First Active | Active | Recovery | Overall | Advantage | Invul |
| 17 | 10 | 13 | 39 | -1 | - |
- Delayed slide
- Travels slightly further than the A version
- Always -1, regardless of how late it connects
Similar to 214A in almost every regard, except for the slightly slower startup and better frame advantage. Where 214A requires a slight delay to frametrap, making it tricky to do so properly without missing windows or not leaving a gap, 214B's naturally slower startup makes it easier to do that as no delay is needed. Also has an identical reward on hit; free combos!
A very important thing to note is that due to the slide leaving Shiki right next to the opponent and -1 on block, this move gives Shiki a solid pressure reset opportunity every time it's blocked, on top of already being safe and allowing a disengage. The startup and low hitbox does make it vulnerable to jumpouts though
This version is much more commonly seen in combos due to the A version missing in a lot of places that B won't, especially at the beginning of combos. Also does a tiny bit more damage, making it more optimal.
| Damage | Guard | Cancel | Property | Cost | Attribute |
|---|---|---|---|---|---|
| 1645 | L | MD | L, LR(2), HK | 1 Magic Circuit | - |
| First Active | Active | Recovery | Overall | Advantage | Invul |
| 4+3 | 10 | 11 | 28 | ±0 (-4) | 1-4 Throw |
- Fastest, metered slide
- NO invulnerability
- Automatically performs the follow-up attack on hit or block
- Follow-up attack now behaves like
 +
+ , launching the opponent
Shiki's EX Edge slide. Unlike numerous other EX Edge specials, this one does not give Shiki any invincibility, but the hurtbox is a bit further back and shorter than the non-metered versions, making the hitbox all the more disjointed. This version is also faster than 214A and travels the furthest of the three. It's primarily used to convert off of the few situations where Shiki cannot get a combo meterless (i.e. normal hit 236A, 22C). Sees little use outside of those situations
In combos, this is guaranteed to combo from your Rapid Beat normal. Also works well as a combo ender when the opponent is too far for other things to reach quick enough, assuming they are low enough to the ground, as you can go into an air combo. Finally, in certain combos where a launch is already used (i.e. 3C starter, Shield Counter starter), managing to land 214C will make the follow-up attack not do a cinematic launch, but still give you a hard knockdown.Flash Run - Double Strike - Followup
| Damage | Guard | Cancel | Property | Cost | Attribute |
|---|---|---|---|---|---|
| 1000 | LH | -EX-, -MD-, (J) | L | - | - |
| First Active | Active | Recovery | Overall | Advantage | Invul |
| 15 | 3 | 20 | 37 | -6 | - |
- Has the same animation as
 +
+ but doesn't cause a launch effect, instead just striking the opponent into the air slightly.
 - Can be jump-cancelled on hit to chain into a variety of air combos, most commonly a charged Aerial
 followed by Aerial
  into some form of ender or relaunch.
 - The Follow-up can be triggered as long as Shiki is still still moving forward, giving the B version a very generous stagger timing if it should be blocked, though you cannot jump cancel the follow-up on block.
- It's also possible to trigger the follow-up before you connect the hit of the slide causing you to drop the combo, so be aware of this.
Boundary Peek Activated (After Arc Drive)
Flash Sheath - Eight Piercings
| Damage | Guard | Cancel | Property | Cost | Attribute |
|---|---|---|---|---|---|
| 1400 | H | -EX-, -MD- | NC, L, SK | - | - |
| First Active | Active | Recovery | Overall | Advantage | Invul |
| 29 ~ 35 37 ~ 43 |
2 | 19 | 48 | -4 | - |
- Overhead that leaves you on the opposite side you started at
- A decent mixup tool that calls out low shield attempts from afar and can lead to potential tech trap situations on hit
- Has a short window of invulnerability that can phase through most wakeup options and reversals
- Won't get you a combo on hit naturally. You can spend Magic Circuit on Aerial


 +
+ if you just want to cash out on damage and knockdown or Moon Drive if you want a longer combo.
 - Safe on block (against strike) but easily punished with throw
- If the opponent is not in a state where the overhead can hit, Shiki will recover in a vulnerable state after teleporting a set distance
Flash Sheath - Eight Piercings (Feint)
| Damage | Guard | Cancel | Property | Cost | Attribute |
|---|---|---|---|---|---|
| - | - | - | - | - | - |
| First Active | Active | Recovery | Overall | Advantage | Invul |
| - | - | - | 32 | - | - |
- Charging 22A causes Tohno to stay in place after posing for the attack, it is essentially a feint.
- The green light doesn't appear when charging making it more ambiguous.
- You can half charge 22A to make the overhead come out slightly delayed.
Flash Sheath - Eight Points
| Damage | Guard | Cancel | Property | Cost | Attribute |
|---|---|---|---|---|---|
| 1419 | LH | -EX-, -MD- | - | - | - |
| First Active | Active | Recovery | Overall | Advantage | Invul |
| 11 | 4,4,4,4,4,2[22] | 19 | 51 | -1 | - |
- Hold
 or
or  during this move to slide backwards or forwards, respectively.
 - Notably different from the other moves unlocked by Boundary Peek,

 +
+ isn't a metered version of either of the 2 dashes, instead having Shiki perform a rapid fire series of slashes in front of him, dealing decent damage.
 - With its massive disjoint, active frames, air unblockable properties, and clash frames, it can be a strong tool for maintaining space and stuffing out aggressive approaches. Where it shines most however is its use in pressure: -1 on block and spacing him perfectly for his plethora of pressure options, these slashes are a powerful reset that can reap great reward on hit. It can also pressure the opponent into making hasty decisions due to its massive chip damage. If your opponent's character or wits can't find a way around this move, they're going to have a hard time once you gain access to it
Moon Skills
Flash Sheath - Single Strike
| Damage | Guard | Cancel | Property | Cost | Attribute |
|---|---|---|---|---|---|
| 1365 | LH | EX, MD | L, GB(2) | 3 Moon Icons | - |
| First Active | Active | Recovery | Overall | Advantage | Invul |
| 14 | 2 (4) 4 | 17 | 41 | -4 | Clash 1-11 |
- Moon Skill version of


 +
+ specials.
 - Hits twice like


 +
+ but otherwise functions the same as

 +
+ . Travels around the same distance and allows a combo extension afterwards, doing slightly less damage for being slightly faster making it easier to work into a combo.
 - Runs off dash momentum incredibly well due to its input being the same direction, making it an even stronger whiff punish tool
Flash Run - Six Fish
| Damage | Guard | Cancel | Property | Cost | Attribute |
|---|---|---|---|---|---|
| 1419 | LHA | EX, MD, -J- | L | 3 Moon Icons | - |
| First Active | Active | Recovery | Overall | Advantage | Invul |
| 6 | 1 (2) 10 | 41 (10) | 60 (29) | -32 (-1) | Clash 1-5 |
Flash Run - Double Strike
| Damage | Guard | Cancel | Property | Cost | Attribute |
|---|---|---|---|---|---|
| 1452 | L | EX, MD, (J) | L, WB(5) | 3 Moon Icons | - |
| First Active | Active | Recovery | Overall | Advantage | Invul |
| 12 | 22 | 17 | 52 | -3 | Clash 1-11 |
- Moon Skill version of


 +
+ special.
 - In between the A and B version in terms of speed and goes further than all the rest by a large margin, covering over half screen.
- Unlike the other versions,
 +
+ +
+ hits multiple times and continues advancing forward on hit or block.
 - The final hit of this is also automatically trigger however it knocks the opponent away instead of launching them up. In the corner this will give you a wall bounce and allow you to further combo into some of his highest damaging routes
- You can EX Cancel any hit into any EX special, though


 +
+ and
and 

 +
+ won't connect on the final hit. You can use

 +
+ and
and 

 +
+ +
+ right away, but delaying the former will increase the distance travelled allowing you to reach the corner in situations you normally wouldn't have.
Flash Run - Six Fish (air)
| Damage | Guard | Cancel | Property | Cost | Attribute |
|---|---|---|---|---|---|
| 1293 | LHA | EX, MD, -J- | L | 3 Moon Icons | - |
| First Active | Active | Recovery | Overall | Advantage | Invul |
| 6 | 2 (2) 10 | Until Landing+12 | - | - | - |
Boundary Peek Activated (After Arc Drive)
Flash Sheath - Eight Piercings
| Damage | Guard | Cancel | Property | Cost | Attribute |
|---|---|---|---|---|---|
| 1530 | H | EX, MD, (J) | NC, L, SK | 3 Moon Icons | - |
| First Active | Active | Recovery | Overall | Advantage | Invul |
| 26 ~ 36 | 4 | 19 | 48 | -1 | Clash 1-11 |
- Moon Skill version of Shiki's

 +
+ .
. - A direct upgrade with faster startup, more damage, and proper advantage on block. It also has a slightly larger trigger range than

 +
+ letting you hit people from a bit farther away. However, it still carries all of
 +
+ 's downsides.
 - Additionally this move is jump cancellable on hit, block, and even whiff. On block Shiki can go for an aerial left/right mix or just land and start a new blockstring, and on whiff can be jumped out of to stay safe.
- Can be combo'd into a full confirm with the jump cancel
Super Moves
Boundary Peek
| Damage | Guard | Cancel | Property | Cost | Attribute |
|---|---|---|---|---|---|
| 3500 | LH | N/A | HK | 3 Magic Circuit | - |
| First Active | Active | Recovery | Overall | Advantage | Invul |
| 1+6 | 7 | 32 | 45 | -22 to -16 | Strike 1-13, Throw 1-31 |
- After performing this move you gain access to 22X special moves for the rest of the round. Hit, block, or whiff does not matter. Killing with this move unlocks them for the next round.
- Almost, but not quite fullscreen travel distance.
| Damage | Guard | Cancel | Property | Cost | Attribute |
|---|---|---|---|---|---|
| 3500 | Unblockable | N/A | HK | 3 Magic Circuit, 2 Moon Icons | - |
| First Active | Active | Recovery | Overall | Advantage | Invul |
| 1+31 (1+20) | 7 | 44 | 82 (71) | N/A | All 1-38 (Strike 1-27, Throw 1-31) |
- After performing this move you gain access to 22X special moves for the rest of the round. Hit, block, or whiff does not matter. Killing with this move unlocks them for the next round.
- Unblockable, but can be stand Shielded.
- Slightly farther range than uncharged version (still not fullscreen).
Testify - Seventeen Dissection
| Damage | Guard | Cancel | Property | Cost | Attribute |
|---|---|---|---|---|---|
| 4800 | LH | N/A | HK | 4 Magic Circuit | - |
| First Active | Active | Recovery | Overall | Advantage | Invul |
| 1+21 | 4 | 27 | 52 | -14 | All 1-25 |
- Usable with 4 full Magic Circuit gauges, at any time in Blood Heat, or with a successful Shield while in Blood Heat.
- Damage in Blood Heat scales with amount of Heat Gauge remaining on activate.
Reverse Beats
| Attack | Chain | Advantage |
|---|---|---|
| 5B/2B | 5A/2A | -3 |
| 5C/2C | 5A/2A | -1 |
| Attack | Chain | Frame Gap |
|---|---|---|
Customization
Palette options
Shiki Tohno Wiki Roadmap
| 31% complete | ||
|
|
| Page | Completed | To-do | Score |
|---|---|---|---|
|
Explanation of most specials, moon skills, arc drive and last arc. Majority of move data and properties. Image previews of normals has been added |
Explanation of majority of normals, images of moves and hitboxes |
18/25 | |
| Strategy |
Unstarted |
0/25 | |
| Combos |
A fair assortment of starter and advanced combos have been added. Combo Theory section added and very basically explained, expand and elaborate in the future |
Expand starter section as much as it can, demonstrations in the notes if possible(streamable links for the harder combos that require tight links) |
13/25 |
| Matchups |
Unstarted |
0/25 |

