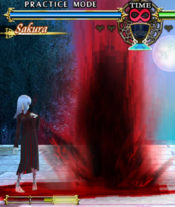
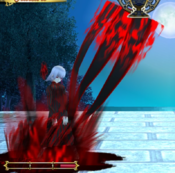
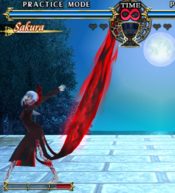
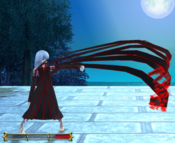
Fate Unlimited Codes/Sakura
| Sakura | |
|---|---|
| Health | 9,000 |
| Prejump | 4 |
| Backdash | 40F (Invulnerable 1-31) |
| Backdash Distance | 1.8359 |
| Sidestep Type | Aggressive Inward Spiral |
| Weight | Light |
Introduction
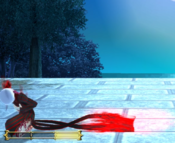
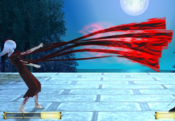
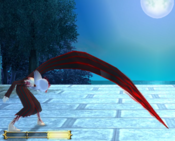
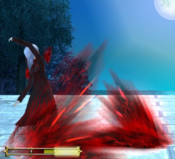
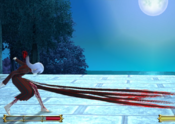
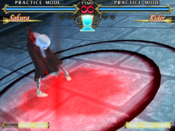
Sakura is one of the longest range characters in this game (kinda like Dhalsim but without hurtboxes on her ribbons), allowing her to poke at opponents from a distance and harrass them with her huge normals which are entirely disjointed. She has the worst grounded mobility (her air mobility is about average) in the game, often giving her difficulties to make use of her powerful normals. While she does possess a teleport, it has a lot of recovery, so you need to be careful with it (land out of range or bait an attack with it). Good use of negative edge can make her pressure and mixup ridiculously good, but only if she has the meter and is given time to setup. Meter management is crucial for her, and meter damage gives her trouble. If she knocks her opponent down though, they have to deal with some downright busted setplay including multiple unblockable setups.
Pros
- Strong DISJOINTED reach on all normals, especially 5B and 2B.
- 2B hurtbox is very low to the ground allowing her to low profile a lot of attacks
- 236[C], while slow, can be detonated even while she is in hitstun by button releasing.
- Using held-button-transfer she can actually use attacks with the buttons the set specials were set with while still holding them
- 214X is a held-button-detonate special, which allows her to detonate while doing other things
- 214C is a low, even when used in the air
- Because 214C is low and she can detonate it while doing other things, she can detonate it with any overhead for an unblockable setup.
- Mixup game is incredibly difficult to block, especially after a knockdown
- Unblockable setups produce very strong possible checkmate scenarios in game-winning rounds.
- (Note: EXTREMELY HARD) Her most Optimal meter gain routing allows for her to loop unblockable setups in a pretty scary manner that is fairly airtight.
- Her shadows can eat activate and burst hits allowing her to punish.
- If her shadow eats a hit from an attack the opponent gets none of their cancel options even if they'd have them on whiff.
Cons
- Very high execution requirements, up there with Saber's, Archer's and Gilgamesh's requirements, putting her around the 3rd-6th hardest execution character in the game
- Held Button Transfer is pretty tricky to learn. Especially on pad.
- Somewhat low damage on paper (her setplay being so strong makes her damage much higher in practice though)
- Mobility is very committal, difficult to use, and overall is not very strong. Her base grounded mobility is especially terrible.
- She needs meter a lot. Her meter management game is crucial and difficult. In part because her meter gain is hampered by her overall combos being on the shorter side, and her tendency to spend meter mid combo when going for her more damaging routes.
- Wakeup/otg activate, especially with varying its timing/doing it early does give players more albeit expensive options to possibly get out of her vortex setups (there are ways to play around this, but they do result in a drop of efficacy of her setplay).
- Some people might throw their controllers after playing you (this might be a pro for some)
Normals
5A
|
|---|
2A
|
|---|
5B
|
|---|
2B
|
|---|
5C
|
|---|
2C
|
|---|
6C
|
|---|
6A+B
|
|---|
j.A
|
|---|
j.B
|
|---|
j.C
|
|---|
Specials
236X
|
|---|
623X
|
|---|
214X
|
|---|
421X
|
|---|
22X
|
|---|
Supers (WIP)
236236A
|
|---|
236236[B]
|
|---|
236236C
|
|---|
Strategies
Sakura's slow, her walk is incredibly slow. You will need to rely on grounded and air teleports to try to trip your opponent up and get them to whiff an attack within the range of her 5B or 2B. As well as jump, double jump, and fastfall. The bulk of Sakura's neutral involves being in the air and trying to bait and punish an anti-air. Once you're in range you have a lot of tools to work with to try to open them up: 5B and 2B have a lot of range, are active for a very long time, 5B hits 3 times and 2B hits twice, 2B is a low on top of all of that and drags them in allowing for more combos off of it. 6C and 421B are both overheads, 421B leaves them in crumple state, while 6C leaves them standing. Additionally both 214C AND it's aerial version hit low, and can be delay detonated.
Her teleports have a lot of recovery, but if you get your opponent to whiff an attack with them they will usually have to wait longer than you will. You want to end combos with 421C most of the time as it hard knockdowns the opponent.
After knocking down the opponent, you have a lot of options for okizeme/setplay. You can meaty with j214C for an aerial low, can even make it be left-right ambiguous at that, can set 214X and do a tk 22A/B for a left-right mixup, can jump over their head with jC for a left-right mixup and sp cancel it into j214C for icing on the cake. And you can even do a bunch of unblockables too. You will want to watch out for wakeup/otg activate however, as there's definitely spots it can be used to get out of your pressure.
Combos (WIP)
normal chain order: (within an arrow separated by commas can be in any order) 5A > 2A > 5B > 2B > 5C, 2C > 6C
6C is an overhead and can link to 5A, 2A, and 5B
(note: 2C is NOT included when a combo says "normals")
Beginner combos:
"normals" means: 5A > 2A > 5B > 2B > 5C
normals > 2C > 421C
Normals > 2C > 421A > jump > j.A > j.B > j.C > d. jump > j.A > j.B > j.C > j.22A/B/j.214[X]
Normals > 2C > 421A > jump > j.A > j.B > j.214A > land > jump > j.A > j.B > j.214A > land > jump > j.A > j.B > j.C > j.22A/B/j.214[X]
Harder combos:
main damage loop (only do 3 loops on light characters: every female character and Shirou. 2 loops for the rest):
normals > 2C > (421A > tkc 214A)x3 > 421A > tkc 421C
damage loop + meter gain v2 (gains 67% meter)
normals → [2C → 421A → tkc 214A]x2 → 2C → 421A → tkc → 421C
- you can omit the last 2C to improve the consistency
Meter gain (intermediate, gains 60? meter):
Normals > 2C/421A > 421C/tkc 421C > 5B 5C 2C 421C
Harder meter gain route (gains 80-90 meter):
Normals > 2C > jump (9) > delay j.B > j.C > land 5B > 5C > 2C > 421A > tkc 421C
Meter gain optimized (even harder but gains 90-100 meter):
Normals > 2C > delay 421A > jump (9) > delay j.B > j.C > land > 5B > 5C > 2C > 421A > tkc 421C
meter neutral combo that ends with 214C set, and a hard knockdown for UB looping
2B > 2C > 421A > tkc 214B > tk j.214[C] > land 2B (transfer held button to B) > 421A > tkc 421C
- 214B has to hit in a very specific manner: its 3rd hit must hit a little later than its first 2 hits to give Sakura time to tk j.214C. and it has to be a super jump tk or this won't work
- Will not work at corner because j.214B's 3rd hit will hit too soon
- Characters' hurtbox specific. Does not work on tall characters
Ridiculously hard meter positive combo ending in HKD and with set 214C for UB looping
5B > 2B > 5C > 2C > 421A > jump (8) > NORMAL JUMP > j.623B > land 5B > 2C > 421A > tkc 214[C] > rc > 5[B] (transfer to B) > 421A > tkc 421C (transfer to A)
(Okizeme is (jump or superjump, turnaround for xup) > jB/C (and release A) > land and do 5B to do the previous combo)
Advanced meter positive with HKD ender and 214[C] set up for UB looping (Video Demonstration)
Normal → 2C → 421A → jump(8) j.623B → 2C → 421A → jump(8) j.623B → 2C → 421A → 214[C] → rc → 5[B] (transfer to B) → 2C(only on light characters, or if you omit 2C earlier) → 421A → tkc 421C (transfer to A)
Unscale setup (RG): (you must have at least 150 meter before the 421A here, or be activated)
combo (dont add too much gravity) > 421A > tkc 214[A] > RG > 5B > 2C > 236236B > release A > (236236B hits)
Unscale setup (activate)
combo (dont add too much gravity) > 421A > tkc 214A~A+B+C (kara activates, the timing is a bit weird) > 236236B > 214A hits > 236236B hits
Unscale setup (neither rc nor activate):
normals > 2C > 421A > tkc 214B > tk j.214[A] (transfer held button to C) > 2B > 421A > tkc 236236B > release C > (214A hits) > (236236B hits)
(note: the key is having the 3rd hit of 214B hit be delayed from its first 2 hit. This is very finicky and will not work on tall characters because the 3rd hit of 214B will hit them too soon)
Combo for activated hit into unscale (4800 damage, needs 100 meter left in the activate):
(hit) > 5B > 2B > 5C > 2C > 421A > tkc 214[A] > RG > 5B > 2C > 236236B > (release A) > (214A hits) > (236236B hits)
(note: you can omit the 421A and thus do 214[A] instead of tkc 214[A], this sacrifices 2-300 damage)
-Sakura got the moves ToD - 10k damage 240%-meter starter (Video Demonstration)
The damage is not cap at 10k if you have more meter
This ToD is not very realistic but it can happen. Avoid using 5C if you know you'll have enough meter as it will reduce the potential damage
The opponent must have 80% meter or less or they will be able to burst before she starts 421A dancing (which she will no longer be in the burst radius. 7 is the maximum number of 421A juggle that she's still safe from burst)
214C hit(optional) → 5B → 2B → [2C → 421A → tkc 214A]x2 → 2C → 421A → tkc 214[A] → RC → 5B → 2C → 421A → tkc 236236B → 214]A[ hit → 236236B hit → 2B → ACTIVATE → 5B → [crouch cancel 421A]x7 → tkc 214B → 236236B (no delay)
-Sakura Unlimited Hips Dance - 300% activation combos (Video Demonstration)
This ToD can work both with and without the Grail, but the damage will not reach 10k without it
- Normal 300% Activation: 214C hit(optional) → normals → [2C → 421A → tkc 214A]x2 → 2C → 421A → tkc 623B → ACTIVATE → [crouch cancel 421A]x11 → tkc 623C → RC → [crouch cancel 421A]x6 → tkc 214B → 236236B (no delay)
- Grail Activation: 214C hit(optional) → normals → [2C → 421A → tkc 214A]x2 → 2C → 421A → tkc 623B → ACTIVATE → [crouch cancel 421A]x11 → tkc 623C → RC → [crouch cancel 421A]x9 → tkc 623B → 236236B (no delay)
- You can add an extra 421A in each reset, but it will be inconsistent
Unblockable setups (she has enough of these that they warrant their own section)
(preset 214C mid combo, or set it mid pressure) > any overhead and release C
(rc-based setup: needs 90 meter at the end of the combo beforehand)
(combo ending in 421C) > 214[C] (transfer held button to A) > rc > 6C > (release A right after inputting C)
(another rc-based setup, needs to end the previous combo with at least 90 meter)
(combo ending in 421C) > 214[C] > rc > jump > (fastfall optional) > jB/C (and release C around the same time)
(needs at least 30 meter) 421C ender > tk 214[C] > set up overhead and release C
Air Unblockable setup (needs 130 meter, does 4.8k):
(combo ending in 421C)> jump > j214C~A+B+C (slide/kara it to immediately activate) > jB/C > land > 5B 2B 5C 2C > 421A > 2147[A] > rc > 5B 2C > 236236B > release A > (236236B hits)
TK Air unblockable setup
(combo ending in 421C) > (if midscreen) tk 22A/B >
tk j.214C > act > j.B/C > land 5B > 2B > 5C > 2C > (opt 421A) > (tkc) 214[A] > rc > 5B > 236236B > (release A) > (236236B hits)
(note: if you do 421A, you must do tkc 214[A], if not you don't need to)
Grail activated UB loop (does meter damage each loop, need to check damage and meter damage amounts)
(with 214C being held on A) 6C and release A => 5B > 2B > 214[C] (transfer to A) > rc > 5B > 2B > 5C > 2C > 421C)xN (do 236236C on the last)
(Command grab super based unblockable setups):
236[C]~A+B (immediate activate, keep C held) > 236236A and release C
(be activated) 236[C] > 236236A and release C
236236[B] > 236236A and release B


