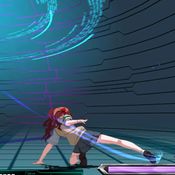
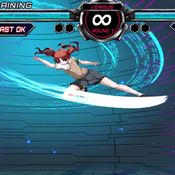
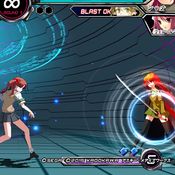
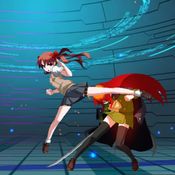
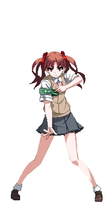
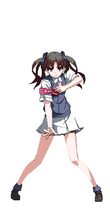
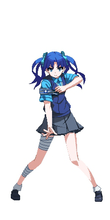
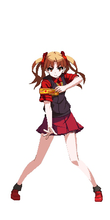
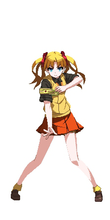
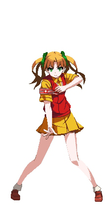
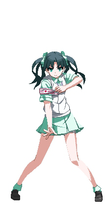
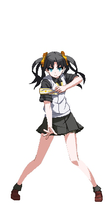
Dengeki Bunko: Fighting Climax/DFCI/Kuroko Shirai
Introduction
Originally from the light novel Toaru Majutsu no Index.
Gameplay
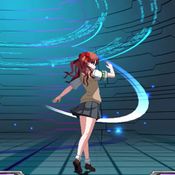
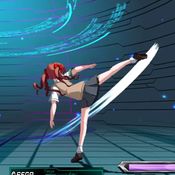
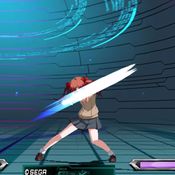
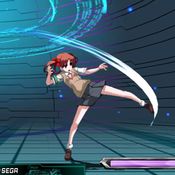
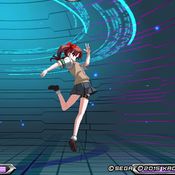
Kuroko has average dash speed, a somewhat slow/noticeable airdash, a few stubby buttons, and some other flaws. However, her pressure (especially in potential) can be scarier than a lot of the cast.
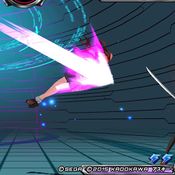
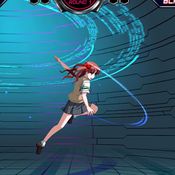
Kuroko's potential allows her dashes to become teleports. You can grab immediately out of teleport or do a low. Her airdash and ground dash are both teleports, so with trump and air-assist call, you can blind the opponent into which teleport you are using. Her potential also allows you to react to things full screen with 5A+B and trump (they become homing moves). Her teleport dash also moves her farther with a dash with a bit of momentum, so dash 2A might catch people playing footsies walking backwards.
Getting air unblockable moves is useful for Kuroko because her j214 series allows her to bring them back down to get more damage with super without an assist. 5B and 2B are both jump cancellable and can be used to catch opponents chicken-blocking and are only -6 and -5 respectively. Due to the large cancel window on jump-cancellable normals and the fact a blocked 2B/5B push your far enough that a move faster than 5-6 frame startup can't punish you, you may be able to run back in for further pressure.
The uncharged needle specials are good zoning tools, but like other attacks that hit far in this game, they have massive recovery. Doing charged needles is okay, but they can easily be ranbu'd/full-screen punished by characters who can do that.
Kuroko can do double overhead outside of trump using her airdashes, making this another thing to look out for during pressure. Doing a falling low-to-ground j236A is also plus on block, and it leaves a slight gap if you cancel it from an air normal.
Pros
- Air mobility (air dash, 214X for forward moving, 236X for air stall)
- Potential causes Kuroko to teleport during dashes, allowing for scarier pressure
- Potential also allows 5A+B and A+C to track full screen, allowing for full screen punishes with strong damage
- Needles can be used for zoning while also contributing to potential
- Charged needles are plus on block
- Can solo combo into powerup blast
- j.214X allows you to get them back to the ground after an air combo for a follow-up super/assist/etc
- Full screen snipes (236A+B and 63214B+C)
Cons
- Does far less damage than other characters
- Some stubby normals and/or slow normals
- Whiffing needles (do to missing or getting pushblocked) is very punishable
- Trump punishable if blocked in corner (both facing towards and away)
- Low-to-ground air dashes reactable enough to be punishable without assist cover
Recommended Assists
Zero - 6D launches them really high in the air. When they're at the peak height you can use trump for a really funny looking OTG. Also, she lets you have an alpha counter, which is pretty nice
Mashiro - Easy confirms from 214X 5S into combo blast. 5S also acts as a fast anti air in a spot Kuroko is awkward dealing with. Cat pressure (6S) off most knockdown moves (214A+B, 236A+B, 41236+C, 63214B+C).
Dokuro - Everyone works well with Dokuro.
Potentials
Universal Potential: Increases damage dealt by 10% for 20 seconds when health falls under 30%. If behind in rounds won, increases damage dealt by 20% instead.
Character Potential: Hit the opponent 3 times with 236X (on block is OK) for Attack Level 1 and to gain a dash teleport (5AB and Trump Card will also track the opponent) for 20 seconds. Can be activated twice per round.
Move List
L = Low, H = High, A = Air
JC = Jump Cancel, SC = Support Cancel, EX = EX Cancel
ISC = Impact Skill Cancel, TCC = Trump Card Cancel, CAC = Climax Art Cancel
Startup includes the first active frame.
Normal Moves
| 5A |
|---|
| 2A |
|---|
| 5B |
|---|
| 2B |
|---|
| 5C |
|---|
| 2C |
|---|
| j.A |
|---|
| j.B |
|---|
| j.C |
|---|
Special Moves
| Steel Darts 「-スティールダーツ-」 236X Air O.K. |
|---|
| Sexy Teleport 「」 214X Air O.K. |
|---|
Universal Mechanics
| Throw 6C or 4C |
|---|
| Impact Skill Teleport Arts 「」 5A+B |
|---|
| Impact Skill Elegant Impact 「」 2A+B |
|---|
| Impact Break 4A+B |
|---|
| Passionate Kiss 「情熱のベーゼ」 A+C |
|---|
Climax Arts
| Justice Enforcer 「」 41236B+C |
|---|
| Steel Phalanx 「」 63214B+C |
|---|
Combos
- For the majority of the following combos, j.236[A+B] should be released as soon as the charge flash appears
- For any combo that goes j.214X > j.214A+B, often the j.214A+B will need to be done before the teleport from the j.214X in order to get hard knockdown
Midscreen
5A Starter
- 5A > 5B > 5C > 5A+B > 214A+B
- 5A > 5B > 2C > 2A+B j.236[A+B] > j.A+B+C
- Solo powerup combo for one meter
- 5C can be used instead of 2C, but2C moves you closer to the opponent so is more consistent
- Completely leaving out the 2C or 5C works too
- 5A > 5B > 5C > 5A+B (one-hit) > 236[A+B] > 66 > 5B > j.B > j.C > j.A+B+C
- Solo powerup combo for one meter.
- More difficult than the 2A+B variant, but 2A+B will not combo at all ranges.
- 5A > 5B > 5C > 2A+B > 236[A+B] > 5B > j.B > j.C > j.A+B+C
- Solo powerup combo for one meter.
- If too far away for 5C > 2A+B to connect you can remove the 5C or replace the 2A+B with 5A+B
- If you're having trouble linking the j.A+B+C then removing the 5C makes it easier
- 5A > 5B > 5C > 2A+B > 236[A+B] > 5B > j.B > j.C > j.B > j.C > j.214C > 214A+B
- Max damage off two meter and ends in hard knockdown.
- 5A > 5B > 5C > 2A+B > 236[A+B] > 5B > j.B > j.C > j.B > j.C > j.214C > 41236B+C
- Max damage off three meter
- 5A > 5B > 5C > 2A+B > 236[A+B] > A+C
- High damage for one meter and puts you in trump state.
- 5A > 5B > 2C > 5C > j.B > j.C > j.236A > j.236[A+B] > 236A
- Requires trump state. Potential off one bar.
- 5A > 5B > 2C > j.A > j.B > j.C > j.236A > j.236[A+B] > 236A
- Requires double ignition. Potential off one bar.
- 5A > 5B > 2C > j.A > j.B > slight delay > j.C > land > j.B > j.C > j.B > j.C > j.214C > slight delay > j.214A+B
- Requires double ignition.
- j.214C can be replaced with j.236A if only one A button was used in the starter due to hitstun scaling.
- j.C > j.236A > j.236[A+B] > 5B > j.B > j.C > j.236A
- Potential off one bar. j.C can be from an IAD
- 5A > 5B > 5C > 5A+B > j.236[A+B] > 66 > 5B > j.B > j.C > j.236A > j.236[A+B] > 63214B+C
- 3.8k and potential off 4 bar. Not bad I guess?
- 5B > j.B > j.C > j.236A > j.236[A+B] > 236A
- Only works on anti-air 5B
- One bar combo into potential
- 5B > j.B > j.C > j.236A > j.236[A+B] > j.B > j.C > j.B > j.C > j.236A > j.214A+B
- Only works on anti-air 5B
- Two bar potential and hard knockdown
- Trump or lv2 can be added to the end for more damage
4A+B Starter
- 4A+B > B > j.B > j.C > j.236A > j.236[A+B] > 236A
- Potential off one bar
- 4A+B > j.B > j.C > j.236A > j.236[A+B] > j.B > j.C > j.236A > j.214A+B
- Two bar potential and hard knockdown
- Trump or lv2 can be added to the end for more damage
- 4A+B > j.B > j.C > j.236A > j.236[A+B] > j.B > j.C > j.B > j.C > j.214A > j.214A+B
- Hard Knockdown
- Trump or lv2 can be added to the end for more damage
Corner
5A Starter
- Notes about this particular combo
- 5A > 5B > 5C > 236A > 236(A+B) > 5B > j.B > j.C > j.B > j.C > j.236A
- Potential off one bar.
4A+B Starter
- 4A+B > B > j.A > etc
- Notes about this particular combo
Assists
Mashiro
- ... > 214X/j.214X > 5S on second hit > 66 > A+B+C
- Hitstun-scaling dependent, but will work most of the time.
Dokuro
- ... > 214X/j.214X > 5S on second hit > 66 > A+B+C
Zero
- ... > 214X/j.214X > 6S on second hit > A+B+C
- ... > 214X/j.214X > 6S on second hit > A+C
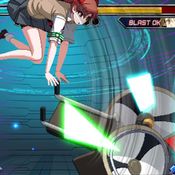
- Doing the Trump late enough will OTG. Kuroko and the opponent will both be on screen and you'll just see the wheelchair falling. Pretty funny looking.
Uiharu
- 5A > 5B > 5C > 5S > 5A+B > A+B+C
- 5A > 5B > 5S > 5C > 236A > A+B+C
- 5A > 5B > 5S > 5C > 236A > j.B > j.C > j.236A > j.236[A+B]/j.214A+B
- Hard knockdown.
- j.214A+B does slightly less damage, but is easier to time hard knockdown with.
- It is possible to insert a second 5B before the j.B for slightly more damage. However, in the event that Uiharu does the red followup, this will prevent hard knockdown.
- 5A > 5B > 5S > 5C > 236A > j.B > j.C > j.236A > j.236[A+B]/j.214A+B > A+B+C
- It is possible to insert a second 5B before the j.B for slightly more damage. However, in the event that Uiharu does the red followup, you will probably need to jump for powerup to connect.
- 5A > 5B > 5S > 5C > 236A > j.B > j.C > j.236A > j.236[A+B]/j.214A+B > A+C
- Hard knockdown.
- 5A > 5B > 5S > 5C > 236A > j.B > j.C > j.236A > j.236[A+B] > 5A+B > 214AB
- Hard knockdown.
- If Uiharu does the red followup let it hit after j.236[A+B] before 5A+B.
- 5A > 5B > 5S > 5C > 236A > j.B > j.C > j.236A > j.236[A+B] > 5A+B > 214AB > 41236B+C
- Hard knockdown
- 5k for 5 bars
- If Uiharu does the red followup let it hit after 214A+B before 41236B+C
- If Uiharu does the red followup let it hit after j.236[A+B] before 5A+B. does 5.1k for 5 bars.
- 5A > 5B > 5C > 5S > 5A+B (one hit) > j.236[A+B]
- Does hard knockdown
- Nothing else stands out about this combo. It's pretty bad. But it hurts my eyes and makes me look away from the screen. If it hurts other people's eyes too then it could have something going for it.
Colors
| Color 1 | Color 2 | Color 3 | Color 4 |
|---|---|---|---|
| Color 5 | Color 6 | Color 7 | Color 8 |
| Color 9 | Color 10 | Color 11 | Color 12 |
| Color 13 | Color 14 | ||

