Dengeki Bunko: Fighting Climax/DFCI/Kuroko Shirai
Players to Watch
JP:
- Oremake (Rank 1 Kuroko/Rusian)
- Mogumogu (Rank 3 Kuroko/Erio OR Wilhelmina)
- Dentou (Insane Kuroko/Accelerator)
- Yumekami (Retired Kuroko/Wilhemina)
- Kinniku (Kuroko/Wilhelmina)
- Daatsu (Retired (but strong) Kuroko/Wilhelmina)
Introduction
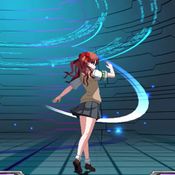
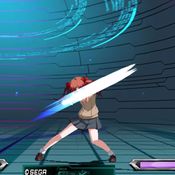
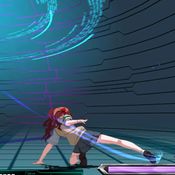
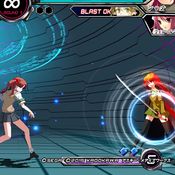
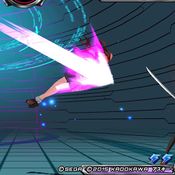
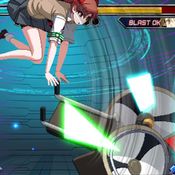
A "Level 4" Teleporter. Mikoto's kouhai and roommate. A girl who calls Mikoto "big sis" and has an excessive, near dangerous affection for Mikoto. She has a complete different side to her as a member of "Judgment". She has a strong sense of justice.
Originally from the light novel series Toaru Majutsu no Index, localized as A Certain Magical Index.
Kuroko is a rather unique character who covers multiple niches. Her projectile needles can be used to some extent as zoning tools which activate her Potential by landing 3 needle attacks on the opponent. Once her Potential activates, she becomes an entirely different character as her dash becomes a series of instant teleports and her air dash also has reduced recovery and increased distance, allowing her to dash in with relative safety and speed to continue her onslaught. Her Red Trump Card and 5AB Impact Skill also track fullscreen in Potential, making her kit particularly deadly. This on top of her multiple AA options, burst-safe 5AB, fullscreen ranbu, insane damage output and above average assist synergy makes her a terrifying character where one momentum swing could cost you the game.
Pros
- Fast normals with deceptively good hitboxes on them, some of which also move her forward
- Extremely strong offense once Potential is activated, with any hit possibly leading into 40+%
- Access to many ways to punish fullscreen Blast activations and whiffed moves
- Has several Blast invulnerable routes
- Higher than average damage making a single mistake a miserable feeling for the opponent
Cons
- Reliant on Potential activation to become threatening
- Even if she's in potential, overcommitment causes her to lose said potential and therefore could be a checkmate. A strong balance of being a threat while staying patient is important.
- While particularly strong with the right assist, she drops in the tier list tremendously with an assist that has poor synergy
- Impact Skills are ill-suited for defense
- Red Trump which is punishable if blocked in corner, unlike almost all other Red Trump attacks. Said Trump also struggles in clash situations as an option etc. Just awful outside of combo enders.
Recommended Assists
Rusian - Easily Kuroko's best assist, Rusian allows her to be a threat anywhere on the screen enabling her to not have to overcommit in neutral. 6S can be installed into a left/right setup or a powerblast combo and she has ways to cover Rusian 6S with her 236x series as well as incredible movement in potential.
Wilhelmina - 5S gives Kuroko some help in neutral and 6S gives Kuroko insanely high damage as a combo extension or starter. While her oki with Wilhelmina isn't the greatest with blue trumps being present, she does gain access to a left/right off of trump install.
Erio - Erio augments Kuroko's oppressive close-range game to maximize her advances. 5S removes any opponent hitboxes that touch her while she jumps, netting easy punishes against antsy foes and forcing respect. 6S is a pressure extender and pseudo-projectile that goes off by hitting (pushing) her to help her slide across the screen. You can repeat this one than once per 6S call.
Potentials
Universal Potential: Increases damage dealt by 10% for 20 seconds when health falls under 30%. If behind in rounds won, increases damage dealt by 20% instead.
Character Potential: Hit the opponent 3 times with 236X (on block is OK) for Attack Level 1 and to gain a dash teleport (5AB and Trump Card will also track the opponent) for 20 seconds. Can be activated twice per round.
Gameplan
This section is dedicated to showing unique elements in a characters' gameplan, not necessarily defining it entirely (ie. explaining how Kuroko might play around her 236x or 5B in neutral but not exactly what spacings to be at).
Neutral
Kuroko's gameplan changes greatly around her assist that she picks, but still centers around her 236x series and strong 5B no matter what assist you pick. Kuroko's kit is fairly well-rounded, however characters with better normals and good movement will feel miserable to fight. Her goal is mainly playing patient until she can exploit a mistake in the opponent's gameplan, allowing her to do high amounts of damage off of most starters. The following tools should be explored when learning Kuroko's neutral: 2B, 5B, jA/jB, 236x.
5B
Kuroko's best button by far. Use this move to steal space, on a dash approach, vs a dash approach, vs jump-ins/up-backing, etc. 5B with 236A buffered behind it easily confirms on AA, hit, and as a way to stay safe from instant pushblocking. A tool that must be established to succeed in most if not all MUs.
2B
A slightly situational AA in which you are looking to space it vs the tip of an aerial attack, likely after moving out of Yuuki jX spacing or after a dash-under vs Shizuo j[C] etc. Its disjointed property being rightmost without much hurt-box attached makes it a nice option to occasionally visit. It can also be done directly under Shana jB/Asuna jC and consistently come out on top. It's spacings will vary depending on char MU a lot more than DFCI AAs normally do.
5C
Likely won't see too much use in neutral but has applications similar to Tatsuya 5C. This move works to pin landings due to it moving you forward, and you can cancel into 236A to stay safe/deal with pushblock/auto confirm on hit.
5AB
A far reaching whiff punish tool which has a "cinematic" state (allows you to invuln through Rusian, Iriya, Tomoka 214 etc). This tool makes for a nice whiff punisher vs very unsafe moves such as whiffed Shana 214, whiff Tatsuya 236, etc. Using this tool as a punish option over 236x/236AB etc. at times is good as it forces burst checkmates.
jA
A slightly disappointing jA but necessary to not be relentlessly bullied in neutral. Best used heads-on against an airborne opponent, while rising, etc.
jB
A wonderful jB that works as an A2A option, especially vs ambitious superjump approaches. Where 9jA could be baited by a double-jump to get above you, doing 7jB vs a superjump per-se would put you in a spacing to where you avoid double-jump opps. and could land 5B, 2AB, late stand guard, etc. Has lots of nice practical use and is easily cancellable into jC for confirms/air-strings.
236x
An extremely important tool and as such will have quite a bit of words to read.
236x Description
Kuroko's most important tool, in which mastering it is absolutely important for success with this character.
To start, 236x is a multi-hit "darts" or "needles" tool in which the set distance is initially decided by the button strength input. However, inputting movement while doing it will cause the darts themselves to adjust positioning in said direction inputted. This can be partial charged for slight curves in needle positioning, or fully charged for a homing effect that you can still move away if desired.
236A is mainly used as a cancel either on hit or block. 236B is mainly used as your primary neutral 236, with it being around where the opponent will likely be. 236C is mainly used if the opponent is fullscreen, covering Rusian, etc.
From what was just said it's important to note that the applications aren't limited to just uncharged or just charged, but both.
236x Application
Uncharged needles provide a poke to check certain spacings from aggressive opponents or answer tools in certain MUs, ie. vs. Iriya 5S, zoner specials, opponents landing/falling w/ button, etc. Uncharged needles are much harder to hit-confirm into 236AB (especially since you need 236[AB] for an optimal confirm), but with combo blast you can easily turn a random 236x 236AB confirm into a disgusting unburstable high damage combo.
Charged needles can be used in the same situation as uncharged but provide more hit-stun, control, and so on. Some common charged needle spots are with an assist covering you, vs far airteching opps. (ie. post powerblast), etc.
236x Roadblocks/Layers/Answers etc
The most obvious will be people running/jumping at you if you needle too close and superjumping at you if you rely on charged needles too often from afar.
For the former, just being aware that your opponent understands this option is the most basic answer. Swapping in dash 5B vs antsy grounded dash-ups, dashblock to get under 9j, 7j to simply retreat, as well as other various options to get around aggressive movement is key here.
For the latter the answer is simply putting yourself within their superjump arc to where they would superjump over you (or late stand guard if you weren't quick enough to do so). By putting yourself in such a spot you get under and behind them. This forces them to land where you can pin their landing, or to double-jump which could be answered with rising jA, jB, dash-under 5B, late stand guard if you're too late, 2AB, the list goes on.
Another issue for needles will be certain assists like Iriya 6S, or trump state assist calls. For this, it's important to either play at a spacing where you can punish assist call, where 236x will counter-hit them assist calling, or simply waiting it out and relying on needles while assist is on CD.
Another issue for charged needles will be characters like Emi/KYH who have fullscreen ranbus. I don't think this removes the option from the table you just have to be careful about fullscreen 236[x] when they have meter. Similarly, zoners with projectiles may seem scary to 236[x] versus, but know the risk/reward is in your favor as you can release needles early and counter-hit them (ie Tatsuya 236AB).
Potential
Kuroko's unique character potential grants her a farther reaching 2AB and 5AB, homing 5AB and trump card, HKD on some 214/j214, her dash becomes a teleport and her airdash goes further for 20 seconds. She also gains attack level 1 for 20 seconds granting increased damage. To activate her potential, 236x needs to hit or be blocked 3 times. She can activate this potential twice per round. I believe with potential being 20sec, and it being achievable twice a round, the timing to do it doesn't matter too much. It is simply worth shooting for when possible as 236 is an important part of your neutral. As for being in potential, Kuroko will be running the same gameplan but "better". Her now unreactable dashing (at certain distances) allows for lots of movement baits, as well as possible rushdown once respect is established. However, mindlessly flying at the opponent with your now terrifying movement speed can be fatal as being forced to block or getting hit burns time in potential. As such, taking advantage of potential and not over-committing is important.
Trump
Kuroko's trump isn't anything special but learning when to install will be important. I believe in R1, your first confirm after powerblast to gain momentum is best. Of course, this has cases where its not necessary or possible. For R2, you have a few routes you can go. From losers' side, you can opt to not trump install if the momentum is heavily in your favor and the opponent used a trump in R1/low on resources. If it's looking close, it's best to get a trump installed. From winner's side, you can trump install if the momentum is in your favor as a way to force them to spend up resources/checkmate them even if you trumped in R1. Alternatively, saving for an explosive R3 is an option too. For R3 you have plenty of freedom with two trumps. You can trump install immediately whether it's a meterless confirm or a "nobility" meterdump confirm. You can also choose to trump install immediately into the next confirm you get even if you're already in trump to get the opponent in a next hit kills state. Alternatively, if you have only one trump, it may get a little tricky. It's worth holding it until at least potential or a potential enabling route to put you in a wincon state. Not related to round x, but it's worth noting trump can be installed by a meterless 236x if you're meter starved. Also, despite 236AB being metered, since it is multi-hit if you trump install before the final hit the opponent can burst. However, if you wait until the final hit to trump, you don't get oki. Deciding when to risk burst or to guarantee its hit is up to you.
Defense
Kuroko's defense is by far her weakest area. She struggles from her 2AB going airborne (but not a weak 2AB itself) and trump not even being a considerable option as its needed for her high damage wincon as a combo ender and works terribly as a defensive tool. Some options Kuroko has are things like dash 2A/5B out of pushblock, fuzzy-jump, 5C whiff punishing out of pushblock, fuzzy-superjump, and other universal defensive options. Jumpy opponents like Yuuki with her jB, Shana jA, Asuna jC pose a serious threat as anti-airing them on the ground is super difficult due to the inability to walk-back to reposition and a rising jA could be easily baited. As such, implementing late stand guard to force deeper jump-ins (and as such, possibly cycle in 5B and dash-under) are your best bet. Rising jA has some decent use and if opponents start double-jumping to avoid it (ie. Yuuki does 9j~8[4]dj~B) you can pin their landing, 2AB their falling normal as they've burned their double-jump, possibly dash-under if in potential or they aren't fading back while djing, etc. Picking your fights here will be key as the lack of blue trump removes a lot of immediate implied threat.
Offense
By far Kuroko's scariest area and where the magic happens. The most common offensive option for Kuroko will be the simple string of 5B236A. Let's break it down.
5B236A (no delays on inputs here) will do multiple things.
- If 5B is pushblocked, 236x is still blocked and Kuroko is put at a spacing where the threat of dash 5B, more 236x, 9j is all there. She alternatively can just wait-and-see to punish you which is just as scary.
- If 236A is pushblocked, Kuroko is pushed out a decent bit. However, pushblock in DFCI adds blockstun and therefore allows Kuroko to dash back in and continue pressure.
- On hit, grounded or air it confirms easily into 236AB.
- On block, it's only -2 and allows for plenty of RPS such as 2A to call out dash-up attempts (dash up grab, 5C, etc), fuzzy-jump, wait-and-see, etc.
Now this is what the threat of 5B236A does alone. She has the option to alternatively stagger into 5C/2C, jump cancel, delay jump cancel, (recover) 5A/2A tickthrow (which she could stagger into 5B236A), (recover) dash 5B (loop), (recover) grab, 4AB cancel, etc. This on top of universal pressure options like A staggers, tickthrows, etc. make her pressure absolutely terrifying and even worse in potential as the fear of dash 2A/grab/4AB, IAD, etc. become a problem too. No matter which option Kuroko picks here successfully opening up the opponent can lead up to 40% easily.
Move List
L = Low, H = High, A = Air
JC = Jump Cancel, SC = Support Cancel, EX = EX Cancel
ISC = Impact Skill Cancel, TCC = Trump Card Cancel, CAC = Climax Art Cancel
Startup includes the first active frame.
Normal Moves
| 5A |
|---|
| 2A |
|---|
| 5B |
|---|
| 2B |
|---|
| 5C |
|---|
| 2C |
|---|
| j.A |
|---|
| j.B |
|---|
| j.C |
|---|
Special Moves
| Steel Darts 「-スティールダーツ-」 236X Air O.K. |
|---|
| Sexy Teleport 「」 214X Air O.K. |
|---|
Universal Mechanics
| Throw 6C or 4C |
|---|
| Impact Skill Teleport Arts 「」 5A+B |
|---|
| Impact Skill Elegant Impact 「」 2A+B |
|---|
| Impact Break 4A+B |
|---|
| Passionate Kiss 「情熱のベーゼ」 A+C |
|---|
Climax Arts
| Justice Enforcer 「」 41236B+C |
|---|
| Steel Phalanx 「」 63214B+C |
|---|
Combos
NOTES:
- For the majority of the following combos, j.236[A+B] should be released as soon as the charge flash appears
- For any combo that goes j.214X > j.214A+B, often the j.214A+B will need to be done before the teleport from the j.214X in order to get hard knockdown.
- Stuff > refers to (jX) > 5A/2A > 2B/5B > 5C/2C etc.
Universal Combos
Stuff > 2C > 2A+B j.236[A+B] > j.A+B+C
- Solo powerblast combo for one meter. 5C can be used instead of 2C, but 2C moves you closer to the opponent and sends them higher which is more consistent.
Stuff > 5A+B (one-hit) > 236[A+B] > 66 > 5B > j.B > j.C > j.A+B+C
- Solo powerblast combo for one meter. More commonly used than the 2AB routing but slightly more difficult. If jB whiffs after 5B, you aren't getting close enough after dashing.
Stuff > 236A(1) > 236[AB] > (micro-dash) 66 > 5B > jBjC > djA+B+C
- Solo powerblast combo for one meter. Possible but very difficult midscreen. Timing of 236[AB] determines how far the opponent goes and how possible the dash 5B link is.
2A/5A > 5B > 5C > 2AB
- Requires close spacing for 2AB to hit. If opponent is airborne (ie. 2C) 2AB will not cause HKD. Meterless confirm.
5A > 5B > jB~jC > 2B > 5C > 2AB
- Standing meterless confirm.
Stuff > 5A+B > 214A+B
- Easy 1 bar BnB for beginner struggling with Kuroko's charged EX needle timings.
Stuff > 2C > 2AB > j236[AB] > 2B > 5C > 236A(1) > 5AC
- 1 bar trump install. Can omit the 2B to make the confirm easier.
5B/2B > jBjC > j236A(1) > j236[AB] > (land, dash) > 2B > 5C > 236A(1) > 5AC
- 1 bar AA trump install. Can omit the 2B to make the confirm easier.
Stuff > 5AB(1) > j236[AB] > (dash) > 5B > 5C > 236A(1) > 5AC
- 1 bar trump install.
4AB~X > jBjC (while rising) > j236A(1) > j236[AB] > 2B > 5C > 236A(1) > 5AC
- 1 bar 4AB trump install. Can omit the 2B to make the confirm easier.
Stuff > 2A+B > 236[A+B] > 5B > j.B > j.C > j.B > j.C > j.214C > 214A+B
- Two bar combo that requires closer spacing for 2AB to hit. Using 2C over 5C may make it easier.
2B/5B > jBjC > j236A(1) > j236[AB] > (land) > 9jBjC > djBjC > j236A(1) > j214AB
- Two bar AA confirm.
5B > 236A(1) > 236{AB} > (combo-blast) > j236[AB] > (dash) > 2C > 2AB > j236[AB] > 5C > 236A(1) > 5AC
- Three bar meter dump combo. Great R3 starter as it puts you in potential and installs trump.
Stuff > 2A+B > 236[A+B] > 5B > j.B > j.C > j.B > j.C > j.214C > 41236B+C
- Three bar combo, j214C > 426BC should be burst safe if cancelled into CA early enough.
4C/6C (grab) > 214AB > (combo-blast) > j236[C](1) > j236[AB] > (land) > 236A(1) > 236[AB] > 426BC
- Grab 5 bar combo-blast routing which is ENTIRELY burst locked done right, even the meterless bits.
236AB > (combo-blast) > j236x(1) > j236[AB] > (land) > 236x(1) > 236[AB] > 426BC
- 5 bar combo-blast routing which is entirely burst locked when done right. 236x depends on initial spacing.
j236(1) > j236[AB] > (land) > 236C(1) > 214AB > (combo-blast) > j236{B}(1) > j236[AB] > (land) > 236B(1) > 236[AB] > 426BC
- 6 bar combo blast route. Should be entirely burst-locked.
Potential Specific Combos
Stuff > 2AB > j236[AB] > 2B/5B > jBjC > j214C
- 1 bar potential specific route.
5B/2B > 2AB > j236[AB] > 2B/5B > jBjC > djBjC > j214C
- 1 bar AA potential specific route.
5B/2B > 2AB > j236[AB] > 2B/5B > 5C > 236A(1) > 5AC
- 1 bar AA potential specific trump install.
5B/2B > 5AB(1) > j236[AB] > 2B/5B > 5C > 236A(1) > 5AC
- 1 bar AA potential specific trump install.
5B > 236A > 236[AB] > (dash) > 2B > 5C > 2AB > j236[AB] > 5C > 236A(1) > 5AC
- 2 bar potential specific trump install.
5B (AA) > 236A > 236[AB] > (dash) > 2C > 2AB > j236[AB] > 5C > 236A(1) > 5AC
- 2 bar AA potential specific trump install.
j236C(1) > j236[AB] > (land) > 236C(1) > 214AB > (combo-blast) > j236{B}(1) > j236[AB] > (land) > 236B(1) > 214AB > 426BC
- 6 bar combo blast route, potential specific (but also installs potential). Should be entirely burst-locked. If you drop out of potential, 214AB > 426BC will not combo and whiff.
Assists
Wilhelmina
Combos
Stuff > 5AB(1) (6S Cancel) > (recover) > (5A+B+C) OR ((dash) 2B > 5C > 236[A] > (recover) > 5A+B+C)
- Powerblast install route.
Stuff > 5AB(1) (6S Cancel) > (recover) > (5A+B+C) (whiff) > 236[A] > (dash) > 5B > jAjC > djBjC > j214C > 426BC
- Powerblast install + CA route. Powerblast is optional.
Stuff > 5AB(1) (6S Cancel) > (recover) > (5A+B+C) (whiff) > 236[A] > (dash) > 2C > 2AB > j236[AB] > (dash) > jBjC > djBjC > j214C > j214AB > 426BC
- Powerblast install + CA route. Powerblast is optional.
4C/6C (grab) > (5S Cancel) > (dash) > 2AB > j236[AB] > 5AB > 426BC
- Grab combo route.
4C/6C (grab) > (6S Cancel) > 236AB > (recover) > (5A+B+C) (whiff) > (dash) > 2AB > j236[AB] > 214A > 214AB > 426BC
- Grab combo route. Powerblast is optional.
236AB(1) > (combo-blast) > (6S Cancel) > j236[AB] > (dash all the way up) > 236[A] > (dash) > 2C > 2AB > j236[AB] > 5AB > 426BC
- 6 bar combo-blast route that uses Wil 6S.
6S hit > 236[A] (when 6S releases) > 2AB > j236[AB] > (2C 5B 5C if trumped) > jBjC > djC > j214C > 426BC
- 3 bar 6S starter.
Okizeme
236[AB] Ender > (recover) > (slight dash) 6S Call
- dash 5A2A / 5A2C
- On 2A/2C hit, wait for 6S release then: 236[A] > (dash) > 5B > jBjC > j236A(1) > j236{AB}
- 4AB
- On 4AB hit, wait for 6S release then: 236[A] > (dash) > 5B > jBjC > j236A(1) > j236{AB}
- (micro-walk, instant 9jA) (answers throw-tech/upback and avoids most red trumps)
- On jA hit, wait for 6S release then: 236[A] > (dash) > 5B > jBjC > j236A(1) > j236{AB}
Grab > (recover) > 6S Call
- 236C
- Covers disrespect on Wil 6S
Trump Install > (recover) > hold 9 and mash 6S >
- (8dj~C)
- Same-side left/right option. On jC hit, wait for 6S release then: 236[A] > 2AB > j236[AB] > micro-walk forward > 2C > 5B > 5C > jBjC > (j236A(1) j236AB) OR (djC j214C 426BC)
- (8dj (land) 2A)
- Same-side left/right option. On 2A hit, wait for 6S release then: 236[A] > 2AB > j236[AB] > micro-walk forward > 2C > 5B > 5C > jBjC > (j236A(1) j236AB) OR (djC j214C 426BC)
- (8dj~66 (airdash))
- Cross-up left/right option. Loses to blue trump. On 6S hit, dash up and wait for 6S release, then: 236[A] > 2AB > j236[AB] > micro-walk forward > 2C > 5B > 5C > jBjC > (j236A(1) j236AB) OR (djC j214C 426BC)
- (8dj (land) (4C/6C))
- Grab option. No follow-up available using Wil 6S.
- ((land) 4AB)
- On 4AB hit, wait for 6S release then: 236[A] > 2AB > j236[AB] > micro-walk forward > 2C > 5B > 5C > jBjC > (j236A(1) j236AB) OR (djC j214C 426BC)
Rusian
NOTE: There's a lot more routing currently undocumented via. Oremake footage which will hopefully make its way here soon enough.
Combos Stuff > 5AB(1) (6S Cancel) > (6S Hit) >
- 5A+B+C
- Powerblast Install
- 236A(1) > 5AC
- Sets up left/right. 9j 8dj~C vs 9j 8dj~66 (airdash).
Mashiro
- ... > 214X/j.214X > 5S on second hit > 66 > A+B+C
- Hitstun-scaling dependent, but will work most of the time.
Dokuro
- ... > 214X/j.214X > 5S on second hit > 66 > A+B+C
Zero
- ... > 214X/j.214X > 6S on second hit > A+B+C
- ... > 214X/j.214X > 6S on second hit > A+C
- Doing the Trump late enough will OTG. Kuroko and the opponent will both be off-screen and you'll just see the wheelchair falling. Pretty funny looking.
Uiharu
- 5A > 5B > 5C > 5S > 5A+B > A+B+C
- 5A > 5B > 5S > 5C > 236A > A+B+C
- 5A > 5B > 5S > 5C > 236A > j.B > j.C > j.236A > j.236[A+B]/j.214A+B
- Hard knockdown.
- j.214A+B does slightly less damage, but is easier to time hard knockdown with.
- It is possible to insert a second 5B before the j.B for slightly more damage. However, in the event that Uiharu does the red followup, this will prevent hard knockdown.
- 5A > 5B > 5S > 5C > 236A > j.B > j.C > j.236A > j.236[A+B]/j.214A+B > A+B+C
- It is possible to insert a second 5B before the j.B for slightly more damage. However, in the event that Uiharu does the red followup, you will probably need to jump for powerup to connect.
- 5A > 5B > 5S > 5C > 236A > j.B > j.C > j.236A > j.236[A+B]/j.214A+B > A+C
- Hard knockdown.
- 5A > 5B > 5S > 5C > 236A > j.B > j.C > j.236A > j.236[A+B] > 5A+B > 214AB
- Hard knockdown.
- If Uiharu does the red followup let it hit after j.236[A+B] before 5A+B.
- 5A > 5B > 5S > 5C > 236A > j.B > j.C > j.236A > j.236[A+B] > 5A+B > 214AB > 41236B+C
- Hard knockdown
- 5k for 5 bars
- If Uiharu does the red followup let it hit after 214A+B before 41236B+C
- If Uiharu does the red followup let it hit after j.236[A+B] before 5A+B. does 5.1k for 5 bars.
- 5A > 5B > 5C > 5S > 5A+B (one hit) > j.236[A+B]
- Does hard knockdown
Colors
| Color 1 | Color 2 | Color 3 | Color 4 |
|---|---|---|---|
| Color 5 | Color 6 | Color 7 | Color 8 |
| Color 9 | Color 10 | Color 11 | Color 12 |
| Color 13 | Color 14 | Color 15 | Color 16 |
| Color 17 | Color 18 | Color 19 | Color 20 |
| Color 21 | Color 22 | Color 23 | Color 24 |
Additional Resources
YouTube Modern Kuroko playlist. Has Dentou, Oremake, etc.
Oremake YT Channel
DFCIDiscord's Kuroko Character Page (Not Recommended, Kuroko is not known in NA)

