Dengeki Bunko: Fighting Climax/DFCI/Ako
Players to Watch
JP:
- Yoshiko (Rank 1? Ako/Zero), Strongest Ako player. Insanely strong sense of fundamentals with great gameflow awareness.
- Moruto (Rank 3? Ako/Zero), Essentially the only other Ako/Zero player. Uses Zero a little too much in neutral but has good sense.
- hito_hard (Rank ??? Ako/Rusian), Your best resource for Ako/Rusian, if you for some reason wanna play that team.
- NG (Rank ??? Ako/Zero), Tomoka main. Plays some Ako.
NA:
- lmao
Introduction
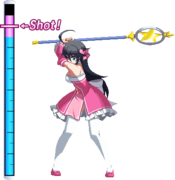
[In-Game] A supreme cleric (♀). Cute but weak. A wife dependent on her husband, Rusian. [Real World] An anxious, lonely girl who can't tell reality and games apart. Reality...? What's that? Something you can eat?
Originally from the light novel series Netoge no Yome ha Onnanoko Janai to Omotta?, localized as And You Thought There Is Never a Girl Online?.
Ako is a fairly unique character who focuses on the relationship between point character and assist. While Ako boasts very respectable air normals and a strong j.214X series, it may often seem that she is more of the support and "assist" than the actual assist is. This is intentional: Her special ability lies within her 214X series, which "heals" and recharges the assist cooldown timer to allow her to more quickly call out her accompanying assist.
Pros
- Strong air normals with good option coverage.
- j214x series. Air spin is insanely degenerate and if not answered before it starts up it is unlikely to get AA'd. This plus her air normals makes her air-scouting among the best in the game.
- Unique Heal special allows her to summon assists at a faster rate than other characters, with 214AB increasing her Support Cast level to hasten assist regeneration even further.
- Some (very) limited zoning ability with her 236x specials, which has decent utility.
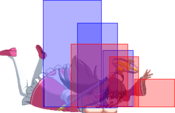
- 2C low moves forward a fair bit and can literally trip up unsuspecting foes.
- Can freely assist cancel during off of normals, allowing for unique combos and OTGs with 236D/214D.
- Her voice will have your opponent wanting to mute the game, allowing you to take advantage of their frustration.
Cons
- Very reliant on assists to make her toolkit cohesive. The wrong assist will lead to you reaching the end of rounds without resources to close them, where losing will be a likely approaching checkmate.
- Difficult to answer pushblock without ending her turn. Even 2A~2C whiffs if 2A is reflect-guarded.
- Slow run speed makes taking control of neutral insanely difficult outside trump.
- Needs large amount of meter to output consistent damage.
- Trump installs off of OTG somewhat often, leading to poor frame-advantage/ambiguous "okizeme".
- Her voice will have you wanting to mute the game, allowing your opponent to take advantage of your frustration.
Recommended Assists
Zero - Zero is a counter assist with setplay capabilities, rolled into one. Furthermore, her 5S can act as a Guard Thrust or Dead Angle for the cost of 2 Meter. 5S is a counter that wallbounces the opponent on contact and checks the opponent’s pokes. 6S is a vine projectile that can be used for cross-up mix-ups and as a combo extender. The preferred combination.
Rusian - Rusian can easily overwhelm opponents with 6S (Monster Train) and completely control the pace of the match. 5S is a counter move with a huge trigger box in case the enemy gets a little too close. It is no exaggeration that Ako is the real assist character in this pairing.
Dokuro - Dokuro-chan is both a powerful neutral tool and a damaging combo extender. 5S is DFCI's greatest anti-air, covering the entire vertical space two character lengths in front of you. This is perfect for catching jump-outs on your offense, and clipping jump-happy opponents on your defense. 6S is a full-screen projectile. Just in case.
Potentials
Universal Potential: Increases damage dealt by 10% for 20 seconds when health falls under 30%. If behind in rounds won, increases damage dealt by 20% instead.
Character Potential: Use 214AB once for Support Cast Level 1 for 10 seconds. Can be activated three times per round.
Gameplan
Neutral
Understanding Ako
Playing Ako is quite a harrowing task and she is often considered the weakest character in the game. Despite this, she has a few strong factors going for her and her synergy with the assists she's defined with is there. Playing Ako will require you to understand what makes her weak and taking advantage of her strengths to mask said weakness.
Confronting Weakness (or: Willingly Playing Bottom 1)
Before playing this character you should clearly understand what makes her so weak to prepare yourself for what is to come.
The immediate dealbreaker for anyone interested in the character is her noticably slow movement. Her walkspeed is nearly as slow as Kuroyukihime's, and her overall dash speed ends up being slower than KYH's. This is insanely easy for an opponent to exploit as choosing to just jump backwards and away from Ako to frustrate is an insanely viable option. This means the Ako player must master jump-scouting and such, which can be somewhat easy to manipulate for more seasoned players.
Her assist synergy is rather lacking, as the player has to choose a strong assist to complete and round out the character as she was designed with her unique 214x (Heal, AKA Support Regen) and 214S/236S (Free Assist Cancel) series in mind as a key-point. Ako is most known for being ran with Zero for Zero's combo utility with 6S, as well as occasional 5S usage in dicey situations. She is also ran with Rusian for his Interactive Neutral via 6S which allows the Ako player to encourage commitment from the opponent. Other assists with Ako have not been explored very far and have a rather undefined wincon.
Additionally, said wincon can be hard to obtain no matter what assist you choose as Ako seems to run out of meter faster than she can close the round when steamrolling without strong control over the gameflow. This point is somewhat minor as all characters must learn their gameflow, however Ako players in particular will find that making one bad decision while spending, not gaining enough momentum in trump to take advantage of the routing buffs, etc. will lead to Round 1 closing unfavorably which could result in an insanely uphill battle for Round 2 and 3.
Ako's specials may also seem somewhat questionable without exploration. Ako's 214x (non-EX) series is somewhat useful as it takes a small chunk off the assist cooldown gauge, but to make any more use of it you'd need to continously hold 214[x] which is not happening without the assist being out to protect you (redudant). Likewise, her 236x series is somewhat high commitment without an assist, a good read etc. All of her j236x series is very dangerous to whiff, and at higher heights on block is punishable forcing Ako to j236AB to stay safe. As said before, this is meter she really can't afford to haphazardly throw out at all.
Finally, an inexperienced Ako player, with the previous points established, may feel too worried jumping in neutral as they are easily being AA'd, they may be getting ran over for poor special usage, and therefore are struggling to find their footing in neutral. Ako's remaining options, or more specifically having to fall back to air-scouting can lead to a player feeling like Ako's neutral is insanely limited and lackluster (despite being the opposite; truthfully).
Taking Advantage of Her Strength(s)
If you have not closed the webpage and are still determined to play this character...
I am sorry but will help you.
With Ako's weaknesses defined, we can move on to her strong points and understand what makes a character just barely incomplete worth playing.
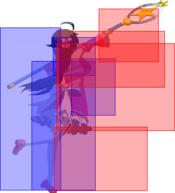
The most obvious strength of Ako is her incredible air normals. While they may not be the best in the game, they are very strong and can fight against most of the roster if not all (with debatable "success" vs Shana). These air normals will be your best friend due to their insane control over the space you do have in neutral. jC has incredible downwards reach allowing for Ako players to present it on 9j and 9djs to preemptively cover multiple options, such as dash-under, A2A attempts, and more. Ako's jB also should not be under-estimated. This move has great horizontal reach going even further than Yuuki jB AND it has realistic cross-up capability. This move is great for similar reasons as her jC, and additionally has utility for space control on 8[4]j to stop an opponent from getting too close, as well as works as a fadeaway anti-air. Finally, Ako jA works as an audible A2A option against double-jumping players, and can be applied at closer scramble spacings where advantage is ambiguous and jB/jC feels like they might be too slow.
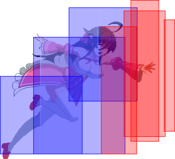
Another terrifying strength of Ako is her j214x series. This special is insane and when applied right will have Ako demand respect from the opponent. Ako spins for over 20 active frames and does an arc'd "hop" forward towards the opponent. This move can and will cross-up and is multi-hit. Unless it's done from super high (where it can be up to -5) this move is also often -1 at worst but more often +0 or even +1. Despite Ako's 2A/5A being 6f AKA too slow to pressure with that, it gives her plenty of room to walk-back and bait buttons, fuzzyjump, etc. allowing her stay in the clear from playing defense. Once j214x is active, it becomes nearly impossible to anti-air without giving Ako a ridiculous amount of space to counter-poke it as AAs do not have upper-body invuln (other than Kirino 236A). This results in Ako's jump-scouting keeping the opponent further out, letting her get away with landing from single jumps with plenty of space and respect to late dj, land and move, and more, as well as force the opponent to not get slow close when she is landing from a double-jump. This tool's power cannot be understated. While it can be reactable at some heights for opponents to 2AB/5AB clash it, as it is multi-hit it may beat some ABs and if it doesn't, the multiple clash frame interactions allows for easy combo-blast reactions on your end. Spin away, free bird.
Ako's routing is another strength of hers. Despite some weaker assist synergy overall, her flexible routing allows her to easily dump meter when necessary. Likewise, she can go into CA from air combos with j214AB allowing her to land and cancel into CA, as well as trump install insanely easily off of j236AB, grab, and even j236AB(OTG). This means that when the cards are on the table for Ako, she can easily do what she needs to, whereas characters like Mikoto, Asuna, or Shizuo are often greatly punished for incorrectly holding onto their trump card. Ako's great solo routing, usually enhanced by her assist, as well as trump installing on any hit allows for great momentum swings in her favor.
Finally, while not a strength per-se, Ako has enough grounded options that are fairly good to enhance her overperforming air game. 5B is a rather solid AA option for scenarios that call for it, 5C moves her forward and can be used to pin landings, and 236A can be used as an ocassional grounded poke, being especially strong vs opponents landing from a double-jump outside your slow dash range, where you can check them for moving after and 236AB hit-confirm on hit. This gives Ako plenty of room to fight on the ground when needed, adding a much needed layer to her neutral game to make it less easily exploitable.
Moving With Ako (or: Making Ako Seem Fast Despite Being Slow)
Your success with Ako with depend greatly on learning to effectively jump, to over-simplify it. Learning to not instantly burn through your double-jump, what spacings to neutral jump drift-back at to where you are not easily dashed under, but can still double-jump ambiguously to stop yourself from being pinned on landing, as well as the hardest jump layer: not jumping at all. Other lower tier characters like Rentaro and Akira must master grounded decision-making and ambiguously doing nothing to hold their ground, while Ako is in the opposite ball-park.
To go over some jump options, we will dissect different jump decisions Ako can make, what they accomplish, what they can be called out by, etc.
8[4]j
8[4]j is as simple as it sounds, perform a neutral jump and hold back. If you are familiar with French Bread's earlier Melty Blood titles jump drift is similar to such, but characters drift much further in this game. At the correct spacing, this allows Ako to position herself above a sudden dash attack, as well as clear her of the opponent jumping forward with the drift-back, allowing her to land if that occurs and 5B AA, late-stand guard, walk-back to make a 9jX whiff, etc. Ako can falling jB to poke at an opponent dashing up from further away waiting for you to whiff/cover a rising jump vector, she can fall with a jC to call out dash-under attempts, fall with a jA when closer to essentially "mash 2A" in scramble spots but from the air, j214x to call out opponents getting too close and waiting for her, she can double-jump in various directions to close off opponent options (7dj to retreat, 8dj to get above a jump-in, 9dj to commit to approaching and closing off options), she can simply land to wait-and-see/jump again, and more. Obviously this is a ridiculous amount of options to consider, but it's as simple or complicated as you make it. To put simply, from an 8[4]j, Ako can control her space with buttons or land/dj to reposition to change it up from this initial movement option.
9j
9j is as simple as it sounds. Jump forward. This can be done to steal space in front of you, to call out an opponent spending too much time playing grounded neutral, to "anti-air" by establishing your 9jX before theirs to apply pressure, and so on. Additionally, you can 7dj, which essentially allows you to bait out and whiff-punish antsy rising jX opponents, allows you to circumvent the superjump arc vector, and more while doing a retreat. 8dj can be done to angle yourself above opponents, but it will leave you open to dash-under attempts.
7j
Dengeki's strongest movement, a master class in risk/reward. By jumping backwards, you disengage. Pretty deep stuff that could take years and years of intense thinking at grandmaster level to understand. By 7jing at spacings such as round-start or just in front of it, you leave all of the opponent's immediate option's range to bait them out and make room for yourself to breathe. On landing, this could put you at a spacing to easily 5B a far 9j, walk/dash-under an easy to react to superjump, if the opponent does 8dj in a 9j~8dj motion as soon as you 7j, you will land first giving you the ability to reclaim space and poke with 236A/9jB/C etc. In the case of an opponent moving up to pin you, you can fall from the initial 7j with a jB or j214x, you can dj instantly or delay the dj, and from that dj you can do jB/j214x. If they wait for the dj or buttons/spin you could just land from the initial 7j and take advantage of them waiting to react in which at the right spacings you can freely move to contest them. This makes the capability of 7j very strong and is the basis of Dengeki. As an Ako player, understanding the risk/reward of not only 7jing but fighting against 7j will be important to ambiguously approach and not destroy yourself by over-committing.
Ako's Commitment Issues
For newer Ako players, they may find themselves easily over-committing. Specifically, doing so against players abusing the high skill movement 7j, a forbidden art passed down from the Gods. To be serious, DFCI's ambiguity with movement options, with some characters having more options or air-stalls means that learning when to pick battles and how to do so at lower commitments will be important. For example, a basic outline of how to play being grounded against an airborne opponent is to first look for the 9j vector. Ideally, you are either just barely in a spacing where you can walkback/7j out of it, or waiting on a read with a pause in your approach to where you can walk-under it. If you choose walk-back, to leave the 9j vector, you can 5B if they commit, dash-under if they 9dj, or take space if they 7/8dj. If you walk under the 9j, you can 5AA the landing, or look to jA the double-jump. As just stated earlier though this has a lot of ambiguity. What if their timing on the initial jump throws you off and you react too late to the option chosen? What if on the dj when you go to jA it on reaction they are already aware of their situation and press jC early to counter-hit you, what if they have an air-stall/divekick and catch you dashing forward on the 7/8dj, what if they have an airdash? The list goes on and on. Likewise, we literally only covered 9j from a specific spacing, and haven't even talked about superjump, or 7j/8[4]j.
Instead of breaking down every possible flowchart tree we can instead generalize the flow of commitment. Rather than looking to dash-up on every 8j/7j, and looking to AA every 9j and the double-jumps that come from each, we can look to position ourselves in spacings where we can be threatening with our jump options while causing theirs to whiff. Even if this puts us at spacings where we are too far to just straight up 9j to get onto the opponent, slowly walking forward to take space, micro-dash 8[4]j/9j/wait, or walk/dash -> 7j are all great options to feel out the opponent to get them to bite rather than you playing their game. Most of this can be accomplished from around round-start spacing or just outside of it. Instead of playing scary spacings to 5B/jA when possible, we can play a little further sometimes from jumps/double-jumps and look to pin the opponent's landing with 236A to establish respect, and/or use that threat to sometimes fall onto the landing opponent with a 9j etc. It's important to remember that while you may not have the best grounded movement to take advantage of poor air decisions, your own air movement options allow for strong defensive/offense play that can change on a dime. Remember to work to trick your opponent into playing your game when possible, rather than fighting an uphill battle of contesting the opponent all the time.
Positioning
To not re-iterate the same points tirelessly this section will be short and brief. Ako is looking to abuse her great air options 80~% of the time with some grounded options sprinkled in. To avoid easily being dash-undered or having her landing pinned, you should look to mostly play around just outside round-start spacing, and when you go beyond that, don't be afraid to 7j and retreat when things don't look great. Ako benefits from a slow and steady game, followed by explosive reward when things go right.
Trump Installs
The final piece of the Ako puzzle is trump-installing. In Round 1, Round 2, or in Round 3 when you have only one trump, you should be looking to trump install when the opponent reaches around 40-45% HP in most cases. It is important for you to do so to allow you to fight the opponent who is going to look to trump soon due to low HP, as well as keep them locked down with trump-state mechanics. Likewise, this will allow you to have much stronger/scarier pressure, as well as blow the opponent up for cheaper (free assist cancel combo etc).
General Tools
5A/2A
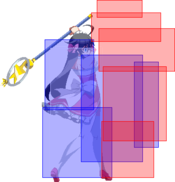
Not great options for Ako due to their speed, but their large size allows for Ako to sometimes control her space with micro-dash A buttons rather than always committing to jumping.
5B
Grounded anti-air option. A great addition for Ako's neutral game to sometimes call-out upbacking as well, but may result in overcommitment if she is too antsy to do so.
jA
jA works as a great A2A, especially vs double-jumping players where it's more "guaranteed", as well as an scramble spacing abare when jB/jC feels too slow.
jB
jB has incredible horizontal disjoint rivaling even Yuuki. Great for A2A and controlling space from antsy opponents.
jC
jC is a harder to contest ATG which can be done preemptively to "anti-air" as well. Great for stopping dash-under happy players.
j214x
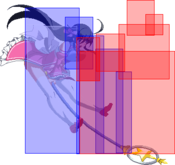
Ako lifts off and does a funny dance. This move can and will cross-up, has multiple hits, and is usually somewhere between -1~+1. Use to establish respect on your landings while jump-scouting, call-out aggressive players, etc. Hard to AA once its active.
236A
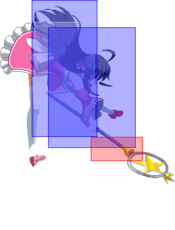
Somewhat harder to use, 236A looks to cover the distance Ako can't. Great to establish to check players landing from a double-jump, where she can use that newly found respect to jump-in more or take some room.
Offense
Ako's offense is rather weak outside of trump and relies greatly on positional understanding as well as ambiguous jump cancels. Unlike most characters, Ako's 2A2C/5A2C strings can whiff if not done in the opponent's face when 5A/2A is reflect-guarded. This means that she often has to can herself into doing ~5C236A/~236A etc, ending her turn. Likewise, she may need to abuse lots of jump cancel threats off of 5A, mixing in 5A~2AA/5A2B etc. to stay ambiguous. While Ako's jump buttons are great, the entire roster faces a problem on jump-in pressure. After doing 5A~jc jX the advantage is ambiguous. You could be reflect-guarded on the jX, you could get fuzzy-mashed trying to stagger, doing a tight string could result in a reflect-guard, and any large gap could be fuzzyjumped. As such, after some jump-ins it may be safer to immediately 5C236A, do nothing and wait to AA/8[4]j to make space to control the opponent's jump arcs, etc.
To stay ambiguous, Ako will need to mostly focus on calling out fuzzy disrespect options when she doesn't have an assist to make strike/throw scary, as well as take advantage of delays and DFCI's large stagger windows. After jump-ins/jump cancel pressure, she should look to not try to overcommit with dash buttons as it could result in painful momentum swings against her without an assist to work with.
Defense
Ako's defense is very average. Her 5B can at times call out jump cancels, allowing her to cycle in late-stand guard (intentionally standing late vs air opponent to cause early air buttons to whiff). Likewise, 5B works as a great 4B~C OS, where you throwtech and get a 5B on whiff by piano-ing the input. 2AB is an OK impact skill, but the lack of multi-hit means if a blue trump player trumps on AB clash, they can freely punish you with a non-ranbu starter of their choice. As your movement is slow, it is rather obvious to the opponent that jumping is your best means out and as such taking it slow on defense to catch the opponent overcommitting to answer your jumps early is your best play.
Move List
L = Low, H = High, A = Air
JC = Jump Cancel, SC = Support Cancel, EX = EX Cancel
ISC = Impact Skill Cancel, TCC = Trump Card Cancel, CAC = Climax Art Cancel
Startup includes the first active frame.
Normal Moves
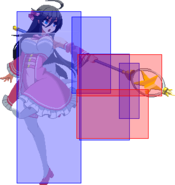
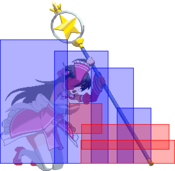
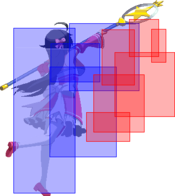
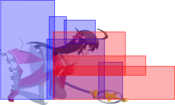
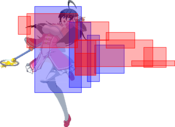
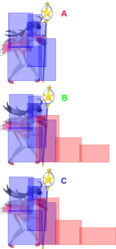
| 5A |
|---|
| 2A |
|---|
| 5B |
|---|
| 2B |
|---|
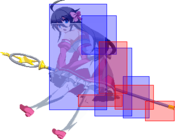
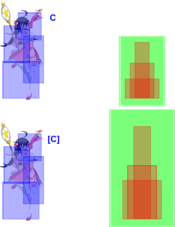
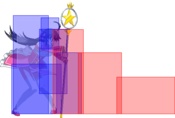
| 5C |
|---|
| 5[C] |
|---|
| 2C |
|---|
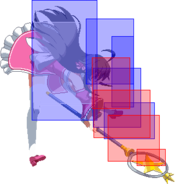
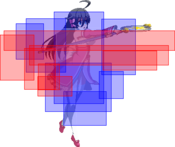
| j.A |
|---|
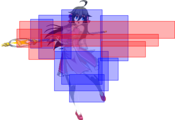
| j.B |
|---|
| j.C |
|---|
Special Moves
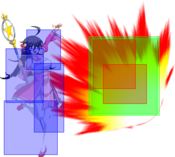
| Magic Scroll (100G) 「マジックスクロール(100G)」 236X Air O.K. 236A - Thunder Spear 236B - Ice Bolt 236C - Flame Charge 236AB - Meteor Strike |
|---|
| Heal 「ヒール」 214X 214A/B/C 214AB |
|---|
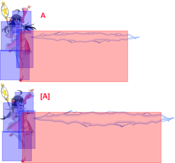
| Rolling Star 「ローリングスター」 j.214X j.214A/B/C j.214AB |
|---|
Universal Mechanics
| Throw 6C or 4C |
|---|
| Impact Skill Twinkle Star 「トゥインクルスター」 5A+B |
|---|
| Impact Skill Lovely Shot 「ラブリーショット」 2A+B |
|---|
| Impact Break 4A+B |
|---|
| Green Onion Sword (Max Strength) 「ネギソード(MAX強化)」 A+C |
|---|
Climax Arts
| I Love You Rusian! 「ルシアン愛してる!」 41236B+C |
|---|
| Perfect Blizzard (10000G) 「パーフェクトブリザード(10000G)」 63214B+C |
|---|
Combos
Solo
(2AA >) 2A > 2B > 2C (> 236C)
- Meterless HKD route. If spaced right, you can OTG with 236C after 2C and have time to power-blast, do 5[C]214x, or whatever you wish. Adding 2As spaces you out as you need, and you do 2B as it doesn't move you forward (5B does so do 2B).
4AB > jAjBjC > djBjC > j214x
- Meterless 4AB route.
5B (AA) > jB~jC > (land) > jAjB > djC > j214x
- Meterless AA route. Can omit the re-jump combo and just do djBjC j214x if it's too hard.
Stuff > 5AB(1-2) > 5AC
- Meterless OTG trump install combo.
Stuff > 5AB > 236AB (> 5AC)
- 1 bar BnB. Can trump install after 236AB.
Stuff > 236A > 236AB (> 5AC)
- 1 bar BnB. Do 236A when you are too far for 5AB to confirm (ie. max range 5C) or if you autopilot 2C/5C > 236A in strings. Can trump install after 236AB.
Stuff > (5C > delay) OR (2C) > 2AB > 236AB > 2C > 214B (> 5AC)
- 1 bar BnB. 5C>delay>2AB is possible at closer ranges, but won't work on longer confirms. Can OTG trump install after 214B.
2AB > 236AB > 2C > 214B (> 5AC)
- 1 bar BnB off 2AB starter. Can OTG trump install after 214B.
4AB > jAjBjC > djBjC > j214x > j236AB (> 5AC)
- 1 bar 4AB BnB. Can OTG trump install after recovering from j236AB.
5B (AA) > jB~jC > (land) > jAjB > djC > j214x > j236AB (> 5AC)
- 1 bar 5B AA BnB. Can OTG trump install after recovering from j236AB.
(5B >) 236A (air hit) > 236AB > 236C OTG
- 1 bar spaced 236A air hit-confirm, leaves time for 236C OTG which is useful if you are running a more okizeme based assist for Ako instead of combo one.
Stuff > 5AB > 236AB > 2A > 5C > 5AB > 214AB (> 5AC)
- 2 bar BnB. If you do 236A instead of 5AB, you are probably too far assuming you aren't in the corner. Can OTG trump install after 214AB.
Stuff > (5C > delay) OR (2C) > 2AB > 236AB > 2C > 5AB > 214AB (> 5AC)
- 2 bar BnB. 5C>delay>2AB is possible at closer ranges, but won't work on longer confirms. Can OTG trump install after 214AB.
Air Combo > j214x > j214AB > 426BC
- 3 bar BnB. Can alternatively ranbu out of j214AB. Pretty awkward window to do j214AB > 426BC so you'll have to practice it a few times.
Stuff > 5AB > combo-blast > 236C > 5[C] > 5AB > 236AB/236AB426BC/etc.
- Combo-blast route with some freedom, just know you can 236C after combo-blast. Has to be done pretty much immediately after landing out of combo-blast.
Stuff > 5AB > combo-blast > 236C > 5[C] > 236[A]
- Corner meterless combo-blast combo. If the opponent is high enough on the wall-bounce, you can 236C OTG. Whether you 236C OTG or not, you can push the opponent into the corner (or not) and do a micro-walk left/right.
Assists
Zero
5S Counter > 236C > 5[C] > 236C
- Final 236C will hit OTG. Meterless counter route.
5S Counter > 236C > 5A5B > jBjC > djA+B+C
- 5S counter PUB install.
Stuff > 5AB > combo-blast > 236C > 6S > 236[C] > 236B > 5[C] > 236[A]
- Meterless corner wall-bounce combo that uses 6S. If the opponent is high enough on the wall-bounce, you can 236C OTG. Whether you 236C OTG or not, you can push the opponent into the corner (or not) and do a micro-walk left/right.
5B > jAjC > j214x > combo-blast (final hit) > 236C > dash > 6S extension > 236[C] > 236B > 5[C] > 236[A] > 236C OTG
- Same combo as above but AA routing.
j236A > j236AB > 6S Cancel (2nd to last) > dash 8[6]/9j~236[C] > 5B > jB(or A)jC > djA+B+C
- High damage 2 bar power-blast combo off j236A starter. Appears mostly in round 2 winners' side.
5S Counter > 236C > 5[C] > jc ~jC > 5B > 2AB > 236AB (> 5AC / >426BC)
- 1-3 bar trump counter route. 5[C] jc ~jC 5B will take some practice.
6S (in-trump) > 4AB > 6S hits > 5[C] > 9j~C > 5B5C > jB > j214x (>j214x>j214AB>CA OR >j236AB)
- 1-3 bar route in trump. As an oki/pressure option, you can call 6S and then do 4AB, and 6S will either keep you plus on block or confirm on hit.
Stuff > 236A > 236AB > combo-blast (final hit) > 6S > 236[C] > 236B > 5[C] > 5AB > 214AB (> 5AC)
- 2 bar combo-blast combo.
Stuff > 236AB > 6S Cancel 2nd to last hit > dash > 236[C] > 236B > dash > 5[C] > 5AC
- 2 bar trump install route.
236A > 236AB > 6S hit 2nd to last > dash > 236[C] > 236B > 5[C] > 5AB > 214AB
- 2 bar routing for poking with 236A.
Raw 6S hit > 236C > 5[C] > 9j~C > (micro-dash) > 5B > 2AB > 236AB > 2C > 5AB > 214AB
- 2 bar 6S combo. Only really done on a 6S left/right setup.
Rusian
(jB/jC >) 5A > 2C > 236S > 9jAjC > djA+B+C
- 0 bar Power-blast combo that uses 236S 5S cancel. 5S recovery is so high that it may not be worth going for over power-blast OTG in some late round 1 scenarios but should be OK earlier into round 1.
6S Summon > 5B > 2C > 236A > wave 1 hits > 5C > 236AB > wave 2 hits > 236[C] (hits OTG) > 5[C]214{A}
- Confirm for calling out disrespect with a meaty 5B after 6S call, ie. 2C214S OTG.
Wave 2 hits (> 236C) > 5[C] > 5AB > 214AB
- Confirm for stray wave 2 hit. Ideally, you can fit in a 236C or 236[C]236B before 5[C], but at some spacings or after some okizeme (ie. the back-grab l/r) you won't be able to fit 236C/[C] in.
Falling jC > wave 1 hits > 5AB > 236AB > wave 2 hits > 236C > 5[C] > 5AB > 214AB > 2B236C OTG
- Confirm for same-side Rusian l/r mix-up.
9dj > wave 1 hits > 5AB > 236AB > 2A > wave 2 hits > 236C > 5[C] > 5AB > 214AB > 2B236C OTG
- Confirm for cross-up Rusian l/r mix-up.
Kouko
Stuff > 236S > 236C (> A+B+C OR 5AC)
- Standard 0-1 bar Kouko BnB (depending on what you cancel into 236S). 236S launches the opponent and lets you powerblast/trump install. After trump install you can 9jB(w)/dash 2C(w) > 8[6]j drift 2A "left/right".
Stuff > 236AB > 2A > 5C > 236S > 236C (> A+B+C OR 5AC)
- Standard 1 bar Kouko BnB. After trump install you can 9jB(w)/dash 2C(w) > 8[6]j drift 2A "left/right".
Stuff > 5AB > 236AB > 2A > 5C > 236S > 236C > 5[C] > 236[A] (> 5AC)
- Corner 2 bar Kouko BnB. You can micro-walk l/r off 236[A] ender or trump install and whiff 5B then 8[6] drift 2a "l/r".
Stuff > 5AB > 214AB > combo-blast > 6S > 662C > 5AB > 236AB > [4] > 5[C] > 236C > 236B > 236AB > 41236BC
- 5 bar combo-blast Kouko combo.
Stuff > 5AB > 214AB > combo-blast > 6S > 5[C] > 236[A] > 2AB > 236AB > 236C > 236B > 236AB > 41236BC
- 5 bar combo-blast corner Kouko combo.
Okizeme
Zero
Trump Install > opponent lands > slight delay > 9j~6S > ...
- Left/right setup off trump install hit. Can land 2A for cross-up, or 7dj for same-side. Alternatively, you can intentionally do 6S a little early to make it whiff on purpose to sneak in a grab (this has a risk of you getting fuzzied).
Trump Install > dash 9j8dj > 5S (while falling) > ...
- After 8dj, you can drift as you please for a weak l/r. From there, you can do anything you want. 2A~grab, 2A~4AB, wait and jump, raw grab, raw 4AB, it goes on. Zero is there to protect you from fuzzies, ABs, trumps, etc.
Rusian
HKD > (2AAA2B >) 2C214S OTG
- Go-to Rusian call for Ako. Different proration will change whether you can fit in a bunch of 2As or not. Either way, shoot for 2C OTG even if it's only 2C. 2C OTG leaves you at a great spacing to bait throw, 4AB, 5B2C to hitconfirm into 236A into wave 1 etc.
j236C/j214x (grounded hit) > 2C214S OTG
- j236C/j214x gives HKD on hit, giving you time to 2C214S OTG. 2C OTG leaves you at a great spacing to bait throw, 4AB, 5B2C to hitconfirm into 236A into wave 1 etc.
2C214S OTG > 5B2C Meaty > ...
- Standard option of checking disrespect. You can 236A to make 2C safe and then have wave 1 be blocked making you safe. 236A will also confirm into wave 1 in which you can setup for a mix with wave 2 or 5C>236AB confirm into wave 2. Additionally, you can mix in 5B2C>4AB on block as if it gets reflect guarded Rusian will keep you safe, or you could 5B>4AB, 5B>dash grab/grab bait, etc. Of course, you can bait powerblasts, trumps, etc. by 7jing, and you can cover the 7j with j236A which Rusian will keep it safe.
214AB Combo Ender > 2B236C OTG
- After a Rusian confirm, such as after the l/r etc., you can 214AB ender into 2B 236C OTG and for the last 2-3s of the cooldown recovering they will be in 236C blockstun giving you time to get Rusian back safely.
2C214S OTG > 4C (back-grab) > superjump > 8dj > ...
- When getting an immediate grab after Rusian call, a back-grab will set up a left/right. after sj8dj, you can falling jC (same-side) or j214A/B (cross-up).
(In Trump) 6S > 66 > 2A/5A~ > ...
- Basically, this is doing what the above set-up does. Call 6S just a moment before the opponent wakes up, dash a bit to push the opponent further from Rusian, then meaty with 2A/5A. From there, you can threaten stagger 2A2C to confirm into wave 1, you can back-grab to do the same l/r as above, can jump to throw-bait, etc.
Trump Install Hit > dash 6S > 2C(w) > 8j > ...
- Left/right setup after trump install. Call 6S while running, and whiff a 2C to "dash-under" and side-swap. After, you 8j and can falling jC for same-side, or 9dj for cross-up option.
Kouko
OTG String > 214S
- Meterless OTG + 6S call using Ako's 214S.
Air Combo > j236AB > 6S Cancel > slight delay > 9j > ...
- Left/right setup. You can 7dj for same-side, land 2A for cross-up.
Colors
| Color 1 | Color 2 | Color 3 | Color 4 |
|---|---|---|---|
| Color 5 | Color 6 | Color 7 | Color 8 |
| Color 9 | Color 10 | Color 11 | Color 12 |
| Color 13 | Color 14 | Color 15 | Color 16 |
| Color 17 | Color 18 | Color 19 | Color 20 |
| Color 21 | Color 22 | Color 23 | Color 24 |

