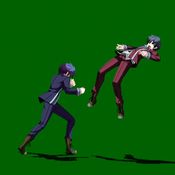
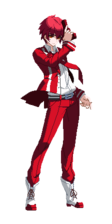
Dengeki Bunko: Fighting Climax/DFCI/Rentaro Satomi
Players to Watch
JP:
- Hana (Rank 1 Rentaro/Mashiro OR Celty OR Enju), known for his insanely slow-burn playstyle and methodical Rentaro.
- Kasuken (Rank 3 Rentaro/Celty OR Iriya OR Mashiro), mostly known for Celty but picked up Iriya lately. Very proactive playstyle.
- hiepita (Rank 2 Rentaro/Rusian), mostly if not only plays online. Unfortunately made Rentaro/Rusian a valid team.
- ANRIMAYU9 (Rank ??? Rentaro/Celty OR Mashiro OR Iriya), also a PSN player. Pretty solid Rentaro.
- DAI (Rank ??? Rentaro/Mashiro), Yuuki main who plays the entire roster somewhat competently.
- OZ (Rank ??? Rentaro/Wilhelmina), former Rentaro main turned Tatsuya. Old-school footage but he exists.
Introduction
A Promoter who, along with his partner and Initiator, Enju, fights the parasitical life forms called Gastrea. He's crazy about living things like bugs and plants.
Originally from the light novel series Black Bullet.
At first glance, Rentaro appears to be another rushdown character, with snappy movement and 214X series punches to traverse distances quickly and break down the opponent's defenses. However, Rentaro's strengths play to a wait-and-see playstyle. His 5B, air 236x gunshot series and assist can punish sloppy approaches from mid-range and force respect. Likewise, his 214x series serves a similar purpose but in close-range combat. While in Trump Mode, Rentaro is the fastest character in the game and his 214X series has drastically reduced charge time, allowing you to link multiple punches together to inflict terrifying damage.
Pros
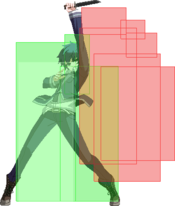
- The absolute best anti-air in the game, 5B. This normal goes all the way above his head, making it an incredible 4B~C tool.
- Insanely strong pressure. His 2B is a low and still jump cancelable, his 236B is ONLY -1 at worst, easy to confirm on hit, and a far reaching low. His 5C moves him forward and can be confirmed into a one button follow-up. In trump, his tick-throws become suffocating.
- Very strong wait-and-see game. In the hands of a patient player with a strong assist, this character will seem unapproachable and frustrating to answer.
- By far the best corner carry in the game, provided you have the resources. On top of this, his routing is very flexible despite how finnicky it can get due to j214AB and 5CC.
- Extremely potent once in Blue Trump and can accumulate damage quickly from stray conversions. A well-timed trump install can secure a game easily.
Cons
- Difficulty cleanly converting into hard knockdown from stray hits, likewise, very finnicky routing with odd delays.
- Difficulty snowballing. Like Kirito, Rentaro takes a keen eye to properly spend meter and trump in order to dominate the gameflow in a game full of characters who can steamroll almost suddenly.
- Weak grounded game. While 5B is insanely impressive, it is arguably all Rentaro has for his grounded game to poke with at "low commitment". A good assist is needed to fully round out Rentaro and give people a reason to jump against him.
- Requires significant resources for corner carry or explosive damage.
- Very poor air-to-air routing with height specific HKD on j214AB. Suffers a similar issue as Shizuo for A2A reward.
Recommended Assists
Mashiro - Arguably Rentaro's best assist. 5S gives Rentaro a forward moving neutral option which encourages opponents to jump where he can 5B, or he can let 214A loose to stay safe after or hitconfirm with 5S. 6S is where the team really comes together, as cats allow for flexibility after airtechs, easily confirm after j214A with some practice into more mixups or (land) > 2C 5AB 426BC, etc. Very technical assist that is equally as rewarding.
Celty - Another safe pick for Rentaro. 5S makes Rentaro's grounded game terrifying and if opponent's jump to avoid Celty, he can easily 5B AA them among other things. 6S works as a way to protect him on airtech situations and leads to moderate damage. In trump, Rentaro can easily set-up left/rights with 6S.
Iriya - As always, iriya strong! Rentaro can use 5S in neutral and if he manages to flick it, it can help cover his gunshots, 214A, etc. Plates also work as great routing options, and in trump Rentaro gets access to some solid okizeme with plates to accomodate is already strong strike/throw game.
Rusian - This team also unfortunately works with Rentaro, and j214x easily confirms into the 2nd wave of 6S. Rentaro has multiple ways to cover 6S with his gun and punch series, and as he routes semi-often into airtech it is a prime spot to 6S. If you pick Rentaro/Rusian, you probably don't actually enjoy this game and think you're special for not just picking Tatsuya/Rusian.
Potentials
Universal Potential: Increases damage dealt by 10% for 20 seconds when health falls under 30%. If behind in rounds won, increases damage dealt by 20% instead.
Character Potential: Use 3 Extend Action attacks (charged moves, ie. 214[A]/214[AB]) for Attack Level 1 for 10 seconds. Can be activated twice a round.
Gameplan
This section is dedicated to showing unique elements in a characters' gameplan, not necessarily defining it entirely (ie. explaining how Rentaro might play around 5B or 214A but not exactly what spacing to be at).
Neutral
Rentaro is at his best when he is playing a proactive defensive style while forcing reaction checks with his AA 5B. His 214A can be used sparingly in neutral, to check a dash every now and then, or as a reaction "dash-under" option when cornered. While his ATGs aren't great, you will often find yourself jumping to be evasive or make room in which jB is your best ATG tool to control space due to its horizontal reach. Playing at a spacing where sudden dash buttons from your opponent won't run you over, aiming to 5B AA your opponents, and abusing your assist is key to making Rentaro work until it is time to trump, where you have the freedom to get much more aggressive. In trump you become a more rushdown type character despite the damage taken increase, and you abuse the threat of your dash and its buttons, as well as the instant assist call. In the right hands, this character goes from untouchable and difficult to approach, to an unstoppable force that you cannot get off of you.
5B
Probably the best 5B in the game. This move will be your dash-in, your anti-air, your pressure starter, etc. It is insanely disjointed above Rentaro's head, leading to some anti-airing that only Rentaro is capable of at otherwise dangerous ranges for the rest of the cast.
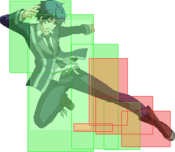
jB
Rentaro's best jump-in option. This move should be spaced out in a way where you take advantage of its horizontal range, as jumping directly onto players with Rentaro is a death sentence.
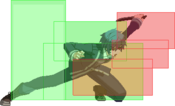
214A
One of Rentaro's more interesting tools. This tool can suffocate hesitant players with its incredible travel speed and range or work as a pseudo dash-under when cornered, and is only -2 at worst. When spaced right, or on counter-hit, this move can be linked into a 2A on hit. It has low recovery, but is susceptible to being whiff-punished by players jumping around in which you can go back to 5Bing. Best used with an assist covering it.
236AB
Similar to Rentaro's superior counterpart, Tatsuya, Rentaro will fire a fullscreen gunshot that does hit crouchers and shares an animation with 236A. This move can be used to whiff punish, and call-out unsafe on block moves like Mikoto 2AB and 5[C].
5AB/214AB
5AB and 214AB work as great whiff punishers, such as an opponent powerblasting in a bad spot in neutral or such as Mikoto whiffing a high j[C]. Keep these tools in mind for some niche callouts.
236x
Insanely niche tool in neutral. 236A has some rare utility to check space in front of you, like taking care of the opponent's Iriya 5S, but it whiffs on crouchers, has lots of recovery on whiff, and very little reward on hit. 236B has more reward and is a far reaching low, but is susceptible to jump-ins. 236C is genuinely useless without an assist like Enju to confirm it.
j236x
Also a niche tool but must be applied at least a little bit with caution. On whiff, this move could have up to 60f of recovery not counting landing recovery. Likewise, on block, it is double digit minus and easily punished by characters with fullscreen punisher options. Due to this, careful use of j236x such as against an antsy opponent checking your landing, or with an assist covering you is necessary to not get murdered by a burst-locked starter.
Assist
Choosing a strong assist, such as anyone but Enju, please, will greatly make this character more threatening. With an assist like Celty, the pending threat of 5S makes Rentaro's grounded game that much more threatening and encourages the opponent to jump where his 5B becomes a problem. With Mashiro, 5S is a slow moving projectile allowing Rentaro to steal space and close in. Both Celty and Mashiro have great 6S options to cover his airtech enders. An assist like Iriya also works, where Rentaro can use flicked plates to establish his 236x and 214A series.
5AC
After a trump install, Rentaro gains access to improved movement with a faster walk, run, and fall speed. This makes his neutral much more threatening, and you now can easily enter a spacing where the top of 5B will AA jumping players. Likewise, gaining access to universal trump mechanics such as instant assist call (even while airborne) allows for you to annoyingly close the gap, bait out commitment from your opponent, and your assist can even cover your gunshots and 214A. Keep in mind that Rentaro takes 10% more damage in trump state, so you should avoid going too overboard.
Offense
236B
The importance of 236B for Rentaro cannot be understated. If you do not use this move you will lose. Rentaro's pressure revolves entirely around the lingering threat of 236B, a far reaching low that shouldn't whiff if the normal before it is reflect-guarded, which is -1 at worst and +1 at best, and can be confirmed into 214A/5AB/dash 5B. The tool's slower startup allows for easy frametrapping, and the long-confirm window means you can easily put focus on trump/ranbu/combo-blast cancels on AB abare clashing in pressure. This insane amount of respect the tool will establish enables sneaky jump cancels and string enders, gives Rentaro to sneak in grabs or 4AB more, etc. When doing 5A236B or 2A236B when reading reflect-guard early, you are safe but left at a somewhat risky spacing to act. However, the range you are left at after a longer string, like 2A~~5A~2C236B, leaves you far enough to stay in control. From there you can look to 5B AA a jumpy opponent, play with your assist, and generally keep the opponent cornered.
5A/2A
Standard A buttons for pressure. 2A works for checking abare and fuzzys, 5A works as a jump cancel tool, where you can stagger, recover and grab, 4AB, jump cancel instantly/delayed, etc.
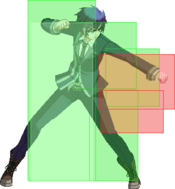
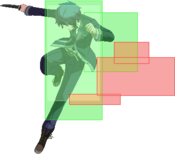
5B
Insanely strong at catching up-backing, and a great redash tool to establish on shorter strings. Can confirm into 5C on ground hit or jA/jB on AA, can frametrap into 236B/2C/5C, or use it as an ambiguous string ender at further spacings.
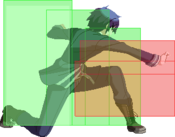
2B
Very good 2B by DFCI standards. Not the furthest reaching, but it is a low while still being jump cancellable (not normal by DFCI standards). This combined with utility similar to 5B makes for another ambiguous tool in Rentaro's lineup.
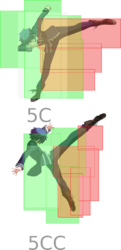
5C
A forward moving 5C that is very unsafe on block. Cancel into 236B/214A to stay safe, and hit-confirm into 5CC, supers, 236B214[AB], etc.
2C
Average sweep. Pressure ender which is only -6 where most are -8 or worse, which you can confirm into 5AB/236B, etc. Safe on block at most spacings.
214A
Similar utility to 236B but a bit weaker. Rentaro's dashing punch covers a lot of space, and becomes plus at tip spacing. On counter-hit at max range, this move can confirm into 5A/2A. Works as a great 5AC/combo-blast cancel frametrap due to its massive stagger window. This move is most often seen after 236B at further spacings, where 214A can check different abare options and establish respect. However, over-relying on this move could cause you to be in their face and minus, or at worse read early, where an opponent jumps back to force it to whiff where they get a falling jC punish.
214[B]
When charged, 214[B] has some utility. After 45f, the move becomes a low, and the hit becomes AUB. This works as a possible mix-up tool in tandem with 214[C] while an assist is up, such as Mashiro 6S. Reactable if done randomly.
214[C]
When charged, 214[C] has some utility. After 31f, the move becomes an overhead. This works as a possible mixup tool in tandem with 214[B].
Trump State
In trump state, Rentaro becomes insufferable to deal with. His dash and walk speed are now amongst the fastest in the game, and his fall speed is increased making him jump cancel pressure harder to anti-air. All charged moves are now faster making 214[B]/[C] a better mixup tool with assists. 236B and 214A can now be freely covered with an assist cancel to catch players taking their turn. All of this combined with universal trump mechanics makes Rentaro's tickthrows stronger, and access to his trump routes makes every opening explosive.
Defense
Defense is a mixed bag for Rentaro but not bad. 5B is disgustingly strong as a defensive tool while cornered due to how high it reaches, greatly reducing the threat of jump cancel pressure. 214A can work at times as a dash-under vs opponents properly spacing and doublejumping to avoid 5B. While his trump makes him take more damage unfortunately, it is ONLY -2 which means you can throwtech out of it making it one of the few true defensive blue trumps. Your 2AB is better than a lot of characters due to the first hit being grounded and therefore trump cancellable, however it moves him forward as well as up causing the 2AB to whiff against some 9js and 8[6]djs. Out of reflect-guard, your options aren't great. 2C doesn't reach as far as you need it to, and 5C is slower than average and high commitment. Likewise, even having the best 5B in the game cannot save you from players doing early air buttons, drift-back on 8j to bait it out, etc. Learning to pick your battles, late-stand guard, and remaining patient will help you stay alive.
Move List
L = Low, H = High, A = Air
JC = Jump Cancel, SC = Support Cancel, EX = EX Cancel
ISC = Impact Skill Cancel, TCC = Trump Card Cancel, CAC = Climax Art Cancel
Normal Moves
| 5A |
|---|
| 2A |
|---|
| 5B |
|---|
| 2B |
|---|
| 5C / 5CC |
|---|
| 2C |
|---|
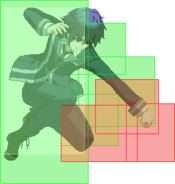
| j.A |
|---|
| j.B |
|---|
| j.C |
|---|
Special Moves
| Gunfire 「ガンファイア」 236X Air O.K. |
|---|
| Homura Kasen 「焔火扇 -ほむらかせん-」 214A |
|---|
| Uki Rouchou 「雨寄籠鳥 -うきろうちょう-」 214B |
|---|
| Rokuro Kabuto 「轆轤鹿伏鬼 -ろくろかぶと-」 214C |
|---|
| EX Homura Kasen 「焔火扇 -ほむらかせん-」 214AB |
|---|
| Inzen Shoukahanameishi 「隠禅・上下花迷子 -いんぜん・しょうかはなめいし-」 j.214X |
|---|
Universal Mechanics
| Throw 6C or 4C |
|---|
| Impact Skill Kohaku Tensei 「虎搏天成 -こはくてんせい-」 5A+B |
|---|
| Impact Skill Unebiko Ryuu 「雲嶺毘湖鯉鮒 -うねびこりゅう-」 2A+B |
|---|
| Impact Break 4A+B |
|---|
| Trump Card Terminal Horizon 「義眼解放 -ターミナル・ホライズン-」 5A+C |
|---|
Climax Arts
| Inzen-Kokutei-Unlimited Burst 「隠禅・哭汀・全弾撃発 -いんぜん・こくてい・アンリミテッドバースト-」 41236B+C |
|---|
| Final Strike 「ファイナルストライク」 63214B+C |
|---|
Combos
Midscreen
5B/2B > 5C~C
- Meterless HKD. Niche but useful route.
2A/5A > 5B/2B > 2C
- Meterless HKD. Also niche but sometimes presented.
Stuff > 236B > ...
- There's some flexibility here. If you're close enough or in the corner, you can do a dash 5B to pick-up. In trump, you should always be able to dash 5B. Otherwise, you can do 214A or 5AB to pick-up after gun-shot hit, and you can cancel both in 426BC (climax art).
5B > jB~jC > (land) > jAjB > djBjC > j236x
- Meterless A2A confirm. Depending on the strength of your gunshot, you change the distance from you and the opponent on their airtech.
4AB~X > jAjBjC > djBjC > j236x
- Meterless 4AB confirm. Can omit j236x if you wish to land into assist call.
214[B] > delay > 5B > jAjBjC > djBjC > (j236A)
- Meterless 214[B] route. Hitstun is too low for a rejump combo. j236A can be omitted for land into assist call.
214[C] > 5B > jBjC > djBjC > (j236A)
- Meterless 214[C] route. This move lacks any hitstun because kermoney, so you need to do 5B quick.
Stuff > 5C~C > j214C > j214AB > (recover) > A+B+C
- Powerblast install combo. Need to use j214C and not the other strings or else it'll OTG. Likewise, may require some delays or adjusted hit-count on stuff.
Stuff > 5C~C > j214A > j214AB (> 2C > 5AB > 426BC)
- Go-to BnB when possible. This route grants Rentaro HKD (if Stuff <4 hits), can be extended into a meterless air portion (5B > air string), or you can go into 2C 5AB 426BC to cash-out. If you are unable to get this to HKD, mess with delays or normal count on "stuff".
Stuff > 2C > 5AB > 214AB
- 1 bar BnB. Not the greatest by any means, but decent option for when you route into 2C and hit-confirm into 5AB.
Stuff > 236B214[AB]
- EX punch combo off gun which wall-bounces. You have to do 214[AB] IMMEDIATELY after 236B. There cannot be a delay.
5B > jB~jC > j214A > j214AB
- Like with the 5CCj214Bj214AB combo, you can route into 2C 5AB 426BC, or do an air-string after. Since you used your jump cancel on 5B, you cannot do another one.
236B > dash > 5B > jB~jC > j214A > j214AB
- Works like combo above.
236B > 5C~C > delay > j214B > j214AB Like above. j214B needs a rather long delay to hit.
4AB > jA~jB~jC > j214AB > 5B > jAjB > djBjC > j236A
- 4AB 1 bar routing.
(Stuff > 5C~C > j214B >) OR (5B > jB~jC > j214A/j214B >) > j214AB > 2C > 2AB > 214[AB]
- 2 bar BnB routing.
Stuff > 5C~C > j214C > 426BC
- 2 bar routing. Window on j214C > CA is somewhat tight due to Rentaro CA having 13f of startup but good to learn.
Stuff > 236B214[AB] > 214[A] > 214[AB]
- 2 bar routing. Not a great option as it puts you in potential early where you won't use it very effectively, but it is an option if you need to dump some meter and have already routed into 236B214[AB].
5B > jBjC > j214A/B > j214AB > 426BC
- 3 bar routing. Rentaro can land from j214AB into a CA for burst-locked routing.
Stuff > 2C > 2AB > 214[AB] > 426BC
- 3 bar routing. While 214AB > 426BC does not combo midscreen, 214[AB] will. In trump this comes up more often, but outside trump it will only be after 2AB > 214[AB] or 236B214[AB].
combo-blast > 236A 426BC
- When doing combo-blast > 426BC (CA), you can do a 236A and if you cancel into CA correctly, it will be burst-locked. It's a special Feature with projectile moves. This is a lot harder midscreen than it is in the corner, but still possible.
Stuff > 236B214[AB] > 214[A] > 214[AB] > 214AB > 426BC
- 5 bar kill combo.
Corner
Stuff > 5AB > 214AB > (wall-bounce, recover) > A+B+C
- Corner PUB install.
4/6C (grab) > slight delay > 214AB > dash > 2C > 5AB > 426BC
- Combo for NEAR CORNER that uses 214AB wallbounce as an extension.
(Stuff >) 236B > dash > 5B...
- Dash 5B should always be possible near the corner unless max distance 236B. Be sure to practice this confirm.
Stuff > 5AB > 214AB > ((wall-bounce) 2C > 2AB/5AB...)
- Corner routing that takes advantage of 214AB's wall-bounce property. You could do a micro-walk left/right, abuse the longer HKD time to call an assist and create an ambiguous situation, you could confirm into 2C>5AB>426BC to cash-out, do 2C>2AB>214[AB] to spend just a little more meter etc.
Stuff > 5AB > 214AB > (wall-bounce) 214AB > delay > 426BC
- Burst locked corner meter-dump. Delay the 426BC as it will whiff otherwise.
Trump
(5B5C5AAA OR Stuff) > 2C > 214[B]OTG, recover, 2A5C5B2B2AA
- Situational meterless combo that uses the faster 214[B] as an OTG tool to burn timer for assist etc.
214A > 5AC > (micro-dash) > 2A2B5C > (slight delay) > 5AAA > 2C > 5AB > 426BC
- Trump install route for 214A, micro-dash is likely necessary at some spacings. Delay after the first 5C to make use of the forward momentum on the normal for 5AAA auto-combo to connect.
214A > 5AC > 2A2B5C > 2C > 5AB > 426BC
- Trump install route for 214A when you 5AC too late and cannot micro-dash.
214AB > 5AC > dash > 5C > jB~jC > j214A > j214AB
- Trump install off 214AB punisher. This tool works great to punish powerblasts, Mikoto 5[C]/2AB/some j[C], etc. It doesn't reach as far as 236AB, but still ALMOST fullscreen.
214AB > 5AC > dash > 5C > jB~jC > j214A > j214AB > (2C > 5AB > 426BC) OR (2C > 2AB > 214[AB])
- Trump install off 214AB punisher. Can spend as much meter as you see fit, and fit in 426BC after 2AB214[AB] if done right.
214AB > 5AC > 214[AB] > 214[AB] > 426BC
- Trump install burst lock kill route off 214AB punisher.
Stuff > 2C > (slight delay) > 5C > jB~jC > j214A > j214AB
- Trump BnB. Depending on your string of "Stuff" it may or may not give HKD. Like the universal AA jBjCj214Aj214AB routing, you can extend it after into 2C5AB426BC or play with oki.
Stuff > 5AB > 214[AB]...
- In trump, your charged moves are faster and as such 214[AB] is possible after 5AB.
Stuff > 5AB > 214[AB] > 214[AB] (> 214[AB]) > 426BC
- In trump, you can chain 214[AB]s up to three times and in the corner can delay 426BC cancel for burst locked explosive damage.
Assists
Celty
6S hits > 2C > 2AB > 214[AB]
- 1 bar 6S hit-confirm.
6S hits > 2C > 5AB > 426BC
- 2 bar 6S hit-confirm.
Stuff > 6S(1) hits > ...
- Can do the same two routes above.
Stuff > 6S(2) hits > ...
- Hitstun is now a lot lower with both 6S hits hitting with things before it. 2C can no longer combo and as such you need to route into 5B air combo etc. If you go for 5B jBjC j214A j214AB, it will not give HKD.
5S > 2A5B > jBjC > j214B > j236AB/j214AB 426BC
- In trump, you can time your 2A5B to hit as 5S hits, such as feinting an empty-jump/throw-bait situation. j214AB will not give HKD here.
Mashiro
5S hits > A+B+C
- The last hit of 5S sends the opponent into an airborne state, making for relatively simple power-blast installs.
Stuff > 5CC > 6S Cancel > j214C > 6S hits x4 > A+B+C
- Powerblast route that gets cats on the screen. You could extend the route to have two more cats hit etc. by doing dash 5BjBjCj214A6S(cats hit), but it's not worth the damage over having cats covering the powerblast airtech (subjective opinion).
5S hits > (5B >) 5CC > j214A > j214AB
- One bar confirm for 5S hit. Can fit a 5B before 5CC if you do it while 5S is hitting before your opponent is launched by final hit of 5S+5CC.
5S hits > 2C > 5AB > 426BC
- 2 bar confirm for 5S hit.
5S hits (AA) > 5B > jBjC > j214A > j214AB
- 1 bar AA 5S confirm.
(During 6S) (5B >) jB > (jC >) > j214A > 6S hit
- Basically the fundamental to making this assist strong. If you score a 4AB hit, a stray cat hits the opponent, or you 5B AA, you adlib the timing into j214A to have a cat extend the combo, or you can land > dash to stop the next cat from hitting for an extra mixup if midscreen. If you are in the corner this is not possible and as such you should at least 2C>2AB>214[AB] if you aren't broke.
(During 6S) Stuff > jB > (jC >) > j214A > 6S hits > 2C > 5AB 426BC OR 2AB 214[AB]
- Extension off j214A > 6S hit, huge damage for small meter.
Iriya
5S/6S hits > ...
- You have absolute freedom. Iriya's proration is unbelievable, letting you do 5B jBjC j214A j214AB, 2C 2AB 426BC, any route you want.
Stuff > 5CC > j214C > j214AB > recover > 5S > 2B/5B > jAjB > djBjC
- Route that uses the hitstun for j214AB to setup 5S before doing an airtech combo. Can flick iriya plate after.
B/C flick plate hits > delay > (5B >) 5CC > delay > j214B > j214AB
- Basis of B/C flick hitting on oki on low proration. Works midscreen. Iriya will fully recover before you do from j214AB. Fair assist for sure.
Rusian
Stuff > j214A > 6S hit
- Basis of Rentaro/Rusian. If it's wave 1 j214A > 6S, you can 214A under the opponent as they get juggled by 6S, letting you side-swap into a drift low/throw situation, you could probably confirm into 2C 2AB 214[AB] into wave 2, etc. Unlike Celty, Rusian 6S should always grant HKD on launch letting you pick-up with 2C into a route of your choice.
Enju
- You don't want to use this assist. You will likely quit the game if you do.
- 5A > 5B > 5C > 214A > Trump Card > 5C > 2C > 5B > j.B > j.C > jc > j.B > j.S > j.C > (j.S connects here) > 41236B+C
- Confirms into Rentaro's Trump card, as well as Inzen-Kokutei-Unlimited Burst.
- Costs 2 bars and 1 Trump Card.
- 4255 damage.
- 5B > 2C > 5A+B > TC > 5C > j.B > j.C > j.S > j.236B > dash under > delay 214[C] > 214A+B > 41236B+C
- 3 bars+1 Trump Card stock
- 5051 damage
Okizeme
Solo
Grab > 236B OTG > manual delay > 214A...
- Super meaty 214A setup. If done right, 214A should hit late making it super plus while also making it linkable into 2A2B5CC j214C j214AB 2B jAjB djBjC on hit. Obviously, this is somewhat telegraphed making it susceptible to ranbu/wakeup trump.
Celty
Air Combo > land > 6S
- Standard air-tech > 6S call combo to let you re-establish advantage vs an airteching opponent.
Stuff > 236B > recover > 6S
- Meterless "combo" into 6S for insurance.
Grab > 6S cancel > superjump...
- Left/right setup. Same side option: 7dj after crossing over. Cross-up option: land 2C. Only 1 hit so susceptible to blue trump, but has explosive confirm options.
Stuff > 214[AB] > 6S Cancel on wall-bounce > 9j into corner > 8j...
- Left/right corner setup. Can be done outside trump if you find a 2C>2AB>214[AB] spot or do 236B214[AB]. In trump, you need to slightly delay the 8j due to Rentaro's fast fall speed when trumped. Same-side: Falling jB, Cross-up: 9dj. 6S only hits once making it open to explosive confirm options, and the same-side option is a falling jX making it mostly safe to ranbu etc if done right.
Mashiro
Air Combo > land > 6S
- Standard air-tech > 6S call combo to let you re-establish advantage vs an airteching opponent.
(During 6S) Stuff > j214A > 6S hits > dash...
- During Mashiro oki, you don't ALWAYS want to cash out. When midscreen, after doing j214A > 6S you can dash to intentionally make the next cat not hit, letting you use it as a tick-throw to bait defensive options.
Iriya
HKD > 5S2AAA2B > ...
- Basis of Rentaro non-trump Iriya oki. After recovering, you can 8[4]jB to flick plate and do Yuuki/Iriya style antics with dash 2A > grab vs 2A again vs jump, 9j > land > 2A/grab/jump again, etc. If you do a 5B plate flick, you can stagger into 2C then 236B, which plate will pick up for you easily giving you HKD or the ability to confirm into a route of your choice. If you do 2C > 214A, where you are only -2 and can hold jump to avoid getting grabbed. Even if they 5A, the plate will come down as insurance to knowledge check them. With this established, if they are doing 5A > 5AB/ranbu, the option of just blocking becomes strong, forcing a jump cancel > RG to not get 5B'd by Rentaro. An insane amount of obnoxious freedom here with Rentaro's specials and how plate will let him confirm them into anything.
Stuff > 2C > 5C > jC > j214A > 5S Cancel > j214AB > 5B2AA OTG > 8[6]j...
- Looping l/r, low/throw oki in trump. You can do 5C5B2B OTG for true left/right (no throw option due to throw protection). After doing 8[6]j, you can land on the opposite side into 2A for cross-up, 7dj for same-side, grab for... grab, etc. Due to Rentaro's faster fall, you will want to mess with the jump cancel timing after OTG.
Stuff > 2C > 5C > jC > delay > jB > j214A > 5S Cancel > j214AB > 5B2AA OTG > 8[6]j...
- Looping l/r #2, low/throw oki in trump. You can do 5C5B2B OTG for true left/right (no throw option due to throw protection). After doing 8[6]j, you can land on the opposite side into 2A for cross-up, 7dj for same-side, grab for... grab, etc. Due to Rentaro's faster fall, you will want to mess with the jump cancel timing after OTG.
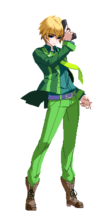
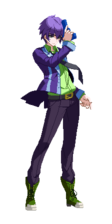
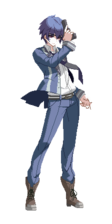
Colors
| Color 1 | Color 2 | Color 3 | Color 4 |
|---|---|---|---|
| Color 5 | Color 6 | Color 7 | Color 8 |
| Color 9 | Color 10 | Color 11 | Color 12 |
| Color 13 | Color 14 | Color 15 | Color 16 |
| Color 17 | Color 18 | Color 19 | Color 20 |
| Color 21 | Color 22 | Color 23 | Color 24 |

