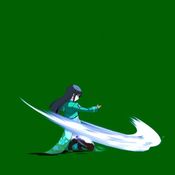
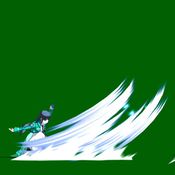
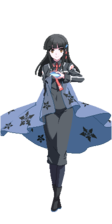
Dengeki Bunko: Fighting Climax/DFCI/Miyuki Shiba
Introduction
Younger of the Shiba siblings and in the top freshman class. She's a "Bloom" and her specialty is her rather extreme brother complex.
Originally from the light novel series Mahouka Koukou no Rettousei, localized as The Irregular at Magic High School.
Gameplay
Tatsuya's younger sister is a hybrid zoner character whose offense primarily focuses on frustrating and confusing the opponent with her 214X and j.214X series in tandem with her momentum shifts on her air dash follow-ups. Her 236X series and large normals keep the opponent in check from approaching too aggressively. Her strongest asset is her Red Trump Card which hits overhead full screen and is air unblockable. Players who enjoy graceful movements in the air while robbing your opponent of their ability to be any close as graceful may enjoy Miyuki's company.
Pros
- Superb air mobility with two air dashes and an air dash follow-up that affects her fall trajectory
- Great ranged ground normals and air to air options to anti-air opponents
- Amazing Red Trump that hits full screen and can be used as an unblockable set-up on opponents who mistime Reflection Guard in the air
- Can easily swap between offense and defense: zone and ensnare with 236X snowflakes and j.214X traps to build an opening to begin the offensive
Cons
- 5A and 2A pokes are 6 frames and therefore on the slower side
- Requires assist to be threatening
- Difficulty converting into large damage from stray conversions
- Difficulty facing other zoner type characters
Recommended Assists
Rusian - Rusian has a dual purpose of giving Miyuki control of neutral to either launch an offense or to continue to frustrate with projectiles as Rusian inflicts white health damage. 6S Monster Train can easily overwhelm opponents and completely control the pace of the match while also chipping slowly away at the foe’s health. 5S is a counter move to ward off overly eager opponents.
Celty - Celty is part neutral tool and part setplay staple. 5S is a giant hitbox in front of you that zooms across the screen with only 10 frame start-up. It’s great for scrambles, mid-screen stand-offs, and quick punishes into hard knockdown.
Mashiro - Mashiro serves as both a potent neutral tool and potentially terrifying setplay. 5S unleashes a murder of baumkuchen that fiendishly roll forward, serving as a projectile to front your approach or as a combo extender. 6S sets out four cats that serve as both ample tick throw and high-low set-ups as well as checks against the opponent's movement and pokes as you close in.
Potentials
Universal Potential: Increases damage dealt by 10% for 20 seconds when health falls under 30%. If behind in rounds won, increases damage dealt by 20% instead.
Character Potential: Use 3 EX Special Attacks for Support Cast Level 3 for 30 seconds. Can be activated once a round.
Move List
L = Low, H = High, A = Air
JC = Jump Cancel, SC = Support Cancel, EX = EX Cancel
ISC = Impact Skill Cancel, TCC = Trump Card Cancel, CAC = Climax Art Cancel
Startup includes the first active frame.
Normal Moves
| 5A |
|---|
| 2A |
|---|
| 5B |
|---|
| 2B |
|---|
| 5C |
|---|
| 5[C] |
|---|
| 2C |
|---|
| 2[C] |
|---|
| j.A |
|---|
| j.B |
|---|
| j.C |
|---|
| j.[C] |
|---|
Special Moves
| Floral Lock 「フローラル・ロック」 236X |
|---|
| Freezing Zone 「フリージング・ゾーン」 214X |
|---|
| Gungnir 「グングニル」 j.214X |
|---|
Universal Mechanics
| Throw 6C or 4C |
|---|
| Impact Skill Fenrir 「フェンリル」 5A+B |
|---|
| Impact Skill Niflheim 「ニブルヘイム」 2A+B Wind install |
|---|
| Impact Break 4A+B |
|---|
| Trump Card Cocytus 「コキュートス」 5A+C |
|---|
Climax Arts
| Inferno 「インフェルノ」 41236B+C |
|---|
| Phantom Dance 「ファントム・ダンス」 63214B+C |
|---|
Combos
Midscreen
if you ever see 2C > 5A+B >214A+B the reason why this is done often over the 5C > 5A+B > 214A+B is because of consistency if you plan to follow up after the 214A+B. 5C will deal more damage but more likely to mess up because certain ranges are better or worse
5A Starter
Most of these will work with 2A starter as well
- 5A > 5B > 2C > dash OTG 2A > 2A > 2A > 2B > 5C
- 1419 damage; no meter
- 5A > 5B > 2C > dash OTG 5A > 2A > 2A > 2B > 5C
- 1423 damage; no meter
- 5A > 5B > 5C > 5A+B > 214A+B > 2A+B(wiff)
- 2103 damage; 1 bar; sets up for wind install on oki
- 5A > 5B > 5C > 5A+B > 214A+B > OTG 2A > 2B > 2C
- 2271 damage; 1 bar
- 5A > 5B > 2C > 5A+B > 214A+B > j.C > land > j.C > jc > j.C > j.214A
- 2521 damage; 1 bar but no oki
- 5A > 5B > 2C > 5A+B > 214A+B > dl j.C > land > dokuro 5P(meterless) > 2[C] > 214C > 662(will have switched sides) airdash oki
- 2715 damage; 1 bar and 1 assist call. may be slightly less damage if the timing is messed up and have chance of accidentally spending 2 bars
- 5A > 5B > 2C > 5A+B > 214A+B > j.C > land > j.C > jc > j.C > j.214A+B > OTG 5[C]
- 2760 damage no 5[C] 2784 with; 2 bars
- 5A > 5B > 5C > 5A+B > burst > dl 5[C] > 214C > j.C > land > j.C > jc > j.C > j.214A+B OTG 5[C]
- 2795 damage; burst and 1 bar built from burst
- 5A > 5B > 5C > 5A+B > 41236B+C
- 3095 damage; 2 bars
2A Starter
- 2A > 5B > 2C > dash OTG 2A > 2A > 2A > 2B > 5C
- 1333 damage; no meter and only use this if you hit a max range 2A. otherwise use 2A > 5A combo
- 2A > 5A > 5B > 2C > dash OTG 2A > 2A > 2A > 2B > 5C
- 1454 damage; no meter
- 2A > 5B > 5C > 214A+B OTG > 2A > 2B > 2C
- 2206 damage
- 2A > 5A > 5B > 5C > 214A+B OTG > 2B > 2C
- 2212 damage
After 2A+B install
- 4A+B > wind hit > 66 5[C] > 214X > j.C > land > j.C > jc > j.C > j.214A+B OTG 5[C]
- 2620 damage with 5[C]; 1 bar; as well you can do 66[C] because there are no command normals
- 4A+B > wind hit > 7j.[C] > j.214A > land > j.C > jc > j.C > j.214A+B OTG 5[C]
- 2400 damage with 5[C]; 1 bar
- 4A+B > wind hit > 66 5[C] > 214X > j.C > land > j.C > jc > j.C > j.214A+B > 41236B+C
- 4070 damage; 3 bar
- 4A+B > wind hit > meterless assist call > ????
- obviously will be vary a lot per assist, but you have plenty of time to call even high startup assists to trigger due to the large amount of hitstun
- throw > wind hit > OTG 5B > 5C
- 1561 damage
- throw > wind hit > OTG 5[C] > 5A+B
- 1640 damage; bad oki
- throw > wind hit > j.B > j.C > jc > j.C > j.214A+B OTG 5[C]
- 2069 damage; 1 bar
- throw > wind hit > j.B > j.C > 8jc > j.C > j.214A+B > 41236B+C
- 3515 damage; 3 bar have to jump cancel directly up.
- 5A > wind hit > 5B > j.B > j.C > jc > j.B > j.C > j.214A > j.214A+B
- 2485 damage
- 5A > wind hit > 5B > j.B > j.C > jc > j.B > j.C > j.214A > j.214A+B > 41236B+C
- 3955 damage; 3 bar
- 3955 damage; 3 bar
- air dash j.A > wind hit > 5[C] > 214A > j.C > land > j.C > jc > j.C > j.214A+B OTG 5[C]
- 2617 damage; 1 bar
- air dash j.A > wind hit > j.B > 5B > j.B > j.C > jc > j.B > j.C > j.214A+B OTG 5[C]
- 2020 damage; 1 bar. when going for double over head. if they get hit by 2nd overhead you can just do the 5[C] route
- 2A > wind hit > microwalk forward 5[C] > 214A > j.C > land > j.C > jc > j.C > j.214A+B OTG 5[C]
- 2617 damage; 1 bar
4A+B Starter
- 4A+B~X > dl j.B > j.C > jc > j.B > j.C > j.214A > dl j.214A+B OTG 5[C]
- 2385 damage; 1 bar
Throw
- throw > 214A+B > j.C > jc > j.C > j.214A+B OTG 5[C]
- 1989 damage; 2 bar
- throw > burst > 5[C] > 214B > j.C > land > j.C > j.214A+B OTG 5[C]
- 2504 with OTG; 1 bar and burst
- throw > burst > j.214B > 214B > j.C > j.214A+B > 41236B+C
- 3313 damage; 3 bars and burst
- throw > Trump > 2A+B install
- 2089 damage; trump
- throw > OTG dash 5A > 5B > 5C
- 1299 damage;
- throw > OTG dash 5[C] > 5A+B
- 1370 damage; bad oki
- throw > wind hit > OTG 5B > 5C
- 1561 damage
- throw > wind hit > OTG 5[C] > 5A+B
- 1640 damage; bad oki
- throw > wind hit > j.B > j.C > jc > j.C > j.214A+B OTG 5[C]
- 2069 damage; 1 bar
- throw > wind hit > j.B > j.C > 8jc > j.C > j.214A+B > 41236B+C
- 3515 damage; 3 bar have to jump cancel directly up.
Corner
5A Starter
- 5A > 5B > 5C > etc
- Notes about this particular combo
4A+B Starter
- 4A+B > B > j.A > etc
- Notes about this particular combo
Assists
Assist Character 1
- 5A > 5B > 5C > 5D > etc
- Notes about this particular combo
Assist Character 2
- 5A > 5B > 5C > 6D > etc
- Notes about this particular combo
Setups and Mixups
j.214X
you can set this up off various knockdowns and can even TK it. this can be very good in certain situations but have to be sure what frame advantage you are at. some setups can still be minus.
Airdash
This would be the main way you would be opening up your opponent. Miyuki's airdash can be directed downwards as well so you can do 662 to get airdash fall. this is useful because it now gives you access to more options.
for the samples below there will be IAD and dl IAD. dl IAD does not mean you are heavily delaying the IAD but only slightly to give you more options
- IAD j.2A(wiff)
- 2A for empty low
- throw for empty throw
- 4A+B if feeling bold
- dl IAD j.2A
- 2A
- IAD j.A > j.B
- microwalk throw
- IAD
- j.C > land > dash 2A
- j.C > land > dash throw
- j.C > land > dl IAD j.2A
- j.[C] not too good on block but the delay can mess with people sometimes
- dl IAD
- j.A > j.B
- j.A > j.C(wiff)
Colors
| Color 1 | Color 2 | Color 3 | Color 4 |
|---|---|---|---|
| Color 5 | Color 6 | Color 7 | Color 8 |
| Color 9 | Color 10 | Color 11 | Color 12 |
| Color 13 | Color 14 | Color 15 | Color 16 |
| Color 17 | Color 18 | Color 19 | Color 20 |
| Color 21 | Color 22 | Color 23 | Color 24 |


