Dengeki Bunko: Fighting Climax/DFCI/Asuna
Players to Watch
JP:
- Jing (Rank 1 Asuna/Iriya, Celty)
- Emurisu (Rank 7 Asuna/Celty)
- Ka-ji (Rank 9 Asuna/Celty)
- Ayuponzu (Asuna/Mashiro)
- Myaa (Rank 5 Asuna/Kuroneko)
NA:
- Tamaki (Asuna/Iriya, Can be found in DFCI Discord)
- Delta (Asuna/Iriya, Celty)
- Inebriated Mage (Asuna/Celty, Iriya, Can be found in DFCI Discord)]
Introduction
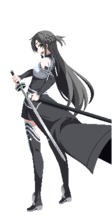
Sub-leader of the Knights of the Blood, the strongest guild in Aincrad. Her nickname is "The Flash" due to her speed with her rapier, Lambent Light. Kirito is her boyfriend. Originally from the light novel series Sword Art Online.
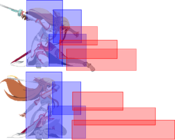
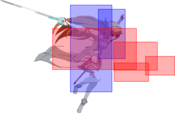
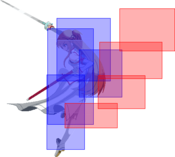
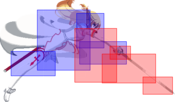
Swift of foot, Asuna is the definitive speed-demon character of DFCI. Wielding a rapier, her normals are of comparable range to Yuuki's and her ground normals are faster. Her 5A is the best in the game and both of her A normals are active on frame 5. Combine her impressive frame data and versatile Specials with the fastest normal run speed in the game, and Asuna possesses incredible conversion prowess on her own. Add a trusty assist to aid her and it becomes quite apparent why Asuna commands such respect from foes.
Pros
- Best run speed and fall speed amplify her pressure game and combo confirms
- Quick normals with incredible option coverage, including a reliable 2B anti-air and j.C
- Best 5AB Impact Skill in the game: incredible reach and speed allows her to punish Power Blasts and whiff punish, as well as escape certain types of pressure
- Very independent character with little co-dependence on assist
- Access to 5 bar meter dump routes without trump or assist
Cons
- Impact Skills are ill-suited for defense, with 2AB having simple counterplay and 5AB unable to hit jumping opponents
- Mid-screen throw set-ups require assists to be threatening
- 236AB enders midscreen are generally weak without Iriya
Recommended Assists
Iriya - 5S gives you a plate projectile to use for setplay or to help you close in on opponents. 6S is a moped that can be used to punish Blasts or whiffed attacks and force out air options from the foe. Use Iriya's 5S to bait opponents into attacking her and move in with an attack of your own to punish the dinner-crashers. Considered Asuna's best assist by most.
Celty - Celty is part neutral tool and part setplay staple. 5S is a giant hitbox in front of you that zooms across the screen with only 10 frame start-up. It’s great for scrambles, mid-screen stand-offs, and quick punishes into hard knockdown. 6S is a giant anti-air bike that hits twice to afford you two opportunities to run cross-ups or tick throws. Can make Asuna's 2AB safe with 1S~AB during Trump State.
Mashiro - Mashiro serves as both a potent neutral tool and potentially terrifying setplay. 5S unleashes a murder of baumkuchen that fiendishly roll forward, serving as a projectile to front your approach or as a combo extender. 6S sets out four cats that serve as both ample tick throw and high-low set-ups as well as checks against the opponent's movement and pokes as you close in.
Potentials
Universal Potential: Increases damage dealt by 10% for 20 seconds when health falls under 30%. If behind in rounds won, increases damage dealt by 20% instead.
Character Potential: Call your assist 2 times for Attack Level 1 for 10 seconds. Can be activated twice a round.
Gameplan
This section is dedicated to showing unique elements in a characters gameplan, not necessarily defining it entirely (ie. explaining how Asuna might play around her dash 5A in neutral but not exactly what spacings to be at).
Neutral
A few elements worth highlighting in Asuna's gameplan is 5A/2A, 2B, jB/jC, and some of jA, and how she uses each to be able to constantly switch between an aggressive style to a more active defensive style in neutral. Asuna benefits greatly from using these tools to shut the opponent down.
5A/2A
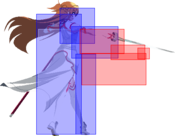
Likely the best A normals in the game. Asuna can use her dash 5A to easily pin landings and stuff grounded buttons which is ridiculous in tandem with her dash speed. 2A can catch an opponent off-guard and counterpoke to protect your grounded space vs more grounded characters like Kuroko, Rentaro. Both are active on frame 5.
2B
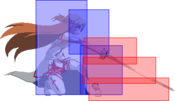
Asuna's go-to and only grounded AA. 2B is great for calling out players that have burned their doublejump early or after a dash-under (which will be common due to Asuna's dash speed). Another huge use for it is after a micro-dash in neutral, you can crouch under opponents going over you and 2B to AA them.
jB
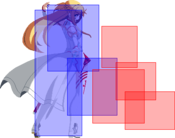
The go-to A2A button that I believe will find the most use for Asuna's defensive air control. It's upwards hitbox makes it great for calling out doublejumps on reaction and can easily be converted on hit.
jC
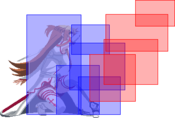
This button pretty much does everything. The most obvious use for this button is as an ATG, which should be applied in "turtling" ways where you abuse its disjoint to slowly take space without overcommitting. You can cycle in 9j~C, 9j~7dj, 9j~8[4]djC to scout on top of dash button approaches or just to control space. Movements like 9j8[4]dj and 9j7dj are great ways to put yourself above people doing 9j/sj and to poke them A2A with jC or to force them to back off in the air, allowing you to land first to pin their landing. On retreating 7js when you're giving up space, you can look for superjump startup and release jC on reaction to the startup to answer over ambitious sj approaches and vs grounded opponents the threat of 7j~C vs late dj~C should give you room to land with respect.
j236x
j236x is a "last resort" tool that can be used in situations where you are clearly checkmated as you've burned your jump options entirely and the opponent is closing in with a dash AA. However, the recovery on whiff is pretty dangerous you shouldn't be using it as an aggressive dive-kick but more-so a tool to keep your landings ambiguous vs aggressive opponents. Punishable on block but easily cancellable into j236AB to be plus.
5AC (Trump Card)
5AC sends Asuna airborne with a far reaching vertical hitbox. This tool is great for checkmating double-jumps and possibly after a landing if you're feeling good. While Asuna does benefit from trump installing on hit, she is allowed to let it rip/have it get blocked at times as it's difficult to answer without looking for it.
5AB
This tool has roughly 2 main uses I'd say. One is that it can be used to whiff punish blast. Asuna 5AB can on reaction call out power-blasts in neutral, giving Asuna great control as a passive character. The second is a MU specific tool which turns you into a projectile. Can be used to whiff punish Tatsuya, Kuroko, KYH, Mikoto, or when an opponent whiffs something with high recovery fullscreen.
All of this makes for a great punish game from Asuna where she can constantly be a threat without committing. Her various established assists like Iriya, Celty, Mashiro, and Kuroneko all grant her the similar ability to encourage players to approach her otherwise they will have to find an uphill battle.
Offense
Asuna's pressure contains little to no faults with no one specific thing to play around. 5A/2A are wonderful stagger tools with far reach, 5A and 5B leave the ambiguity of jump cancel vs staggers and the delays that come with them, and 2C/5C are wonderful string enders to keep people locked if they reflect guard and 2C is multi-hit, making it easy to confirm and a nice way to blow-up fuzzy options. Extra: 214[A] is a command backdash you can cancel your c normals into occasionally on block to give up space to just present implied spacing pressure.
Some string ideas:
5A...
- >(recover) grab
- Option that takes advantage of respect and can even grab "reaction" RG
- >(delay) jump cancel
- Great option that blows up reaction RG, can catch people throw-teching expecting a grab out of recovery
- >~2A...
- Another way to blowup people expecting grab that will also catch a fuzzy-jump that they may present in the case of grab.
- Can stagger into more 2As for catch abare/upback, 5A to catch upback/possibly delay jump cancel, etc.
- >~2A5A
- Alternative to above, you lose continued a staggers but present a possible dash grab vs
2A...
- >(recover) grab
- Option that takes advantage of respect and can even grab "reaction" RG like above, but it's worth keeping in mind that the 2A version is much weaker as you lose the jump cancel option.
- >5A
- Simple 2A5A stagger which gets the same options as "5A..." above, but recover grab may require a micro-walk, this enables shimmy-ing with respect (though expect lots of fuzzy-jumping from more experienced players in low/throw situations)
...5C
- Good standard string ender that reaches far and answers people RGing the button before it. What makes it better than 2C for dealing with RG in longer strings is that if you are spaced out, the 1st hit of 2C can whiff after RG as the 2nd hit reaches further.
...2C
- Multi-hit 2C and incredible for pressure. You can use it to answer fuzzies, do 2A2C to answer people doing RG > buttons, etc.
- In trump, you can actually abuse the multi-hit feature and jump cancel the 1st hit on block as people may react to that first hit and try to RG the 2nd hit. They will then whiff a 1AC/AB/BC etc. opening them up.
...214[A]
- Option that you could use after 2C/5C on block. It should only be considered SOMETIMES and you shouldn't be looking to either confirm 5AB on hit vs 214[A] block, but rather focus on confirming 5C/2C and occasionally using the massive C normal stagger window to cancel into 214[A].
OTHER: 236A is not a real pressure tool and can be punished by Climax Arts on blocked etc. Do not use this as an offense tool.
Defense
Asuna has some interesting defensive choices. 2A/5A are above average abare tools. 5C works great out of RG to punish whiff buttons and you can even dash 5A/2A or 5B to whiff punish on reaction after RG. You of course have a strong jC after RG to turtle with as well.
AAing
2B is not great for defensive AA, but, you can abuse your movement options in place of this. If people 9j or 8[6]j in pressure after a jump cancel etc. you can abuse your walk-speed to walk under them. Another option after RG if people are jumping in is to possibly attempt dash-under or to 7j8dj to angle a jC above the opponent's 9j attempt etc. Finally, you can scout with 9j and prepare to jA on reaction to the opponent's jump start-up.
Reversal 5AC
Asuna's 5AC works as a possible RG OS due to its far horizontal and vertical reach and can be even be done as an AA, either late-ish into a 9j or after seeing people burn their dj.
5AB
Asuna's 5AB is an interesting AB tool. For some reason if people clash with Asuna 5AB with a forward moving 5AB, it can sometimes go through her 5AB and whiff. If people ranbu back vs Asuna 5AB, most ranbus will whiff as she will go through them. This means that:
- If people 2AB back, you can combo-blast/5AC cancel to punish them.
- If people combo-blast or trump back, they have spent a huge resource.
Some Asuna 5AB RPS will force the use of trump/CB as ranbu is not an option vs her. On top of this, if you do 5AB and they jump cancel or 5AB early vs a jump-in, you will go under them and across the screen. In trump characters can punish this with some assists or zoners could use a move to catch it but many characters struggle to really shut it down.
Punishes
Asuna also has a set of various punishes. For example, 236A is able to punish Yuuki 2C on block (as well as other string enders that are >= -7). Even if she cancels into 214x the multi-hit for 236A will come out on top vs her guard-point frames.
Against Shana 5C236C string enders, Celty 5S will punish 236C on block.
Move List
Normal Moves
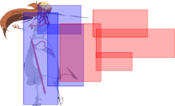
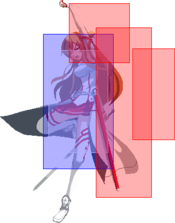
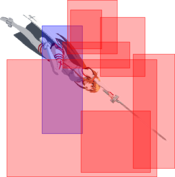
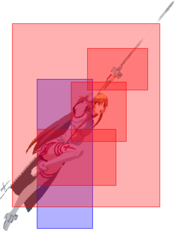
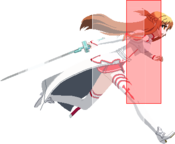
| 5A |
|---|
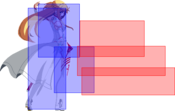
| 2A |
|---|
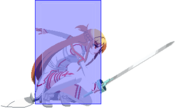
| 5B |
|---|
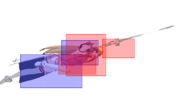
| 2B |
|---|
| 5C |
|---|
| 2C |
|---|
| j.A |
|---|
| j.B |
|---|
| j.C |
|---|
Special Moves
| Parallel Splash 「パラレル・スプラッシュ」 236X EX Ender |
|---|
| Flashing Penetrator 「フラッシング・ペネトレイター」 214X Hold button for a feint 214A/B/C 214AB |
|---|
| Shooting Star (Air Version) 「シューティング・スター」 j.236X j.236A/B/C j.236AB |
|---|
Universal Mechanics
| Throw 6C or 4C |
|---|
| Impact Skill Shooting Star 「シューティング・スター」 5A+B |
|---|
| Impact Skill Aero Penetrator 「エアロ・ペネトレイター」 2A+B |
|---|
| Impact Break 4A+B |
|---|
| Trump Card Wife of Iron Fist 「鉄拳正妻」 5A+C |
|---|
Climax Arts
| Mother’s Rosario 「マザーズ・ロザリオ」 41236B+C |
|---|
| Stardust Splash 「スターダスト・スプラッシュ」 63214B+C |
|---|
Combos
Solo
A Starter
- 2A > 5B > 5C > 5AB > 236AB
- Staple one meter combo that leads into oki
- 41236BC can be added after 5AB for a 2 meter combo or after 236AB for a 3 meter combo
- Can be ended with 5B > 2C instead for a meterless knockdown
- Can cancel into Trump Card any time before the last hit of 236AB when in the corner (Asuna's only other Solo Combo into Trump Card is off throw when in the corner)
- 2A > 5B > 5C > 236C > 214AB > 9jc > j.C > j.236AB > 5B > 236C > 236AB > 41236BC
- Solo 5 meter combo
- While the damage isn't the best, Asuna is one of the few characters who can spend her meter without the use of an assist
- The air portion of this combo can be applied to stray air confirms for a 3 meter combo (for the 2 meter combo see the first 4AB Starter Combo)
- 236AB can be omitted for a 4 meter combo
- Add 5AB > 236AB > Combo Blast after 5C and omit 236C for Asuna's most damaging Solo Combo with Blast and 5 meter
- Possible to go into Power Blast immediately after jump cancelling
- 2A > 5B > 5C > 5AB > Combo Blast > 5B > j.B > j.C > j.236B
- Combo Blast route which is important towards the end of the round for spending all remaining resources to defeat the opponent
- Use 236AB after j.236B when starting with 0 meter
- Use 41236BC after j.236B when starting with 1 meter
- Use 236AB > 41236BC after j.236B when starting with 2 meter
- Omit j.236B and instead use j.236AB > 5C > 5AB > 236AB > 41236BC after j.C when starting with 3 meter
- When starting with 4 meter add 236AB after 5AB, then use the 3 meter combo listed above
4AB Starter
- 4AB~X > j.B > j.C > 8jc > j.C > j.236B
- Staple 4AB combo and meterless air route
- j.236AB and 41236BC can be added after j.236B for hard knockdown or maximum damage
- Use only j.C > j.236B after 4AB~X to incorporate 41236BC after j.236B for a 2 meter combo
- For anti-air or air-to-air confirms, omit the second j.C to incorporate 41236BC after j.236B for a 2 meter combo
- Possible to go into Power Blast immediately after jump cancelling
- 4AB~X > 5AC
- Solo combo into Trump Card
- Sets up left/right mixup with certain assists
Assist
Iriya combos can be found on DFCIDiscord's Asuna Combo Page/YT
Celty
- 5A > 5B > 5C > 5AB > Combo Blast > 6S > 236A > j.B > j.C > dl j.236B > 41236BC (4355/1 Meter)
- Does not work off prorated starters
- 5C > 5AB > Combo Blast > 6S > 236B > j.B > j.C > dl j.236B > 236AB > 41236BC (4981/2 Meter)
- Whiff/normal punish combo
- 4AB > 6S Hit > 214A > 5B > j.B > j.C > jc > j.C > dl j.236B > j.236AB or 41236BC (2953/1 Meter)
- Corner oki combo
- j.236C > Combo Blast > 214A > j.236AB > 5B > 6S > j.B > j.C > 236C > 5C > 236C > 236AB > 41236BC (5653/3 Meter)
- Fuzzy 5A punish
- Throw > 5S > 5AC
- Throw starter into Trump Card
- j.B > j.C > jc > j.C > j.236B > dl 5S > 5AC
- Air confirm into Trump Card
- Throw > 6S Hit > 5AC
- Throw after 6S oki into Trump Card
- Post Trump 2A 6S Hit dl 214[B] jC 5C jB jC j236B j236AB or 41236BC
- 5S > 5B > 5C > 5AB > Combo Blast > j.236C > j.236AB
- OTG combo off 5S
- Adds an extra 1000 damage to 5S and is extremely useful when the opponent is low on health
- CH j.236C > 5B > 6S > j.B > j.C > 236C > 2B > 5C > 236A > Lv2
- Corner anti-fuzzy 5A/frame trap combo
- TK j.236A > j.236AB > 5B > j.B > j.C > jc > j.B > j.C > j.236B > j.236AB
- Frame trap after safe jump that beats B~C throw tech, 2A mash, and fuzzy jump
- A preferred method of inputting TK in DFC is 23693
Setups (Okizeme)
Solo
Safejump: j236AB Ender > 5A (whiff) > 9j~C...
- Can do a hitstop OS with 2AB in the corner to blow-up powerblast, or ranbu everywhere to blowup powerblast, backdash, etc.
Throw > OTG 2AAA > 5B > 2C (2nd hit whiffs) > 5A
- Yuuki and Kirito wakeup 1F slower so you have to use 2A against them.
- Shana wakes up 1F faster so this does not work against her.
Celty
Various confirms can be found here for Celty 6S Okizeme
236AB Ender (Midscreen) > (recover, 6S Call) >
- micro-dash 5C to check upbacking
- Otherwise, can dash 2A~4AB, dash grab, dash 2A~2A, dash 8[4]j etc.
j236AB Ender > (recover, 6S Call) >
- Can abuse 2A~grab, 2A~2A, 2A~4AB etc. A much better KD
Trump Install > superjump (call 6S right before landing) >
- 9j (land) 2A for cross-up option
- superjump 7dj/9j7dj for same-side option (must swap sides and crossback before opponent wakes up)
Iriya
HKD ender > (dash) > 2S~2AAA5B OTG > plate flick of your choice
Buttons > 236AB (delay 5S after the last hit) > OTG 2A > 5C > 5B > 2B (plate launches) > 2AA
- left/right setup, watch here
Buttons > 236AB (delay 5S after the last hit) > OTG 2A > 5C > 2A
- left/right fireworks variant
Colors
| Color 1 | Color 2 | Color 3 | Color 4 |
|---|---|---|---|
| Color 5 | Color 6 | Color 7 | Color 8 |
| Color 9 | Color 10 | Color 11 | Color 12 |
| Color 13 | Color 14 | Color 15 | Color 16 |
| Color 17 | Color 18 | Color 19 | Color 20 |
| Color 21 | Color 22 | Color 23 | Color 24 |
Additional Resources
- DFCIDiscord's Asuna Character Page
- JIN's recommended Asuna assists (translated on DFCI char page)
- JIN's Asuna setplay guide (translated on DFCI char page)

