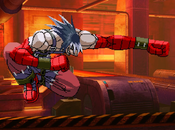
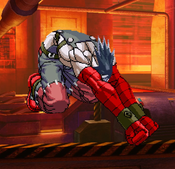
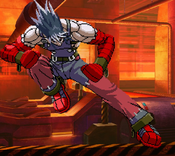
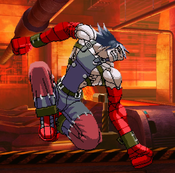
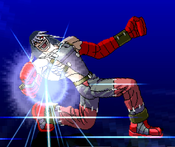
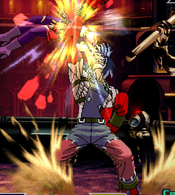
Introduction
| Gender
|
Male
|
Blood type
|
A(Rh-)
|
Birthday
|
November 6th
|
Fighting Style
|
Vale-Tudo Based boxing
|
Birthplace
|
Australia
|
Height
|
250cm
|
Weight
|
190kg
|
Voice Actor
|
|
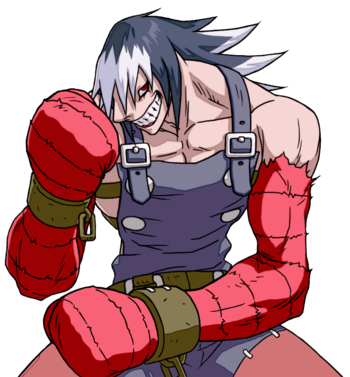
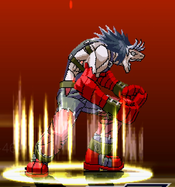
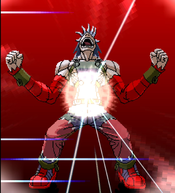
Fun fact: His hobby is demolishing his opponent to the point of irrecoverability. He is extra resistant against pain and starvation.
Gameplay
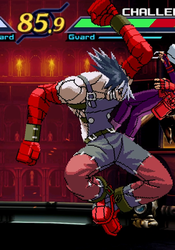
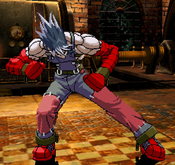
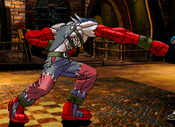
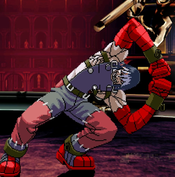
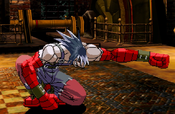
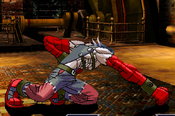
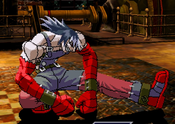
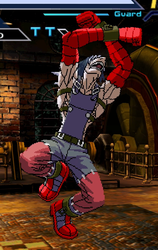
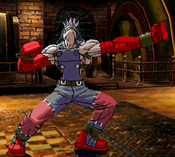
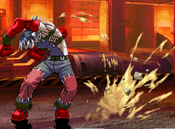
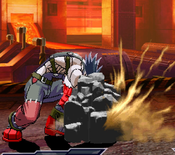
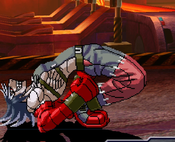
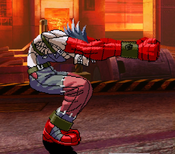
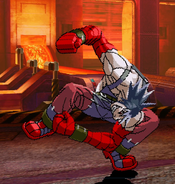
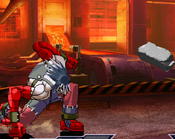
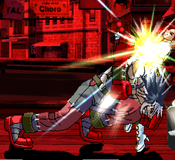
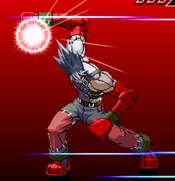
Bazoo is primarily a "zoner", using his long limbs and powerful ceiling rock projectiles, Earth Dive, to keep the opponent at bay from mid range. Earth Dive can be used both offensively and defensively, and is most effective if you can think one step ahead of your opponent. While generally weaker at close range, Bazoo's invincible OA and powerful combos off of counterhit cl.SP mean he is still a force to be reckoned with.
Note that Bazoo does not follow the usual Rush Combo rules. His only routes are light to light, and any normal into his single command normal. Longer combos and blockstrings require an Earth Dive placed in advance, meter, counterhits, or maybe even all three.
| Pros
|
Cons
|
| Extremely powerful mid-range zoning
|
Limited combo routes
|
| Able to force good tech chase situations
|
Very meter reliant when not zoning
|
| Has one of the highest damage combos in the game
|
His install super locks him out of said combo
|
Version Differences
Note any important changes from Atomiswave to Nesica if relevant
Move Set
Standing Normals
5LP
|
| Damage
|
Guard
|
Startup
|
Active
|
Recovery
|
Frame Adv
|
I-Blow OK
|
Punishes G.Dodge
|
| -
|
Mid
|
8
|
-
|
-
|
-5
|
-
|
-
|
Shorter range and slower than 2LP, and it's punishable on block. It's not even good for a throw OS since cl.SP is so powerful.
|
|
5SP
|
| Damage
|
Guard
|
Startup
|
Active
|
Recovery
|
Frame Adv
|
I-Blow OK
|
Punishes G.Dodge
|
| -
|
Mid
|
20
|
-
|
-
|
-5↑
|
No
|
-
|
Moves Bazoo forward about one character's width. The pushback on both hit and block is very high, so it's hard to punish despite the frame advantage. It reaches fairly far. Due to how strong 2LP is in zoning, there is probably not much reason to use this move.
|
|
cl.SP
|
| Damage
|
Guard
|
Startup
|
Active
|
Recovery
|
Frame Adv
|
I-Blow OK
|
Punishes G.Dodge
|
| -
|
Mid
|
4
|
-
|
-
|
-9↑
|
-
|
-
|
This move is absurdly good. It's as fast as many characters jabs, and it's the starter to one of the highest damage combos in the game on counter hit. Launches the opponent on hit, and adds a float effect on counter hit. You can throw it out in situations where you're at slight advantage, slight disadvantage, or even. Its main downside is if it gets blocked, about the only thing that can save you is AA.
|
|
5LK
|
| Damage
|
Guard
|
Startup
|
Active
|
Recovery
|
Frame Adv
|
I-Blow OK
|
Punishes G.Dodge
|
| -
|
Mid
|
7
|
-
|
-
|
-4
|
No
|
✓
|
Bazoo's only rapid fire move. Great for reading G.Dodges, using in hit confirms, and whittling down the opponent's guard gauge if they have a Bank Riser boulder behind them.
|
|
5SK
|
| Damage
|
Guard
|
Startup
|
Active
|
Recovery
|
Frame Adv
|
I-Blow OK
|
Punishes G.Dodge
|
| -
|
Mid
|
17
|
-
|
-
|
-1
|
No
|
-
|
An insanely long reaching straight. Very possibly the longest reaching normal in the game. Takes about 40% of the opponent's guard gauge on block. However, its slow start up can lead to disaster if the opponent G.Dodges or jumps. A good option to mix in when zoning with 2LP and 2LK.
|
|
cl.SK Fusion... Fusion...
|
| Damage
|
Guard
|
Startup
|
Active
|
Recovery
|
Frame Adv
|
I-Blow OK
|
Punishes G.Dodge
|
| -
|
Mid
|
11
|
-
|
-
|
-6
|
No
|
-
|
Mostly used in combos, especially after AA. Good to cancel into Gills Shatter
|
|
Crouching Normals
2LP
|
| Damage
|
Guard
|
Startup
|
Active
|
Recovery
|
Frame Adv
|
I-Blow OK
|
Punishes G.Dodge
|
| -
|
Mid
|
5
|
-
|
-
|
-5
|
No
|
-
|
One of Bazoo's best moves, featuring insanely long reach for a jab. Especially strong when utilizing the momentum from a forward dash. It is negative on hit, but the range is too long for anyone to do anything about it. Use this to annoy the heck out of your opponent. The main downsides are that it's weak to G.Dodge, and the hurtbox reaches fairly far, so it can trade if the opponent starts their attack first. Either way, this move is the starting point of Bazoo's game plan, so learn how to use it well.
|
|
2SP
|
| Damage
|
Guard
|
Startup
|
Active
|
Recovery
|
Frame Adv
|
I-Blow OK
|
Punishes G.Dodge
|
| -
|
Mid
|
14
|
-
|
-
|
-4↑
|
No
|
✓
|
This is Bazoo's sweep. Not 2SK, this move. 2SP. He sweeps with his hand because he is a freak. Reaches a little longer than 2LP, and gives you enough time to set up and Earth Dive on hit. Thanks to the high push back, it's fairly hard to punish unless you are extremely close to the opponent. However, you are wide open if you whiff this move. If the opponent jumps over it, you are in a lot of trouble, and the opponent is already going to be jumping to avoid 2LP.
|
|
2LK
|
| Damage
|
Guard
|
Startup
|
Active
|
Recovery
|
Frame Adv
|
I-Blow OK
|
Punishes G.Dodge
|
| -
|
Low
|
4
|
-
|
-
|
0
|
No
|
✓
|
Has proration. Another powerful light attack for Bazoo, tying cl.SP for his fastest move at 4f. Throw it out when you feel the opponent might try to G.Dodge through 2LP, or utilize its even frame advantage in offense. They key here is to find a good balance with 2LP to balance out its inherent risk. Just don't use it in punishes if you like doing damage.
|
|
2SK
|
| Damage
|
Guard
|
Startup
|
Active
|
Recovery
|
Frame Adv
|
I-Blow OK
|
Punishes G.Dodge
|
| -
|
Mid
|
13
|
-
|
-
|
-
|
No
|
-
|
In case you didn't notice, this isn't his sweep. That's 2SP. This move is mainly for tech chases. It reaches so high, it whiffs on most characters even when they are standing. It is almost guaranteed to catch any opponent that tries to air recover over Bazoo.
|
|
Jumping Normals
j.LP
|
| Damage
|
Guard
|
Startup
|
Active
|
Recovery
|
Frame Adv
|
I-Blow OK
|
Punishes G.Dodge
|
| -
|
High
|
-
|
-
|
-
|
-
|
No
|
-
|
Basically a jumping 2LP, with equally insane range. Use this after a vertical or back jump to keep the opponent at bay once they start trying to jump over your other moves. Knowing the ranges and optimal times to use 2LP and this move is Bazoo's foundation.
|
|
j.SP
|
| Damage
|
Guard
|
Startup
|
Active
|
Recovery
|
Frame Adv
|
I-Blow OK
|
Punishes G.Dodge
|
| -
|
High
|
-
|
-
|
-
|
-
|
No
|
✓
|
Reaches very far down, can punish G.Dodge, and is surprisingly fast. Great as an instant overhead; in this case, you can do j.LK or j.SK on the way back down to keep the pressure up. When using this move in a forward jump, sometimes the opponent can G.Dodge through it, so use vertical or back jump if you think the opponent might G.Dodge.
|
|
j.LK
|
| Damage
|
Guard
|
Startup
|
Active
|
Recovery
|
Frame Adv
|
I-Blow OK
|
Punishes G.Dodge
|
| -
|
High
|
-
|
-
|
-
|
-
|
No
|
✓
|
Reaches very far down and is extremely good at stopping G.Dodges. Works as an instant overhead even from a back jump. You can use j.SP and j.SK on the way back down after the instant overhead. Mix up this option with 2LK when going on the offensive.
|
|
j.SK
|
| Damage
|
Guard
|
Startup
|
Active
|
Recovery
|
Frame Adv
|
I-Blow OK
|
Punishes G.Dodge
|
| -
|
High
|
-
|
-
|
-
|
-
|
No
|
✓
|
Slower than j.SP, so it cannot instant overhead. It can punish G.Dodge as well, but there's not much reason to use this move over the others.
|
|
Command Normal
Bone Crusher
6SP
|
| Damage
|
Guard
|
Startup
|
Active
|
Recovery
|
Frame Adv
|
I-Blow OK
|
Punishes G.Dodge
|
| -
|
Mid
|
19
|
-
|
-
|
-
|
No
|
-
|
Cannot hit most characters when they are crouching, and even some while they are standing. Mainly used in combos.
|
|
Special Moves
Bottom Scratch
[4]6K
|
| Damage
|
Guard
|
Startup
|
Active
|
Recovery
|
Frame Adv
|
I-Blow OK
|
Punishes G.Dodge
|
| -
|
Mid
|
17(L) 23(S)
|
-
|
-
|
-11↑
|
-
|
✓
|
When this attack lands at close range, Bazoo will punch the opponent. The punch is extremely punishable and does not do much damage, so it should be avoided as much as possible.
|
| Damage
|
Guard
|
Startup
|
Active
|
Recovery
|
Frame Adv
|
I-Blow OK
|
Punishes G.Dodge
|
| -
|
Mid
|
22(L) 28(S)
|
-
|
-
|
+4
|
-
|
✓
|
When this attack is used out of punching distance, the sand he flings acts as a projectile. This gives you enough advantage to continue a block string with 2LK or frametrap with 2LP. Very powerful.
|
|
Bank Riser
[4]6P
|
| Damage
|
Guard
|
Startup
|
Active
|
Recovery
|
Frame Adv
|
I-Blow OK
|
Punishes G.Dodge
|
| -
|
Low
|
24
|
-
|
-
|
0
|
-
|
✓
|
Causes a tiny earthquake that hits low. After the earthquake, a boulder juts out of the ground. The LP version puts the boulder directly in front of Bazoo, and the SP version puts it about two character widths away. The boulder acts as a wall that neither player can walk through. The rock goes away after a set period of time, or when hit by the opponent. You can use this to effectively put the opponent in the corner at mid-screen, or use it to help keep the opponent away from you. Note that the boulder cannot shield you from attacks.
|
|
Dragon Fish
214P Neo's got nothing on this. Neo's got nothing on this. 214PP 214PP 214PK 214PK
|
| Version
|
Damage
|
Guard
|
Startup
|
Active
|
Recovery
|
Frame Adv
|
I-Blow OK
|
Punishes G.Dodge
|
| 214P
|
-
|
-
|
-
|
-
|
-
|
-
|
-
|
-
|
A sort of stance, where Bazoo leans way back. Pressing P or K leads to different follow-ups. The stance itself is not an attack. Bazoo bends back low enough to go under Aran's 2SP and most characters 2LPs. The SP version makes Bazoo stay in the stance longer than the LP version. You can delay the follow-ups quite a bit, so try to visually confirm that you've dodged a move before going for the punish. However, you are very vulnerable when exiting the stance, making this a pretty high risk move. It may be wiser to use G.Dodge depending on the situation. If you want to show off, you can cancel into this from a normal, then counter the opponent when they try to take their turn back, but you might get blown up for it.
|
| Version
|
Damage
|
Guard
|
Startup
|
Active
|
Recovery
|
Frame Adv
|
I-Blow OK
|
Punishes G.Dodge
|
| 214PP
|
-
|
Mid
|
25(L) 29(S)
|
-
|
-
|
-4
|
✓
|
-
|
Dragon Fish Knock. Sends the opponent flying across the screen on hit. The LP and SP versions are practically the same, but SP will move Bazoo forward a bit, making it riskier when blocked. The true power of this move is the combos it leads to after a counter hit launcher. Go for it after a counter hit cl.SP or Dragon Fish Blow, and you can do enough damage to win the entire round.
With gloves off, Bazoo will fling the opponent behind him on hit. For clarity, this is a hit grab, meaning it can be blocked. This can lead to combos. The move also gains advantage on block. However, you lose access to the high damage combos that normal DFK leads to.
|
| Version
|
Damage
|
Guard
|
Startup
|
Active
|
Recovery
|
Frame Adv
|
I-Blow OK
|
Punishes G.Dodge
|
| 214PK
|
-
|
High
|
29(L) 33(S)
|
-
|
-
|
0
|
-
|
-
|
Dragon Fish Blow. On normal hit, gives you a big bouncy knockdown so you can set up an Earth Dive. On counter hit, it causes a gigantic launch. Same as Hook, the S version moves Bazoo forward, making it a little less safe on block.
With gloves off, it will launch the opponent even on normal hit. The SK version causes a higher launch, leading to easier combos. Airborne opponents will not get launched.
|
|
Earth Dive
236X/22X
|
| Damage
|
Guard
|
Startup
|
Active
|
Recovery
|
Frame Adv
|
I-Blow OK
|
Punishes G.Dodge
|
| -
|
Mid
|
27+26(L) 23+26(S)
|
-
|
-
|
-
|
-
|
-
|
One of Bazoo's most important moves. Upon pressing the button, Bazoo "sets" a rock to fall from the ceiling. The rock falls once you let go of the button. LP places the rock above the opponent. SP places it one character's width in front of the opponent. LK places it one character's width in front of Bazoo. SK places it two character's widths. You can hold the rocks the rocks as long as you want, hold as many as you want, and let them go whenever you want, even when being hit. The positions of the rocks are determined when you set the rock, not when you let go. You can use LK to become a veritable fortress, or LP for offense, or whatever else you can think of. Using Earth Dive defensively can be very powerful, especially when you're swinging 2LP and j.LP from behind it. Even if the opponent gets in on you, the Earth Dive will just hit them back, and you can land a combo. Then even if the opponent blocked, you can get a free Jolt and combo them anyways. Earth Dive is also very powerful on offense, allowing you to create safe high/low set-ups. How you choose to use this move defines what kind of Bazoo player you are.
|
|
Universal Mechanics
Throw
4/6SP
|
| Damage
|
Guard
|
Startup
|
Active
|
Recovery
|
Frame Adv
|
I-Blow OK
|
Punishes G.Dodge
|
| -
|
-
|
-
|
-
|
-
|
-
|
No
|
-
|
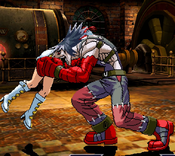
Throws the opponent behind him. Inputting forward throw sends the opponent backwards; inputting backward throw sends the opponent forwards. If the forward throw input whiffs, you'll get 6SP, so it's best to stick to back throw. This move creates a lot of distance, making it a great opportunity to set up an Earth Dive. You can opt for LP rock to keep up your offense, or LK rock to bolster your defense. Depending on your spacing from the corner, SP and SK rocks might be better options. There's a lot of room for decision making here. Most characters will want to input LP+SP so that they get a jab if the throw whiffs. However, Bazoo's cl.SP is basically a super jab, so it's actually better to input SP alone. You might even accidentally get a counter hit!
|
|
Boost Dive
LK+SP/LP+SK
|
| Damage
|
Guard
|
Startup
|
Active
|
Recovery
|
Frame Adv
|
I-Blow OK
|
Punishes G.Dodge
|
| -
|
Mid
|
-
|
-
|
-
|
-
|
No
|
-
|
Buffs Earth Dive's rocks, at the cost of being able to hold them. The rocks become massive, about as wide as Bazoo himself, and they also do considerable guard gauge damage. Not used often, but certainly not bad.
|
|
Jolt Attack (air OK)
LP+LK
|
| Damage
|
Guard
|
Startup
|
Active
|
Recovery
|
Frame Adv
|
I-Blow OK
|
Punishes G.Dodge
|
| -
|
Unblockable
|
-
|
-
|
-
|
-
|
No
|
-
|
Bazoo can easily set up unavoidable Jolts by using Earth Dive.
|
|
Advancing Attack
SP+SK
|
| Damage
|
Guard
|
Startup
|
Active
|
Recovery
|
Frame Adv
|
I-Blow OK
|
Punishes G.Dodge
|
| -
|
Mid
|
-
|
-
|
-
|
-
|
No
|
-
|
|
|
|
Super Arts
Gills Shatter
236236P Offensive Arts Offensive Arts
|
| Damage
|
Guard
|
Startup
|
Active
|
Recovery
|
Frame Adv
|
I-Blow OK
|
Punishes G.Dodge
|
| -
|
Mid/High
|
5/4(L) 5/8(S)
|
-
|
-
|
-3
|
-
|
-
|
First hit is mid, second hit is high. Invincible for a very long time, and only slightly at disadvantage on block. However, the opponent can G.Dodge on reaction to the super flash. A great reversal and "get off me" move. You can even combo into it from light attacks, but it is difficult. Most importantly, it grants a hard knockdown, leading to Bazoo's vicious set-play with Earth Dive. Practically a win condition.
With gloves off, the second hit grabs the opponent and flings them. This allows you to continue comboing, or set up two Earth Dives for even more devilish okizeme.
|
|
Scale Out
63214632146P Offensive Arts Offensive Arts
|
| Damage
|
Guard
|
Startup
|
Active
|
Recovery
|
Frame Adv
|
I-Blow OK
|
Punishes G.Dodge
|
| -
|
Mid
|
8/10
|
-
|
-
|
-
|
-
|
-
|
Rips Bazoo's gloves off. This powers up a bunch of his moves, but locks you out of his incredibly powerful I-Blow combos. The safe times to use this move are also safe times to set up an Earth Dive, so you can lose a lot of momentum if you choose this. Your best opportunity is after KO'ing the opponent but before the next round begins.
|
|
Swordfish Counter
463214X Defensive Arts Defensive Arts
|
| Damage
|
Guard
|
Startup
|
Active
|
Recovery
|
Frame Adv
|
I-Blow OK
|
Punishes G.Dodge
|
| -
|
Mid
|
15/4(L) 15/11(S)
|
-
|
-
|
-
|
-
|
-
|
Only usable when getting hit. This one is not as good as Kaya's or Viren's DAs. The invincibility runs out before the attack connects, the start up is slow, and it doesn't combo in the corner. You must use this move very carefully and time it properly. Don't treat it like a burst. If you use it at a bad time, you'll lose two D Gauge and give your opponent a free reset.
|
|
Bite and Sap
2363214P Critical Arts Critical Arts
|
| Damage
|
Guard
|
Startup
|
Active
|
Recovery
|
Frame Adv
|
I-Blow OK
|
Punishes G.Dodge
|
| -
|
Unblockable
|
10/15
|
-
|
-
|
-
|
-
|
-
|
A very cool-looking move that will get you killed. It may be unblockable, but it is extremely reactable after the super flash. Any decent opponent will jump and land a gigantic punish. About the only place you can use this is if you read the opponent throwing a projectile (reacting will not be fast enough). Rarely worth spending all of your meter.
|
|
Combos
General Combos
- Basic bread and butter into OA. 2LP > 2LK will work too. Bazoo cannot chain from light to strong, and his only rapid fire move is LK, so you'll have to use this combo a lot. This combo is surprisingly difficult because the game likes to prioritize 22LP over the super. You can't try to buffer the super early (like 2LK > 236LP > 236LP) because you'll get Earth Dive. Landing this will lead to Bazoo's powerful okizeme, so it's very important to master it.
- Very easy combo into super. Use in punishes or after an AA. As always, landing Gills Shatter will lead to extremely powerful okizeme, so be sure to land it whenever you can.
- Launch the opponent with cl.SP, then follow up with 6SP. Creates a lot of distance. The opponent can neutral air recover out of this, so it's not really a combo, but you don't have much else you can do without meter. However, this does allow you to force a tech chase situation. If you think the opponent will neutral air recover to punish you, you can delay the 6P, or wait and do another cl.SP, or do cl.SP > 214PP. If the opponent Quick Recovers, however, there is nothing you can do, so be careful when they have D Gauge on deck.
- Jolt > dash 2SK > 22SK (Hold) > cl.SP > 22SP (Hold)
- Jolt > dash 2SK > dash hj.SP > j.SK > cl.SP > Whatever
- The first gets you two Earth Dives, the second gets you more damage and corner carry. Pretty difficult, but Bazoo can easily land guaranteed Jolts, so these are very good to learn.
Corner Combos
- cl.SP (CH) > 214LPP (I-Blow) > (dash cl.SP > 6P)x3~4 > (Air Stun)
- This is it. The giant counter hit combo you've been looking for. You need to be near the corner, but not all the way in it for this to land. cl.SP is incredibly fast, so just throwing it out when at slight advantage or disadvantage can get you counter hits pretty often. Try to land the Knock as early as possible to keep the opponent high up. After that, the loop is pretty simple. You can stun the opponent with this, but it's possible to shake out before standing back up, so you should opt for okizeme against good players.
- 214PK (I-Blow) > (cl.SP > 6P)x2 > dash 2SP > 22SP/SK
- When in the corner, using Knock will cause the opponent to switch sides after the cl.SP, so we use Blow instead. This still does a ton of damage, and gives you an Earth Dive afterwards. Doing just one iteration of the loop leaves you closer to the opponent, granting stronger okizeme.
- Simple and does a lot of damage. You can still do the general Jolt combos while in the corner, so take your pick.
Gloves Off Combos
- cl.SP (CH) > 214SPP > dash 2SP > 22S (Hold)
- A follow-up combo after Knock throws the opponent behind you. Remember, having gloves off locks you out of the normal loop.
- Jolt > dash cross-under 2SK > 22SP/SK (Hit) > 214SPK
- Jolt > 6P > dash 2SK > 214SPP > dash 2SP > Earth Dive (Hold)
- Very weird timing on these. The second one gives you an Earth Dive, does more damage, and is a bit easier.
Strategy
Earth Dive Okizeme
Okizeme after a hard knockdown from an I-Blow combo or Gills Shatter.
- Dash > OTG 5LK > Earth Dive (Hold) > Earth Dive (Release) > forward j.SP > (Earth Dive hits) > j.SK > 2LK > 2LP > 236236LP
- The high option. Is a true blockstring all the way through the j.SK. Even if the opponent does an invincible move, the Earth Dive can cover you.
- Dash > OTG 5LK > Earth Dive (Hold) > 2LK > (Earth Dive hits) > 5SK > 236236LP
- The low option. Same as before, a very solid blockstring, plus the Earth Dive will help against invincible moves.
- cl.[4]6LK (I-Blow) > (Earth Dive hits) > cl.SP > 6SP
- The previous two options will cover almost all cases, but they are weak to reversal backdash. Close Bottom Scratch will catch backdashers, and can lead to a very solid combo. In the corner, you can do two loops of cl.SP > 6SP. If the opponent blocks, the Earth Dive will cover you.
All of the above options will not work against invincible moves that put the opponent in the air. Your best option against those is to just block and wait for the opponent to land before dropping the Earth Dive. If you release it too early, it will hit the opponent while they are still in the air and ruin everything.
With gloves off, Bazoo gains the ability to set up two Earth Dives before a knockdown, possibly leading to even crazier okizeme.
External Links
youtube.com
twitch.tv
