The Rumble Fish 2/System
| The Rumble Fish 2 System Mechanics Primer | |
|---|---|
Basic Mechanics
Dodging
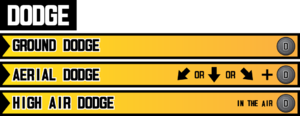
Ground Dodge (GD): 5D
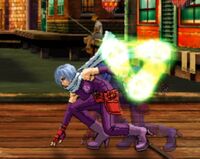
Rolls forward with upper-body invincibility, similarly to the roll mechanic in GBVS. The invincibility lasts until the dodge ends. Ground Dodge distance also varies between characters -- for example, Greed's GD travels a noticeably smaller distance than other characters. The initial frames of the dodge can also be cancelled into a normal, but this will not cause the normal to retain any forward momentum from the dodge.
Specials moves cannot be performed from a dodge under normal circumstances. But is possible to kara the normal that cancels the dodge into a special move by inputting the special within the first two frames of the normal. This is rather difficult to do but you can hit two buttons instead of one to increase your chances to karaing your normal. Ex. if you want to do a fireball out of 5D you can input 236LP+SP to get a normal kara cancelled into a special.
Ground Dodge is excellent for dealing with:
- Jolt Attack
- Advanced Attack
- Standing pokes
- Projectiles that hit above the waist.
Aerial Dodge (AD): 1/2/3D
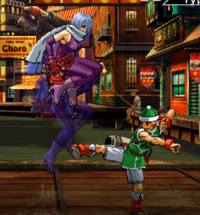
Airborne from frame 1. Functions like a short hop from KOF or P4AU. Can be used to go over most low hitting moves. You can attack out of an AD, but only with aerial normals. You are in counter hit state if you manage to get hit during a dodge or the recovery frames. In the Atomiswave version, there is a bug with AD that can cause the special move lockout to continue indefinitely until you perform a normal attack. This can even prevent you from using reversals on wakeup if you get knocked down.
High Air Dodge (HAD): j.D
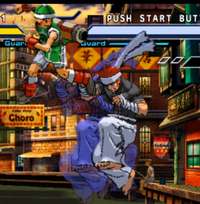
Invincible dodge with a lot of recovery frames. Use if you’re certain you’re going to dodge through a move with a lot of recovery, otherwise you risk getting your landing recovery punished. The invincibility frames are very short so it’s safer to avoid using this unless you’re certain you will succeed. You are in counter hit state if you manage to get hit during the recovery frames.
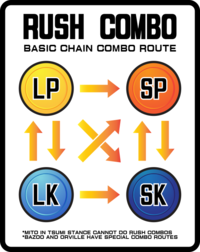
Rush Combo
TRF2's universal chain combo mechanic -- use this to form combos and blockstrings. Some normals (mostly light normals) can be chained into themselves.
Throws
Performed with 4/6SP while close. Throws all have 1F startup, making them the fastest move in the game. There is no whiff animation for throws. You can break (tech) a throw by inputting your own throw as you are thrown. Can be option selected with 6LP+SP, which will cause your character to perform their LP if the opponent is not in throw range. LK is also usable for this purpose, but be careful to not accidentally activate Boost Dive.
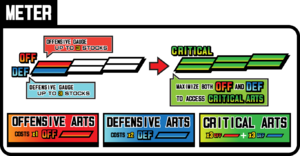
TRF2's super meter is unique in that it holds six bars total -- three bars of Offensive (OFF) meter, and three bars of Defensive (DEF) meter, all of which are used for different purposes.
OFF meter is built by landing attacks and dealing damage to your opponent, while DEF meter builds up slowly over time as well as whenever you are hit.
Offensive Arts
Costs 1 OFF meter. These are effectively supers meant primarily to deal damage. All OAs cause hard knockdown.
Defensive Arts
Costs two DEF meter. Supers vary between characters but they are always defensive in nature. Usually have invincibility or counter properties. Similarly to OAs, DAs all cause a hard knockdown if they connect.
Critical Arts
These are extremely damaging supers that cost three OFF meters and three DEF meters. Most characters can rarely afford the 6 bars needed to use this. Practically speaking you are more likely to use the meter in neutral or for other reasons. It is a cool way to win a game though.
Advanced Mechanics
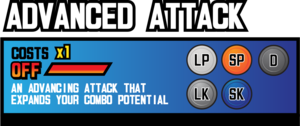
Advanced Attack
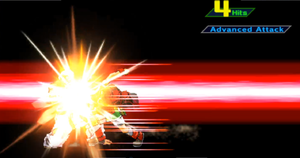
Will cancel any normal on block/hit/whiff into AA. AA is fairly fast and far reaching so using it after a successful Impact Break can get a consistent punish in some cases.
There is meter scaling after using AA so less meter is gained when chaining attacks afterwards. This is to prevent infinite combos that continually use AA. Your opponent’s guard gauge loss is also scaled to be lower as well if they blocked your AA.
The meter penalty can be circumvented on block if you delay the follow up so that it is not a tight blockstring after AA connects. In other words after using AA, delay the follow up attack so that there is a gap between the two attacks.
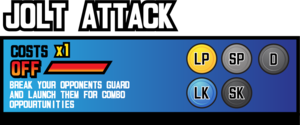
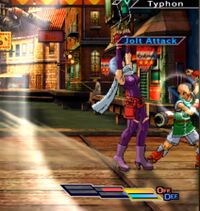
Jolt Attack
An unblockable attack that launches the opponent into an untechable state (locks out all forms of recovery). The untechable time is indicated by the red background. This is also available in the air.
Impact Blow modifications to specials cannot be used after a successful Jolt attack.
White Rings will appear indicating a JA is coming. You can press 5D to avoid the JA on reaction if you are not stuck in blockstun. If you are, then must IB it to not get hit.
Note that there are different launch states depending on if you perform the aerial or grounded version vs grounded or aerial opponents.
Jolt Attack on the ground:
- Opponent on the ground: Launches them upwards for a juggle combo.
- Opponent in the air: Causes them to bounce on the ground once and they are able to tech immediately.
Jolt Attack in the air:
- Opponent on the ground: Causes them to bounce on the ground once and they are able to tech immediately.
- Opponent in the Air: Knocks them through the air for a juggle combo.
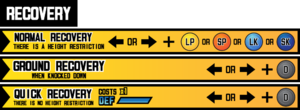
Recovery, Quick Recovery, Ground Recovery
Recovery: Mash any attack button + 4/5/6 and if your character is not in hitstun, they will recover in the air. There is a height restriction for recoveries and they cannot be done near the lower half of the screen. Risky to use sometimes because it is easy to reset or continue pressure on someone who recovers in a bad spot.
Quick Recovery (QR): Costs 1 DEF to use. Will break out of any air combo and tech out in the air in the direction chosen (4/5/6). The distance travelled is greater than a regular recovery and leaves little room for your opponent to tech chase. The height restriction is lower than normal recovery but QR cannot be used near the ground. Use quick recovery to avoid devastating air combos. Avoid using if normal recovery is available or if the combo will not do much damage. Some moves also lock out QR by default such as Bazoo’s command throw or Hikari’s flipping moves.
Ground Recovery: 4/6D after knocked down Does not cost meter. An invincible roll in a direction but with punishable recovery. Use sparingly and only when you’re confident your opponent won’t chase your tech and punish.
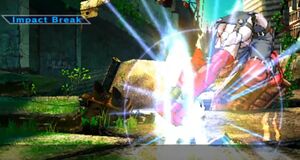
Impact Break
Costs 1 DEF gauge. Success is indicated by a light blue flash and the Impact Break status message. When used correctly, it will reduce your opponent’s frame advantage after a successful impact break. This is similar to instant blocking in Arcsys games. Impact breaking while standing will defend against high and mid attacks while impact breaking while crouching only protects against lows. It is also possible to impact break while in the when air blocking against air attacks. The effect of impact breaking air-to-air attempts is that it will cause you to fall while you're opponent remains airborne longer creating a situation where you land first and are able to anti-air them before they can land.
IBing an aerial attack will rarely give you more advantage than your opponent. Most deep jump ins are still very plus even after successful IB so therefore IBing airborne moves is usually not recommended. A successful anti-air IB will add 3f of landing recovery to your opponent but this recovery is cancellable into backdash. Avoid using anti air IB as much as possible.
Failed Impact Break: A failed impact break occurs when you press the button if you tried to low impact break a mid attack. Failed IBs are signaled by a red flash and no properties of the IB take place aside from losing 1 DEF for every failed IB.
Double Impact Break
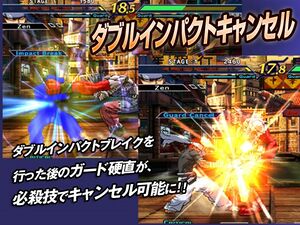
Performed by pressing the D button twice instead of once in the same window as a normal impact break. It will use up a second DEF gauge. Successful Impact Breaks do not always guarantee a positive result. Double Impact Breaks however will double the amount of advantage that you gain thereby making situations even more advantageous. A triple impact break is also possible but is incredibly rare as it would use up to 3 DEF bars and is also even more difficult to pull off.
Guard Cancel (Nesica Version Only): In the Nesica version of TRF2, Double Impact Breaks can be cancelled into special moves, effectively allowing you to use any special move as a Guard Cancel. This feature is not present in the Atomiswave version, however.
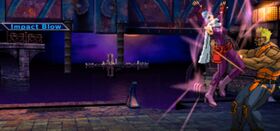
Impact Blow
Performed by double-tapping D when an attack hits the opponent, at the cost of 1 bar of OFF. Only compatible with certain special moves. Impact Blow will lock out your opponent’s ability to use recovery options, making some combos more consistent or increasing opportunities for okizeme. Impact Blows can also be performed on block, but this has no effect outside of wasting your meter.
Boost Dive
When activated the game will freeze briefly and you will gain invincibility during this freeze (this functions like Chain Shift from UNI). You can use it in a similar manner as Chain Shift to see what your opponent is doing and then respond accordingly. Only Sheryl does not gain full invincibility during this activation so she cannot use it in this manner. Boost Dive will enhance a character’s special abilities and give them new move properties. A timer will appear below your characters health bar to indicate the remaining BD time.
When using an OA while in Boost Dive, the state will end instantly. When Boost Dive is active, you cannot gain meter.
Critical Cancellation
Some special moves can be cancelled into OA and CAs. That’s all this mechanic is.
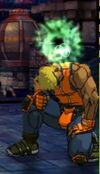
Stun
After taking several continuous hits your character will become stunned with a green bubble effect above their head. The stun gauge is apparently constant for each character, so everyone will stun at the same point in a stun combo.
To recovery out of stun faster spin the stick in a circle. Button inputs have no effect on stun recovery.
If your opponent was in the air when stunned they will fall to the ground first and then automatically wake up into their stun animation. Hitting someone out of stun will reset the combo counter. Unless they managed to break out of stun or you waited too long, your follow up combo is still valid.
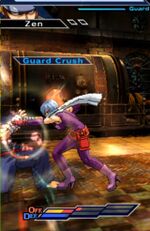
Guard Crush
After damaging your opponents guard gauge your opponent will start flashing red when they block to indicate that they are about to be guard crushed. A successful guard crush will leave your opponent defenseless and you will be able to go for a full combo of your choice. When a guard crush is about to occur, it is important to slow down and confirm the guard crush otherwise you end up wasting it. Only certain moves can cause the actual guard crush to trigger (typically strong or special moves).
Esoterics
Damage Scaling
This game uses a damage scaling system similar to Arcsys games where subsequent hits in a combo do less damage than their base damage. Additionally combos also do less damage due to Guts.
Input Priority
Dodge > Jolt Attack > Advanced Attack > Boost Dive > Specials > Normal Throw > Command Normals > Normals (LP > LK > SP > SK)
The first 2f of a normal attack can be kara-cancelled into specials.
Parts Crush
When a character gets hit and takes damage eventually their clothing will be damaged. This has no effect on gameplay outside of one specific Defensive Arts used by Lud. Clothing damage will be retained between rounds and games if your character continues to win. It will also affect their character portraits.
