JoJo's Bizarre Adventure: All-Star Battle R/Gyro Zeppeli: Difference between revisions

From Mizuumi Wiki
Jump to navigation Jump to search
Line 623: Line 623:
  |description=
  |description=
Valkyrie performs an attack with both knees.
*Notes 2
  }}
  }}
}}
}}

Revision as of 15:35, 3 October 2022

Introduction

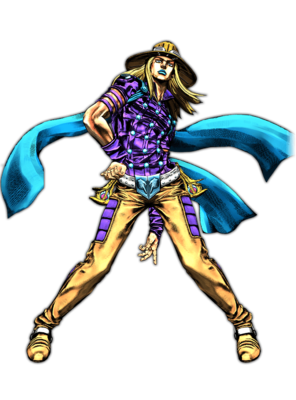
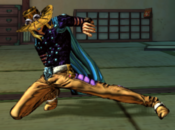
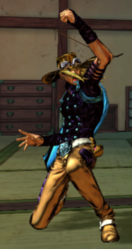
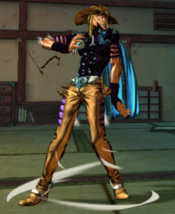
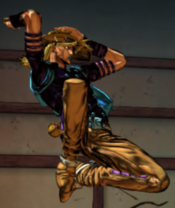
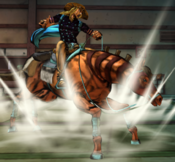
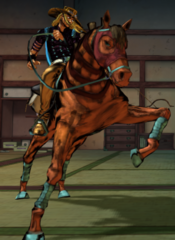
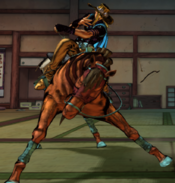
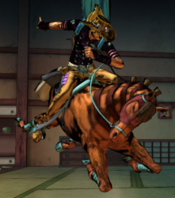
The deuteragonist from Steel Ball Run, the seventh part of JoJo's Bizarre Adventure, Gyro Zeppeli is focused around resource management that rewards the player with higher damage and improved special moves. Gyro's moveset allows him to play footsies and perform strike/throw mixups. As a Mount character, Gyro also has access to Mounted Mode, which gives him access to a separate moveset along with altered movement (in a similar way to characters with the Stand style). He also uses his unique Spin Gauge and Steel Ball mechanics to pressure and mix up opponents from up close. He has good moves and buttons for footsies, as some moves will reach fairly far out and the normals that do so can be made safe via Spin.

  • Spin: Gyro is the only character with the Spin Gauge, which is increased with Spin or GHA. This allows for Gyro to become more of a threat if the player manages their resources correctly.
Playstyle
JJASBR Gyro Small Icon.png Gyro Zeppeli is a Mount character who utilizes his Steel Balls and Spin Gauge to attack from a comfortable range.
Pros Cons
  • Meter Gain: Gyro has combo routes that build a good amount of meter without spending too much, being able build back half a bar of HH gauge after using Quick Mount On.
  • Safe Pressure: Gyro's Spin allows him to cancel out of any normal, allowing him to make safe pokes at an opponent's guard.
  • Golden Spin Mode: When Gyro uses Golden Spin Mode, all of his Steel Ball special moves are enhanced, making them more of a threat on hit and block.
  • Hard Routing: While Gyro can build meter well with his routes, some of the meterless routes are a bit harder, making it easy to drop the combo.
  • Strange Angles: Gyro's Spin, spin! has three angles, and only one can really be used to attack from long range. Scan does track the opponent, but requires a second Steel Ball to be thrown in order to do so.
  • Many Resources: Gyro has three different resources to worry about while playing: Spin Gauge, Steel Balls, and Holy Corpse parts. This makes it a bit harder to pick up Gyro, as it adds many things for the player to keep their eyes on.

Spin Gauge

The Spin Gauge appears above Gyro's Heart Heat Gauge, and functions as a unique mechanic that drains over time with use. Normally, the higher the gauge is filled, the more damage Gyro's Steel Ball special moves will do. However, once it is completely filled, Gyro enters Golden Spin Mode. While in Golden Spin Mode, Gyro's Spin Gauge becomes a timer for an install where all of his special moves are enhanced. The Golden Spin Mode damage values are listed in parentheses.

Holy Corpse

All of the Steel Ball Run characters have the Holy Corpse mechanic. This spawns three parts of the Holy Corpse over time for the Steel Ball Run characters to collect. Each piece collected provides a buff to the character that is active until the character loses it via being knocked down, which drops the most recent piece collected. For Gyro, the buffs are applied as follows:

  • One: Gyro gains access to Scan.
  • Two: Gyro's Steel Ball special moves are armored.
  • Three: Gyro enters Golden Spin Mode until the corpse part is dropped.

Stats

Style Health Low Health Mode Hashtag(s)
Mounted 900 Rumble #ASBR_GYR


Move List

JJASBR User Icon.png
JJASBR Mounted Icon.png

User Mode

Normal Moves

5L
5L
JJASBR Gyro 5L.png
Damage Guard Startup Active Recovery Block Adv. Hit Adv.
13 Mid - - - - -

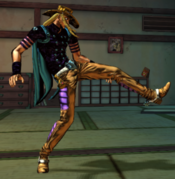
Gyro performs a low kick.

  • Does not hit Low, despite appearances.
  • A decent reaching 5L, but by no means big. Will mainly see use as combo filler or pressure tool.
5M
5M
JJASBR Gyro 5M.png
Damage Guard Startup Active Recovery Block Adv. Hit Adv.
21 Mid - - - - -

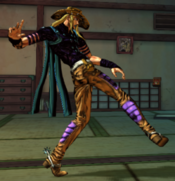
Gyro performs a kick outwards.

  • A good move for counter-pokes. Because Gyro has forward momentum as well, it reaches farther, giving it an edge.
5H
5H
JJASBR Gyro 5H.png
Damage Guard Startup Active Recovery Block Adv. Hit Adv.
34 Mid - - - - -

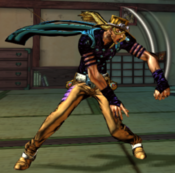
Gyro performs an overhand punch.

  • Gyro's farthest reaching standing normal. Good for punishing moves that are very unsafe.
2L
2L
JJASBR Gyro 2L.png
Damage Guard Startup Active Recovery Block Adv. Hit Adv.
12 Low - - - - -

Gyro performs a crouching kick.

  • A good poke with more range than 5L.
2M
2M
JJASBR Gyro 2M.png
Damage Guard Startup Active Recovery Block Adv. Hit Adv.
20 Low - - - - -

Gyro slides on the ground with a kick.

  • Gyro's sweep, causes hard knockdown.
2H
2H
JJASBR Gyro 2H.png
Damage Guard Startup Active Recovery Block Adv. Hit Adv.
37 Mid - - - - -

Gyro performs an uppercut.

  • Gyro's most reliable anti-air. It still isn't the best anti-air due to its speed and hurtbox, but when it does it, it leads to a full combo due to its launch effect. It is also great combo filler for this reason.
4S
4S
I toughened my skin.
JJASBR Gyro 4S.png
Damage Guard Startup Active Recovery Block Adv. Hit Adv.
- - - - - - -

Gyro uses a Steel Ball to guard more effectively.

  • Prevents chip damage, guard breaks, and unblockables aside from throws at the cost of draining the HH gauge over time.
JL
j.L
JJASBR Gyro Jump L.png
Damage Guard Startup Active Recovery Block Adv. Hit Adv.
16 Overhead - - - - -

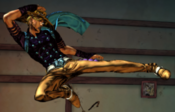
Gyro attacks with both knees simultaneously.

  • Gyro's smallest aerial. Good for cross ups due to the hitbox encompassing both knees.
JM
j.M
JJASBR Gyro Jump M.png
Damage Guard Startup Active Recovery Block Adv. Hit Adv.
24 Overhead - - - - -

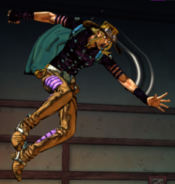
Gyro performs an aerial kick outwards.

  • Gyro's go-to air-to-air aside from j.L. It reaches out, making it good at poking out an airborne opponent.
JH
j.H
JJASBR Gyro Jump H.png
Damage Guard Startup Active Recovery Block Adv. Hit Adv.
38 Overhead - - - - -

Gyro swings his arm downwards.

  • Another good cross up aerial, but is also good for adding an aerial attack to a combo.

Special Moves

236X
Spin, spin!
236L/M/H
Version Damage Guard Startup Active Recovery Block Adv. Hit Adv.
Light 5, 9*3 (20, 15*3) Mid - - - - -

Gyro throws a Steel Ball upwards.

  • Can be used as an anti-air, though it is a bit difficult
  • Good for combo filler
Medium 5, 9*3 (20, 15*3) Mid - - - - -

Gyro throws a Steel Ball straight forward.

  • Best used for footsies/zoning
Heavy 5, 9*3 (20, 15*3) Mid - - - - -

Gyro throws a Steel Ball downwards.

  • Best used for pressure
  • Very awkward angle
Stand 236X-5X
Spin, spin!
236L/M/H>5L/M/H
Version Damage Guard Startup Active Recovery Block Adv. Hit Adv.
Light 5, 9*3 (20, 15*3) Mid - - - - -

Gyro throws a second Steel Ball upwards.

Medium 5, 9*3 (20, 15*3) Mid - - - - -

Gyro throws a second Steel Ball straight forward.

Heavy 5, 9*3 (20, 15*3) Mid - - - - -

Gyro throws a second Steel Ball downwards.

236S
Scan
236S
Requires one corpse part
Damage Guard Startup Active Recovery Block Adv. Hit Adv.
56 (80) Mid - - - - -

Gyro throws a Steel Ball straight outward and it floats in the air after stopping. Can fly longer if held.

  • If the ball is touched while floating, it deals the damage and comes back
  • If the input is done a second time while the ball is floating, a second Steel Ball is thrown at it and ricochets towards the opponent.
  • The ball returns the moment it makes contact with the opponent
214X
Raaaaugh!
214L/M/H
Naturally combos in Golden Spin Mode
Version Damage Guard Startup Active Recovery Block Adv. Hit Adv.
Light 17, 45 (30, 75) Low, Mid - - - - -
  • Notes 1
  • Notes 2
Medium 24, 45 (40, 75) Low, Mid - - - - -
  • Notes 1
  • Notes 2
Heavy 31, 45 (50, 75) Low, Mid - - - - -
  • Notes 1
  • Notes 2
623X
I'm gonna throw it away!
623L/M/H
Version Damage Guard Startup Active Recovery Block Adv. Hit Adv.
Light 12, 32 (8*3, 32) Mid - - - - -
  • Requires both Steel Balls
Medium 12*2, 32 (8*4, 32) Mid - - - - -
Heavy 12*3, 32 (8*5, 32) Mid - - - - -

Mounted

Normal Moves

Mounted 5L
5L
JJASBR Gyro Mounted 5L.png
Damage Guard Startup Active Recovery Block Adv. Hit Adv.
15 Mid - - - - -

Gyro performs a kick outwards.

  • A good poke, as Gyro kicks fairly far out
Mounted 5M
5M
JJASBR Gyro Mounted 5M.png
Damage Guard Startup Active Recovery Block Adv. Hit Adv.
24 Mid - - - - -

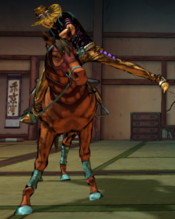
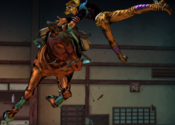
Valkyrie performs a lunge attack.

  • A fairly standard medium normal, good for counter-pokes
Mounted 5H
5H
JJASBR Gyro Mounted 5H.png
Damage Guard Startup Active Recovery Block Adv. Hit Adv.
38 Mid - - - - -

Valkyrie slams both hooves on the ground.

  • A slow normal that launches on air hit, good for Quick Mount combos
Mounted 2L
2L
JJASBR Gyro Mounted 2L.png
Damage Guard Startup Active Recovery Block Adv. Hit Adv.
14 Mid - - - - -

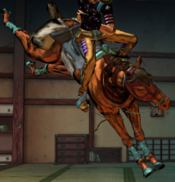
Valkyrie raises a knee to attack.

  • Reaches high enough to help juggle in Quick Mount combos
  • Can chain into itself up to 3 or 4 times on block
Mounted 2M
2M
JJASBR Gyro Mounted 2M.png
Damage Guard Startup Active Recovery Block Adv. Hit Adv.
24 Low - - - - -

Valkyrie pokes low with a hoof.

  • Hits very low, but reaches far enough to be a decent poke
Mounted 2H
2H
Damage Guard Startup Active Recovery Block Adv. Hit Adv.
18*2 Low, Mid - - - - -

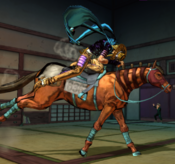
Valkyrie kicks twice with both hind legs.

  • A bit awkward to combo into, but the second hit launches away on hit
Mounted JL
j.L
JJASBR Gyro Mounted Jump L.png
Damage Guard Startup Active Recovery Block Adv. Hit Adv.
18 Overhead - - - - -

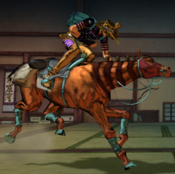
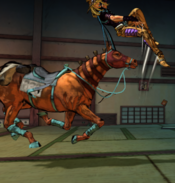
Valkyrie performs an attack with both knees.

Mounted JM
j.M
JJASBR Gyro Mounted Jump M.png
Damage Guard Startup Active Recovery Block Adv. Hit Adv.
28 Overhead - - - - -

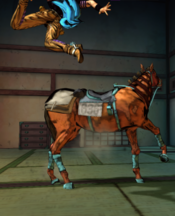
Gyro jumps off Valkyrie and kicks outwards.

  • Notes 2
Mounted JH
j.H
JJASBR Gyro Mounted Jump H.png
Damage Guard Startup Active Recovery Block Adv. Hit Adv.
40 Overhead - - - - -

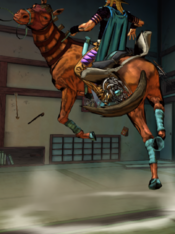
Valkyrie attacks downwards with both hooves.

  • Notes 2

Special Moves

Mounted 236X
Spin, spin!
236L/M/H
Version Damage Guard Startup Active Recovery Block Adv. Hit Adv.
Light 5, 9*3 (20, 15*3) Mid - - - - -

Gyro throws a Steel Ball upwards.

  • Can be used as an anti-air, though it is a bit difficult
  • Good for combo filler
Medium 5, 9*3 (20, 15*3) Mid - - - - -

Gyro throws a Steel Ball straight forward.

  • Best used for footsies/zoning
Heavy 5, 9*3 (20, 15*3) Mid - - - - -

Gyro throws a Steel Ball downwards.

  • Best used for pressure
  • Less awkward angle than the User Mode variant due to height
Mounted 236X-5X
Spin, spin!
236L/M/H>5L/M/H
Version Damage Guard Startup Active Recovery Block Adv. Hit Adv.
Light 5, 9*3 (20, 15*3) Mid - - - - -

Gyro throws a second Steel Ball upwards.

Medium 5, 9*3 (20, 15*3) Mid - - - - -

Gyro throws a second Steel Ball straight forward.

Heavy 5, 9*3 (20, 15*3) Mid - - - - -

Gyro throws a second Steel Ball downwards.

Mounted 236S
Scan
236S
Requires one corpse part
Damage Guard Startup Active Recovery Block Adv. Hit Adv.
56 (80) Mid - - - - -

Gyro throws a Steel Ball straight outward and floats in the air. Can fly longer if held.

  • If the ball is touched while floating, it deals the damage and comes back
  • If the input is done a second time while the ball is floating, a second Steel Ball is thrown at it and ricochets towards the opponent.
  • The ball returns the moment it makes contact with the opponent
Mounted 623X
Run wild, run free!
623L/M/H
JJASBR Gyro Mounted 623X.png
Version Damage Guard Startup Active Recovery Block Adv. Hit Adv.
Light 10, 20, 30 (10*2, 15*2, 30) Low - - - - -
  • Requires both Steel Balls
  • All versions OTG
  • All versions can be punished on OTG if against the wall
  • Different versions move Gyro further
  • Keeps Gyro basically stationary
Medium 10, 20, 30 (10*2, 15*2, 30) Low - - - - -
  • Moves Gyro a bit forward
Heavy 10, 20, 30 (10*2, 15*2, 30) Low - - - - -
  • Moves Gyro the furthest
Mounted 214X
Winds from Mexico
214L/M/H
JJASBR Gyro Mounted 214X.png
Version Damage Guard Startup Active Recovery Block Adv. Hit Adv.
Light 20, 45 Mid - - - - -
  • Requires both Steel Balls
Medium 20, 50 Mid - - - - -
Heavy 20, 55 Mid - - - - -

System Mechanics

Throw
Throw
Can only spin for a bit!
5/4 + Any Two Attack Buttons
Version Damage Guard Startup Active Recovery Block Adv. Hit Adv.
Forward 130 Throw - - - - -
  • Only available in User Mode.
  • Notes 2
Back 130 Throw - - - - -
  • Only available in User Mode.
  • Notes 2
Assist
Assist
Raaaaugh!
Damage Guard Startup Active Recovery Block Adv. Hit Adv.
20, 54 Low, Mid - - - - -
  • Assault Assist Stocks: 2
  • Reversal Assist Stocks: 2
  • Based on 214L
  • Still does not naturally combo both hits
  • Second hit launches
Mount
Mount/Dismount
5S
JJASBR Gyro Mount.png
Mount
Mount
JJASBR Gyro Dismount.png
Dismount
Dismount
Version Damage Guard Startup Active Recovery Block Adv. Hit Adv.
Normal - - - - - - -
Quick Mount On - - - - - - -

Summons Gyro's horse, Valkyrie, altering Gyro's moveset and abilities.

  • Quick Mount On deals damage.
  • The Guard Gauge will not restore while you are in Mounted Mode.
Spin
Spin
22M
Damage Guard Startup Active Recovery Block Adv. Hit Adv.
- - - - - - -
  • Notes 1
  • Notes 2

Heart Heat Attack

One moooore shot!
236 + Any Two Attack Buttons
Damage Guard Startup Active Recovery Block Adv. Hit Adv.
21, 50, 108 (30, 50, 108) Mid - - - - -
  • Tracks to the opponent's location on activation
  • Notes 2

Great Heat Attack

Ball Breaker
236L+M+H
The untold powers of the Golden Rectangle!
Damage Guard Startup Active Recovery Block Adv. Hit Adv.
310 (50+248+12) Mid - - - - -
  • Can only be used while Mounted. Will force you into Mount Mode if in User Mode when activated, increasing startup.
  • Notes 2

Navigation

General
FAQ
Controls
Stages
HUD
System
Esoterics
Character Data
Patch Notes
Glossary
JJASBR Part 1 Emblem.png
Phantom Blood
Jonathan
Zeppeli
Speedwagon
Dio Brando
JJASBR Part 2 Emblem.png
Battle Tendency
Joseph
Caesar
Lisa Lisa
Stroheim
Wamuu
Esidisi
Kars
JJASBR Part 3 Emblem.png
Stardust Crusaders
Jotaro (Part 3)
Old Joseph
Avdol
Kakyoin
Polnareff
Iggy
Hol Horse
Mariah
Pet Shop
Vanilla Ice
DIO
JJASBR Part 4 Emblem.png
Diamond is Unbreakable
Josuke (Part 4)
Jotaro (Part 4)
Koichi
Okuyasu
Yukako
Rohan
Shigechi
Yuya
Keicho
Akira
Kira
Kosaku
JJASBR Part 5 Emblem.png
Vento Aureo
Giorno
Bucciarati
Mista
Narancia
Fugo
Trish
Abbacchio
Prosciutto
Ghiaccio
Risotto
Diavolo
JJASBR Part 6 Emblem.png
Stone Ocean
Jolyne
Ermes
Foo Fighters
Anasui
Weather
Pucci (WS)
Pucci (Final)
JJASBR Part 7 Emblem.png
Steel Ball Run
Johnny
Gyro
Diego
AW Diego
Valentine
JJASBR Part 8 Emblem.png
JoJolion
Josuke (Part 8)
Wonder of U
Baoh the Visitor
Baoh