JoJo's Bizarre Adventure: All-Star Battle R/Jonathan Joestar: Difference between revisions
(Rephrased Notable Trait) |
(Fixed twitter tags and added Move Links) |
||
| Line 2: | Line 2: | ||
==Introduction== | ==Introduction== | ||
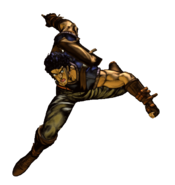
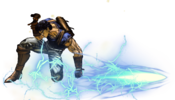
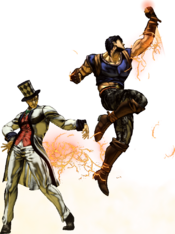
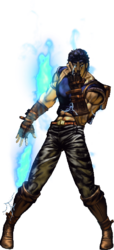
Jonathan Joestar, the protagonist of Phantom Blood, the first part of Jojo’s Bizarre Adventure, is a versatile character who is good at many things. He excels at extending combos and pressure using Hamon specials, the main gimmick of Hamon Style characters. | Jonathan Joestar, the protagonist of Phantom Blood, the first part of Jojo’s Bizarre Adventure, is a versatile character who is good at many things. He excels at extending combos and pressure using Hamon specials, the main gimmick of Hamon Style characters. | ||
His neutral shines around mid-range, where his projectiles reach, 6M will poke, and 214X will reach. Jonathan will almost always have a solid knockdown off of any hit, as if he confirms into 6M, he is guaranteed to get a 214X followup. Up close, this can lead to a full combo, or can be used to build meter with 5S if too far away. | His neutral shines around mid-range, where his projectiles reach, [[JoJo's Bizarre Adventure: All-Star Battle R/Jonathan Joestar#6L-M|6M]] will poke, and [[JoJo's Bizarre Adventure: All-Star Battle R/Jonathan Joestar#214X|214X]] will reach. Jonathan will almost always have a solid knockdown off of any hit, as if he confirms into [[JoJo's Bizarre Adventure: All-Star Battle R/Jonathan Joestar#6L-M|6M]], he is guaranteed to get a [[JoJo's Bizarre Adventure: All-Star Battle R/Jonathan Joestar#214X|214X]] followup. Up close, this can lead to a full combo, or can be used to build meter with [[JoJo's Bizarre Adventure: All-Star Battle R/Jonathan Joestar#5S|5S]] if too far away. | ||
On offense, Jonathan has some fairly safe options with 22X or 236X being used to end blockstrongs. Both options will create some distance between himself and the opponent, and 22X will provide a soft launch on hit. Ending blockstrings with 22S or 236S also opens the opportunity to get a combo off of a stray hit in said blockstring, as both launch the opponent high into the air. For combos, Jonathan has a lot of opportunities to spend meter to extend his combos, leading him to have above average damage with the cost of sometimes running out of meter | On offense, Jonathan has some fairly safe options with [[JoJo's Bizarre Adventure: All-Star Battle R/Jonathan Joestar#22X|22X]] or [[JoJo's Bizarre Adventure: All-Star Battle R/Jonathan Joestar#236X|236X]] being used to end blockstrongs. Both options will create some distance between himself and the opponent, and [[JoJo's Bizarre Adventure: All-Star Battle R/Jonathan Joestar#22X|22X]] will provide a soft launch on hit. Ending blockstrings with [[JoJo's Bizarre Adventure: All-Star Battle R/Jonathan Joestar#22X|22S]] or [[JoJo's Bizarre Adventure: All-Star Battle R/Jonathan Joestar#236X|236S]] also opens the opportunity to get a combo off of a stray hit in said blockstring, as both launch the opponent high into the air. For combos, Jonathan has a lot of opportunities to spend meter to extend his combos, leading him to have above average damage with the cost of sometimes running out of meter. | ||
On defense, Jonathan has a meterless invincible reversal with [[JoJo's Bizarre Adventure: All-Star Battle R/Jonathan Joestar#623X|623X]]. All of the versions have invincibility, making it very versatile in different situations. The M, H, and S variants all add a hit before the uppercut, which can either hit assists out of the way or be used to add more damage to the move. This makes it a bit more tricky for the opponent to attack on his wakeup, as there is always the chance that Jonathan uses one of the [[JoJo's Bizarre Adventure: All-Star Battle R#Jonathan Joestar/623X|623Xs]]. | |||
*'''EX Moves''': Explain what Jonathan can do with EX Moves and Hamon. | *'''EX Moves''': Explain what Jonathan can do with EX Moves and Hamon. | ||
| Line 19: | Line 18: | ||
|cons = | |cons = | ||
* '''Meter Hungry:''' Being a Hamon user, Jonathan can spend half a bar to make a special better, but this can start to be very costly in combos. By using just 2 EX specials in a combo, you have already spent a bar, leaving you with less resources. | * '''Meter Hungry:''' Being a Hamon user, Jonathan can spend half a bar to make a special better, but this can start to be very costly in combos. By using just 2 EX specials in a combo, you have already spent a bar, leaving you with less resources. | ||
* '''Gimmicky Mixups:''' Jonathan’s 214X hits overhead, but is very slow, making it a bit harder to use as a mixup tool, since it is also unsafe on block. | * '''Gimmicky Mixups:''' Jonathan’s [[JoJo's Bizarre Adventure: All-Star Battle R/Jonathan Joestar#214X|214X]] hits overhead, but is very slow, making it a bit harder to use as a mixup tool, since it is also unsafe on block. | ||
| tablewidth = 80 | | tablewidth = 80 | ||
}} | }} | ||
| Line 34: | Line 33: | ||
| health = 1000 | | health = 1000 | ||
| lowhealth = Rumble | | lowhealth = Rumble | ||
| hashtag = [https://twitter.com/hashtag/ASBR_JON?src=hashtag_click #ASBR_JON] | | hashtag = [https://twitter.com/hashtag/ASBR_JON?src=hashtag_click #ASBR_JON]<br>[https://twitter.com/hashtag/ASBR_JNT?src=hashtag_click #ASBR_JNT] | ||
}} | }} | ||
}} | }} | ||
| Line 166: | Line 165: | ||
}} | }} | ||
====== <font style="visibility:hidden" size="0">6L | ====== <font style="visibility:hidden" size="0">6L-M</font> ====== | ||
{{MoveData | {{MoveData | ||
|image=JJASBR_Jonathan_6L | |image=JJASBR_Jonathan_6L-M.png | ||
|caption= | |caption= | ||
|name=6L/M | |name=6L/M | ||
Revision as of 14:55, 4 October 2022
Introduction
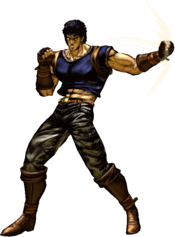
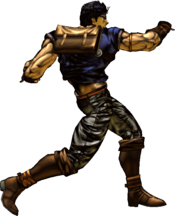
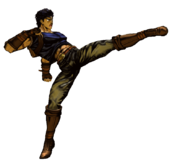
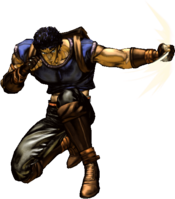
Jonathan Joestar, the protagonist of Phantom Blood, the first part of Jojo’s Bizarre Adventure, is a versatile character who is good at many things. He excels at extending combos and pressure using Hamon specials, the main gimmick of Hamon Style characters. His neutral shines around mid-range, where his projectiles reach, 6M will poke, and 214X will reach. Jonathan will almost always have a solid knockdown off of any hit, as if he confirms into 6M, he is guaranteed to get a 214X followup. Up close, this can lead to a full combo, or can be used to build meter with 5S if too far away.
On offense, Jonathan has some fairly safe options with 22X or 236X being used to end blockstrongs. Both options will create some distance between himself and the opponent, and 22X will provide a soft launch on hit. Ending blockstrings with 22S or 236S also opens the opportunity to get a combo off of a stray hit in said blockstring, as both launch the opponent high into the air. For combos, Jonathan has a lot of opportunities to spend meter to extend his combos, leading him to have above average damage with the cost of sometimes running out of meter.
On defense, Jonathan has a meterless invincible reversal with 623X. All of the versions have invincibility, making it very versatile in different situations. The M, H, and S variants all add a hit before the uppercut, which can either hit assists out of the way or be used to add more damage to the move. This makes it a bit more tricky for the opponent to attack on his wakeup, as there is always the chance that Jonathan uses one of the 623Xs.
- EX Moves: Explain what Jonathan can do with EX Moves and Hamon.
|
|
|
| Pros | Cons |
|
|
Hamon Breathing
Explain Hamon Breathing here.
This is my final Hamon!
Explain Revive here.
Stats
| Style | Health | Low Health Mode | Hashtag(s) |
|---|---|---|---|
| Hamon | 1000 | Rumble | #ASBR_JON #ASBR_JNT |
Move List
Normal Moves
5L
5L
|
|---|
5M
5M
|
|---|
5H
5H
|
|---|
2L
2L
|
|---|
2M
2M
|
|---|
2H
2H
|
|---|
6L-M
6L/M
Zoom Punch |
|---|
6H
6H
Tackle |
|---|
JL
j.L
|
|---|
JM
j.M
|
|---|
JH
j.H
|
|---|
Special Moves
236X
Sendo Overdrive
236L/M/H/S |
|---|
22X
Overdrive Barrage
22L/M/H/S |
|---|
214X
The Sword of Luck and Pluck
214L/M/H/S |
|---|
623X
Scarlet Overdrive
623L/M/H/S |
|---|
System Mechanics
Throw
Throw
I will protect my father! 5/4 + Any Two Attack Buttons |
|---|
Assist
Assist
Scarlet Overdrive |
|---|
5S
Hamon Breathing
5S |
|---|
Heart Heat Attack
Who'll be the last one standing?
236 + Any Two Attack Buttons |
|---|
Great Heat Attack
Sunlight Yellow Overdrive
236L+M+H |
|---|
