JoJo's Bizarre Adventure: All-Star Battle R/Jonathan Joestar: Difference between revisions
Smol-squish (talk | contribs) (→Assist) |
No edit summary |
||
| Line 8: | Line 8: | ||
On defense, Jonathan has a meterless invincible reversal with [[JoJo's Bizarre Adventure: All-Star Battle R/Jonathan Joestar#623X|623X]]. All of the versions have invincibility, making it very versatile in different situations. The M, H, and S variants all add a hit before the uppercut, which can either hit assists out of the way or be used to add more damage to the move. This makes it a bit more tricky for the opponent to attack on his wakeup, as there is always the chance that Jonathan uses one of the [[JoJo's Bizarre Adventure: All-Star Battle R#Jonathan Joestar/623X|623Xs]]. | On defense, Jonathan has a meterless invincible reversal with [[JoJo's Bizarre Adventure: All-Star Battle R/Jonathan Joestar#623X|623X]]. All of the versions have invincibility, making it very versatile in different situations. The M, H, and S variants all add a hit before the uppercut, which can either hit assists out of the way or be used to add more damage to the move. This makes it a bit more tricky for the opponent to attack on his wakeup, as there is always the chance that Jonathan uses one of the [[JoJo's Bizarre Adventure: All-Star Battle R#Jonathan Joestar/623X|623Xs]]. | ||
*'''EX Moves''': | *'''EX Moves''': For the cost of 0.5 bars, Jonathan can perform enhanced versions of his special moves. These enhanced moves cause Hamon Damage damage against Vampire and Pillar Men characters, making these moves deal extra damage against them. | ||
*'''This is my final Hamon!''': For the cost of all meter available (and a requirement of 1 bar), Jonathan can prepare a resurrection that replaces his special moves with their EX versions. | |||
{{StrengthsAndWeaknesses | {{StrengthsAndWeaknesses | ||
| Line 21: | Line 22: | ||
| tablewidth = 80 | | tablewidth = 80 | ||
}} | }} | ||
===Stats=== | ===Stats=== | ||
| Line 54: | Line 49: | ||
|blockadv= | |blockadv= | ||
|hitadv= | |hitadv= | ||
|description=Jonathan performs a quick standing jab | |description= | ||
*Good for stopping dash jump attempts | Jonathan performs a quick standing jab. | ||
*Good for stopping dash jump attempts. | |||
}} | }} | ||
}} | }} | ||
| Line 74: | Line 70: | ||
|blockadv= | |blockadv= | ||
|hitadv= | |hitadv= | ||
|description=Jonathan performs a forward moving hook | |description= | ||
*Good poke and punish starter | Jonathan performs a forward-moving hook. | ||
*Not as much range as other 5Ms despite forward momentum | *Good poke and punish starter. | ||
*Confirms into GHA | *Not as much range as other 5Ms, despite forward momentum. | ||
*Confirms into GHA. | |||
}} | }} | ||
}} | }} | ||
| Line 96: | Line 93: | ||
|blockadv= | |blockadv= | ||
|hitadv= | |hitadv= | ||
|description=Jonathan performs a double-hitting roundhouse kick | |description= | ||
*Moves Jonathan forward | Jonathan performs a double-hitting roundhouse kick. | ||
*Confirms into GHA | *Moves Jonathan forward. | ||
*Confirms into GHA. | |||
}} | }} | ||
}} | }} | ||
| Line 117: | Line 115: | ||
|blockadv= | |blockadv= | ||
|hitadv= | |hitadv= | ||
|description=Jonathan performs a quick crouching jab | |description= | ||
*Reaches around the same distance as 5L | Jonathan performs a quick crouching jab. | ||
*Not as good for stopping dash jumps, but still a fast button | *Reaches around the same distance as 5L. | ||
*Not as good for stopping dash jumps, but still a fast button. | |||
}} | }} | ||
}} | }} | ||
| Line 138: | Line 137: | ||
|blockadv= | |blockadv= | ||
|hitadv= | |hitadv= | ||
|description=Jonathan performs a crouching chop | |description= | ||
*Reaches father than 5M | Jonathan performs a crouching chop. | ||
*Good for pokes and counter-pokes | *Reaches father than 5M. | ||
*Confirms into GHA | *Good for pokes and counter-pokes. | ||
*Confirms into GHA. | |||
}} | }} | ||
}} | }} | ||
| Line 160: | Line 160: | ||
|blockadv= | |blockadv= | ||
|hitadv= | |hitadv= | ||
|description=Jonathan performs an advancing sweep kick | |description= | ||
*Provides hard knockdown | Jonathan performs an advancing sweep kick. | ||
*Less reach than 5H | *Provides hard knockdown. | ||
*Less reach than 5H. | |||
}} | }} | ||
}} | }} | ||
| Line 182: | Line 183: | ||
|blockadv= | |blockadv= | ||
|hitadv= | |hitadv= | ||
|description=Jonathan performs Zoom Punch at an upwards angle | |description= | ||
*Great for anti-airing opponents | Jonathan performs Zoom Punch at an upwards angle. | ||
*Works well as combo filler | *Great for anti-airing opponents. | ||
*Works well as combo filler. | |||
}} | }} | ||
{{AttackData-ASBR | {{AttackData-ASBR | ||
| Line 196: | Line 198: | ||
|blockadv= | |blockadv= | ||
|hitadv= | |hitadv= | ||
|description=Jonathan performs Zoom Punch straight forward | |description= | ||
*Great for pokes and combo confirms, as it causes crumple | Jonathan performs Zoom Punch straight forward. | ||
*Can work well as combo filler | *Great for pokes and combo confirms, as it causes crumple. | ||
*Can work well as combo filler. | |||
}} | }} | ||
}} | }} | ||
| Line 217: | Line 220: | ||
|blockadv= | |blockadv= | ||
|hitadv= | |hitadv= | ||
|description=Jonathan performs a shoulder tackle that launches the opponent away on hit | |description= | ||
*Hard to confirm off of due to the launch effect | Jonathan performs a shoulder tackle that launches the opponent away on hit. | ||
*Best used in corner combos or as a poke | *Has one hit of super armor. | ||
*Hard to confirm off of due to the launch effect. | |||
*Best used in corner combos or as a poke. | |||
}} | }} | ||
}} | }} | ||
| Line 238: | Line 243: | ||
|blockadv= | |blockadv= | ||
|hitadv= | |hitadv= | ||
|description=Jonathan performs a quick jumping chop | |description= | ||
*Good speed for air-to-airs | Jonathan performs a quick jumping chop. | ||
*Can be used as a very low overhead | *Good speed for air-to-airs. | ||
*Can be used as a very low-altitude overhead. | |||
}} | }} | ||
}} | }} | ||
| Line 259: | Line 265: | ||
|blockadv= | |blockadv= | ||
|hitadv= | |hitadv= | ||
|description=Jonathan twists his body and kicks backwards, resulting in the kick going forwards | |description= | ||
*Very good jump in, as it is quick and can cross up ambiguously | Jonathan twists his body and kicks backwards, resulting in the kick going forwards. | ||
*Very good jump in, as it is quick and can cross up ambiguously. | |||
}} | }} | ||
}} | }} | ||
| Line 279: | Line 286: | ||
|blockadv= | |blockadv= | ||
|hitadv= | |hitadv= | ||
|description=Jonathan performs a jumping punch downwards | |description= | ||
*Slow, but can also provide ambiguous crossups | Jonathan performs a jumping punch downwards. | ||
*Slow, but can also provide ambiguous crossups. | |||
}} | }} | ||
}} | }} | ||
| Line 301: | Line 309: | ||
|blockadv= | |blockadv= | ||
|hitadv= | |hitadv= | ||
|description=Jonathan punches the ground, sending a wave of Hamon along the ground | |description=Jonathan punches the ground, sending a wave of Hamon along the ground. | ||
*Travels to just past midscreen | *Travels to just past midscreen. | ||
}} | }} | ||
{{AttackData-ASBR | {{AttackData-ASBR | ||
| Line 315: | Line 323: | ||
|hitadv= | |hitadv= | ||
|description= | |description= | ||
*Travels to about midscreen | *Travels to about midscreen. | ||
}} | }} | ||
{{AttackData-ASBR | {{AttackData-ASBR | ||
| Line 328: | Line 336: | ||
|hitadv= | |hitadv= | ||
|description= | |description= | ||
*Travels to a little before midscreen | *Travels to a little before midscreen. | ||
}} | }} | ||
{{AttackData-ASBR | {{AttackData-ASBR | ||
| Line 340: | Line 348: | ||
|blockadv= | |blockadv= | ||
|hitadv= | |hitadv= | ||
|description=EX variant | |description= | ||
*Launches on hit | EX variant | ||
*Travels the farthest | *Launches on hit. | ||
*Travels the farthest. | |||
}} | }} | ||
}} | }} | ||
| Line 362: | Line 371: | ||
|blockadv= | |blockadv= | ||
|hitadv= | |hitadv= | ||
|description=Jonathan unleashes a barrage of punches that soft-launches the opponent | |description= | ||
Jonathan unleashes a barrage of punches that soft-launches the opponent. | |||
}} | }} | ||
{{AttackData-ASBR | {{AttackData-ASBR | ||
| Line 398: | Line 408: | ||
|blockadv= | |blockadv= | ||
|hitadv= | |hitadv= | ||
|description=EX variant | |description= | ||
EX variant | |||
*Launches the opponent higher on hit | *Launches the opponent higher on hit | ||
*Confirms into combos | *Confirms into combos | ||
| Line 420: | Line 431: | ||
|blockadv= | |blockadv= | ||
|hitadv= | |hitadv= | ||
|description=Jonathan jumps up with his sword and slashes three times | |description= | ||
*Travels the least | Jonathan jumps up with his sword and slashes three times. | ||
*Can confirm into 623X or 236X | *Travels the least. | ||
*Can confirm into 623X or 236X. | |||
}} | }} | ||
{{AttackData-ASBR | {{AttackData-ASBR | ||
| Line 435: | Line 447: | ||
|hitadv= | |hitadv= | ||
|description= | |description= | ||
*Travels farther than the L variant | *Travels farther than the L variant. | ||
}} | }} | ||
{{AttackData-ASBR | {{AttackData-ASBR | ||
| Line 448: | Line 460: | ||
|hitadv= | |hitadv= | ||
|description= | |description= | ||
*Travels the farthest | *Travels the farthest. | ||
}} | }} | ||
{{AttackData-ASBR | {{AttackData-ASBR | ||
| Line 460: | Line 472: | ||
|blockadv= | |blockadv= | ||
|hitadv= | |hitadv= | ||
|description=EX variant | |description= | ||
*This variant is armored | EX variant | ||
*Travels the same distance as the H variant | *This variant is armored. | ||
*Travels the same distance as the H variant. | |||
}} | }} | ||
}} | }} | ||
| Line 482: | Line 495: | ||
|blockadv= | |blockadv= | ||
|hitadv= | |hitadv= | ||
|description=Jonathan performs a quick rising uppercut | |description= | ||
*No invul, but is very fast | Jonathan performs a quick rising uppercut. | ||
*No invul, but is very fast. | |||
}} | }} | ||
{{AttackData-ASBR | {{AttackData-ASBR | ||
| Line 519: | Line 533: | ||
|blockadv= | |blockadv= | ||
|hitadv= | |hitadv= | ||
|description=EX Variant | |description= | ||
EX Variant | |||
*This variant is invul | *This variant is invul | ||
*Otherwise identical to H variant | *Otherwise identical to H variant | ||
| Line 543: | Line 558: | ||
|blockadv= | |blockadv= | ||
|hitadv=+90 | |hitadv=+90 | ||
|description=Jonathan picks up the opponent with one hand and slams them to the ground | |description= | ||
*Leaves them just outside of 6M range | Jonathan picks up the opponent with one hand and slams them to the ground. | ||
*5L>5D auto-times a safejump | *Leaves them just outside of 6M range. | ||
*5L>5D auto-times a safejump. | |||
}} | }} | ||
{{AttackData-ASBR | {{AttackData-ASBR | ||
| Line 558: | Line 574: | ||
|hitadv=+90 | |hitadv=+90 | ||
|description= | |description= | ||
*Leaves opponent slightly farther than forward throw | *Leaves opponent slightly farther than forward throw. | ||
*Auto-timed safejump still works | *Auto-timed safejump still works. | ||
}} | }} | ||
}} | }} | ||
| Line 581: | Line 597: | ||
*Assault Assist Stocks: 2 | *Assault Assist Stocks: 2 | ||
*Reversal Assist Stocks: 2 | *Reversal Assist Stocks: 2 | ||
*Based on 623H | *Based on [[JoJo's Bizarre Adventure: All-Star Battle R/Jonathan Joestar#623X|623H]] | ||
}} | }} | ||
}} | }} | ||
| Line 600: | Line 616: | ||
|blockadv= | |blockadv= | ||
|hitadv= | |hitadv= | ||
|description=Jonathan uses Hamon Breathing to charge HH gauge | |description= | ||
*Takes 20.2 seconds to charge from 0 to 3 bars | Jonathan uses Hamon Breathing to charge HH gauge. | ||
*Can not be cancelled into or out of | *Takes 20.2 seconds to charge from 0 to 3 bars. | ||
*Can not be cancelled into or out of. | |||
*Animation changes on each use; purely aesthetic. | |||
}} | |||
}} | |||
====== <font style="visibility:hidden" size="0">This is my final Hamon!</font> ====== | |||
{{MoveData | |||
|image=JJASBR_Jonathan_22LMH.png | |||
|caption= | |||
|name=This is my final Hamon! | |||
|input=22L+M+H | |||
|data= | |||
{{AttackData-ASBR | |||
|damage= | |||
|guard= | |||
|startup= | |||
|active= | |||
|recovery= | |||
|blockadv= | |||
|hitadv= | |||
|description= | |||
Jonathan focuses and makes a pose. | |||
*Requires 1 bar to use; consumes all available. | |||
*Disables usage of EX Moves. | |||
*Revives Jonathan with 100 Health. | |||
*After reviving, the HH Gauge is fully destroyed, and non-EX Moves, HHA and GHA can no longer be used. | |||
}} | }} | ||
}} | }} | ||
| Line 621: | Line 663: | ||
|blockadv=-59 | |blockadv=-59 | ||
|hitadv= | |hitadv= | ||
|description=Jonathan slides forward with his arms extended, empowered with Hamon. Finishes with a punch on hit. | |description= | ||
*This move is a | Jonathan slides forward with his arms extended, empowered with Hamon. Finishes with a punch on hit. | ||
*Provides hard knockdown | *This move is a hitgrab. | ||
*Does not deal Hamon damage | *Provides hard knockdown. | ||
*Does not deal Hamon damage. | |||
}} | }} | ||
}} | }} | ||
| Line 643: | Line 686: | ||
|blockadv=-118 | |blockadv=-118 | ||
|hitadv= | |hitadv= | ||
|description=Performs a roundhouse kick, followed by a flurry of attacks. | |description= | ||
*Very fast GHA activation | Performs a roundhouse kick, followed by a flurry of attacks. | ||
*Can be used to avoid assists easily due to its speed | *Very fast GHA activation. | ||
*Does not deal Hamon damage | *Can be used to avoid assists easily due to its speed. | ||
*Does not deal Hamon damage. | |||
}} | }} | ||
}} | }} | ||
Revision as of 13:59, 5 October 2022
Introduction
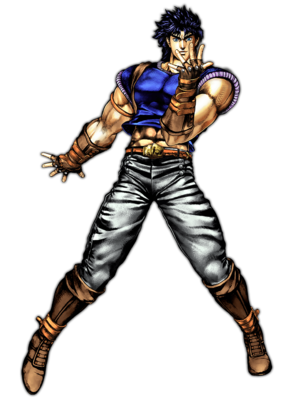
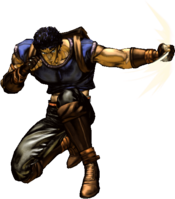
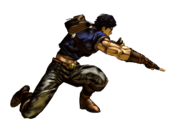
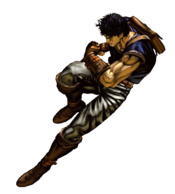
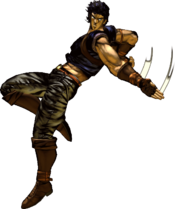
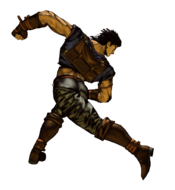
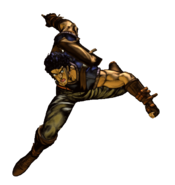
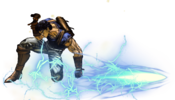
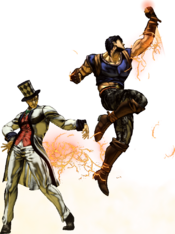
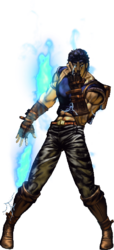
Jonathan Joestar, the protagonist of Phantom Blood, the first part of Jojo’s Bizarre Adventure, is a versatile character who is good at many things. He excels at extending combos and pressure using Hamon specials, the main gimmick of Hamon Style characters. His neutral shines around mid-range, where his projectiles reach, 6M will poke, and 214X will reach. Jonathan will almost always have a solid knockdown off of any hit, as if he confirms into 6M, he is guaranteed to get a 214X followup. Up close, this can lead to a full combo, or can be used to build meter with 5S if too far away.
On offense, Jonathan has some fairly safe options with 22X or 236X being used to end blockstrongs. Both options will create some distance between himself and the opponent, and 22X will provide a soft launch on hit. Ending blockstrings with 22S or 236S also opens the opportunity to get a combo off of a stray hit in said blockstring, as both launch the opponent high into the air. For combos, Jonathan has a lot of opportunities to spend meter to extend his combos, leading him to have above average damage with the cost of sometimes running out of meter.
On defense, Jonathan has a meterless invincible reversal with 623X. All of the versions have invincibility, making it very versatile in different situations. The M, H, and S variants all add a hit before the uppercut, which can either hit assists out of the way or be used to add more damage to the move. This makes it a bit more tricky for the opponent to attack on his wakeup, as there is always the chance that Jonathan uses one of the 623Xs.
- EX Moves: For the cost of 0.5 bars, Jonathan can perform enhanced versions of his special moves. These enhanced moves cause Hamon Damage damage against Vampire and Pillar Men characters, making these moves deal extra damage against them.
- This is my final Hamon!: For the cost of all meter available (and a requirement of 1 bar), Jonathan can prepare a resurrection that replaces his special moves with their EX versions.
|
|
|
| Pros | Cons |
|
|
Stats
| Style | Health | Low Health Mode | Hashtag(s) |
|---|---|---|---|
| Hamon | 1000 | Rumble | #ASBR_JON #ASBR_JNT |
Move List
Normal Moves
5L
5L
|
|---|
5M
5M
|
|---|
5H
5H
|
|---|
2L
2L
|
|---|
2M
2M
|
|---|
2H
2H
|
|---|
6L-M
6L/M
Zoom Punch |
|---|
6H
6H
Tackle |
|---|
JL
j.L
|
|---|
JM
j.M
|
|---|
JH
j.H
|
|---|
Special Moves
236X
Sendo Overdrive
236L/M/H/S |
|---|
22X
Overdrive Barrage
22L/M/H/S |
|---|
214X
The Sword of Luck and Pluck
214L/M/H/S |
|---|
623X
Scarlet Overdrive
623L/M/H/S |
|---|
System Mechanics
Throw
Throw
I will protect my father! 5/4 + Any Two Attack Buttons |
|---|
Assist
Assist
Scarlet Overdrive |
|---|
5S
Hamon Breathing
5S |
|---|
This is my final Hamon!
This is my final Hamon!
22L+M+H |
|---|
Heart Heat Attack
Who'll be the last one standing?
236 + Any Two Attack Buttons |
|---|
Great Heat Attack
Sunlight Yellow Overdrive 236L+M+H Cut him, beat of my blood! Cut him, beat of my blood!
|
|---|
