JoJo's Bizarre Adventure: All-Star Battle R/Josuke Higashikata (Part 8): Difference between revisions
No edit summary |
No edit summary |
||
| Line 2: | Line 2: | ||
==Introduction== | ==Introduction== | ||
:''This article is about the character from Part 8, ''JoJolion'', primarily known as "Josuke 8". For information about the character from Part 4, ''Diamond is Unbreakable'', see [[JoJo's Bizarre Adventure: All-Star Battle R/Josuke Higashikata (Part 4)|Josuke Higashikata (Part 4)]].'' | :''This article is about the character from Part 8, ''JoJolion'', primarily known as "Josuke 8". For information about the character from Part 4, ''Diamond is Unbreakable'', see [[JoJo's Bizarre Adventure: All-Star Battle R/Josuke Higashikata (Part 4)|Josuke Higashikata (Part 4)]].'' | ||
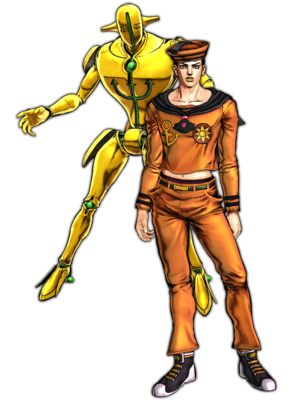
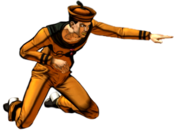
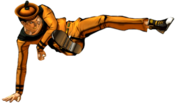
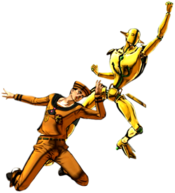
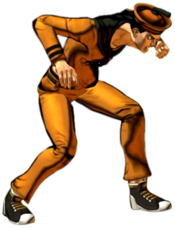
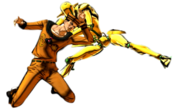
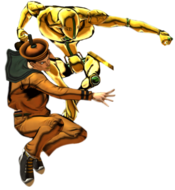
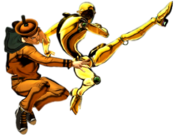
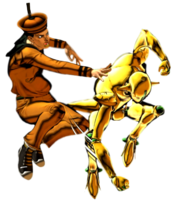
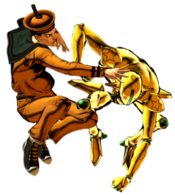
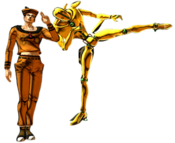
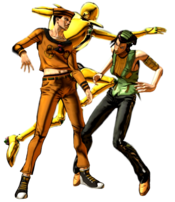
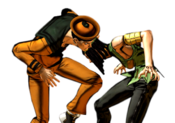
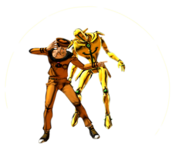
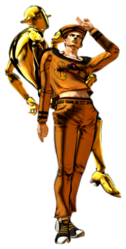
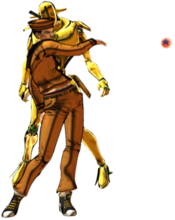
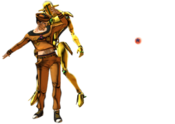
The primary protagonist of "JoJolion", the eighth part of "JoJo's Bizarre Adventure", Josuke Higashikata 8 is a character who gains momentum by utilizing a variety of powerful okizeme setups. Josuke specializes in strong strike-throw pressure and uses deceptive mobility to start high damage combos that lead to dangerous hard knockdown situations. His playstyle in Stand Off revolves around closing the gap in mid-range and starting his oki setups. "[[JoJo's Bizarre Adventure: All-Star Battle R/Josuke Part 8#236X|So slippery!]]" hits low and travels far, making it very effective at catching opponents off guard. Also, while not as good a neutral tool, "[[JoJo's Bizarre Adventure: All-Star Battle R/Josuke Part 8#623X|Don't mess with me.]]" has invincibility frames allowing Josuke to dash through even multi-hitting projectiles (i.e. Emerald Splash, Narancia's bullets, Risotto's scalpels, etc.). "[[JoJo's Bizarre Adventure: All-Star Battle R/Josuke Part 8#22X|How to use the bubbles...]]" is his primary okizeme tool, creating a wall of bubbles that surround Josuke. Using this move after grab or on knockdown greatly limits the opponent's options on wake-up. In Stand-On, his gameplan is focused on applying strong pressure using his long-range normals. [[JoJo's Bizarre Adventure: All-Star Battle R/Josuke Part 8#Stand 5H|S.5H]] in particular is plus on block, allowing for easy stagger pressure. | |||
*'''Link Combos''': Josuke is able to link from special into normals much more easily than other characters, being able to juggle at both midscreen and in the corner. This leads to him having high damage potential on many hits. | *'''Link Combos''': Josuke 8 is able to link from special into normals much more easily than other characters, being able to juggle at both midscreen and in the corner. This leads to him having high damage potential on many hits. | ||
*'''HHA Combos''': Unlinke most characters in the game, Josuke 8 is able to combo after landing HHA, which leads to high damage, impressive meter gain, and an oki setup. | |||
{{StrengthsAndWeaknesses | {{StrengthsAndWeaknesses | ||
| intro = [[file:JJASBR_Josuke_Part_8_Small_Icon.png|50px]] '''Josuke Higashikata 8''' is a Stand character who utilizes his strong pressure and various okizeme setups to keep the opponent guessing. | | intro = [[file:JJASBR_Josuke_Part_8_Small_Icon.png|50px]] '''Josuke Higashikata 8''' is a Stand character who utilizes his strong pressure and various okizeme setups to keep the opponent guessing. | ||
| pros = | | pros = | ||
* '''Self | * '''Self Sufficient:''' Josuke's meter gain is above average (especially in the corner) thanks to most of his moves being multi-hitting. | ||
* '''Good Oki:''' | * '''Good Oki:''' Josuke's 22X can provide a sort of wall of safety after hard knockdown>3H OTG, giving him the chance to attack and start pressure. He also has a great variety of meaty setups. | ||
* '''HHA:''' Josuke's HHA activation has invincible frames so defensive assists can't always interrupt it. It can also | * '''HHA:''' Josuke's HHA activation has invincible frames so defensive assists can't always interrupt it. It can also lead to a combo after a grounded hit. | ||
|cons = | |cons = | ||
* '''Execution:''' Josuke's combos are very long and somewhat precise. Calling assist after HHA has strict timing. | * '''Execution:''' Josuke's combos are very long and somewhat precise (especially in the corner). Calling assist after HHA has strict timing. | ||
* ''' | * '''Needs Meter''' If not facing the corner, Josuke needs meter in order to start any decent damage combo's. | ||
| tablewidth = 80 | | tablewidth = 80 | ||
}} | }} | ||
| Line 27: | Line 29: | ||
}} | }} | ||
}} | }} | ||
==Move List== | ==Move List== | ||
<div style="position: sticky; top: 0; display: flex; justify-content: center; background-color: #cacace;" class="movelist-toggles sticky"> | <div style="position: sticky; top: 0; display: flex; justify-content: center; background-color: #cacace;" class="movelist-toggles sticky"> | ||
| Line 45: | Line 48: | ||
|damage=14 | |damage=14 | ||
|guard=Mid | |guard=Mid | ||
|startup=5 | |startup= 5 | ||
|active= | |active= | ||
|recovery= | |recovery= | ||
| Line 52: | Line 55: | ||
|description= | |description= | ||
Josuke raises his knee to do a quick attack. | Josuke raises his knee to do a quick attack. | ||
* | *Good range for a light | ||
}} | }} | ||
}} | }} | ||
| Line 74: | Line 76: | ||
|description= | |description= | ||
Josuke throws his leg forward. | Josuke throws his leg forward. | ||
* | *Decent range | ||
}} | }} | ||
}} | }} | ||
| Line 95: | Line 96: | ||
|hitadv= | |hitadv= | ||
|description= | |description= | ||
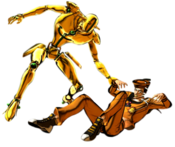
Josuke summons Soft | Josuke summons Soft and Wet to throw out a punch. | ||
* | *Decent range | ||
}} | }} | ||
}} | }} | ||
| Line 117: | Line 117: | ||
|hitadv= | |hitadv= | ||
|description= | |description= | ||
A crouching chop. | |||
* | *Decent range | ||
}} | }} | ||
}} | }} | ||
| Line 131: | Line 130: | ||
|data= | |data= | ||
{{AttackData-ASBR | {{AttackData-ASBR | ||
|damage= | |damage=12, 15 | ||
|guard=Low | |guard=Low | ||
|startup= | |startup= | ||
| Line 140: | Line 139: | ||
|description= | |description= | ||
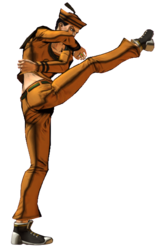
Josuke gets on one hand and kicks the opponent twice as he twirls around. | Josuke gets on one hand and kicks the opponent twice as he twirls around. | ||
* | *Good range | ||
* | *Downs on hit, leads to oki | ||
}} | }} | ||
}} | }} | ||
| Line 153: | Line 152: | ||
|data= | |data= | ||
{{AttackData-ASBR | {{AttackData-ASBR | ||
|damage= | |damage=15, 25 | ||
|guard=Low | |guard=Low | ||
|startup= | |startup= | ||
| Line 161: | Line 160: | ||
|hitadv= | |hitadv= | ||
|description= | |description= | ||
Soft | Soft and Wet is summoned to do an uppercut. | ||
* | *Mostly combo filler | ||
}} | }} | ||
}} | }} | ||
| Line 184: | Line 182: | ||
|description= | |description= | ||
Josuke leans forward and stomps on the grounded opponent. | Josuke leans forward and stomps on the grounded opponent. | ||
* | *OTGs | ||
* | *Main starter for oki situations | ||
}} | }} | ||
}} | }} | ||
| Line 191: | Line 189: | ||
====== <font style="visibility:hidden" size="0">JL</font> ====== | ====== <font style="visibility:hidden" size="0">JL</font> ====== | ||
{{MoveData | {{MoveData | ||
|image= | |image=JJASBR_Josuke_Part_8_jL.png | ||
|caption= | |caption= | ||
|name=j.L | |name=j.L | ||
| Line 205: | Line 203: | ||
|hitadv= | |hitadv= | ||
|description= | |description= | ||
An arial knee strike. | |||
* | *Can cross up | ||
}} | }} | ||
}} | }} | ||
| Line 213: | Line 210: | ||
====== <font style="visibility:hidden" size="0">JM</font> ====== | ====== <font style="visibility:hidden" size="0">JM</font> ====== | ||
{{MoveData | {{MoveData | ||
|image= | |image=JJASBR_Josuke_Part_8_jM.png | ||
|caption= | |caption= | ||
|name=j.M | |name=j.M | ||
| Line 228: | Line 225: | ||
|description= | |description= | ||
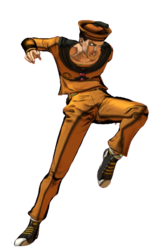
Josuke throws his body forward in the air to kick the opponent. | Josuke throws his body forward in the air to kick the opponent. | ||
* | *Decently active hitbox | ||
* | *Can cross up | ||
}} | }} | ||
}} | }} | ||
| Line 235: | Line 232: | ||
====== <font style="visibility:hidden" size="0">JH</font> ====== | ====== <font style="visibility:hidden" size="0">JH</font> ====== | ||
{{MoveData | {{MoveData | ||
|image= | |image=JJASBR_Josuke_Part_8_jH.png | ||
|caption= | |caption= | ||
|name=j.H | |name=j.H | ||
| Line 249: | Line 246: | ||
|hitadv= | |hitadv= | ||
|description= | |description= | ||
Soft and Wet is summoned to kick the opponent midair. | |||
* | *Decently active hitbox | ||
* | *Crosses up | ||
}} | }} | ||
}} | }} | ||
| Line 265: | Line 262: | ||
{{AttackData-ASBR | {{AttackData-ASBR | ||
|version=Light | |version=Light | ||
|damage= | |damage=2*9 | ||
|guard=Low | |guard=Low | ||
|startup= | |startup= | ||
| Line 273: | Line 270: | ||
|hitadv= | |hitadv= | ||
|description= | |description= | ||
Josuke spins around and hits his opponent in the process. Depending on L/M/H, the range changes. | |||
*Has the shortest range. | |||
*Safe on block | |||
}} | }} | ||
{{AttackData-ASBR | {{AttackData-ASBR | ||
|version=Medium | |version=Medium | ||
|header=no | |header=no | ||
|damage= | |damage=2*12 | ||
|guard=Low | |guard=Low | ||
|startup= | |startup= | ||
| Line 285: | Line 285: | ||
|hitadv= | |hitadv= | ||
|description= | |description= | ||
*Has average range. | |||
}} | }} | ||
{{AttackData-ASBR | {{AttackData-ASBR | ||
|version=Heavy | |version=Heavy | ||
|header=no | |header=no | ||
|damage= | |damage=2*15 | ||
|guard=Low | |guard=Low | ||
|startup= | |startup= | ||
| Line 297: | Line 298: | ||
|hitadv= | |hitadv= | ||
|description= | |description= | ||
*Has the most range out of every version. | |||
* | |||
}} | }} | ||
}} | }} | ||
| Line 308: | Line 307: | ||
|caption= | |caption= | ||
|name=Zero Friction | |name=Zero Friction | ||
|input=236L/M/H > 6L/M/H | |input=236L/M/H>6L/M/H | ||
|data= | |data= | ||
{{AttackData-ASBR | {{AttackData-ASBR | ||
|damage= | |version=Light | ||
|damage=20*2 | |||
|guard=Low | |||
|startup= | |||
|active= | |||
|recovery= | |||
|blockadv= | |||
|hitadv= | |||
|description= | |||
After spinning, Josuke kicks the opponent down. Depending on L/M/H, the distance the opponent is left at from you changes. | |||
*Leaves the opponent close by you. | |||
}} | |||
{{AttackData-ASBR | |||
|version=Medium | |||
|header=no | |||
|damage=20*2 | |||
|guard=Low | |||
|startup= | |||
|active= | |||
|recovery= | |||
|blockadv= | |||
|hitadv= | |||
|description= | |||
*Leaves the opponent at an average range from you. | |||
}} | |||
{{AttackData-ASBR | |||
|version=Heavy | |||
|header=no | |||
|damage=20*2 | |||
|guard=Low | |guard=Low | ||
|startup= | |startup= | ||
| Line 319: | Line 346: | ||
|hitadv= | |hitadv= | ||
|description= | |description= | ||
*The opponent is knocked back the farthest in this version. | |||
}} | }} | ||
}} | }} | ||
====== <font style="visibility:hidden" size="0"> | ====== <font style="visibility:hidden" size="0">214X</font> ====== | ||
{{MoveData | {{MoveData | ||
|image= | |image=JJASBR_Josuke_Part_8_214X_(1).png | ||
|caption= | |caption=Light | ||
|name= | |image2=JJASBR_Josuke_Part_8_214X_(2).png | ||
|input= | |caption2=Medium | ||
|image3=JJASBR_Josuke_Part_8_214X_(3).png | |||
|caption3=Heavy | |||
|name=Let me take that from you. | |||
|input=214L/M/H | |||
|data= | |data= | ||
{{AttackData-ASBR | {{AttackData-ASBR | ||
|version=Light | |version=Light | ||
|damage= | |damage=9*4 | ||
|guard=Mid | |guard=Mid | ||
|startup= | |startup= | ||
| Line 342: | Line 371: | ||
|hitadv= | |hitadv= | ||
|description= | |description= | ||
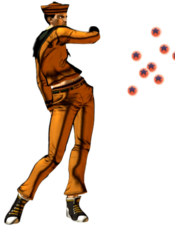
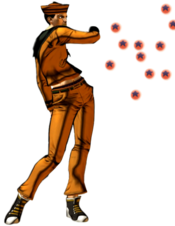
Josuke throws bubbles at his opponent as a projectile. Depending on L/M/H, the amount of bubbles thrown changes. | |||
*4 Bubbles are thrown. | |||
*Allows you to combo after at specific ranges with 2L, 5M, 2M and 2H. | |||
}} | }} | ||
{{AttackData-ASBR | {{AttackData-ASBR | ||
|version=Medium | |version=Medium | ||
|header=no | |header=no | ||
|damage= | |damage=9*8 | ||
|guard=Mid | |guard=Mid | ||
|startup= | |startup= | ||
| Line 354: | Line 386: | ||
|hitadv= | |hitadv= | ||
|description= | |description= | ||
*8 Bubbles are thrown. | |||
*Allows you to combo after at specific ranges with 2H | |||
}} | }} | ||
{{AttackData-ASBR | {{AttackData-ASBR | ||
|version=Heavy | |version=Heavy | ||
|header=no | |header=no | ||
|damage= | |damage=9*12 | ||
|guard=Mid | |guard=Mid | ||
|startup= | |startup= | ||
| Line 366: | Line 400: | ||
|hitadv= | |hitadv= | ||
|description= | |description= | ||
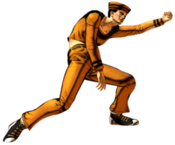
*11 Bubbles are thrown. | |||
* | *Allows you to combo after at specific ranges with 2H | ||
* | |||
}} | }} | ||
}} | }} | ||
====== <font style="visibility:hidden" size="0"> | ====== <font style="visibility:hidden" size="0">623X</font> ====== | ||
{{MoveData | {{MoveData | ||
|image= | |image=JJASBR_Josuke_Part_8_623X.png | ||
|caption= | |caption= | ||
|name=Don't mess with me. | |||
|input=623L/M/H | |||
|name= | |||
|input= | |||
|data= | |data= | ||
{{AttackData-ASBR | {{AttackData-ASBR | ||
|version=Light | |version=Light | ||
|damage= | |damage=38 | ||
|guard=Mid | |guard=Mid | ||
|startup= | |startup= | ||
| Line 394: | Line 422: | ||
|hitadv= | |hitadv= | ||
|description= | |description= | ||
Josuke weaves forward to deliver a punch that neutralizes the opponent. Depending on L/M/H, the range that Josuke travels changes. All versions are plus on block. | |||
*Has the shortest range. | |||
}} | }} | ||
{{AttackData-ASBR | {{AttackData-ASBR | ||
|version=Medium | |version=Medium | ||
|header=no | |header=no | ||
|damage= | |damage=40 | ||
|guard=Mid | |guard=Mid | ||
|startup= | |startup= | ||
| Line 406: | Line 436: | ||
|hitadv= | |hitadv= | ||
|description= | |description= | ||
*Has average range. | |||
}} | }} | ||
{{AttackData-ASBR | {{AttackData-ASBR | ||
|version=Heavy | |version=Heavy | ||
|header=no | |header=no | ||
|damage= | |damage=42 | ||
|guard=Mid | |guard=Mid | ||
|startup= | |startup= | ||
| Line 418: | Line 449: | ||
|hitadv= | |hitadv= | ||
|description= | |description= | ||
*Has the furthest range. | |||
* | |||
}} | }} | ||
}} | }} | ||
| Line 447: | Line 464: | ||
{{AttackData-ASBR | {{AttackData-ASBR | ||
|version=Light | |version=Light | ||
|damage= | |damage=10*6 | ||
|guard=Mid | |guard=Mid | ||
|startup= | |startup= | ||
| Line 455: | Line 472: | ||
|hitadv= | |hitadv= | ||
|description= | |description= | ||
Josuke covers himself with bubbles. | |||
*Can be flash cancelled the fastest | |||
}} | }} | ||
{{AttackData-ASBR | {{AttackData-ASBR | ||
|version=Medium | |version=Medium | ||
|header=no | |header=no | ||
|damage= | |damage=10*6 | ||
|guard=Mid | |guard=Mid | ||
|startup= | |startup= | ||
| Line 467: | Line 486: | ||
|hitadv= | |hitadv= | ||
|description= | |description= | ||
*Can be flash cancelled the second fastest | |||
}} | }} | ||
{{AttackData-ASBR | {{AttackData-ASBR | ||
|version=Heavy | |version=Heavy | ||
|header=no | |header=no | ||
|damage= | |damage=10*6 | ||
|guard=Mid | |guard=Mid | ||
|startup= | |startup= | ||
| Line 479: | Line 499: | ||
|hitadv= | |hitadv= | ||
|description= | |description= | ||
*Least amount of recovery | |||
* | *Primary okizeme tool | ||
* | |||
}} | }} | ||
}} | }} | ||
</div> | </div> | ||
<div id="movelist-2" class="movelist"><!-- Stand On Move List --> | <div id="movelist-2" class="movelist"><!-- Stand On Move List --> | ||
===Stand On=== | ===Stand On=== | ||
====Normal Moves==== | ====Normal Moves==== | ||
| Line 504: | Line 524: | ||
|hitadv= | |hitadv= | ||
|description= | |description= | ||
Soft | Soft and Wet throws out a jab. | ||
* | *Decent range | ||
}} | }} | ||
}} | }} | ||
| Line 527: | Line 546: | ||
|description= | |description= | ||
A low kick. | A low kick. | ||
* | *Decent range | ||
* | *Poor hitbox | ||
}} | }} | ||
}} | }} | ||
| Line 542: | Line 561: | ||
|data= | |data= | ||
{{AttackData-ASBR | {{AttackData-ASBR | ||
|damage= | |damage=16, 25 | ||
|guard=Mid | |guard=Mid | ||
|startup= | |startup= | ||
| Line 550: | Line 569: | ||
|hitadv= | |hitadv= | ||
|description= | |description= | ||
Soft | Soft and Wet throws out 2 punches. | ||
* | *Good range | ||
* | *Plus on block | ||
}} | }} | ||
}} | }} | ||
| Line 572: | Line 591: | ||
|hitadv= | |hitadv= | ||
|description= | |description= | ||
*Decent range | |||
* | |||
}} | }} | ||
}} | }} | ||
| Line 594: | Line 611: | ||
|hitadv= | |hitadv= | ||
|description= | |description= | ||
*Good range | |||
* | |||
}} | }} | ||
}} | }} | ||
| Line 616: | Line 631: | ||
|hitadv= | |hitadv= | ||
|description= | |description= | ||
*Good range | |||
* | |||
}} | }} | ||
}} | }} | ||
| Line 638: | Line 651: | ||
|hitadv= | |hitadv= | ||
|description= | |description= | ||
*Average range | |||
* | |||
}} | }} | ||
}} | }} | ||
| Line 660: | Line 671: | ||
|hitadv= | |hitadv= | ||
|description= | |description= | ||
*Decent range | |||
* | |||
}} | }} | ||
}} | }} | ||
| Line 676: | Line 685: | ||
|data= | |data= | ||
{{AttackData-ASBR | {{AttackData-ASBR | ||
|damage= | |damage=18, 20 | ||
|guard=Overhead | |guard=Overhead | ||
|startup= | |startup= | ||
| Line 684: | Line 693: | ||
|hitadv= | |hitadv= | ||
|description= | |description= | ||
*Good range | |||
* | *Hits twice | ||
* | *Can cross up | ||
}} | }} | ||
}} | }} | ||
| Line 700: | Line 709: | ||
{{AttackData-ASBR | {{AttackData-ASBR | ||
|version=Light | |version=Light | ||
|damage= | |damage=5*7, 25 | ||
|guard=Mid | |guard=Mid | ||
|startup= | |startup= | ||
| Line 708: | Line 717: | ||
|hitadv= | |hitadv= | ||
|description= | |description= | ||
*Mainly combo filler | |||
}} | }} | ||
{{AttackData-ASBR | {{AttackData-ASBR | ||
|version=Medium | |version=Medium | ||
|header=no | |header=no | ||
|damage= | |damage=5*7, 25 | ||
|guard=Mid | |guard=Mid | ||
|startup= | |startup= | ||
| Line 720: | Line 730: | ||
|hitadv= | |hitadv= | ||
|description= | |description= | ||
*Can be used as a pseudo-reversal after being Stylish Guarded | |||
}} | }} | ||
{{AttackData-ASBR | {{AttackData-ASBR | ||
|version=Heavy | |version=Heavy | ||
|header=no | |header=no | ||
|damage= | |damage=5*7, 25 | ||
|guard=Mid | |guard=Mid | ||
|startup= | |startup= | ||
| Line 732: | Line 743: | ||
|hitadv= | |hitadv= | ||
|description= | |description= | ||
*Can be used as a pseudo-reversal after being Stylish Guarded | |||
* | |||
}} | }} | ||
}} | }} | ||
====== <font style="visibility:hidden" size="0">Stand | ====== <font style="visibility:hidden" size="0">Stand 214X</font> ====== | ||
{{MoveData | {{MoveData | ||
|image= | |image=JJASBR_Josuke_Part_8_Stand_214X.png | ||
|caption= | |caption= | ||
|name=I gotta win this! | |||
|input=214L/M/H | |||
|name= | |||
|input= | |||
|data= | |data= | ||
{{AttackData-ASBR | {{AttackData-ASBR | ||
|version=Light | |version=Light | ||
|damage= | |damage=55 | ||
|guard=Mid | |guard=Mid | ||
|startup= | |startup= | ||
| Line 758: | Line 764: | ||
|hitadv= | |hitadv= | ||
|description= | |description= | ||
*Has the shortest range | |||
*Mainly combo filler | |||
}} | }} | ||
{{AttackData-ASBR | {{AttackData-ASBR | ||
|version=Medium | |version=Medium | ||
|header=no | |header=no | ||
|damage= | |damage=55 | ||
|guard=Mid | |guard=Mid | ||
|startup= | |startup= | ||
| Line 770: | Line 778: | ||
|hitadv= | |hitadv= | ||
|description= | |description= | ||
*Has average range | |||
}} | }} | ||
{{AttackData-ASBR | {{AttackData-ASBR | ||
|version=Heavy | |version=Heavy | ||
|header=no | |header=no | ||
|damage= | |damage=55 | ||
|guard=Mid | |guard=Mid | ||
|startup= | |startup= | ||
| Line 782: | Line 791: | ||
|hitadv= | |hitadv= | ||
|description= | |description= | ||
*Travels the farthest | |||
* | |||
}} | }} | ||
}} | }} | ||
====== <font style="visibility:hidden" size="0">Stand | ====== <font style="visibility:hidden" size="0">Stand 623X</font> ====== | ||
{{MoveData | {{MoveData | ||
|image= | |image=JJASBR_Josuke_Part_8_Stand_623X_(1).png | ||
|caption= | |caption= | ||
|name= | |image2=JJASBR_Josuke_Part_8_Stand_623X_(2).png | ||
|input= | |caption2= | ||
|name=Don't try anything funny! | |||
|input=623L/M/H | |||
|data= | |data= | ||
{{AttackData-ASBR | {{AttackData-ASBR | ||
|version=Light | |version=Light | ||
|damage= | |damage=5*7, 100 | ||
|guard=Mid | |guard=Mid | ||
|startup= | |startup= | ||
| Line 804: | Line 813: | ||
|blockadv= | |blockadv= | ||
|hitadv= | |hitadv= | ||
|description= | |description= Josuke and his stand float forward unleashing a barrage of punches ending in a hit-grab. Can float over grounded traps | ||
*Has the shortest range | |||
}} | }} | ||
{{AttackData-ASBR | {{AttackData-ASBR | ||
|version=Medium | |version=Medium | ||
|header=no | |header=no | ||
|damage= | |damage=5*7, 100 | ||
|guard=Mid | |guard=Mid | ||
|startup= | |startup= | ||
| Line 817: | Line 827: | ||
|hitadv= | |hitadv= | ||
|description= | |description= | ||
*Has average range | |||
}} | }} | ||
{{AttackData-ASBR | {{AttackData-ASBR | ||
|version=Heavy | |version=Heavy | ||
|header=no | |header=no | ||
|damage= | |damage=5*7, 100 | ||
|guard=Mid | |guard=Mid | ||
|startup= | |startup= | ||
| Line 829: | Line 840: | ||
|hitadv= | |hitadv= | ||
|description= | |description= | ||
*Travels the farthest | |||
* | |||
}} | }} | ||
}} | }} | ||
</div> | </div> | ||
==System Mechanics== | ==System Mechanics== | ||
====== <font style="visibility:hidden" size="0">Throw</font> ====== | ====== <font style="visibility:hidden" size="0">Throw</font> ====== | ||
| Line 850: | Line 859: | ||
|damage=130 | |damage=130 | ||
|guard=Throw | |guard=Throw | ||
|startup= | |startup= | ||
|active= | |active= | ||
|recovery= | |recovery= | ||
| Line 856: | Line 865: | ||
|hitadv= | |hitadv= | ||
|description= | |description= | ||
*Both Throws are identical aside from direction. | |||
*Leaves the opponent directly in front of Josuke. | *Leaves the opponent directly in front of Josuke. | ||
*Can be followed up by 3H OTG. | *Can be followed up by 3H OTG. | ||
}} | }} | ||
| Line 871: | Line 879: | ||
|data= | |data= | ||
{{AttackData-ASBR | {{AttackData-ASBR | ||
|damage= | |damage= | ||
|guard=Low, Mid | |guard=Low, Mid | ||
|startup= | |startup= | ||
| Line 879: | Line 887: | ||
|hitadv= | |hitadv= | ||
|description= | |description= | ||
*Assault Assist Stocks: 2 | *Assault Assist Stocks: 2 | ||
*Reversal Assist Stocks: 1 | *Reversal Assist Stocks: 1 | ||
*Based on [[JoJo's Bizarre Adventure: All-Star Battle R/Josuke Higashikata (Part 8)#236X|236H]] | *Based on [[JoJo's Bizarre Adventure: All-Star Battle R/Josuke Higashikata (Part 8)#236X|236H]] | ||
*As the first hit is a | *As the first hit is a low, this can be used to set up hard-to-blockable situations. | ||
}} | }} | ||
}} | }} | ||
| Line 897: | Line 904: | ||
|data= | |data= | ||
{{AttackData-ASBR | {{AttackData-ASBR | ||
|damage= | |damage= | ||
|guard= | |guard= | ||
|startup= | |startup= | ||
| Line 905: | Line 912: | ||
|hitadv= | |hitadv= | ||
|description= | |description= | ||
(Un)Summons Soft | (Un)Summons Soft and Wet, altering Josuke's moveset and abilities. | ||
}} | }} | ||
}} | }} | ||
| Line 930: | Line 937: | ||
|description= | |description= | ||
Josuke sends forth a bubble, stealing the opponent's vision on hit. | Josuke sends forth a bubble, stealing the opponent's vision on hit. | ||
* | *Can be Flash Cancelled. | ||
* | *Crumples on hit during recovery. | ||
}} | }} | ||
}} | }} | ||
| Line 944: | Line 950: | ||
|image3=JJASBR_Josuke_Part_8_GHA_(3).png | |image3=JJASBR_Josuke_Part_8_GHA_(3).png | ||
|caption3= | |caption3= | ||
|name=Soft | |name=Soft and Wet | ||
|input=236L+M+H | |input=236L+M+H | ||
|data= | |data= | ||
| Line 956: | Line 962: | ||
|hitadv= | |hitadv= | ||
|description= | |description= | ||
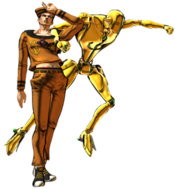
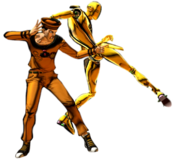
Josuke throws a bubble at the opponent | Josuke throws a bubble at the opponent stealing their friction, ending with Soft and Wet throwing out a barrage of punches. | ||
* | *Tracks somewhat | ||
* | *Can be combo'd from HHA | ||
}} | }} | ||
}} | }} | ||
Revision as of 10:09, 24 February 2023
Introduction
- This article is about the character from Part 8, JoJolion, primarily known as "Josuke 8". For information about the character from Part 4, Diamond is Unbreakable, see Josuke Higashikata (Part 4).
The primary protagonist of "JoJolion", the eighth part of "JoJo's Bizarre Adventure", Josuke Higashikata 8 is a character who gains momentum by utilizing a variety of powerful okizeme setups. Josuke specializes in strong strike-throw pressure and uses deceptive mobility to start high damage combos that lead to dangerous hard knockdown situations. His playstyle in Stand Off revolves around closing the gap in mid-range and starting his oki setups. "So slippery!" hits low and travels far, making it very effective at catching opponents off guard. Also, while not as good a neutral tool, "Don't mess with me." has invincibility frames allowing Josuke to dash through even multi-hitting projectiles (i.e. Emerald Splash, Narancia's bullets, Risotto's scalpels, etc.). "How to use the bubbles..." is his primary okizeme tool, creating a wall of bubbles that surround Josuke. Using this move after grab or on knockdown greatly limits the opponent's options on wake-up. In Stand-On, his gameplan is focused on applying strong pressure using his long-range normals. S.5H in particular is plus on block, allowing for easy stagger pressure.
- Link Combos: Josuke 8 is able to link from special into normals much more easily than other characters, being able to juggle at both midscreen and in the corner. This leads to him having high damage potential on many hits.
- HHA Combos: Unlinke most characters in the game, Josuke 8 is able to combo after landing HHA, which leads to high damage, impressive meter gain, and an oki setup.
Stats
| Style | Health | Low Health Mode | Hashtag(s) |
|---|---|---|---|
| Stand | 1000 | Rumble | #ASBR_GAP #ASBR_JSK8 |
Move List
Stand Off
Normal Moves
5L
5L
|
|---|
5M
5M
|
|---|
5H
5H
|
|---|
2L
2L
|
|---|
2M
2M
|
|---|
2H
2H
|
|---|
3H
3H
Don't screw with me! |
|---|
JL
j.L
|
|---|
JM
j.M
|
|---|
JH
j.H
|
|---|
Special Moves
236X
So slippery!
236L/M/H |
|---|
236X-6X
Zero Friction
236L/M/H>6L/M/H |
|---|
214X
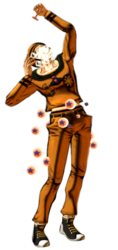
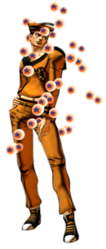
Let me take that from you. 214L/M/H Light Light Medium Medium Heavy Heavy
|
|---|
623X
Don't mess with me.
623L/M/H |
|---|
22X
How to use the bubbles...
22L/M/H |
|---|
Stand On
Normal Moves
Stand 5L
5L
|
|---|
Stand 5M
5M
|
|---|
Stand 5H
5H First Punch First Punch Second Punch Second Punch
|
|---|
Stand 2L
2L
|
|---|
Stand 2M
2M
|
|---|
Stand 2H
2H
|
|---|
Stand JL
j.L
|
|---|
Stand JM
j.M
|
|---|
Stand JH
j.H First Punch First Punch Second Punch Second Punch
|
|---|
Special Moves
Stand 236X
The hell is your problem?!
236L/M/H |
|---|
Stand 214X
I gotta win this!
214L/M/H |
|---|
Stand 623X
Don't try anything funny!
623L/M/H |
|---|
System Mechanics
Throw
Throw
I've taken your friction. 5/4 + Any Two Attack Buttons |
|---|
Assist
Assist
So slippery! |
|---|
5S
Stand On/Off 5S Stand On Stand On Stand Off Stand Off
|
|---|
Heart Heat Attack
I can steal your vision. 236 + Any Two Attack Buttons Can't actually steal your vision. Can't actually steal your vision.
|
|---|
Great Heat Attack
Soft and Wet
236L+M+H |
|---|
