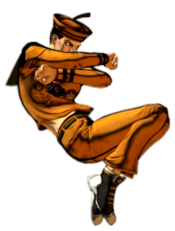
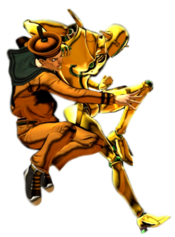
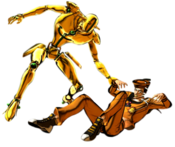
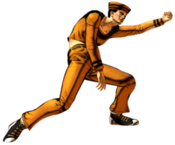
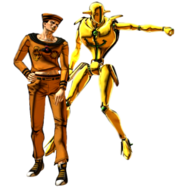
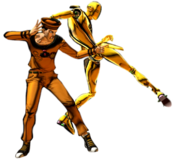
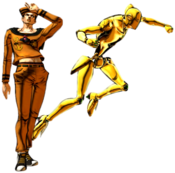
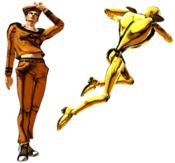
JoJo's Bizarre Adventure: All-Star Battle R/Josuke Higashikata (Part 8): Difference between revisions
No edit summary |
No edit summary |
||
| Line 2: | Line 2: | ||
==Introduction== | ==Introduction== | ||
:''This article is about the character from Part 8, ''JoJolion'', primarily known as "Josuke 8". For information about the character from Part 4, ''Diamond is Unbreakable'', see [[JoJo's Bizarre Adventure: All-Star Battle R/Josuke Higashikata (Part 4)|Josuke Higashikata (Part 4)]].'' | :''This article is about the character from Part 8, ''JoJolion'', primarily known as "Josuke 8". For information about the character from Part 4, ''Diamond is Unbreakable'', see [[JoJo's Bizarre Adventure: All-Star Battle R/Josuke Higashikata (Part 4)|Josuke Higashikata (Part 4)]].'' | ||
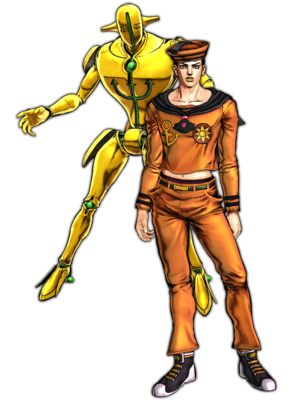
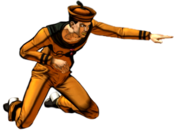
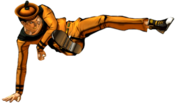
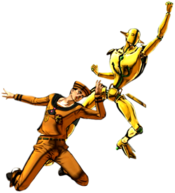
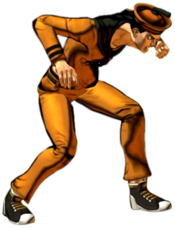
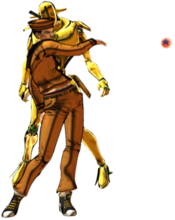
The primary protagonist of | The primary protagonist of ''JoJolion'', the eighth part of ''JoJo's Bizarre Adventure'', Josuke Higashikata is a character who gains momentum by utilizing a variety of powerful okizeme setups. Josuke specializes in strong strike-throw pressure, and uses deceptive mobility to start high damage combos that lead to dangerous hard knockdown situations. | ||
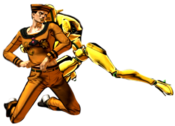
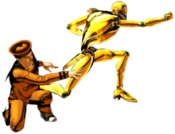
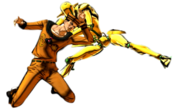
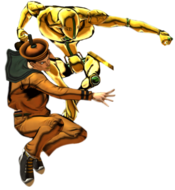
His playstyle in Stand Off revolves around closing the gap in mid-range and starting his oki setups. "[[JoJo's Bizarre Adventure: All-Star Battle R/Josuke Higashikata (Part 8)#236X|So slippery!]]" hits Low and travels far, making it very effective at catching opponents off guard. Also, while not as good a neutral tool, "[[JoJo's Bizarre Adventure: All-Star Battle R/Josuke Higashikata (Part 8)#623X|Don't mess with me.]]" has upper-body invincibility frames, allowing Josuke to dash through even multi-hitting projectiles (i.e. [[JoJo's Bizarre Adventure: All-Star Battle R/Noriaki Kakyoin|Kakyoin]]'s Emerald Splash, [[JoJo's Bizarre Adventure: All-Star Battle R/Narancia Ghirga|Narancia]]'s bullets, [[JoJo's Bizarre Adventure: All-Star Battle R/Risotto Nero|Risotto]]'s scalpels, etc.). "[[JoJo's Bizarre Adventure: All-Star Battle R/Josuke Higashikata (Part 8)#22X|How to use the bubbles...]]" is his primary okizeme tool, creating a wall of bubbles that surround Josuke; using this move after a knockdown (such as his [[JoJo's Bizarre Adventure: All-Star Battle R/Josuke Higashikata (Part 8)#Throw|Throw]]) greatly limits the opponent's options on wake-up. | |||
*''' | In Stand On, his gameplan is focused on applying strong pressure using his long-range normals. [[JoJo's Bizarre Adventure: All-Star Battle R/Josuke Higashikata (Part 8)#Stand 5H|s.5H]] in particular is plus on block, allowing for easy stagger pressure. | ||
*'''Link Combos''': Josuke is able to link from special moves into normals much more easily than other characters, being able to juggle at both midscreen and in the corner. | |||
{{StrengthsAndWeaknesses | {{StrengthsAndWeaknesses | ||
| Line 12: | Line 14: | ||
| pros = | | pros = | ||
* '''Self Sufficient:''' Josuke's meter gain is above average (especially in the corner) thanks to most of his moves being multi-hitting. | * '''Self Sufficient:''' Josuke's meter gain is above average (especially in the corner) thanks to most of his moves being multi-hitting. | ||
* '''Good Oki:''' | * '''Good Oki:''' "[[JoJo's Bizarre Adventure: All-Star Battle R/Josuke Higashikata (Part 8)#22X|How to use the bubbles...]]" can provide a sort of wall of safety after a hard knockdown > 3H OTG, giving Josuke the chance to attack and start pressure. He also has a great variety of meaty setups. | ||
* '''HHA | * '''HHA Combos''': Unlike most characters in the game, Josuke is able to combo after landing his [[JoJo's Bizarre Adventure: All-Star Battle R/Josuke Higashikata (Part 8)#Heart Heat Attack|HHA]], which leads to high damage, impressive meter gain, and an oki setup. | ||
* '''Not So Soft:''' Josuke can deal great damage with just a bar and build enough meter back to end in HHA. | |||
|cons = | |||
* '''Execution:''' Josuke's combos are very long and somewhat precise (especially in the corner). | * '''Execution:''' Josuke's combos are very long and somewhat precise (especially in the corner). In particular, calling an Assist after an HHA has strict timing. | ||
* '''Needs Meter''' If not facing the corner, Josuke needs meter in order to start any decent damage | * '''Needs Meter:''' If not facing the corner, Josuke needs meter in order to start any decent damage combos. | ||
| tablewidth = 80 | | tablewidth = 80 | ||
}} | }} | ||
| Line 29: | Line 31: | ||
}} | }} | ||
}} | }} | ||
==Move List== | ==Move List== | ||
<div style="position: sticky; top: 0; display: flex; justify-content: center; background-color: #cacace;" class="movelist-toggles sticky"> | <div style="position: sticky; top: 0; display: flex; justify-content: center; background-color: #cacace;" class="movelist-toggles sticky"> | ||
| Line 48: | Line 49: | ||
|damage=14 | |damage=14 | ||
|guard=Mid | |guard=Mid | ||
|startup= 5 | |startup=5 | ||
|active= | |active= | ||
|recovery= | |recovery= | ||
| Line 55: | Line 56: | ||
|description= | |description= | ||
Josuke raises his knee to do a quick attack. | Josuke raises his knee to do a quick attack. | ||
*Good range for a light | *Good range for a light attack. | ||
}} | }} | ||
}} | }} | ||
| Line 75: | Line 76: | ||
|hitadv= | |hitadv= | ||
|description= | |description= | ||
Josuke throws his leg forward. | Josuke throws his leg forward. | ||
*Decent range | *Decent range. | ||
}} | }} | ||
}} | }} | ||
| Line 96: | Line 97: | ||
|hitadv= | |hitadv= | ||
|description= | |description= | ||
Josuke summons Soft | Josuke summons Soft & Wet to throw out a punch. | ||
*Decent range | *Decent range. | ||
}} | }} | ||
}} | }} | ||
| Line 117: | Line 118: | ||
|hitadv= | |hitadv= | ||
|description= | |description= | ||
Josuke attacks with a crouching chop. | |||
*Decent range | *Decent range. | ||
}} | }} | ||
}} | }} | ||
| Line 130: | Line 131: | ||
|data= | |data= | ||
{{AttackData-ASBR | {{AttackData-ASBR | ||
|damage=12, 15 | |damage=27 (12, 15) | ||
|guard=Low | |guard=Low | ||
|startup= | |startup= | ||
| Line 139: | Line 140: | ||
|description= | |description= | ||
Josuke gets on one hand and kicks the opponent twice as he twirls around. | Josuke gets on one hand and kicks the opponent twice as he twirls around. | ||
*Good range | *Good range. | ||
* | *Causes hard knockdown, leading into oki. | ||
}} | }} | ||
}} | }} | ||
| Line 152: | Line 153: | ||
|data= | |data= | ||
{{AttackData-ASBR | {{AttackData-ASBR | ||
|damage=15, 25 | |damage=40 (15, 25) | ||
|guard=Low | |guard=Low | ||
|startup= | |startup= | ||
| Line 160: | Line 161: | ||
|hitadv= | |hitadv= | ||
|description= | |description= | ||
Soft | Soft & Wet is summoned by Josuke to do an uppercut. | ||
*Mostly combo filler | *Mostly combo filler. | ||
}} | }} | ||
}} | }} | ||
| Line 181: | Line 182: | ||
|hitadv= | |hitadv= | ||
|description= | |description= | ||
Josuke leans forward and stomps on the | Josuke leans forward and stomps on the opponent. | ||
* | *Can hit OTG. | ||
*Main starter for oki situations | *Can only be used once per combo. | ||
*Main starter for oki situations. | |||
}} | }} | ||
}} | }} | ||
| Line 189: | Line 191: | ||
====== <font style="visibility:hidden" size="0">JL</font> ====== | ====== <font style="visibility:hidden" size="0">JL</font> ====== | ||
{{MoveData | {{MoveData | ||
|image= | |image=JJASBR_Josuke_Part_8_Jump_L.png | ||
|caption= | |caption= | ||
|name=j.L | |name=j.L | ||
| Line 203: | Line 205: | ||
|hitadv= | |hitadv= | ||
|description= | |description= | ||
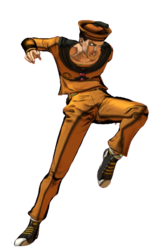
Josuke attacks with an aerial knee strike. | |||
*Can cross up | *Can cross up. | ||
}} | }} | ||
}} | }} | ||
| Line 210: | Line 212: | ||
====== <font style="visibility:hidden" size="0">JM</font> ====== | ====== <font style="visibility:hidden" size="0">JM</font> ====== | ||
{{MoveData | {{MoveData | ||
|image= | |image=JJASBR_Josuke_Part_8_Jump_M.png | ||
|caption= | |caption= | ||
|name=j.M | |name=j.M | ||
| Line 224: | Line 226: | ||
|hitadv= | |hitadv= | ||
|description= | |description= | ||
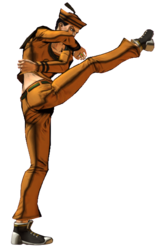
Josuke throws his body forward in the air to kick the opponent. | Josuke throws his body forward in the air to kick the opponent. | ||
*Decently active hitbox | *Decently active hitbox. | ||
*Can cross up | *Can cross up. | ||
}} | }} | ||
}} | }} | ||
| Line 232: | Line 234: | ||
====== <font style="visibility:hidden" size="0">JH</font> ====== | ====== <font style="visibility:hidden" size="0">JH</font> ====== | ||
{{MoveData | {{MoveData | ||
|image= | |image=JJASBR_Josuke_Part_8_Jump_H.png | ||
|caption= | |caption= | ||
|name=j.H | |name=j.H | ||
| Line 246: | Line 248: | ||
|hitadv= | |hitadv= | ||
|description= | |description= | ||
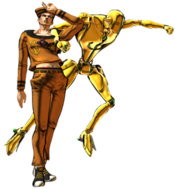
Soft | Josuke summons Soft & Wet to kick the opponent midair. | ||
*Decently active hitbox | *Decently active hitbox. | ||
* | *Can cross up. | ||
}} | }} | ||
}} | }} | ||
| Line 262: | Line 264: | ||
{{AttackData-ASBR | {{AttackData-ASBR | ||
|version=Light | |version=Light | ||
|damage=2*9 | |damage=18 (2*9) | ||
|guard=Low | |guard=Low, Mid | ||
|startup= | |startup= | ||
|active= | |active= | ||
| Line 270: | Line 272: | ||
|hitadv= | |hitadv= | ||
|description= | |description= | ||
}} | }} | ||
{{AttackData-ASBR | {{AttackData-ASBR | ||
|version=Medium | |version=Medium | ||
|header=no | |header=no | ||
|damage=2*12 | |damage=24 (2*12) | ||
|guard=Low | |guard=Low, Mid | ||
|startup= | |startup= | ||
|active= | |active= | ||
| Line 285: | Line 284: | ||
|hitadv= | |hitadv= | ||
|description= | |description= | ||
}} | }} | ||
{{AttackData-ASBR | {{AttackData-ASBR | ||
|version=Heavy | |version=Heavy | ||
|header=no | |header=no | ||
|damage=2*15 | |damage=30 (2*15) | ||
|guard=Low | |guard=Low, Mid | ||
|startup= | |startup= | ||
|active= | |active= | ||
| Line 298: | Line 296: | ||
|hitadv= | |hitadv= | ||
|description= | |description= | ||
Josuke slides and spins around. | |||
*Different versions increase the amount of damage and the distance covered. | |||
*The first hit is a Low, susqequent hits hit Mid. | |||
---- | |||
'''L version:''' | |||
*Has the shortest range. | |||
*Safe on block. | |||
---- | |||
'''M version:''' | |||
*Has average range. | |||
---- | |||
'''H version:''' | |||
*Has the most range out of every version. | *Has the most range out of every version. | ||
}} | }} | ||
| Line 307: | Line 320: | ||
|caption= | |caption= | ||
|name=Zero Friction | |name=Zero Friction | ||
|input=236L/M/H>6L/M/H | |input=236L/M/H > 6L/M/H | ||
|data= | |data= | ||
{{AttackData-ASBR | {{AttackData-ASBR | ||
|damage=40 (20*2) | |||
|damage=20*2 | |||
|guard=Low | |guard=Low | ||
|startup= | |startup= | ||
| Line 333: | Line 331: | ||
|hitadv= | |hitadv= | ||
|description= | |description= | ||
After spinning, Josuke kicks the opponent twice while sliding. | |||
*Move performance is identical across all versions. | |||
*Launches on hit. | |||
* | |||
}} | }} | ||
}} | }} | ||
====== <font style="visibility:hidden" size="0"> | ====== <font style="visibility:hidden" size="0">623X</font> ====== | ||
{{MoveData | {{MoveData | ||
|image= | |image=JJASBR_Josuke_Part_8_623X.png | ||
|caption= | |caption= | ||
|name=Don't mess with me. | |||
|input=623L/M/H | |||
|name= | |||
|input= | |||
|data= | |data= | ||
{{AttackData-ASBR | {{AttackData-ASBR | ||
|version=Light | |version=Light | ||
|damage= | |damage=38 | ||
|guard=Mid | |guard=Mid | ||
|startup= | |startup= | ||
| Line 371: | Line 354: | ||
|hitadv= | |hitadv= | ||
|description= | |description= | ||
}} | }} | ||
{{AttackData-ASBR | {{AttackData-ASBR | ||
|version=Medium | |version=Medium | ||
|header=no | |header=no | ||
|damage= | |damage=40 | ||
|guard=Mid | |guard=Mid | ||
|startup= | |startup= | ||
| Line 386: | Line 366: | ||
|hitadv= | |hitadv= | ||
|description= | |description= | ||
}} | }} | ||
{{AttackData-ASBR | {{AttackData-ASBR | ||
|version=Heavy | |version=Heavy | ||
|header=no | |header=no | ||
|damage= | |damage=42 | ||
|guard=Mid | |guard=Mid | ||
|startup= | |startup= | ||
| Line 400: | Line 378: | ||
|hitadv= | |hitadv= | ||
|description= | |description= | ||
* | Josuke weaves forward to deliver a punch. | ||
* | *Different versions increase the amount of damage and the distance covered. | ||
*All versions are plus on block. | |||
*Josuke has upper-body invulnerability during his weave. | |||
*Causes crumple on hit. | |||
}} | }} | ||
}} | }} | ||
====== <font style="visibility:hidden" size="0"> | ====== <font style="visibility:hidden" size="0">214X</font> ====== | ||
{{MoveData | {{MoveData | ||
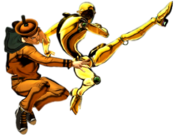
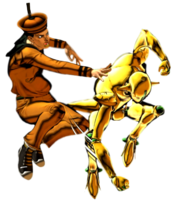
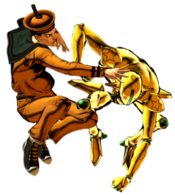
|image= | |image=JJASBR_Josuke_Part_8_214X_(1).png | ||
|caption= | |caption=Light | ||
|name= | |image2=JJASBR_Josuke_Part_8_214X_(2).png | ||
|input= | |caption2=Medium | ||
|image3=JJASBR_Josuke_Part_8_214X_(3).png | |||
|caption3=Heavy | |||
|name=Let me take that from you. | |||
|input=214L/M/H | |||
|data= | |data= | ||
{{AttackData-ASBR | {{AttackData-ASBR | ||
|version=Light | |version=Light | ||
|damage= | |damage=36 (9*4) | ||
|guard=Mid | |guard=Mid | ||
|startup= | |startup= | ||
| Line 422: | Line 407: | ||
|hitadv= | |hitadv= | ||
|description= | |description= | ||
}} | }} | ||
{{AttackData-ASBR | {{AttackData-ASBR | ||
|version=Medium | |version=Medium | ||
|header=no | |header=no | ||
|damage= | |damage=72 (9*8) | ||
|guard=Mid | |guard=Mid | ||
|startup= | |startup= | ||
| Line 436: | Line 419: | ||
|hitadv= | |hitadv= | ||
|description= | |description= | ||
}} | }} | ||
{{AttackData-ASBR | {{AttackData-ASBR | ||
|version=Heavy | |version=Heavy | ||
|header=no | |header=no | ||
|damage= | |damage=108 (9*12) | ||
|guard=Mid | |guard=Mid | ||
|startup= | |startup= | ||
| Line 449: | Line 431: | ||
|hitadv= | |hitadv= | ||
|description= | |description= | ||
* | Josuke throws bubbles at his opponent as a projectile. | ||
*Different versions increase the amount of bubbles fired and the distance covered. | |||
*None of the versions reach past midscreen. | |||
---- | |||
:'''L version:''' | |||
*Josuke sends 4 bubbles. | |||
*Allows Josuke to combo after at specific ranges with 2L, 5M, 2M and 2H. | |||
---- | |||
:'''M version:''' | |||
*Josuke sends 8 bubbles. | |||
*Notes 2 | |||
---- | |||
:'''H version:''' | |||
*Josuke sends 12 bubbles. | |||
*Notes 2 | |||
}} | }} | ||
}} | }} | ||
| Line 464: | Line 460: | ||
{{AttackData-ASBR | {{AttackData-ASBR | ||
|version=Light | |version=Light | ||
|damage=10*6 | |damage=60 (10*6) | ||
|guard=Mid | |guard=Mid | ||
|startup= | |startup= | ||
| Line 472: | Line 468: | ||
|hitadv= | |hitadv= | ||
|description= | |description= | ||
}} | }} | ||
{{AttackData-ASBR | {{AttackData-ASBR | ||
|version=Medium | |version=Medium | ||
|header=no | |header=no | ||
|damage=10*6 | |damage=60 (10*6) | ||
|guard=Mid | |guard=Mid | ||
|startup= | |startup= | ||
| Line 486: | Line 480: | ||
|hitadv= | |hitadv= | ||
|description= | |description= | ||
}} | }} | ||
{{AttackData-ASBR | {{AttackData-ASBR | ||
|version=Heavy | |version=Heavy | ||
|header=no | |header=no | ||
|damage=10*6 | |damage=60 (10*6) | ||
|guard=Mid | |guard=Mid | ||
|startup= | |startup= | ||
| Line 499: | Line 492: | ||
|hitadv= | |hitadv= | ||
|description= | |description= | ||
* | Josuke covers himself with bubbles, which will start moving forward after a brief moment. | ||
*Primary okizeme tool | *Different versions alter the velocity of the bubbles, although all of them are very slow regardless. | ||
*Due to its slow startup, it's not a good projectile or combo filler. Instead, it plays the role of an oki tool. | |||
---- | |||
'''L version:''' | |||
*Has the most recovery, but can be Flash Cancelled the soonest. | |||
---- | |||
'''M version:''' | |||
*Balanced recovery. | |||
---- | |||
'''H version:''' | |||
*Has the least amount of recovery, but takes the longest to Flash Cancel. | |||
*Primary okizeme tool. | |||
}} | }} | ||
}} | }} | ||
</div> | </div> | ||
<div id="movelist-2" class="movelist"><!-- Stand On Move List --> | <div id="movelist-2" class="movelist"><!-- Stand On Move List --> | ||
===Stand On=== | ===Stand On=== | ||
====Normal Moves==== | ====Normal Moves==== | ||
| Line 524: | Line 530: | ||
|hitadv= | |hitadv= | ||
|description= | |description= | ||
Soft | Soft & Wet throws out a jab. | ||
*Decent range | *Decent range. | ||
}} | }} | ||
}} | }} | ||
| Line 546: | Line 552: | ||
|description= | |description= | ||
A low kick. | A low kick. | ||
*Decent range | *Decent range. | ||
*Poor hitbox | *Poor hitbox. | ||
}} | }} | ||
}} | }} | ||
| Line 561: | Line 567: | ||
|data= | |data= | ||
{{AttackData-ASBR | {{AttackData-ASBR | ||
|damage=16, 25 | |damage=41 (16, 25) | ||
|guard=Mid | |guard=Mid | ||
|startup= | |startup= | ||
| Line 569: | Line 575: | ||
|hitadv= | |hitadv= | ||
|description= | |description= | ||
Soft | Soft & Wet throws out 2 punches. | ||
*Good range | *Good range. | ||
*Plus on block | *Plus on block. | ||
}} | }} | ||
}} | }} | ||
| Line 591: | Line 597: | ||
|hitadv= | |hitadv= | ||
|description= | |description= | ||
*Decent range | Soft & Wet attacks with a low kick. | ||
*Decent range. | |||
}} | }} | ||
}} | }} | ||
| Line 611: | Line 618: | ||
|hitadv= | |hitadv= | ||
|description= | |description= | ||
*Good range | Soft & Wet attacks with a crouching jab. | ||
*Good range. | |||
}} | }} | ||
}} | }} | ||
| Line 631: | Line 639: | ||
|hitadv= | |hitadv= | ||
|description= | |description= | ||
*Good range | Soft & Wet performs a sweeping kick. | ||
*Causes hard knockdown. | |||
*Good range. | |||
}} | }} | ||
}} | }} | ||
| Line 651: | Line 661: | ||
|hitadv= | |hitadv= | ||
|description= | |description= | ||
*Average range | Soft & Wet punches with a hook. | ||
*Average range. | |||
}} | }} | ||
}} | }} | ||
| Line 671: | Line 682: | ||
|hitadv= | |hitadv= | ||
|description= | |description= | ||
*Decent range | Soft & Wet kicks forward. | ||
*Decent range. | |||
}} | }} | ||
}} | }} | ||
| Line 685: | Line 697: | ||
|data= | |data= | ||
{{AttackData-ASBR | {{AttackData-ASBR | ||
|damage=18, 20 | |damage=38 (18, 20) | ||
|guard=Overhead | |guard=Overhead | ||
|startup= | |startup= | ||
| Line 693: | Line 705: | ||
|hitadv= | |hitadv= | ||
|description= | |description= | ||
*Good range | Soft & Wet punches below itself twice. | ||
*Good range. | |||
*Can cross up | *Can cross up. | ||
}} | }} | ||
}} | }} | ||
| Line 709: | Line 721: | ||
{{AttackData-ASBR | {{AttackData-ASBR | ||
|version=Light | |version=Light | ||
|damage=5*7, 25 | |damage=60 (5*7, 25) | ||
|guard=Mid | |guard=Mid | ||
|startup= | |startup= | ||
| Line 717: | Line 729: | ||
|hitadv= | |hitadv= | ||
|description= | |description= | ||
}} | }} | ||
{{AttackData-ASBR | {{AttackData-ASBR | ||
|version=Medium | |version=Medium | ||
|header=no | |header=no | ||
|damage=5*7, 25 | |damage=60 (5*7, 25) | ||
|guard=Mid | |guard=Mid | ||
|startup= | |startup= | ||
| Line 730: | Line 741: | ||
|hitadv= | |hitadv= | ||
|description= | |description= | ||
}} | }} | ||
{{AttackData-ASBR | {{AttackData-ASBR | ||
|version=Heavy | |version=Heavy | ||
|header=no | |header=no | ||
|damage=5*7, 25 | |damage=60 (5*7, 25) | ||
|guard=Mid | |guard=Mid | ||
|startup= | |startup= | ||
| Line 743: | Line 753: | ||
|hitadv= | |hitadv= | ||
|description= | |description= | ||
*Can be used as a pseudo-reversal after | Jouske jumps backwards while Soft & Wet performs an advancing barrage of punches. | ||
*Different versions alter the distance Josuke leaps backwards, as well as Soft & Wet's speed and distance covered. | |||
*Stand Rush-compatible. | |||
*The final hit launches. | |||
---- | |||
'''L version:''' | |||
*Mainly combo filler. | |||
---- | |||
'''M version:''' | |||
*Can be used as a pseudo-reversal after an opponent's successful Stylish Guard. | |||
---- | |||
'''H version:''' | |||
*Can be used as a pseudo-reversal after an opponent's successful Stylish Guard. | |||
}} | }} | ||
}} | }} | ||
====== <font style="visibility:hidden" size="0">Stand | ====== <font style="visibility:hidden" size="0">Stand 623X</font> ====== | ||
{{MoveData | {{MoveData | ||
|image= | |image=JJASBR_Josuke_Part_8_Stand_623X_(1).png | ||
|caption= | |caption= | ||
|name= | |image2=JJASBR_Josuke_Part_8_Stand_623X_(2).png | ||
|input= | |caption2= | ||
|name=Don't try anything funny! | |||
|input=623L/M/H | |||
|data= | |data= | ||
{{AttackData-ASBR | {{AttackData-ASBR | ||
|version=Light | |version=Light | ||
|damage= | |damage=135 (5*7, 100) | ||
|guard=Mid | |guard=Mid | ||
|startup= | |startup= | ||
| Line 764: | Line 791: | ||
|hitadv= | |hitadv= | ||
|description= | |description= | ||
}} | }} | ||
{{AttackData-ASBR | {{AttackData-ASBR | ||
|version=Medium | |version=Medium | ||
|header=no | |header=no | ||
|damage= | |damage=135 (5*7, 100) | ||
|guard=Mid | |guard=Mid | ||
|startup= | |startup= | ||
| Line 778: | Line 803: | ||
|hitadv= | |hitadv= | ||
|description= | |description= | ||
}} | }} | ||
{{AttackData-ASBR | {{AttackData-ASBR | ||
|version=Heavy | |version=Heavy | ||
|header=no | |header=no | ||
|damage= | |damage=135 (5*7, 100) | ||
|guard=Mid | |guard=Mid | ||
|startup= | |startup= | ||
| Line 791: | Line 815: | ||
|hitadv= | |hitadv= | ||
|description= | |description= | ||
*Travels the farthest | Jouske and Soft & Wet perform an advancing barrage of punches, following up by reaching for the opponent and throwing them behind themselves. | ||
*Different versions alter the distance covered. | |||
*The final hit leads into a hitgrab that causes a hard knockdown and switches sides. | |||
*Since Josuke is floating during the move, he can go over grounded traps. | |||
---- | |||
'''L version:''' | |||
*Has the shortest range. | |||
*Mainly combo filler. | |||
---- | |||
'''M version:''' | |||
*Has average range. | |||
---- | |||
'''H version:''' | |||
*Travels the farthest. | |||
}} | }} | ||
}} | }} | ||
====== <font style="visibility:hidden" size="0">Stand | ====== <font style="visibility:hidden" size="0">Stand 214X</font> ====== | ||
{{MoveData | {{MoveData | ||
|image= | |image=JJASBR_Josuke_Part_8_Stand_214X.png | ||
|caption= | |caption= | ||
|name=I gotta win this! | |||
|input=214L/M/H | |||
|name= | |||
|input= | |||
|data= | |data= | ||
{{AttackData-ASBR | {{AttackData-ASBR | ||
|version=Light | |version=Light | ||
|damage= | |damage=55 | ||
|guard=Mid | |guard=Mid | ||
|startup= | |startup= | ||
| Line 813: | Line 851: | ||
|blockadv= | |blockadv= | ||
|hitadv= | |hitadv= | ||
|description= | |description= | ||
}} | }} | ||
{{AttackData-ASBR | {{AttackData-ASBR | ||
|version=Medium | |version=Medium | ||
|header=no | |header=no | ||
|damage= | |damage=55 | ||
|guard=Mid | |guard=Mid | ||
|startup= | |startup= | ||
| Line 827: | Line 864: | ||
|hitadv= | |hitadv= | ||
|description= | |description= | ||
}} | }} | ||
{{AttackData-ASBR | {{AttackData-ASBR | ||
|version=Heavy | |version=Heavy | ||
|header=no | |header=no | ||
|damage= | |damage=55 | ||
|guard=Mid | |guard=Mid | ||
|startup= | |startup= | ||
| Line 840: | Line 876: | ||
|hitadv= | |hitadv= | ||
|description= | |description= | ||
*Travels the farthest | Soft & Wet attacks with a turning kick. | ||
*Different versions alter the distance covered by Soft & Wet. | |||
*Stand Rush-compatible. | |||
*Launches on hit. | |||
---- | |||
'''L version:''' | |||
*Has the shortest range. | |||
*Mainly combo filler. | |||
---- | |||
'''M version:''' | |||
*Has average range. | |||
---- | |||
'''H version:''' | |||
*Travels the farthest. | |||
}} | }} | ||
}} | }} | ||
</div> | </div> | ||
==System Mechanics== | ==System Mechanics== | ||
====== <font style="visibility:hidden" size="0">Throw</font> ====== | ====== <font style="visibility:hidden" size="0">Throw</font> ====== | ||
| Line 859: | Line 910: | ||
|damage=130 | |damage=130 | ||
|guard=Throw | |guard=Throw | ||
|startup= | |startup=7 | ||
|active= | |active= | ||
|recovery= | |recovery= | ||
| Line 865: | Line 916: | ||
|hitadv= | |hitadv= | ||
|description= | |description= | ||
Soft & Wet knocks the opponent off-balance with a bubble, with Josuke following up with a knee strike. | |||
*Leaves the opponent directly in front of Josuke. | |||
*Both Throws are identical aside from direction. | *Both Throws are identical aside from direction. | ||
*Can be followed up by 3H OTG. | *Can be followed up by 3H OTG. | ||
}} | }} | ||
| Line 879: | Line 931: | ||
|data= | |data= | ||
{{AttackData-ASBR | {{AttackData-ASBR | ||
|damage= | |damage=30 (2*15) | ||
|guard=Low, Mid | |guard=Low, Mid | ||
|startup= | |startup= | ||
| Line 887: | Line 939: | ||
|hitadv= | |hitadv= | ||
|description= | |description= | ||
Josuke slides and spins around. | |||
*Assault Assist Stocks: 2 | *Assault Assist Stocks: 2 | ||
*Reversal Assist Stocks: 1 | *Reversal Assist Stocks: 1 | ||
*Based on [[JoJo's Bizarre Adventure: All-Star Battle R/Josuke Higashikata (Part 8)#236X|236H]] | *Based on [[JoJo's Bizarre Adventure: All-Star Battle R/Josuke Higashikata (Part 8)#236X|236H]] | ||
*As the first hit is a | *As the first hit is a Low, this can be used to set up hard-to-blockable situations. | ||
}} | }} | ||
}} | }} | ||
| Line 904: | Line 957: | ||
|data= | |data= | ||
{{AttackData-ASBR | {{AttackData-ASBR | ||
|damage= | |damage=0 | ||
|guard= | |guard= | ||
|startup= | |startup= | ||
| Line 912: | Line 965: | ||
|hitadv= | |hitadv= | ||
|description= | |description= | ||
(Un)Summons Soft | (Un)Summons Soft & Wet, altering Josuke's moveset and abilities. | ||
}} | }} | ||
}} | }} | ||
| Line 937: | Line 990: | ||
|description= | |description= | ||
Josuke sends forth a bubble, stealing the opponent's vision on hit. | Josuke sends forth a bubble, stealing the opponent's vision on hit. | ||
* | *Activation is a projectile that covers halfscreen. | ||
* | *Invincible on startup, allowing it to plow through an opponent's Reversal Assist. | ||
*Causes crumple on hit. | |||
*Notably among HHAs, its recovery can be Flash Canceled on hit. | |||
}} | }} | ||
}} | }} | ||
| Line 945: | Line 1,000: | ||
{{MoveData | {{MoveData | ||
|image=JJASBR_Josuke_Part_8_GHA_(1).png | |image=JJASBR_Josuke_Part_8_GHA_(1).png | ||
|caption= | |caption=''Soft & Wet. Pop!'' | ||
|image2=JJASBR_Josuke_Part_8_GHA_(2).png | |image2=JJASBR_Josuke_Part_8_GHA_(2).png | ||
|caption2= | |caption2=''I just stole the friction from your body.'' | ||
|image3=JJASBR_Josuke_Part_8_GHA_(3).png | |image3=JJASBR_Josuke_Part_8_GHA_(3).png | ||
|caption3= | |caption3=''Just slide away.'' | ||
|name=Soft | |name=Soft & Wet | ||
|input=236L+M+H | |input=236L+M+H | ||
|data= | |data= | ||
| Line 962: | Line 1,017: | ||
|hitadv= | |hitadv= | ||
|description= | |description= | ||
Josuke throws a bubble at the opponent stealing their friction, | Josuke throws a bubble at the opponent, stealing their friction. On a successful hit, Soft & Wet starts throwing out a barrage of punches that finishes with the opponent sliding away. | ||
* | *Activation is a projectile that covers fullscreen. | ||
*Can be combo'd from HHA | *Has slight tracking properties. | ||
*Can be combo'd into from HHA. | |||
*Among the lowest damaging GHAs in the game. | |||
}} | }} | ||
}} | }} | ||
Revision as of 13:20, 24 February 2023
Introduction
- This article is about the character from Part 8, JoJolion, primarily known as "Josuke 8". For information about the character from Part 4, Diamond is Unbreakable, see Josuke Higashikata (Part 4).
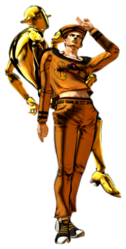
The primary protagonist of JoJolion, the eighth part of JoJo's Bizarre Adventure, Josuke Higashikata is a character who gains momentum by utilizing a variety of powerful okizeme setups. Josuke specializes in strong strike-throw pressure, and uses deceptive mobility to start high damage combos that lead to dangerous hard knockdown situations.
His playstyle in Stand Off revolves around closing the gap in mid-range and starting his oki setups. "So slippery!" hits Low and travels far, making it very effective at catching opponents off guard. Also, while not as good a neutral tool, "Don't mess with me." has upper-body invincibility frames, allowing Josuke to dash through even multi-hitting projectiles (i.e. Kakyoin's Emerald Splash, Narancia's bullets, Risotto's scalpels, etc.). "How to use the bubbles..." is his primary okizeme tool, creating a wall of bubbles that surround Josuke; using this move after a knockdown (such as his Throw) greatly limits the opponent's options on wake-up.
In Stand On, his gameplan is focused on applying strong pressure using his long-range normals. s.5H in particular is plus on block, allowing for easy stagger pressure.
- Link Combos: Josuke is able to link from special moves into normals much more easily than other characters, being able to juggle at both midscreen and in the corner.
|
|
|
| Pros | Cons |
|
|
Stats
| Style | Health | Low Health Mode | Hashtag(s) |
|---|---|---|---|
| Stand | 1000 | Rumble | #ASBR_GAP #ASBR_JSK8 |
Move List
Stand Off
Normal Moves
5L
5L
|
|---|
5M
5M
|
|---|
5H
5H
|
|---|
2L
2L
|
|---|
2M
2M
|
|---|
2H
2H
|
|---|
3H
3H
Don't screw with me! |
|---|
JL
j.L
|
|---|
JM
j.M
|
|---|
JH
j.H
|
|---|
Special Moves
236X
So slippery!
236L/M/H |
|---|
236X-6X
Zero Friction
236L/M/H > 6L/M/H |
|---|
623X
Don't mess with me.
623L/M/H |
|---|
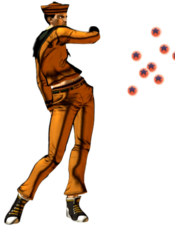
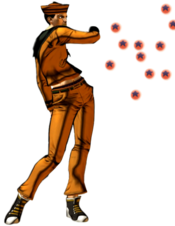
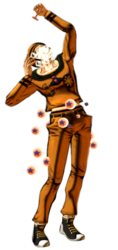
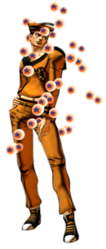
214X
Let me take that from you. 214L/M/H Light Light Medium Medium Heavy Heavy
|
|---|
22X
How to use the bubbles...
22L/M/H |
|---|
Stand On
Normal Moves
Stand 5L
5L
|
|---|
Stand 5M
5M
|
|---|
Stand 5H
5H First Punch First Punch Second Punch Second Punch
|
|---|
Stand 2L
2L
|
|---|
Stand 2M
2M
|
|---|
Stand 2H
2H
|
|---|
Stand JL
j.L
|
|---|
Stand JM
j.M
|
|---|
Stand JH
j.H First Punch First Punch Second Punch Second Punch
|
|---|
Special Moves
Stand 236X
The hell is your problem?!
236L/M/H |
|---|
Stand 623X
Don't try anything funny!
623L/M/H |
|---|
Stand 214X
I gotta win this!
214L/M/H |
|---|
System Mechanics
Throw
Throw
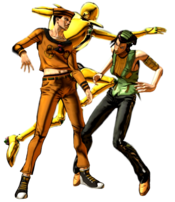
I've taken your friction. 5/4 + Any Two Attack Buttons |
|---|
Assist
Assist
So slippery! |
|---|
5S
Stand On/Off 5S Stand On Stand On Stand Off Stand Off
|
|---|
Heart Heat Attack
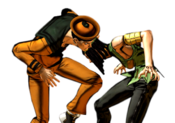
I can steal your vision. 236 + Any Two Attack Buttons Can't actually steal your vision. Can't actually steal your vision.
|
|---|
Great Heat Attack
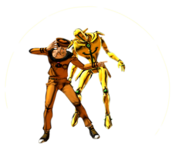
Soft & Wet 236L+M+H Soft & Wet. Pop! Soft & Wet. Pop! I just stole the friction from your body. I just stole the friction from your body. Just slide away. Just slide away.
|
|---|
