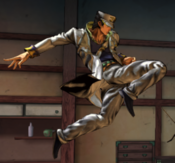
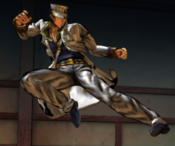
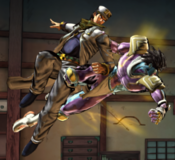
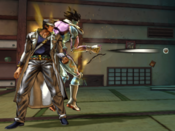
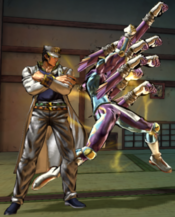
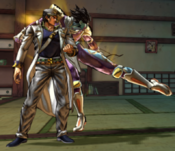
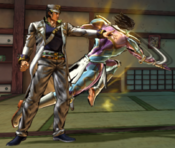
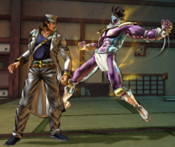
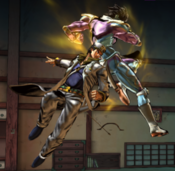
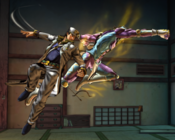
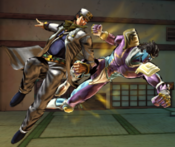
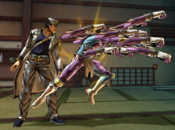
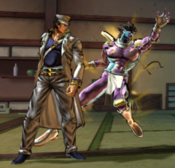
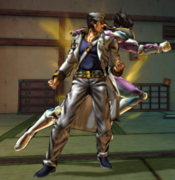
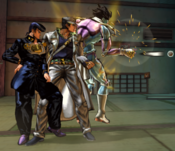
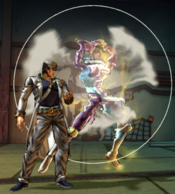
JoJo's Bizarre Adventure: All-Star Battle R/Jotaro Kujo (Part 4): Difference between revisions

From Mizuumi Wiki
Jump to navigation Jump to search
No edit summary
(Undo revision 288367 by GunBlaze (talk))
Tag: Undo
Line 4: Line 4:
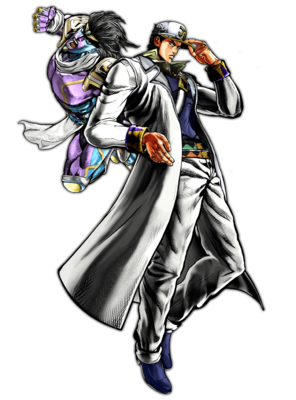
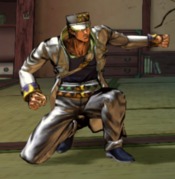
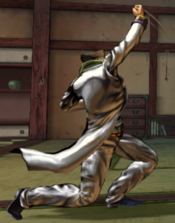
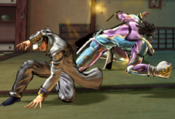
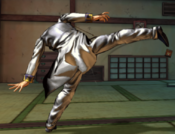
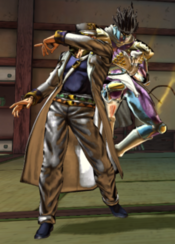
In his incarnation as a major character in ''Diamond is Unbreakable'', the fourth part of ''JoJo's Bizarre Adventure'', Jotaro Kujo mellows out and takes on the role of a mentor, though his ferocity still remains. These aspects are shown through his moveset in this form, being an all-rounder with one or two tricks under his sleeve.


Moving through Jotaro's moveset piece by piece, the first thing to note are his great normals, which are backed by pretty solid frame data that stays pretty consistent between modes. Jotaro's light normals allows him to get quick counter-pokes against gaps in pressure, with [[JoJo's Bizarre Adventure: All-Star Battle R/Jotaro Kujo (Part 4)#Stand 5L|s.5L]] being noteworthy due to its impressive range compared to other characters' equivalents. Buttons like [[JoJo's Bizarre Adventure: All-Star Battle R/Jotaro Kujo (Part 4)#5H|5H]] and [[JoJo's Bizarre Adventure: All-Star Battle R/Jotaro Kujo (Part 4)#2H|2H]] serve as good pokes/counter-pokes too, with [[JoJo's Bizarre Adventure: All-Star Battle R/Jotaro Kujo (Part 4)#Stand 5H|their Stand On]] [[JoJo's Bizarre Adventure: All-Star Battle R/Jotaro Kujo (Part 4)#Stand 2H|counterparts]] basically being strict upgrades. He has access to one of the best buttons in the game in [[JoJo's Bizarre Adventure: All-Star Battle R/Jotaro Kujo (Part 4)#Stand 2L|s.2L]]: a very quick normal boasting phenomenal range that enables a solid strike/throw gameplan, since it can be canceled into itself and leads to incredible stagger pressure from distances other characters could only dream of. As for aerials, buttons like [[JoJo's Bizarre Adventure: All-Star Battle R/Jotaro Kujo (Part 4)#JM|j.M]] and [[JoJo's Bizarre Adventure: All-Star Battle R/Jotaro Kujo (Part 4)#Stand JL|s.jL]] serve as great air-to-airs (and both can cross up if need be), while both [[JoJo's Bizarre Adventure: All-Star Battle R/Jotaro Kujo (Part 4)#JH|j.H]] and [[JoJo's Bizarre Adventure: All-Star Battle R/Jotaro Kujo (Part 4)#Stand JH|s.jH]] shine when used as jump-ins, since they cover a lot of space and are very active. Both of his command normals, [[JoJo's Bizarre Adventure: All-Star Battle R/Jotaro Kujo (Part 4)#3H|3H]] and [[JoJo's Bizarre Adventure: All-Star Battle R/Jotaro Kujo (Part 4)#Stand 3H|s.3H]], serve as fundamental combo starters in their respective modes as they can lead into anti-air conversions from the rest of Jotaro's normals, which is a strong privilege to have.
The first thing to notice are his beefy normals. In Stand Off, [[JoJo's Bizarre Adventure: All-Star Battle R/Jotaro Kujo (Part 4)#5H|5H]] is a great move in general, acting as a decent anti-air, a good wall, and a solid poke all at once; [[JoJo's Bizarre Adventure: All-Star Battle R/Jotaro Kujo (Part 4)#2H|2H]] is amazing as well, being an incredibly quick normal that knocks down; [[JoJo's Bizarre Adventure: All-Star Battle R/Jotaro Kujo (Part 4)#3H|3H]] launches and can be combo'd out of with Quick Stand On; and [[JoJo's Bizarre Adventure: All-Star Battle R/Jotaro Kujo (Part 4)#JH|j.H]] is a godly air-to-air, having a massive lingering hitbox that can catch people where it really shouldn't. Stand On normals further compliment this, since they have amazing range and easily set up combos: [[JoJo's Bizarre Adventure: All-Star Battle R/Jotaro Kujo (Part 4)#Stand 2H|s.2H]] is even better, having more range yet similar framedata than its Stand Off counterpart; [[JoJo's Bizarre Adventure: All-Star Battle R/Jotaro Kujo (Part 4)#Stand 3H|s.3H]] becomes a horizontal wall; and [[JoJo's Bizarre Adventure: All-Star Battle R/Jotaro Kujo (Part 4)#Stand JM|s.jM]] is a solid air-to-air.


As for special moves, Jotaro's kit has different purposes depending on his current mode. In Stand Off, Jotaro's toolkit leans into a more passive playstyle, with "[[JoJo's Bizarre Adventure: All-Star Battle R/Jotaro Kujo (Part 4)#236X|If I throw this bearing...]]" being a solid projectile to pester opponents from long range and even leading into conversions depending on Jotaro's distance with the opponent; "[[JoJo's Bizarre Adventure: All-Star Battle R/Jotaro Kujo (Part 4)#214X|Star Finger]]" is a poke and pressure tool with respectable range, considerable Guard Damage, and strong frame advantage, while also allowing meterless extensions in a variety of routings; and "[[JoJo's Bizarre Adventure: All-Star Battle R/Jotaro Kujo (Part 4)#623X|I'm going to break you into pieces.]]" mainly serves as combo filler near walls, since its slow startup makes it unreliable as a dedicated anti-air. In Stand On, on the other hand, Jotaro's toolset switches to a more aggressive focus: "[[JoJo's Bizarre Adventure: All-Star Battle R/Jotaro Kujo (Part 4)#Stand 236X|ORA ORA!]]" is a persistent hitbox with [[JoJo's Bizarre Adventure: All-Star Battle R/Jotaro Kujo (Part 4)#Stand 236X-6X|a variety of follow-ups]] that enables strong pressure on block, can be used as an anti-air against dash-jumps and even leads into combos; "[[JoJo's Bizarre Adventure: All-Star Battle R/Jotaro Kujo (Part 4)#Stand 236X|So I'm gonna bust you up!]]" serves as a solid command grab with amazing range, allowing Jotaro to open up opponents who like to play very defensively and turtle; and "[[JoJo's Bizarre Adventure: All-Star Battle R/Jotaro Kujo (Part 4)#Stand 22X|Where'd all that time go?]]" is a teleport that allows for coversions from incredible ranges and lets him control space extraordinarily well.
As for special moves, Jotaro's kit has different purposes depending on his current state. In Stand Off, Jotaro's toolkit revolves around space control, with access to a projectile in "[[JoJo's Bizarre Adventure: All-Star Battle R/Jotaro Kujo (Part 4)#236X|If I throw this bearing...]]", a powerful anti-air in "[[JoJo's Bizarre Adventure: All-Star Battle R/Jotaro Kujo (Part 4)#623X|I'm going to break you into pieces.]]", and a potent combo extender in "[[JoJo's Bizarre Adventure: All-Star Battle R/Jotaro Kujo (Part 4)#214X|Star Finger]]". Stand On's tools, on the other hand, have more offensive/mix-up purposes, with "[[JoJo's Bizarre Adventure: All-Star Battle R/Jotaro Kujo (Part 4)#Stand 236X|ORA ORA!]]" being a persistent hitbox that features [[JoJo's Bizarre Adventure: All-Star Battle R/Jotaro Kujo (Part 4)#Stand 236X-6X|several follow-ups]], the ability to teleport with "[[JoJo's Bizarre Adventure: All-Star Battle R/Jotaro Kujo (Part 4)#Stand 22X|Where'd all that time go?]]", and a long-ranged command grab in "[[JoJo's Bizarre Adventure: All-Star Battle R/Jotaro Kujo (Part 4)#Stand 236X|So I'm gonna bust you up!]]".


Jotaro's versatility is paid with a price, however: very slow mobility and a near-complete lack of reversal options, which makes him a very momentum-based character and leaves him heavily reliant on universal mechanics. Adding on to this, Jotaro's strongest tools are only present while in Stand On, so if the opponent manages to get a lead and/or maintains constant pressure, there's not a lot Jotaro can do on his own. Jotaro thrives when playing from ahead, but struggles with playing from behind, so finding balance between his passive and aggressive tools is key to succeeding with this character.
Jotaro's versatility is paid with a price, however: his ability to convert off of stray air hits in neutral is lacking without spending his resources. While there are ways to play around it, his biggest threat comes into play when close to the opponent, a deceptively hard task to achieve due to his telegraphed approach options; his teleport is a strong tool, but it is limited by requiring both meter and Stand On. This issue also extends to his attacks: while possessing rather large hitboxes, they are marred by their absence of air convertibility. He mainly suffers, however, due to a very weak okizeme game and a lack of meterless defensive tools, making it easy for the opponent to take his momentum away.


*'''[[JoJo's Bizarre Adventure: All-Star Battle R/Jotaro Kujo (Part 4)#22S|Star Platinum, The World!]]''': Jotaro is one of four characters in the game (along with his [[JoJo's Bizarre Adventure: All-Star Battle R/Jotaro Kujo (Part 3)|younger incarnation]], [[JoJo's Bizarre Adventure: All-Star Battle R/DIO|DIO]], and [[JoJo's Bizarre Adventure: All-Star Battle R/Alternate World Diego|AW Diego]]) with the ability to stop time, rendering the opponent completely unable to act. It is similar to Axl Low's "One Vision" Overdrive from ''Guilty Gear -Strive-''.
Line 15: Line 15:
| intro = [[file:JJASBR_Jotaro_Part_4_Small_Icon.png|50px]] '''Jotaro Kujo (Part 4)''' is a Stand character who controls space with strong normals and a balanced toolkit.
| intro = [[file:JJASBR_Jotaro_Part_4_Small_Icon.png|50px]] '''Jotaro Kujo (Part 4)''' is a Stand character who controls space with strong normals and a balanced toolkit.
| pros =
| pros =
* '''Versatile:''' Jotaro's toolkit features tools that gives him options at any range, granting him varied offenses. This includes [[JoJo's Bizarre Adventure: All-Star Battle R/Jotaro Kujo (Part 4)#236X|a good projectile to zone with]], [[JoJo's Bizarre Adventure: All-Star Battle R/Jotaro Kujo (Part 4)#Stand 22X|a teleport to anti-zone with]], [[JoJo's Bizarre Adventure: All-Star Battle R/Jotaro Kujo (Part 4)#Stand 63214X|a command grab to open the opponent up]], and [[JoJo's Bizarre Adventure: All-Star Battle R/Jotaro Kujo (Part 4)#Stand 236X|a rekka with a variety of useful options]].
* '''Versatile:''' Jotaro's toolkit features tools that allow him to shine at any range, including a projectile, a beefy anti-air and a self-contained mix-up option.
* '''Beefy Normals:''' Both in Stand Off and Stand On, Jotaro has access to a very strong set of normals. Notable examples include [[JoJo's Bizarre Adventure: All-Star Battle R/Jotaro Kujo (Part 4)#JM|j.M]] (a strong cross-up tool), [[JoJo's Bizarre Adventure: All-Star Battle R/Jotaro Kujo (Part 4)#Stand 2L|s.2L]] (one of the longest and fastest low pokes in the game), [[JoJo's Bizarre Adventure: All-Star Battle R/Jotaro Kujo (Part 4)#Stand JL|s.jL]] (one of the fastest air-to-airs in the game), and [[JoJo's Bizarre Adventure: All-Star Battle R/Jotaro Kujo (Part 4)#Stand 3H|s.3H]] (a very powerful command normal that serves both as a safe poke and a great combo starter).
* '''Beefy Normals:''' Jotaro's normals possess deceptively large hitboxes, allowing him to contest opponents and land confirms in ways that would fail for most characters. Similarly, Stand On normals boast range that can feel oppressive to uninitiated opponents.
* '''Meter Battery:''' Most of Jotaro's combos are meter neutral at worst, very meter positive at best, and they don't cost much to start. This allows him to constantly have meter to use his teleport, while still saving meter for his high damage routes and [[JoJo's Bizarre Adventure: All-Star Battle R/Jotaro Kujo (Part 4)#22S|Time Stop]] setups.
* '''Big Damage:''' Jotaro can deal high damage without using up many resources.
* '''Overwhelming Vortex:''' Thanks to his teleport and ability to reset juggle height with a groundbounce, Jotaro has a very potent vortex. This typically loops between a strike/throw scenario, with a left/right aspect thrown on top with his teleport. Jotaro also sets this vortex up off of his command grab and Throw, which allows him to loop constant oki on the opponent from a variety of setups.
* '''Teleport:''' With access to a teleport, Jotaro can reach his opponent in a flash, notably giving him a strong option against zoners.
  |cons =
  |cons =
* '''Poor Defense:''' Jotaro's anti-airs are very inconsistent, forcing him to rely on universal mechanics like Stylish Evade and Stylish Guard against airborne opponents. Combined with his lack of an invincible reversal beyond [[JoJo's Bizarre Adventure: All-Star Battle R/Jotaro Kujo (Part 4)#Great Heat Attack|GHA]], he is left open to setups that other characters could potentially escape.
* '''Weak Air Conversions:''' Although Jotaro has huge buttons to hit the opponent out of the air with, he lacks a reliable way to be able to convert off of those hits. His most consistent anti-air, "[[JoJo's Bizarre Adventure: All-Star Battle R/Jotaro Kujo (Part 4)#623X|I'm going to break you into pieces.]]", requires Jotaro to use a resource of some kind to be able to convert off of it.
* '''Terrible Movement Speed:''' Regardless of his current mode, Jotaro possesses some of the worst mobility in the game. While his teleport can make up for this in regards to approaches, Jotaro's ability to evade attacks on short notice is severely limited as a result (especially while in Stand On due to his larger hurtboxes).
* '''Midscreen Preference:''' "[[JoJo's Bizarre Adventure: All-Star Battle R/Jotaro Kujo (Part 4)#214X|Star Finger]]" loops tends to fail by the wall, making them inconsistent and removing some of his strongest combo routes. While this can be mitigated by running under the opponent during the combo, it increases the chances for the combo to drop nonetheless.
* '''Poor Defense:''' Jotaro's best pokes tend to be lacking when used defensively, mostly due to their high recovery. Combined with his lack of an invincible reversal beyond [[JoJo's Bizarre Adventure: All-Star Battle R/Jotaro Kujo (Part 4)#Great Heat Attack|GHA]], he is left open to setups that other characters could potentially escape.
* '''Poor Oki:''' Jotaro does not have many tools that force opponents to block after a knockdown. In addition, most of his meterless, Stand Off routes also send the opponent far away, further limiting his options.
| tablewidth = 80
| tablewidth = 80
}}
}}
Line 57: Line 59:
  |hitadv=
  |hitadv=
  |description=
  |description=
Jotaro attacks with a high jab in front of him.
Jotaro attacks with a high jab in front of him.  
*Can hit crouchers despite its height.
*Good for stopping the opponent's jumps, and can also be converted from after anti-airing the opponent with use of [[JoJo's Bizarre Adventure: All-Star Battle R/Jotaro Kujo (Part 4)#3H|3H]].
  }}
  }}
}}
}}
Line 80: Line 81:
  |description=
  |description=
Jotaro does a downwards kick with the tip of his boot.
*Moves Jotaro forward.
*Moves Jotaro forward during startup.
*A rare standing Low, making it a deceptive tool.
*Mainly used as combo filler/combo ender.
*Slow recovery. Always cancel into another move when it connects.
*Very slow recovery. Always cancel into another move when it connects.
  }}
  }}
}}
}}
Line 105: Line 105:
Jotaro quickly summons Star Platinum, who attacks with an uppercut.  
*Massive hitbox; can easily hit people above him.
*Can also hit crouchers despite its height.
*Hits crouchers.
  }}
  }}
}}
}}
Line 126: Line 126:
  |description=
  |description=
Jotaro attacks with a crouching backfist strike.
*Very stubby.
*Easy way to confirm as it combos into itself.
*Mainly used as a means to 50/50 between strike/throw.
*Good combo filler, and can be used to stabilize certain routes.
  }}
  }}
}}
}}
Line 149: Line 147:
  |description=
  |description=
Jotaro attacks with a crouching uppercut.
*Despite its appearance, it does not work well as an anti-air.
*Deceptively short vertical reach, often needing to be delayed in order to connect.
*Mainly used as combo filler/combo stabilizing, as it makes "[[JoJo's Bizarre Adventure: All-Star Battle R/Jotaro Kujo (Part 4)#214X|Star Finger]]" loops work near walls.
*As an anti-air, tends to clash at best and flat out lose at worst.
*Great combo tool, however, as it makes "[[JoJo's Bizarre Adventure: All-Star Battle R/Jotaro Kujo (Part 4)#214X|Star Finger]]" loops more consistent.
  }}
  }}
}}
}}
Line 193: Line 192:
  |description=
  |description=
Jotaro steps forward and delivers a high side kick.
*Launches opponents away on hit.
*Launches the opponent on hit.
*Jotaro's main combo starter when canceled into Quick Stand On.
*One of Jotaro's main ways to Quick Stand On.
*Fast enough to connect and convert into combos from anti-airing with normals, leading into "[[JoJo's Bizarre Adventure: All-Star Battle R/Jotaro Kujo (Part 4)#214X|Star Finger]]".
*Sends opponents high enough for 3H>623H to connect midscreen.
  }}
  }}
}}
}}
Line 216: Line 215:
  |description=
  |description=
Jotaro attacks with his knee.
*Jotaro's fastest aerial while in Stand Off, but has a deceptively bad hitbox.
*Good air-to-air button when up close with the opponent.
*Can cross up.
*Can manage to hit as a cross-up, but has poor range overall.
  }}
  }}
}}
}}
Line 238: Line 237:
  |description=
  |description=
Jotaro extends his leg diagonally downwards, retracting it after a moment.
*Great move for air-to-airs and jump-ins.
*Great air button for air-to-air battles and for jump-ins.
*Can cross up, making it Jotaro's prime jump-in.
*Doubles as Jotaro's main cross-up button, but its few active frames can make this difficult.
  }}
  }}
}}
}}
Line 260: Line 259:
  |description=
  |description=
Jotaro summons Star Platinum, who attacks with a downward punch.
*A deceptively large forward hitbox makes it a very good option to catch opponents backdashing.
*Although a bit slow, its deceptively large hitbox and high amount of active frames make this the prime jump-in.
*Mainly used as combo filler, however, due to having issues hitting opponents directly below Jotaro.
  }}
  }}
}}
}}
Line 310: Line 308:
*The version used changes the number of bearings fired.
*The final bearing launches opponents away.
*Limited to 9 ball bearings on-screen during [[JoJo's Bizarre Adventure: All-Star Battle R/Jotaro Kujo (Part 4)#22S|Time Stop]].
*Limited to 9 ball bearings on-screen during [[JoJo's Bizarre Adventure: All-Star Battle R/Jotaro Kujo (Part 4)#22S|Time Stop]]; will all combine if there is enough distance between them and the opponent when time resumes.
**All existing ball bearings will combine if there is enough distance between them and the opponent when time resumes.
----
----
'''L version:'''
'''L version:'''
Line 369: Line 366:
  |hitadv=KD
  |hitadv=KD
  |description=
  |description=
Jotaro crosses his arms while summoning Star Platinum, who rapidly punches upwards.
Jotaro crosses his arms while summoning Star Platinum, who punches upwards rapidly.
*The amount of hits changes depending on the version used.
*Startup and amount of hits depend on the version used.
*Launches opponents away on hit.
*Fantastic combo tool when near the walls.
*Fantastic combo tool when near the walls, and is the the main combo ender when paired with HHA.
----
----
'''L version:'''
'''L version:'''
*Deals the least amount of damage.
*Fastest startup with the least damage.
*Often outclassed by other versions while still being too slow to be a reliable anti-air.
*Main anti-air.
----
----
'''M version:'''
'''M version:'''
*Has some niche uses in combos along the wall.
*Balanced startup and range.
*Has an unusual Flash Cancel window, only allowing its use after the final hit.
*Cannot be Flash Canceled on whiff.
----
----
'''H version:'''
'''H version:'''
*Deals the most amount of damage.
*Slowest startup with the most damage.
*Has an unusual Flash Cancel window, only allowing its use after the final hit.
*Cannot be Flash Canceled on whiff.
*The main version used, since it still allows for meterless combo extensions when near the wall.
*Despite its high recovery, a delayed HHA Cancel after this move will still connect.
  }}
  }}
}}
}}
Line 434: Line 428:
*Startup, launch height and pull force (both on hit and block) all change on the version used, inversely affecting recovery.  
*The second hit launches the opponent and causes hard knockdown.
*Fast enough to serve as a combo extender and loop into itself once.
*If blocked, the first hit deals considerable Guard Damage, while the second hit pulls the opponent towards Jotaro.
----
----
Line 492: Line 487:
  |description=
  |description=
Star Platinum strikes with a quick sideways chop.
*Has good range, making it a good counter-poke.
*Medium normal, meaning it gives some of the best possible scaling for a combo on hit if it connects.
*Deceptive hitbox, allowing for cheesy Counter Hit openings from a distance the opponent may not expect.
  }}
  }}
}}
}}
Line 534: Line 530:
  |description=
  |description=
While crouching, Star Platinum performs a quick low kick.
*Jotaro's main crouching poke in Stand On, with s.2L > s.3H working even at max range.
*Main crouching poke in Stand On due to its reduced hurtbox and the fact that it hits Low.
*Has EXTRAORDINARY range for a move of its type, enabling a good strike/throw game since it can be canceled into itself.
  }}
  }}
}}
}}
Line 556: Line 551:
  |description=
  |description=
Star Platinum attacks with a crouching uppercut.
*Improved vertical reach compared to the Stand Off version, so it can be used as an anti-air option against forward jumps.
*Improved vertical reach compared to the Stand Off version, although it can potentially miss against dash-jumps.
*Has a lot of pushback on hit and block, making it risky to use over s.5M in grounded chains.
  }}
  }}
}}
}}
Line 571: Line 565:
  |damage=36
  |damage=36
  |guard=Low
  |guard=Low
  |startup=12
  |startup=
  |active=
  |active=
  |recovery=
  |recovery=
Line 599: Line 593:
  |description=
  |description=
Star Platinum moves a great distance forward and delivers a downwards punch.
*The second hit launches the opponent away on hit, and causes a hard knockdown.
*The second hit launches the opponent away and causes a hard knockdown.
*Jotaro's main combo starter, either used by itself or when paired with a poke (mainly s.2L), due to its incredible range and startup.
*Fast enough to combo from [[JoJo's Bizarre Adventure: All-Star Battle R/Jotaro Kujo (Part 4)#Stand 236|236L/M/H]] > [[JoJo's Bizarre Adventure: All-Star Battle R/Jotaro Kujo (Part 4)#Stand 236-6X|6L]], and from [[JoJo's Bizarre Adventure: All-Star Battle R/Jotaro Kujo (Part 4)#Stand 236|236L/M/H]] > [[JoJo's Bizarre Adventure: All-Star Battle R/Jotaro Kujo (Part 4)#Stand 236-6X|6M]] against airborne opponents.
*If this move connects, Jotaro can cancel into [[JoJo's Bizarre Adventure: All-Star Battle R/Jotaro Kujo (Part 4)#Stand 22X|s.22L/M]] to convert into a combo, regardless of distance.
*If this move connects, Jotaro can cancel into [[JoJo's Bizarre Adventure: All-Star Battle R/Jotaro Kujo (Part 4)#Stand 22X|s.22L/M]] to convert into a combo.
*Fast enough to connect and convert into combos from anti-airing with normals, as well [[JoJo's Bizarre Adventure: All-Star Battle R/Jotaro Kujo (Part 4)#Stand 236|236L/M/H]] > [[JoJo's Bizarre Adventure: All-Star Battle R/Jotaro Kujo (Part 4)#Stand 236-6X|6L]], but is mainly used to pick up after [[JoJo's Bizarre Adventure: All-Star Battle R/Jotaro Kujo (Part 4)#Stand 236|236L/M/H]] > [[JoJo's Bizarre Adventure: All-Star Battle R/Jotaro Kujo (Part 4)#Stand 236-6X|6M]].
*Because of the angle it launches opponents, it can be used to set up a [[JoJo's Bizarre Adventure: All-Star Battle R/Jotaro Kujo (Part 4)#22S|Time Stop]] if cancelled immediately into it (and if used with 3 HH Gauges).
  }}
  }}
}}
}}
Line 623: Line 617:
  |description=
  |description=
Star Platinum extends its leg downwards.
*One of the fastest aerials in the game, and thus a very strong air-to-air.
*Jotaro's best answer against opponents below him.
*Jotaro's best answer against opponents below him, and can even cross up.
  }}
  }}
}}
}}
Line 645: Line 638:
  |description=
  |description=
Star Platinum punches straight ahead.
*Fastest air-to-air.
*Can hit grounded opponents.
*Mainly used as a means to bait Stylish Guard, but is otherwise is outclassed by both s.jL and s.jH when it comes to air-to-airs and jump-ins.
  }}
  }}
}}
}}
Line 668: Line 661:
Star Platinum attacks with a downward punch.
*Essentially Stand Off j.H but with slightly more range.
*The main jump-in button while in Stand On due to its massive hitbox.
*Star Platinum's model shifts upwards slightly when landing from this move.
  }}
  }}
}}
}}

Revision as of 14:44, 4 November 2023

Introduction

This article is about Jotaro Kujo's Diamond is Unbreakable incarnation, primarily known as "Jotaro 4". For information about his Stardust Crusaders incarnation, see Jotaro Kujo (Part 3).

In his incarnation as a major character in Diamond is Unbreakable, the fourth part of JoJo's Bizarre Adventure, Jotaro Kujo mellows out and takes on the role of a mentor, though his ferocity still remains. These aspects are shown through his moveset in this form, being an all-rounder with one or two tricks under his sleeve.

The first thing to notice are his beefy normals. In Stand Off, 5H is a great move in general, acting as a decent anti-air, a good wall, and a solid poke all at once; 2H is amazing as well, being an incredibly quick normal that knocks down; 3H launches and can be combo'd out of with Quick Stand On; and j.H is a godly air-to-air, having a massive lingering hitbox that can catch people where it really shouldn't. Stand On normals further compliment this, since they have amazing range and easily set up combos: s.2H is even better, having more range yet similar framedata than its Stand Off counterpart; s.3H becomes a horizontal wall; and s.jM is a solid air-to-air.

As for special moves, Jotaro's kit has different purposes depending on his current state. In Stand Off, Jotaro's toolkit revolves around space control, with access to a projectile in "If I throw this bearing...", a powerful anti-air in "I'm going to break you into pieces.", and a potent combo extender in "Star Finger". Stand On's tools, on the other hand, have more offensive/mix-up purposes, with "ORA ORA!" being a persistent hitbox that features several follow-ups, the ability to teleport with "Where'd all that time go?", and a long-ranged command grab in "So I'm gonna bust you up!".

Jotaro's versatility is paid with a price, however: his ability to convert off of stray air hits in neutral is lacking without spending his resources. While there are ways to play around it, his biggest threat comes into play when close to the opponent, a deceptively hard task to achieve due to his telegraphed approach options; his teleport is a strong tool, but it is limited by requiring both meter and Stand On. This issue also extends to his attacks: while possessing rather large hitboxes, they are marred by their absence of air convertibility. He mainly suffers, however, due to a very weak okizeme game and a lack of meterless defensive tools, making it easy for the opponent to take his momentum away.

  • Star Platinum, The World!: Jotaro is one of four characters in the game (along with his younger incarnation, DIO, and AW Diego) with the ability to stop time, rendering the opponent completely unable to act. It is similar to Axl Low's "One Vision" Overdrive from Guilty Gear -Strive-.
Playstyle
JJASBR Jotaro Part 4 Small Icon.png Jotaro Kujo (Part 4) is a Stand character who controls space with strong normals and a balanced toolkit.
Pros Cons
  • Versatile: Jotaro's toolkit features tools that allow him to shine at any range, including a projectile, a beefy anti-air and a self-contained mix-up option.
  • Beefy Normals: Jotaro's normals possess deceptively large hitboxes, allowing him to contest opponents and land confirms in ways that would fail for most characters. Similarly, Stand On normals boast range that can feel oppressive to uninitiated opponents.
  • Big Damage: Jotaro can deal high damage without using up many resources.
  • Teleport: With access to a teleport, Jotaro can reach his opponent in a flash, notably giving him a strong option against zoners.
  • Weak Air Conversions: Although Jotaro has huge buttons to hit the opponent out of the air with, he lacks a reliable way to be able to convert off of those hits. His most consistent anti-air, "I'm going to break you into pieces.", requires Jotaro to use a resource of some kind to be able to convert off of it.
  • Midscreen Preference: "Star Finger" loops tends to fail by the wall, making them inconsistent and removing some of his strongest combo routes. While this can be mitigated by running under the opponent during the combo, it increases the chances for the combo to drop nonetheless.
  • Poor Defense: Jotaro's best pokes tend to be lacking when used defensively, mostly due to their high recovery. Combined with his lack of an invincible reversal beyond GHA, he is left open to setups that other characters could potentially escape.
  • Poor Oki: Jotaro does not have many tools that force opponents to block after a knockdown. In addition, most of his meterless, Stand Off routes also send the opponent far away, further limiting his options.

Stats

Style Health Low Health Mode Hashtag(s)
Stand 1000 Rumble #ASBR_4JO
#ASBR_JTR4

Move List

JJASBR User Icon.png
JJASBR Stand Icon.png

Stand Off

Normal Moves

5L
5L
JJASBR Jotaro Part 4 5L.png
Damage Guard Startup Active Recovery Block Adv. Hit Adv.
14 Mid 4 - - -2 -

Jotaro attacks with a high jab in front of him.

  • Can hit crouchers despite its height.
5M
5M
JJASBR Jotaro Part 4 5M.png
As Jotaro matured, so did his command normal
Damage Guard Startup Active Recovery Block Adv. Hit Adv.
18 Low 8 3 29 -18 -

Jotaro does a downwards kick with the tip of his boot.

  • Moves Jotaro forward during startup.
  • A rare standing Low, making it a deceptive tool.
  • Slow recovery. Always cancel into another move when it connects.
5H
5H
JJASBR Jotaro Part 4 5H.png
A giant button that's great for any scenario
Damage Guard Startup Active Recovery Block Adv. Hit Adv.
37 Mid 10 3 25 -10 -

Jotaro quickly summons Star Platinum, who attacks with an uppercut.

  • Massive hitbox; can easily hit people above him.
  • Hits crouchers.
2L
2L
JJASBR Jotaro Part 4 2L.png
Damage Guard Startup Active Recovery Block Adv. Hit Adv.
13 Low 6 - - -2 -

Jotaro attacks with a crouching backfist strike.

  • Easy way to confirm as it combos into itself.
2M
2M
JJASBR Jotaro Part 4 2M.png
Anti-airing Low
Anti-airing Low
Damage Guard Startup Active Recovery Block Adv. Hit Adv.
22 Low 6 5 15 -6 -

Jotaro attacks with a crouching uppercut.

  • Deceptively short vertical reach, often needing to be delayed in order to connect.
  • As an anti-air, tends to clash at best and flat out lose at worst.
  • Great combo tool, however, as it makes "Star Finger" loops more consistent.
2H
2H
JJASBR Jotaro Part 4 2H.png
Damage Guard Startup Active Recovery Block Adv. Hit Adv.
35 Low 12 - - -8 HKD

Jotaro summons Star Platinum to attack with a crouching fist.

  • Causes hard knockdown.
  • Very low recovery for an attack of its type.
3H
3H
Just shut up!
JJASBR Jotaro Part 4 3H.png
Damage Guard Startup Active Recovery Block Adv. Hit Adv.
24 Mid 12 5 35 -22 KD

Jotaro steps forward and delivers a high side kick.

  • Launches the opponent on hit.
  • One of Jotaro's main ways to Quick Stand On.
  • Sends opponents high enough for 3H>623H to connect midscreen.
JL
j.L
JJASBR Jotaro Part 4 Jump L.png
Damage Guard Startup Active Recovery Block Adv. Hit Adv.
16 Overhead 8 - - - -

Jotaro attacks with his knee.

  • Good air-to-air button when up close with the opponent.
  • Can manage to hit as a cross-up, but has poor range overall.
JM
j.M
JJASBR Jotaro Part 4 Jump M.png
Damage Guard Startup Active Recovery Block Adv. Hit Adv.
21 Overhead 10 - - - -

Jotaro extends his leg diagonally downwards, retracting it after a moment.

  • Great air button for air-to-air battles and for jump-ins.
  • Doubles as Jotaro's main cross-up button, but its few active frames can make this difficult.
JH
j.H
JJASBR Jotaro Part 4 Jump H.png
Criminal
Criminal
Damage Guard Startup Active Recovery Block Adv. Hit Adv.
37 Overhead 14 - - - -

Jotaro summons Star Platinum, who attacks with a downward punch.

  • Although a bit slow, its deceptively large hitbox and high amount of active frames make this the prime jump-in.

Special Moves

236X
If I throw this bearing...
236L/M/H
JJASBR Jotaro Part 4 236X.png
Version Damage Guard Startup Active Recovery Block Adv. Hit Adv.
Light 20 Mid 18 - - -6 KD
Medium 40 (20*2) Mid 22 - - -10 KD
Heavy 60 (20*3) Mid 24 - - -16 KD

Jotaro summons Star Platinum and commands it to fire ball bearings at high speed.

  • The version used changes the number of bearings fired.
  • The final bearing launches opponents away.
  • Limited to 9 ball bearings on-screen during Time Stop; will all combine if there is enough distance between them and the opponent when time resumes.

L version:

  • Jotaro fires a single bearing.
  • The most commonly used version due to having the least amount of recovery in neutral.

M version:

  • Jotaro fires two bearings.
  • Sees use in certain combos so as to stabilize an HHA Cancel at certain distances.
  • When used in neutral, the second bearing usually whiffs against airborne opponents.

H version:

  • Jotaro fires three bearings.
  • Bearings beyond the first one usually whiff against airborne opponents, leading to the opponent teching out and leaving Jotaro vulnerable.
623X
I'm going to break you into pieces.
623L/M/H
JJASBR Jotaro Part 4 623X.png
Version Damage Guard Startup Active Recovery Block Adv. Hit Adv.
Light 36 (4*5, 16) Mid 20 - - -16 KD
Medium 49 (4*7, 21) Mid 20 - - -16 KD
Heavy 62 (4*9, 26) Mid 20 - - -20 KD

Jotaro crosses his arms while summoning Star Platinum, who punches upwards rapidly.

  • Startup and amount of hits depend on the version used.
  • Fantastic combo tool when near the walls.

L version:

  • Fastest startup with the least damage.
  • Main anti-air.

M version:

  • Balanced startup and range.
  • Cannot be Flash Canceled on whiff.

H version:

  • Slowest startup with the most damage.
  • Cannot be Flash Canceled on whiff.
214X
Star Finger
214L/M/H
JJASBR Jotaro Part 4 214X.png
Version Damage Guard Startup Active Recovery Block Adv. Hit Adv.
Light 41 (26, 15) Mid 34 1(11)5 15 0 HKD
Medium 43 (26, 17) Mid 38 1(11)5 11 +4 HKD
Heavy 46 (26, 20) Mid 44 1(11)5 9 +6 HKD

Jotaro summons Star Platinum, who extends its fingers out to pierce the opponent and pull them.

  • Startup, launch height and pull force (both on hit and block) all change on the version used, inversely affecting recovery.
  • The second hit launches the opponent and causes hard knockdown.
  • Fast enough to serve as a combo extender and loop into itself once.
  • If blocked, the first hit deals considerable Guard Damage, while the second hit pulls the opponent towards Jotaro.

L version:

  • Leaves the opponent mostly in place.
  • Pulls the opponent the least on block.

M version:

  • Launches the opponent towards Jotaro.
  • Pulls the opponent more on block.

H version:

  • Launches the opponent even more strongly towards Jotaro.
  • Pulls the opponent the most on block.

Stand On

Normal Moves

Stand 5L
5L
JJASBR Jotaro Part 4 Stand 5L.png
Damage Guard Startup Active Recovery Block Adv. Hit Adv.
15 Mid 4 - - -2 -

Star Platinum performs a low kick.

  • Does not hit Low, despite appearances.
  • HUGE reach for a Light Attack.
Stand 5M
5M
JJASBR Jotaro Part 4 Stand 5M.png
Damage Guard Startup Active Recovery Block Adv. Hit Adv.
25 Mid 6 3 15 -4 -

Star Platinum strikes with a quick sideways chop.

  • Medium normal, meaning it gives some of the best possible scaling for a combo on hit if it connects.
  • Deceptive hitbox, allowing for cheesy Counter Hit openings from a distance the opponent may not expect.
Stand 5H
5H
JJASBR Jotaro Part 4 Stand 5H.png
Damage Guard Startup Active Recovery Block Adv. Hit Adv.
37 High 10 3 19 -4 -

Star Platinum attacks with an uppercut.

  • Essentially Stand Off 5H but with even more range, making it a solid poke and anti-air option.
Stand 2L
2L
JJASBR Jotaro Part 4 Stand 2L.png
Damage Guard Startup Active Recovery Block Adv. Hit Adv.
13 Low 6 - - -2 -

While crouching, Star Platinum performs a quick low kick.

  • Main crouching poke in Stand On due to its reduced hurtbox and the fact that it hits Low.
Stand 2M
2M
JJASBR Jotaro Part 4 Stand 2M.png
The OTHER anti-airing Low
Damage Guard Startup Active Recovery Block Adv. Hit Adv.
23 Low 6 5 15 -6 -

Star Platinum attacks with a crouching uppercut.

  • Improved vertical reach compared to the Stand Off version, although it can potentially miss against dash-jumps.
Stand 2H
2H
JJASBR Jotaro Part 4 Stand 2H.png
Damage Guard Startup Active Recovery Block Adv. Hit Adv.
36 Low - - - -8 -

While crouching, Star Platinum strikes with a quick sideways chop.

  • Causes hard knockdown.
Stand 3H
3H
ORAAAA!
JJASBR Jotaro Part 4 Stand 3H.png
It has four "A"s
It has four "A"s
Damage Guard Startup Active Recovery Block Adv. Hit Adv.
44 (18, 26) Mid 12 5 21 -4 -

Star Platinum moves a great distance forward and delivers a downwards punch.

  • The second hit launches the opponent away and causes a hard knockdown.
  • Fast enough to combo from 236L/M/H > 6L, and from 236L/M/H > 6M against airborne opponents.
  • If this move connects, Jotaro can cancel into s.22L/M to convert into a combo.
  • Because of the angle it launches opponents, it can be used to set up a Time Stop if cancelled immediately into it (and if used with 3 HH Gauges).
Stand JL
j.L
JJASBR Jotaro Part 4 Stand Jump L.png
Damage Guard Startup Active Recovery Block Adv. Hit Adv.
18 Overhead 6 - - - -

Star Platinum extends its leg downwards.

  • Jotaro's best answer against opponents below him.
Stand JM
j.M
JJASBR Jotaro Part 4 Stand Jump M.png
Damage Guard Startup Active Recovery Block Adv. Hit Adv.
27 Overhead 10 - - - -

Star Platinum punches straight ahead.

  • Fastest air-to-air.
  • Can hit grounded opponents.
Stand JH
j.H
JJASBR Jotaro Part 4 Stand Jump H.png
Damage Guard Startup Active Recovery Block Adv. Hit Adv.
38 Overhead 14 - - - -

Star Platinum attacks with a downward punch.

  • Essentially Stand Off j.H but with slightly more range.
  • Star Platinum's model shifts upwards slightly when landing from this move.

Special Moves

Stand 236X
ORA ORA!
236L/M/H
JJASBR Jotaro Part 4 Stand 236X.png
Version Damage Guard Startup Active Recovery Block Adv. Hit Adv.
Light 64 (4, 5*10, 10) Mid 16 - - -12 -
Medium 64 (4, 5*10, 10) Mid 16 - - -12 -
Heavy 64 (4, 5*10, 10) Mid 16 - - -16 -

Star Platinum unleashes a barrage of punches.

  • The distance covered by Star Platinum depends on the version used.
  • Leaves grounded opponents standing, while leaving airborne opponents mostly in place.
  • Cannot be Flash Canceled, but can be canceled into an HHA.

L version:

  • Star Platinum doesn't move at all.

M version:

  • Star Platinum moves a bit further, though still remaining close to Jotaro.

H version:

  • Star Platinum moves even further, though still remaining close to Jotaro.
Stand 236X-6X
ORAAA!
236L/M/H > 6L/M/H
JJASBR Jotaro Part 4 Stand 236X-6L.png
Light
Light
JJASBR Jotaro Part 4 Stand 236X-6M.png
Medium
Medium
JJASBR Jotaro Part 4 Stand 236X-6H.png
Heavy
Heavy
That's three "A"s
That's three "A"s
Version Damage Guard Startup Active Recovery Block Adv. Hit Adv.
Light 20 Mid 10 - - -4 KD
Medium 30 Overhead 20 - - -16 Groundbounce
Heavy 60 Low 12 - - -8 HKD

Star Platinum winds up and delivers a finishing punch.

  • The attack is determined by the version used.
  • The version of "ORA ORA" used prior can alter the range of these moves.

L version:

Star Platinum extends a slight bit and follows up with an uppercut.

  • Launches on hit.
  • The only Stand Rush-compatible attack in Jotaro's moveset; a quintessential combo piece because of this.

M version:

Star Platinum swings down with a slow overhead punch.

  • Causes a groundbounce on hit.
  • Cannot be Flash Canceled, but can be canceled into an HHA.
  • Will combo from "ORA ORA", and will catch opponents attempting to jump out.
  • Against grounded opponents, it can be converted into a combo with a launching Assist, such as Jonathan.
  • If it hits an airborne opponent, Jotaro can pick up a combo with s.3H > s.22L/M.

H version:

Star Platinum attacks with a crouching fist, visually similar to Stand Off 2H.

  • Causes hard knockdown.
    • Because of its knockdown, canceling into HHA will not connect if used against grounded opponents.
  • Reliable ender to finish off a string.
Stand 22X
Where'd all that time go?
236L/M/H > 4L/M/H
or
22L/M/H
JJASBR Jotaro Part 4 Stand 22X.png
Version Damage Guard Startup Active Recovery Block Adv. Hit Adv.
Light - - - - Total 28 - -
Medium - - - - Total 28 - -
Heavy - - - - Total 28 - -

Star Platinum briefly stops time and, alongside Jotaro, "teleports" to another location.

  • The point where Jotaro and Star Platinum reappear depends on the version used.
  • Requires 0.2 HH Gauge to be used.
  • When chained into from "ORA ORA":
    • Requires 0.4 HH Gauge to be used.
    • Total move duration is reduced by 4 frames.
  • Mainly used to pick up a combo after s.3H.

L version:

  • Teleports in front of the opponent.

M version:

  • Teleports behind the opponent unless their back is against the wall.

H version:

  • Jotaro teleports backwards (about two characters away).
Stand 63214X
So I'm gonna bust you up!
63214L/M/H
JJASBR Jotaro Part 4 Stand 63214X (1).png
JJASBR Jotaro Part 4 Stand 63214X (2).png
Version Damage Guard Startup Active Recovery Block Adv. Hit Adv.
Light 95 (15, 10*6, 20) Throw 20 - - - HKD
Medium 120 (15, 10*8, 25) Throw 22 - - - HKD
Heavy 145 (15, 10*10, 30) Throw 24 - - - HKD

Star Platinum moves forward and extends its hand to grab the opponent. If successful, Star Platinum will pick them up and punch them several times before knocking them away.

  • How far Star Platinum moves, as well as how far the opponent ends up, depend on the version used.
  • Launches the opponent away and causes hard knockdown on a successful Throw.
  • A ranged command grab that grants Jotaro an option to open up the opponent from a fair distance away. This can catch the opponent by surprise at ranges his standard Throw won't connect.

L version:

  • Shortest range, fastest recovery.
  • Leaves the opponent close to Jotaro.

M version:

  • Intermediate startup and recovery.
  • Leaves the opponent far from Jotaro.

H version:

  • Longest range, slowest recovery.
  • Leaves the opponent much farther from Jotaro.

System Mechanics

Throw
Throw
UUORA!
5/4 + Any Two Attack Buttons
JJASBR Jotaro Part 4 Throw (1).png
JJASBR Jotaro Part 4 Throw (2).png
Damage Guard Startup Active Recovery Block Adv. Hit Adv.
140 Throw 6 3 - - -

Star Platinum picks the opponent up and slams them into the ground.

  • In Stand Off, Back Throw leaves the opponent closer to Jotaro.
  • In Stand On, Back Throw leaves the opponent significantly closer than Forward Throw.
  • Regardless of the version used, Jotaro's Throws slightly rotate the axis.
Assist
JJASBR Jotaro Part 4 Assist.png
Damage Guard Startup Active Recovery Block Adv. Hit Adv.
60 (20*3) Mid - - - - -

Jotaro summons Star Platinum and commands it to fire 3 ball bearings at high speed.

  • Assault Assist Stocks: 2
  • Reversal Assist Stocks: 1
  • Based on 236H.
  • The final hit launches opponents away.
  • As a projectile assist, Jotaro can be used to briefly empower zoning maneuvers, play around neutral or disrupt opponents who try to activate an install.
5S
Stand On/Off
5S
JJASBR Jotaro Part 4 Stand On.png
Stand On
Stand On
JJASBR Jotaro Part 4 Stand Off.png
Stand Off
Stand Off
Damage Guard Startup Active Recovery Block Adv. Hit Adv.
- - - - - - -

(Un)Summons Star Platinum, altering Jotaro's moveset and abilities.

22S
Star Platinum, The World!
22S
JJASBR Jotaro Part 4 22S (1).png
JJASBR Jotaro Part 4 22S (2).png
JJASBR Jotaro Part 4 22S (3).png
Damage Guard Startup Active Recovery Block Adv. Hit Adv.
- - 202~103 - - - -

After a lenghty startup, Jotaro stops time, freezing the stage effects, the battle timer, and the opponent.

  • Requires 1.5 HH Gauges to be used; startup accelerates if 3 HH Gauges have been accumulated before use.
  • Starting a cutscene with a Throw, an HHA or a GHA will instantly end the Time Stop and take away the rest of Jotaro's meter.
  • Projectiles fired by "If I throw this bearing..." hang in the air during the Time Stop.
  • Damage dealt to the opponent during the Time Stop is reduced. When the ability ends and time resumes, the opponent will suffer all damage dealt to them at once.
  • All attacks can OTG during Time Stop, restanding the opponent if they can reach. This allows setting up for juggles post Time Stop, although normal IPS rules will still apply.
  • After the Time Stop ends, there is a ~5 second period where Jotaro cannot gain any HH Gauge (with Akira's Assist providing the only exception).
  • Against Jotaro (Part 3), DIO, AW Diego, and himself, Jotaro can use this ability to move within their Time Stop for the minimum requirement of 1 HH Gauge. If their Time Stop runs out before Jotaro's does, they will be frozen instead.

Heart Heat Attack

I'm going to break it... And by "it," I mean your face.
236 + Any Two Attack Buttons
JJASBR Jotaro Part 4 HHA (1).png
JJASBR Jotaro Part 4 HHA (2).png
JJASBR Jotaro Part 4 HHA (3).png
Damage Guard Startup Active Recovery Block Adv. Hit Adv.
215 (45+5*20+70) Mid - - - - -

Star Platinum flies a moderate distance forward to throw a heavy punch. If it connects, Star Platinum unleashes a barrage of punches on the opponent before knocking them away.

  • Its great range, along with Jotaro's meter efficiency, make this the go-to ender in low-resource combos.
  • Not very useful as a defensive option due to very low invulnerability.

Great Heat Attack

I hate things that are a pain in the ass...
236L+M+H
JJASBR Jotaro Part 4 GHA (1).png
JJASBR Jotaro Part 4 GHA (2).png
JJASBR Jotaro Part 4 GHA (3).png
Damage Guard Startup Active Recovery Block Adv. Hit Adv.
325 (40+2*38+15+2*74+46) Mid - - - - -

Star Platinum flies a short distance forward to throw a heavy downwards punch. On a successful hit, Star Platinum proceeds to viciously pummel the opponent before sending them flying.

  • Deceptive vertical range.

Costumes

Normal (Color 1)
Normal (Color 2)
Normal (Color 3)
Normal (Color 4)

Navigation

General
FAQ
Controls
Stages
HUD
System
Esoterics
Character Data
Patch Notes
Glossary
JJASBR Part 1 Emblem.png
Phantom Blood
Jonathan
Zeppeli
Speedwagon
Dio Brando
JJASBR Part 2 Emblem.png
Battle Tendency
Joseph
Caesar
Lisa Lisa
Stroheim
Wamuu
Esidisi
Kars
JJASBR Part 3 Emblem.png
Stardust Crusaders
Jotaro (Part 3)
Old Joseph
Avdol
Kakyoin
Polnareff
Iggy
Hol Horse
Mariah
Pet Shop
Vanilla Ice
DIO
JJASBR Part 4 Emblem.png
Diamond is Unbreakable
Josuke (Part 4)
Jotaro (Part 4)
Koichi
Okuyasu
Yukako
Rohan
Shigechi
Yuya
Keicho
Akira
Kira
Kosaku
JJASBR Part 5 Emblem.png
Vento Aureo
Giorno
Bucciarati
Mista
Narancia
Fugo
Trish
Abbacchio
Prosciutto
Ghiaccio
Risotto
Diavolo
JJASBR Part 6 Emblem.png
Stone Ocean
Jolyne
Ermes
Foo Fighters
Anasui
Weather
Pucci (WS)
Pucci (Final)
JJASBR Part 7 Emblem.png
Steel Ball Run
Johnny
Gyro
Diego
AW Diego
Valentine
JJASBR Part 8 Emblem.png
JoJolion
Josuke (Part 8)
Wonder of U
Baoh the Visitor
Baoh