|
|
| Line 1: |
Line 1: |
| {{ASBR Character Subnav|char=WS Pucci|short=wsp|sub=1}} | | {{ASBR Character Intro|char=Keicho|short=kei|content= |
| :<big>{{Disclaimer-CommunityWritten}}</big>
| | ==Introduction== |
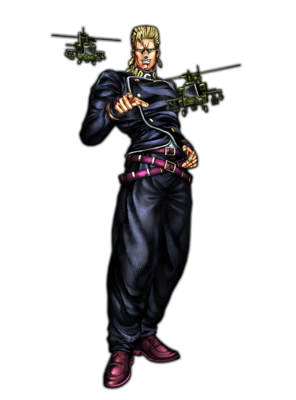
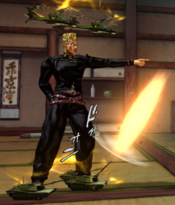
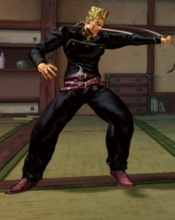
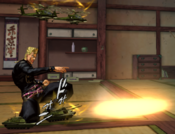
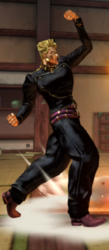
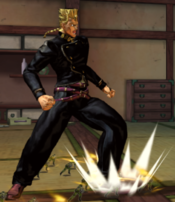
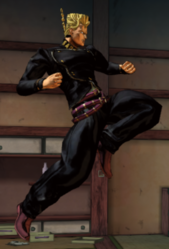
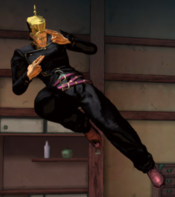
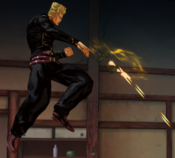
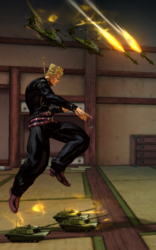
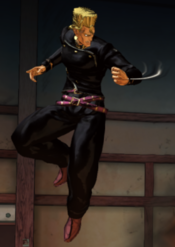
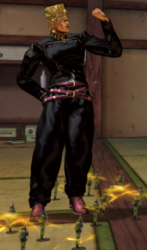
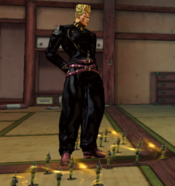
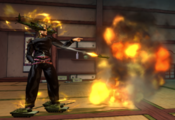
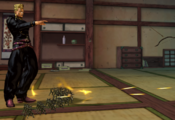
| == Neutral == | | Making his debut in ''Diamond is Unbreakable'', the fourth part of ''JoJo's Bizarre Adventure'', Keicho Nijimura is one of the few dedicated setplay characters in ''All-Star Battle R'', using projectiles and traps to lock down his opponent for big damage. |
| ===Stand Off===
| |
| Pucci has an extremely threatening neutral game against the vast majority of the roster, particularly while in Stand Off. Among his most notorious tools in this mode are his [[JoJo's Bizarre Adventure: All-Star Battle R/Enrico Pucci (Whitesnake)#5M|5M]], [[JoJo's Bizarre Adventure: All-Star Battle R/Enrico Pucci (Whitesnake)#JH|j.H]], and his "[[JoJo's Bizarre Adventure: All-Star Battle R/Enrico Pucci (Whitesnake)#236X|I order you!]]" projectile.
| |
|
| |
|
| 5M is a fast kick at 6 frames, sporting deceptively good range and generous active frames for clipping opponents. This easily makes it his best button and main method of persuading opponents to block when grounded, as refusing to respect this normal is a death sentence due to the ease at which it forces blocking and leads to a seamless transition into mix-ups. The Light version of "[[JoJo's Bizarre Adventure: All-Star Battle R/Enrico Pucci (Whitesnake)#623X|A Stand power that can boil water...]]" becomes another strong option in neutral once the opponent has learned to fear the repercussions of disrespecting 5M. It is also worth noting that [[JoJo's Bizarre Adventure: All-Star Battle R/Enrico Pucci (Whitesnake)#2M|2M]], which has identical startup but slightly worse range than 5M, is a solid Low option against opponents who default to block while standing in preparation of Pucci pressing 5M.
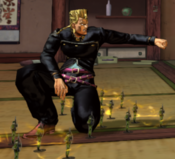
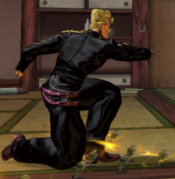
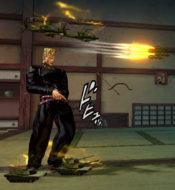
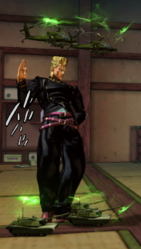
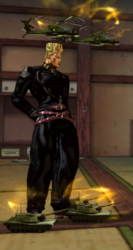
| | *'''Bad Company''': Keicho can switch between Infantry and Helicopters/Tanks formations, altering his abilities. |
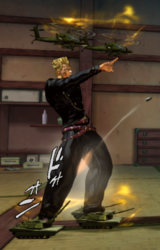
| | *'''[[JoJo's Bizarre Adventure: All-Star Battle R/Keicho Nijimura#HT 22S|All units, halt!]]''': While in Helicopters/Tanks formation, Keicho can command his Stand to remain in place and attack automatically, granting him free movement while being covered. |
|
| |
|
| A smart player will attempt to use jump-ins as a means to avoid Pucci's grounded approach. This is where j.H comes in: an 8 frame aerial that serves as his main deterrent for jumping due to its groundbounce property, which allows for combo follow-ups on airborne opponents and favorable trades on air-to-air exchanges. It also sports a generous hitbox that makes it conducive to clipping opponents caught recklessly throwing out grounded neutral tools. Though Pucci's floaty jump arc can make it easier for attentive players to anti-air or Stylish Guard on reaction, the extra height allows him to outright jump over and punish certain projectiles that other characters may struggle to avoid/punish. Though not particularly crucial to his gameplan, it is worth mentioning that [[JoJo's Bizarre Adventure: All-Star Battle R/Enrico Pucci (Whitesnake)#JM|j.M]] has a solid cross-up hitbox, though his floaty jump arc often makes it reactable and logistically difficult to utilize offensively. The primary use for j.M is in conjunction with neutral jumps to float over dash-jump attempts. Regardless of whether the opponent lands in front of or behind you, it will generally hit and allow for a punish on the way down.
| | {{StrengthsAndWeaknesses |
| | | intro = [[file:JJASBR_Keicho_Small_Icon.png|50px]] '''Keicho Nijimura''' is a Stand character who ambushes his opponent from all angles with calculated precision. |
| | | pros = |
| | * '''Disjointed Offense:''' Several of Keicho's attacks are either disjointed or considered projectiles, granting him very good priority on his attacks. His unique attack structure also allows him to challenge Stylish Evade/Stylish Guard in ways that other characters cannot. |
| | * '''Zoning/Setplay Synergy:''' Keicho's projectiles can be deployed in several angles at once, allowing him to cover both horizontal and vertical planes with his zoning, as well as limit the opponent's escape routes while potentially remaining safe. |
| | *'''Rulebreaker:''' Keicho's projectiles will still deploy during a Flash Cancel, and most will not disengage if another projectile is used. Furthermore, all of them can be chained into his unique "Maintain Battle Formation" ability, resulting in a neutral game that is both strange and very difficult to deal with. |
| | |cons = |
| | * '''Slow Start:''' While powerful, all of Keicho's projectiles possess very high startup, limiting their use in neutral and pressure situations without proper setup and awareness. |
| | * '''Difficulty:''' Many of Keicho's more optimal routes are both fairly difficult and quite unorthodox due to the way many of his combo tools work. |
| | * '''Flawed Defense:''' When Keicho loses the advantage, he can struggle to regain his turn against consistent, safe pressure. While having access to an invincible reversal in "[[JoJo's Bizarre Adventure: All-Star Battle R/Keicho Nijimura#623X|Stop spacing out, you dumbass!]]", it features several flaws that render it a subpar defensive option (most notably, very short range in general). |
| | | tablewidth = 80 |
| | }} |
|
| |
|
| "I order you!" is one of the better single-hit projectiles in the game, even if fairly straightforward in a vacuum. Its main strength lies in the varying travel speeds afforded by the different versions of the move: the projectile speed is slowest for the Light version, medium speed for the Medium version, and fastest for the Heavy version (with its recovery also increasing to match). This projectile serves as his main form of keepout and provide him with a degree of screen control against opponents who habitually dance outside of his 5M/dash-jump range. Though a single projectile is fairly easy to deal with on its own, constantly mixing up the travel speeds can create projectile patterns that require some thought to deal with:
| | ===Bad Company=== |
| | Keicho's Stand, Bad Company, is always active, separating him from other Stand characters and resulting in unique interactions with his moveset. |
|
| |
|
| *Throwing the Light version followed by the Heavy version will cause the second projectile to follow closely behind the first.
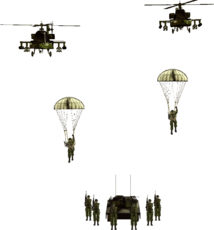
| | Keicho can switch between '''Infantry''' and '''Helicopters/Tanks''', two formations that change some of his attacks. In addition to changing his Heavy normals (with the exception of [[JoJo's Bizarre Adventure: All-Star Battle R/Keicho Nijimura#3H|3H]]), most of Keicho's Special Moves (the sole exception being "[[JoJo's Bizarre Adventure: All-Star Battle R/Keicho Nijimura#623X|Stop spacing out, you dumbass!]]") change based on his currently active formation: |
| *Alternatively, throwing two Light versions in a row may cause the second projectile to punish opponents who fail to recognize its speed attempting to Stylish Guard the second projectile.
| |
| *Even delaying your projectile throws between uses is a viable strategy to further confuse the opponent.
| |
|
| |
|
| The projectile also possesses some more esoteric properties: due to its lingering hitbox, when thrown near the sidewall, the opponent sometimes must Stylish Guard it twice (or move forward after the first Stylish Guard). Also worth noting is that a poorly timed use can sometimes save Pucci from well-timed jump-ins as the projectile will blast opponents away on hit, even if the animation is partially interrupted by an aerial button. Despite its main function as a long-range tool, it also excels as a mid-range tool when combined with Flash Cancels: the screen freeze afforded by it allows Pucci to use this as a non-committal neutral option and act accordingly. If the opponent is visibly jumping, Pucci has time to run under them and punish the landing. If the opponent is running forward and clearly can't stop in time to avoid getting hit, then Pucci can begin advancing forward for a follow-up combo. If the opponent is clearly going to use a Stylish Guard against the projectile, Pucci has time to acknowledge this and safely block or retreat.
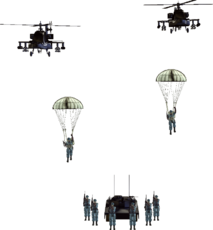
| | *'''Infantry''' grants access to "[[JoJo's Bizarre Adventure: All-Star Battle R/Keicho Nijimura#INF 236X|All units, charge!]]", "[[JoJo's Bizarre Adventure: All-Star Battle R/Keicho Nijimura#INF 214X|A bunch of guys are falling...]]", and "[[JoJo's Bizarre Adventure: All-Star Battle R/Keicho Nijimura#INF 22X|A l-landmine?!]]". |
| | *'''Helicopters/Tanks''' grants access to "[[JoJo's Bizarre Adventure: All-Star Battle R/Keicho Nijimura#HT 236X|Commence attack!]]", "[[JoJo's Bizarre Adventure: All-Star Battle R/Keicho Nijimura#HT 214X|Fire missiles!]]", and "[[JoJo's Bizarre Adventure: All-Star Battle R/Keicho Nijimura#HT 22S|All units, halt!]]". |
|
| |
|
| ===Stand On===
| | As part of this unique distinction, some of Keicho's Special Moves can be chained into "Maintain Battle Formation", a variant of Stand Rush exclusive to him. Keicho is allowed to use this ability in both formations, switching from one to the other upon use. However, if moves from both formations are present on the screen at the same time, it cannot be used until one of the moves ends. Just like Stand Rush, this ability costs Keicho 0.5 HH Gauge to use, but unlike it, Keicho is allowed to block and use other moves involving his Stand while it attacks. |
| Due to the impressively versatile toolkit Pucci sports while in Stand Off, it is generally recommended to play neutral with said moveset while using knockdowns or [[JoJo's Bizarre Adventure: All-Star Battle R/System#Uses of the Heart Heat Gauge|Quick Stand On]] as a means to transition into Stand On for more threatening pressure. That being said, Pucci has some very respectable neutral tools in this mode as well.
| |
|
| |
|
| For instance, [[JoJo's Bizarre Adventure: All-Star Battle R/Enrico Pucci (Whitesnake)#Stand 5L|s.5L]] is an extremely fast button with range far eclipsing its Stand Off counterpart, confirming into [[JoJo's Bizarre Adventure: All-Star Battle R/Enrico Pucci (Whitesnake)#Stand 5M|s.5M]] even at max range. It also sports a very generous hitbox against airborne opponents (dash-jumps in particular), making it the go-to button while in Stand On for poking opponents in neutral. Neither s.5M or [[JoJo's Bizarre Adventure: All-Star Battle R/Enrico Pucci (Whitesnake)#Stand 5H|s.5H]] cover a particularly good range for their startup; [[JoJo's Bizarre Adventure: All-Star Battle R/Enrico Pucci (Whitesnake)#Stand 2H|s.2H]], however, covers quite a bit of distance and is useful for clipping opponents trying to outspace your s.5L attempts. Though s.2H only leads into a hard knockdown, Pucci can use the Heavy version of "[[JoJo's Bizarre Adventure: All-Star Battle R/Enrico Pucci (Whitesnake)#Stand 214X|You shall be crucified!]]" to OTG the opponent afterwards, providing a little more damage and more consistent oki. The last grounded button worth mentioning is [[JoJo's Bizarre Adventure: All-Star Battle R/Enrico Pucci (Whitesnake)#Stand 3H|s.3H]], a rather slow multi-hitting move that causes crumple on hit and has the unique property of being cancelable into special moves on whiff. This move mainly serves as a combo extender, but the potential reward and ability to cancel a whiffed s.3H into any of his counterttacks ("[[JoJo's Bizarre Adventure: All-Star Battle R/Enrico Pucci (Whitesnake)#Stand 22X|It's an illusion.]]" and [[JoJo's Bizarre Adventure: All-Star Battle R/Enrico Pucci (Whitesnake)#Great Heat Attack|GHA]]) make it an occasionally decent gimmick to bait reckless opponents. Habitually using s.3H in neutral is not a sustainable strategy and should only be used sparingly.
| | ===Stats=== |
| | {{CharacterData-ASBR |
| | | style = Stand |
| | | health = 900 |
| | | lowhealth = Rumble |
| | | hashtag = [https://twitter.com/hashtag/ASBR_KEI?src=hashtag_click #ASBR_KEI] |
| | }} |
| | }} |
| | ==Move List== |
| | ===Normal Moves=== |
| | ====== <font style="visibility:hidden" size="0">5L</font> ====== |
| | {{MoveData |
| | |image=JJASBR_Keicho_5L.png |
| | |caption= |
| | |name=5L |
| | |subtitle= |
| | |data= |
| | {{AttackData-ASBR |
| | |damage=13 |
| | |guard=Mid |
| | |startup=4 |
| | |active= |
| | |recovery= |
| | |blockadv=-6 |
| | |hitadv=-2 |
| | |description= |
| | Keicho attacks with an underhanded jab. |
| | *Standard jab. |
| | }} |
| | }} |
|
| |
|
| When it comes to aerial attacks, although [[JoJo's Bizarre Adventure: All-Star Battle R/Enrico Pucci (Whitesnake)#Stand JH|s.jH]] doesn't cause a groundbounce (unlike its Stand Off counterpart), Pucci's phenomenal launching [[JoJo's Bizarre Adventure: All-Star Battle R/Enrico Pucci (Whitesnake)#Stand JM|s.jM]] serves essentially the same function as a combo starter from air-to-air trades. Due to the jump-in deterrents afforded by s.5L and s.jM, it is not a bad idea to play neutral while in Stand On against particularly jump-happy opponents. The last tool in this mode worth mentioning is "It's an illusion.": a fast counterattack which forces the opponent into a crumple state upon successful activation, solidifying its utility for countering jump-ins and far-reaching normal attacks in neutral on a hard read.
| | ====== <font style="visibility:hidden" size="0">5M</font> ====== |
| | {{MoveData |
| | |image=JJASBR_Keicho_5M.png |
| | |caption= |
| | |name=5M |
| | |subtitle= |
| | |data= |
| | {{AttackData-ASBR |
| | |damage=25 |
| | |guard=Mid |
| | |startup=6 |
| | |active= |
| | |recovery= |
| | |blockadv=-10 |
| | |hitadv=-6 |
| | |description= |
| | Keicho performs a low kick. |
| | *Does not hit Low, despite appearances. |
| | }} |
| | }} |
|
| |
|
| == Offense == | | <div style="position: top: 0; display: flex; justify-content: center; background-color: #cacace;" class="movelist-toggles"> |
| One of Pucci's strengths is his ability to keep the opponent relentlessly guessing on defense. He sports several simple but effective means to open up even the most defensive opponents, the most defining element being his three command grabs — "[[JoJo's Bizarre Adventure: All-Star Battle R/Enrico Pucci (Whitesnake)#623X|A Stand power]] [[JoJo's Bizarre Adventure: All-Star Battle R/Enrico Pucci (Whitesnake)#Stand 623X|that can boil water...]]" (available in both modes) and "[[JoJo's Bizarre Adventure: All-Star Battle R/Enrico Pucci (Whitesnake)#Stand 63214X|It's mine!]]" (while in Stand On).
| | <div id="movelist-toggle-1" class="movelist-toggle-button">[[File:JJASBR_Infantry_Icon_(2).png|center|link=]]</div> |
| | <div id="movelist-toggle-2" class="movelist-toggle-button">[[File:JJASBR_Helicopter_Icon_(2).png|center|link=]]</div> |
| | <div id="movelist-toggle-3" class="movelist-toggle-button">[[file:JJASBR_Keicho_Small_Icon.png|50px|center|link=]]</div> |
| | </div> |
| | <div id="movelist-1" class="movelist"><!-- Infantry Move List --> |
| | ====== <font style="visibility:hidden" size="0">5H</font> ====== |
| | {{MoveData |
| | |image=JJASBR_Keicho_INF_5H.png |
| | |caption= |
| | |name=i.5H |
| | |subtitle= |
| | |data= |
| | {{AttackData-ASBR |
| | |damage=48 (12, 3*12) |
| | |guard=Low, Mid |
| | |startup=10 |
| | |active= |
| | |recovery= |
| | |blockadv=-10 |
| | |hitadv=-6 |
| | |description= |
| | Keicho commands Bad Company's infantry to fire their assault rifles upwards. |
| | *Hits 2-13 are considered projectiles. |
| | *The shots reach roughly max jump height. |
| | }} |
| | }} |
| | </div> |
| | <div id="movelist-2" class="movelist"><!-- Helicopters/Tanks Move List --> |
| | ====== <font style="visibility:hidden" size="0">5H</font> ====== |
| | {{MoveData |
| | |image=JJASBR_Keicho_HT_5H.png |
| | |caption= |
| | |name=ht.5H |
| | |subtitle= |
| | |data= |
| | {{AttackData-ASBR |
| | |damage=44 |
| | |guard=Mid |
| | |startup=10 |
| | |active= |
| | |recovery= |
| | |blockadv=-22 |
| | |hitadv=KD |
| | |description= |
| | Keicho commands Bad Company's tank to fire a blast upwards. |
| | *Launches on hit. |
| | *Notes 2 |
| | }} |
| | }} |
| | </div> |
| | <div id="movelist-3" class="movelist"><!-- AUT Move List --> |
| | ====== <font style="visibility:hidden" size="0">5H</font> ====== |
| | {{MoveData |
| | |image=JJASBR_Keicho_AUH_5H.png |
| | |caption= |
| | |name=aut.5H |
| | |subtitle= |
| | |data= |
| | {{AttackData-ASBR |
| | |damage=36 |
| | |guard=Mid |
| | |startup=14 |
| | |active= |
| | |recovery= |
| | |blockadv=-14 |
| | |hitadv=-8 |
| | |description= |
| | Keicho attacks with a hook. |
| | *Moves Keicho forward. |
| | *Mainly used in combos. |
| | }} |
| | }} |
| | </div> |
|
| |
|
| The Stand Off version of "[[JoJo's Bizarre Adventure: All-Star Battle R/Enrico Pucci (Whitesnake)#623X|A Stand power that can boil water...]]" leads into a crumple upon successfully connecting. From here, Pucci can either perform a combo, or chain into [[JoJo's Bizarre Adventure: All-Star Battle R/System#Uses of the Heart Heat Gauge|Quick Stand On]] and use his advantage on hit to enforce another strike/throw mix-up using his more rewarding Stand On tools; the Light version is recommended for this goal as it can be used as a [[JoJo's Bizarre Adventure: All-Star Battle R/Glossary#Tick Throw|tick throw]] from any Stand Off normal. While combo damage off the grab is fairly scaled, continuing the combo is a great means of building HH Gauge, and even becomes especially enticing against opponents at low health since Pucci can easily break 200 damage by ending such routes in [[JoJo's Bizarre Adventure: All-Star Battle R/Enrico Pucci (Whitesnake)#Heart Heat Attack|HHA]]. Alternatively, Pucci can use Quick Stand On to create a strike/throw mix-up (such as <code>623L > 5M > 5H(QSOn) > 66 s.5L</code>) utilizing his rewarding Stand On tools: after the s.5L hits, Pucci can either execute "[[JoJo's Bizarre Adventure: All-Star Battle R/Enrico Pucci (Whitesnake)#Stand 63214X|It's mine!]]" or chain into <code>s.5H > s.3H</code>. The former is a fast command grab which seals the opponent's special moves, while the latter can be used against attempts to jump or backdash on read to evade said grab for a full combo punish. While the gap in the mix-up is large enough for an opponent to use an invincible reversal and beat both options, "[[JoJo's Bizarre Adventure: All-Star Battle R/Enrico Pucci (Whitesnake)#Stand 22X|It's an illusion.]]" can be used after the s.5L to bait, counter and punish non-HHA/GHA reversal attempts.
| | ====== <font style="visibility:hidden" size="0">2L</font> ====== |
| | {{MoveData |
| | |image=JJASBR_Keicho_2L.png |
| | |caption= |
| | |name=2L |
| | |subtitle= |
| | |data= |
| | {{AttackData-ASBR |
| | |damage=13 |
| | |guard=Low |
| | |startup=6 |
| | |active= |
| | |recovery= |
| | |blockadv=-2 |
| | |hitadv=+2 |
| | |description= |
| | Keicho attacks with a crouching jab. |
| | *Standard jab. |
| | }} |
| | }} |
|
| |
|
| In Stand On, Pucci's usage of command grabs is rather straightforward. As mentioned earlier, "It's mine!" is a fast command grab which seals the opponent's special moves in the form of a DISC, which they must get back in order to regain access to their lost abilities. The Light version can tick throw from Light and Medium normals, with a slight delay being required to tick throw from s.5H. It generally isn't recommended to use the Medium and Heavy versions because they're both slower while adding only minor range increases to compensate. The Stand On version of "[[JoJo's Bizarre Adventure: All-Star Battle R/Enrico Pucci (Whitesnake)#Stand 623X|A Stand power that can boil water...]]" behaves similarly to its Stand Off counterpart, but instead of causing the opponent to crumple, they will be put into a launch state if it lands (with combo extensions being just as susceptible to damage scaling). Since landing "It's mine!" is generally considered a higher reward, this command grab is mainly used when the opponent has already had their DISC stolen. Just like its Stand Off counterpart, the Light version of this grab can be used as a tick throw from any Stand On normal.
| | ====== <font style="visibility:hidden" size="0">2M</font> ====== |
| | {{MoveData |
| | |image=JJASBR_Keicho_2M.png |
| | |caption= |
| | |name=2M |
| | |subtitle= |
| | |data= |
| | {{AttackData-ASBR |
| | |damage=21 |
| | |guard=Low |
| | |startup=6 |
| | |active= |
| | |recovery= |
| | |blockadv=-4 |
| | |hitadv=0 |
| | |description= |
| | Keicho does a crouching hook. |
| | *Fast but stubby. |
| | }} |
| | }} |
|
| |
|
| Pucci also possesses a quick Overhead in the form of "[[JoJo's Bizarre Adventure: All-Star Battle R/Enrico Pucci (Whitesnake)#214X|You shall]] [[JoJo's Bizarre Adventure: All-Star Battle R/Enrico Pucci (Whitesnake)#Stand 214X|be crucified!]]", which is accessible in both modes. While the Light version does very little damage on its own and always leads into a soft knockdown, it is still an invaluable addition to his offensive arsenal, its threat alone being a nuisance that enables Pucci to annoy opponents into making further mistakes on defense. Furthermore, Pucci's strong buttons, such as 5M and s.2L, make it very easy to continue applying pressure regardless of whether the opponent techs the soft knockdown or not. Another notable property of this version is that it is only -6 on block (with pushback), making it an extremely difficult tool to punish for most of the cast. Due to this, the move has applications as a gapless safe blockstring ender from buttons like 3H. Pucci tends to benefit more from this move while in Stand Off because of the constant threat of high/low mix-ups with either this move or Quick Stand On > s.2L at any point in a blockstring. The addition of Quick Stand On > "It's mine!" can further frustrate opponents preoccupied with guessing which way to block.
| | ====== <font style="visibility:hidden" size="0">2H</font> ====== |
| | {{MoveData |
| | |image=JJASBR_Keicho_INF_2H.png |
| | |caption=Infantry |
| | |image2=JJASBR_Keicho_HT_2H.png |
| | |caption2=Helicopters/Tanks |
| | |image3=JJASBR_Keicho_AUH_2H.png |
| | |caption3=All units, halt! |
| | |name=2H |
| | |subtitle= |
| | |data= |
| | {{AttackData-ASBR |
| | |version=Infantry |
| | |damage=37 |
| | |guard=Low |
| | |startup=14 |
| | |active= |
| | |recovery= |
| | |blockadv=-18 |
| | |hitadv=HKD |
| | |description= |
| | }} |
| | {{AttackData-ASBR |
| | |version=Helicopters/Tanks |
| | |header=no |
| | |damage=42 |
| | |guard=Low |
| | |startup=10 |
| | |active= |
| | |recovery= |
| | |blockadv=-10 |
| | |hitadv=HKD |
| | |description= |
| | }} |
| | {{AttackData-ASBR |
| | |version=All units, halt! |
| | |header=no |
| | |damage=45 (25, 20) |
| | |guard=Low, Mid |
| | |startup=12(2)1 |
| | |active= |
| | |recovery= |
| | |blockadv=-6 |
| | |hitadv=KD |
| | |description= |
| | '''Infantry:''' |
|
| |
|
| Despite Pucci's command grabs and Overhead doing the bulk of the work on offense, he also has a strong stagger pressure game to rely on should the need arise for more layered pressure. His main stagger buttons in Stand Off are 2L and 2M, both of which are 6 frame lows that are -2 on block. Performing a microdash 2L after either of these buttons on block is generally a solid option to continue pressure. Alternatively, backdashing after 2L or 2M on block provides a means of resetting neutral on opponents respectful of his pressure. This grants Pucci a second opportunity to clip the opponent with his threatening neutral tools. Ending your turn on these safe buttons is also useful for blocking to bait reversal attempts against players familiar with the gaps in his pressure.
| | Keicho commands Bad Company's infantry to advance a short distance. |
| | *Causes hard knockdown. |
| | ---- |
| | '''Helicopters/Tanks:''' |
|
| |
|
| == Defense ==
| | Keicho commands Bad Company's tank to fire a blast straight ahead. |
| While not primarily a defensive character, Pucci still has some options to thwart offense against him.
| | *Launches on hit and causes hard knockdown. |
| | *The hitbox extends across the move's active frames. |
| | ---- |
| | '''All units, halt!:''' |
|
| |
|
| ==="[[JoJo's Bizarre Adventure: All-Star Battle R/Enrico Pucci (Whitesnake)#Stand 22X|It's an illusion.]]"===
| | Keicho attacks with an uppercut. |
| Most notable among his defensive tools is this 4-frame counterattack that is only available while in Stand On. Leading to a crumple state upon successful activation, it has several realistic applications to condition opponents into letting Pucci control the pace of the game. For instance, the relatively quick startup makes it a serviceable anti-air against jump-in happy opponents, and is also a useful asset for situations where a normal attack is evaded by a Stylish Guard; canceling the normal into this move can sometimes catch opponents who are overly eager to respond, in turn granting Pucci a full combo punish. Smart opponents may catch on to this tactic and delay attempts to attack after a Stylish Guard, but Pucci can adapt by mixing up other options (such as other special moves or Flash Cancels) to capitalize off this hesitation and potentially retreat safety, or even steal a turn back.
| | *Moves Keicho forward. |
| | *The second hit launches. |
| | }} |
| | }} |
|
| |
|
| Although not fast enough to interrupt all gaps, it is a decent option for checking players prone to utilizing pressure sequences involving large gaps between moves, because even if such opponents attempt to use Assists to discourage interruption, the cinematic nature of this counterattack will render these attempts pointless since all Assists on-screen are nullified immediately upon activation. Lastly, this move can be used as a preemptive defensive measure when running Pucci's offense against characters with strong meterless reversal options: if capable of predicting their attempts to interrupt the gaps in his offense —on read of a command grab, for example— with a non-cinematic reversal, then Pucci can instead cancel into it and get a full combo punish.
| | ====== <font style="visibility:hidden" size="0">3H</font> ====== |
| | {{MoveData |
| | |image=JJASBR_Keicho_3H.png |
| | |caption= |
| | |name=3H |
| | |subtitle=It pisses me off! |
| | |data= |
| | {{AttackData-ASBR |
| | |damage=28 |
| | |guard=Low |
| | |startup=18 |
| | |active= |
| | |recovery= |
| | |blockadv=-8 |
| | |hitadv=Crumple |
| | |description= |
| | Keicho stomps in front of him. |
| | *Causes crumple on hit. |
| | *Can hit OTG. |
| | }} |
| | }} |
|
| |
|
| The move's main drawback lies in its nature as a counterattack: it is quite punishable if not activated, leaving it liable to baits by clever opponents. In addition, it will not protect Pucci from throws, projectiles, HHAs, and GHAs, leaving him vulnerable to these actions.
| | ====== <font style="visibility:hidden" size="0">JL</font> ====== |
| | {{MoveData |
| | |image=JJASBR_Keicho_Jump_L.png |
| | |caption= |
| | |name=j.L |
| | |subtitle= |
| | |data= |
| | {{AttackData-ASBR |
| | |damage=13 |
| | |guard=Overhead |
| | |startup=8 |
| | |active= |
| | |recovery= |
| | |blockadv= |
| | |hitadv= |
| | |description= |
| | Keicho attacks with his knee. |
| | *Has a lot of active frames, making it great for jump-ins. |
| | }} |
| | }} |
|
| |
|
| ==="[[JoJo's Bizarre Adventure: All-Star Battle R/Enrico Pucci (Whitesnake)#Heart Heat Attack|So it was already done...]]"=== | | ====== <font style="visibility:hidden" size="0">JM</font> ====== |
| Pucci's HHA is an invincible, advancing attack that will steal the opponent's DISC (and with it, their own HHA) if it connects. This is Pucci's staple reversal option when playing in Stand Off. The hitbox is very generous for catching dash-jump attempts, but it is not recommended to use this for anti-airing normal jumps because Pucci will generally travel under the opponent and leave himself wide open. Much like "[[JoJo's Bizarre Adventure: All-Star Battle R/Enrico Pucci (Whitesnake)#Stand 22X|It's an illusion.]]", HHA can also be used as a check after a normal is Stylish Evaded or for interrupting gaps in the opponent's pressure. There are some cases where HHA is better for these functions, however: performing an HHA after a normal is Stylish Guarded will cover an opponent's attempt to mash a 5L or Throw (with the latter normally punishing counterattack attempts), and its invincible startup also allows it to be activated between all gaps in pressure (whereas "It's an illusion." needs at least a 4-frame gap to complete its startup).
| | {{MoveData |
| | |image=JJASBR_Keicho_Jump_M.png |
| | |caption= |
| | |name=j.M |
| | |subtitle= |
| | |data= |
| | {{AttackData-ASBR |
| | |damage=25 |
| | |guard=Overhead |
| | |startup=8 |
| | |active= |
| | |recovery= |
| | |blockadv= |
| | |hitadv= |
| | |description= |
| | Keicho kicks downwards. |
| | *Good for jump-ins and juggles. |
| | }} |
| | }} |
|
| |
|
| There are some downsides to using HHA, though. Most obviously is the fact that its the nature as an HHA means that a cinematic animation will play before the move becomes active. As such, smart opponents with adequate resources will react to the cinematic playing and respond accordingly by Flash Canceling their attack and blocking the HHA attempt (although not every attack in the game can be Flash Canceled, these are few and far between, which hinders the effectiveness of HHA as a reversal in practice). This encourages Pucci to keep his opponent's HH Gauge in mind and develop matchup familiarity with other characters, so as to know when he can activate a reversal HHA with relative safety. Another drawback (though minor) is the reward from landing the move: HHA will only deal 160 damage under normal conditions (among the lower end of HHAs) and leaves the opponent further away, meaning it can offer less reward than a combo afforded by landing "It's an illusion.".
| | ====== <font style="visibility:hidden" size="0">JH</font> ====== |
| | {{MoveData |
| | |image=JJASBR_Keicho_INF_Jump_H.png |
| | |caption=Infantry |
| | |image2=JJASBR_Keicho_HT_Jump_H.png |
| | |caption2=Helicopters/Tanks |
| | |image3=JJASBR_Keicho_AUH_Jump_H.png |
| | |caption3=All units, halt! |
| | |name=j.H |
| | |subtitle= |
| | |data= |
| | {{AttackData-ASBR |
| | |version=Infantry |
| | |damage=33 (5.5*6) |
| | |guard=Mid |
| | |startup=18 |
| | |active= |
| | |recovery= |
| | |blockadv= |
| | |hitadv= |
| | |description= |
| | }} |
| | {{AttackData-ASBR |
| | |version=Helicopters/Tanks |
| | |header=no |
| | |damage=36 (10*2, 8*2) |
| | |guard=Mid |
| | |startup=18 |
| | |active= |
| | |recovery= |
| | |blockadv= |
| | |hitadv= |
| | |description= |
| | }} |
| | {{AttackData-ASBR |
| | |version=All units, halt! |
| | |header=no |
| | |damage=30 |
| | |guard=Overhead |
| | |startup=12 |
| | |active= |
| | |recovery= |
| | |blockadv= |
| | |hitadv= |
| | |description= |
| | '''Infantry:''' |
|
| |
|
| ==="[[JoJo's Bizarre Adventure: All-Star Battle R/Enrico Pucci (Whitesnake)#Great Heat Attack|This is my Whitesnake's ability!]]"===
| | Keicho commands Bad Company's infantry to fire their assault rifles downwards. |
| Pucci's GHA is a frame 2 counterattack that deals massive damage and ends with Whitesnake stealing the opponent's DISC (which revokes their access to the HH Gauge). Managing to use this GHA successfully grants Pucci a massive advantage, not only for its massive damage (instantly depleting around half their health at LV1), but also due to locking them out of options like HHA/GHA reversals and Flash Canceling. In turn, Pucci is able to run his pressure with less risk of reversals or being punished for any significant amount of damage (as most characters need Flash Cancels for stronger combo extensions).
| | *Considered a projectile. |
| | *The shots disappear after about 0.5 seconds. |
| | *Keicho remains suspended in midair during this move. |
| | ---- |
| | '''Helicopters/Tanks:''' |
|
| |
|
| While extremely good on paper, the GHA suffers from the same issue that hinders the effectiveness of HHA for defensive applications. The GHA activation cutscene is even longer than that of HHA, giving opponents ample time to Flash Cancel their attacks and punish its recovery accordingly. Due to this, GHA's main application is for punishing opponents who overcommit to options that are barred from Flash Canceling, which often requires an impressive degree of matchup knowledge from Pucci. Additionally, some attacks have Flash Cancel windows that don't occur until after the move has already connected (such as {{NotationIcon-ASBR|Diavolo}}'s "[[JoJo's Bizarre Adventure: All-Star Battle R/Diavolo#236X|The passage of time resumes!]]" at full charge), making them especially liable to trigger the counterattack.
| | Keicho commands Bad Company's helicopter to fire two missiles downwards. |
| | *Considered a projectile. |
| | *The missiles explode after about 0.5 seconds. |
| | ---- |
| | '''All units, halt!:''' |
|
| |
|
| Generally, jump-in attacks are a good time to activate GHA, as Pucci can react fast enough to see the startup of an aerial attack. While the GHA will not be activated by throws or projectiles (similar to "It's an illusion."), it is able to counter certain HHAs and GHAs, a list of which can be seen below:
| | Keicho attacks with a midair hook. |
| | *Mainly used in combos. |
| | }} |
| | }} |
|
| |
|
| <center>
| | ===Special Moves=== |
| {|class="wikitable mw-collapsible mw-collapsed"
| | ====== <font style="visibility:hidden" size="0">623X</font> ====== |
| |+ style="white-space:nowrap" |'''HHAs/GHAs that trigger Pucci (WS)'s GHA'''
| | {{MoveData |
| |-
| | |image=JJASBR_Keicho_623X.png |
| !rowspan="2" align="center"|Character
| | |caption= |
| !colspan="2" align="center"|Can GHA be triggered by...
| | |name=Stop spacing out, you dumbass! |
| !rowspan="2" align="center"|Notes
| | |input=623L/M/H |
| |-style="vertical-align:center" | | |data= |
| !align="center"|HHA?
| | {{AttackData-ASBR |
| !align="center"|GHA?
| | |version=Light |
| |-style="vertical-align:center" | | |damage=35 |
| |align="center"|Jonathan | | |guard=Mid |
| |align="center"|✔ | | |startup=10 |
| |align="center"|✔ | | |active= |
| | | | |recovery= |
| |- | | |blockadv=-16 |
| |align="center"|Zeppeli | | |hitadv=HKD |
| |align="center"|✔ | | |description= |
| |align="center"|✔ | | }} |
| |
| | {{AttackData-ASBR |
| |-
| | |version=Medium |
| |align="center"|Speedwagon | | |header=no |
| |align="center"|✔ | | |damage=45 (10, 35) |
| |align="center"|✔ | | |guard=Mid |
| | | | |startup=12 |
| |- | | |active= |
| |align="center"|Dio Brando | | |recovery= |
| |align="center"|× | | |blockadv=-24 |
| |align="center"|✔ | | |hitadv=HKD |
| | | | |description= |
| <div style="text-align: left;">
| | }} |
| *HHA is considered a projectile.
| | {{AttackData-ASBR |
| </div>
| | |version=Heavy |
| |- | | |header=no |
| |align="center"|Joseph | | |damage=55 (10*2, 35) |
| |align="center"|✔ | | |guard=Mid |
| |align="center"|✔ | | |startup=16 |
| | | | |active= |
| <div style="text-align: left;">
| | |recovery= |
| *For HHA, only the follow-up can trigger it.
| | |blockadv=-30 |
| </div>
| | |hitadv=HKD |
| |- | | |description= |
| |align="center"|Caesar | | Keicho leaps forward while performing an uppercut. |
| |align="center"|× | | *The version used determines how far Keicho leaps. |
| |align="center"|× | | *Launches on hit and causes hard knockdown. |
| |
| | *Rather poor range in general (mainly in the vertical aspect). |
| <div style="text-align: left;">
| | ---- |
| *Both HHA and GHA are considered projectiles. | | '''L version:''' |
| </div>
| | *Has the least range. |
| |-
| | *Does not have invul. |
| |align="center"|Lisa Lisa
| | *The only version that can be canceled into HHA. |
| |align="center"|×
| | ---- |
| |align="center"|✔
| | '''M version:''' |
| |
| | *Range is in between the L and H versions. |
| <div style="text-align: left;">
| | *Has invul. |
| *HHA is considered a projectile. | | *Cannot be Flash Canceled. |
| *GHA does not gain its hitbox immediately. | | ---- |
| </div>
| | '''H version:''' |
| |-
| | *Has the most range. |
| |align="center"|Stroheim
| | *Has longer invul than the M version. |
| |align="center"|×
| | *Cannot be Flash Canceled. |
| |align="center"|✔
| | }} |
| |
| | }} |
| <div style="text-align: left;"> | | <br> |
| *HHA is considered a projectile.
| | <div style="position: top: 0; display: flex; justify-content: center; background-color: #cacace;" class="movelist-toggles"> |
| </div> | | <div id="movelist-toggle-1" class="movelist-toggle-button">[[File:JJASBR_Infantry_Icon_(2).png|center|link=]]</div> |
| |-
| | <div id="movelist-toggle-2" class="movelist-toggle-button">[[File:JJASBR_Helicopter_Icon_(2).png|center|link=]]</div> |
| |align="center"|Wamuu
| |
| |align="center"|✔
| |
| |align="center"|× | |
| |
| |
| <div style="text-align: left;"> | |
| *For HHA, only the first, point-blank hit can trigger it.
| |
| *HHA's hits beyond point-blank, as well as GHA, are both considered projectiles.
| |
| </div> | |
| |-
| |
| |align="center"|Esidisi
| |
| |align="center"|✔
| |
| |align="center"|✔
| |
| |
| |
| |-
| |
| |align="center"|Kars
| |
| |align="center"|✔ | |
| |align="center"|× | |
| |
| |
| <div style="text-align: left;"> | |
| *GHA does not have a hitbox.
| |
| </div> | | </div> |
| |-
| | <div id="movelist-1" class="movelist"><!-- Infantry Move List --> |
| |align="center"|Jotaro (Part 3)
| |
| |align="center"|✔
| |
| |align="center"|✔
| |
| |
| |
| |-
| |
| |align="center"|Old Joseph
| |
| |align="center"|×
| |
| |align="center"|✔
| |
| |
| |
| <div style="text-align: left;">
| |
| *HHA does not have a hitbox.
| |
| </div>
| |
| |-
| |
| |align="center"|Avdol
| |
| |align="center"|✔
| |
| |align="center"|×
| |
| |
| |
| <div style="text-align: left;">
| |
| *GHA is considered a projectile.
| |
| </div>
| |
| |-
| |
| |align="center"|Kakyoin
| |
| |align="center"|✔
| |
| |align="center"|×
| |
| |
| |
| <div style="text-align: left;">
| |
| *GHA is considered a projectile.
| |
| </div>
| |
| |-
| |
| |align="center"|Polnareff
| |
| |align="center"|×
| |
| |align="center"|✔
| |
| |
| |
| <div style="text-align: left;">
| |
| *HHA does not have a hitbox.
| |
| </div>
| |
| |-
| |
| |align="center"|Iggy
| |
| |align="center"|✔
| |
| |align="center"|✔
| |
| |
| |
| |-
| |
| |align="center"|Hol Horse
| |
| |align="center"|×
| |
| |align="center"|×
| |
| |
| |
| <div style="text-align: left;">
| |
| *Both HHA and GHA are considered projectiles.
| |
| </div>
| |
| |-
| |
| |align="center"|Mariah
| |
| |align="center"|×
| |
| |align="center"|×
| |
| |
| |
| <div style="text-align: left;">
| |
| *Both HHA and GHA are considered projectiles.
| |
| </div>
| |
| |-
| |
| |align="center"|Pet Shop
| |
| |align="center"|×
| |
| |align="center"|✔
| |
| |
| |
| <div style="text-align: left;">
| |
| *HHA is considered a projectile.
| |
| </div>
| |
| |-
| |
| |align="center"|Vanilla Ice
| |
| |align="center"|✔
| |
| |align="center"|×
| |
| |
| |
| <div style="text-align: left;">
| |
| *GHA cannot trigger counterattacks.
| |
| </div>
| |
| |-
| |
| |align="center"|DIO
| |
| |align="center"|✔
| |
| |align="center"|✔
| |
| |
| |
| <div style="text-align: left;">
| |
| *The Time Stop version of HHA is considered a projectile.
| |
| </div>
| |
| |-
| |
| |align="center"|Josuke (Part 4)
| |
| |align="center"|✔
| |
| |align="center"|✔
| |
| |
| |
| |-
| |
| |align="center"|Jotaro (Part 4)
| |
| |align="center"|✔
| |
| |align="center"|✔
| |
| |
| |
| |-
| |
| |align="center"|Koichi
| |
| |align="center"|✔
| |
| |align="center"|×
| |
| |
| |
| <div style="text-align: left;">
| |
| *GHA is considered a projectile.
| |
| </div>
| |
| |-
| |
| |align="center"|Okuyasu
| |
| |align="center"|×
| |
| |align="center"|✔
| |
| |
| |
| <div style="text-align: left;">
| |
| *HHA cannot trigger counterattacks.
| |
| </div>
| |
| |-
| |
| |align="center"|Yukako
| |
| |align="center"|✔
| |
| |align="center"|×
| |
| |
| |
| <div style="text-align: left;">
| |
| *GHA is considered a projectile.
| |
| </div>
| |
| |-
| |
| |align="center"|Rohan
| |
| |align="center"|✔
| |
| |align="center"|✔
| |
| |
| |
| |-
| |
| |align="center"|Shigechi
| |
| |align="center"|×
| |
| |align="center"|×
| |
| |
| |
| <div style="text-align: left;">
| |
| *Both HHA and GHA are considered projectiles.
| |
| </div>
| |
| |-
| |
| |align="center"|Yuya
| |
| |align="center"|×
| |
| |align="center"|×
| |
| |
| |
| <div style="text-align: left;">
| |
| *Both HHA and GHA are considered projectiles.
| |
| </div>
| |
| |-
| |
| |align="center"|Keicho
| |
| |align="center"|×
| |
| |align="center"|×
| |
| |
| |
| <div style="text-align: left;">
| |
| *Both HHA and GHA are considered projectiles.
| |
| </div>
| |
| |-
| |
| |align="center"|Akira
| |
| |align="center"|✔
| |
| |align="center"|✔
| |
| |
| |
| |-
| |
| |align="center"|Kira
| |
| |align="center"|✔
| |
| |align="center"|×
| |
| |
| |
| <div style="text-align: left;">
| |
| *GHA is considered a projectile.
| |
| </div> | |
| |-
| |
| |align="center"|Kosaku
| |
| |align="center"|×
| |
| |align="center"|×
| |
| |
| |
| <div style="text-align: left;">
| |
| *HHA does not have a hitbox.
| |
| *GHA is considered a projectile.
| |
| </div>
| |
| |-
| |
| |align="center"|Giorno
| |
| |align="center"|✔
| |
| |align="center"|×
| |
| |
| |
| <div style="text-align: left;">
| |
| *GHA does not have a hitbox.
| |
| </div>
| |
| |-
| |
| |align="center"|Bucciarati
| |
| |align="center"|✔
| |
| |align="center"|×
| |
| |
| |
| <div style="text-align: left;">
| |
| *GHA is considered a projectile.
| |
| </div>
| |
| |-
| |
| |align="center"|Mista
| |
| |align="center"|×
| |
| |align="center"|×
| |
| |
| |
| <div style="text-align: left;">
| |
| *Both HHA and GHA are considered projectiles.
| |
| </div>
| |
| |-
| |
| |align="center"|Narancia
| |
| |align="center"|✔
| |
| |align="center"|✔
| |
| |
| |
| <div style="text-align: left;">
| |
| *For HHA, only the first hit can trigger it.
| |
| </div>
| |
| |-
| |
| |align="center"|Fugo
| |
| |align="center"|✔
| |
| |align="center"|✔
| |
| |
| |
| |-
| |
| |align="center"|Trish
| |
| |align="center"|✔
| |
| |align="center"|×
| |
| |
| |
| <div style="text-align: left;">
| |
| *GHA is considered a projectile.
| |
| </div>
| |
| |-
| |
| |align="center"|Abbacchio
| |
| |align="center"|✔
| |
| |align="center"|✔
| |
| |
| |
| |-
| |
| |align="center"|Prosciutto
| |
| |align="center"|×
| |
| |align="center"|✔
| |
| |
| |
| <div style="text-align: left;">
| |
| *HHA does not have a hitbox.
| |
| </div>
| |
| |-
| |
| |align="center"|Ghiaccio
| |
| |align="center"|×
| |
| |align="center"|✔
| |
| |
| |
| <div style="text-align: left;">
| |
| *HHA does not have a hitbox.
| |
| </div>
| |
| |-
| |
| |align="center"|Risotto
| |
| |align="center"|×
| |
| |align="center"|×
| |
| |
| |
| <div style="text-align: left;">
| |
| *Both HHA and GHA are considered projectiles.
| |
| </div>
| |
| |-
| |
| |align="center"|Diavolo
| |
| |align="center"|×
| |
| |align="center"|×
| |
| |
| |
| <div style="text-align: left;">
| |
| *Neither HHA nor GHA have hitboxes.
| |
| </div>
| |
| |-
| |
| |align="center"|Jolyne
| |
| |align="center"|✔
| |
| |align="center"|✔
| |
| |
| |
| |-
| |
| |align="center"|Ermes
| |
| |align="center"|×
| |
| |align="center"|✔
| |
| |
| |
| <div style="text-align: left;">
| |
| *HHA does not have a hitbox.
| |
| </div>
| |
| |-
| |
| |align="center"|Foo Fighters
| |
| |align="center"|×
| |
| |align="center"|×
| |
| |
| |
| <div style="text-align: left;">
| |
| *HHA does not have a hitbox.
| |
| *GHA is considered a projectile.
| |
| </div>
| |
| |-
| |
| |align="center"|Anasui
| |
| |align="center"|✔
| |
| |align="center"|✔
| |
| |
| |
| |-
| |
| |align="center"|Weather
| |
| |align="center"|×
| |
| |align="center"|×
| |
| |
| |
| <div style="text-align: left;">
| |
| *Both HHA and GHA are considered projectiles.
| |
| </div>
| |
| |-
| |
| |align="center"|Pucci (WS)
| |
| |align="center"|✔
| |
| |align="center"|×
| |
| |
| |
| <div style="text-align: left;">
| |
| *GHA does not have a hitbox.
| |
| </div>
| |
| |-
| |
| |align="center"|Pucci (Final)
| |
| |align="center"|✔
| |
| |align="center"|✔
| |
| |
| |
| |-
| |
| |align="center"|Johnny
| |
| |align="center"| -
| |
| |align="center"|✔
| |
| |
| |
| <div style="text-align: left;">
| |
| *In ACTs 1 & 2, HHA is considered a projectile.
| |
| *In ACTs 3 & 4, HHA can trigger it.
| |
| *For GHA, only the Horse's hitbox can trigger it.
| |
| </div>
| |
| |-
| |
| |align="center"|Gyro
| |
| |align="center"|×
| |
| |align="center"|✔
| |
| |
| |
| <div style="text-align: left;">
| |
| *HHA is considered a projectile.
| |
| *For GHA, only the Horse's hitbox can trigger it.
| |
| </div> | |
| |-
| |
| |align="center"|Diego
| |
| |align="center"|×
| |
| |align="center"|✔
| |
| |
| |
| <div style="text-align: left;">
| |
| *HHA does not have a hitbox.
| |
| </div>
| |
| |-
| |
| |align="center"|AW Diego
| |
| |align="center"|✔
| |
| |align="center"|✔
| |
| |
| |
| |-
| |
| |align="center"|Valentine
| |
| |align="center"|×
| |
| |align="center"|×
| |
| |
| |
| <div style="text-align: left;">
| |
| *HHA does not have a hitbox.
| |
| *GHA cannot trigger counterattacks.
| |
| </div>
| |
| |-
| |
| |align="center"|Josuke (Part 8)
| |
| |align="center"|×
| |
| |align="center"|×
| |
| |
| |
| <div style="text-align: left;">
| |
| *Both HHA and GHA are considered projectiles.
| |
| </div>
| |
| |-
| |
| |align="center"|Wonder of U
| |
| |align="center"|×
| |
| |align="center"|×
| |
| |
| |
| <div style="text-align: left;">
| |
| *HHA is considered a projectile.
| |
| *GHA does not have a hitbox.
| |
| </div>
| |
| |-
| |
| |align="center"|Baoh
| |
| |align="center"|×
| |
| |align="center"|✔
| |
| |
| |
| <div style="text-align: left;">
| |
| *HHA is considered a projectile.
| |
| </div>
| |
| |}
| |
| </center>
| |
|
| |
|
| == Assist Usage == | | ====== <font style="visibility:hidden" size="0">INF 236X</font> ====== |
| === [[File:JJASBR_Koichi_Small_Icon.png|40px]] Koichi Hirose === | | {{MoveData |
| {{NotationIcon-ASBR|Assault}}{{NotationIcon-ASBR|Assault}}{{NotationIcon-ASBR|Burst}} | | |image=JJASBR_Keicho_INF_236X.png |
| | |caption= |
| | |name=All units, charge! |
| | |input=236L/M/H |
| | |data= |
| | {{AttackData-ASBR |
| | |version=Light |
| | |damage=45 |
| | |guard=Low |
| | |startup=22 |
| | |active= |
| | |recovery= |
| | |blockadv=+10 |
| | |hitadv=+12 |
| | |description= |
| | }} |
| | {{AttackData-ASBR |
| | |version=Medium |
| | |header=no |
| | |damage=56 |
| | |guard=Low |
| | |startup=28 |
| | |active= |
| | |recovery= |
| | |blockadv=+10 |
| | |hitadv=+12 |
| | |description= |
| | }} |
| | {{AttackData-ASBR |
| | |version=Heavy |
| | |header=no |
| | |damage=67 |
| | |guard=Low |
| | |startup=38 |
| | |active= |
| | |recovery= |
| | |blockadv=+10 |
| | |hitadv=+12 |
| | |description= |
| | Keicho commands Bad Company's infantry to advance while firing their assault rifles. |
| | *The infantry's damage, as well as the distance covered, change depending on the version used. |
| | *Can be cancelled into "Maintain Battle Formation". |
| | *Very high pushback on block. |
| | *Both the infantry and the shots are considered projectiles. |
| | *If Flash Canceled, the infantry's attack will continue executing. |
| | ---- |
| | '''L version:''' |
| | *The infantry advances the least. |
| | ---- |
| | '''M version:''' |
| | *The infantry covers a distance in between the L and H versions. |
| | ---- |
| | '''H version:''' |
| | *The infantry advances the most. |
| | }} |
| | }} |
|
| |
|
| By using '''Koichi''' to end combos in the 3 Freeze status effect, Pucci can devise [[JoJo's Bizarre Adventure: All-Star Battle R/Glossary#Frame Kill|frame kills]] to perfectly time a meaty command grab from "[[JoJo's Bizarre Adventure: All-Star Battle R/Enrico Pucci (Whitesnake)#Stand 63214X|It's mine!]]". The only way to avoid the meaty command grab would be to jump or perform a reversal, which 3 Freeze locks the opponent out of (thus making the command grab guaranteed with proper timing).
| | ====== <font style="visibility:hidden" size="0">INF 214X</font> ====== |
| | {{MoveData |
| | |image=JJASBR_Keicho_INF_214X.png |
| | |caption= |
| | |name=A bunch of guys are falling... |
| | |input=214L/M/H |
| | |data= |
| | {{AttackData-ASBR |
| | |version=Light |
| | |damage=24 (4*6) |
| | |guard=Overhead |
| | |startup=48 |
| | |active= |
| | |recovery= |
| | |blockadv=+18 |
| | |hitadv= |
| | |description= |
| | }} |
| | {{AttackData-ASBR |
| | |version=Medium |
| | |header=no |
| | |damage=48 (4*12) |
| | |guard=Overhead |
| | |startup=50 |
| | |active= |
| | |recovery= |
| | |blockadv=+26 |
| | |hitadv= |
| | |description= |
| | }} |
| | {{AttackData-ASBR |
| | |version=Heavy |
| | |header=no |
| | |damage=72 (4*18) |
| | |guard=Overhead |
| | |startup=52 |
| | |active= |
| | |recovery= |
| | |blockadv=+38 |
| | |hitadv= |
| | |description= |
| | Keicho commands Bad Company's infantry to parachute while firing their assault rifles. |
| | *The infantry's damage, as well as the amount of soldiers, change depending on the version used. |
| | *Can be cancelled into "Maintain Battle Formation". |
| | *Both the infantry and the shots are considered projectiles. |
| | *If Flash Canceled, the infantry's attack will continue executing. |
| | ---- |
| | '''L version:''' |
| | *Keicho summons two soldiers. |
| | ---- |
| | '''M version:''' |
| | *Keicho summons four soldiers. |
| | ---- |
| | '''H version:''' |
| | *Keicho summons six soldiers. |
| | }} |
| | }} |
|
| |
|
| Using this technique in conjunction with optimized combo routes allows for consistent situations where the opponent eats upwards of 400 damage during a combo and has their special moves stolen at the end. Against opponents adamant on jumping the command grab, this is the most practical means of stealing their special move DISC: assuming that Pucci can hit the opponent at least twice when they are without Reversal Assists available, then he is guaranteed to steal the DISC twice in a single round. This setup can also be used after a normal Throw by landing "[[JoJo's Bizarre Adventure: All-Star Battle R/Enrico Pucci (Whitesnake)#214X|You shall]] [[JoJo's Bizarre Adventure: All-Star Battle R/Enrico Pucci (Whitesnake)#Stand 214X|be crucified!]]" as an OTG to stall for Koichi's startup time. Keep in mind that Koichi only carries one Reversal Assist Stock, which necessitates minimal mistakes.
| | ====== <font style="visibility:hidden" size="0">INF 22X</font> ====== |
| | {{MoveData |
| | |image=JJASBR_Keicho_INF_22X_(1).png |
| | |caption= |
| | |image2=JJASBR_Keicho_INF_22X_(2).png |
| | |caption2= |
| | |name=A l-landmine?! |
| | |input=22L/M/H |
| | |data= |
| | {{AttackData-ASBR |
| | |version=Light |
| | |damage=110 (60, 50) |
| | |guard=Mid |
| | |startup=42 |
| | |active= |
| | |recovery= |
| | |blockadv=+16 |
| | |hitadv=KD |
| | |description= |
| | }} |
| | {{AttackData-ASBR |
| | |version=Medium |
| | |header=no |
| | |damage=110 (60, 50) |
| | |guard=Mid |
| | |startup=42 |
| | |active= |
| | |recovery= |
| | |blockadv=+16 |
| | |hitadv=KD |
| | |description= |
| | }} |
| | {{AttackData-ASBR |
| | |version=Heavy |
| | |header=no |
| | |damage=110 (60, 50) |
| | |guard=Mid |
| | |startup=52 |
| | |active= |
| | |recovery= |
| | |blockadv=+26 |
| | |hitadv=KD |
| | |description= |
| | Keicho commands one of Bad Company's soldiers to place a landmine on the field. |
| | *The location where the landmine is deployed depends on the version used. |
| | *Can be cancelled into "Maintain Battle Formation". |
| | *The second hit launches. |
| | *Both the landmine and the explosion are considered projectiles. |
| | *Only one landmine can be active at a time. |
| | **The landmine will remain on the field for ~10 seconds before disengaging, but will disappear immediately if Keicho is hit. |
| | *The landmine cannot be triggered by Keicho stepping on it, but the explosion can harm (and kill) him. |
| | *If Flash Canceled at any point, the soldier will still place the landmine. |
| | ---- |
| | '''L version:''' |
| | *The landmine is placed right in front of Keicho. |
| | ---- |
| | '''M version:''' |
| | *The landmine is placed about a character away. |
| | ---- |
| | '''H version:''' |
| | *The landmine is placed around 1/3 of the screen. |
| | }} |
| | }} |
| | </div> |
| | <div id="movelist-2" class="movelist"> |
|
| |
|
| This Assist is for players who want to abuse Pucci's move sealing mechanics and are confident in their ability to land hits in neutral/pressure situations without the aid of an Assist.
| | ====== <font style="visibility:hidden" size="0">HT 236X</font> ====== |
| | {{MoveData |
| | |image=JJASBR_Keicho_HT_236X.png |
| | |caption= |
| | |name=Commence attack! |
| | |input=236L/M/H |
| | |data= |
| | {{AttackData-ASBR |
| | |version=Light |
| | |damage=36 |
| | |guard=Mid |
| | |startup=30 |
| | |active= |
| | |recovery= |
| | |blockadv=-4 |
| | |hitadv=HKD |
| | |description= |
| | }} |
| | {{AttackData-ASBR |
| | |version=Medium |
| | |header=no |
| | |damage=54 (27*2) |
| | |guard=Mid |
| | |startup=34 |
| | |active= |
| | |recovery= |
| | |blockadv=+4 |
| | |hitadv=HKD |
| | |description= |
| | }} |
| | {{AttackData-ASBR |
| | |version=Heavy |
| | |header=no |
| | |damage=72 (24*3) |
| | |guard=Mid |
| | |startup=38 |
| | |active= |
| | |recovery= |
| | |blockadv=+12 |
| | |hitadv=HKD |
| | |description= |
| | Keicho commands Bad Company's tank to fire artillery rounds upwards, which explode upon touching the ground. |
| | *The amount of rounds fired changes depending on the version used. |
| | *Launches on hit and causes a hard knockdown. |
| | *Can be cancelled into "Maintain Battle Formation". |
| | *While the rounds are considered to be projectiles, their explosions are not. |
| | *Can only be Flash Canceled after the rounds are fired. |
| | ---- |
| | '''L version:''' |
| | *Fires a single round. |
| | *Covers the least distance. |
| | ---- |
| | '''M version:''' |
| | *Fires 2 rounds. |
| | *Covers a longer distance. |
| | ---- |
| | '''H version:''' |
| | *Fires 3 rounds. |
| | *Covers the most distance. |
| | }} |
| | }} |
|
| |
|
| === [[File:JJASBR_Keicho_Small_Icon.png|40px]] Keicho Nijimura === | | ====== <font style="visibility:hidden" size="0">HT 214X</font> ====== |
| {{NotationIcon-ASBR|Assault}}{{NotationIcon-ASBR|Assault}}{{NotationIcon-ASBR|Burst}}{{NotationIcon-ASBR|Burst}} | | {{MoveData |
| | |image=JJASBR_Keicho_HT_214X.png |
| | |caption= |
| | |name=Fire missiles! |
| | |input=214L/M/H |
| | |data= |
| | {{AttackData-ASBR |
| | |version=Light |
| | |damage=44 (11*4) |
| | |guard=Mid |
| | |startup=24 |
| | |active= |
| | |recovery= |
| | |blockadv=-6 |
| | |hitadv=-4 |
| | |description= |
| | }} |
| | {{AttackData-ASBR |
| | |version=Medium |
| | |header=no |
| | |damage=44 (11*4) |
| | |guard=Mid |
| | |startup=58 |
| | |active= |
| | |recovery= |
| | |blockadv= |
| | |hitadv= |
| | |description= |
| | }} |
| | {{AttackData-ASBR |
| | |version=Heavy |
| | |header=no |
| | |damage=44 (11*4) |
| | |guard=Mid |
| | |startup=88 |
| | |active= |
| | |recovery= |
| | |blockadv= |
| | |hitadv= |
| | |description= |
| | Keicho commands Bad Company's helicopters to fire four missiles. |
| | *The missiles' behavior changes depending on the version used. |
| | *Can be cancelled into "Maintain Battle Formation". |
| | *Considered a projectile. |
| | *Can only be Flash Canceled after the missiles are fired. |
| | ---- |
| | '''L version:''' |
| | *The missiles are fired immediately. |
| | ---- |
| | '''M version:''' |
| | *The missiles are fired together after a brief delay. |
| | *Launches on hit. |
| | ---- |
| | '''H version:''' |
| | *After a delay, the missiles are fired one after another. |
| | *Launches on hit and causes hard knockdown. |
| | }} |
| | }} |
|
| |
|
| '''Keicho''' is able to damage Pucci and allow him to drop stolen DISCs on the floor while the opponent is in an inactionable juggle state (aside from using their Reversal Assist). Additionally, standing on the landmine immediately after he places it serves as a viable camping maneuver, deterring most approaches with the threat of high damage followed by conversions into combos.
| | ====== <font style="visibility:hidden" size="0">HT 22S</font> ====== |
| | | {{MoveData |
| Keicho shares much of the same utility as Kira, both being Assists that can damage Pucci. When comparing the two, Keicho provides an extremely potent combo game, acting as means to easily break 700 damage with once-per-match Taunt combos. In exchange, Pucci loses a non-committal anti-air tool and some oki presence, while also having generally comparable damage potential.
| | |image=JJASBR_Keicho_HT_22S.png |
| | | |caption= |
| This Assist is for players who want to perform stylish, destructive combos while retaining the essential self-damage DISC drop opportunity. Carrying two Reversal Assist Stocks allows for a higher margin of error by Pucci.
| | |name=All units, halt! |
| | | |input=22S |
| === [[File:JJASBR_Kira_Small_Icon.png|40px]] Yoshikage Kira === | | |data= |
| {{NotationIcon-ASBR|Assault}}{{NotationIcon-ASBR|Assault}}{{NotationIcon-ASBR|Burst}}{{NotationIcon-ASBR|Burst}}
| | {{AttackData-ASBR |
| | | |version=Helicopter |
| '''Kira''' is one of the main Assist choices for Pucci because it affords him the opportunity to self-damage during a combo and drop any stolen DISCs in his possession on the floor. By the time the combo ends, the opponent is usually left at least half-a-screen worth of distance away and must get through Pucci in order to regain whatever abilities were lost. It is extremely difficult for the opponent to win a round after they have lost their DISC in this fashion. | | |damage=44 (11*4) |
| | |guard=Mid |
| | |startup= |
| | |active= |
| | |recovery= |
| | |blockadv= |
| | |hitadv= |
| | |description= |
| | }} |
| | {{AttackData-ASBR |
| | |version=Tank |
| | |header=no |
| | |damage=27 |
| | |guard=Mid |
| | |startup= |
| | |active= |
| | |recovery= |
| | |blockadv= |
| | |hitadv= |
| | |description= |
| | Keicho commands Bad Company's helicopters and tanks to remain in position and attack automatically. |
| | *Costs 1 HH Gauge. |
| | *The move ends once the vehicles attack 3 times or if Keicho gets hit during it. |
| | *The vehicles will track the opponent's Dodge, autocorrecting before firing. |
| | *Locks Keicho into Helicopters/Tanks formation, granting him new Heavy normals while active. |
| | *Prevents usage of Special Moves except for "[[JoJo's Bizarre Adventure: All-Star Battle R/Keicho Nijimura#623X|Stop spacing out, you dumbass!]]". |
| | *The helicopters will attack by using missiles based on those from [[JoJo's Bizarre Adventure: All-Star Battle R/Keicho Nijimura#HT 214X|ht.214L]], while the tanks will fire a single round with a trajectory reminiscent of [[JoJo's Bizarre Adventure: All-Star Battle R/Keicho Nijimura#HT 236X|ht.236M]]. |
| | }} |
| | }} |
| | </div> |
|
| |
|
| In addition, Kira brings utility as an anti-air tool: calling Kira in neutral is a good option for catching opponents who overrely on jump-ins as a means of approaching Pucci during zoning sequences with "[[JoJo's Bizarre Adventure: All-Star Battle R/Enrico Pucci (Whitesnake)#236X|I order you!]]". If the coin hits an airborne opponent, Pucci's j.H allows for an extremely easy combo conversion. Should the coin hit the floor, Pucci can create a difficult situation for the opponent by running and standing on top of it, a strategy can be useful for stalling the clock and zoning in a safe fashion.
| | ==System Mechanics== |
| | ====== <font style="visibility:hidden" size="0">Throw</font> ====== |
| | {{MoveData |
| | |image=JJASBR_Keicho_Throw_(1).png |
| | |caption= |
| | |image2=JJASBR_Keicho_Throw_(2).png |
| | |caption2= |
| | |name=Throw |
| | |subtitle=We'll just have to put you in that situation! |
| | |input=5/4 + Any Two Attack Buttons |
| | |data= |
| | {{AttackData-ASBR |
| | |damage=120 (120, 0) |
| | |guard=Throw |
| | |startup= |
| | |active= |
| | |recovery= |
| | |blockadv= |
| | |hitadv= |
| | |description= |
| | Keicho pushes the opponent, after which two of Bad Company's soldiers descend with a rope and stab the opponent's face. |
| | *Leaves the opponent very far away from Keicho. |
| | *Both Throws are identical besides direction. |
| | }} |
| | }} |
|
| |
|
| Kira's coin also provides a degree of trickiness to his oki when used in conjunction with "[[JoJo's Bizarre Adventure: All-Star Battle R/Enrico Pucci (Whitesnake)#623X|A Stand power]] [[JoJo's Bizarre Adventure: All-Star Battle R/Enrico Pucci (Whitesnake)#Stand 623X|that can boil water...]]". After knockdowns such as from a normal Throw, Pucci is put at a range where calling Kira and performing the Heavy version of this command grab will punish opponents trying to either block or neutral jump the setup. Though there are other options to avoid it (reversals for instance), many players will panic and try to commit to one of the options the setup covers.
| | ====== <font style="visibility:hidden" size="0">Assist</font> ====== |
| | {{MoveData |
| | |image=JJASBR_Keicho_Assist_(1).png |
| | |caption= |
| | |image2=JJASBR_Keicho_Assist_(2).png |
| | |caption2= |
| | |name=Assist |
| | |subtitle=A l-landmine?!<br>{{NotationIcon-ASBR|Assault}}{{NotationIcon-ASBR|Assault}}{{NotationIcon-ASBR|Burst}}{{NotationIcon-ASBR|Burst}} |
| | |data= |
| | {{AttackData-ASBR |
| | |damage=110 (60, 50) |
| | |guard=Mid |
| | |startup= |
| | |active= |
| | |recovery= |
| | |blockadv= |
| | |hitadv=KD |
| | |description= |
| | Keicho commands one of Bad Company's soldiers to place a landmine on the field. |
| | *Assault Assist Stocks: 2 |
| | *Reversal Assist Stocks: 2 |
| | *Based on [[JoJo's Bizarre Adventure: All-Star Battle R/Keicho Nijimura#INF 22X|i.22L]] |
| | *The second hit launches. |
| | *The landmine will remain on the field for ~10 seconds before disengaging. |
| | *The landmine cannot be triggered by the point character stepping on it, but the explosion can hurt (and kill) them. |
| | }} |
| | }} |
|
| |
|
| A jack-of-all trades assist. As with Keicho, carrying two Reversal Assist Stocks allows for a higher margin of error by Pucci.
| | ====== <font style="visibility:hidden" size="0">5S</font> ====== |
| | {{MoveData |
| | |image=JJASBR_Keicho_INF_5S.png |
| | |caption=Switch to Helicopters/Tanks |
| | |image2=JJASBR_Keicho_HT_5S.png |
| | |caption2=Switch to Infantry |
| | |name=Bad Company |
| | |input=5S |
| | |data= |
| | {{AttackData-ASBR |
| | |damage= |
| | |guard= |
| | |startup= |
| | |active= |
| | |recovery=Total XX |
| | |blockadv= |
| | |hitadv= |
| | |description= |
| | Switches between Infantry and Helicopters/Tanks formations, altering Keicho's moveset and abilities. |
| | }} |
| | }} |
|
| |
|
| === [[File:JJASBR_AW_Diego_Small_Icon.png|40px]] Alternate World Diego === | | ==Heart Heat Attack== |
| {{NotationIcon-ASBR|Assault}}{{NotationIcon-ASBR|Assault}}{{NotationIcon-ASBR|Burst}} | | {{MoveData |
| | |image=JJASBR_Keicho_HHA_(1).png |
| | |caption= |
| | |image2=JJASBR_Keicho_HHA_(2).png |
| | |caption2=''Commence attack!'' |
| | |name=My Bad Company has unbreakable defense. |
| | |input=236 + Any Two Attack Buttons |
| | |data= |
| | {{AttackData-ASBR |
| | |damage=148 (7*14, 50) |
| | |guard=Mid |
| | |startup=2+12 |
| | |active= |
| | |recovery= |
| | |blockadv=-32 |
| | |hitadv= |
| | |description= |
| | Keicho commands Bad Company's helicopters to fire a volley of missiles that explode at a short distance. |
| | *Switches into Helicopters/Tanks formation upon use. |
| | *Considerable Chip Damage. |
| | }} |
| | }} |
|
| |
|
| The general idea behind using '''AW Diego''' as an Assist is somewhat similar to the gameplan provided by Koichi, in the sense that it is catered towards facing opponents who make landing "[[JoJo's Bizarre Adventure: All-Star Battle R/Enrico Pucci (Whitesnake)#Stand 63214X|It's mine!]]" particularly difficult. The difference lies in that Koichi requires securing a hit to put the opponent into an unfavorable situation, whereas AW Diego is intended to put opponents into unfavorable situations on block.
| | ==Great Heat Attack== |
| | {{MoveData |
| | |image=JJASBR_Keicho_GHA_(1).png |
| | |caption=''First, damage to your legs!'' |
| | |image2=JJASBR_Keicho_GHA_(2).png |
| | |caption2=''Then, fire missiles!'' |
| | |image3=JJASBR_Keicho_GHA_(3).png |
| | |caption3=''All units, get ready to fire at once!'' |
| | |name=Fire! |
| | |input=236L+M+H |
| | |data= |
| | {{AttackData-ASBR |
| | |damage=288 (48+2*20+50*2+100) |
| | |guard=Mid |
| | |startup=2+28 |
| | |active= |
| | |recovery= |
| | |blockadv=-68 |
| | |hitadv= |
| | |description= |
| | Keicho commands Bad Company's infantry to fire their assault rifles straight ahead. If they connect, the opponent will be subject to a full-blown military ambush by Bad Company. |
| | *The second least damaging GHA in the game. |
| | *Cannot trigger Counters. |
| | *Reaches about two characters away from Keicho. |
| | *Has somewhat high startup post-superflash. |
| | }} |
| | }} |
|
| |
|
| Pucci's most useful pressure sequence involving AW Diego is the following: <code>5M(AA) > 3H(QSOn) > 5L > 63214L</code>. The sequence is gapless prior to 63214L, allowing time for AW Diego to place his barbed wire on the stage at roughly the same time as the command grab connects. Because of this timing, the opponent will be very limited in what options they have to escape: attempting to neutral jump or backdash the command grab will result in the opponent being put into a bind state by the Assist; attempting to block, use Stylish Guard, or Dodge the wire will result in the opponent being grabbed and having their DISC stolen. Essentially, Pucci becomes capable of getting a favorable situation regardless of whether the opponent tries to jump the grab or block the wire: getting hit by the wire allows for a full combo, while the grab seals a large portion of the opponent's moves.
| | ==Colors== |
| | ===Normal=== |
| | {{ColorGallery | filePrefix=JJASBR_Keicho_Color_ | imageFileTypes=png| imageWidths=250 | colors= |
| | {{ColorGallery/Color|1| text=Normal (Color 1) }} |
| | {{ColorGallery/Color|2| text=Normal (Color 2) }} |
| | {{ColorGallery/Color|3| text=Normal (Color 3) }} |
| | {{ColorGallery/Color|4| text=Normal (Color 4) }} |
| | }} |
|
| |
|
| Some reversals can beat the setup, but others will be absorbed by AW Diego taking the hit, which leaves the opponent in a punishable state. Pucci could also forgo the 63214L and block in order to bait and punish reversal attempts. Certain characters (such as {{NotationIcon-ASBR|Diavolo}}) can jump forward to get out of the setup, but changing the timing of the Assist call can bypass this issue at the cost of making it possible to escape with Stylish Guard. Like Koichi, AW Diego carries only one Reversal Assist Stock, which means that Pucci must make fewer mistakes than would otherwise be allowed.
| | ===Stand=== |
| | {{ColorGallery | filePrefix=JJASBR_Keicho_Color_ | imageFileTypes=png| imageWidths=250 | colors= |
| | {{ColorGallery/Color|Stand 1| text={{Tooltip|color=purple|text=Bad Company (Color 1)|hovertext=Used for odd-numbered colors.}} }} |
| | {{ColorGallery/Color|Stand 2| text={{Tooltip|color=purple|text=Bad Company (Color 2)|hovertext=Used for even-numbered colors.}} }} |
| | }} |
|
| |
|
| This assist is for players who enjoy tormenting defensive opponents and being heavily rewarded for it.
| | ==Navigation== |
| | {{Navbox-ASBR}} |
| | [[Category:Keicho Nijimura]] |
| | [[Category:JoJo's Bizarre Adventure: All-Star Battle R]] |
