JoJo's Bizarre Adventure: All-Star Battle R/Yoshikage Kira: Difference between revisions
| (33 intermediate revisions by 6 users not shown) | |||
| Line 6: | Line 6: | ||
In Stand Off, Kira can send Killer Queen to attack forward with "[[JoJo's Bizarre Adventure: All-Star Battle R/Yoshikage Kira#236X|Ha!]]" as a way to control the neutral. He also has access to the crux of his okizeme: "[[JoJo's Bizarre Adventure: All-Star Battle R/Yoshikage Kira#214X|Anything can be a bomb.]]", a move in which Kira lobs an explosive coin. The coin can serve as an esoteric anti-air, but its true power lies in its effect: on hit, the coin explodes, launching the opponent into the air and allowing Kira to convert into a combo. While the opponent has some options around it, they will have to make a hard read as to what Kira will do as the coin falls: he can either land a Throw, continue his pressure, or even chain into his [[JoJo's Bizarre Adventure: All-Star Battle R/Yoshikage Kira#3H|3H]] Overhead. Even if the coin doesn't hit the opponent, it will remain on the ground as an inconspicious trap that can be manually detonated with "[[JoJo's Bizarre Adventure: All-Star Battle R/Yoshikage Kira#623X|Blown to pieces!]]". | In Stand Off, Kira can send Killer Queen to attack forward with "[[JoJo's Bizarre Adventure: All-Star Battle R/Yoshikage Kira#236X|Ha!]]" as a way to control the neutral. He also has access to the crux of his okizeme: "[[JoJo's Bizarre Adventure: All-Star Battle R/Yoshikage Kira#214X|Anything can be a bomb.]]", a move in which Kira lobs an explosive coin. The coin can serve as an esoteric anti-air, but its true power lies in its effect: on hit, the coin explodes, launching the opponent into the air and allowing Kira to convert into a combo. While the opponent has some options around it, they will have to make a hard read as to what Kira will do as the coin falls: he can either land a Throw, continue his pressure, or even chain into his [[JoJo's Bizarre Adventure: All-Star Battle R/Yoshikage Kira#3H|3H]] Overhead. Even if the coin doesn't hit the opponent, it will remain on the ground as an inconspicious trap that can be manually detonated with "[[JoJo's Bizarre Adventure: All-Star Battle R/Yoshikage Kira#623X|Blown to pieces!]]". | ||
In Stand On, Kira loses access to his coins and | In Stand On, Kira loses access to his coins and Overhead, but gains his most powerful combo extender: "[[JoJo's Bizarre Adventure: All-Star Battle R/Yoshikage Kira#Stand 214X|The First Bomb]]", a move where Kira turns his opponent into a bomb [[JoJo's Bizarre Adventure: All-Star Battle R/Yoshikage Kira#Stand 623X|which he can manually detonate]]; combos involving this move are very damaging without spending too much meter. In conjunction with Stand Rush, "[[JoJo's Bizarre Adventure: All-Star Battle R/Yoshikage Kira#Stand 236X|You bastard!]]" can allow Kira to set up blockstrings, or even confirm into a combo while the opponent is standing. With his toolset and/or certain Assists, Kira is also able to set up very deadly blockstrings into his Unblockable [[JoJo's Bizarre Adventure: All-Star Battle R/Yoshikage Kira#Great Heat Attack|GHA]], giving him the chance to swing the game to his favor with one momentum shift. | ||
Kira's main flaw lies in his defense: he does not have any sort of meterless invincible reversals, and while he has access to a counter in "[[JoJo's Bizarre Adventure: All-Star Battle R/Yoshikage Kira#Stand 421X|Calm and cool]]", it can only be used while in Stand On. | Kira's main flaw lies in his defense: he does not have any sort of meterless invincible reversals, and while he has access to a counter in "[[JoJo's Bizarre Adventure: All-Star Battle R/Yoshikage Kira#Stand 421X|Calm and cool]]", it can only be used while in Stand On. | ||
*'''Only one bomb at a time''': | *'''Only one bomb at a time''': If bomb-related special moves are used in succession, the previous bomb will be nullified. In addition, the explosions generated by Kira's special moves can damage (and kill) him. | ||
{{StrengthsAndWeaknesses | {{StrengthsAndWeaknesses | ||
| Line 21: | Line 21: | ||
|cons = | |cons = | ||
* '''Weak Air Conversions:''' While Kira is not lacking in anti-airs, only his coin can allow him to convert into a combo in such cases, with every other option leading into a reset. | * '''Weak Air Conversions:''' While Kira is not lacking in anti-airs, only his coin can allow him to convert into a combo in such cases, with every other option leading into a reset. | ||
* '''Self-Damage:''' Kira's explosions can damage and kill him, | * '''Self-Damage:''' Kira's explosions can damage and kill him, which makes using certain moves at specific ranges or performing certain routes very risky when Kira is at low health. | ||
* '''No Meterless Reversals:''' Kira's HHA is his only invincible option, and suffers from poor vertical range, making safejumps very effective against him. | * '''No Meterless Reversals:''' Kira's HHA is his only invincible option, and suffers from poor vertical range, making safejumps very effective against him. | ||
* '''Port-Specific Shenanigans:''' As Player 2, Kira is incapable of hitting himself with certain explosions, causing Kira to lose access to certain blockstrings and combo routes. | |||
| tablewidth = 80 | | tablewidth = 80 | ||
}} | }} | ||
| Line 52: | Line 53: | ||
|damage=14 | |damage=14 | ||
|guard=Mid | |guard=Mid | ||
|startup= | |startup=4 | ||
|active= | |active= | ||
|recovery= | |recovery= | ||
|blockadv=-2 | |blockadv=-2 | ||
|hitadv= | |hitadv=+2 | ||
|description= | |description= | ||
Kira performs a jab outwards. | Kira performs a jab outwards. | ||
| Line 73: | Line 74: | ||
|damage=23 | |damage=23 | ||
|guard=Mid | |guard=Mid | ||
|startup= | |startup=6 | ||
|active= | |active= | ||
|recovery= | |recovery= | ||
|blockadv=-6 | |blockadv=-6 | ||
|hitadv= | |hitadv=-2 | ||
|description= | |description= | ||
Kira performs a gut punch. | Kira performs a gut punch. | ||
| Line 95: | Line 96: | ||
|damage=36 | |damage=36 | ||
|guard=Mid | |guard=Mid | ||
|startup= | |startup=12 | ||
|active= | |active= | ||
|recovery= | |recovery= | ||
|blockadv=-8 | |blockadv=-8 | ||
|hitadv= | |hitadv=-2 | ||
|description= | |description= | ||
Kira summons Killer Queen, who performs an uppercut. | Kira summons Killer Queen, who performs an uppercut. | ||
*Good for anti-airs. | *Good for anti-airs. | ||
*A bit stubbier than | *A bit stubbier than the average 5H. | ||
}} | }} | ||
}} | }} | ||
| Line 117: | Line 118: | ||
|damage=13 | |damage=13 | ||
|guard=Low | |guard=Low | ||
|startup= | |startup=6 | ||
|active= | |active= | ||
|recovery= | |recovery= | ||
|blockadv=-2 | |blockadv=-2 | ||
|hitadv= | |hitadv=+2 | ||
|description= | |description= | ||
Kira performs a crouching poke. | Kira performs a crouching poke. | ||
*Standard jab | *Standard crouching jab. | ||
}} | }} | ||
}} | }} | ||
| Line 139: | Line 139: | ||
|damage=21 | |damage=21 | ||
|guard=Low | |guard=Low | ||
|startup= | |startup=6 | ||
|active= | |active= | ||
|recovery= | |recovery= | ||
|blockadv=-8 | |blockadv=-8 | ||
|hitadv= | |hitadv=-4 | ||
|description= | |description= | ||
Kira | While kneeling, Kira leans forward with a punch. | ||
*Moves Kira forward. | *Moves Kira forward. | ||
*Good range for pokes and counter-pokes. | *Good range for pokes and counter-pokes. | ||
| Line 161: | Line 161: | ||
|damage=34 | |damage=34 | ||
|guard=Low | |guard=Low | ||
|startup= | |startup=12 | ||
|active= | |active= | ||
|recovery= | |recovery= | ||
| Line 183: | Line 183: | ||
|damage=35 | |damage=35 | ||
|guard=Overhead | |guard=Overhead | ||
|startup= | |startup=26 | ||
|active= | |active= | ||
|recovery= | |recovery= | ||
| Line 205: | Line 205: | ||
|damage=17 | |damage=17 | ||
|guard=Overhead | |guard=Overhead | ||
|startup= | |startup=8 | ||
|active= | |active= | ||
|recovery= | |recovery= | ||
| Line 211: | Line 211: | ||
|hitadv= | |hitadv= | ||
|description= | |description= | ||
Kira | Kira swipes his arm outwards. | ||
*Good for air-to-airs. | *Good for air-to-airs. | ||
}} | }} | ||
| Line 226: | Line 226: | ||
|damage=26 | |damage=26 | ||
|guard=Overhead | |guard=Overhead | ||
|startup= | |startup=10 | ||
|active= | |active= | ||
|recovery= | |recovery= | ||
| Line 247: | Line 247: | ||
|damage=40 | |damage=40 | ||
|guard=Overhead | |guard=Overhead | ||
|startup= | |startup=14 | ||
|active= | |active= | ||
|recovery= | |recovery= | ||
| Line 271: | Line 271: | ||
|damage=62 (5, 4*8, 25) | |damage=62 (5, 4*8, 25) | ||
|guard=Mid | |guard=Mid | ||
|startup= | |startup=20 | ||
|active= | |active= | ||
|recovery= | |recovery= | ||
| Line 283: | Line 283: | ||
|damage=80 (5*10, 30) | |damage=80 (5*10, 30) | ||
|guard=Mid | |guard=Mid | ||
|startup= | |startup=20 | ||
|active= | |active= | ||
|recovery= | |recovery= | ||
| Line 295: | Line 295: | ||
|damage=100 (5, 6*10, 35) | |damage=100 (5, 6*10, 35) | ||
|guard=Mid | |guard=Mid | ||
|startup= | |startup=20 | ||
|active= | |active= | ||
|recovery= | |recovery= | ||
| Line 302: | Line 302: | ||
|description= | |description= | ||
Kira summons Killer Queen, who attacks with an advancing barrage of punches. | Kira summons Killer Queen, who attacks with an advancing barrage of punches. | ||
* | *The version used determines the distance Killer Queen covers. | ||
*The final hit launches. | *The final hit launches. | ||
*Due to its low recovery, it can be combo'd off of naturally in the corner or on air hit. | *Due to its low recovery, it can be combo'd off of naturally in the corner or on air hit. | ||
| Line 330: | Line 330: | ||
|damage=90 (40, 50) | |damage=90 (40, 50) | ||
|guard=Mid | |guard=Mid | ||
|startup= | |startup=22 | ||
|active= | |active= | ||
|recovery= | |recovery= | ||
| Line 342: | Line 342: | ||
|damage=90 (40, 50) | |damage=90 (40, 50) | ||
|guard=Mid | |guard=Mid | ||
|startup= | |startup=28 | ||
|active= | |active= | ||
|recovery= | |recovery= | ||
| Line 354: | Line 354: | ||
|damage=90 (40, 50) | |damage=90 (40, 50) | ||
|guard=Mid | |guard=Mid | ||
|startup= | |startup=32 | ||
|active= | |active= | ||
|recovery= | |recovery= | ||
| Line 361: | Line 361: | ||
|description= | |description= | ||
Kira summons Killer Queen to toss a coin that has been turned into a bomb. | Kira summons Killer Queen to toss a coin that has been turned into a bomb. | ||
* | *The arc the coin follows upon being tossed depends on the version used. | ||
*Upon reaching the ground, the coin will remain on the field for 10 seconds. | *Launches on hit. | ||
*The coin | *Can hit OTG. | ||
*Upon reaching the ground, the coin will remain on the field for 10 seconds, and will not go away if Kira is hit. | |||
*The explosion cannot be triggered by Kira stepping on the coin. | |||
---- | ---- | ||
'''L version:''' | '''L version:''' | ||
* | *Throws the coin at a mostly vertical trajectory. | ||
---- | ---- | ||
'''M version:''' | '''M version:''' | ||
* | *Throws the coin at a diagonal trajectory. | ||
---- | ---- | ||
'''H version:''' | '''H version:''' | ||
* | *Throws the coin at a more horizontal trajectory. | ||
}} | }} | ||
}} | }} | ||
| Line 386: | Line 388: | ||
|damage= | |damage= | ||
|guard=Mid | |guard=Mid | ||
|startup= | |startup=6 | ||
|active= | |active= | ||
|recovery=Total XX | |recovery=Total XX | ||
|blockadv=-4 | |blockadv=-4 | ||
|hitadv= | |hitadv=KD | ||
|description= | |description= | ||
Kira summons Killer Queen, who detonates whatever it currently has turned into a bomb. | Kira summons Killer Queen, who detonates whatever it currently has turned into a bomb. | ||
*Move performance is identical across all versions. | *Move performance is identical across all versions. | ||
*Can hit OTG. | *Can hit OTG. | ||
*If used to detonate an application of "The First Bomb" within the same combo it was applied in, the move does not count as an input for the purposes of damage scaling. | |||
*Explosion is normally -4 on block. However, if it hits Kira, he will recover faster and be at +10. | *Explosion is normally -4 on block. However, if it hits Kira, he will recover faster and be at +10. | ||
**If triggered after "The First Bomb" while playing as Player 2, Kira is unable to hit himself with the explosion. | |||
}} | }} | ||
}} | }} | ||
| Line 406: | Line 410: | ||
|image=JJASBR_Kira_Stand_5L.png | |image=JJASBR_Kira_Stand_5L.png | ||
|caption= | |caption= | ||
|name=5L | |name=s.5L | ||
|subtitle= | |subtitle= | ||
|data= | |data= | ||
| Line 412: | Line 416: | ||
|damage=14 | |damage=14 | ||
|guard=Mid | |guard=Mid | ||
|startup= | |startup=4 | ||
|active= | |active= | ||
|recovery= | |recovery= | ||
|blockadv=-2 | |blockadv=-2 | ||
|hitadv= | |hitadv=+2 | ||
|description= | |description= | ||
Killer Queen performs a backhanded jab. | Killer Queen performs a backhanded jab. | ||
| Line 427: | Line 431: | ||
|image=JJASBR_Kira_Stand_5M.png | |image=JJASBR_Kira_Stand_5M.png | ||
|caption= | |caption= | ||
|name=5M | |name=s.5M | ||
|subtitle= | |subtitle= | ||
|data= | |data= | ||
| Line 433: | Line 437: | ||
|damage=23 | |damage=23 | ||
|guard=Mid | |guard=Mid | ||
|startup= | |startup=8 | ||
|active= | |active= | ||
|recovery= | |recovery= | ||
|blockadv=-4 | |blockadv=-4 | ||
|hitadv= | |hitadv=0 | ||
|description= | |description= | ||
Killer Queen performs a hook while Kira checks his watch. | Killer Queen performs a hook while Kira checks his watch. | ||
| Line 448: | Line 452: | ||
|image=JJASBR_Kira_Stand_5H.png | |image=JJASBR_Kira_Stand_5H.png | ||
|caption= | |caption= | ||
|name=5H | |name=s.5H | ||
|subtitle= | |subtitle= | ||
|data= | |data= | ||
| Line 454: | Line 458: | ||
|damage=36 (16, 20) | |damage=36 (16, 20) | ||
|guard=Mid | |guard=Mid | ||
|startup= | |startup=12 | ||
|active= | |active= | ||
|recovery= | |recovery= | ||
|blockadv=-8 | |blockadv=-8 | ||
|hitadv= | |hitadv=-2 | ||
|description= | |description= | ||
Killer Queen performs | Killer Queen performs a vertical chop. | ||
*Very good range for pokes. | *Very good range for pokes. | ||
}} | }} | ||
| Line 469: | Line 473: | ||
|image=JJASBR_Kira_Stand_2L.png | |image=JJASBR_Kira_Stand_2L.png | ||
|caption= | |caption= | ||
|name=2L | |name=s.2L | ||
|subtitle= | |subtitle= | ||
|data= | |data= | ||
| Line 475: | Line 479: | ||
|damage=13 | |damage=13 | ||
|guard=Low | |guard=Low | ||
|startup= | |startup=6 | ||
|active= | |active= | ||
|recovery= | |recovery= | ||
|blockadv=-2 | |blockadv=-2 | ||
|hitadv= | |hitadv=+2 | ||
|description= | |description= | ||
Killer Queen performs a crouching jab. | Killer Queen performs a crouching jab. | ||
| Line 490: | Line 494: | ||
|image=JJASBR_Kira_Stand_2M.png | |image=JJASBR_Kira_Stand_2M.png | ||
|caption= | |caption= | ||
|name=2M | |name=s.2M | ||
|subtitle= | |subtitle= | ||
|data= | |data= | ||
| Line 496: | Line 500: | ||
|damage=21 | |damage=21 | ||
|guard=Low | |guard=Low | ||
|startup= | |startup=6 | ||
|active= | |active= | ||
|recovery= | |recovery= | ||
|blockadv=-4 | |blockadv=-4 | ||
|hitadv= | |hitadv=0 | ||
|description= | |description= | ||
Killer Queen stabs at the opponent's knees as Kira adjusts his tie. | Killer Queen stabs at the opponent's knees as Kira adjusts his tie. | ||
| Line 511: | Line 515: | ||
|image=JJASBR_Kira_Stand_2H.png | |image=JJASBR_Kira_Stand_2H.png | ||
|caption= | |caption= | ||
|name=2H | |name=s.2H | ||
|subtitle= | |subtitle= | ||
|data= | |data= | ||
| Line 517: | Line 521: | ||
|damage=34 | |damage=34 | ||
|guard=Low | |guard=Low | ||
|startup= | |startup=12 | ||
|active= | |active= | ||
|recovery= | |recovery= | ||
| Line 533: | Line 537: | ||
|image=JJASBR_Kira_Stand_Jump_L.png | |image=JJASBR_Kira_Stand_Jump_L.png | ||
|caption= | |caption= | ||
|name= | |name=s.jL | ||
|subtitle= | |subtitle= | ||
|data= | |data= | ||
| Line 539: | Line 543: | ||
|damage=17 | |damage=17 | ||
|guard=Overhead | |guard=Overhead | ||
|startup= | |startup=8 | ||
|active= | |active= | ||
|recovery= | |recovery= | ||
| Line 554: | Line 558: | ||
|image=JJASBR_Kira_Stand_Jump_M.png | |image=JJASBR_Kira_Stand_Jump_M.png | ||
|caption= | |caption= | ||
|name= | |name=s.jM | ||
|subtitle= | |subtitle= | ||
|data= | |data= | ||
| Line 560: | Line 564: | ||
|damage=26 | |damage=26 | ||
|guard=Overhead | |guard=Overhead | ||
|startup= | |startup=10 | ||
|active= | |active= | ||
|recovery= | |recovery= | ||
| Line 576: | Line 580: | ||
|image=JJASBR_Kira_Stand_Jump_H.png | |image=JJASBR_Kira_Stand_Jump_H.png | ||
|caption= | |caption= | ||
|name= | |name=s.jH | ||
|subtitle= | |subtitle= | ||
|data= | |data= | ||
| Line 582: | Line 586: | ||
|damage=40 | |damage=40 | ||
|guard=Overhead | |guard=Overhead | ||
|startup= | |startup=14 | ||
|active= | |active= | ||
|recovery= | |recovery= | ||
| Line 599: | Line 603: | ||
|caption= | |caption= | ||
|name=You bastard! | |name=You bastard! | ||
|input=236L/M/H | |input=s.236L/M/H | ||
|data= | |data= | ||
{{AttackData-ASBR | {{AttackData-ASBR | ||
| Line 605: | Line 609: | ||
|damage=69 (9, 3*10, 30) | |damage=69 (9, 3*10, 30) | ||
|guard=Mid | |guard=Mid | ||
|startup= | |startup=14 | ||
|active= | |active= | ||
|recovery= | |recovery= | ||
|blockadv=-8 | |blockadv=-8 | ||
|hitadv= | |hitadv=-2 | ||
|description= | |description= | ||
}} | }} | ||
| Line 617: | Line 621: | ||
|damage=69 (9, 3*10, 30) | |damage=69 (9, 3*10, 30) | ||
|guard=Mid | |guard=Mid | ||
|startup= | |startup=16 | ||
|active= | |active= | ||
|recovery= | |recovery= | ||
|blockadv=-4 | |blockadv=-4 | ||
|hitadv= | |hitadv=+2 | ||
|description= | |description= | ||
}} | }} | ||
| Line 629: | Line 633: | ||
|damage=69 (9, 3*10, 30) | |damage=69 (9, 3*10, 30) | ||
|guard=Mid | |guard=Mid | ||
|startup= | |startup=20 | ||
|active= | |active= | ||
|recovery= | |recovery= | ||
|blockadv=-4 | |blockadv=-4 | ||
|hitadv= | |hitadv=+2 | ||
|description= | |description= | ||
Killer Queen barrages the opponent with punches. | Killer Queen barrages the opponent with punches. | ||
* | *The version used alters the distance Killer Queen covers. | ||
*Leaves grounded opponents standing. | |||
*Stand Rush-compatible. | *Stand Rush-compatible. | ||
---- | ---- | ||
'''L version:''' | '''L version:''' | ||
* | *Killer Queen remains close to Kira. | ||
---- | ---- | ||
'''M version:''' | '''M version:''' | ||
* | *Killer Queen moves further. | ||
---- | ---- | ||
'''H version:''' | '''H version:''' | ||
* | *Killer Queen moves even further. | ||
}} | }} | ||
}} | }} | ||
| Line 655: | Line 660: | ||
|caption= | |caption= | ||
|name=The First Bomb | |name=The First Bomb | ||
|input=214L/M/H | |input=s.214L/M/H | ||
|data= | |data= | ||
{{AttackData-ASBR | {{AttackData-ASBR | ||
| Line 661: | Line 666: | ||
|damage=20 | |damage=20 | ||
|guard=Mid | |guard=Mid | ||
|startup= | |startup=22 | ||
|active= | |active= | ||
|recovery= | |recovery= | ||
| Line 673: | Line 678: | ||
|damage=20 | |damage=20 | ||
|guard=Mid | |guard=Mid | ||
|startup= | |startup=30 | ||
|active= | |active= | ||
|recovery= | |recovery= | ||
| Line 685: | Line 690: | ||
|damage=20 | |damage=20 | ||
|guard=Mid | |guard=Mid | ||
|startup= | |startup=40 | ||
|active= | |active= | ||
|recovery= | |recovery= | ||
| Line 703: | Line 708: | ||
|hitadv=KD | |hitadv=KD | ||
|description= | |description= | ||
Killer Queen performs | Killer Queen performs a downward chop, turning the opponent into a bomb to detonate. | ||
* | *Killer Queen's movement distance changes depending on the version used. | ||
*Launches on hit. | *Launches on hit. | ||
*Can hit OTG. | |||
*Stand Rush-compatible. | *Stand Rush-compatible. | ||
*Cannot be Flash Canceled. | *Cannot be Flash Canceled. | ||
* | *On a successful hit, the opponent is turned into a bomb for 9 seconds. When the bomb is applied, the effect will stay on them even if Kira is hit (unless he is knocked down). | ||
---- | ---- | ||
'''L version:''' | '''L version:''' | ||
| Line 715: | Line 720: | ||
---- | ---- | ||
'''M version:''' | '''M version:''' | ||
*Killer Queen moves | *Killer Queen moves forward. | ||
---- | ---- | ||
'''H version:''' | '''H version:''' | ||
*Killer Queen moves | *Killer Queen moves forward more. | ||
}} | }} | ||
}} | }} | ||
| Line 727: | Line 732: | ||
|caption= | |caption= | ||
|name=Blown to pieces! | |name=Blown to pieces! | ||
|input=623L/M/H while a bomb is active | |input=s.623L/M/H while a bomb is active | ||
|data= | |data= | ||
{{AttackData-ASBR | {{AttackData-ASBR | ||
|damage= | |damage= | ||
|guard=Mid | |guard=Mid | ||
|startup= | |startup=6 | ||
|active= | |active= | ||
|recovery=Total XX | |recovery=Total XX | ||
| Line 741: | Line 746: | ||
*Move performance is identical across all versions. | *Move performance is identical across all versions. | ||
*Can hit OTG. | *Can hit OTG. | ||
*If used to detonate an application of "The First Bomb" within the same combo it was applied in, the move does not count as an input for the purposes of damage scaling. | |||
*Explosion is normally -4 on block. However, if it hits Kira, he will recover faster and be at +10. | *Explosion is normally -4 on block. However, if it hits Kira, he will recover faster and be at +10. | ||
**If triggered after "The First Bomb" Kira is unable to hit himself with | **If triggered after "The First Bomb" while playing as Player 2, Kira is unable to hit himself with the explosion. | ||
}} | }} | ||
}} | }} | ||
| Line 753: | Line 759: | ||
|caption2= | |caption2= | ||
|name=Calm and cool | |name=Calm and cool | ||
|input=421L/M/H | |input=s.421L/M/H | ||
|data= | |data= | ||
{{AttackData-ASBR | {{AttackData-ASBR | ||
| Line 791: | Line 797: | ||
Killer Queen puts up its open palms, rapidly moving them. If hit, Killer Queen retaliates with a backfist. | Killer Queen puts up its open palms, rapidly moving them. If hit, Killer Queen retaliates with a backfist. | ||
*The version used determines the startup and recovery. | *The version used determines the startup and recovery. | ||
*Launches on a successful activation. | |||
*Does not work against projectiles, Throws, HHAs, or GHAs. | *Does not work against projectiles, Throws, HHAs, or GHAs. | ||
*On a successful activation, the move can be Flash Canceled to convert into a combo. | *On a successful activation, the move can be Flash Canceled to convert into a combo. | ||
---- | ---- | ||
| Line 820: | Line 826: | ||
|damage=120 (10+110) | |damage=120 (10+110) | ||
|guard=Throw | |guard=Throw | ||
|startup= | |startup=6 | ||
|active= | |active=3 | ||
|recovery= | |recovery= | ||
|blockadv= | |blockadv= | ||
|hitadv= | |hitadv=HKD | ||
|description= | |description= | ||
Kira grabs the opponent and slams them to the ground, following up with a stomp. | Kira grabs the opponent and slams them to the ground, following up with a stomp. | ||
*Leaves the opponent directly in front of Kira. | *Leaves the opponent directly in front of Kira, with Back Throw leaving the opponent slightly further away. | ||
* | *Regardless of the version used, Kira's Throws slightly rotate the axis. | ||
*Can be followed up with [[JoJo's Bizarre Adventure: All-Star Battle R/Yoshikage Kira#3H|3H]]. | *Can be followed up with [[JoJo's Bizarre Adventure: All-Star Battle R/Yoshikage Kira#3H|3H]]. | ||
}} | }} | ||
| Line 838: | Line 844: | ||
|caption= | |caption= | ||
|name=Assist | |name=Assist | ||
|subtitle=Anything can be a bomb.<br>{{NotationIcon- | |subtitle=Anything can be a bomb.<br>{{NotationIcon-ASBR|Assault}}{{NotationIcon-ASBR|Assault}}{{NotationIcon-ASBR|Burst}}{{NotationIcon-ASBR|Burst}} | ||
|data= | |data= | ||
{{AttackData-ASBR | {{AttackData-ASBR | ||
| Line 847: | Line 853: | ||
|recovery= | |recovery= | ||
|blockadv= | |blockadv= | ||
|hitadv= | |hitadv=KD | ||
|description= | |description= | ||
Kira summons Killer Queen to toss a coin that has been turned into a bomb. | Kira summons Killer Queen to toss a coin that has been turned into a bomb. | ||
*Assault Assist Stocks: 2 | *Assault Assist Stocks: 2 | ||
*Reversal Assist Stocks: 2 | *Reversal Assist Stocks: 2 | ||
*Based on [[JoJo's Bizarre Adventure: All-Star Battle R/Yoshikage Kira#214X| | *Based on [[JoJo's Bizarre Adventure: All-Star Battle R/Yoshikage Kira#214X|214M]] | ||
*Launches on hit. | *Launches on hit. | ||
* | *Upon reaching the ground, the coin will remain on the field for 10 seconds, and will not go away if the point character is hit. | ||
*The explosion cannot be triggered by the point character stepping on the coin, but it can hurt (and kill) them. | |||
}} | }} | ||
}} | }} | ||
| Line 872: | Line 879: | ||
|startup= | |startup= | ||
|active= | |active= | ||
|recovery= | |recovery=Total XX | ||
|blockadv= | |blockadv= | ||
|hitadv= | |hitadv= | ||
| Line 894: | Line 901: | ||
|damage=210 (30+20*5+80) | |damage=210 (30+20*5+80) | ||
|guard=Mid | |guard=Mid | ||
|startup= | |startup=2+6 | ||
|active= | |active= | ||
|recovery= | |recovery= | ||
|blockadv= | |blockadv=-38 | ||
|hitadv= | |hitadv=HKD (+90) | ||
|description= | |description= | ||
Killer Queen chops the opponent, and then repeatedly detonates them. | Killer Queen chops the opponent, and then repeatedly detonates them. | ||
| Line 920: | Line 927: | ||
|damage=342 (30+312) | |damage=342 (30+312) | ||
|guard=Unblockable | |guard=Unblockable | ||
|startup= | |startup=2+40 | ||
|active= | |active= | ||
|recovery= | |recovery= | ||
|blockadv= | |blockadv= | ||
|hitadv= | |hitadv=HKD | ||
|description= | |description= | ||
Killer Queen deploys Sheer Heart Attack, making it chase the opponent. Upon contact, Sheer Heart Attack digs into the opponent before flying up and divebombing them as it explodes. | Killer Queen deploys Sheer Heart Attack, making it chase the opponent. Upon contact, Sheer Heart Attack digs into the opponent before flying up and divebombing them as it explodes. | ||
| Line 935: | Line 942: | ||
==Costumes== | ==Costumes== | ||
===Normal=== | ===Normal=== | ||
{{ColorGallery | filePrefix=JJASBR_Kira_Color_ | imageFileTypes=png| imageWidths= | {{ColorGallery | filePrefix=JJASBR_Kira_Color_ | imageFileTypes=png| imageWidths=250 | colors= | ||
{{ColorGallery/Color|1| text=Normal (Color 1) }} | {{ColorGallery/Color|1| text=Normal (Color 1) }} | ||
{{ColorGallery/Color|2| text=Normal (Color 2) }} | {{ColorGallery/Color|2| text=Normal (Color 2) }} | ||
| Line 943: | Line 950: | ||
===Special=== | ===Special=== | ||
{{ColorGallery | filePrefix=JJASBR_Kira_Color_ | imageFileTypes=png| imageWidths= | {{ColorGallery | filePrefix=JJASBR_Kira_Color_ | imageFileTypes=png| imageWidths=250 | colors= | ||
{{ColorGallery/Color|Special A 1| text=Special A (Color 1) }} | {{ColorGallery/Color|Special A 1| text=Special A (Color 1) }} | ||
{{ColorGallery/Color|Special A 2| text=Special A (Color 2) }} | {{ColorGallery/Color|Special A 2| text=Special A (Color 2) }} | ||
}} | |||
===Stand=== | |||
{{ColorGallery | filePrefix=JJASBR_Kira_Color_ | imageFileTypes=png| imageWidths=250 | colors= | |||
{{ColorGallery/Color|Stand 1| text={{Tooltip|color=purple|text=Killer Queen (Color 1)|hovertext=Used for odd-numbered colors.}} }} | |||
{{ColorGallery/Color|Stand 2| text={{Tooltip|color=purple|text=Killer Queen (Color 2)|hovertext=Used for even-numbered colors.}} }} | |||
}} | }} | ||
Latest revision as of 21:38, 8 June 2024
Introduction
- This article is about the user of the Stand Killer Queen, primarily known as "Kira". For information about the man often mistaken for Kira, see Kosaku Kawajiri.
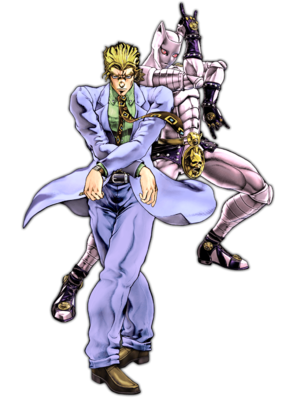
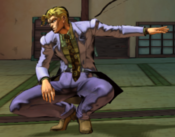
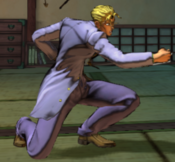
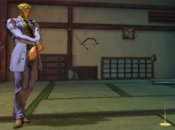
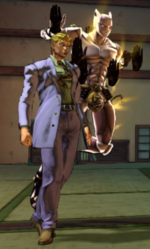
Yoshikage Kira, the main antagonist of Diamond is Unbreakable, the fourth part of JoJo's Bizarre Adventure, is a rushdown character that focuses on scoring a hit into large damage, securing a knockdown, and then pressuring his opponent with powerful okizeme. Kira operates as a relatively quick powerhouse, being able to score high damage without sacrificing too much speed.
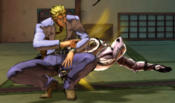
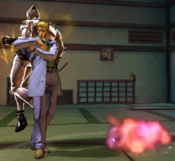
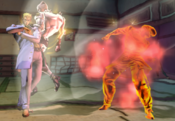
In Stand Off, Kira can send Killer Queen to attack forward with "Ha!" as a way to control the neutral. He also has access to the crux of his okizeme: "Anything can be a bomb.", a move in which Kira lobs an explosive coin. The coin can serve as an esoteric anti-air, but its true power lies in its effect: on hit, the coin explodes, launching the opponent into the air and allowing Kira to convert into a combo. While the opponent has some options around it, they will have to make a hard read as to what Kira will do as the coin falls: he can either land a Throw, continue his pressure, or even chain into his 3H Overhead. Even if the coin doesn't hit the opponent, it will remain on the ground as an inconspicious trap that can be manually detonated with "Blown to pieces!".
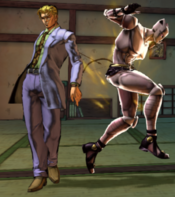
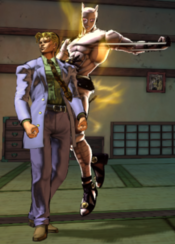
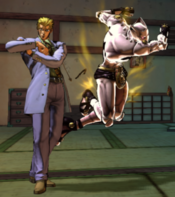
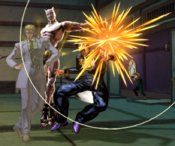
In Stand On, Kira loses access to his coins and Overhead, but gains his most powerful combo extender: "The First Bomb", a move where Kira turns his opponent into a bomb which he can manually detonate; combos involving this move are very damaging without spending too much meter. In conjunction with Stand Rush, "You bastard!" can allow Kira to set up blockstrings, or even confirm into a combo while the opponent is standing. With his toolset and/or certain Assists, Kira is also able to set up very deadly blockstrings into his Unblockable GHA, giving him the chance to swing the game to his favor with one momentum shift.
Kira's main flaw lies in his defense: he does not have any sort of meterless invincible reversals, and while he has access to a counter in "Calm and cool", it can only be used while in Stand On.
- Only one bomb at a time: If bomb-related special moves are used in succession, the previous bomb will be nullified. In addition, the explosions generated by Kira's special moves can damage (and kill) him.
|
|
|
| Pros | Cons |
|
|
Stats
| Style | Health | Low Health Mode | Hashtag(s) |
|---|---|---|---|
| Stand | 950 | Rumble | #ASBR_KIR |
Move List
Stand Off
Normal Moves
5L
5L
|
|---|
5M
5M
|
|---|
5H
5H
|
|---|
2L
2L
|
|---|
2M
2M
|
|---|
2H
2H
|
|---|
3H
3H
It's your fate to be defeated here... |
|---|
JL
j.L
|
|---|
JM
j.M
|
|---|
JH
j.H
|
|---|
Special Moves
236X
Ha!
236L/M/H |
|---|
214X
Anything can be a bomb.
214L/M/H |
|---|
623X
Blown to pieces!
623L/M/H while a bomb is active |
|---|
Stand On
Normal Moves
Stand 5L
s.5L
|
|---|
Stand 5M
s.5M
|
|---|
Stand 5H
s.5H
|
|---|
Stand 2L
s.2L
|
|---|
Stand 2M
s.2M
|
|---|
Stand 2H
s.2H
|
|---|
Stand JL
s.jL
|
|---|
Stand JM
s.jM
|
|---|
Stand JH
s.jH
|
|---|
Special Moves
Stand 236X
You bastard!
s.236L/M/H |
|---|
Stand 214X
The First Bomb
s.214L/M/H |
|---|
Stand 623X
Blown to pieces!
s.623L/M/H while a bomb is active |
|---|
Stand 421X
Calm and cool
s.421L/M/H |
|---|
System Mechanics
Throw
Throw
Watch and learn 5/4 + Any Two Attack Buttons |
|---|
Assist
Assist
Anything can be a bomb. |
|---|
5S
Stand On/Off 5S Stand On Stand On Stand Off Stand Off
|
|---|
Heart Heat Attack
I'm going to blow you to smithereens!
236 + Any Two Attack Buttons |
|---|
Great Heat Attack
Sheer Heart Attack 236L+M+H Sheer Heart Attack! Sheer Heart Attack! Look over here! Look over here! Sheer Heart Attack... has no weaknesses. Sheer Heart Attack... has no weaknesses.
|
|---|
