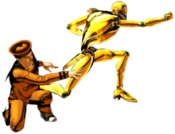
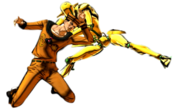
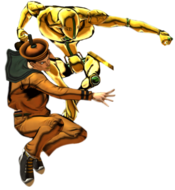
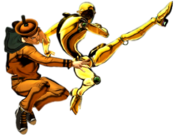
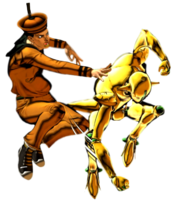
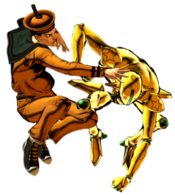
JoJo's Bizarre Adventure: All-Star Battle R/Josuke Higashikata (Part 8): Difference between revisions
No edit summary |
No edit summary |
||
| (68 intermediate revisions by 6 users not shown) | |||
| Line 2: | Line 2: | ||
==Introduction== | ==Introduction== | ||
:''This article is about the character from Part 8, ''JoJolion'', primarily known as "Josuke 8". For information about the character from Part 4, ''Diamond is Unbreakable'', see [[JoJo's Bizarre Adventure: All-Star Battle R/Josuke Higashikata (Part 4)|Josuke Higashikata (Part 4)]].'' | :''This article is about the character from Part 8, ''JoJolion'', primarily known as "Josuke 8". For information about the character from Part 4, ''Diamond is Unbreakable'', see [[JoJo's Bizarre Adventure: All-Star Battle R/Josuke Higashikata (Part 4)|Josuke Higashikata (Part 4)]].'' | ||
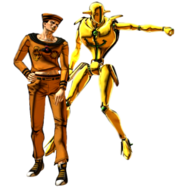
The primary protagonist of | The primary protagonist of ''JoJolion'', the eighth part of ''JoJo's Bizarre Adventure'', Josuke Higashikata is a character who gains momentum by utilizing a variety of powerful okizeme setups. Josuke specializes in strong strike-throw pressure, and uses deceptive mobility to start high damage combos that lead to dangerous hard knockdown situations. | ||
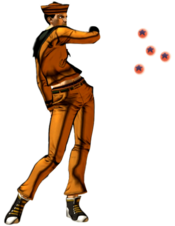
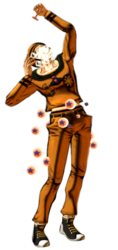
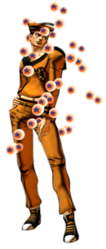
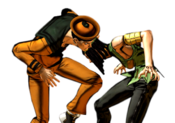
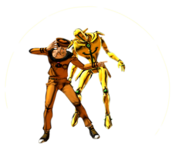
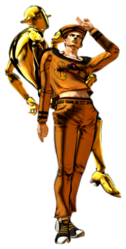
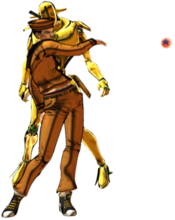
His playstyle in Stand Off revolves around closing the gap in mid-range and starting his oki setups. "[[JoJo's Bizarre Adventure: All-Star Battle R/Josuke Higashikata (Part 8)#236X|So slippery!]]" hits Low and travels far, making it very effective at catching opponents off guard. Also, while not as good a neutral tool, "[[JoJo's Bizarre Adventure: All-Star Battle R/Josuke Higashikata (Part 8)#623X|Don't mess with me.]]" has upper-body invincibility frames, allowing Josuke to dash through even multi-hitting projectiles (i.e. [[JoJo's Bizarre Adventure: All-Star Battle R/Noriaki Kakyoin|Kakyoin]]'s Emerald Splash, [[JoJo's Bizarre Adventure: All-Star Battle R/Narancia Ghirga|Narancia]]'s bullets, [[JoJo's Bizarre Adventure: All-Star Battle R/Risotto Nero|Risotto]]'s scalpels, etc.). "[[JoJo's Bizarre Adventure: All-Star Battle R/Josuke Higashikata (Part 8)#22X|How to use the bubbles...]]" is his primary okizeme tool, creating a wall of bubbles that surround Josuke; using this move after a knockdown (such as his [[JoJo's Bizarre Adventure: All-Star Battle R/Josuke Higashikata (Part 8)#Throw|Throw]]) greatly limits the opponent's options on wake-up. | |||
*''' | In Stand On, his gameplan is focused on applying pressure and contending in air-to-air situations using his long-range normals. [[JoJo's Bizarre Adventure: All-Star Battle R/Josuke Higashikata (Part 8)#Stand JM|s.jM]] in particular causes a launch animation, allowing for effective punishes against errant jumpers. Additionally, "[[JoJo's Bizarre Adventure: All-Star Battle R/Josuke Higashikata (Part 8)#Stand 236X|The hell is your problem?!]]" makes for a decent anti-air and defensive tool. The medium and heavy versions in particular are excellent at avoiding well-timed attacks and creating distance. | ||
*'''Link Combos''': Josuke is able to link from special moves into normals much more easily than other characters, being able to juggle at both midscreen and in the corner. | |||
{{StrengthsAndWeaknesses | {{StrengthsAndWeaknesses | ||
| intro = [[file:JJASBR_Josuke_Part_8_Small_Icon.png|50px]] '''Josuke Higashikata 8''' is a Stand character who utilizes his strong | | intro = [[file:JJASBR_Josuke_Part_8_Small_Icon.png|50px]] '''Josuke Higashikata 8''' is a Stand character who utilizes his strong neutral presence and various okizeme setups to keep the opponent guessing. | ||
| pros = | | pros = | ||
* '''Self Sufficient:''' Josuke's meter gain is above average (especially in the corner) thanks to most of his moves being multi-hitting. | * '''Self-Sufficient:''' Josuke's meter gain is above average (especially in the corner) thanks to most of his moves being multi-hitting. | ||
* '''Good Oki:''' | * '''Good Oki:''' "[[JoJo's Bizarre Adventure: All-Star Battle R/Josuke Higashikata (Part 8)#22X|How to use the bubbles...]]" can provide a sort of wall of safety after a hard knockdown > 3H OTG, giving Josuke the chance to attack and start pressure. He also has a great variety of meaty setups. | ||
* ''' | * '''Not So Soft''': Unlike most characters in the game, Josuke is able to combo after landing his [[JoJo's Bizarre Adventure: All-Star Battle R/Josuke Higashikata (Part 8)#Heart Heat Attack|HHA]], which leads to high damage, impressive meter gain, and a potential oki setup. | ||
|cons = | |||
* '''Needs Meter:''' If not facing the corner, Josuke needs meter in order to start any decent damage combos. | |||
* '''Commital Neutral Options:''' Most of Josuke's long-range neutral tools have a lot of recovery on whiff or are very unsafe on block, so approaching in neutral can be risky without enough meter to Flash Cancel. | |||
* '''Needs Meter''' If not facing the corner, Josuke needs meter in order to start any decent damage | |||
| tablewidth = 80 | | tablewidth = 80 | ||
}} | }} | ||
| Line 29: | Line 30: | ||
}} | }} | ||
}} | }} | ||
==Move List== | ==Move List== | ||
<div style="position: sticky; top: 0; display: flex; justify-content: center; background-color: #cacace;" class="movelist-toggles sticky"> | <div style="position: sticky; top: 0; display: flex; justify-content: center; background-color: #cacace;" class="movelist-toggles sticky"> | ||
| Line 48: | Line 48: | ||
|damage=14 | |damage=14 | ||
|guard=Mid | |guard=Mid | ||
|startup= | |startup=4 | ||
|active= | |active= | ||
|recovery= | |recovery= | ||
|blockadv= | |blockadv=-4 | ||
|hitadv= | |hitadv= | ||
|description= | |description= | ||
Josuke raises his knee to do a quick attack. | Josuke raises his knee to do a quick attack. | ||
* | *Short range, though average for a light attack. | ||
*Moves Josuke very slightly forward. | |||
*Josuke's fastest option while in Stand Off. | |||
}} | }} | ||
}} | }} | ||
| Line 69: | Line 71: | ||
|damage=23 | |damage=23 | ||
|guard=Mid | |guard=Mid | ||
|startup= | |startup=8 | ||
|active= | |active= | ||
|recovery= | |recovery= | ||
|blockadv= | |blockadv=-4 | ||
|hitadv= | |hitadv=0 | ||
|description= | |description= | ||
Josuke throws his leg forward. | Josuke throws his leg forward. | ||
*Decent range | *Decent range, slightly better than 2L. | ||
*Moves Josuke slightly forward. | |||
}} | }} | ||
}} | }} | ||
| Line 90: | Line 93: | ||
|damage=37 | |damage=37 | ||
|guard=Mid | |guard=Mid | ||
|startup= | |startup=12 | ||
|active= | |active= | ||
|recovery= | |recovery= | ||
|blockadv= | |blockadv=+2 | ||
|hitadv= | |hitadv=+8 | ||
|description= | |description= | ||
Josuke summons Soft | Josuke summons Soft & Wet to throw out a punch. | ||
*Decent range | *Decent range, slightly worse than 2H. | ||
*Great for pressure. | |||
}} | }} | ||
}} | }} | ||
| Line 111: | Line 115: | ||
|damage=13 | |damage=13 | ||
|guard=Low | |guard=Low | ||
|startup= | |startup=6 | ||
|active= | |active= | ||
|recovery= | |recovery= | ||
|blockadv= | |blockadv=-6 | ||
|hitadv= | |hitadv= | ||
|description= | |description= | ||
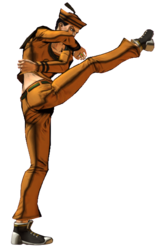
Josuke attacks with a crouching chop. | |||
* | *Can cancel into itself. | ||
*Better range than 5L. | |||
}} | }} | ||
}} | }} | ||
| Line 130: | Line 135: | ||
|data= | |data= | ||
{{AttackData-ASBR | {{AttackData-ASBR | ||
|damage=12, 15 | |damage=27 (12, 15) | ||
|guard=Low | |guard=Low | ||
|startup= | |startup=6(9)1 | ||
|active= | |active= | ||
|recovery= | |recovery= | ||
|blockadv= | |blockadv=-14 | ||
|hitadv= | |hitadv= | ||
|description= | |description= | ||
Josuke gets on one hand and kicks the opponent twice as he twirls around. | Josuke gets on one hand and kicks the opponent twice as he twirls around. | ||
* | *Both hits can be special-canceled. | ||
* | *The second hit causes hard knockdown, leading into oki. | ||
*Amazing range (the most out of all Stand Off normals, in fact), with the second hit reaching further than the first. | |||
*Horrible recovery for a 2M. | |||
}} | }} | ||
}} | }} | ||
| Line 152: | Line 159: | ||
|data= | |data= | ||
{{AttackData-ASBR | {{AttackData-ASBR | ||
|damage=15, 25 | |damage=40 (15, 25) | ||
|guard=Low | |guard=Low | ||
|startup= | |startup=12 | ||
|active= | |active= | ||
|recovery= | |recovery= | ||
|blockadv= | |blockadv=-16 | ||
|hitadv= | |hitadv= | ||
|description= | |description= | ||
Soft | Soft & Wet is summoned by Josuke to do an uppercut. | ||
* | *Hits twice with double heavy hitstop, making it good for hitconfirms. | ||
*Better range than 5H. | |||
*Can function as an (inconsistent) anti-air. | |||
}} | }} | ||
}} | }} | ||
| Line 175: | Line 184: | ||
|damage=28 | |damage=28 | ||
|guard=Low | |guard=Low | ||
|startup= | |startup=22 | ||
|active= | |active= | ||
|recovery= | |recovery= | ||
|blockadv= | |blockadv=-18 | ||
|hitadv= | |hitadv= | ||
|description= | |description= | ||
Josuke leans forward and stomps on the | Josuke leans forward and stomps on the opponent. | ||
* | *Can hit OTG. | ||
*Main starter for oki situations | *Can only be used once per combo. | ||
*Cannot be cancelled into [[JoJo's Bizarre Adventure: All-Star Battle R/System#Uses of the Heart Heat Gauge|Quick Stand On]]. | |||
*Main starter for oki situations. | |||
}} | }} | ||
}} | }} | ||
| Line 189: | Line 200: | ||
====== <font style="visibility:hidden" size="0">JL</font> ====== | ====== <font style="visibility:hidden" size="0">JL</font> ====== | ||
{{MoveData | {{MoveData | ||
|image= | |image=JJASBR_Josuke_Part_8_Jump_L.png | ||
|caption= | |caption= | ||
|name=j.L | |name=j.L | ||
| Line 197: | Line 208: | ||
|damage=17 | |damage=17 | ||
|guard=Overhead | |guard=Overhead | ||
|startup= | |startup=10 | ||
|active= | |active= | ||
|recovery= | |recovery= | ||
| Line 203: | Line 214: | ||
|hitadv= | |hitadv= | ||
|description= | |description= | ||
Josuke attacks with an aerial knee strike. | |||
*Can cross up | *Can cross up. | ||
*Has the lowest hitstun out of Josuke's aerials, which he can take advantage of to tick throw soon after. | |||
}} | }} | ||
}} | }} | ||
| Line 210: | Line 222: | ||
====== <font style="visibility:hidden" size="0">JM</font> ====== | ====== <font style="visibility:hidden" size="0">JM</font> ====== | ||
{{MoveData | {{MoveData | ||
|image= | |image=JJASBR_Josuke_Part_8_Jump_M.png | ||
|caption= | |caption= | ||
|name=j.M | |name=j.M | ||
| Line 218: | Line 230: | ||
|damage=24 | |damage=24 | ||
|guard=Overhead | |guard=Overhead | ||
|startup= | |startup=10 | ||
|active= | |active= | ||
|recovery= | |recovery= | ||
| Line 224: | Line 236: | ||
|hitadv= | |hitadv= | ||
|description= | |description= | ||
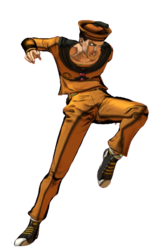
Josuke throws his body forward in the air to kick the opponent. | Josuke throws his body forward in the air to kick the opponent. | ||
*Decently active hitbox | *Decently active hitbox. | ||
*Can cross up | *Can cross up. | ||
*Has the longest horizontal range out of Josuke's aerials while in Stand Off, making it a great air-to-air. | |||
}} | }} | ||
}} | }} | ||
| Line 232: | Line 245: | ||
====== <font style="visibility:hidden" size="0">JH</font> ====== | ====== <font style="visibility:hidden" size="0">JH</font> ====== | ||
{{MoveData | {{MoveData | ||
|image= | |image=JJASBR_Josuke_Part_8_Jump_H.png | ||
|caption= | |caption= | ||
|name=j.H | |name=j.H | ||
| Line 240: | Line 253: | ||
|damage=38 | |damage=38 | ||
|guard=Overhead | |guard=Overhead | ||
|startup= | |startup=10 | ||
|active= | |active= | ||
|recovery= | |recovery= | ||
| Line 246: | Line 259: | ||
|hitadv= | |hitadv= | ||
|description= | |description= | ||
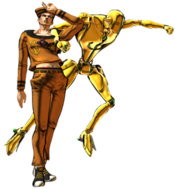
Soft | Josuke summons Soft & Wet to kick the opponent midair. | ||
*Decently active hitbox | *Decently active hitbox. | ||
* | *Can cross up. | ||
*Large vertical hitbox, can hit most standing opponents while rising. | |||
}} | }} | ||
}} | }} | ||
| Line 262: | Line 276: | ||
{{AttackData-ASBR | {{AttackData-ASBR | ||
|version=Light | |version=Light | ||
|damage=2*9 | |damage=18 (2*9) | ||
|guard=Low | |guard=Low, Mid | ||
|startup= | |startup=10 | ||
|active= | |active= | ||
|recovery= | |recovery= | ||
|blockadv= | |blockadv=-2 | ||
|hitadv= | |hitadv=0 | ||
|description= | |description= | ||
}} | }} | ||
{{AttackData-ASBR | {{AttackData-ASBR | ||
|version=Medium | |version=Medium | ||
|header=no | |header=no | ||
|damage=2*12 | |damage=24 (2*12) | ||
|guard=Low | |guard=Low, Mid | ||
|startup= | |startup=10 | ||
|active= | |active= | ||
|recovery= | |recovery= | ||
|blockadv= | |blockadv=-4 | ||
|hitadv= | |hitadv=-2 | ||
|description= | |description= | ||
}} | }} | ||
{{AttackData-ASBR | {{AttackData-ASBR | ||
|version=Heavy | |version=Heavy | ||
|header=no | |header=no | ||
|damage=2*15 | |damage=30 (2*15) | ||
|guard=Low | |guard=Low, Mid | ||
|startup= | |startup=10 | ||
|active= | |active= | ||
|recovery= | |recovery= | ||
|blockadv= | |blockadv=-6 | ||
|hitadv= | |hitadv=-4 | ||
|description= | |description= | ||
*Has the most range | Josuke summons Soft & Wet, which pushes him forward and causes him to slide and spin around. | ||
*Different versions increase the amount of hits, as well as the distance covered. | |||
*The first hit is a Low, while susqequent hits are Mids. | |||
---- | |||
'''L version:''' | |||
*Has the shortest range. | |||
*Safe on block; the go-to blockstring ender. | |||
---- | |||
'''M version:''' | |||
*Has average range. | |||
---- | |||
'''H version:''' | |||
*Has the most range. | |||
*Great against run-ins from afar, or as a whiff punish. | |||
}} | }} | ||
}} | }} | ||
| Line 307: | Line 330: | ||
|caption= | |caption= | ||
|name=Zero Friction | |name=Zero Friction | ||
|input=236L/M/H>6L/M/H | |input=236L/M/H > 6L/M/H | ||
|data= | |data= | ||
{{AttackData-ASBR | {{AttackData-ASBR | ||
|damage=40 (20*2) | |||
|damage=20*2 | |||
|guard=Low | |guard=Low | ||
|startup= | |startup=12(13)1 | ||
|active= | |active= | ||
|recovery= | |recovery= | ||
|blockadv= | |blockadv=-22 | ||
|hitadv= | |hitadv= | ||
|description= | |description= | ||
* | After spinning, Josuke kicks the opponent twice while sliding. | ||
*Move performance is identical across all versions. | |||
*Lightly launches on hit, making it a great Stand Off juggle starter with a Flash Cancel. | |||
}} | }} | ||
}} | }} | ||
====== <font style="visibility:hidden" size="0"> | ====== <font style="visibility:hidden" size="0">623X</font> ====== | ||
{{MoveData | {{MoveData | ||
|image= | |image=JJASBR_Josuke_Part_8_623X.png | ||
|caption= | |caption= | ||
|name=Don't mess with me. | |||
|input=623L/M/H | |||
|name= | |||
|input= | |||
|data= | |data= | ||
{{AttackData-ASBR | {{AttackData-ASBR | ||
|version=Light | |version=Light | ||
|damage= | |damage=38 | ||
|guard=Mid | |guard=Mid | ||
|startup= | |startup=26 | ||
|active= | |active= | ||
|recovery= | |recovery= | ||
|blockadv= | |blockadv=+2 | ||
|hitadv= | |hitadv= | ||
|description= | |description= | ||
}} | }} | ||
{{AttackData-ASBR | {{AttackData-ASBR | ||
|version=Medium | |version=Medium | ||
|header=no | |header=no | ||
|damage= | |damage=40 | ||
|guard=Mid | |guard=Mid | ||
|startup= | |startup=26 | ||
|active= | |active= | ||
|recovery= | |recovery= | ||
|blockadv= | |blockadv=0 | ||
|hitadv= | |hitadv= | ||
|description= | |description= | ||
}} | }} | ||
{{AttackData-ASBR | {{AttackData-ASBR | ||
|version=Heavy | |version=Heavy | ||
|header=no | |header=no | ||
|damage= | |damage=42 | ||
|guard=Mid | |guard=Mid | ||
|startup= | |startup=26 | ||
|active= | |active= | ||
|recovery= | |recovery= | ||
|blockadv= | |blockadv=-2 | ||
|hitadv= | |hitadv= | ||
|description= | |description= | ||
* | Josuke weaves forward to deliver a punch. | ||
* | *Different versions increase the amount of damage, as well as the distance covered. | ||
*Causes crumple on hit. | |||
*Josuke has upper-body invulnerability during his weave. | |||
*Triggers [[JoJo's Bizarre Adventure: All-Star Battle R/System#Rush Mode|Rush Mode]]. | |||
---- | |||
'''L version:''' | |||
*Has the shortest range. | |||
*Plus on block. | |||
---- | |||
'''M version:''' | |||
*Has average range. | |||
---- | |||
'''H version:''' | |||
*Has the longest range. | |||
}} | }} | ||
}} | }} | ||
====== <font style="visibility:hidden" size="0"> | ====== <font style="visibility:hidden" size="0">214X</font> ====== | ||
{{MoveData | {{MoveData | ||
|image= | |image=JJASBR_Josuke_Part_8_214X.png | ||
|caption= | |caption= | ||
|name= | |name=Let me take that from you. | ||
|input= | |input=214L/M/H | ||
|data= | |data= | ||
{{AttackData-ASBR | {{AttackData-ASBR | ||
|version=Light | |version=Light | ||
|damage= | |damage=36 (9*4) | ||
|guard=Mid | |guard=Mid | ||
|startup= | |startup= | ||
| Line 422: | Line 423: | ||
|hitadv= | |hitadv= | ||
|description= | |description= | ||
}} | }} | ||
{{AttackData-ASBR | {{AttackData-ASBR | ||
|version=Medium | |version=Medium | ||
|header=no | |header=no | ||
|damage= | |damage=72 (9*8) | ||
|guard=Mid | |guard=Mid | ||
|startup= | |startup= | ||
| Line 436: | Line 435: | ||
|hitadv= | |hitadv= | ||
|description= | |description= | ||
}} | }} | ||
{{AttackData-ASBR | {{AttackData-ASBR | ||
|version=Heavy | |version=Heavy | ||
|header=no | |header=no | ||
|damage= | |damage=108 (9*12) | ||
|guard=Mid | |guard=Mid | ||
|startup= | |startup= | ||
| Line 449: | Line 447: | ||
|hitadv= | |hitadv= | ||
|description= | |description= | ||
* | Josuke throws bubbles at his opponent as a projectile. | ||
*Different versions increase the amount of bubbles fired, as well as the distance covered. | |||
*None of the versions reach past midscreen. | |||
---- | |||
:'''L version:''' | |||
*Josuke sends 4 bubbles. | |||
*Allows Josuke to combo after at specific ranges with 2L, 5M, 2M and 2H. | |||
---- | |||
:'''M version:''' | |||
*Josuke sends 8 bubbles. | |||
*Allows Josuke to combo after at specific ranges with 2H. | |||
---- | |||
:'''H version:''' | |||
*Josuke sends 12 bubbles. | |||
*Allows Josuke to combo after at specific ranges with 2H. | |||
}} | }} | ||
}} | }} | ||
| Line 458: | Line 470: | ||
|caption= | |caption= | ||
|image2=JJASBR_Josuke_Part_8_22X_(2).png | |image2=JJASBR_Josuke_Part_8_22X_(2).png | ||
|caption2= | |caption2=Bubble Buddy! | ||
|name=How to use the bubbles... | |name=How to use the bubbles... | ||
|input=22L/M/H | |input=22L/M/H | ||
| Line 464: | Line 476: | ||
{{AttackData-ASBR | {{AttackData-ASBR | ||
|version=Light | |version=Light | ||
|damage=10*6 | |damage=60 (10*6) | ||
|guard=Mid | |guard=Mid | ||
|startup= | |startup= | ||
| Line 472: | Line 484: | ||
|hitadv= | |hitadv= | ||
|description= | |description= | ||
}} | }} | ||
{{AttackData-ASBR | {{AttackData-ASBR | ||
|version=Medium | |version=Medium | ||
|header=no | |header=no | ||
|damage=10*6 | |damage=60 (10*6) | ||
|guard=Mid | |guard=Mid | ||
|startup= | |startup= | ||
| Line 486: | Line 496: | ||
|hitadv= | |hitadv= | ||
|description= | |description= | ||
}} | }} | ||
{{AttackData-ASBR | {{AttackData-ASBR | ||
|version=Heavy | |version=Heavy | ||
|header=no | |header=no | ||
|damage=10*6 | |damage=60 (10*6) | ||
|guard=Mid | |guard=Mid | ||
|startup= | |startup= | ||
| Line 499: | Line 508: | ||
|hitadv= | |hitadv= | ||
|description= | |description= | ||
* | Josuke covers himself with bubbles, which will start moving forward after a brief moment. | ||
*Primary okizeme tool | *Different versions alter the velocity of the bubbles, although all of them are very slow regardless. | ||
*None of the versions reach midscreen. | |||
*Due to its slow startup, it's not a good projectile or combo filler. Instead, it plays the role of an oki tool. | |||
---- | |||
'''L version:''' | |||
*Has the most recovery, but can be Flash Cancelled the soonest. | |||
---- | |||
'''M version:''' | |||
*Balanced recovery and Flash Cancel timing. | |||
---- | |||
'''H version:''' | |||
*Has the least amount of recovery, but takes the longest to Flash Cancel. | |||
*Primary okizeme tool. | |||
}} | }} | ||
}} | }} | ||
</div> | </div> | ||
<div id="movelist-2" class="movelist"><!-- Stand On Move List --> | <div id="movelist-2" class="movelist"><!-- Stand On Move List --> | ||
===Stand On=== | ===Stand On=== | ||
====Normal Moves==== | ====Normal Moves==== | ||
| Line 512: | Line 532: | ||
|image=JJASBR_Josuke_Part_8_Stand_5L.png | |image=JJASBR_Josuke_Part_8_Stand_5L.png | ||
|caption= | |caption= | ||
|name=5L | |name=s.5L | ||
|subtitle= | |subtitle= | ||
|data= | |data= | ||
| Line 518: | Line 538: | ||
|damage=15 | |damage=15 | ||
|guard=Mid | |guard=Mid | ||
|startup= | |startup=4 | ||
|active= | |active= | ||
|recovery= | |recovery= | ||
|blockadv= | |blockadv=-4 | ||
|hitadv= | |hitadv= | ||
|description= | |description= | ||
Soft | Soft & Wet throws out a jab. | ||
*Decent range | *Decent range, very slightly worse than s.2L. | ||
*Fastest option while in Stand On. | |||
*Great at stopping dash-jumps. | |||
}} | }} | ||
}} | }} | ||
| Line 533: | Line 555: | ||
|image=JJASBR_Josuke_Part_8_Stand_5M.png | |image=JJASBR_Josuke_Part_8_Stand_5M.png | ||
|caption= | |caption= | ||
|name=5M | |name=s.5M | ||
|subtitle= | |subtitle= | ||
|data= | |data= | ||
{{AttackData-ASBR | {{AttackData-ASBR | ||
|damage=24 | |damage=24 | ||
|guard= | |guard=Low | ||
|startup= | |startup=6 | ||
|active= | |active= | ||
|recovery= | |recovery= | ||
|blockadv= | |blockadv=-6 | ||
|hitadv= | |hitadv=-2 | ||
|description= | |description= | ||
A low kick. | A low kick. | ||
* | *Hits Low even though it's a standing normal. | ||
* | *Good range, slightly more than s.2M. | ||
*Great for pokes. | |||
}} | }} | ||
}} | }} | ||
| Line 554: | Line 577: | ||
{{MoveData | {{MoveData | ||
|image=JJASBR_Josuke_Part_8_Stand_5H_(1).png | |image=JJASBR_Josuke_Part_8_Stand_5H_(1).png | ||
|caption= | |caption= | ||
|image2=JJASBR_Josuke_Part_8_Stand_5H_(2).png | |image2=JJASBR_Josuke_Part_8_Stand_5H_(2).png | ||
|caption2= | |caption2= | ||
|name=5H | |name=s.5H | ||
|subtitle= | |subtitle= | ||
|data= | |data= | ||
{{AttackData-ASBR | {{AttackData-ASBR | ||
|damage=16, 25 | |damage=41 (16, 25) | ||
|guard=Mid | |guard=Mid | ||
|startup= | |startup=12 | ||
|active= | |active= | ||
|recovery= | |recovery= | ||
|blockadv= | |blockadv=-4 | ||
|hitadv= | |hitadv=+2 | ||
|description= | |description= | ||
Soft | Soft & Wet throws out 2 punches. | ||
* | *Amazing range. | ||
* | *Low recovery, safe on block. | ||
}} | }} | ||
}} | }} | ||
| Line 579: | Line 602: | ||
|image=JJASBR_Josuke_Part_8_Stand_2L.png | |image=JJASBR_Josuke_Part_8_Stand_2L.png | ||
|caption= | |caption= | ||
|name=2L | |name=s.2L | ||
|subtitle= | |subtitle= | ||
|data= | |data= | ||
| Line 585: | Line 608: | ||
|damage=14 | |damage=14 | ||
|guard=Low | |guard=Low | ||
|startup= | |startup=6 | ||
|active= | |active= | ||
|recovery= | |recovery= | ||
|blockadv= | |blockadv=-4 | ||
|hitadv= | |hitadv= | ||
|description= | |description= | ||
*Decent range | Soft & Wet attacks with a low kick. | ||
*Decent range, very slightly more than s.5L. | |||
*It's recommended to cancel into s.5H after a stagger pressure attempt, as other options can whiff at max range. | |||
}} | }} | ||
}} | }} | ||
| Line 599: | Line 624: | ||
|image=JJASBR_Josuke_Part_8_Stand_2M.png | |image=JJASBR_Josuke_Part_8_Stand_2M.png | ||
|caption= | |caption= | ||
|name=2M | |name=s.2M | ||
|subtitle= | |subtitle= | ||
|data= | |data= | ||
| Line 605: | Line 630: | ||
|damage=23 | |damage=23 | ||
|guard=Low | |guard=Low | ||
|startup= | |startup=6 | ||
|active= | |active= | ||
|recovery= | |recovery= | ||
|blockadv= | |blockadv=-6 | ||
|hitadv= | |hitadv= | ||
|description= | |description= | ||
*Good range | Soft & Wet attacks with a crouching jab. | ||
*Good range, slightly more than s.2L. | |||
*Incredibly similar to 5M in almost every aspect, with only very slightly shorter range and a very minor difference in damage. | |||
}} | }} | ||
}} | }} | ||
| Line 619: | Line 646: | ||
|image=JJASBR_Josuke_Part_8_Stand_2H.png | |image=JJASBR_Josuke_Part_8_Stand_2H.png | ||
|caption= | |caption= | ||
|name=2H | |name=s.2H | ||
|subtitle= | |subtitle= | ||
|data= | |data= | ||
| Line 625: | Line 652: | ||
|damage=37 | |damage=37 | ||
|guard=Low | |guard=Low | ||
|startup= | |startup=12 | ||
|active= | |active= | ||
|recovery= | |recovery= | ||
|blockadv= | |blockadv=-8 | ||
|hitadv= | |hitadv= | ||
|description= | |description= | ||
*Good range | Soft & Wet performs a sweeping kick. | ||
*Causes hard knockdown. | |||
*Good range, slightly more than s.5M. | |||
}} | }} | ||
}} | }} | ||
| Line 639: | Line 668: | ||
|image=JJASBR_Josuke_Part_8_Stand_Jump_L.png | |image=JJASBR_Josuke_Part_8_Stand_Jump_L.png | ||
|caption= | |caption= | ||
|name= | |name=s.jL | ||
|subtitle= | |subtitle= | ||
|data= | |data= | ||
| Line 645: | Line 674: | ||
|damage=18 | |damage=18 | ||
|guard=Overhead | |guard=Overhead | ||
|startup= | |startup=6 | ||
|active= | |active= | ||
|recovery= | |recovery= | ||
| Line 651: | Line 680: | ||
|hitadv= | |hitadv= | ||
|description= | |description= | ||
*Average range | Soft & Wet punches with a hook. | ||
*Average range. | |||
*Fastest aerial while in Stand On, making it great to contest air-to-airs. | |||
}} | }} | ||
}} | }} | ||
| Line 659: | Line 690: | ||
|image=JJASBR_Josuke_Part_8_Stand_Jump_M.png | |image=JJASBR_Josuke_Part_8_Stand_Jump_M.png | ||
|caption= | |caption= | ||
|name= | |name=s.jM | ||
|subtitle= | |subtitle= | ||
|data= | |data= | ||
| Line 665: | Line 696: | ||
|damage=25 | |damage=25 | ||
|guard=Overhead | |guard=Overhead | ||
|startup= | |startup=10 | ||
|active= | |active= | ||
|recovery= | |recovery= | ||
| Line 671: | Line 702: | ||
|hitadv= | |hitadv= | ||
|description= | |description= | ||
* | Soft & Wet kicks forward. | ||
*Launches on hit. | |||
*Has the tallest vertical reach out of Josuke's aerials while in Stand On. | |||
**This renders the move as an amazing air-to-air, being able to combo even at max range. | |||
}} | }} | ||
}} | }} | ||
| Line 678: | Line 712: | ||
{{MoveData | {{MoveData | ||
|image=JJASBR_Josuke_Part_8_Stand_Jump_H_(1).png | |image=JJASBR_Josuke_Part_8_Stand_Jump_H_(1).png | ||
|caption= | |caption= | ||
|image2=JJASBR_Josuke_Part_8_Stand_Jump_H_(2).png | |image2=JJASBR_Josuke_Part_8_Stand_Jump_H_(2).png | ||
|caption2= | |caption2= | ||
|name= | |name=s.jH | ||
|subtitle= | |subtitle= | ||
|data= | |data= | ||
{{AttackData-ASBR | {{AttackData-ASBR | ||
|damage=18, 20 | |damage=38 (18, 20) | ||
|guard=Overhead | |guard=Overhead | ||
|startup= | |startup=10(5)1 | ||
|active= | |active= | ||
|recovery= | |recovery= | ||
| Line 693: | Line 727: | ||
|hitadv= | |hitadv= | ||
|description= | |description= | ||
*Good range | Soft & Wet punches below itself twice. | ||
*Good vertical range. | |||
*Can cross up | *Can cross up. | ||
*Resets vertical momentum if used while descending. | |||
}} | }} | ||
}} | }} | ||
| Line 705: | Line 740: | ||
|caption= | |caption= | ||
|name=The hell is your problem?! | |name=The hell is your problem?! | ||
|input=236L/M/H | |input=s.236L/M/H | ||
|data= | |||
{{AttackData-ASBR | |||
|version=Light | |||
|damage=60 (5*7, 25) | |||
|guard=Mid | |||
|startup=16 | |||
|active= | |||
|recovery= | |||
|blockadv=-2 | |||
|hitadv= | |||
|description= | |||
}} | |||
{{AttackData-ASBR | |||
|version=Medium | |||
|header=no | |||
|damage=60 (5*7, 25) | |||
|guard=Mid | |||
|startup=22 | |||
|active= | |||
|recovery= | |||
|blockadv=-4 | |||
|hitadv= | |||
|description= | |||
}} | |||
{{AttackData-ASBR | |||
|version=Heavy | |||
|header=no | |||
|damage=60 (5*7, 25) | |||
|guard=Mid | |||
|startup=24 | |||
|active= | |||
|recovery= | |||
|blockadv=-4 | |||
|hitadv= | |||
|description= | |||
Josuke and Soft & Wet jump backwards before the latter performs an advancing barrage of punches. | |||
*Different versions alter the distance Josuke and Soft & Wet leap backwards, as well as Soft & Wet's speed and the distance it covers. | |||
*The final hit launches. | |||
*Stand Rush-compatible. | |||
*Triggers [[JoJo's Bizarre Adventure: All-Star Battle R/System#Rush Mode|Rush Mode]]. | |||
*Since all versions are safe on block, this move is a great blockstring ender. | |||
---- | |||
'''L version:''' | |||
*Josuke and Soft & Wet leap backwards the least. | |||
*Mainly combo filler. | |||
---- | |||
'''M version:''' | |||
*Josuke and Soft & Wet leap backwards more. | |||
*Can be used as a pseudo-reversal after an opponent's successful Stylish Guard. | |||
---- | |||
'''H version:''' | |||
*Josuke and Soft & Wet leap backwards the most. | |||
*Can be used as a pseudo-reversal after an opponent's successful Stylish Guard. | |||
*Great anti-air tool, as it first moves Josuke out of range and then whiff-punishes with Soft & Wet. | |||
}} | |||
}} | |||
====== <font style="visibility:hidden" size="0">Stand 623X</font> ====== | |||
{{MoveData | |||
|image=JJASBR_Josuke_Part_8_Stand_623X_(1).png | |||
|caption= | |||
|image2=JJASBR_Josuke_Part_8_Stand_623X_(2).png | |||
|caption2= | |||
|name=Don't try anything funny! | |||
|input=s.623L/M/H | |||
|data= | |data= | ||
{{AttackData-ASBR | {{AttackData-ASBR | ||
|version=Light | |version=Light | ||
|damage=5*7, | |damage=135 (5*7, 100) | ||
|guard=Mid | |guard=Mid | ||
|startup= | |startup=22 | ||
|active= | |active= | ||
|recovery= | |recovery= | ||
|blockadv= | |blockadv=-14 | ||
|hitadv= | |hitadv= | ||
|description= | |description= | ||
}} | }} | ||
{{AttackData-ASBR | {{AttackData-ASBR | ||
|version=Medium | |version=Medium | ||
|header=no | |header=no | ||
|damage=5*7, | |damage=135 (5*7, 100) | ||
|guard=Mid | |guard=Mid | ||
|startup= | |startup=22 | ||
|active= | |active= | ||
|recovery= | |recovery= | ||
|blockadv= | |blockadv=-18 | ||
|hitadv= | |hitadv= | ||
|description= | |description= | ||
}} | }} | ||
{{AttackData-ASBR | {{AttackData-ASBR | ||
|version=Heavy | |version=Heavy | ||
|header=no | |header=no | ||
|damage=5*7, | |damage=135 (5*7, 100) | ||
|guard=Mid | |guard=Mid | ||
|startup= | |startup=22 | ||
|active= | |active= | ||
|recovery= | |recovery= | ||
|blockadv= | |blockadv=-22 | ||
|hitadv= | |hitadv= | ||
|description= | |description= | ||
* | Josuke and Soft & Wet perform an advancing barrage of punches, following up by reaching for the opponent and throwing them behind themselves. | ||
*Different versions alter the distance covered by Josuke and Soft & Wet. | |||
*The final hit leads into a hitgrab that switches sides and causes hard knockdown. | |||
*Since Josuke is floating during the move, he can go over grounded traps. | |||
*Josuke bounces backwards if this move is blocked. | |||
---- | |||
'''L version:''' | |||
*Travels the least far. | |||
*Mainly combo filler. | |||
---- | |||
'''M version:''' | |||
*Travels farther. | |||
---- | |||
'''H version:''' | |||
*Travels the farthest. | |||
}} | }} | ||
}} | }} | ||
| Line 752: | Line 864: | ||
|caption= | |caption= | ||
|name=I gotta win this! | |name=I gotta win this! | ||
|input=214L/M/H | |input=s.214L/M/H | ||
|data= | |data= | ||
{{AttackData-ASBR | {{AttackData-ASBR | ||
| Line 758: | Line 870: | ||
|damage=55 | |damage=55 | ||
|guard=Mid | |guard=Mid | ||
|startup= | |startup=20 | ||
|active= | |active= | ||
|recovery= | |recovery= | ||
|blockadv= | |blockadv=-4 | ||
|hitadv= | |hitadv=+2 | ||
|description= | |description= | ||
}} | }} | ||
{{AttackData-ASBR | {{AttackData-ASBR | ||
| Line 772: | Line 882: | ||
|damage=55 | |damage=55 | ||
|guard=Mid | |guard=Mid | ||
|startup= | |startup=26 | ||
|active= | |active= | ||
|recovery= | |recovery= | ||
|blockadv= | |blockadv=-4 | ||
|hitadv= | |hitadv=+2 | ||
|description= | |description= | ||
}} | }} | ||
{{AttackData-ASBR | {{AttackData-ASBR | ||
| Line 785: | Line 894: | ||
|damage=55 | |damage=55 | ||
|guard=Mid | |guard=Mid | ||
|startup= | |startup=34 | ||
|active= | |active= | ||
|recovery= | |recovery= | ||
|blockadv= | |blockadv=-4 | ||
|hitadv= | |hitadv=+2 | ||
|description= | |description= | ||
* | Soft & Wet attacks with a turning kick. | ||
*Different versions alter the distance between Josuke and Soft & Wet. | |||
*Stand Rush-compatible. | |||
---- | |||
'''L version:''' | |||
*Has the shortest range. | |||
*Mainly combo filler. | |||
---- | |||
'''M version:''' | |||
*Has average range. | |||
---- | |||
'''H version:''' | |||
*Has the longest range. | |||
}} | }} | ||
}} | }} | ||
====== <font style="visibility:hidden" size="0">Stand | ====== <font style="visibility:hidden" size="0">Stand 214X-X</font> ====== | ||
{{MoveData | {{MoveData | ||
|image= | |image=JJASBR_Josuke_Part_8_Stand_214X-L.png | ||
|caption= | |caption=Light | ||
|image2= | |image2=JJASBR_Josuke_Part_8_Stand_214X-M.png | ||
|caption2= | |caption2=Medium | ||
|name= | |image3=JJASBR_Josuke_Part_8_Stand_214X-H.png | ||
|input= | |caption3=Heavy | ||
|name=I gotta win this! (Follow-up) | |||
|input=s.214L/M/H > L/M/H | |||
|data= | |data= | ||
{{AttackData-ASBR | {{AttackData-ASBR | ||
|version=Light | |version=Light | ||
|damage= | |damage=30 | ||
|guard=Mid | |guard=Mid | ||
|startup= | |startup=12 | ||
|active= | |active= | ||
|recovery= | |recovery= | ||
|blockadv= | |blockadv=-4 | ||
|hitadv= | |hitadv=Crumple | ||
|description= | |description= | ||
}} | }} | ||
{{AttackData-ASBR | {{AttackData-ASBR | ||
|version=Medium | |version=Medium | ||
|header=no | |header=no | ||
|damage= | |damage=40 | ||
|guard= | |guard=Overhead | ||
|startup= | |startup=24 | ||
|active= | |active= | ||
|recovery= | |recovery= | ||
|blockadv= | |blockadv=0 | ||
|hitadv= | |hitadv=KD | ||
|description= | |description= | ||
}} | }} | ||
{{AttackData-ASBR | {{AttackData-ASBR | ||
|version=Heavy | |version=Heavy | ||
|header=no | |header=no | ||
|damage= | |damage=42 (12, 30) | ||
|guard= | |guard=Low | ||
|startup= | |startup=14(9)1 | ||
|active= | |active= | ||
|recovery= | |recovery= | ||
|blockadv= | |blockadv=0 | ||
|hitadv= | |hitadv=HKD | ||
|description= | |description= | ||
* | After Soft & Wet's kick, Josuke runs forward and follows up with an attack of his own. | ||
*The attack performed by Josuke is determined by the version used. | |||
*Can only be used if "I gotta win this!" hits or is blocked. | |||
*This move does not count as a separate input for the purposes of Damage Scaling. | |||
---- | |||
'''L version:''' | |||
Josuke attacks with his knee. | |||
*Causes crumple on hit. | |||
---- | |||
'''M version:''' | |||
Josuke jumps forward to attack with a dropkick. | |||
*Launches on hit. | |||
---- | |||
'''H version:''' | |||
Josuke gets on one hand and kicks the opponent twice as he twirls around. | |||
*Causes hard knockdown. | |||
}} | }} | ||
}} | }} | ||
</div> | </div> | ||
==System Mechanics== | ==System Mechanics== | ||
====== <font style="visibility:hidden" size="0">Throw</font> ====== | ====== <font style="visibility:hidden" size="0">Throw</font> ====== | ||
| Line 859: | Line 997: | ||
|damage=130 | |damage=130 | ||
|guard=Throw | |guard=Throw | ||
|startup= | |startup=6 | ||
|active= | |active= | ||
|recovery= | |recovery= | ||
| Line 865: | Line 1,003: | ||
|hitadv= | |hitadv= | ||
|description= | |description= | ||
Soft & Wet knocks the opponent off-balance with a bubble, with Josuke following up with a knee strike. | |||
*Leaves the opponent directly in front of Josuke. | |||
*Both Throws are identical aside from direction. | *Both Throws are identical aside from direction. | ||
*Can be followed up by [[JoJo's Bizarre Adventure: All-Star Battle R/Josuke Higashikata (Part 8)#3H|3H]] OTG. | |||
*Can be followed up by 3H OTG. | |||
}} | }} | ||
}} | }} | ||
| Line 876: | Line 1,015: | ||
|caption= | |caption= | ||
|name=Assist | |name=Assist | ||
|subtitle=So slippery! | |subtitle=So slippery!<br>{{NotationIcon-ASBR|Assault}}{{NotationIcon-ASBR|Assault}}{{NotationIcon-ASBR|Burst}} | ||
|data= | |data= | ||
{{AttackData-ASBR | {{AttackData-ASBR | ||
|damage= | |damage=30 (2*15) | ||
|guard=Low, Mid | |guard=Low, Mid | ||
|startup= | |startup= | ||
| Line 887: | Line 1,026: | ||
|hitadv= | |hitadv= | ||
|description= | |description= | ||
Josuke slides and spins around. | |||
*Assault Assist Stocks: 2 | *Assault Assist Stocks: 2 | ||
*Reversal Assist Stocks: 1 | *Reversal Assist Stocks: 1 | ||
*Based on [[JoJo's Bizarre Adventure: All-Star Battle R/Josuke Higashikata (Part 8)#236X|236H]] | *Based on [[JoJo's Bizarre Adventure: All-Star Battle R/Josuke Higashikata (Part 8)#236X|236H]] | ||
*As the first hit is a | *As the first hit is a Low, this can be used to set up hard-to-blockable situations. | ||
}} | }} | ||
}} | }} | ||
| Line 908: | Line 1,048: | ||
|startup= | |startup= | ||
|active= | |active= | ||
|recovery= | |recovery=Total XX | ||
|blockadv= | |blockadv= | ||
|hitadv= | |hitadv= | ||
|description= | |description= | ||
(Un)Summons Soft | (Un)Summons Soft & Wet, altering Josuke's moveset and abilities. | ||
}} | }} | ||
}} | }} | ||
| Line 932: | Line 1,072: | ||
|startup= | |startup= | ||
|active= | |active= | ||
|recovery= | |recovery= | ||
|blockadv= | |blockadv= | ||
|hitadv= | |hitadv=Crumple (+10~+34) | ||
|description= | |description= | ||
Josuke sends forth a bubble, stealing the opponent's vision on hit. | Josuke sends forth a bubble, stealing the opponent's vision on hit. | ||
* | *Activation is a projectile that reaches up to midscreen. | ||
* | *Causes crumple on hit against standing opponents. | ||
**Causes hard knockdown against airborne opponents, as well as if the opponent has already been crumpled during a combo. | |||
***Because of this, the move has variable frame advantage on hit, being significantly better when the crumple is triggered. | |||
*Invincible on startup, allowing it to plow through an opponent's Reversal Assist. | |||
*On a successful hit, Josuke's recovery can be Flash Canceled (as well as canceled into GHA). | |||
}} | }} | ||
}} | }} | ||
| Line 945: | Line 1,089: | ||
{{MoveData | {{MoveData | ||
|image=JJASBR_Josuke_Part_8_GHA_(1).png | |image=JJASBR_Josuke_Part_8_GHA_(1).png | ||
|caption= | |caption=''Soft & Wet. Pop!'' | ||
|image2=JJASBR_Josuke_Part_8_GHA_(2).png | |image2=JJASBR_Josuke_Part_8_GHA_(2).png | ||
|caption2= | |caption2=''I just stole the friction from your body.'' | ||
|image3=JJASBR_Josuke_Part_8_GHA_(3).png | |image3=JJASBR_Josuke_Part_8_GHA_(3).png | ||
|caption3= | |caption3=''Just slide away.'' | ||
|name=Soft | |name=Soft & Wet | ||
|input=236L+M+H | |input=236L+M+H | ||
|data= | |data= | ||
| Line 962: | Line 1,106: | ||
|hitadv= | |hitadv= | ||
|description= | |description= | ||
Josuke throws a bubble at the opponent stealing their friction, | Josuke throws a bubble at the opponent, stealing their friction. On a successful hit, Soft & Wet starts throwing out a barrage of punches that finishes with the opponent sliding away. | ||
* | *The third least damaging GHA in the game. | ||
* | *Causes a groundbounce after the cutscene ends. | ||
*Activation is a projectile that reaches fullscreen and has slight tracking properties. | |||
}} | }} | ||
}} | }} | ||
| Line 970: | Line 1,115: | ||
==Costumes== | ==Costumes== | ||
===Normal=== | ===Normal=== | ||
{{ColorGallery | filePrefix=JJASBR_Josuke_Part_8_Color_ | imageFileTypes=png| imageWidths= | {{ColorGallery | filePrefix=JJASBR_Josuke_Part_8_Color_ | imageFileTypes=png| imageWidths=250 | colors= | ||
{{ColorGallery/Color|1| text=Normal (Color 1) }} | {{ColorGallery/Color|1| text=Normal (Color 1) }} | ||
{{ColorGallery/Color|2| text=Normal (Color 2) }} | {{ColorGallery/Color|2| text=Normal (Color 2) }} | ||
| Line 978: | Line 1,123: | ||
===Special=== | ===Special=== | ||
{{ColorGallery | filePrefix=JJASBR_Josuke_Part_8_Color_ | imageFileTypes=png| imageWidths= | {{ColorGallery | filePrefix=JJASBR_Josuke_Part_8_Color_ | imageFileTypes=png| imageWidths=250 | colors= | ||
{{ColorGallery/Color|Special A 1| text=Special A (Color 1) }} | {{ColorGallery/Color|Special A 1| text=Special A (Color 1) }} | ||
{{ColorGallery/Color|Special A 2| text=Special A (Color 2) }} | {{ColorGallery/Color|Special A 2| text=Special A (Color 2) }} | ||
| Line 985: | Line 1,130: | ||
{{ColorGallery/Color|Special C 1| text=Special C (Color 1) }} | {{ColorGallery/Color|Special C 1| text=Special C (Color 1) }} | ||
{{ColorGallery/Color|Special C 2| text=Special C (Color 2) }} | {{ColorGallery/Color|Special C 2| text=Special C (Color 2) }} | ||
}} | |||
===Stand=== | |||
{{ColorGallery | filePrefix=JJASBR_Josuke_Part_8_Color_ | imageFileTypes=png| imageWidths=250 | colors= | |||
{{ColorGallery/Color|Stand 1| text={{Tooltip|color=purple|text=Soft & Wet (Color 1)|hovertext=Used for odd-numbered colors.}} }} | |||
{{ColorGallery/Color|Stand 2| text={{Tooltip|color=purple|text=Soft & Wet (Color 2)|hovertext=Used for even-numbered colors.}} }} | |||
}} | }} | ||
Latest revision as of 22:11, 8 June 2024
Introduction
- This article is about the character from Part 8, JoJolion, primarily known as "Josuke 8". For information about the character from Part 4, Diamond is Unbreakable, see Josuke Higashikata (Part 4).
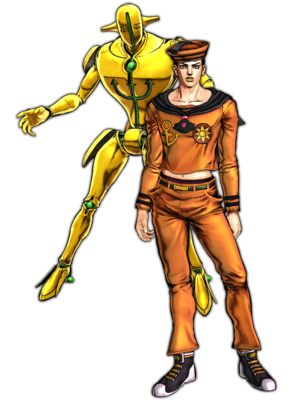
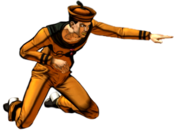
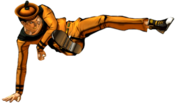
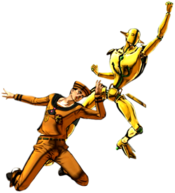
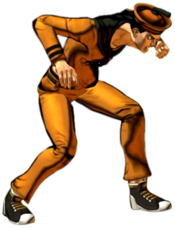
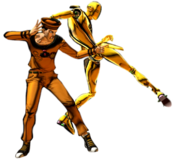
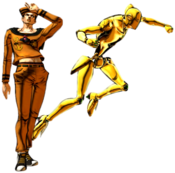
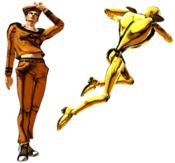
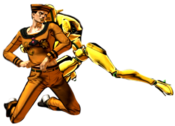
The primary protagonist of JoJolion, the eighth part of JoJo's Bizarre Adventure, Josuke Higashikata is a character who gains momentum by utilizing a variety of powerful okizeme setups. Josuke specializes in strong strike-throw pressure, and uses deceptive mobility to start high damage combos that lead to dangerous hard knockdown situations.
His playstyle in Stand Off revolves around closing the gap in mid-range and starting his oki setups. "So slippery!" hits Low and travels far, making it very effective at catching opponents off guard. Also, while not as good a neutral tool, "Don't mess with me." has upper-body invincibility frames, allowing Josuke to dash through even multi-hitting projectiles (i.e. Kakyoin's Emerald Splash, Narancia's bullets, Risotto's scalpels, etc.). "How to use the bubbles..." is his primary okizeme tool, creating a wall of bubbles that surround Josuke; using this move after a knockdown (such as his Throw) greatly limits the opponent's options on wake-up.
In Stand On, his gameplan is focused on applying pressure and contending in air-to-air situations using his long-range normals. s.jM in particular causes a launch animation, allowing for effective punishes against errant jumpers. Additionally, "The hell is your problem?!" makes for a decent anti-air and defensive tool. The medium and heavy versions in particular are excellent at avoiding well-timed attacks and creating distance.
- Link Combos: Josuke is able to link from special moves into normals much more easily than other characters, being able to juggle at both midscreen and in the corner.
|
|
|
| Pros | Cons |
|
|
Stats
| Style | Health | Low Health Mode | Hashtag(s) |
|---|---|---|---|
| Stand | 1000 | Rumble | #ASBR_GAP #ASBR_JSK8 |
Move List
Stand Off
Normal Moves
5L
5L
|
|---|
5M
5M
|
|---|
5H
5H
|
|---|
2L
2L
|
|---|
2M
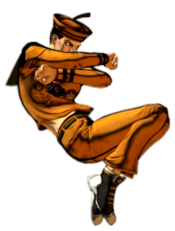
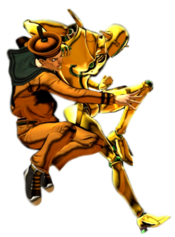
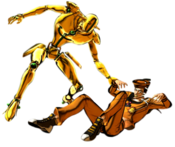
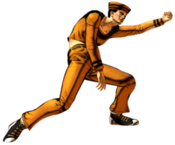
2M
|
|---|
2H
2H
|
|---|
3H
3H
Don't screw with me! |
|---|
JL
j.L
|
|---|
JM
j.M
|
|---|
JH
j.H
|
|---|
Special Moves
236X
So slippery!
236L/M/H |
|---|
236X-6X
Zero Friction
236L/M/H > 6L/M/H |
|---|
623X
Don't mess with me.
623L/M/H |
|---|
214X
Let me take that from you.
214L/M/H |
|---|
22X
How to use the bubbles... 22L/M/H Bubble Buddy! Bubble Buddy!
|
|---|
Stand On
Normal Moves
Stand 5L
s.5L
|
|---|
Stand 5M
s.5M
|
|---|
Stand 5H
s.5H
|
|---|
Stand 2L
s.2L
|
|---|
Stand 2M
s.2M
|
|---|
Stand 2H
s.2H
|
|---|
Stand JL
s.jL
|
|---|
Stand JM
s.jM
|
|---|
Stand JH
s.jH
|
|---|
Special Moves
Stand 236X
The hell is your problem?!
s.236L/M/H |
|---|
Stand 623X
Don't try anything funny!
s.623L/M/H |
|---|
Stand 214X
I gotta win this!
s.214L/M/H |
|---|
Stand 214X-X
I gotta win this! (Follow-up) s.214L/M/H > L/M/H Light Light Medium Medium Heavy Heavy
|
|---|
System Mechanics
Throw
Throw
I've taken your friction. 5/4 + Any Two Attack Buttons |
|---|
Assist
Assist
So slippery! |
|---|
5S
Stand On/Off 5S Stand On Stand On Stand Off Stand Off
|
|---|
Heart Heat Attack
I can steal your vision. 236 + Any Two Attack Buttons Can't actually steal your vision. Can't actually steal your vision.
|
|---|
Great Heat Attack
Soft & Wet 236L+M+H Soft & Wet. Pop! Soft & Wet. Pop! I just stole the friction from your body. I just stole the friction from your body. Just slide away. Just slide away.
|
|---|
