Acceleration of Suguri 2/Hime: Difference between revisions
FenixStryk (talk | contribs) mNo edit summary |
No edit summary |
||
| (12 intermediate revisions by 4 users not shown) | |||
| Line 1: | Line 1: | ||
[ | ''Credits to Nyu-13 for allowing to transcribe their [https://docs.google.com/document/d/1aNziek2N7zKfbg5-L54lr3sHn4TnGqUHs6nVgprp1VI guide] to populate this page.'' | ||
[[File:AoS2Hime.png|frame|right]] | |||
==Introduction== | |||
The guardian of the Shifu colony ship, whose inhabitants treated her as a godly creature. After Suguri stops Shifu from destroying the planet, Hime spends the rest of her life having fun. | |||
== | ==Overview== | ||
Hime is the first of AoS2's 3 boss characters. She is very punish heavy and generally performs well at any range. | |||
* Strengths: | |||
** High speed. | |||
** Versatile kit. | |||
** Good hypers. | |||
** Decent meter gain. | |||
** Many different combo variations. | |||
** Good keepaway game. | |||
* Weaknesses: | |||
** Unintuitive playstyle. | |||
** Somewhat long attacks. | |||
** Lack of ballistic clearing options. | |||
'''Difficulty: Hard''' | |||
Hime can be played both from close or long range, what allows her to perform quite well at any matchup, but her weaknesses can cause some characters to give her a little bit of trouble. | |||
Her kit is very versatile but has a lot to learn. It requires the player to understand what is going on not to get heavily punished for long attacks or know when is the best moment to go for some attack. In contrast, Hime can heavily punish the opponent's mistakes having attacks that raise heat and a lot of different combo variations. | |||
' | Hime's main gimmick is that none of her attacks are dashable. The damage of all her attacks is scaled with heat but blue swords are the only exception. | ||
==Normal Moves== | |||
=== | ===Weapon A=== | ||
{{MoveData-AOS2 | |||
| name = Faint Breeze | |||
| image = AoS2_Hime_tap_wA.png | |||
| icon = a | |||
<!------------------> | |||
| type = Direct | |||
| energy = Primary: 20% | |||
| shots = 2 | |||
<!------------------> | |||
| damage = 120 (each) | |||
| metergain = ~1.99% per projectile, ~26 uses for 1 bar | |||
| grazedgain = ~2.4% per projectile, ~42 projectiles for 1 bar | |||
<!------------------> | |||
| startup = 13 | |||
| canceledrecovery = 3 | |||
| fullrecovery = 18 | |||
<!------------------> | |||
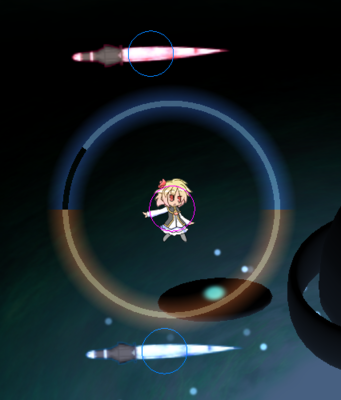
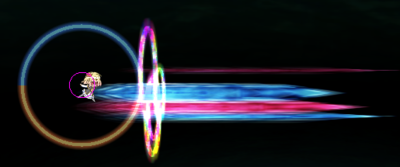
| description = Spawns 1 red and 1 blue sword that fly towards the opponent. Only red sword comes out when low on energy. | |||
}} | |||
{{MoveData-AOS2 | |||
| name = Needle Fruit | |||
| image = AoS2_Hime_hold_wA_setup.png | |||
| image2 = AoS2_Hime_hold_wA_shot.png | |||
| icon = hold | |||
| icon2 = a | |||
<!------------------> | |||
| type = Direct | |||
| energy = Primary: 75% | |||
| shots = 24 | |||
<!------------------> | |||
| damage = 60 (startup), 120 (shot out) | |||
| metergain = ~10% per attack, ~10 uses for 1 bar | |||
| grazedgain = ~2.4% per projectile, ~42 projectiles for 1 bar | |||
<!------------------> | |||
| startup = 16 | |||
| canceledrecovery = 15 | |||
| fullrecovery = 35 | |||
<!------------------> | |||
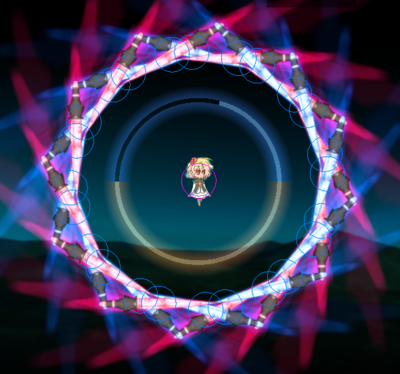
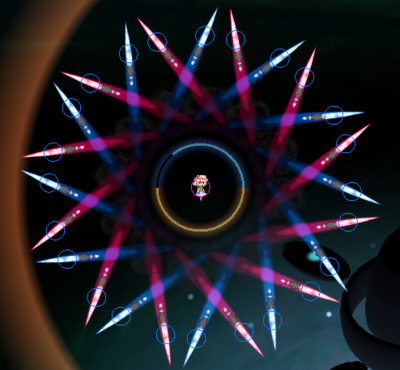
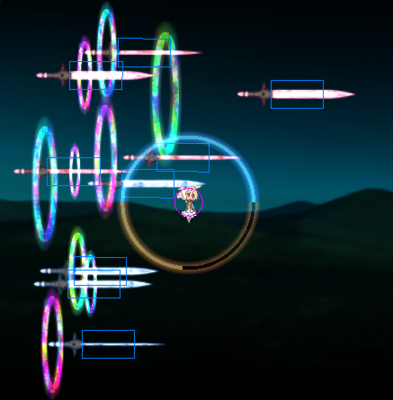
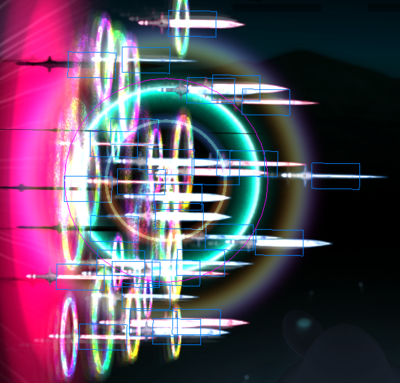
| description = Spawns a circle of 12 red and 12 blue swords spinning around Hime. After the circle shrinks, swords shoot out (at frame 76) in a criss cross like pattern which never rotates. Even though hitboxes appear together with swords, they start dealing damage 10 frames after. | |||
}} | |||
{{MoveData-AOS2 | |||
| name = Faint Breeze (Plenty) | |||
| image = AoS2_Hime_dash_wA.png | |||
| icon = d | |||
| icon2 = a | |||
<!------------------> | |||
| type = Direct | |||
| energy = Primary: 45% | |||
| shots = 6 | |||
<!------------------> | |||
| damage = 120 (each) | |||
| metergain = ~1.49% per projectile, ~12 uses for 1 bar | |||
| grazedgain = ~2.4% per projectile, ~42 projectiles for 1 bar | |||
<!------------------> | |||
| startup = 11 | |||
| canceledrecovery = 25 | |||
| fullrecovery = 40 | |||
<!------------------> | |||
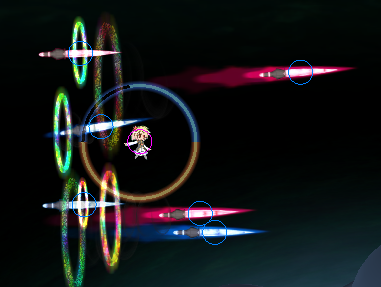
| description = Spawns 3 pairs of swords with same properties as Faint Breeze but less accurate. Swords appear every 4 frames and alternate starting with red. | |||
}} | |||
{{MoveData-AOS2 | |||
| name = Delicate Binding | |||
| image = AoS2_Hime_SPwA_first.png | |||
| image2 = AoS2_Hime_SPwA_followup.png | |||
| icon = s | |||
| icon2 = a | |||
<!------------------> | |||
| type = Direct | |||
| energy = - | |||
| shots = 1 (first chain), 6 (follow up chains) | |||
<!------------------> | |||
| damage = 25 per tick (6-7 ticks for the first chain), 20 per tick (2 ticks per follow up chain) | |||
| metergain = ~5% without follow up (~20 uses for 1 bar), ~1.99% per follow up chain (~6 uses for 1 bar) | |||
| grazedgain = - | |||
<!------------------> | |||
| startup = 6 | |||
| canceledrecovery = 35 (if chain comes out), 20 (otherwise) | |||
| fullrecovery = 75 (if chain comes out), 60 (otherwise) | |||
<!------------------> | |||
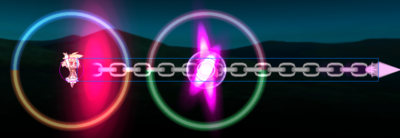
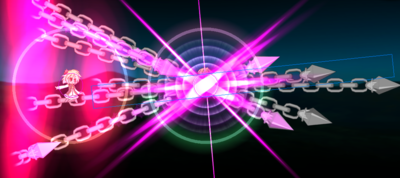
| description = Throws a chain that can pull the opponent closer to Hime if they are far. Note that this attack is slightly affected by momentum and can destroy ballistics. Chain can be pulled off only once per ~2.5 seconds, otherwise Hime will just stop for a while. The chain appears at frame 6 and extends for the next 12 frames, and at 11 of them it has a bitbox. After it's fully extended, it ticks every 3 frames. Follow up chains can be called during recovery after frame 21. The first chain has +10 frame advantage. The second set of chains has a -4 frame advantage which should be cancelled with other attacks (see combo section). | |||
}} | |||
=== | ===Weapon B=== | ||
{{MoveData-AOS2 | |||
| name = Paradise of Faint Pain | |||
| image = AoS2_Hime_tap_wB.png | |||
| icon = b | |||
<!------------------> | |||
| type = Direct | |||
| energy = Sub: 55% | |||
| shots = 9 | |||
<!------------------> | |||
| damage = 120 (each) | |||
| metergain = ~1.2% per projectile, ~10 uses for 1 bar | |||
| grazedgain = ~2.4% per projectile, ~42 projectiles for 1 bar | |||
<!------------------> | |||
| startup = 13 | |||
| canceledrecovery = 18 | |||
| fullrecovery = 38 | |||
<!------------------> | |||
| description = Spawns 5 red and 4 blue swords in a random pattern behind Hime. This attack is slightly affected by momentum. The first red sword spawns at frame 13, the rest of them appears every 2 frames, alternating. | |||
}} | |||
{{MoveData-AOS2 | |||
| name = Fever | |||
| image = AoS2_Hime_hold_wB_hit.png | |||
| image2 = AoS2_Hime_hold_wB_momentum.png | |||
| icon = hold | |||
| icon2 = b | |||
<!------------------> | |||
| type = Direct | |||
| energy = Sub: 75% | |||
| shots = 1 | |||
<!------------------> | |||
| damage = 50 per tick | |||
| metergain = ~5% per shot, ~20 uses for full bar | |||
| grazedgain = - | |||
<!------------------> | |||
| startup = 20 | |||
| canceledrecovery = 21 | |||
| fullrecovery = 31 | |||
<!------------------> | |||
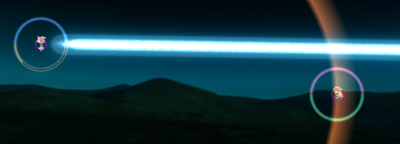
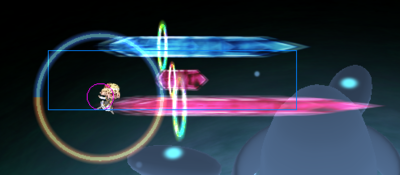
| description = Shoots a screen wide beam that ticks up to 6 times and clear ballistics. This attack is heavily affected by momentum (see second image). -5 frame advantage on hit; so do not use it when the opponent will hit the wall early. Even though beam appears at frame 11, it starts dealing damage at frame 20. | |||
}} | |||
{{MoveData-AOS2 | |||
| name = Sadism | |||
| image = AoS2_Hime_SPwB_attack.png | |||
| image2 = AoS2_Hime_SPwB_hitbox.png | |||
| icon = s | |||
| icon2 = b | |||
<!------------------> | |||
| type = Direct | |||
| energy = - | |||
| shots = 4 | |||
<!------------------> | |||
| damage = 80 (each) | |||
| metergain = ~1.99% per crystal, ~13 uses for 1 bar | |||
| grazedgain = - | |||
<!------------------> | |||
| startup = 13 | |||
| canceledrecovery = 23 | |||
| fullrecovery = 33 | |||
<!------------------> | |||
| description = Summons 4 crystals in front of Hime. All crystals are capable of clearing ballistics, although it is quite risky. Note that crystals cover a small area behind Hime. The last crystal always pushes the opponent away. This attack is slightly affected by momentum so not all crystals can hit (first three will spawn in front of Hime while the last one will try to spawn closer to the opponent). +2 frame advantage. | |||
}} | |||
==Hypers== | |||
{{MoveData-AOS2 | |||
| name = Amber | |||
| image = AoS2_Hime_N_hyper.png | |||
| icon = a | |||
| icon2 = h | |||
<!------------------> | |||
| type = Direct | |||
| energy = - | |||
| shots = 1 | |||
<!------------------> | |||
| damage = 40 per tick (16 ticks max) | |||
| metergain = 0 | |||
| grazedgain = - | |||
<!------------------> | |||
| startup = 20 | |||
| canceledrecovery = 41 | |||
| fullrecovery = 61 | |||
<!------------------> | |||
| description = Shoots the beam that has all the same properties as normal hold wB but wider hitbox. While shooting the beam, Hime can also move but with heavily reduced speed. +5 frame advantage on hit. | |||
}} | |||
== | {{MoveData-AOS2 | ||
| name = Life-Long Burning (Far) | |||
| image = AoS2_Hime_B_hyper_far.png | |||
| icon = b | |||
| icon2 = h | |||
<!------------------> | |||
| type = Direct | |||
| energy = - | |||
| shots = 41 | |||
<!------------------> | |||
| damage = 120 (each) | |||
| metergain = 0 | |||
| grazedgain = ~2.4% per projectile, ~42 projectiles for 1 bar | |||
<!------------------> | |||
| startup = 6 | |||
| canceledrecovery = 55 | |||
| fullrecovery = 75 | |||
<!------------------> | |||
| description = Spawns 21 red and 20 blue sword which behave identical to tap wB. | |||
}} | |||
=== | {{MoveData-AOS2 | ||
| name = Life-Long Burning (Close) | |||
| image = AoS2_Hime_B_hyper_close.png | |||
| icon = close | |||
| icon2 = b | |||
| icon3 = h | |||
<!------------------> | |||
| type = Direct | |||
| energy = - | |||
| shots = 21 | |||
<!------------------> | |||
| damage = 60 (each) | |||
| metergain = 0 | |||
| grazedgain = ~1.2% per projectile, ~84 projectiles for 1 bar | |||
<!------------------> | |||
| startup = 7 | |||
| canceledrecovery = 54 | |||
| fullrecovery = 54 | |||
<!------------------> | |||
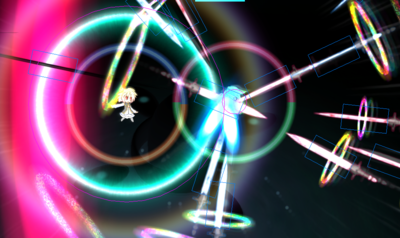
| description = Spawns 11 red and 10 blue swords around the opponent. Swords have the same properties as tap wB. Can have over +20 frame advantage. | |||
}} | |||
{{MoveData-AOS2 | |||
| name = Untouchable | |||
| image = AoS2_Hime_SP_hyper.png | |||
| icon = s | |||
| icon2 = h | |||
<!------------------> | |||
| type = Direct | |||
| energy = - | |||
| shots = 6 | |||
<!------------------> | |||
| damage = 20 per tick | |||
| metergain = 0 | |||
| grazedgain = - | |||
<!------------------> | |||
| startup = 11 | |||
| canceledrecovery = 90 | |||
| fullrecovery = 110 | |||
<!------------------> | |||
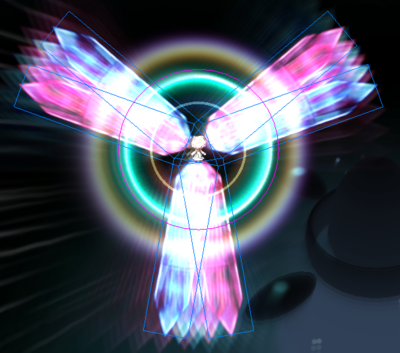
| description = Summons 6 huge crystals that spin around Hime like a windmill and tick up to 50 times (about 20-40 on average). In the end the opponent is pushed away. Can be as bad as -12 frame advantage; so this hyper is situational (see gameplan and combo sections). | |||
}} | |||
=== | {{MoveData-AOS2 | ||
| name = Leash | |||
| image = AoS2_Hime_D_hyper.png | |||
| icon = d | |||
| icon2 = h | |||
<!------------------> | |||
| type = Direct | |||
| energy = - | |||
| shots = 3x5 | |||
<!------------------> | |||
| damage = 50 per tick (7 ticks max depending on distance) | |||
| metergain = 0 | |||
| grazedgain = - | |||
<!------------------> | |||
| startup = 26 | |||
| canceledrecovery = 35 | |||
| fullrecovery = 55 | |||
<!------------------> | |||
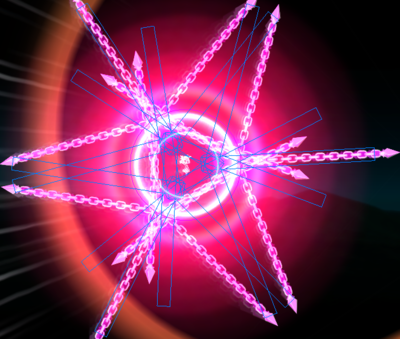
| description = Creates a 3 spots which spawn 5 chains (each) pulling the opponent to the heatzone near Hime. This heatzone can add up to 159% heat to the opponent's gauge. At frame 61 the opponent is pushed away and Hime can dash cancel the hyper. +15 frame advantage. | |||
}} | |||
{{MoveData-AOS2 | |||
| name = Accel Hyper: God Knows | |||
| image = AoS2_Hime_Accel_hyper.png | |||
| icon = s | |||
| icon2 = b | |||
| icon3 = h | |||
<!------------------> | |||
| type = Direct | |||
| energy = - | |||
| shots = 2 | |||
<!------------------> | |||
| damage = 170 per tick (9 ticks max per wing) | |||
| metergain = 0 | |||
| grazedgain = - | |||
<!------------------> | |||
| startup = 11 | |||
| canceledrecovery = 90 | |||
| fullrecovery = 110 | |||
<!------------------> | |||
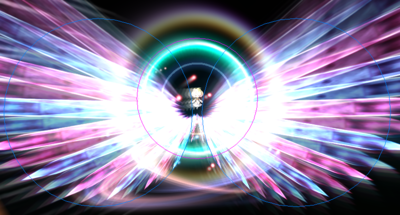
| description = Summons 2 giant wings and pushes the opponent away (at frame 66) no matter if wings hit. It is possible that both wings tick if the opponent stays close to Hime on the same horizontal line. -20 to -35 frame advantage. | |||
}} | |||
== | ==Gameplan== | ||
Hime usually plays best adjusted to the matchup but can perform quite well both at offense and defense. | |||
===Farming meter=== | |||
Hime's best meter gain tools are all swords attacks (tap wA, hold wA, dash wA, tap wB). SPwB is a great tool as well but is more dangerous to spam. | |||
Chains can give a lot of meter as a part of some combo, but are usually very hard to land without confirms. Hold wB can be used too but only at middle or long range due to its long startup and recovery. | |||
The best way to safely farm meter is to stay away from the opponent or zone them with hold wA and tap wB using one or both. | |||
Additionally, Hime's high speed can let her graze most of projectiles gaining a lot of meter. | |||
===Playing offensively=== | |||
For an aggressive approach Hime should play with hold wA to cut escape routes and SPwB at close range. A good alternative is dash wA, which can act as a good confirm into a chain combo or wallbangs. Any of this methods will provide aggressive Hime with a good portion of meter. | |||
Meter can potentially boost Hime's damage output. For example, SP. hyper can act as good combo starter provided that the opponent has no meter, or can finish off a low HP opponent. B. hyper can be a variation of chain combo, and D. hyper can raise the opponent's heat. | |||
===Playing defensively=== | |||
Defensive Hime can still pressure the opponent well. She usually wants to setup a hold wA circle to stay safe and poke the opponent with hold wB more often. To do so, Hime can predict the opponent moves or make them move in a specific pattern with dwA or hold wA. | |||
Keepaway game is built around hold wA and tap wB to zone the opponent. Melees can be punished with SPwA or SPwB. Also, tap wA is recommended because it can help to apply some pressure staying mobile. Since Hime has a decent meter gain, she can predict halfshield approaches and halfshield in response and/or just run away. | |||
Having some meter allows Hime to confirm into Neutral Hypers with hold wB or dash wA. If the opponent has no meter, they can be punished with SP. Hyper into any combo. Also, melee whiffs can be counterattacked with D. hyper timed right. | |||
==Combos== | |||
===Meterless=== | |||
* dwA > hold wB | |||
: Long range flowchart move based on prediction of where the opponent moves. | |||
* SPwA > SPwA > SPwB | |||
: Simple chain combo. The opponent can goldshield and counterattack when follow up chains come out. | |||
* SPwA > SPwB | |||
: A variation of simple combo. It's likely to drain meter because the opponent may expect normal chain combo but will be pushed away instead. | |||
* wA/dwA > any chain combo | |||
: If swords hit, Hime can catch the opponent with chains. | |||
* SPwA > SPwA > hold wB | |||
: Disadvantageous (6 frames) combo that is usually pulled off by mistake by new players. | |||
* SPwA > SPwA > tap wB > Dash cancel > dwA > any chain combo | |||
: Advanced chain combo, though it is not a true combo because tap wB is not reliable (depends on RNG and hits quite slow). It's more safe to use from closest range, near the wall, or against the opponent with no meter. | |||
* SPwA > SPwA > tap wB > Dash cancel > SPwB | |||
: Another variation of advanced combo with the same issue. This one can be used if there's not enough energy for another version. | |||
* SPwB > dash cancel > SPwB > dash cancel > ... | |||
: Commonly known as Wallbangs, these are just SPwB staggers near the wall. This is not a true combo but should work well against slow characters. It requires to predict the opponent moves. | |||
* SPwA > SPwA > Wallbangs | |||
: Should be used near the wall. | |||
===Meter=== | |||
* hold wB > N. Hyper | |||
: Simple Neutral hyper confirm. | |||
* SPwA > SPwA > hold wB > N. Hyper | |||
: A better and more safe version of the combo described in previous section. | |||
* SPwB > N. Hyper | |||
: Another confirm into Neutral hyper which should be used after the opponent is pushed away. Optionally, this can start with chains confirm. | |||
* SPwA > SPwA > B. Hyper > any chain combo | |||
: Another variation of chain combo that can deal massive damage. Follow up chains should be delayed to safely pull off the second chain combo with no need to dash cancel. | |||
* SPwA > SPwA > D. Hyper > Dash cancel > any chain combo | |||
: Follow up chains and D. Hyper should both be delayed to start a chain combo against hot opponent, which means tons of damage. If timed wrong, the chain won't come out after the hyper. | |||
* SP. Hyper > B. Hyper > any chain combo | |||
: Requires 2 meter bars but can deal massive damage to the opponent with no meter to goldshield. | |||
* D. Hyper > B. Hyper > any chain combo | |||
: Same as previous combo but raises heat in advance. Optionally, delayed chains can be added in the beginning. | |||
{{AOS2}} | {{AOS2}} | ||
[[Category:Acceleration of Suguri | [[Category:Acceleration of Suguri 2]] | ||
Latest revision as of 07:20, 26 February 2022
Credits to Nyu-13 for allowing to transcribe their guide to populate this page.
Introduction
The guardian of the Shifu colony ship, whose inhabitants treated her as a godly creature. After Suguri stops Shifu from destroying the planet, Hime spends the rest of her life having fun.
Overview
Hime is the first of AoS2's 3 boss characters. She is very punish heavy and generally performs well at any range.
- Strengths:
- High speed.
- Versatile kit.
- Good hypers.
- Decent meter gain.
- Many different combo variations.
- Good keepaway game.
- Weaknesses:
- Unintuitive playstyle.
- Somewhat long attacks.
- Lack of ballistic clearing options.
Difficulty: Hard
Hime can be played both from close or long range, what allows her to perform quite well at any matchup, but her weaknesses can cause some characters to give her a little bit of trouble.
Her kit is very versatile but has a lot to learn. It requires the player to understand what is going on not to get heavily punished for long attacks or know when is the best moment to go for some attack. In contrast, Hime can heavily punish the opponent's mistakes having attacks that raise heat and a lot of different combo variations.
Hime's main gimmick is that none of her attacks are dashable. The damage of all her attacks is scaled with heat but blue swords are the only exception.
Normal Moves
Weapon A
Weapon B
Hypers
Gameplan
Hime usually plays best adjusted to the matchup but can perform quite well both at offense and defense.
Farming meter
Hime's best meter gain tools are all swords attacks (tap wA, hold wA, dash wA, tap wB). SPwB is a great tool as well but is more dangerous to spam.
Chains can give a lot of meter as a part of some combo, but are usually very hard to land without confirms. Hold wB can be used too but only at middle or long range due to its long startup and recovery.
The best way to safely farm meter is to stay away from the opponent or zone them with hold wA and tap wB using one or both.
Additionally, Hime's high speed can let her graze most of projectiles gaining a lot of meter.
Playing offensively
For an aggressive approach Hime should play with hold wA to cut escape routes and SPwB at close range. A good alternative is dash wA, which can act as a good confirm into a chain combo or wallbangs. Any of this methods will provide aggressive Hime with a good portion of meter.
Meter can potentially boost Hime's damage output. For example, SP. hyper can act as good combo starter provided that the opponent has no meter, or can finish off a low HP opponent. B. hyper can be a variation of chain combo, and D. hyper can raise the opponent's heat.
Playing defensively
Defensive Hime can still pressure the opponent well. She usually wants to setup a hold wA circle to stay safe and poke the opponent with hold wB more often. To do so, Hime can predict the opponent moves or make them move in a specific pattern with dwA or hold wA.
Keepaway game is built around hold wA and tap wB to zone the opponent. Melees can be punished with SPwA or SPwB. Also, tap wA is recommended because it can help to apply some pressure staying mobile. Since Hime has a decent meter gain, she can predict halfshield approaches and halfshield in response and/or just run away.
Having some meter allows Hime to confirm into Neutral Hypers with hold wB or dash wA. If the opponent has no meter, they can be punished with SP. Hyper into any combo. Also, melee whiffs can be counterattacked with D. hyper timed right.
Combos
Meterless
- dwA > hold wB
- Long range flowchart move based on prediction of where the opponent moves.
- SPwA > SPwA > SPwB
- Simple chain combo. The opponent can goldshield and counterattack when follow up chains come out.
- SPwA > SPwB
- A variation of simple combo. It's likely to drain meter because the opponent may expect normal chain combo but will be pushed away instead.
- wA/dwA > any chain combo
- If swords hit, Hime can catch the opponent with chains.
- SPwA > SPwA > hold wB
- Disadvantageous (6 frames) combo that is usually pulled off by mistake by new players.
- SPwA > SPwA > tap wB > Dash cancel > dwA > any chain combo
- Advanced chain combo, though it is not a true combo because tap wB is not reliable (depends on RNG and hits quite slow). It's more safe to use from closest range, near the wall, or against the opponent with no meter.
- SPwA > SPwA > tap wB > Dash cancel > SPwB
- Another variation of advanced combo with the same issue. This one can be used if there's not enough energy for another version.
- SPwB > dash cancel > SPwB > dash cancel > ...
- Commonly known as Wallbangs, these are just SPwB staggers near the wall. This is not a true combo but should work well against slow characters. It requires to predict the opponent moves.
- SPwA > SPwA > Wallbangs
- Should be used near the wall.
Meter
- hold wB > N. Hyper
- Simple Neutral hyper confirm.
- SPwA > SPwA > hold wB > N. Hyper
- A better and more safe version of the combo described in previous section.
- SPwB > N. Hyper
- Another confirm into Neutral hyper which should be used after the opponent is pushed away. Optionally, this can start with chains confirm.
- SPwA > SPwA > B. Hyper > any chain combo
- Another variation of chain combo that can deal massive damage. Follow up chains should be delayed to safely pull off the second chain combo with no need to dash cancel.
- SPwA > SPwA > D. Hyper > Dash cancel > any chain combo
- Follow up chains and D. Hyper should both be delayed to start a chain combo against hot opponent, which means tons of damage. If timed wrong, the chain won't come out after the hyper.
- SP. Hyper > B. Hyper > any chain combo
- Requires 2 meter bars but can deal massive damage to the opponent with no meter to goldshield.
- D. Hyper > B. Hyper > any chain combo
- Same as previous combo but raises heat in advance. Optionally, delayed chains can be added in the beginning.

