JoJo's Bizarre Adventure: All-Star Battle R/Noriaki Kakyoin: Difference between revisions

From Mizuumi Wiki
Jump to navigation Jump to search
m (Fixed infobox and GHA image link.)
No edit summary
Line 10: Line 10:
* '''Best In Class Zoning''' Kakyoin's long reaching normals and multi-hitting projectiles allow him to zone effectively without being beaten out by most other zoners
* '''Independent Trap:''' Because Kakyoin's 22X is independent of him, he is able to set it up as he defensive measure against opponents who are trying to approach, allowing him to keep up his game plan even after getting hit
* '''Pro 3:''' TBD
* '''Damage:''' Kakyoin does great damage and builds great meter with his combos and using meter or assists allow you to convert long range pokes into high damage and sometimes these combos can be unbreakable
*'''Matchups:''' Kakyoin does not lose many (if any) matchups, going slightly losing at worst.
  |cons =
  |cons =
* '''Lack of Meterless Reversal:''' Kakyoin's only invincible options are HHA and GHA, making it harder for him to escape pressure in certain situations
* '''Con 2:''' TBD
| tablewidth = 80
| tablewidth = 80
}}
}}

Revision as of 03:33, 30 October 2022

Introduction

Insert character introduction here.

  • Long Range Normals: Kakyoin has access to long reaching normals that can combo from afar, allowing Kakyoin to play from his most effective distance
Playstyle
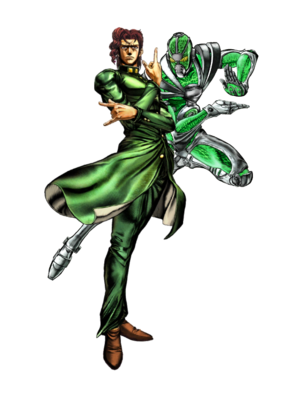
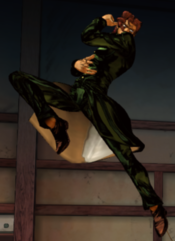
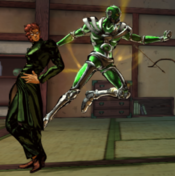
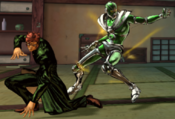
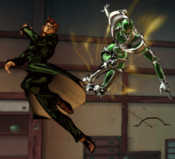
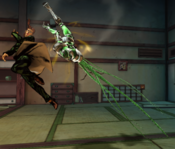
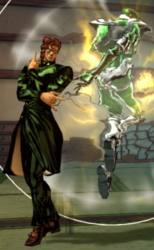
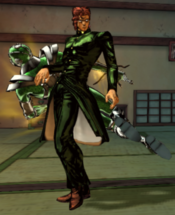
JJASBR Kakyoin Small Icon.png Noriaki Kakyoin is a ABC character who utilizes their XYZ
Pros Cons
  • Best In Class Zoning Kakyoin's long reaching normals and multi-hitting projectiles allow him to zone effectively without being beaten out by most other zoners
  • Independent Trap: Because Kakyoin's 22X is independent of him, he is able to set it up as he defensive measure against opponents who are trying to approach, allowing him to keep up his game plan even after getting hit
  • Damage: Kakyoin does great damage and builds great meter with his combos and using meter or assists allow you to convert long range pokes into high damage and sometimes these combos can be unbreakable
  • Matchups: Kakyoin does not lose many (if any) matchups, going slightly losing at worst.
  • Lack of Meterless Reversal: Kakyoin's only invincible options are HHA and GHA, making it harder for him to escape pressure in certain situations

Stats

Style Health Low Health Mode Hashtag(s)
Stand 1000 Rumble #ASBR_KAK


Move List

JJASBR User Icon.png
JJASBR Stand Icon.png

Stand Off

Normal Moves

5L
5L
JJASBR Kakyoin 5L.png
Damage Guard Startup Active Recovery Block Adv. Hit Adv.
13 Mid - - - - -

Kakyoin performs an open-handed attack while facing away from the opponent

  • Standard jab, good for stopping dash jumps
5M
5M
JJASBR Kakyoin 5M.png
Damage Guard Startup Active Recovery Block Adv. Hit Adv.
21 Mid - - - - -

Hierophant Green performs a long-range attack with a tentacle

  • Very long reach, good for pokes and zoning
  • Make sure it doesn't whiff, as it has long recovery
5H
5H
Damage Guard Startup Active Recovery Block Adv. Hit Adv.
4*9 Mid - - - - -

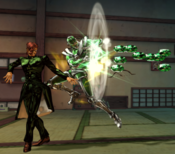
Hierophant Green performs a short range Emerald Splash

  • Less range than 5M, but still a good button for pokes
2L
2L
JJASBR Kakyoin 2L.png
Damage Guard Startup Active Recovery Block Adv. Hit Adv.
12 Low - - - - -

Kakyoin performs a crouching variation of his 5L

  • A standard jab
  • Chains into itself 3 times
2M
2M
JJASBR Kakyoin 2M.png
Damage Guard Startup Active Recovery Block Adv. Hit Adv.
20 Low - - - - -

Hierophant Green performs a long-range low attack with a tentacle

  • Very long reach, good for pokes and zoning
  • Make sure it doesn't whiff, as it has long recovery
2H
2H
JJASBR Kakyoin 2H.png
Damage Guard Startup Active Recovery Block Adv. Hit Adv.
32 Low - - - - -

Hierophant Green performs a low sweeping attack with a tentacle

  • Provides hard knockdown
  • Has less reach than 2M, but still a good button for pokes
6M
6M
Let's shake on it.
JJASBR Kakyoin 6M.png
Damage Guard Startup Active Recovery Block Adv. Hit Adv.
45 Mid - - - - -

Kakyoin performs an elbow attack

  • Moves Kakyoin forward
  • Launches on hit
JL
j.L
JJASBR Kakyoin Jump L.png
Damage Guard Startup Active Recovery Block Adv. Hit Adv.
16 Overhead - - - - -

Kakyoin performs a kick downwards

  • Kakyoin's fastest aerial
  • Good for air-to-airs and jump-ins
JM
j.M
JJASBR Kakyoin Jump M.png
Damage Guard Startup Active Recovery Block Adv. Hit Adv.
24 Overhead - - - - -

Hierophant Green performs an attack outwards with a tentacle

  • Reaches very far outwards, good for air-to-airs and combo filler
JH
j.H
JJASBR Kakyoin Jump H.png
Damage Guard Startup Active Recovery Block Adv. Hit Adv.
35 Overhead - - - - -

Hierophant Green performs an attack downwards with a bunch of tentacles

  • Ground bounces on hit
  • Kakyoin's best aerial, as it can confirm into combos from a distance

Special Moves

236X
Emerald Splash
236L/M/H (Air OK)
Version Damage Guard Startup Active Recovery Block Adv. Hit Adv.
Light 6 each Mid - - - - -

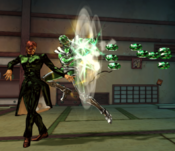
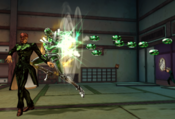
Hierophant Green launches emeralds out towards the opponent

  • Notes 1
  • Notes 2
Medium 6 or 7 each - - - - - -
  • Notes 1
  • Notes 2
Heavy 7 each - - - - - -
  • Notes 1
  • Notes 2
22X
Hierophant's Barrier
22L/M/H
Version Damage Guard Startup Active Recovery Block Adv. Hit Adv.
Light 5 each Mid - - - - -
Medium 5 each Mid - - - - -
Heavy 5 each Mid - - - - -

Hierophant Green places a trap of tentacles that launches emeralds on contact with the opponent

  • Remains active even if Kakyoin is hit
  • Different strengths place the trap at different distances, increasing distance with the strength of the button
214X
How's this!
214L/M/H
JJASBR Kakyoin 214X.png
Version Damage Guard Startup Active Recovery Block Adv. Hit Adv.
Light 20, 10*2, 60 Mid - - - - -
Medium 20, 10*2, 60 Mid - - - - -
Heavy 20, 10*2, 60 Mid - - - - -

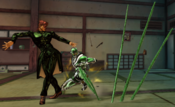
Hierophant Green summons tentacles from the ground, attacking the opponent

  • Causes crumple on hit
  • Different strengths attack at different distances, increasing distance with the strength of the button

Stand On

Normal Moves

Stand 5L
5L
JJASBR Kakyoin Stand 5L.png
Damage Guard Startup Active Recovery Block Adv. Hit Adv.
13 Mid - - - - -

Hierophant Green performs a jab

  • Standard jab, good for stopping dash jumps
Stand 5M
5M
Damage Guard Startup Active Recovery Block Adv. Hit Adv.
21 Mid - - - - -

Hierophant Green performs a long range attack with a tentacle

  • Very long reach, good for pokes and zoning
  • Make sure it doesn't whiff, as it has long recovery
Stand 5H
5H
JJASBR Kakyoin Stand 5H.png
Damage Guard Startup Active Recovery Block Adv. Hit Adv.
9, 8*4 Mid - - - - -

Hierophant Green performs a short range Emerald Splash

  • Less range than 5M, but still a good button for pokes
Stand 2L
2L
JJASBR Kakyoin Stand 2L.png
Damage Guard Startup Active Recovery Block Adv. Hit Adv.
12 Mid - - - - -

Hierophant Green performs a crouching jab

  • A standard jab, but does not hit low
  • Chains into itself 3 times
Stand 2M
2M
JJASBR Kakyoin Stand 2M.png
Damage Guard Startup Active Recovery Block Adv. Hit Adv.
20 Mid - - - - -

Hierophant Green performs a long range low attack with a tentacle

  • Very long reach, good for pokes and zoning, but does not hit low
  • Make sure it doesn't whiff, as it has long recovery
Stand 2H
2H
JJASBR Kakyoin Stand 2H.png
Damage Guard Startup Active Recovery Block Adv. Hit Adv.
9*2, 18 Low - - - - -

Hierophant Green performs an attack with a bunch of tentacles that starts low and angles upwards

  • Launches on hit
  • Has less reach than 2M, but still a good button for pokes
Stand JL
j.L
JJASBR Kakyoin Stand Jump L.png
Damage Guard Startup Active Recovery Block Adv. Hit Adv.
16 Overhead - - - - -

Hierophant Green performs a stab downwards

  • Hierophant Green's fastest aerial
  • Good for air-to-airs and jump-ins
Stand JM
j.M
JJASBR Kakyoin Stand Jump M.png
Damage Guard Startup Active Recovery Block Adv. Hit Adv.
24 Overhead - - - - -

Hierophant Green performs a long range attack outwards with a tentacle

  • Reaches very far outwards, good for air-to-airs and combo filler
Stand JH
j.H
JJASBR Kakyoin Stand Jump H.png
Damage Guard Startup Active Recovery Block Adv. Hit Adv.
10, 14 Overhead - - - - -

Hierophant Green performs an attack downwards with a bunch of tentacles

  • Does not ground bounce like the Stand Off variant, but now hits twice
  • Good for jump-ins and combo filler

Special Moves

Stand 236X
Emerald Splash
236L/M/H
JJASBR Kakyoin Stand 236L.png
L version
L version
JJASBR Kakyoin Stand 236M.png
M version
M version
JJASBR Kakyoin Stand 236H.png
H version
H version
Version Damage Guard Startup Active Recovery Block Adv. Hit Adv.
Light 6 each Mid - - - - -
Medium 6 or 7 each Mid - - - - -
Heavy 7 each Mid - - - - -
  • The projectiles spread out horizontally based on the button pressed, spreading further the higher the strength
  • Stand-Rush Compatible
Stand j236X
Emerald Splash (Air)
236L/M/H in air
L version
L version
M version
M version
H version
H version
Version Damage Guard Startup Active Recovery Block Adv. Hit Adv.
Light 6 each Mid - - - - -
Medium 6 or 7 each Mid - - - - -
Heavy 7 each Mid - - - - -
  • The projectiles spread out horizontally and angle based on the button pressed, spreading further and aiming lower the higher the strength
  • Stand-Rush Compatible
Stand 623X
You're already in my grasp!
623L/M/H
JJASBR Kakyoin Stand 623X.png
Version Damage Guard Startup Active Recovery Block Adv. Hit Adv.
Light 5*3, 10*4 Mid - - - - -
Medium 5*3, 10*4 Mid - - - - -
Heavy 5*3, 10*4 Mid - - - - -

Hierophant Green performs a long range attack with 3 tentacles from the ground

  • Launches on hit
  • Different strengths attack at different distances, increasing distance with the strength of the button
Stand 63214X
Didn't you notice?
63214L/M/H
Version Damage Guard Startup Active Recovery Block Adv. Hit Adv.
Light 20, 80 Throw - - - - -
Medium 20, 110 Throw - - - - -
Heavy 20, 140 Throw - - - - -

Hierophant Green wraps its tentacles around the opponent before hitting them with a point blank Emerald Splash

  • Different strengths increase the startup and damage of the attack

System Mechanics

Throw
Throw
No match for my Stand!
5/4 + Any Two Attack Buttons
Version Damage Guard Startup Active Recovery Block Adv. Hit Adv.
Forward 120, 10 Throw - - - - -

Kakyoin grabs the opponent before Hierophant Green knocks them down

  • Leaves the opponent close to Kakyoin
Back 120, 10 Throw - - - - -
  • Leaves the opponent slightly further away
Assist
Assist
Assist Name
JJASBR Kakyoin Assist.png
Damage Guard Startup Active Recovery Block Adv. Hit Adv.
- - - - - - -
  • Notes 1
  • Notes 2
Stand On
Stand On/Off
5S
JJASBR Kakyoin Stand On.png
Stand On
Stand On
JJASBR Kakyoin Stand Off.png
Stand Off
Stand Off
Damage Guard Startup Active Recovery Block Adv. Hit Adv.
- - - - - - -

(Un)Summons Hierophant Green, altering Kakyoin's moveset and abilities.

Heart Heat Attack

Time for your punishment!
236 + Any Two Attack Buttons
Damage Guard Startup Active Recovery Block Adv. Hit Adv.
168 (50+6*6+11*2+20+40) Mid - - - - -

Hierophant Green attacks with tentacles from the sky, using them to enter the opponent's body and tear them apart from the inside

  • This is a hitgrab
  • While the activation hitbox can be used for anti-airs, it can miss deceptively often

Great Heat Attack

20m Radius Emerald Splash
236L+M+H
Damage Guard Startup Active Recovery Block Adv. Hit Adv.
- Mid - - - - -

Hierophant Green fires an emerald splash. On hit, Hierophant Green then sets up its tentacles around the opponent and bounces them between them while hitting them with multiple Emerald Splashes before finishing with a point blank Emerald Splash.

  • Can be used from full screen
  • Activation projectiles travel very quickly

Navigation

General
FAQ
Controls
Stages
HUD
System
Esoterics
Character Data
Patch Notes
Glossary
JJASBR Part 1 Emblem.png
Phantom Blood
Jonathan
Zeppeli
Speedwagon
Dio Brando
JJASBR Part 2 Emblem.png
Battle Tendency
Joseph
Caesar
Lisa Lisa
Stroheim
Wamuu
Esidisi
Kars
JJASBR Part 3 Emblem.png
Stardust Crusaders
Jotaro (Part 3)
Old Joseph
Avdol
Kakyoin
Polnareff
Iggy
Hol Horse
Mariah
Pet Shop
Vanilla Ice
DIO
JJASBR Part 4 Emblem.png
Diamond is Unbreakable
Josuke (Part 4)
Jotaro (Part 4)
Koichi
Okuyasu
Yukako
Rohan
Shigechi
Yuya
Keicho
Akira
Kira
Kosaku
JJASBR Part 5 Emblem.png
Vento Aureo
Giorno
Bucciarati
Mista
Narancia
Fugo
Trish
Abbacchio
Prosciutto
Ghiaccio
Risotto
Diavolo
JJASBR Part 6 Emblem.png
Stone Ocean
Jolyne
Ermes
Foo Fighters
Anasui
Weather
Pucci (WS)
Pucci (Final)
JJASBR Part 7 Emblem.png
Steel Ball Run
Johnny
Gyro
Diego
AW Diego
Valentine
JJASBR Part 8 Emblem.png
JoJolion
Josuke (Part 8)
Wonder of U
Baoh the Visitor
Baoh