JoJo's Bizarre Adventure: All-Star Battle R/Kars: Difference between revisions

From Mizuumi Wiki
Jump to navigation Jump to search
mNo edit summary
mNo edit summary
Line 490: Line 490:
**Damage notated as: Normal / Mode 1 / Mode 2.
*Ground bounces on hit, letting you get a full combo from it.
*Kinda risky. It's really minus on whiff and block, and it whiffs more often than it hits, so it's really only useful if someone doesn't know the matchup or you're insanely deep in their head
*One of the main tentpoles of Kars' offense. Plus on block and an overhead that's incredibly easy to meaty.
  }}
  }}
  {{AttackData-ASBR
  {{AttackData-ASBR
Line 506: Line 506:
*Affected by Modes.
*Affected by Modes.
**Damage notated as: Normal / Mode 1 / Mode 2.
*Also pretty minus and risky, plus you can't combo off of this one. Only teleport version that beats running straight ahead (though all three teleports can be OS'd by running forward and doing a dash jump as late as possible)
*Pretty minus and risky, plus you can't combo off of this one. Only teleport version that beats running straight ahead (though all three teleports can be OS'd by running forward and doing a dash jump as late as possible)
  }}
  }}
  {{AttackData-ASBR
  {{AttackData-ASBR
Line 701: Line 701:
  |blockadv=
  |blockadv=
  |hitadv=
  |hitadv=
  |description=
  |description=Kars does a short jab with the tip of his elbow.
*Notes 1
*Unchanged from base form
*Notes 2
  }}
  }}
}}
}}
Line 722: Line 721:
  |blockadv=
  |blockadv=
  |hitadv=
  |hitadv=
  |description=
  |description= Kars stands on one foot and attacks with a leg strike from behind his back.
*Notes 1
*Unchanged from base form
*Notes 2
  }}
  }}
}}
}}
Line 743: Line 741:
  |blockadv=
  |blockadv=
  |hitadv=
  |hitadv=
  |description=
  |description=A two-hit blade strike.
*Notes 1
*Notes 2
  }}
  }}
}}
}}

Revision as of 01:06, 6 November 2022

Introduction

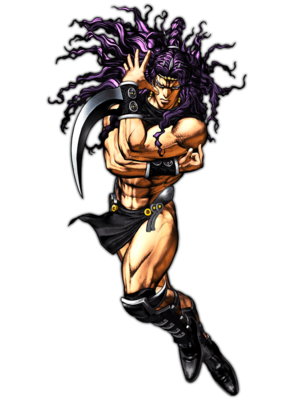
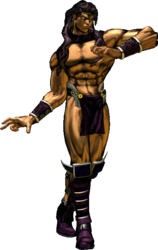
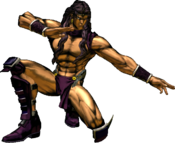
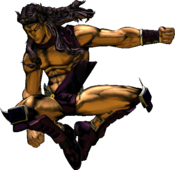
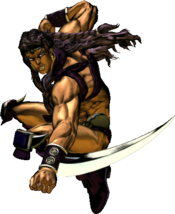
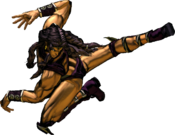
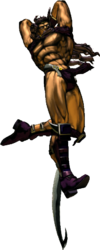
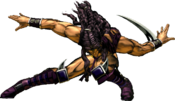
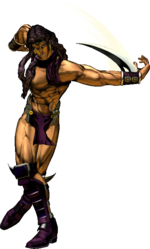
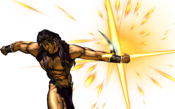
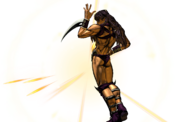
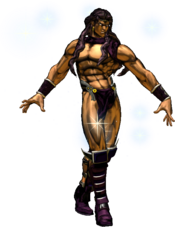
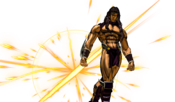
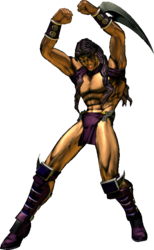
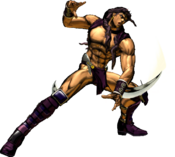
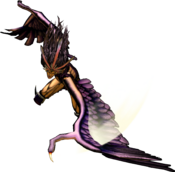
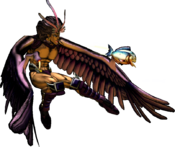
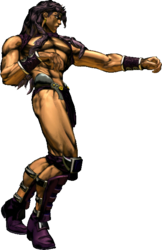
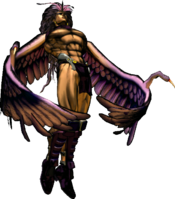
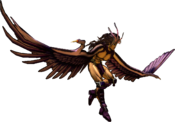
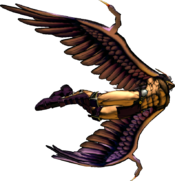
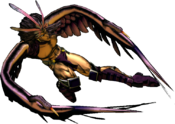
The central antagonist of Battle Tendency, the second part of JoJo's Bizarre Adventure, Kars is the leader of the Pillar Men, a group of ancient, super-human beings that seek to acquire the Red Stone of Aja so that Kars can be transformed into the most powerful being on the planet. As the leader of the Pillar Men, Kars is cunning and deceitful, always looking to gain an upper hand over his opponent at any cost.

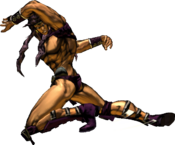
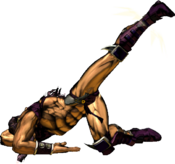
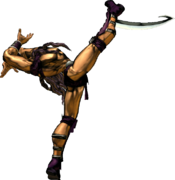
In ASBR, Kars is a close-ranged rushdown character that can bully his way into his preferred range with his incredible aerial buttons, large and good-scaling grounded normals, and a variety of movement-based special moves that influence the different ways he can approach the opponent. His Modes add additional hits to his blade-related normals and special moves, increasing the pushback and hit confirm potential on them as well as giving him an easy cancel option to continue his mixups. He has relatively high damage, being able to convert into 30-40% off of even the smallest stray hits, and his vortex potential after a hard knockdown makes him one of the most threatening characters in the game to defend against.

For the cost of two bars and a setup, however, Kars can shed his base form to become the Ultimate Life Form, an install super that dramatically changes his playstyle into a hybrid zoner-setplay monster who can pressure with a multitude of safe buttons and projectiles, as well as one of the best zoning tools in the game in "The power of supreme genes!". The drastic variations in gameplay between base form and Ultimate means that Kars can tweak his play depending on the matchup and his opponent, and choose to play in a variety of archetypes to find the one that irritates the other player the most.

Kars isn't all strengths, though; his wakeup is very weak in both forms, especially in Ultimate when he loses access to his wakeup HHA, a large and fast-starting hitbox that can be used as an anti-air callout at some ranges. Kars is extremely momentum focused, and understanding exactly how to keep his mixups going is the key to winning games with him.

  • Life Regeneration: Part of the damage Kars receives is converted into silver, residual health, which he passively recovers over time.
  • Modes: Kars has two main installs, both of which change the properties on his blade-related normals and special moves.
  • Ultimate Life Form: For two bars, Kars can transform into the Ultimate Life Form, his third install. As the Ultimate Life Form, Kars has a multitude of changes to his original moveset, as all of his original special moves have been replaced with new tools.
Playstyle
JJASBR Kars Small Icon.png Kars is a Mode character who utilizes his long-reaching normals and high damage to pressure the opponent into making bad decisions.
Pros Cons
  • Ease of execution: In both base form and Ultimate, Kars' combos are generally quite simple for the amount of damage they output, and his optimal loops are not much more difficult.
  • Strong mixups: Kars is amazing at getting hits and converting those into hard knockdowns that he can thrive off of, pressuring with a series of high-lows and janky left-right camera mixups with the threat of taking a third of your health bar on any one blocking mistake.
  • Flexibility in playstyle: Between his two main forms and the multitude of special moves he gets in both, Kars can play multiple kinds of archetypes of his own choice, and even switch between them freely; from a mixup-heavy rushdown beast to a keepaway zoner and everything in between.
  • Low health: Kars has 850 HP, one of the lowest values in the game, and due to the high damage of some of the strongest characters in ASBR, he can quite easily get two-touched or even TOD'd with the right resources and routes.
  • Volatile wakeup game: If Kars loses the advantage, he can have quite the difficult time gaining it again, especially if his Stylish Guard attempts get repeatedly baited. He has no true invincible wakeup options in Ultimate Life Form, and combined with his low health, playing in ULF can very quickly spiral out of your control if up against another character with strong safejumps.

Modes

Kars has access to two installs in order to enhance his abilities, both of which are accessible from his base form.

  • Light Mode (Mode 1) is activated by pressing the Style button, and costs no meter. This Mode adds an additional hit to each of Kars' blade-related moves and shortens the arc of his jump.
  • Brilliant Bone Blades (Mode 2) is activated by pressing 22S, and costs one bar. This Mode adds a third hit to each of Kars' blade-related moves, as well as making his jump arc even shorter and making some of his blade moves start up and end much sooner.

The following moves are affected by both Modes:

The tradeoff for using Mode is that while in either install, you are unable to build any meter until you either turn off Mode (by pressing Style again, only in Mode 1), use an HHA or GHA, or are forcefully knocked out of the install by taking a hard knockdown. This means that Mode is a very strong tool to use to close out games, throwing your opponent's reactions out of wack at the very end by implementing a much shorter jump for your mixups to open them up easier.

Stats

Style Health Low Health Mode Hashtag(s)
Mode 850 Rumble #ASBR_KAR
#ASBR_KAS

Move List

Normal Form

Normal Moves

5L
5L
JJASBR Kars 5L.png
Damage Guard Startup Active Recovery Block Adv. Hit Adv.
15 Mid - - - - -

Kars does a short jab with the tip of his elbow.

  • Stubby, not your best starter or neutral tool. Pretty much always gonna wanna use 2L or 5M in neutral exchanges.
5M
5M
JJASBR Kars 5M.png
Damage Guard Startup Active Recovery Block Adv. Hit Adv.
25 Mid - - - - -

Kars stands on one foot and attacks with a leg strike from behind his back.

  • Big range and quick startup. Amazing in neutral as it can stuff a lot of approaches and gives you medium scaling.
5H
5H
JJASBR Kars 5H.png
Damage Guard Startup Active Recovery Block Adv. Hit Adv.
35 / 20x2 / 15x3 Mid - - - - -

Kars quickly juts out forward with a bone blade extending from his arm.

  • Affected by Modes.
    • Damage notated as: Normal / Mode 1 / Mode 2.
  • Unreasonably fast, which means it can also be used as a solid poke at a close range.
  • Combos into 3H if used as an anti-air, giving you a full combo.
2L
2L
JJASBR Kars 2L.png
Damage Guard Startup Active Recovery Block Adv. Hit Adv.
14 Low - - - - -

Kars attacks with a short poke of his fingers to the opponent's lower half.

  • Kars' best low, has fast startup and short recovery meaning it can be chained 3-5 times in a blockstring before needing to cancel into another normal.
2M
2M
JJASBR Kars 2M.png
Damage Guard Startup Active Recovery Block Adv. Hit Adv.
23 Low - - - - -

Kars does a short roundhouse sweep with his leg.

  • Stubby range, can occasionally poke out some moves that lose to crouchers.
2H
2H
JJASBR Kars 2H.png
Damage Guard Startup Active Recovery Block Adv. Hit Adv.
34 Low - - - - -

Kars does an approaching slide, kicking his legs into the air.

  • Mainly combo filler for his 236H loops, as he has better lows and better neutral buttons that don't leave you so exposed.
3H
3H
Sabers from my feet!
JJASBR Kars 3H.png
Damage Guard Startup Active Recovery Block Adv. Hit Adv.
25 / 15x2 / 12x3 Mid - - - - -

A bone blade emerges from the underside of Kars' feet.

  • Affected by Modes.
    • Damage notated as: Normal / Mode 1 / Mode 2.
  • Launches, leads into his main air juggles and loops. The main tool you'll be using for extending combos.
  • Gives relative safety if canceled into on block, though how safe you are depends on the character matchup, so end in something safer if you feel like they have a punish. Extremely safe in modes 1/2.
  • Air crushes if done to an aerial opponent, giving you a free combo on anti-airs.
JL
j.L
JJASBR Kars Jump L.png
Damage Guard Startup Active Recovery Block Adv. Hit Adv.
18 Overhead - - - - -

A fist strike from the air.

  • Superceded by Kars' two other amazing air normals, though it can occasionally be useful for fakeout overheads to try and catch a Stylish Guard.
JM
j.M
JJASBR Kars Jump M.png
SCREW this move
SCREW this move
Damage Guard Startup Active Recovery Block Adv. Hit Adv.
28 Overhead - - - - -

Kars extends his leg to strike with an overhead attack.

  • Extremely deceptive hitboxes on the front and back of the animation. Amazing for crossups.
  • Has a very high amount of active frames, making it perfect for meaty setups.
  • Dash jump j.M is one of the most oppressive approaching tools in the game, use it whenever possible.
JH
j.H
JJASBR Kars Jump H.png
Damage Guard Startup Active Recovery Block Adv. Hit Adv.
40 / 25x2 / 20x3 Overhead - - - - -

A bone-blade strike with the edge of Kars' arm.

  • Affected by Modes.
    • Damage notated as: Normal / Mode 1 / Mode 2.
  • Another great hitbox, better for crossing up than intercepting approaches.
  • All of the extra hits in modes 1/2 are overheads, so feel free to abuse it for free double/triple overheads into low pressure.

Special Moves

236X
Cruel and beautiful violence!
236L/M/H
Version Damage Guard Startup Active Recovery Block Adv. Hit Adv.
Light 10, 50 / 12, 27x2 / 14, 20x3 Mid - - - - -
Medium 12, 55 / 14, 30x2 / 16, 24x3 Mid - - - - -
Heavy 14, 66 / 16, 35x2 / 18, 28x3 Mid - - - - -

Kars does an approaching bone blade slash that crosses up depending on the version used.

  • Affected by Modes.
    • Damage notated as: Normal / Mode 1 / Mode 2.
  • Light and medium stay same-side, whereas heavy crosses you up to the other side of the opponent.
  • Light and medium are occasionally true blockstrings out of a normal depending on spacing, but 236H is never true regardless of spacing, so remember to use it with an assist if you want to use it in a blockstring.
  • Heavy is Kars' main juggle tool.
623X
Behold, frozen brilliance!
623L/M/H
JJASBR Kars 623X.png
Version Damage Guard Startup Active Recovery Block Adv. Hit Adv.
Light 10x4, 4 / 11x5, 6 / 12x6, 8 Mid - - - - -
Medium 10x5, 6 / 11x6, 8 / 12x7, 10 Mid - - - - -
Heavy 10x6, 8 / 11x7, 10 / 12x9 Mid - - - - -

Kars does a flurry of blade strikes.

  • Affected by Modes.
    • Damage notated as: Normal / Mode 1 / Mode 2.
  • Bad. Minus on block, can't combo into it or from it very easily, and has terrible damage. The only reason you'd ever use this move is accidentally.
214X
Shatter against the wall!
214L/M/H
JJASBR Kars 214X.png
Version Damage Guard Startup Active Recovery Block Adv. Hit Adv.
Light 55 Mid - - - - -
Light (Air) 90 Mid - - - - -
Medium 65 Mid - - - - -
Medium (Air) 100 Mid - - - - -
Heavy 75 Mid - - - - -
Heavy (Air) 110 Mid - - - - -

Kars does a strong mule kick against the back wall.

  • Light/medium are mostly not that important, as they do less damage and their only benefit is starting up faster.
  • Heavy is Kars' main combo ender. Causes hard knockdown and can launch the opponent across the screen if done facing away from a wall, giving you the only true setup into GHA.
  • Heavy also has high guard gauge damage, and doing a flash cancel or assist call after the initial blocked hit gives you more than enough plus frames to force more mixups or place pressure on your opponent's guard gauge. Feel free to burn leftover meter on a 214H mixup from time to time to keep yourself safe.
22X
Victory is everything!
22L/M/H
Start
Start
JJASBR Kars 22L.png
Light
Light
JJASBR Kars 22M.png
Medium
Medium
JJASBR Kars 22H.png
Heavy
Heavy
Version Damage Guard Startup Active Recovery Block Adv. Hit Adv.
Light 60 / 32x2 / 24x3 Overhead - - - - -

Kars does a small animation and then teleports to a specific location based on input. The light version is an overhead that appears directly above your opponent's current position.

  • Affected by Modes.
    • Damage notated as: Normal / Mode 1 / Mode 2.
  • Ground bounces on hit, letting you get a full combo from it.
  • One of the main tentpoles of Kars' offense. Plus on block and an overhead that's incredibly easy to meaty.
Medium 50 / 5, 80 / 5x2, 80 Low - - - - -

Kars does a small animation and then teleports to a specific location based on input. The medium version is a same-side low that launches.

  • Affected by Modes.
    • Damage notated as: Normal / Mode 1 / Mode 2.
  • Pretty minus and risky, plus you can't combo off of this one. Only teleport version that beats running straight ahead (though all three teleports can be OS'd by running forward and doing a dash jump as late as possible)
Heavy - - - - - - -

Kars does a small animation and then teleports to a specific location based on your input. The heavy version teleports you directly behind the opponent, with no initial hitbox.

  • Very powerful anti-zoning tool, as it can invalidate a lot of keepaway play if done at the right time.
  • Actionable almost immediately after the teleport animation ends, giving you a hit/throw mixup or even a guaranteed whiff punish.

System Mechanics

Throw
Normal Throw
I'll slice you in two!
5/4 + Any Two Attack Buttons
JJASBR Kars Throw (1).png
JJASBR Kars Throw (2).png
Forward
Forward
JJASBR Kars Throw (3).png
Back
Back
Damage Guard Startup Active Recovery Block Adv. Hit Adv.
110 Throw - - - - -
  • Forward and Back Throws have unique animations.
  • Notes 2
Assist
Assist
Victory is everything!
Damage Guard Startup Active Recovery Block Adv. Hit Adv.
60 Overhead - - - - -
  • Assault Assist Stocks: 2
  • Reversal Assist Stocks: 1
  • Based on 22L
5S
Light Mode
5S
JJASBR Kars Mode On (1).png
Animation
Animation
JJASBR Kars Mode On (2).png
Mode On
Mode On
Version Damage Guard Startup Active Recovery Block Adv. Hit Adv.
Mode On - - - - Total XX - -
Mode Off - - - - Total XX - -

Turns Light Mode on/off.

22S
Brilliant Bone Blades
22S
Not to be confused with the HHA
Damage Guard Startup Active Recovery Block Adv. Hit Adv.
- - - - - - -

Activates Brilliant Bone Blades.

  • Requires 1 bar.
  • Using an HHA during Brilliant Bone Blades will remove its meter cost.

Heart Heat Attack

Brilliant Bone Blades
236 + Any Two Attack Buttons
JJASBR Kars HHA (1).png
JJASBR Kars HHA (2).png
JJASBR Kars HHA (3).png
Not to be confused with the Mode
Damage Guard Startup Active Recovery Block Adv. Hit Adv.
174 (6+12x5+18+20+70) Mid - - - - -

Kars licks the one blade in his arm before unleashing a large, shining array of slashes done in a single movement of his arm. If they successfully hit, Kars then dives forward to slash past the opponent.

  • Only Hit 8 triggers cinematic properties.

Great Heat Attack

Kars, the Ultimate Thing, is born!
236L+M+H
Damage Guard Startup Active Recovery Block Adv. Hit Adv.
- - - - - - -

Kars dons the Stone Mask with the Red Stone of Aja inserted into it, going through a slow and entirely vulnerable animation of transforming (similar to Giorno Giovanna). When the transformation is complete, Kars does a small cinematic cutscene before the install is finished.

  • Transformation.
  • Grants Kars a new moveset.
  • Disables Light Mode and Brilliant Bone Blades (both the Mode and HHA) for the rest of the match.

Ultimate Life Form

Normal Moves

ULF 5L
5L
Damage Guard Startup Active Recovery Block Adv. Hit Adv.
17 Mid - - - - -

Kars does a short jab with the tip of his elbow.

  • Unchanged from base form
ULF 5M
5M
Damage Guard Startup Active Recovery Block Adv. Hit Adv.
27 Mid - - - - -

Kars stands on one foot and attacks with a leg strike from behind his back.

  • Unchanged from base form
ULF 5H
5H
Damage Guard Startup Active Recovery Block Adv. Hit Adv.
17, 27 Mid - - - - -

A two-hit blade strike.

ULF 2L
2L
JJASBR Kars ULF 2L.png
Damage Guard Startup Active Recovery Block Adv. Hit Adv.
16 Low - - - - -
  • Notes 1
  • Notes 2
ULF 2M
2M
Damage Guard Startup Active Recovery Block Adv. Hit Adv.
25 Low - - - - -
  • Notes 1
  • Notes 2
ULF 2H
2H
JJASBR Kars ULF 2H.png
Damage Guard Startup Active Recovery Block Adv. Hit Adv.
38 Mid - - - - -
  • Launches
  • Notes 2
ULF 3H
6H
Brilliant Bone Blades
JJASBR Kars ULF 6H.png
Not to be confused with the Mode or the HHA
Damage Guard Startup Active Recovery Block Adv. Hit Adv.
50 Unblockable - - - - -
  • Launches
  • Notes 2
ULF JL
j.L
JJASBR Kars ULF Jump L.png
Damage Guard Startup Active Recovery Block Adv. Hit Adv.
20 Overhead - - - - -
  • Notes 1
  • Notes 2
ULF JM
j.M
JJASBR Kars ULF Jump M.png
Damage Guard Startup Active Recovery Block Adv. Hit Adv.
30 Overhead - - - - -
  • Notes 1
  • Notes 2
ULF JH
j.H
JJASBR Kars ULF Jump H.png
Damage Guard Startup Active Recovery Block Adv. Hit Adv.
44 Overhead - - - - -
  • Notes 1
  • Notes 2

Special Moves

ULF 236X
Feast your eyes on my Hamon!
236L/M/H
Version Damage Guard Startup Active Recovery Block Adv. Hit Adv.
Light 30, 35 Mid - - - - -
  • Launches
  • Notes 2
Medium 75 Mid - - - - -
  • Causes crumple
  • Notes 2
Heavy 75 Mid - - - - -
  • Launches
  • Notes 2
ULF 214X
The power of supreme genes!
214L/M/H
JJASBR Kars ULF 214L.png
Light
Light
JJASBR Kars ULF 214M.png
Medium
Medium
Heavy
Heavy
Version Damage Guard Startup Active Recovery Block Adv. Hit Adv.
Light 11x6 Mid - - - - -
  • Notes 1
  • Notes 2
Medium 58 Overhead - - - - -
  • Notes 1
  • Notes 2
Heavy 15x5 Low - - - - -
  • Notes 1
  • Notes 2
ULF 623X
This cannot be!
623L/M/H
JJASBR Kars ULF 623X.png
Version Damage Guard Startup Active Recovery Block Adv. Hit Adv.
Light 15x3, 20 Mid - - - - -
  • Notes 1
  • Notes 2
Medium 20x4 - - - - - -
  • Notes 1
  • Notes 2
Heavy 25x3, 95 - - - - - -
  • Notes 1
  • Notes 2

System Mechanics

ULF Throw
Throw
You IDIOT!
5/4 + Any Two Attack Buttons
JJASBR Kars ULF Throw (1).png
JJASBR Kars ULF Throw (2).png
Forward
Forward
Back
Back
Damage Guard Startup Active Recovery Block Adv. Hit Adv.
110 Throw - - - - -
  • Forward and Back Throws have unique animations.
  • Notes 2
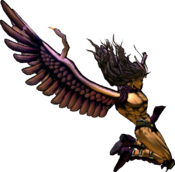
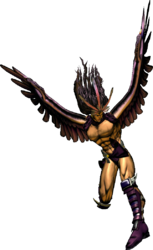
Predator Wings
Predator Wings
Any jump after 1/2/3
JJASBR Kars ULF 28.png
JJASBR Kars ULF 28 (Flight).png
Damage Guard Startup Active Recovery Block Adv. Hit Adv.
- - - - - - -
  • Super Jump
  • Transitions into Flight for the cost of meter; drains meter while flying.
  • Can perform Aerial Chain Beat while flying.
  • Can cancel Flight by:
    • Pressing 5S
    • Running out of meter
    • Performing 3 actions (any combination between aerial attacks and Aerial Dash)
Aerial Dash
Aerial Dash
j.44 / j.66
JJASBR Kars ULF Jump 66.png
Forward
Forward
JJASBR Kars ULF Jump 44.png
Back
Back
Damage Guard Startup Active Recovery Block Adv. Hit Adv.
- - - - - - -
  • Air Dashes
  • Notes 2

Navigation

General
FAQ
Controls
Stages
HUD
System
Esoterics
Character Data
Patch Notes
Glossary
JJASBR Part 1 Emblem.png
Phantom Blood
Jonathan
Zeppeli
Speedwagon
Dio Brando
JJASBR Part 2 Emblem.png
Battle Tendency
Joseph
Caesar
Lisa Lisa
Stroheim
Wamuu
Esidisi
Kars
JJASBR Part 3 Emblem.png
Stardust Crusaders
Jotaro (Part 3)
Old Joseph
Avdol
Kakyoin
Polnareff
Iggy
Hol Horse
Mariah
Pet Shop
Vanilla Ice
DIO
JJASBR Part 4 Emblem.png
Diamond is Unbreakable
Josuke (Part 4)
Jotaro (Part 4)
Koichi
Okuyasu
Yukako
Rohan
Shigechi
Yuya
Keicho
Akira
Kira
Kosaku
JJASBR Part 5 Emblem.png
Vento Aureo
Giorno
Bucciarati
Mista
Narancia
Fugo
Trish
Abbacchio
Prosciutto
Ghiaccio
Risotto
Diavolo
JJASBR Part 6 Emblem.png
Stone Ocean
Jolyne
Ermes
Foo Fighters
Anasui
Weather
Pucci (WS)
Pucci (Final)
JJASBR Part 7 Emblem.png
Steel Ball Run
Johnny
Gyro
Diego
AW Diego
Valentine
JJASBR Part 8 Emblem.png
JoJolion
Josuke (Part 8)
Wonder of U
Baoh the Visitor
Baoh