JoJo's Bizarre Adventure: All-Star Battle R/Shigekiyo Yangu: Difference between revisions
Jump to navigation
Jump to search

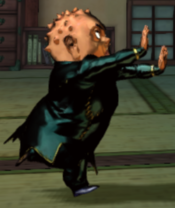
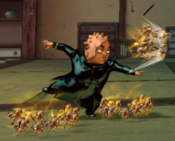
Offensive Formation

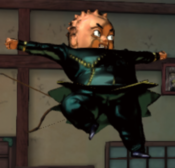
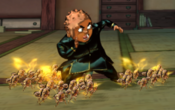
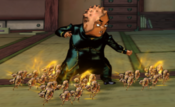
Defensive Formation
(Added Template for Shigechi) |
(Added Pros Cons, Frame Data, and a Notible Trait.) |
||
| Line 3: | Line 3: | ||
Insert character introduction here. | Insert character introduction here. | ||
*'''Stance Switching''': | *'''Stance Switching''': Can switch between stances to get access to different special moves. It can be canceled into special moves as well, allowing you to quickly do this in strings. Does not change anything other than the special moves you have access to. | ||
{{StrengthsAndWeaknesses | {{StrengthsAndWeaknesses | ||
| intro = [[file:JJASBR_Shigechi_Small_Icon.png|50px]] '''Shigechi''' is a | | intro = [[file:JJASBR_Shigechi_Small_Icon.png|50px]] '''Shigechi''' is a Stance character who utilizes his special moves to pester and mix up the opponent. | ||
| pros = | | pros = | ||
* ''' | * '''Great OTG Damage:''' Can hit the opponent OTG with special moves and his HHA, allowing him to combo after knockdowns, even at range. | ||
* ''' | * '''Low Recovery Options:''' Access to [[JoJo's_Bizarre_Adventure:_All-Star_Battle_R/Shigekiyo_Yangu#623X|I can get anything I want!]] and [[JoJo's_Bizarre_Adventure:_All-Star_Battle_R/Shigekiyo_Yangu#4S|4S/6S]] to end strings in low recovery, as well as throwing projectiles to stay at advantage or getting resources back. | ||
* ''' | * '''Oppressive Strings:''' While spending your Harvest stacks on your offense you can create long strings with small gaps leaving your opponent guessing for the next strike or throw mixup. | ||
|cons = | |cons = | ||
* ''' | * '''TERRIBLE Normals:''' Abysmal range on his normals and a lack of 5f move in general make him an absolute hell to play as in neutral, you're better off letting your opponent engage you. | ||
* ''' | * '''Useless without Stacks:''' Heavily relies on his Harvest stacks to do anything. Without them he needs to confirm into 2H to get them back, hard to do with his poor normals. | ||
* '''Bad grabs:''' Low damage and lacking advantage to set up on oki, forward throw will not give you enough time to hit the opponent meaty at all, and a backthrow only gives you a dashjump jH at best. | |||
* '''OTG HHA leaves him minus:''' While OTG HHA is a great tool to end your combos and refill your Harvest stacks, it leaves you minus on hit meaning you can't keep your advantage going. Normal HHA isn't a much better option either, since that just launches away and resets the opponent to neutral. | |||
| tablewidth = 80 | | tablewidth = 80 | ||
}} | }} | ||
===Unique Mechanic=== | ===Unique Mechanic=== | ||
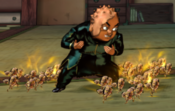
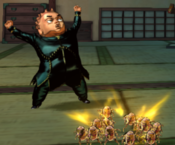
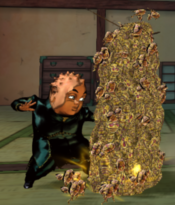
'''Herd of Harvests''' | *'''Herd of Harvests:''' | ||
===Stats=== | ===Stats=== | ||
| Line 47: | Line 49: | ||
|damage= | |damage= | ||
|guard= | |guard= | ||
|startup= | |startup=7 | ||
|active= | |active= | ||
|recovery= | |recovery= | ||
|blockadv= | |blockadv=+2 | ||
|hitadv= | |hitadv=+6 | ||
|description= | |description= | ||
*Notes 1 | *Notes 1 | ||
| Line 68: | Line 70: | ||
|damage= | |damage= | ||
|guard= | |guard= | ||
|startup= | |startup=7 | ||
|active= | |active= | ||
|recovery= | |recovery= | ||
|blockadv= | |blockadv=-2 | ||
|hitadv= | |hitadv=+2 | ||
|description= | |description= | ||
*Notes 1 | *Notes 1 | ||
| Line 89: | Line 91: | ||
|damage= | |damage= | ||
|guard= | |guard= | ||
|startup= | |startup=13 | ||
|active= | |active= | ||
|recovery= | |recovery= | ||
|blockadv= | |blockadv=-6 | ||
|hitadv= | |hitadv=0 | ||
|description= | |description= | ||
*Notes 1 | *Notes 1 | ||
| Line 110: | Line 112: | ||
|damage= | |damage= | ||
|guard= | |guard= | ||
|startup= | |startup=7 | ||
|active= | |active= | ||
|recovery= | |recovery= | ||
|blockadv= | |blockadv=0 | ||
|hitadv= | |hitadv=+4 | ||
|description= | |description= | ||
*Notes 1 | *Notes 1 | ||
| Line 131: | Line 133: | ||
|damage= | |damage= | ||
|guard= | |guard= | ||
|startup= | |startup=7 | ||
|active= | |active= | ||
|recovery= | |recovery= | ||
|blockadv= | |blockadv=-2 | ||
|hitadv= | |hitadv=+2 | ||
|description= | |description= | ||
*Notes 1 | *Notes 1 | ||
| Line 152: | Line 154: | ||
|damage= | |damage= | ||
|guard= | |guard= | ||
|startup= | |startup=13 | ||
|active= | |active= | ||
|recovery= | |recovery= | ||
|blockadv= | |blockadv=-6 | ||
|hitadv= | |hitadv= | ||
|description= | |description= | ||
| Line 194: | Line 196: | ||
|damage= | |damage= | ||
|guard= | |guard= | ||
|startup= | |startup=9 | ||
|active= | |active= | ||
|recovery= | |recovery= | ||
| Line 236: | Line 238: | ||
|damage= | |damage= | ||
|guard= | |guard= | ||
|startup= | |startup=15 | ||
|active= | |active= | ||
|recovery= | |recovery= | ||
| Line 309: | Line 311: | ||
|damage= | |damage= | ||
|guard= | |guard= | ||
|startup= | |startup=17 | ||
|active= | |active= | ||
|recovery= | |recovery= | ||
|blockadv= | |blockadv=-8 | ||
|hitadv= | |hitadv= | ||
|description= | |description= | ||
| Line 912: | Line 914: | ||
|hitadv= | |hitadv= | ||
|description= Summons a stack of Harvest. | |description= Summons a stack of Harvest. | ||
*Notes 1 | |||
*Notes 2 | |||
}} | |||
}} | |||
====== <font style="visibility:hidden" size="0">66-44</font> ====== | |||
{{MoveData | |||
|image=JJASBR_Shigechi_66-44.png | |||
|caption= | |||
|name=Relay Race | |||
|input=66/44 | |||
|data= | |||
{{AttackData-ASBR | |||
|version=Forward | |||
|damage= | |||
|guard= | |||
|startup= | |||
|active= | |||
|recovery= | |||
|blockadv= | |||
|hitadv= | |||
|description= | |||
*Notes 1 | |||
*Notes 2 | |||
}} | |||
{{AttackData-ASBR | |||
|version=Back | |||
|header=no | |||
|damage= | |||
|guard= | |||
|startup= | |||
|active= | |||
|recovery= | |||
|blockadv= | |||
|hitadv= | |||
|description= | |||
*Notes 1 | *Notes 1 | ||
*Notes 2 | *Notes 2 | ||
Revision as of 11:25, 27 September 2022
Introduction
Insert character introduction here.
- Stance Switching: Can switch between stances to get access to different special moves. It can be canceled into special moves as well, allowing you to quickly do this in strings. Does not change anything other than the special moves you have access to.
Playstyle
|
|
|
| Pros | Cons |
|
|
Unique Mechanic
- Herd of Harvests:
Stats
| Style | Health | Low Health Mode | Hashtag(s) |
|---|---|---|---|
| Stand | 900 | Rumble | #ASBR_SHI #ASBR_SIG |
Move List
Offensive Formation
Defensive Formation
Offensive Formation
Normal Moves
5L
5L
|
|---|
5M
5M
|
|---|
5H
5H
|
|---|
2L
2L
|
|---|
2M
2M
|
|---|
2H
2H
|
|---|
4S
4S
Defensive Formation |
|---|
JL
j.L
|
|---|
JM
j.M
|
|---|
JH
j.H
|
|---|
Special Moves
623X
I can get anything I want!
623L/M/H |
|---|
236X
Don't underestimate Harvest!
236L/M/H |
|---|
214X
Mess with me and you're gonna get hurt!
214L/M/H |
|---|
41236X
Move and you'll regret it!
41236L/M/H |
|---|
Defensive Formation
Normal Moves
5L
5L
|
|---|
5M
5M
|
|---|
5H
5H
|
|---|
2L
2L
|
|---|
2M
2M
|
|---|
2H
2H
|
|---|
6S
6S
Offensive Formation |
|---|
JL
j.L
|
|---|
JM
j.M
|
|---|
JH
j.H
|
|---|
Special Moves
623X
I can get anything I want!
623L/M/H |
|---|
214X
Don't come any closer!
214L/M/H |
|---|
Stand 214X-6X
I'll protect them!
214L/M/H>6L/M/H |
|---|
41236X
So itchy!
41236L/M/H |
|---|
System Mechanics
Throw
Throw
Don't move! 5/4 + Any Two Attack Buttons |
|---|
Assist
Assist
Assist Name |
|---|
5S
You can see my Harvest?!
5S |
|---|
66-44
Relay Race
66/44 |
|---|
Heart Heat Attack
Now I'm real mad!
236 + Any Two Attack Buttons |
|---|
Great Heat Attack
You want proof? Here it is!
236L+M+H |
|---|

