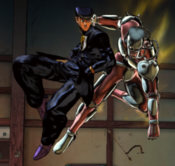
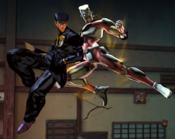
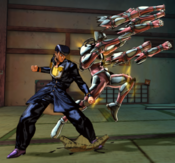
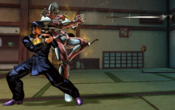
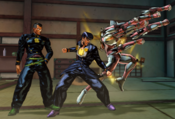
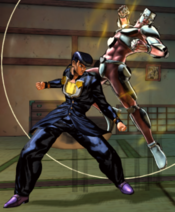
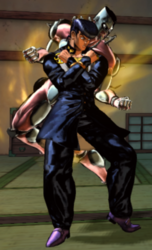
JoJo's Bizarre Adventure: All-Star Battle R/Josuke Higashikata (Part 4): Difference between revisions
mNo edit summary |
Smol-squish (talk | contribs) No edit summary |
||
| Line 1: | Line 1: | ||
{{ASBR Character Intro|char=Josuke Part 4|short=js4|content= | {{ASBR Character Intro|char=Josuke Part 4|short=js4|content= | ||
==Introduction== | ==Introduction== | ||
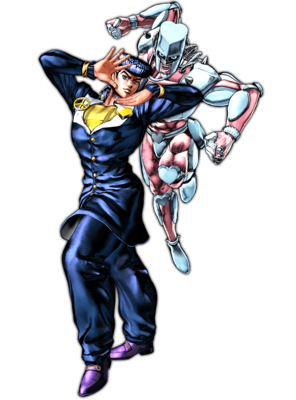
The primary protagonist of ''Diamond is Unbreakable'', the fourth part of ''JoJo's Bizarre Adventure'', Josuke Higashikata is an | The primary protagonist of ''Diamond is Unbreakable'', the fourth part of ''JoJo's Bizarre Adventure'', Josuke Higashikata is an rushdown character with a variety of powerful tools. He can play at a variety of ranges well and convert just about any hit into a knockdown, allowing him to set up his powerful offense. | ||
On offense, he boasts a strong mixup game with his left-right setups. His guard damage also adds an additional threat of guard breaking to his pressure. | On offense, he boasts a strong mixup game with his left-right setups. His guard damage also adds an additional threat of guard breaking to his pressure. | ||
{{StrengthsAndWeaknesses | {{StrengthsAndWeaknesses | ||
| intro = [[file:JJASBR_Josuke_Part_4_Small_Icon.png| | | intro = [[file:JJASBR_Josuke_Part_4_Small_Icon.png|68x70px]] '''Josuke Higashikata''' is a Stand character who closes in on the opponent in order to break down both their health bar and their guard gauge | ||
| pros = | | pros = | ||
* '''Stable Conversions:''' Just about anything can convert into 236L, letting him turn most hits in neutral into a longer combo. | * '''Stable Conversions:''' Just about anything can convert into 236L, letting him turn most hits in neutral into a longer combo. | ||
* '''Strong Oki:''' Good left-right mixups with his crossup j.L, allowing him to turn most knockdowns into a scary high-low-left-right-throw guessing game. | * '''Strong Oki:''' Good left-right mixups with his crossup j.L, allowing him to turn most knockdowns into a scary high-low-left-right-throw guessing game. | ||
* '''Guard Damage:''' Can deal a lot of damage to an opponent's guard, potentially letting him score guard breaks after the opponent successfully blocks his mixups. | * '''Guard Damage:''' Can deal a lot of damage to an opponent's guard, potentially letting him score guard breaks after the opponent successfully blocks his mixups. | ||
* '''Good Neutral:''' | * '''Good Neutral:''' Josuke has an array solid pokes with a good combination of speed and range, good jump-ins, decent mobility, and an acceptable projectile, letting him play at a variety of ranges and make his way through neutral | ||
* '''Damage:''' | * '''High Damage:''' Josuke has above average damage, allowing him to finish the opponent with relatively few interactions | ||
| cons = | | cons = | ||
* | * '''Unsafe Pressure:''' Josuke's specials are almost all unsafe, making him have to be careful with blockstrings or use PCs to keep himself safe | ||
|tablewidth=80 | |tablewidth=80 | ||
}} | }} | ||
===Watch Your Mouth!=== | ===Watch Your Mouth!=== | ||
A unique stance Josuke enters after blocking an attack with 22H. In this mode, Josuke will constantly walk towards the opponent, and cannot move backwards or crouch. However, Josuke gains perpetual hyper armor, the ability to chain normals into each other in any order, and a new | A unique stance Josuke enters after blocking an attack with 22H. In this mode, Josuke will constantly walk towards the opponent, and cannot move backwards or crouch. However, Josuke gains perpetual hyper armor, the ability to chain normals into each other in any order, and a new OTG move in 3M. | ||
===Stats=== | ===Stats=== | ||
| Line 45: | Line 45: | ||
|data= | |data= | ||
{{AttackData-ASBR | {{AttackData-ASBR | ||
|damage= | |damage=7 | ||
|guard= | |guard=Mid | ||
|startup= | |startup= | ||
|active= | |active= | ||
| Line 52: | Line 52: | ||
|blockadv= | |blockadv= | ||
|hitadv= | |hitadv= | ||
|description= | |description=Josuke performs a backhanded attack | ||
*A standard jab, good for stopping dash jumps | |||
}} | }} | ||
}} | }} | ||
| Line 65: | Line 65: | ||
|data= | |data= | ||
{{AttackData-ASBR | {{AttackData-ASBR | ||
|damage= | |damage=23 | ||
|guard= | |guard=Mid | ||
|startup= | |startup= | ||
|active= | |active= | ||
| Line 72: | Line 72: | ||
|blockadv= | |blockadv= | ||
|hitadv= | |hitadv= | ||
|description= | |description=Josuke performs a an advancing hook | ||
*Good range for pokes and counter-pokes | |||
*Mainly used as combo and pressure filler | |||
}} | }} | ||
}} | }} | ||
| Line 85: | Line 86: | ||
|data= | |data= | ||
{{AttackData-ASBR | {{AttackData-ASBR | ||
|damage= | |damage=35 | ||
|guard= | |guard=Mid | ||
|startup= | |startup= | ||
|active= | |active= | ||
| Line 92: | Line 93: | ||
|blockadv= | |blockadv= | ||
|hitadv= | |hitadv= | ||
|description= | |description=Crazy Diamond performs a quick punch | ||
Crazy Diamond | *Good range for pokes and confirms | ||
}} | }} | ||
}} | }} | ||
| Line 105: | Line 106: | ||
|data= | |data= | ||
{{AttackData-ASBR | {{AttackData-ASBR | ||
|damage= | |damage=13 | ||
|guard= | |guard=Low | ||
|startup= | |startup= | ||
|active= | |active= | ||
| Line 112: | Line 113: | ||
|blockadv= | |blockadv= | ||
|hitadv= | |hitadv= | ||
|description= | |description=Josuke performs a stationary kick | ||
*Very good range for pokes | |||
}} | }} | ||
}} | }} | ||
| Line 125: | Line 126: | ||
|data= | |data= | ||
{{AttackData-ASBR | {{AttackData-ASBR | ||
|damage= | |damage=18 | ||
|guard= | |guard=Low | ||
|startup= | |startup= | ||
|active= | |active= | ||
| Line 132: | Line 133: | ||
|blockadv= | |blockadv= | ||
|hitadv= | |hitadv= | ||
|description= | |description=Josuke performs a sliding kick | ||
*Good range for pokes and counter pokes | |||
}} | }} | ||
}} | }} | ||
| Line 145: | Line 146: | ||
|data= | |data= | ||
{{AttackData-ASBR | {{AttackData-ASBR | ||
|damage= | |damage=33 | ||
|guard= | |guard=Low | ||
|startup= | |startup= | ||
|active= | |active= | ||
| Line 152: | Line 153: | ||
|blockadv= | |blockadv= | ||
|hitadv= | |hitadv= | ||
|description= | |description=Crazy Diamond performs an overhead punch to the ground | ||
*Provides hard knockdown | |||
*Good range for pokes | |||
}} | }} | ||
}} | }} | ||
| Line 165: | Line 167: | ||
|data= | |data= | ||
{{AttackData-ASBR | {{AttackData-ASBR | ||
|damage= | |damage=10, 6*2, 10*2 | ||
|guard= | |guard=Mid | ||
|startup= | |startup= | ||
|active= | |active= | ||
| Line 172: | Line 174: | ||
|blockadv= | |blockadv= | ||
|hitadv= | |hitadv= | ||
|description= | |description=Crazy Diamond performs a barrage of punches without fully manifesting | ||
Does a | *Does a lot of guard damage, making it very useful for guard break setups. However, it is difficult to true blockstring into this with just Josuke's normals, so be wary of potential SGs and SDs. | ||
*Despite not causing crumple, uses crumple on hit | |||
}} | }} | ||
}} | }} | ||
| Line 187: | Line 188: | ||
|data= | |data= | ||
{{AttackData-ASBR | {{AttackData-ASBR | ||
|damage= | |damage=17 | ||
|guard= | |guard=Overhead | ||
|startup= | |startup= | ||
|active= | |active= | ||
| Line 194: | Line 195: | ||
|blockadv= | |blockadv= | ||
|hitadv= | |hitadv= | ||
|description= | |description=Josuke performs an attack with his knees | ||
*Small, but can cross up | |||
*Good for air-to-airs and jump-ins | |||
}} | }} | ||
}} | }} | ||
| Line 207: | Line 209: | ||
|data= | |data= | ||
{{AttackData-ASBR | {{AttackData-ASBR | ||
|damage= | |damage=26 | ||
|guard= | |guard=Overhead | ||
|startup= | |startup= | ||
|active= | |active= | ||
| Line 214: | Line 216: | ||
|blockadv= | |blockadv= | ||
|hitadv= | |hitadv= | ||
|description= | |description=Josuke performs a kick downwards | ||
*A good jump-in due to its angle | |||
}} | }} | ||
}} | }} | ||
| Line 227: | Line 229: | ||
|data= | |data= | ||
{{AttackData-ASBR | {{AttackData-ASBR | ||
|damage= | |damage=30 | ||
|guard= | |guard=Overhead | ||
|startup= | |startup= | ||
|active= | |active= | ||
| Line 234: | Line 236: | ||
|blockadv= | |blockadv= | ||
|hitadv= | |hitadv= | ||
|description= | |description=Crazy Diamond performs an uppercut | ||
Launches | *Launches on hit | ||
*Does not reach very far down, but good for combo filler | |||
}} | }} | ||
}} | }} | ||
| Line 244: | Line 247: | ||
|image=JJASBR_Josuke_Part_4_236X.png | |image=JJASBR_Josuke_Part_4_236X.png | ||
|caption= | |caption= | ||
|image2=JJASBR_Josuke_Part_4_236L.png | |||
|caption2=L version | |||
|image3=JJASBR_Josuke_Part_4_236M.png | |||
|caption3=M version | |||
|image4=JJASBR_Josuke_Part_4_236H.png | |||
|caption4=H version | |||
|name=Break through, beat you up! | |name=Break through, beat you up! | ||
|input=236L/M/H | |input=236L/M/H | ||
| Line 249: | Line 258: | ||
{{AttackData-ASBR | {{AttackData-ASBR | ||
|version=Light | |version=Light | ||
|damage= | |damage=10*4, 4*11, 20 | ||
|guard= | |guard=Mid | ||
|startup= | |startup= | ||
|active= | |active= | ||
| Line 256: | Line 265: | ||
|blockadv= | |blockadv= | ||
|hitadv= | |hitadv= | ||
|description= | |description=Josuke performs a shoulder tackle forward, with Crazy Diamond following up with a barrage of punches and a final straight punch | ||
*Causes crumple on hit | |||
*Can not followed up without spending HH gauge or OTG | |||
*Does a lot of guard damage | |||
*Josuke's main Stand Off combo tool | |||
}} | }} | ||
{{AttackData-ASBR | {{AttackData-ASBR | ||
|version=Medium | |version=Medium | ||
|header=no | |header=no | ||
|damage= | |damage=10*4, 4*11, 30 | ||
|guard= | |guard=Mid, Overhead | ||
|startup= | |startup= | ||
|active= | |active= | ||
| Line 271: | Line 281: | ||
|blockadv= | |blockadv= | ||
|hitadv= | |hitadv= | ||
|description= | |description=Josuke performs a shoulder tackle forward, with Crazy Diamond following up with a barrage of punches and a final overhead punch | ||
*Causes ground bounce on hit | |||
*Can not be followed up without spending meter or OTG | |||
}} | }} | ||
{{AttackData-ASBR | {{AttackData-ASBR | ||
|version=Heavy | |version=Heavy | ||
|header=no | |header=no | ||
|damage= | |damage=10*4, 4*11, 34 | ||
|guard= | |guard=Mid, Low | ||
|startup= | |startup= | ||
|active= | |active= | ||
| Line 284: | Line 295: | ||
|blockadv= | |blockadv= | ||
|hitadv= | |hitadv= | ||
|description= | |description=Josuke performs a shoulder tackle forward, with Crazy Diamond following up with a barrage of punches and a final sweeping punch | ||
*Launches on hit | |||
*Can not combo on grounded hit, but can combo after a juggle | |||
}} | }} | ||
}} | }} | ||
| Line 298: | Line 310: | ||
{{AttackData-ASBR | {{AttackData-ASBR | ||
|version=Light | |version=Light | ||
|damage= | |damage=10*6 | ||
|guard= | |guard=Low | ||
|startup= | |startup= | ||
|active= | |active= | ||
| Line 305: | Line 317: | ||
|blockadv= | |blockadv= | ||
|hitadv= | |hitadv= | ||
|description= | |description=Crazy Diamond rapidly punches the ground, breaking it and leaving a small hole | ||
*Can OTG | |||
*L version can OTG after [[JoJo's Bizarre Adventure: All-Star Battle R/Josuke Higashikata (Part 4)#Stand 236X|Rockabye baby!]] in the corner | |||
}} | }} | ||
{{AttackData-ASBR | {{AttackData-ASBR | ||
|version=Medium | |version=Medium | ||
|header=no | |header=no | ||
|damage= | |damage=12*6, 15 | ||
|guard= | |guard=Low | ||
|startup= | |startup= | ||
|active= | |active= | ||
| Line 321: | Line 332: | ||
|hitadv= | |hitadv= | ||
|description= | |description= | ||
}} | }} | ||
{{AttackData-ASBR | {{AttackData-ASBR | ||
|version=Heavy | |version=Heavy | ||
|header=no | |header=no | ||
|damage= | |damage=14*7, 20 | ||
|guard= | |guard=Low | ||
|startup= | |startup= | ||
|active= | |active= | ||
| Line 334: | Line 344: | ||
|hitadv= | |hitadv= | ||
|description= | |description= | ||
*Most used version, can OTG after [[JoJo's Bizarre Adventure: All-Star Battle R/Josuke Higashikata (Part 4)#236X|236L/M]] and both versions of [[JoJo's Bizarre Adventure: All-Star Battle R/Josuke Higashikata (Part 4)#Heart Heat Attack|HHA]] | |||
}} | }} | ||
}} | }} | ||
| Line 346: | Line 356: | ||
|data= | |data= | ||
{{AttackData-ASBR | {{AttackData-ASBR | ||
|damage= | |damage=10 | ||
|guard= | |guard=Overhead | ||
|startup= | |startup= | ||
|active= | |active= | ||
| Line 353: | Line 363: | ||
|blockadv= | |blockadv= | ||
|hitadv= | |hitadv= | ||
|description= | |description=Josuke rapidly slides across the floor, back to the last spot where he used [[JoJo's Bizarre Adventure: All-Star Battle R/Josuke Higashikata (Part 4)#214X|214X]] | ||
*All versions do the same thing | |||
*Incredibly active, making is usable as a meaty | |||
Josuke rapidly slides across the floor, back to the last spot where he used 214X | |||
}} | }} | ||
}} | }} | ||
| Line 369: | Line 378: | ||
{{AttackData-ASBR | {{AttackData-ASBR | ||
|version=Light | |version=Light | ||
|damage= | |damage=50 | ||
|guard= | |guard=Mid | ||
|startup= | |startup= | ||
|active= | |active= | ||
| Line 376: | Line 385: | ||
|blockadv= | |blockadv= | ||
|hitadv= | |hitadv= | ||
|description= | |description=Crazy Diamond flicks a bearing like a bullet at the opponent | ||
*Standard projectile, reaches very high and can be crouched under | |||
}} | }} | ||
{{AttackData-ASBR | {{AttackData-ASBR | ||
|version=Medium | |version=Medium | ||
|header=no | |header=no | ||
|damage= | |damage=60 | ||
|guard= | |guard=Mid | ||
|startup= | |startup= | ||
|active= | |active= | ||
| Line 390: | Line 399: | ||
|hitadv= | |hitadv= | ||
|description= | |description= | ||
*Travels faster than the L version | |||
}} | }} | ||
{{AttackData-ASBR | {{AttackData-ASBR | ||
|version=Heavy | |version=Heavy | ||
|header=no | |header=no | ||
|damage= | |damage=70 | ||
|guard= | |guard=Mid | ||
|startup= | |startup= | ||
|active= | |active= | ||
| Line 403: | Line 412: | ||
|hitadv= | |hitadv= | ||
|description= | |description= | ||
*Travels faster than the M version | |||
*Launches on hit | |||
}} | }} | ||
}} | }} | ||
| Line 422: | Line 432: | ||
|blockadv= | |blockadv= | ||
|hitadv= | |hitadv= | ||
|description= | |description=Josuke stops and fixes his hair. If the opponent directly attacks him, they will instead insult his hair and enrage him, putting him into Watch Your Mouth! mode | ||
Costs 1 | *Costs 1 HH gauge to use | ||
}} | }} | ||
}} | }} | ||
| Line 432: | Line 442: | ||
|caption= | |caption= | ||
|name=I'm not done kicking your ass! | |name=I'm not done kicking your ass! | ||
|input=3M near downed opponent in Watch Your Mouth mode | |input=3M near downed opponent in Watch Your Mouth! mode | ||
|data= | |data= | ||
{{AttackData-ASBR | {{AttackData-ASBR | ||
|damage= | |damage=0 | ||
|guard= | |guard=Mid | ||
|startup= | |startup= | ||
|active= | |active= | ||
| Line 442: | Line 452: | ||
|blockadv= | |blockadv= | ||
|hitadv= | |hitadv= | ||
|description= | |description=Josuke grabs the opponent off the ground, allowing him to continue his enraged assault on the opponent | ||
*Can only be used as an OTG | |||
}} | }} | ||
}} | }} | ||
| Line 459: | Line 469: | ||
|data= | |data= | ||
{{AttackData-ASBR | {{AttackData-ASBR | ||
|damage= | |damage=15 | ||
|guard= | |guard=Mid | ||
|startup= | |startup= | ||
|active= | |active= | ||
| Line 466: | Line 476: | ||
|blockadv= | |blockadv= | ||
|hitadv= | |hitadv= | ||
|description= | |description=Crazy Diamond performs a quick backhanded attack | ||
*Standard jab, good at stopping dash jumps | |||
}} | }} | ||
}} | }} | ||
| Line 479: | Line 489: | ||
|data= | |data= | ||
{{AttackData-ASBR | {{AttackData-ASBR | ||
|damage= | |damage=25 | ||
|guard= | |guard=Mid | ||
|startup= | |startup= | ||
|active= | |active= | ||
| Line 486: | Line 496: | ||
|blockadv= | |blockadv= | ||
|hitadv= | |hitadv= | ||
|description= | |description=Crazy Diamond performs backhanded attack that reaches further out | ||
*Good range for pokes and counter-pokes | |||
}} | }} | ||
}} | }} | ||
| Line 499: | Line 509: | ||
|data= | |data= | ||
{{AttackData-ASBR | {{AttackData-ASBR | ||
|damage= | |damage=12, 24 | ||
|guard= | |guard=Mid | ||
|startup= | |startup= | ||
|active= | |active= | ||
| Line 506: | Line 516: | ||
|blockadv= | |blockadv= | ||
|hitadv= | |hitadv= | ||
|description= | |description=Crazy Diamond performs an uppercut | ||
*Moves Josuke forward | |||
*Good range for counter-pokes | |||
*Good for combo filler for juggles | |||
}} | }} | ||
}} | }} | ||
| Line 519: | Line 531: | ||
|data= | |data= | ||
{{AttackData-ASBR | {{AttackData-ASBR | ||
|damage= | |damage=14 | ||
|guard= | |guard=Low | ||
|startup= | |startup= | ||
|active= | |active= | ||
| Line 526: | Line 538: | ||
|blockadv= | |blockadv= | ||
|hitadv= | |hitadv= | ||
|description= | |description=Crazy Diamond performs a crouching jab | ||
*Despite its animation, hits low | |||
*Otherwise standard jab | |||
}} | }} | ||
}} | }} | ||
| Line 539: | Line 552: | ||
|data= | |data= | ||
{{AttackData-ASBR | {{AttackData-ASBR | ||
|damage= | |damage=23 | ||
|guard= | |guard=Low | ||
|startup= | |startup= | ||
|active= | |active= | ||
| Line 546: | Line 559: | ||
|blockadv= | |blockadv= | ||
|hitadv= | |hitadv= | ||
|description= | |description=Crazy Diamond performs a backhanded attack that reaches slightly upwards | ||
*Good range for pokes and counter-pokes | |||
}} | }} | ||
}} | }} | ||
| Line 559: | Line 572: | ||
|data= | |data= | ||
{{AttackData-ASBR | {{AttackData-ASBR | ||
|damage= | |damage=36 | ||
|guard= | |guard=Low | ||
|startup= | |startup= | ||
|active= | |active= | ||
| Line 566: | Line 579: | ||
|blockadv= | |blockadv= | ||
|hitadv= | |hitadv= | ||
|description= | |description=Crazy Diamond performs a sweeping kick | ||
*Provides hard knockdown | |||
*Good range for pokes | |||
}} | }} | ||
}} | }} | ||
| Line 579: | Line 593: | ||
|data= | |data= | ||
{{AttackData-ASBR | {{AttackData-ASBR | ||
|damage= | |damage=25 | ||
|guard= | |guard=Mid | ||
|startup= | |startup= | ||
|active= | |active= | ||
| Line 586: | Line 600: | ||
|blockadv= | |blockadv= | ||
|hitadv= | |hitadv= | ||
|description= | |description=Josuke and Crazy Diamond slide along the ground and Crazy Diamond kicks upwards | ||
*Launches on hit | |||
}} | }} | ||
}} | }} | ||
| Line 599: | Line 613: | ||
|data= | |data= | ||
{{AttackData-ASBR | {{AttackData-ASBR | ||
|damage= | |damage=18 | ||
|guard= | |guard=Overhead | ||
|startup= | |startup= | ||
|active= | |active= | ||
| Line 606: | Line 620: | ||
|blockadv= | |blockadv= | ||
|hitadv= | |hitadv= | ||
|description= | |description=Crazy Diamond performs a quick punch downwards | ||
*Good for air-to-airs | |||
}} | }} | ||
}} | }} | ||
| Line 619: | Line 633: | ||
|data= | |data= | ||
{{AttackData-ASBR | {{AttackData-ASBR | ||
|damage= | |damage=28 | ||
|guard= | |guard=Overhead | ||
|startup= | |startup= | ||
|active= | |active= | ||
| Line 626: | Line 640: | ||
|blockadv= | |blockadv= | ||
|hitadv= | |hitadv= | ||
|description= | |description=Crazy Diamond performs a kick outwards | ||
*Good for jump-ins and combo filler | |||
}} | }} | ||
}} | }} | ||
| Line 639: | Line 653: | ||
|data= | |data= | ||
{{AttackData-ASBR | {{AttackData-ASBR | ||
|damage= | |damage=22, 15 | ||
|guard= | |guard=Overhead | ||
|startup= | |startup= | ||
|active= | |active= | ||
| Line 646: | Line 660: | ||
|blockadv= | |blockadv= | ||
|hitadv= | |hitadv= | ||
|description= | |description=Crazy Diamond performs 2 jumping punches downwards | ||
*Good for jump-ins and combo filler | |||
}} | }} | ||
}} | }} | ||
| Line 661: | Line 675: | ||
{{AttackData-ASBR | {{AttackData-ASBR | ||
|version=Light | |version=Light | ||
|damage= | |damage=20, 4*12, 15 | ||
|guard= | |guard=Mid | ||
|startup= | |startup= | ||
|active= | |active= | ||
| Line 669: | Line 683: | ||
|hitadv= | |hitadv= | ||
|description= | |description= | ||
}} | }} | ||
{{AttackData-ASBR | {{AttackData-ASBR | ||
|version=Medium | |version=Medium | ||
|header=no | |header=no | ||
|damage= | |damage=20, 5*13, 15 | ||
|guard= | |guard=Mid | ||
|startup= | |startup= | ||
|active= | |active= | ||
| Line 684: | Line 695: | ||
|hitadv= | |hitadv= | ||
|description= | |description= | ||
}} | }} | ||
{{AttackData-ASBR | {{AttackData-ASBR | ||
|version=Heavy | |version=Heavy | ||
|header=no | |header=no | ||
|damage= | |damage=20, 6*14, 15 | ||
|guard= | |guard=Mid | ||
|startup= | |startup= | ||
|active= | |active= | ||
| Line 696: | Line 706: | ||
|blockadv= | |blockadv= | ||
|hitadv= | |hitadv= | ||
|description= | |description=Crazy Diamond punches the opponent before barraging the opponent with punches | ||
*Hit-grab | |||
*Launches the opponent away at the end | |||
*Different versions change the startup and damage | |||
}} | }} | ||
}} | }} | ||
| Line 709: | Line 721: | ||
|data= | |data= | ||
{{AttackData-ASBR | {{AttackData-ASBR | ||
|damage=15, 20 | |||
|damage= | |guard=Low, Mid | ||
|guard= | |||
|startup= | |startup= | ||
|active= | |active= | ||
| Line 743: | Line 728: | ||
|blockadv= | |blockadv= | ||
|hitadv= | |hitadv= | ||
|description= | |description=Crazy Diamond punches the ground and repairs the rubble into a wall | ||
*The different versions of the move place the wall at different distances, increasing distance with each strength | |||
}} | }} | ||
}} | }} | ||
| Line 757: | Line 742: | ||
{{AttackData-ASBR | {{AttackData-ASBR | ||
|version=Light | |version=Light | ||
|damage= | |damage=3, 4*12, 10 | ||
|guard= | |guard=Mid | ||
|startup= | |startup= | ||
|active= | |active= | ||
| Line 764: | Line 749: | ||
|blockadv= | |blockadv= | ||
|hitadv= | |hitadv= | ||
|description= | |description=Crazy Diamond performs a barrage of punches upwards | ||
*Good anti-air | |||
*Does not have invul | |||
}} | }} | ||
{{AttackData-ASBR | {{AttackData-ASBR | ||
|version=Medium | |version=Medium | ||
|header=no | |header=no | ||
|damage= | |damage=3, 4*13, 20 | ||
|guard= | |guard=Mid | ||
|startup= | |startup= | ||
|active= | |active= | ||
| Line 778: | Line 764: | ||
|hitadv= | |hitadv= | ||
|description= | |description= | ||
*This version has invul | |||
}} | }} | ||
{{AttackData-ASBR | {{AttackData-ASBR | ||
|version=Heavy | |version=Heavy | ||
|header=no | |header=no | ||
|damage= | |damage=3, 4*14, 30 | ||
|guard= | |guard=Mid | ||
|startup= | |startup= | ||
|active= | |active= | ||
| Line 791: | Line 777: | ||
|hitadv= | |hitadv= | ||
|description= | |description= | ||
*This version has invul | |||
}} | }} | ||
}} | }} | ||
| Line 797: | Line 783: | ||
====== <font style="visibility:hidden" size="0">Stand 421X</font> ====== | ====== <font style="visibility:hidden" size="0">Stand 421X</font> ====== | ||
{{MoveData | {{MoveData | ||
|image= | |image=JJASBR_Josuke_Part_4_Stand_421X.png | ||
|caption= | |caption= | ||
|name=I'm a real Deadeye Dick! | |name=I'm a real Deadeye Dick! | ||
| Line 804: | Line 790: | ||
{{AttackData-ASBR | {{AttackData-ASBR | ||
|version=Light | |version=Light | ||
|damage= | |damage=50 | ||
|guard= | |guard=Mid | ||
|startup= | |startup= | ||
|active= | |active= | ||
| Line 811: | Line 797: | ||
|blockadv= | |blockadv= | ||
|hitadv= | |hitadv= | ||
|description= | |description=Crazy Diamond flicks a bearing like a bullet at the opponent | ||
*Standard projectile, reaches very high and can be crouched under | |||
}} | }} | ||
{{AttackData-ASBR | {{AttackData-ASBR | ||
|version=Medium | |version=Medium | ||
|header=no | |header=no | ||
|damage= | |damage=60 | ||
|guard= | |guard=Mid | ||
|startup= | |startup= | ||
|active= | |active= | ||
| Line 825: | Line 811: | ||
|hitadv= | |hitadv= | ||
|description= | |description= | ||
*Travels faster than the L version | |||
}} | }} | ||
{{AttackData-ASBR | {{AttackData-ASBR | ||
|version=Heavy | |version=Heavy | ||
|header=no | |header=no | ||
|damage= | |damage=70 | ||
|guard= | |guard=Mid | ||
|startup= | |startup= | ||
|active= | |active= | ||
| Line 838: | Line 824: | ||
|hitadv= | |hitadv= | ||
|description= | |description= | ||
*Travels faster than the M version | |||
*Launches on hit | |||
}} | }} | ||
}} | }} | ||
| Line 854: | Line 841: | ||
{{AttackData-ASBR | {{AttackData-ASBR | ||
|version=Forward | |version=Forward | ||
|damage= | |damage=130 | ||
|guard= | |guard=Throw | ||
|startup= | |startup= | ||
|active= | |active= | ||
| Line 861: | Line 848: | ||
|blockadv= | |blockadv= | ||
|hitadv= | |hitadv= | ||
|description= | |description=Josuke grabs the opponent and Crazy Diamond punches the opponent | ||
*Leaves the opponent too far too OTG | |||
}} | }} | ||
{{AttackData-ASBR | {{AttackData-ASBR | ||
|version=Back | |version=Back | ||
|header=no | |header=no | ||
|damage= | |damage=130 | ||
|guard= | |guard=Throw | ||
|startup= | |startup= | ||
|active= | |active= | ||
| Line 875: | Line 862: | ||
|hitadv= | |hitadv= | ||
|description= | |description= | ||
*Identical to forward throw, but backwards | |||
}} | }} | ||
}} | }} | ||
| Line 884: | Line 871: | ||
|caption= | |caption= | ||
|name=Assist | |name=Assist | ||
|subtitle= | |subtitle=DORARARARARARARA! | ||
|data= | |data= | ||
{{AttackData-ASBR | {{AttackData-ASBR | ||
|damage= | |damage= | ||
|guard= | |guard=Mid | ||
|startup= | |startup= | ||
|active= | |active= | ||
| Line 895: | Line 882: | ||
|hitadv= | |hitadv= | ||
|description= | |description= | ||
*Assault Assist Stocks: 2 | |||
*Reversal Assist Stocks: 2 | |||
*Based on [[JoJo's Bizarre Adventure: All-Star Battle R/Josuke Higashikata (Part 4)#Stand 623X|s.623L]] | |||
}} | }} | ||
}} | }} | ||
| Line 917: | Line 906: | ||
|hitadv= | |hitadv= | ||
|description= | |description= | ||
(Un)Summons Crazy Diamond, altering Josuke's moveset and abilities | (Un)Summons Crazy Diamond, altering Josuke's moveset and abilities | ||
}} | }} | ||
}} | }} | ||
| Line 929: | Line 918: | ||
|data= | |data= | ||
{{AttackData-ASBR | {{AttackData-ASBR | ||
|damage= | |damage=176 (24+2*33+14+2*6+12+24*2) | ||
|guard= | |guard=Mid | ||
|startup= | |startup= | ||
|active= | |active= | ||
| Line 936: | Line 925: | ||
|blockadv= | |blockadv= | ||
|hitadv= | |hitadv= | ||
|description= | |description=Crazy Diamond punches the opponent, following up with a barrage of punches and finishing with an overhead punch followed by an uppercut | ||
*This is a hit-grab | |||
*Low enough recovery to follow up with 66>214H | |||
}} | }} | ||
}} | }} | ||
{{MoveData | {{MoveData | ||
|image=JJASBR_Josuke_Part_4_HHA_236X.png | |image=JJASBR_Josuke_Part_4_HHA_236X.png | ||
| Line 948: | Line 937: | ||
|data= | |data= | ||
{{AttackData-ASBR | {{AttackData-ASBR | ||
|damage= | |damage=202 (24+2*43+27*2+38) | ||
|guard= | |guard= | ||
|startup= | |startup= | ||
| Line 955: | Line 944: | ||
|blockadv= | |blockadv= | ||
|hitadv= | |hitadv= | ||
|description= | |description=Crazy Diamond shoots a piece of glass through the opponent and "repairs" it back to hit a second time | ||
*Changes the ending of the HHA | |||
*Costs an additional 0.5 HH gauge | |||
}} | }} | ||
}} | }} | ||
| Line 968: | Line 958: | ||
|data= | |data= | ||
{{AttackData-ASBR | {{AttackData-ASBR | ||
|damage= | |damage=280 (60+20+2*90+20) | ||
|guard= | |guard=Mid | ||
|startup= | |startup= | ||
|active= | |active= | ||
| Line 975: | Line 965: | ||
|blockadv= | |blockadv= | ||
|hitadv= | |hitadv= | ||
|description= | |description=Crazy Diamond punches the opponent to the ground, healing them back to full health before beating them down with a barrage of punches. | ||
*The heal is purely aesthetic and doesn't affect actual damage numbers | |||
*Just make sure it hits | |||
}} | }} | ||
}} | }} | ||
Revision as of 16:27, 26 October 2022
Introduction
The primary protagonist of Diamond is Unbreakable, the fourth part of JoJo's Bizarre Adventure, Josuke Higashikata is an rushdown character with a variety of powerful tools. He can play at a variety of ranges well and convert just about any hit into a knockdown, allowing him to set up his powerful offense.
On offense, he boasts a strong mixup game with his left-right setups. His guard damage also adds an additional threat of guard breaking to his pressure.
Watch Your Mouth!
A unique stance Josuke enters after blocking an attack with 22H. In this mode, Josuke will constantly walk towards the opponent, and cannot move backwards or crouch. However, Josuke gains perpetual hyper armor, the ability to chain normals into each other in any order, and a new OTG move in 3M.
Stats
| Style | Health | Low Health Mode | Hashtag(s) |
|---|---|---|---|
| Stand | 1000 | Rumble | #ASBR_JOS #ASBR_JSK4 |
Move List
Stand Off
Normal Moves
5L
5L
|
|---|
5M
5M
|
|---|
5H
5H
|
|---|
2L
2L
|
|---|
2M
2M
|
|---|
2H
2H
|
|---|
6H
6H
Get closer and pull 300km/h! |
|---|
JL
j.L
|
|---|
JM
j.M
|
|---|
JH
j.H
|
|---|
Special Moves
236X
Break through, beat you up! 236L/M/H L version L version M version M version H version H version
|
|---|
214X
DORA!
214L/M/H |
|---|
623X
As you were!
623L/M/H |
|---|
421X
I'm a real Deadeye Dick!
421L/M/H |
|---|
22H
Watch Your Mouth!
22H |
|---|
3M
I'm not done kicking your ass!
3M near downed opponent in Watch Your Mouth! mode |
|---|
Stand On
Normal Moves
Stand 5L
5L
|
|---|
Stand 5M
5M
|
|---|
Stand 5H
5H
|
|---|
Stand 2L
2L
|
|---|
Stand 2M
2M
|
|---|
Stand 2H
2H
|
|---|
Stand 3H
3H
DORA...! |
|---|
Stand JL
j.L
|
|---|
Stand JM
j.M
|
|---|
Stand JH
j.H
|
|---|
Special Moves
Stand 236X
Rockabye baby!
236L/M/H |
|---|
Stand 214X
He heals pretty quick!
214L/M/H |
|---|
Stand 623X
DORARARARARARARA!
623L/M/H |
|---|
Stand 421X
I'm a real Deadeye Dick!
421L/M/H |
|---|
System Mechanics
Throw
Throw
Guess I wasn't mad enough 5/4 + Any Two Attack Buttons |
|---|
Assist
Assist
DORARARARARARARA! |
|---|
Stand On
Stand On/Off 5S Stand On Stand On Stand Off Stand Off
|
|---|
Heart Heat Attack
You're in my range...
236 + Any Two Attack Buttons |
|---|
Meet my homing missile!
236L/M/H during HHA |
|---|
Great Heat Attack
You're already fixed!
236L+M+H |
|---|
