JoJo's Bizarre Adventure: All-Star Battle R/Shigekiyo Yangu: Difference between revisions
(Rewrote Pros and Cons post Patch 1.3) |
No edit summary |
||
| Line 8: | Line 8: | ||
*'''Relay Race''': Shigechi is one of the only characters that is able to run both forward and backwards, giving him more maneuverability than most characters. | *'''Relay Race''': Shigechi is one of the only characters that is able to run both forward and backwards, giving him more maneuverability than most characters. | ||
*'''Mode Switching''': | *'''Mode Switching''': Shigechi can switch between Offensive and Defensive Harvest formations as modes to get access to different special moves; this maneuver can be canceled into special moves as well, allowing him to quickly do this in strings. | ||
{{StrengthsAndWeaknesses | {{StrengthsAndWeaknesses | ||
| Line 31: | Line 31: | ||
Shigechi has access to a maximum of '''3''' Harvest stacks, which he can use on special moves. Depending on the button used, the special will get different properties and use a different amount of Harvest stacks: Light consumes one stack, Medium uses two stacks and Heavy requires all three stacks. | Shigechi has access to a maximum of '''3''' Harvest stacks, which he can use on special moves. Depending on the button used, the special will get different properties and use a different amount of Harvest stacks: Light consumes one stack, Medium uses two stacks and Heavy requires all three stacks. | ||
All of Shigechi's special moves consume Harvest stacks, becoming completely unavailable without them. Additionally, if Shigechi attempts to perform a special move that consumes multiple Harvest stacks while he has an insufficient amount, | All of Shigechi's special moves consume Harvest stacks, becoming completely unavailable without them. Additionally, if Shigechi attempts to perform a special move variation that consumes multiple Harvest stacks while he has an insufficient amount, Shigechi will be locked out of said variation. | ||
===Stats=== | ===Stats=== | ||
| Line 63: | Line 63: | ||
*On hit sets up timing perfectly for a Throw after. Also a Frame Trap with 5L and 2L. | *On hit sets up timing perfectly for a Throw after. Also a Frame Trap with 5L and 2L. | ||
*Small pushback, can be done 3 times on block without moving. | *Small pushback, can be done 3 times on block without moving. | ||
**Neutral on block, but he doesn't have a 5f normal, so opponents can beat | **Neutral on block, but he doesn't have a 5f normal, so opponents can beat him. | ||
}} | }} | ||
}} | }} | ||
| Line 261: | Line 261: | ||
{{MoveData | {{MoveData | ||
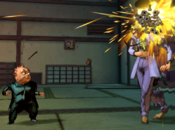
|image=JJASBR_Shigechi_623X.png | |image=JJASBR_Shigechi_623X.png | ||
|caption= | |caption=Start | ||
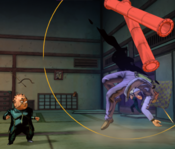
|image2=JJASBR_Shigechi_623L.png | |||
|caption2=Light | |||
|image3=JJASBR_Shigechi_623M.png | |||
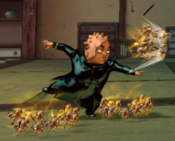
|caption3=Medium | |||
|image4=JJASBR_Shigechi_623H.png | |||
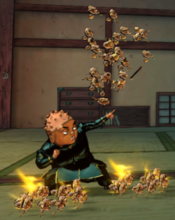
|caption4=Heavy | |||
|name=I can get anything I want! | |name=I can get anything I want! | ||
|input=623L/M/H | |input=623L/M/H | ||
| Line 267: | Line 273: | ||
{{AttackData-ASBR | {{AttackData-ASBR | ||
|version=Light | |version=Light | ||
|damage=11*6 | |damage=66 (11*6) | ||
|guard=Mid | |guard=Mid | ||
|startup= | |startup= | ||
| Line 279: | Line 285: | ||
|version=Medium | |version=Medium | ||
|header=no | |header=no | ||
|damage=6*13 | |damage=78 (6*13) | ||
|guard=Mid | |guard=Mid | ||
|startup= | |startup= | ||
| Line 300: | Line 306: | ||
|description= | |description= | ||
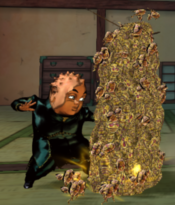
Shigechi uses his Harvest to drop objects from above the opponent. | Shigechi uses his Harvest to drop objects from above the opponent. | ||
*Short recovery, recovers before the projectile is spawned. | *Short recovery, to the point Shigechi recovers before the projectile is spawned. | ||
*Spawning location depends on horizontal and vertical location of the opponent. | *Spawning location depends on horizontal and vertical location of the opponent. | ||
*Projectile despawns if Shigechi is hit after it spawned. | *Projectile despawns if Shigechi is hit after it spawned. | ||
*If performed at 3 stacks of Harvest, Shigechi will have to wait a bit before using [[JoJo's Bizarre Adventure: All-Star Battle R/Shigekiyo Yangu#4S-6S|4/6S]] or [[JoJo's Bizarre Adventure: All-Star Battle R/Shigekiyo Yangu#5S|5S]]. Otherwise Shigechi will perform them but not regain a stack. | *If performed at 3 stacks of Harvest, Shigechi will have to wait a bit before using [[JoJo's Bizarre Adventure: All-Star Battle R/Shigekiyo Yangu#4S-6S|4/6S]] or [[JoJo's Bizarre Adventure: All-Star Battle R/Shigekiyo Yangu#5S|5S]]. Otherwise, Shigechi will perform them but not regain a stack. | ||
---- | ---- | ||
'''L version: | '''L version:''' | ||
*Harvest drops nuts and bolts. | |||
*Decides spawning location at Frame 15. | *Decides spawning location at Frame 15. | ||
*Cancels summoning the projectile if | *Cancels summoning the projectile if [[JoJo's Bizarre Adventure: All-Star Battle R/Shigekiyo Yangu#Defense 214X|Defense 214X]] is performed. | ||
*Has a ghost hit with no damage or hitstun that lets still Stylish Evade or Stylish Guard the full move even after getting hit. | *Has a ghost hit with no damage or hitstun that lets still Stylish Evade or Stylish Guard the full move even after getting hit. | ||
---- | ---- | ||
'''M version:''' | '''M version:''' | ||
*Harvest drops more nuts and bolts. | |||
*Decides spawning location at Frame 17-19. | *Decides spawning location at Frame 17-19. | ||
*Has a ghost hit with no damage or hitstun that lets still Stylish Evade or Stylish Guard the full move even after getting hit. | *Has a ghost hit with no damage or hitstun that lets still Stylish Evade or Stylish Guard the full move even after getting hit. | ||
---- | ---- | ||
'''H version:''' | '''H version:''' | ||
* | *Harvest drops construction pipes. | ||
*Causes groundbounce on hit. | |||
*Decides spawning location at Frame 19. | *Decides spawning location at Frame 19. | ||
*If the opponent Stylish Evades or Stylish Guards, the 3D hitbox is wide and active enough to force them to defend again. | *If the opponent Stylish Evades or Stylish Guards, the 3D hitbox is wide and active enough to force them to defend again. | ||
*Works for Taunt combos | *Works for Taunt combos; Taunt will need to be timed around its lowest point. | ||
}} | }} | ||
}} | }} | ||
| Line 329: | Line 338: | ||
====== <font style="visibility:hidden" size="0">236X</font> ====== | ====== <font style="visibility:hidden" size="0">236X</font> ====== | ||
{{MoveData | {{MoveData | ||
|image= | |image=JJASBR_Shigechi_Off_236X.png | ||
|caption= | |caption= | ||
|name=Don't underestimate Harvest! | |name=Don't underestimate Harvest! | ||
| Line 336: | Line 345: | ||
{{AttackData-ASBR | {{AttackData-ASBR | ||
|version=Light | |version=Light | ||
|damage=10*6 | |damage=60 (10*6) | ||
|guard=Mid | |guard=Mid | ||
|startup=17 | |startup=17 | ||
| Line 344: | Line 353: | ||
|hitadv= | |hitadv= | ||
|description= | |description= | ||
}} | }} | ||
{{AttackData-ASBR | {{AttackData-ASBR | ||
|version=Medium | |version=Medium | ||
|header=no | |header=no | ||
|damage=7*12 | |damage=84 (7*12) | ||
|guard=Mid | |guard=Mid | ||
|startup=17 | |startup=17 | ||
| Line 358: | Line 365: | ||
|hitadv= | |hitadv= | ||
|description= | |description= | ||
}} | }} | ||
{{AttackData-ASBR | {{AttackData-ASBR | ||
|version=Heavy | |version=Heavy | ||
|header=no | |header=no | ||
|damage=6*18 | |damage=108 (6*18) | ||
|guard=Mid | |guard=Mid | ||
|startup=17 | |startup=17 | ||
| Line 372: | Line 377: | ||
|hitadv= | |hitadv= | ||
|description= | |description= | ||
Shigechi sends Harvest flying forward as an arcing projectile. | |||
---- | |||
'''L version:''' | |||
*Notes 1 | |||
*Notes 2 | |||
---- | |||
'''M version:''' | |||
*Notes 1 | |||
*Notes 2 | |||
---- | |||
'''H version:''' | |||
*Notes 1 | *Notes 1 | ||
*Notes 2 | *Notes 2 | ||
| Line 386: | Line 402: | ||
{{AttackData-ASBR | {{AttackData-ASBR | ||
|version=Light | |version=Light | ||
|damage=9*6 | |damage=54 (9*6) | ||
|guard=Low | |guard=Low | ||
|startup=21 | |startup=21 | ||
| Line 394: | Line 410: | ||
|hitadv=-20 | |hitadv=-20 | ||
|description= | |description= | ||
}} | }} | ||
{{AttackData-ASBR | {{AttackData-ASBR | ||
|version=Medium | |version=Medium | ||
|header=no | |header=no | ||
|damage=6*12 | |damage=72 (6*12) | ||
|guard=Low | |guard=Low | ||
|startup=21 | |startup=21 | ||
| Line 408: | Line 422: | ||
|hitadv=-18 | |hitadv=-18 | ||
|description= | |description= | ||
}} | }} | ||
{{AttackData-ASBR | {{AttackData-ASBR | ||
|version=Heavy | |version=Heavy | ||
|header=no | |header=no | ||
|damage=5*18 | |damage=90 (5*18) | ||
|guard=Low | |guard=Low | ||
|startup=21 | |startup=21 | ||
| Line 422: | Line 434: | ||
|hitadv=-16 | |hitadv=-16 | ||
|description= | |description= | ||
Shigechi sends Harvest running at the opponent. | |||
---- | |||
'''L version:''' | |||
*Notes 1 | |||
*Notes 2 | |||
---- | |||
'''M version:''' | |||
*Notes 1 | |||
*Notes 2 | |||
---- | |||
'''H version:''' | |||
*Notes 1 | *Notes 1 | ||
*Notes 2 | *Notes 2 | ||
| Line 429: | Line 452: | ||
====== <font style="visibility:hidden" size="0">Offense 41236X</font> ====== | ====== <font style="visibility:hidden" size="0">Offense 41236X</font> ====== | ||
{{MoveData | {{MoveData | ||
|image= | |image=JJASBR_Shigechi_Off_41236X_(1).png | ||
|caption= | |caption= | ||
|image2=JJASBR_Shigechi_Off_41236X_(2).png | |||
|caption2= | |||
|name=Move and you'll regret it! | |name=Move and you'll regret it! | ||
|input=41236L/M/H | |input=41236L/M/H | ||
| Line 436: | Line 461: | ||
{{AttackData-ASBR | {{AttackData-ASBR | ||
|version=Light | |version=Light | ||
|damage=14, 5*4, 20 | |damage=54 (14, 5*4, 20) | ||
|guard=Throw | |guard=Throw | ||
|startup=27 | |startup=27 | ||
| Line 444: | Line 469: | ||
|hitadv= | |hitadv= | ||
|description= | |description= | ||
}} | }} | ||
{{AttackData-ASBR | {{AttackData-ASBR | ||
|version=Medium | |version=Medium | ||
|header=no | |header=no | ||
|damage=14, 5*5, 25 | |damage=64 (14, 5*5, 25) | ||
|guard=Throw | |guard=Throw | ||
|startup=27 | |startup=27 | ||
| Line 458: | Line 481: | ||
|hitadv= | |hitadv= | ||
|description= | |description= | ||
}} | }} | ||
{{AttackData-ASBR | {{AttackData-ASBR | ||
|version=Heavy | |version=Heavy | ||
|header=no | |header=no | ||
|damage=14, 5*6, 30 | |damage=74 (14, 5*6, 30) | ||
|guard=Throw | |guard=Throw | ||
|startup=27 | |startup=27 | ||
| Line 472: | Line 493: | ||
|hitadv= | |hitadv= | ||
|description= | |description= | ||
Shigechi has Harvest leap upwards in a falling arc. If they connect, a number of Harvests will hold the opponent still as a single one of them attacks their neck before throwing them away. | |||
---- | |||
'''L version:''' | |||
*Notes 1 | |||
*Notes 2 | |||
---- | |||
'''M version:''' | |||
*Notes 1 | |||
*Notes 2 | |||
---- | |||
'''H version:''' | |||
*Notes 1 | *Notes 1 | ||
*Notes 2 | *Notes 2 | ||
| Line 494: | Line 526: | ||
|hitadv= | |hitadv= | ||
|description= | |description= | ||
* | Harvest instantly forms a wall in front of Shigechi. | ||
* | *Protects Shigechi from every non-HHA/GHA projectile and attack. | ||
*Does not works against Throws. | |||
}} | }} | ||
}} | }} | ||
| Line 501: | Line 534: | ||
====== <font style="visibility:hidden" size="0">Defense 214X-6X</font> ====== | ====== <font style="visibility:hidden" size="0">Defense 214X-6X</font> ====== | ||
{{MoveData | {{MoveData | ||
|image=JJASBR_Shigechi_Def_214X- | |image=JJASBR_Shigechi_Def_214X-6X_(1).png | ||
|caption= | |caption=Light | ||
|image2=JJASBR_Shigechi_Def_214X-6X_(2).png | |||
|caption2=Medium | |||
|image3=JJASBR_Shigechi_Def_214X-6X_(3).png | |||
|caption3=Heavy | |||
|name=I'll protect them! | |name=I'll protect them! | ||
|input=214L/M/H>6L/M/H | |input=214L/M/H>6L/M/H | ||
| Line 516: | Line 553: | ||
|hitadv= | |hitadv= | ||
|description= | |description= | ||
}} | }} | ||
{{AttackData-ASBR | {{AttackData-ASBR | ||
|version=Medium | |version=Medium | ||
|header=no | |header=no | ||
|damage=5*15 | |damage=75 (5*15) | ||
|guard=Mid | |guard=Mid | ||
|startup=5 | |startup=5 | ||
| Line 530: | Line 565: | ||
|hitadv=+22 | |hitadv=+22 | ||
|description= | |description= | ||
}} | }} | ||
{{AttackData-ASBR | {{AttackData-ASBR | ||
|version=Heavy | |version=Heavy | ||
|header=no | |header=no | ||
|damage=40*2 | |damage=80 (40*2) | ||
|guard=Low | |guard=Low | ||
|startup=5 | |startup=5 | ||
| Line 544: | Line 577: | ||
|hitadv= | |hitadv= | ||
|description= | |description= | ||
Shigechi launches the Harvests making up the wall at the opponent. | |||
---- | |||
'''L version:''' | |||
*Notes 1 | |||
*Notes 2 | |||
---- | |||
'''M version:''' | |||
*Notes 1 | |||
*Notes 2 | |||
---- | |||
'''H version:''' | |||
*Notes 1 | *Notes 1 | ||
*Notes 2 | *Notes 2 | ||
| Line 566: | Line 610: | ||
|hitadv= | |hitadv= | ||
|description= | |description= | ||
}} | }} | ||
{{AttackData-ASBR | {{AttackData-ASBR | ||
| Line 580: | Line 622: | ||
|hitadv= | |hitadv= | ||
|description= | |description= | ||
}} | }} | ||
{{AttackData-ASBR | {{AttackData-ASBR | ||
| Line 594: | Line 634: | ||
|hitadv= | |hitadv= | ||
|description= | |description= | ||
Shigechi sends Harvest running at the opponent. | |||
*Causes crumple on hit. | |||
---- | |||
'''L version:''' | |||
*Notes 1 | |||
*Notes 2 | |||
---- | |||
'''M version:''' | |||
*Notes 1 | |||
*Notes 2 | |||
---- | |||
'''H version:''' | |||
*Notes 1 | *Notes 1 | ||
*Notes 2 | *Notes 2 | ||
| Line 599: | Line 651: | ||
}} | }} | ||
</div> | </div> | ||
==System Mechanics== | ==System Mechanics== | ||
====== <font style="visibility:hidden" size="0">Throw</font> ====== | ====== <font style="visibility:hidden" size="0">Throw</font> ====== | ||
| Line 620: | Line 671: | ||
|hitadv=+20 | |hitadv=+20 | ||
|description= | |description= | ||
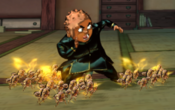
Shigechi bombards the enemy with a barrage of Harvests rapidly tackling them, sending them flying. | |||
*Forward Throw will not allow Shigechi to hit the opponent in time for wakeup. | *Forward Throw will not allow Shigechi to hit the opponent in time for wakeup. | ||
*Back Throw leaves the opponent closer, but can't set up 623L or get a stack back before it. | *Back Throw leaves the opponent closer, but can't set up 623L or get a stack back before it. | ||
| Line 627: | Line 679: | ||
====== <font style="visibility:hidden" size="0">Assist</font> ====== | ====== <font style="visibility:hidden" size="0">Assist</font> ====== | ||
{{MoveData | {{MoveData | ||
|image= | |image=JJASBR_Shigechi_Assist_(1).png | ||
|caption= | |caption= | ||
|image2=JJASBR_Shigechi_Assist_(2).png | |||
|caption2= | |||
|name=Assist | |name=Assist | ||
|subtitle=Don't come any closer! | |subtitle=Don't come any closer! | ||
| Line 641: | Line 695: | ||
|hitadv= | |hitadv= | ||
|description= | |description= | ||
Harvest instantly forms a wall in front of Shigechi. If the wall is hit by the opponent, Shigechi launches the Harvests making it up at the opponent. | |||
*Assault Assist Stocks: 2 | *Assault Assist Stocks: 2 | ||
*Reversal Assist Stocks: 2 | *Reversal Assist Stocks: 2 | ||
*Based on [[JoJo's Bizarre Adventure: All-Star Battle R/Shigekiyo Yangu#Defense 214X|214X | *Based on [[JoJo's Bizarre Adventure: All-Star Battle R/Shigekiyo Yangu#Defense 214X|Defense 214H]]>[[JoJo's Bizarre Adventure: All-Star Battle R/Shigekiyo Yangu#Defense 214X-6X|6X]] | ||
}} | }} | ||
}} | }} | ||
| Line 700: | Line 755: | ||
|hitadv= | |hitadv= | ||
|description= | |description= | ||
Shigechi summons a stack of Harvest. | |||
*Notes 1 | *Notes 1 | ||
*Notes 2 | *Notes 2 | ||
| Line 748: | Line 803: | ||
|hitadv= | |hitadv= | ||
|description= | |description= | ||
}} | }} | ||
{{AttackData-ASBR | {{AttackData-ASBR | ||
| Line 762: | Line 815: | ||
|hitadv=0 | |hitadv=0 | ||
|description= | |description= | ||
Shigechi points and quickly sends out a large, dense wave of Harvests a long distance forward. | |||
*Can hit OTG. | |||
*Automatically summons 3 Harvest stacks upon use. | |||
---- | |||
'''Normal version:''' | |||
*Notes 1 | |||
*Notes 2 | |||
---- | |||
'''OTG version:''' | |||
*Notes 1 | *Notes 1 | ||
*Notes 2 | *Notes 2 | ||
| Line 787: | Line 849: | ||
|hitadv= | |hitadv= | ||
|description= | |description= | ||
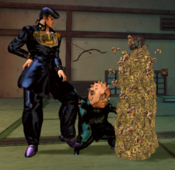
* | Shigechi calls forth a massive wave of Harvests that rapidly travel forward. If they connect, the Harvests will cover the opponent from head to toe as they pile on top of them, each one relentlessly punching the opponent before they all deliver an uppercut in unison. | ||
* | *Travels fullscreen. | ||
*Automatically summons 3 Harvest stacks upon use. | |||
}} | }} | ||
}} | }} | ||
Revision as of 00:32, 4 December 2022
Introduction
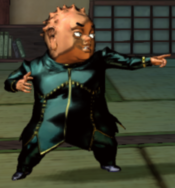
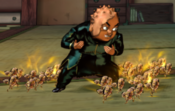
Shigekiyo Yangu, best known as Shigechi, is a secondary ally in Diamond is Unbreakable, the fourth part of JoJo's Bizarre Adventure. He uses his Stand, Harvest, to make the opponent move to him and overwhelm them on offense.
Despite being a Stand User, Shigechi does not follow the typical rules of Stand characters. Instead of switching between Stand Off and Stand On modes, Shigechi can put Harvest in Defensive and Offensive Formations: this gives him access to different special moves based on what Formation he is in. Other than that, all of these special moves cost him Harvest stacks, which he'll need to keep up with "You can see my Harvest?!" and Formation Changes to get to use them.
While his normals may be small, he can force his enemies to come towards him by harassing them with "I can get anything I want!", wait for the opponent to make mistakes and punish them with high pressure strings. His main combos come from Defensive Formation, where he uses "So itchy!" and "I'll protect them!" (Medium) to extend his combos, and then switches to Offensive Formation to hit them on the ground with "Mess with me and you're gonna get hurt!".
- Relay Race: Shigechi is one of the only characters that is able to run both forward and backwards, giving him more maneuverability than most characters.
- Mode Switching: Shigechi can switch between Offensive and Defensive Harvest formations as modes to get access to different special moves; this maneuver can be canceled into special moves as well, allowing him to quickly do this in strings.
|
|
|
| Pros | Cons |
|
|
Herd of Harvests
Unlike other Stand characters, Shigechi's Stand, Harvest, is always active. This repurposes his Style button to summon a Harvest stack.
Shigechi has access to a maximum of 3 Harvest stacks, which he can use on special moves. Depending on the button used, the special will get different properties and use a different amount of Harvest stacks: Light consumes one stack, Medium uses two stacks and Heavy requires all three stacks.
All of Shigechi's special moves consume Harvest stacks, becoming completely unavailable without them. Additionally, if Shigechi attempts to perform a special move variation that consumes multiple Harvest stacks while he has an insufficient amount, Shigechi will be locked out of said variation.
Stats
| Style | Health | Low Health Mode | Hashtag(s) |
|---|---|---|---|
| Stand | 900 | Rumble | #ASBR_SHI #ASBR_SIG |
Move List
Normal Moves
5L
5L
|
|---|
5M
5M
|
|---|
5H
5H
|
|---|
2L
2L
|
|---|
2M
2M
|
|---|
2H
2H
|
|---|
JL
j.L
|
|---|
JM
j.M
|
|---|
JH
j.H
|
|---|
Special Moves
623X
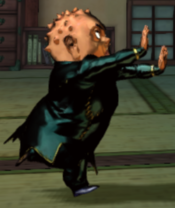
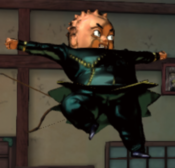
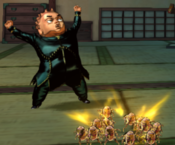
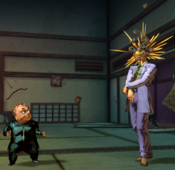
I can get anything I want! 623L/M/H Start Start Light Light Medium Medium Heavy Heavy
|
|---|
236X
Don't underestimate Harvest!
236L/M/H |
|---|
Offense 214X
Mess with me and you're gonna get hurt!
214L/M/H |
|---|
Offense 41236X
Move and you'll regret it!
41236L/M/H |
|---|
Defense 214X
Don't come any closer!
214L/M/H |
|---|
Defense 214X-6X
I'll protect them! 214L/M/H>6L/M/H Light Light Medium Medium Heavy Heavy
|
|---|
Defense 41236X
So itchy!
41236L/M/H |
|---|
System Mechanics
Throw
Throw
Don't move! 5/4 + Any Two Attack Buttons |
|---|
Assist
Assist
Don't come any closer! |
|---|
66-44
Relay Race 66/44 Forward Forward Back Back
|
|---|
5S
You can see my Harvest?!
5S |
|---|
4S-6S
Defensive Formation Offensive Formation 4S/6S Offensive Formation Offensive Formation Defensive Formation Defensive Formation
|
|---|
Heart Heat Attack
Now I'm real mad!
236 + Any Two Attack Buttons |
|---|
Great Heat Attack
You want proof? Here it is!
236L+M+H |
|---|


