JoJo's Bizarre Adventure: All-Star Battle R/Shigekiyo Yangu: Difference between revisions
m (Banger wording, wanted to change this for a while.) |
No edit summary |
||
| Line 18: | Line 18: | ||
|cons = | |cons = | ||
* '''TERRIBLE Normals:''' Abysmal range on his normals and a lack of a 5f move in general make him an absolute hell to play as in neutral; he's better off letting the opponent engage him. | * '''TERRIBLE Normals:''' Abysmal range on his normals and a lack of a 5f move in general make him an absolute hell to play as in neutral; he's better off letting the opponent engage him. | ||
* '''Hard to Master:''' During advantage, Shigechi will be continuously performing inputs and keeping track of Harvest stacks and Formation, requiring both execution and resource awareness. This makes him a character that really needs time and practice to get the good stuff out of him. | |||
* '''Hard to Master:''' | * '''Resource-Dependent:''' Shigechi heavily relies on his Harvest stacks to do anything. Without them, he needs to confirm into 2H to get them back, which is hard to do with his poor normals. | ||
* ''' | * '''Bad Throws:''' Shigechi's Throws deal low damage and are lacking in advantage to set up on oki. | ||
* '''Bad Throws:''' Shigechi's Throws deal low damage and are lacking in advantage to set up on oki. | * '''Neutered OTG Options:''' With a lot of his kit allowing him to extend combos and add OTG damage against his opponent, the OTG scaling unfortunately makes it less valuable to spend resources for these options. | ||
* '''OTG HHA Neutral on Hit:''' While OTG HHA is a great tool to end combos and refill Harvest stacks, it leaves Shigechi neutral on hit, meaning he can't keep his advantage going | * '''OTG HHA Neutral on Hit:''' While OTG HHA is a great tool to end combos and refill Harvest stacks, it leaves Shigechi neutral on hit, meaning he can't keep his advantage going. | ||
| tablewidth = 80 | | tablewidth = 80 | ||
}} | }} | ||
| Line 313: | Line 313: | ||
'''L version:''' | '''L version:''' | ||
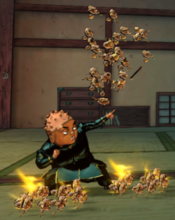
*Harvest drops nuts and bolts. | *Harvest drops nuts and bolts. | ||
*Decides spawning location at | *Decides spawning location at frame 15. | ||
*Cancels summoning the projectile if [[JoJo's Bizarre Adventure: All-Star Battle R/Shigekiyo Yangu#Defense 214X|Defense 214X]] is performed. | *Cancels summoning the projectile if [[JoJo's Bizarre Adventure: All-Star Battle R/Shigekiyo Yangu#Defense 214X|Defense 214X]] is performed. | ||
*Has a ghost hitbox with no damage or hitstun that allows opponents to Stylish Evade or Stylish Guard the full move even after getting hit. | *Has a ghost hitbox with no damage or hitstun that allows opponents to Stylish Evade or Stylish Guard the full move even after getting hit. | ||
| Line 319: | Line 319: | ||
'''M version:''' | '''M version:''' | ||
*Harvest drops more nuts and bolts. | *Harvest drops more nuts and bolts. | ||
*Decides spawning location at | *Decides spawning location at frames 17-19. | ||
*Has a ghost hitbox with no damage or hitstun that allows opponents to Stylish Evade or Stylish Guard the full move even after getting hit. | *Has a ghost hitbox with no damage or hitstun that allows opponents to Stylish Evade or Stylish Guard the full move even after getting hit. | ||
---- | ---- | ||
| Line 325: | Line 325: | ||
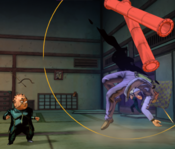
*Harvest drops construction pipes. | *Harvest drops construction pipes. | ||
*Causes groundbounce on hit. | *Causes groundbounce on hit. | ||
*Decides spawning location at | *Decides spawning location at frame 19. | ||
*If the opponent Stylish Evades or Stylish Guards, the 3D hitbox is wide and active enough to force them to defend again. | *If the opponent Stylish Evades or Stylish Guards, the 3D hitbox is wide and active enough to force them to defend again. | ||
*Works for Taunt combos; Taunt will need to be timed around its lowest point. | *Works for Taunt combos; Taunt will need to be timed around its lowest point. | ||
| Line 336: | Line 336: | ||
</div> | </div> | ||
<div id="movelist-1" class="movelist"><!-- Offensive Formation Move List --> | <div id="movelist-1" class="movelist"><!-- Offensive Formation Move List --> | ||
====== <font style="visibility:hidden" size="0">236X</font> ====== | ====== <font style="visibility:hidden" size="0">Offense 236X</font> ====== | ||
{{MoveData | {{MoveData | ||
|image=JJASBR_Shigechi_Off_236X.png | |image=JJASBR_Shigechi_Off_236X.png | ||
| Line 378: | Line 378: | ||
|description= | |description= | ||
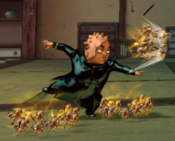
Shigechi sends one-to-three Harvest flying forward as an arcing projectile in a spreading pattern. | Shigechi sends one-to-three Harvest flying forward as an arcing projectile in a spreading pattern. | ||
*Damage and distance increase based on the version used. | |||
---- | ---- | ||
'''L version:''' | '''L version:''' | ||
*Launches projectile that slowly descends. | *Launches a projectile that slowly descends. | ||
*Opponent is launched on hit. | *Opponent is launched on hit. | ||
---- | ---- | ||
| Line 392: | Line 393: | ||
**Goes further than the Light and Medium version. | **Goes further than the Light and Medium version. | ||
*Opponent is launched significantly on hit. | *Opponent is launched significantly on hit. | ||
**Allows for [ | **Allows for 6[6]>5M extension. | ||
}} | }} | ||
}} | }} | ||
| Line 438: | Line 439: | ||
|description= | |description= | ||
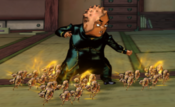
Shigechi sends Harvest running at the opponent. | Shigechi sends Harvest running at the opponent. | ||
*Can hit OTG | *Can hit OTG. | ||
* | *Damage and speed increase based on the version used. | ||
}} | }} | ||
}} | }} | ||
| Line 487: | Line 488: | ||
|description= | |description= | ||
Shigechi has Harvest leap upwards in a falling arc. If they connect, a number of Harvests will hold the opponent still as a single one of them attacks their neck before throwing them away. | Shigechi has Harvest leap upwards in a falling arc. If they connect, a number of Harvests will hold the opponent still as a single one of them attacks their neck before throwing them away. | ||
* | *Damage and range increase based on the version used. | ||
*Medium version gives the most advantage. | *Medium version gives the most advantage. | ||
}} | }} | ||
| Line 493: | Line 494: | ||
</div> | </div> | ||
<div id="movelist-2" class="movelist"><!-- Defensive Formation Move List --> | <div id="movelist-2" class="movelist"><!-- Defensive Formation Move List --> | ||
====== <font style="visibility:hidden" size="0">Defense 214X</font> ====== | ====== <font style="visibility:hidden" size="0">Defense 214X</font> ====== | ||
{{MoveData | {{MoveData | ||
| Line 512: | Line 512: | ||
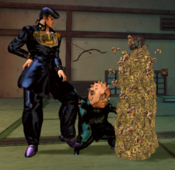
Harvest instantly forms a wall in front of Shigechi. | Harvest instantly forms a wall in front of Shigechi. | ||
*Protects Shigechi from every non-HHA/GHA projectile and attack. | *Protects Shigechi from every non-HHA/GHA projectile and attack. | ||
**If the hitbox of the opponent's attack is big enough, it can hit Shigechi on the other side of the wall. This happens rather inconsistently, making this move unreliable at times. | |||
*Does not works against Throws. | *Does not works against Throws. | ||
*The version used, in addition to consuming the required amount of Harvest stacks, determines the follow-up used. | *The version used, in addition to consuming the required amount of Harvest stacks, determines the follow-up used. | ||
*While visually it may not appear so, the protecting hitbox of the wall automatically turns around when the opponent switches sides. | |||
*While visually it may not appear so, the protecting hitbox of the wall automatically turns around when | |||
}} | }} | ||
}} | }} | ||
| Line 571: | Line 571: | ||
---- | ---- | ||
'''L version:''' | '''L version:''' | ||
* | *Launches the projectile at an upwards angle. | ||
** | *Causes a groundbounce on hit. | ||
**Shigechi is able to [[JoJo's Bizarre Adventure: All-Star Battle R/System#Uses of the Heart Heat Gauge|Flash Cancel]] into [[JoJo's Bizarre Adventure: All-Star Battle R/Shigekiyo Yangu#41236X|41236L/M]] to continue a combo. | |||
---- | ---- | ||
'''M version:''' | '''M version:''' | ||
*Launches projectile at a horizontal angle. | *Launches the projectile at a horizontal angle. | ||
*Gives considerably large advantage on hit and block. | *Gives considerably large advantage on hit and block. | ||
*Large damage and extension options make it a common combo tool. | *Large damage and extension options make it a common combo tool. | ||
---- | ---- | ||
'''H version:''' | '''H version:''' | ||
*Launches fast, low-hitting projectile over the ground. | |||
*Launches the opponent on hit. | |||
*Can hit OTG. | *Can hit OTG. | ||
}} | }} | ||
}} | }} | ||
| Line 628: | Line 628: | ||
|hitadv= | |hitadv= | ||
|description= | |description= | ||
Shigechi | Shigechi commands Harvest to run at the opponent. | ||
* | *Binds the opponent on hit, after which it causes a crumple. | ||
*Recovery time decreases with stronger | *Recovery time decreases with stronger versions. | ||
*Common combo tool as it gives access to MANY different extensions | *Common combo tool, as it gives access to MANY different extensions such as [[JoJo's Bizarre Adventure: All-Star Battle R/Shigekiyo Yangu#623X|623L/M/H]] and [[JoJo's Bizarre Adventure: All-Star Battle R/Shigekiyo Yangu#Great Heat Attack|GHA]]. | ||
}} | }} | ||
}} | }} | ||
</div> | </div> | ||
==System Mechanics== | ==System Mechanics== | ||
====== <font style="visibility:hidden" size="0">Throw</font> ====== | ====== <font style="visibility:hidden" size="0">Throw</font> ====== | ||
| Line 659: | Line 657: | ||
Shigechi bombards the enemy with a barrage of Harvests rapidly tackling them, sending them flying. | Shigechi bombards the enemy with a barrage of Harvests rapidly tackling them, sending them flying. | ||
*Forward Throw will not allow Shigechi to hit the opponent in time for wakeup. | *Forward Throw will not allow Shigechi to hit the opponent in time for wakeup. | ||
*Back Throw leaves the opponent closer and | *Back Throw leaves the opponent closer and has greater advantage, but Shigechi can't set up [[JoJo's Bizarre Adventure: All-Star Battle R/Shigekiyo Yangu#623X|623L]] or get a stack back before it without sacrificing oki. | ||
}} | }} | ||
}} | }} | ||
| Line 681: | Line 679: | ||
|hitadv= | |hitadv= | ||
|description= | |description= | ||
Harvest instantly forms a wall in front of Shigechi. If the wall is hit by the opponent, Shigechi launches the Harvests making it up | Harvest instantly forms a wall in front of Shigechi. If the wall is hit by the opponent, Shigechi launches the Harvests making it up towards them. | ||
*Assault Assist Stocks: 2 | *Assault Assist Stocks: 2 | ||
*Reversal Assist Stocks: 2 | *Reversal Assist Stocks: 2 | ||
*Based on [[JoJo's Bizarre Adventure: All-Star Battle R/Shigekiyo Yangu#Defense 214X|Defense 214H]]>[[JoJo's Bizarre Adventure: All-Star Battle R/Shigekiyo Yangu#Defense 214X-6X|6X]] | *Based on [[JoJo's Bizarre Adventure: All-Star Battle R/Shigekiyo Yangu#Defense 214X|Defense 214H]]>[[JoJo's Bizarre Adventure: All-Star Battle R/Shigekiyo Yangu#Defense 214X-6X|6X]] | ||
*The second portion causes knockback on hit. | |||
*The wall possesses Auto Guard rather than proper counter frames, allowing it to interact with [[JoJo's Bizarre Adventure: All-Star Battle R/Rohan Kishibe|Rohan]]'s Safety Locks. | *The wall possesses Auto Guard rather than proper counter frames, allowing it to interact with [[JoJo's Bizarre Adventure: All-Star Battle R/Rohan Kishibe|Rohan]]'s Safety Locks. | ||
}} | }} | ||
}} | }} | ||
| Line 724: | Line 722: | ||
*Allows Shigechi to run backwards. | *Allows Shigechi to run backwards. | ||
*Movement speed increases with Harvest stacks. | *Movement speed increases with Harvest stacks. | ||
*Cannot | *Cannot be canceled into special moves. | ||
**Can cancel Forward Dash into [[JoJo's Bizarre Adventure: All-Star Battle R/Shigekiyo Yangu#5S|5S]] and [[JoJo's Bizarre Adventure: All-Star Battle R/Shigekiyo Yangu# | **Can cancel Forward Dash into [[JoJo's Bizarre Adventure: All-Star Battle R/Shigekiyo Yangu#5S|5S]] and [[JoJo's Bizarre Adventure: All-Star Battle R/Shigekiyo Yangu#4S-6S|Formation Changes]]. | ||
}} | }} | ||
}} | }} | ||
| Line 746: | Line 744: | ||
|description= | |description= | ||
Shigechi summons a stack of Harvest. | Shigechi summons a stack of Harvest. | ||
*Cannot | *Cannot be canceled into anything. | ||
}} | }} | ||
}} | }} | ||
| Line 770: | Line 768: | ||
Switches Offensive to Defensive Formation (4S), or Defensive to Offensive Formation (6S). | Switches Offensive to Defensive Formation (4S), or Defensive to Offensive Formation (6S). | ||
*Both versions summon a stack of Harvest on use. | *Both versions summon a stack of Harvest on use. | ||
*Both have the same cancel features of a | *Both have the same cancel features of a command normal, meaning they can be canceled into from Normals and canceled into Special Moves. | ||
}} | }} | ||
}} | }} | ||
| Line 831: | Line 829: | ||
|data= | |data= | ||
{{AttackData-ASBR | {{AttackData-ASBR | ||
|damage=354 (60+ | |damage=354 (60+12*9+6*21+60) | ||
|guard=Mid | |guard=Mid | ||
|startup=1(26)1 | |startup=1(26)1 | ||
Revision as of 09:33, 28 January 2023
Introduction
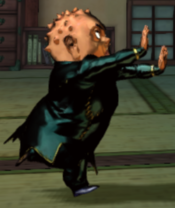
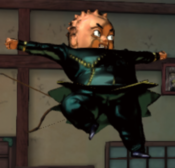
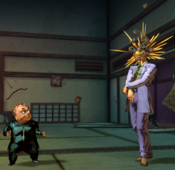
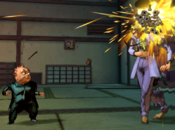
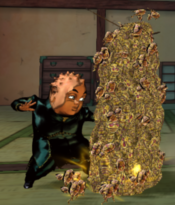
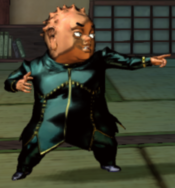
Shigekiyo Yangu, best known as Shigechi, is a secondary ally in Diamond is Unbreakable, the fourth part of JoJo's Bizarre Adventure. He uses his Stand, Harvest, to make the opponent move to him and overwhelm them on offense.
Despite being a Stand User, Shigechi does not follow the typical rules of Stand characters. Instead of switching between Stand Off and Stand On modes, Shigechi can put Harvest in Defensive and Offensive Formations: this gives him access to different special moves based on what Formation he is in. Other than that, all of these special moves cost him Harvest stacks, which he'll need to keep up with "You can see my Harvest?!" and Formation Changes to get to use them.
While his normals may be small, he can force his enemies to come towards him by harassing them with "I can get anything I want!", wait for the opponent to make mistakes and punish them with high pressure strings. His main combos come from Defensive Formation, where he uses "So itchy!" and "I'll protect them!" (Medium) to extend his combos, and then switches to Offensive Formation to hit them on the ground with "Mess with me and you're gonna get hurt!".
- Relay Race: Shigechi is one of the only characters that is able to run both forward and backwards, giving him more maneuverability than most characters.
- Mode Switching: Shigechi can switch between Offensive and Defensive Harvest formations as modes to get access to different special moves; this maneuver can be canceled into special moves as well, allowing him to quickly do this in strings.
|
|
|
| Pros | Cons |
|
|
Herd of Harvests
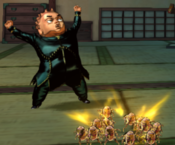
Unlike other Stand characters, Shigechi's Stand, Harvest, is always active. This repurposes his Style button to summon a Harvest stack.
Shigechi has access to a maximum of 3 Harvest stacks, which he can use on special moves. Depending on the button used, the special will get different properties and use a different amount of Harvest stacks: Light consumes one stack, Medium uses two stacks and Heavy requires all three stacks.
All of Shigechi's special moves consume Harvest stacks, becoming completely unavailable without them. Additionally, if Shigechi attempts to perform a special move variation that consumes multiple Harvest stacks while he has an insufficient amount, Shigechi will be locked out of said variation.
Stats
| Style | Health | Low Health Mode | Hashtag(s) |
|---|---|---|---|
| Stand | 900 | Rumble | #ASBR_SHI #ASBR_SIG |
Move List
Normal Moves
5L
5L
|
|---|
5M
5M
|
|---|
5H
5H
|
|---|
2L
2L
|
|---|
2M
2M
|
|---|
2H
2H
|
|---|
JL
j.L
|
|---|
JM
j.M
|
|---|
JH
j.H
|
|---|
Special Moves
623X
I can get anything I want! 623L/M/H Start Start Light Light Medium Medium Heavy Heavy
|
|---|
Offense 236X
Don't underestimate Harvest!
236L/M/H |
|---|
Offense 214X
Mess with me and you're gonna get hurt!
214L/M/H |
|---|
Offense 41236X
Move and you'll regret it!
41236L/M/H |
|---|
Defense 214X
Don't come any closer!
214L/M/H |
|---|
Defense 214X-6X
I'll protect them! 214L/M/H>6L/M/H Light Light Medium Medium Heavy Heavy
|
|---|
Defense 41236X
So itchy!
41236L/M/H |
|---|
System Mechanics
Throw
Throw
Don't move! 5/4 + Any Two Attack Buttons |
|---|
Assist
Assist
Don't come any closer! |
|---|
66-44
Relay Race 6[6]/4[4] Forward Forward Back Back
|
|---|
5S
You can see my Harvest?!
5S |
|---|
4S-6S
Defensive Formation Offensive Formation 4S/6S Offensive Formation Offensive Formation Defensive Formation Defensive Formation
|
|---|
Heart Heat Attack
Now I'm real mad!
236 + Any Two Attack Buttons |
|---|
Great Heat Attack
You want proof? Here it is!
236L+M+H |
|---|

