JoJo's Bizarre Adventure: All-Star Battle R/Caesar A. Zeppeli: Difference between revisions
Jump to navigation
Jump to search
(→421X: Added Frame Data) |
(updated pros and cons) |
||
| Line 12: | Line 12: | ||
| pros = | | pros = | ||
* '''Good Space Control:''' Caesar has access to several projectiles such as "[[JoJo's Bizarre Adventure: All-Star Battle R/Caesar A. Zeppeli#236M|Bubble Cutter]]", "[[JoJo's Bizarre Adventure: All-Star Battle R/Caesar A. Zeppeli#236L|Bubble Launcher (Air)]]", and "[[JoJo's Bizarre Adventure: All-Star Battle R/Caesar A. Zeppeli#22X|Bubble Lenses]]", meaning the opponent has to take risks to approach. | * '''Good Space Control:''' Caesar has access to several projectiles such as "[[JoJo's Bizarre Adventure: All-Star Battle R/Caesar A. Zeppeli#236M|Bubble Cutter]]", "[[JoJo's Bizarre Adventure: All-Star Battle R/Caesar A. Zeppeli#236L|Bubble Launcher (Air)]]", and "[[JoJo's Bizarre Adventure: All-Star Battle R/Caesar A. Zeppeli#22X|Bubble Lenses]]", meaning the opponent has to take risks to approach. | ||
* '''Good Defense:''' Caesar's "[[JoJo's Bizarre Adventure: All-Star Battle R/Caesar A. Zeppeli#623X|One-Fisted Uppercut]]" and "[[JoJo's Bizarre Adventure: All-Star Battle R/Caesar A. Zeppeli#214S|Hamon Kick(S version)]]" are both invincible reversals allowing him to easily punish gaps in pressure. | |||
* '''Good Setplay:''' From any hit during a "[[JoJo's Bizarre Adventure: All-Star Battle R/Caesar A. Zeppeli#22X|Bubble Lenses]]" setup, Caesar can end the combo and return into an identical setup. | * '''Good Setplay:''' From any hit during a "[[JoJo's Bizarre Adventure: All-Star Battle R/Caesar A. Zeppeli#22X|Bubble Lenses]]" setup, Caesar can end the combo and return into an identical setup. | ||
* '''Knockdowns:''' Caesar can score a knockdown from any hit, as his 2H will cause a hard knockdown even against airborne opponents. | * '''Knockdowns:''' Caesar can score a knockdown from any hit, as his 2H will cause a hard knockdown even against airborne opponents. | ||
| Line 17: | Line 18: | ||
* '''Terrible Damage:''' Caesar cannot crack 200+ damage without meter, and is probably the least meter efficient character in the game, damage-wise. | * '''Terrible Damage:''' Caesar cannot crack 200+ damage without meter, and is probably the least meter efficient character in the game, damage-wise. | ||
* '''Stubby Buttons:''' Short normals with poor conversions make it hard for him to be the aggressor in neutral and bait Throws. | * '''Stubby Buttons:''' Short normals with poor conversions make it hard for him to be the aggressor in neutral and bait Throws. | ||
* '''Meter Reliant:''' Caesar's best tools are the S versions of his special moves which cost meter to use, this combined with his low damage meterless combos makes him strongly rely on meter to get good offense and damage. | |||
* '''Inconsistent Routes:''' Due to the nature of his routing, different factors (such as Stand hurtboxes, positioning and distance to the wall, and his projeciles hitting in inconsistent ways) will often require for Caesar to improvise and modify a combo on the fly. | |||
| tablewidth = 80 | | tablewidth = 80 | ||
}} | }} | ||
Revision as of 08:07, 15 December 2023
Introduction
Insert character introduction here.
- Hamon Specials: For the cost of 0.5 bars, Caesar can perform enhanced versions of his special moves, which will also cause Hamon Damage when used against Stone Mask characters.
- Seated Leap: Caesar has access to a Super Jump ability that can be cancelled into from normals on both hit and block, giving him solid combo extensions and allowing for some situational mixups.
- Aerial Chain Beat: Caesar can chain his aerial attacks, allowing him to have different combos and confirms.
- Setplay: Thanks to his "Bubble Lenses" and their delayed activation, Caesar can enable okizeme through repeated knockdowns and ambiguous cross-ups.
Playstyle
|
|
|
| Pros | Cons |
|
|
Stats
| Style | Health | Low Health Mode | Hashtag(s) |
|---|---|---|---|
| Hamon | 950 | Rumble | #ASBR_CAE |

Move List
Normal Moves
5L
5L  |
|---|
5M
5M  |
|---|
5H
5H  |
|---|
2L
2L  |
|---|
2M
2M  |
|---|
2H
2H  |
|---|
JL
j.L  |
|---|
JM
j.M  |
|---|
JH
j.H  |
|---|
Special Moves
28
Seated Jump Any jump after 1/2/3  |
|---|
236L
Bubble Launcher 236L (Air OK) .png) Ground Ground .png) Air Air
|
|---|
236M-S
Bubble Cutter 236M/S .png) .png) |
|---|
236H
Gliding Bubble Cutter 236H .png) .png) |
|---|
623X
One-Fisted Uppercut 623L/M/H  |
|---|
214X
Hamon Kick 214L/M/H/S  |
|---|
421X
Cat Stance 421L/M/H/S  |
|---|
22X
Bubble Lenses 22L/M/H/S (Air OK)  L version L version  M version M version  H version H version  S version S version
|
|---|
J214X
Hamon Kick (Air) j.214L/M/H/S  |
|---|
System Mechanics
Throw
Throw Hamon Spark 5/4 + Any Two Attack Buttons .png) .png) |
|---|
Assist
Assist Bubble Lenses Template:NotationIcon-JJASBRTemplate:NotationIcon-JJASBRTemplate:NotationIcon-JJASBRTemplate:NotationIcon-JJASBR .png) .png) |
|---|
5S
Hamon Breathing 5S  |
|---|
Heart Heat Attack
Bubble Barrier 236 + Any Two Attack Buttons .png) .png) .png) |
|---|
Great Heat Attack
Burn Black! 236L+M+H .png) .png) .png) The light! It goes from lens to lens! Burn Black! The light! It goes from lens to lens! Burn Black!
|
|---|
Costumes
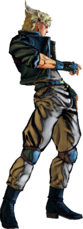
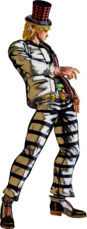
Normal
Normal (Color 1)

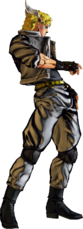
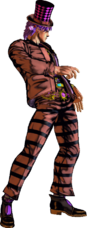
Normal (Color 2)

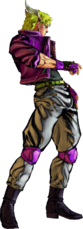
Normal (Color 3)

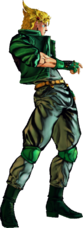
Normal (Color 4)

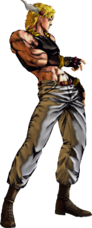
Special
Special A (Color 1)

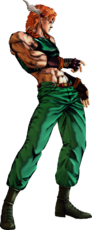
Special A (Color 2)

Special B (Color 1)

Special B (Color 2)
