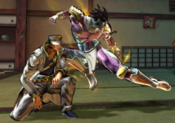
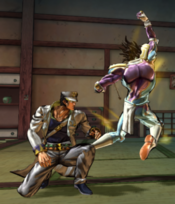
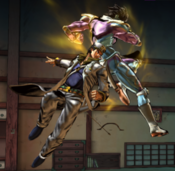
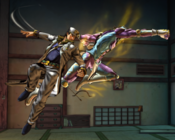
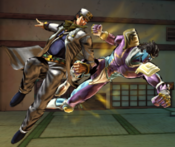
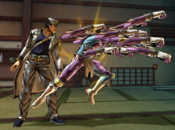
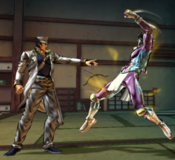
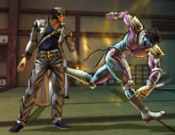
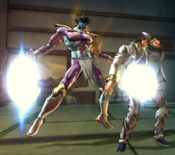
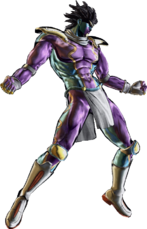
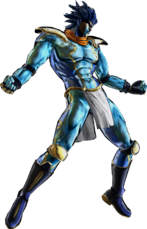
JoJo's Bizarre Adventure: All-Star Battle R/Jotaro Kujo (Part 4): Difference between revisions
mNo edit summary |
mNo edit summary |
||
| (33 intermediate revisions by 5 users not shown) | |||
| Line 4: | Line 4: | ||
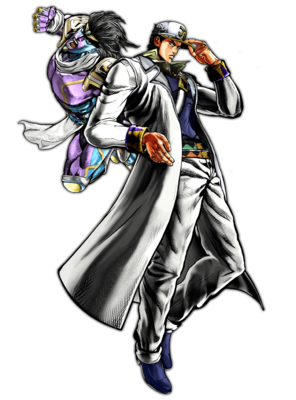
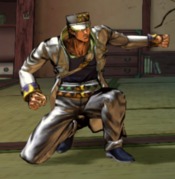
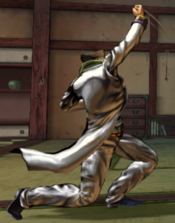
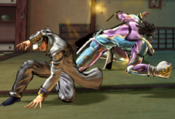
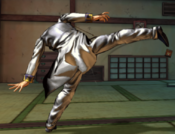
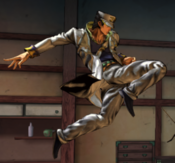
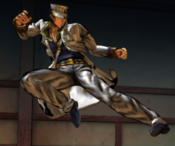
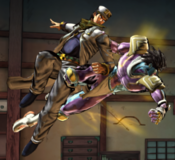
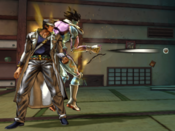
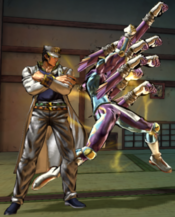
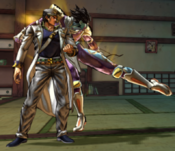
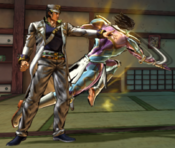
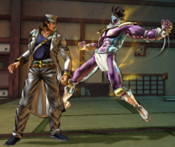
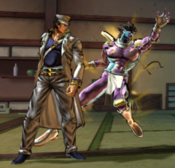
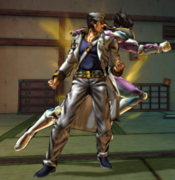
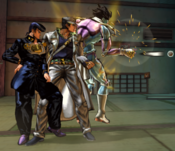
In his incarnation as a major character in ''Diamond is Unbreakable'', the fourth part of ''JoJo's Bizarre Adventure'', Jotaro Kujo mellows out and takes on the role of a mentor, though his ferocity still remains. These aspects are shown through his moveset in this form, being an all-rounder with one or two tricks under his sleeve. | In his incarnation as a major character in ''Diamond is Unbreakable'', the fourth part of ''JoJo's Bizarre Adventure'', Jotaro Kujo mellows out and takes on the role of a mentor, though his ferocity still remains. These aspects are shown through his moveset in this form, being an all-rounder with one or two tricks under his sleeve. | ||
Jotaro's versatility begins while in Stand Off, where his more passive tools lie. This is seen in special moves like "[[JoJo's Bizarre Adventure: All-Star Battle R/Jotaro Kujo (Part 4)#236X|If I throw this bearing...]]", a projectile that can be used to pester the opponent from afar; and "[[JoJo's Bizarre Adventure: All-Star Battle R/Jotaro Kujo (Part 4)#214X|Star Finger]]", a poke and pressure tool that can be used from respectable ranges, which provides good pressure on block thanks to its good frame advantage. While both of these moves allow Jotaro to play safely, they can also be combo starters, allowing Jotaro to easily capitalize on his opponent's mistakes. In combination with his normals, these tools lead to a more patient playstyle rather than an offensive one. | |||
It is while in Stand On, however, where Jotaro more than makes up for this with improved offensive capabilities. In this form, Jotaro wields normals with incredible range (especially when compared to their Stand Off counterparts), with notable examples including [[JoJo's Bizarre Adventure: All-Star Battle R/Jotaro Kujo (Part 4)#Stand 2L|s.2L]] (a very long and very quick button that enables strong strike/throw mix-ups) and [[JoJo's Bizarre Adventure: All-Star Battle R/Jotaro Kujo (Part 4)#Stand 3H|s.3H]] (an extremely large and fast command normal). His special moves in this mode also take on a much more aggressive focus: "[[JoJo's Bizarre Adventure: All-Star Battle R/Jotaro Kujo (Part 4)#Stand 22X|Where'd all that time go?]]" is a teleport that lets Jotaro instantly approach while also allowing combo conversions from incredible ranges, "[[JoJo's Bizarre Adventure: All-Star Battle R/Jotaro Kujo (Part 4)#Stand 236X|ORA ORA!]]" is a persistent hitbox with [[JoJo's Bizarre Adventure: All-Star Battle R/Jotaro Kujo (Part 4)#Stand 236X-6X|a variety of follow-ups]] which help with pressure and combos, and "[[JoJo's Bizarre Adventure: All-Star Battle R/Jotaro Kujo (Part 4)#Stand 236X|So I'm gonna bust you up!]]" is a command grab with sizeable range that can help open his opponent up and improves his general strike/throw gameplan. | |||
Jotaro's versatility is paid with a price, however: | Jotaro's versatility is paid with a price, however: very slow mobility and a near-complete lack of reversal options leave him heavily reliant on universal mechanics. Adding on to this, Jotaro's strongest tools are only present while in Stand On, so if the opponent manages to get a lead and/or maintains constant pressure, there's not a lot Jotaro can do on his own. Jotaro thrives when playing from ahead, but struggles with playing from behind, so finding balance between his passive and aggressive tools is key to succeeding with this character. | ||
*'''[[JoJo's Bizarre Adventure: All-Star Battle R/Jotaro Kujo (Part 4)#22S|Star Platinum, The World!]]''': Jotaro | *'''[[JoJo's Bizarre Adventure: All-Star Battle R/Jotaro Kujo (Part 4)#22S|Star Platinum, The World!]]''': Jotaro has the ability to stop time, rendering the opponent completely unable to act. It is similar to Axl Low's "One Vision" Overdrive from ''Guilty Gear -Strive-''. | ||
{{StrengthsAndWeaknesses | {{StrengthsAndWeaknesses | ||
| intro = [[file:JJASBR_Jotaro_Part_4_Small_Icon.png|50px]] '''Jotaro Kujo (Part 4)''' is a Stand character who controls space with strong normals and a balanced toolkit. | | intro = [[file:JJASBR_Jotaro_Part_4_Small_Icon.png|50px]] '''Jotaro Kujo (Part 4)''' is a Stand character who controls space with strong normals and a balanced toolkit. | ||
| pros = | | pros = | ||
* '''Versatile:''' Jotaro's toolkit features tools that | * '''Versatile:''' Jotaro's toolkit features tools that gives him options at any range, granting him varied offenses. These include [[JoJo's Bizarre Adventure: All-Star Battle R/Jotaro Kujo (Part 4)#236X|a good projectile to zone with]], [[JoJo's Bizarre Adventure: All-Star Battle R/Jotaro Kujo (Part 4)#Stand 22X|a teleport to anti-zone with]], [[JoJo's Bizarre Adventure: All-Star Battle R/Jotaro Kujo (Part 4)#Stand 63214X|a command grab to open the opponent up]], and [[JoJo's Bizarre Adventure: All-Star Battle R/Jotaro Kujo (Part 4)#Stand 236X|a rekka]] [[JoJo's Bizarre Adventure: All-Star Battle R/Jotaro Kujo (Part 4)#Stand 236X-6X|with a variety of useful options]]. | ||
* '''Beefy Normals:''' Jotaro's | * '''Beefy Normals:''' Jotaro has access to a very strong set of normals regardless of his current mode. Notable examples include [[JoJo's Bizarre Adventure: All-Star Battle R/Jotaro Kujo (Part 4)#JM|j.M]] (a strong cross-up tool), [[JoJo's Bizarre Adventure: All-Star Battle R/Jotaro Kujo (Part 4)#Stand 2L|s.2L]] (one of the longest and fastest Low pokes in the game), [[JoJo's Bizarre Adventure: All-Star Battle R/Jotaro Kujo (Part 4)#Stand JL|s.jL]] (one of the fastest air-to-airs in the game), and [[JoJo's Bizarre Adventure: All-Star Battle R/Jotaro Kujo (Part 4)#Stand 3H|s.3H]] (a very powerful command normal that serves both as a safe poke and a great combo starter). | ||
* ''' | * '''Meter Battery:''' Most of Jotaro's combos are meter neutral at worst, very meter positive at best, and they don't cost much to start. This allows him to constantly have meter to use his teleport, while still saving meter for his high damage routes and [[JoJo's Bizarre Adventure: All-Star Battle R/Jotaro Kujo (Part 4)#22S|Time Stop]] setups. | ||
* ''' | * '''Overwhelming Vortex:''' Thanks to his teleport and ability to reset juggle height with a groundbounce, Jotaro has a very potent vortex. This typically loops between a strike/throw scenario, with a left/right aspect thrown on top with his teleport. Jotaro can also set this vortex up off of his command grab and Throw, which allows him to loop constant oki on the opponent from a variety of setups. | ||
|cons = | |cons = | ||
* ''' | * '''Poor Defense:''' Jotaro's anti-airs are very inconsistent, forcing him to rely on universal mechanics like Stylish Evade and Stylish Guard against airborne opponents. Combined with his lack of an invincible reversal beyond [[JoJo's Bizarre Adventure: All-Star Battle R/Jotaro Kujo (Part 4)#Great Heat Attack|GHA]], he is left open to setups that other characters could potentially escape. | ||
* '''Terrible Movement Speed:''' Regardless of his current mode, Jotaro possesses some of the worst mobility in the game. While his teleport can make up for this in regards to approaches, Jotaro's ability to evade attacks on short notice is severely limited as a result (especially while in Stand On due to his larger hurtboxes). | |||
* ''' | |||
| tablewidth = 80 | | tablewidth = 80 | ||
}} | }} | ||
| Line 53: | Line 51: | ||
|damage=14 | |damage=14 | ||
|guard=Mid | |guard=Mid | ||
|startup= | |startup=4 | ||
|active= | |active= | ||
|recovery= | |recovery= | ||
|blockadv=-2 | |blockadv=-2 | ||
|hitadv= | |hitadv=+2 | ||
|description= | |description= | ||
Jotaro attacks with a high jab in front of him. | Jotaro attacks with a high jab in front of him. | ||
*Can hit crouchers despite its height. | *Can hit crouchers despite its height. | ||
*Good for stopping the opponent's jumps, and can also be converted into a combo by canceling into [[JoJo's Bizarre Adventure: All-Star Battle R/Jotaro Kujo (Part 4)#3H|3H]] after anti-airing the opponent. | |||
}} | }} | ||
}} | }} | ||
| Line 74: | Line 73: | ||
|damage=18 | |damage=18 | ||
|guard=Low | |guard=Low | ||
|startup= | |startup=8 | ||
|active=3 | |active=3 | ||
|recovery=29 | |recovery=29 | ||
|blockadv=-18 | |blockadv=-18 | ||
|hitadv= | |hitadv=-14 | ||
|description= | |description= | ||
Jotaro does a | Jotaro does a downward kick with the tip of his boot. | ||
*Moves Jotaro forward. | |||
*A rare standing Low, making it a deceptive tool. | *A rare standing Low, making it a deceptive tool. | ||
* | *Mainly used as combo filler/combo ender. | ||
* | *Very slow recovery. Always cancel into another move when it connects. | ||
}} | }} | ||
}} | }} | ||
| Line 97: | Line 97: | ||
|damage=37 | |damage=37 | ||
|guard=Mid | |guard=Mid | ||
|startup= | |startup=10 | ||
|active=3 | |active=3 | ||
|recovery=25 | |recovery=25 | ||
|blockadv=-10 | |blockadv=-10 | ||
|hitadv= | |hitadv=-4 | ||
|description= | |description= | ||
Jotaro quickly summons Star Platinum, who attacks with an uppercut. | Jotaro quickly summons Star Platinum, who attacks with an uppercut. | ||
*Massive hitbox; can easily hit people above him. | *Massive hitbox; can easily hit people above him. | ||
* | *Can also hit crouchers despite its height. | ||
}} | }} | ||
}} | }} | ||
| Line 119: | Line 119: | ||
|damage=13 | |damage=13 | ||
|guard=Low | |guard=Low | ||
|startup= | |startup=6 | ||
|active= | |active= | ||
|recovery= | |recovery= | ||
|blockadv=-2 | |blockadv=-2 | ||
|hitadv= | |hitadv=+2 | ||
|description= | |description= | ||
Jotaro attacks with a crouching backfist strike. | Jotaro attacks with a crouching backfist strike. | ||
* | *Very stubby. | ||
*Mainly used as a means to 50/50 between strike/throw. | |||
*Good combo filler, and can be used to stabilize certain routes. | |||
}} | }} | ||
}} | }} | ||
| Line 133: | Line 135: | ||
{{MoveData | {{MoveData | ||
|image=JJASBR_Jotaro_Part_4_2M.png | |image=JJASBR_Jotaro_Part_4_2M.png | ||
|caption= | |caption= | ||
|name=2M | |name=2M | ||
|subtitle= | |subtitle= | ||
| Line 140: | Line 142: | ||
|damage=22 | |damage=22 | ||
|guard=Low | |guard=Low | ||
|startup= | |startup=6 | ||
|active=5 | |active=5 | ||
|recovery=15 | |recovery=15 | ||
|blockadv=-6 | |blockadv=-6 | ||
|hitadv= | |hitadv=-2 | ||
|description= | |description= | ||
Jotaro attacks with a crouching uppercut. | Jotaro attacks with a crouching uppercut. | ||
* | *Moves Jotaro forward slightly. | ||
* | *Despite its appearance, it does not work well as an anti-air. | ||
* | *Mainly used as combo filler/combo stabilizing, as it makes "[[JoJo's Bizarre Adventure: All-Star Battle R/Jotaro Kujo (Part 4)#214X|Star Finger]]" loops work near walls. | ||
}} | }} | ||
}} | }} | ||
| Line 163: | Line 165: | ||
|damage=35 | |damage=35 | ||
|guard=Low | |guard=Low | ||
|startup= | |startup=12 | ||
|active= | |active= | ||
|recovery= | |recovery= | ||
|blockadv=-8 | |blockadv=-8 | ||
|hitadv= | |hitadv=HKD | ||
|description= | |description= | ||
Jotaro summons Star Platinum to attack with a crouching fist. | Jotaro summons Star Platinum to attack with a crouching fist. | ||
| Line 185: | Line 187: | ||
|damage=24 | |damage=24 | ||
|guard=Mid | |guard=Mid | ||
|startup= | |startup=12 | ||
|active=5 | |active=5 | ||
|recovery=35 | |recovery=35 | ||
|blockadv=-22 | |blockadv=-22 | ||
|hitadv= | |hitadv=KD | ||
|description= | |description= | ||
Jotaro steps forward and delivers a high side kick. | Jotaro steps forward and delivers a high side kick. | ||
*Launches | *Launches opponents away on hit. | ||
* | *Jotaro's main combo starter when canceled into Quick Stand On. | ||
* | *Fast enough to connect and convert into combos from anti-airing with normals, leading into "[[JoJo's Bizarre Adventure: All-Star Battle R/Jotaro Kujo (Part 4)#214X|Star Finger]]". | ||
}} | }} | ||
}} | }} | ||
| Line 208: | Line 210: | ||
|damage=16 | |damage=16 | ||
|guard=Overhead | |guard=Overhead | ||
|startup= | |startup=8 | ||
|active= | |active= | ||
|recovery= | |recovery= | ||
| Line 215: | Line 217: | ||
|description= | |description= | ||
Jotaro attacks with his knee. | Jotaro attacks with his knee. | ||
* | *Jotaro's fastest aerial while in Stand Off, but has a deceptively bad hitbox. | ||
*Can | *Can cross up. | ||
}} | }} | ||
}} | }} | ||
| Line 230: | Line 232: | ||
|damage=21 | |damage=21 | ||
|guard=Overhead | |guard=Overhead | ||
|startup= | |startup=10 | ||
|active= | |active= | ||
|recovery= | |recovery= | ||
| Line 237: | Line 239: | ||
|description= | |description= | ||
Jotaro extends his leg diagonally downwards, retracting it after a moment. | Jotaro extends his leg diagonally downwards, retracting it after a moment. | ||
*Great | *Great move for air-to-airs and jump-ins. | ||
* | *Can cross up, making it Jotaro's prime jump-in. | ||
}} | }} | ||
}} | }} | ||
| Line 252: | Line 254: | ||
|damage=37 | |damage=37 | ||
|guard=Overhead | |guard=Overhead | ||
|startup= | |startup=14 | ||
|active= | |active= | ||
|recovery= | |recovery= | ||
| Line 259: | Line 261: | ||
|description= | |description= | ||
Jotaro summons Star Platinum, who attacks with a downward punch. | Jotaro summons Star Platinum, who attacks with a downward punch. | ||
* | *A deceptively large forward hitbox makes it a very good option to catch opponents backdashing. | ||
*Mainly used as combo filler, however, due to having issues hitting opponents directly below Jotaro. | |||
}} | }} | ||
}} | }} | ||
| Line 275: | Line 278: | ||
|damage=20 | |damage=20 | ||
|guard=Mid | |guard=Mid | ||
|startup= | |startup=18 | ||
|active= | |active= | ||
|recovery= | |recovery= | ||
|blockadv=-6 | |blockadv=-6 | ||
|hitadv= | |hitadv=KD | ||
|description= | |description= | ||
}} | }} | ||
| Line 287: | Line 290: | ||
|damage=40 (20*2) | |damage=40 (20*2) | ||
|guard=Mid | |guard=Mid | ||
|startup= | |startup=22 | ||
|active= | |active= | ||
|recovery= | |recovery= | ||
|blockadv=-10 | |blockadv=-10 | ||
|hitadv= | |hitadv=KD | ||
|description= | |description= | ||
}} | }} | ||
| Line 299: | Line 302: | ||
|damage=60 (20*3) | |damage=60 (20*3) | ||
|guard=Mid | |guard=Mid | ||
|startup= | |startup=24 | ||
|active= | |active= | ||
|recovery= | |recovery= | ||
|blockadv=-16 | |blockadv=-16 | ||
|hitadv= | |hitadv=KD | ||
|description= | |description= | ||
Jotaro summons Star Platinum and commands it to fire ball bearings at high speed. | Jotaro summons Star Platinum and commands it to fire ball bearings at high speed. | ||
* | *The version used changes the number of bearings fired. | ||
* | *The final bearing launches opponents away. | ||
*Limited to 9 ball bearings on-screen during Time Stop | *Limited to 9 ball bearings on-screen during [[JoJo's Bizarre Adventure: All-Star Battle R/Jotaro Kujo (Part 4)#22S|Time Stop]]. | ||
**All existing ball bearings will combine if there is enough distance between them and the opponent when time resumes. | |||
---- | ---- | ||
'''L version:''' | '''L version:''' | ||
*Jotaro fires a single bearing. | *Jotaro fires a single bearing. | ||
*The most commonly used version | *The most commonly used version due to having the least amount of recovery in neutral. | ||
---- | ---- | ||
'''M version:''' | '''M version:''' | ||
*Jotaro fires two bearings. | *Jotaro fires two bearings. | ||
*Sees use in certain combos so as to stabilize an HHA Cancel at certain distances. | *Sees use in certain combos so as to stabilize an HHA Cancel at certain distances. | ||
*When used in neutral, the second bearing usually whiffs against airborne opponents. | |||
---- | ---- | ||
'''H version:''' | '''H version:''' | ||
*Jotaro fires three bearings. | *Jotaro fires three bearings. | ||
*Bearings beyond the first one usually whiff against airborne opponents, leading to the opponent teching out and leaving Jotaro vulnerable. | |||
}} | }} | ||
}} | }} | ||
| Line 334: | Line 340: | ||
|damage=36 (4*5, 16) | |damage=36 (4*5, 16) | ||
|guard=Mid | |guard=Mid | ||
|startup= | |startup=20 | ||
|active= | |active= | ||
|recovery= | |recovery= | ||
|blockadv=-16 | |blockadv=-16 | ||
|hitadv= | |hitadv=KD | ||
|description= | |description= | ||
}} | }} | ||
| Line 346: | Line 352: | ||
|damage=49 (4*7, 21) | |damage=49 (4*7, 21) | ||
|guard=Mid | |guard=Mid | ||
|startup= | |startup=20 | ||
|active= | |active= | ||
|recovery= | |recovery= | ||
|blockadv=-16 | |blockadv=-16 | ||
|hitadv= | |hitadv=KD | ||
|description= | |description= | ||
}} | }} | ||
| Line 358: | Line 364: | ||
|damage=62 (4*9, 26) | |damage=62 (4*9, 26) | ||
|guard=Mid | |guard=Mid | ||
|startup= | |startup=20 | ||
|active= | |active= | ||
|recovery= | |recovery= | ||
|blockadv=-20 | |blockadv=-20 | ||
|hitadv= | |hitadv=KD | ||
|description= | |description= | ||
Jotaro crosses his arms while summoning Star Platinum, who punches upwards | Jotaro crosses his arms while summoning Star Platinum, who rapidly punches upwards. | ||
* | *The amount of hits changes depending on the version used. | ||
* | *Launches opponents away on hit. | ||
*Fantastic combo tool when near the walls, and is the main combo ender when paired with HHA. | |||
---- | |||
'''L version:''' | |||
*Often outclassed by other versions while still being too slow to be a reliable anti-air. | |||
---- | |||
'''M version:''' | |||
*Has some niche uses in combos along the wall. | |||
*Has an unusual Flash Cancel window, only allowing its use after the final hit's active frames end. | |||
---- | |||
'''H version:''' | |||
*The main version used, since it still allows for meterless combo extensions when near the wall. | |||
*Has an unusual Flash Cancel window, only allowing its use after the final hit's active frames end. | |||
*Despite its high recovery, a delayed HHA Cancel after this move will still connect. | |||
}} | }} | ||
}} | }} | ||
| Line 381: | Line 400: | ||
|damage=41 (26, 15) | |damage=41 (26, 15) | ||
|guard=Mid | |guard=Mid | ||
|startup= | |startup=34 | ||
|active=1(11)5 | |active=1(11)5 | ||
|recovery=15 | |recovery=15 | ||
|blockadv=0 | |blockadv=0 | ||
|hitadv= | |hitadv=HKD | ||
|description= | |description= | ||
}} | }} | ||
| Line 393: | Line 412: | ||
|damage=43 (26, 17) | |damage=43 (26, 17) | ||
|guard=Mid | |guard=Mid | ||
|startup= | |startup=38 | ||
|active=1(11)5 | |active=1(11)5 | ||
|recovery=11 | |recovery=11 | ||
|blockadv=+4 | |blockadv=+4 | ||
|hitadv= | |hitadv=HKD | ||
|description= | |description= | ||
}} | }} | ||
| Line 405: | Line 424: | ||
|damage=46 (26, 20) | |damage=46 (26, 20) | ||
|guard=Mid | |guard=Mid | ||
|startup= | |startup=44 | ||
|active=1(11)5 | |active=1(11)5 | ||
|recovery=9 | |recovery=9 | ||
|blockadv=+6 | |blockadv=+6 | ||
|hitadv= | |hitadv=HKD | ||
|description= | |description= | ||
Jotaro summons Star Platinum, who extends its fingers out to pierce the opponent and pull them. | Jotaro summons Star Platinum, who extends its fingers out to pierce the opponent and pull them. | ||
*Startup and | *Startup, launch height and pull force (both on hit and block) all change on the version used, inversely affecting recovery. | ||
* | *The second hit launches the opponent and causes hard knockdown. | ||
* | *If blocked, the first hit deals considerable Guard Damage, while the second hit pulls the opponent towards Jotaro. | ||
* | ---- | ||
* | '''L version:''' | ||
* | *Leaves the opponent mostly in place. | ||
*Pulls the opponent the least on block. | |||
---- | |||
'''M version:''' | |||
*Launches the opponent towards Jotaro. | |||
*Pulls the opponent more on block. | |||
---- | |||
'''H version:''' | |||
*Launches the opponent even more strongly towards Jotaro. | |||
*Pulls the opponent the most on block. | |||
}} | }} | ||
}} | }} | ||
</div> | </div> | ||
<div id="movelist-2" class="movelist"><!-- Stand On Move List --> | <div id="movelist-2" class="movelist"><!-- Stand On Move List --> | ||
===Stand On=== | ===Stand On=== | ||
====Normal Moves==== | ====Normal Moves==== | ||
| Line 429: | Line 456: | ||
|image=JJASBR_Jotaro_Part_4_Stand_5L.png | |image=JJASBR_Jotaro_Part_4_Stand_5L.png | ||
|caption= | |caption= | ||
|name=5L | |name=s.5L | ||
|subtitle= | |subtitle= | ||
|data= | |data= | ||
| Line 435: | Line 462: | ||
|damage=15 | |damage=15 | ||
|guard=Mid | |guard=Mid | ||
|startup= | |startup=4 | ||
|active= | |active= | ||
|recovery= | |recovery= | ||
|blockadv=-2 | |blockadv=-2 | ||
|hitadv= | |hitadv=+2 | ||
|description= | |description= | ||
Star Platinum performs a low kick. | Star Platinum performs a low kick. | ||
*Does not hit Low, despite appearances. | *Does not hit Low, despite appearances. | ||
*HUGE reach for a | *HUGE reach for a move of its type. | ||
}} | }} | ||
}} | }} | ||
| Line 451: | Line 478: | ||
|image=JJASBR_Jotaro_Part_4_Stand_5M.png | |image=JJASBR_Jotaro_Part_4_Stand_5M.png | ||
|caption= | |caption= | ||
|name=5M | |name=s.5M | ||
|subtitle= | |subtitle= | ||
|data= | |data= | ||
| Line 457: | Line 484: | ||
|damage=25 | |damage=25 | ||
|guard=Mid | |guard=Mid | ||
|startup= | |startup=6 | ||
|active=3 | |active=3 | ||
|recovery=15 | |recovery=15 | ||
|blockadv=-4 | |blockadv=-4 | ||
|hitadv= | |hitadv=0 | ||
|description= | |description= | ||
Star Platinum strikes with a quick sideways chop. | Star Platinum strikes with a quick sideways chop. | ||
* | *Has good range, making it a good counter-poke. | ||
}} | }} | ||
}} | }} | ||
| Line 472: | Line 498: | ||
{{MoveData | {{MoveData | ||
|image=JJASBR_Jotaro_Part_4_Stand_5H.png | |image=JJASBR_Jotaro_Part_4_Stand_5H.png | ||
|caption= | |caption= | ||
|name=5H | |name=s.5H | ||
|subtitle= | |subtitle= | ||
|data= | |data= | ||
| Line 479: | Line 505: | ||
|damage=37 | |damage=37 | ||
|guard=High | |guard=High | ||
|startup= | |startup=10 | ||
|active=3 | |active=3 | ||
|recovery=19 | |recovery=19 | ||
|blockadv=-4 | |blockadv=-4 | ||
|hitadv= | |hitadv=+2 | ||
|description= | |description= | ||
Star Platinum attacks with an uppercut. | Star Platinum attacks with an uppercut. | ||
| Line 494: | Line 520: | ||
|image=JJASBR_Jotaro_Part_4_Stand_2L.png | |image=JJASBR_Jotaro_Part_4_Stand_2L.png | ||
|caption= | |caption= | ||
|name=2L | |name=s.2L | ||
|subtitle= | |subtitle= | ||
|data= | |data= | ||
| Line 500: | Line 526: | ||
|damage=13 | |damage=13 | ||
|guard=Low | |guard=Low | ||
|startup= | |startup=6 | ||
|active= | |active= | ||
|recovery= | |recovery= | ||
|blockadv=-2 | |blockadv=-2 | ||
|hitadv= | |hitadv=+2 | ||
|description= | |description= | ||
While crouching, Star Platinum performs a quick low kick. | While crouching, Star Platinum performs a quick low kick. | ||
* | *Jotaro's main crouching poke in Stand On, with s.2L > s.3H working even at max range. | ||
*Has EXTRAORDINARY range for a move of its type, enabling a good strike/throw game since it can be canceled into itself. | |||
}} | }} | ||
}} | }} | ||
| Line 514: | Line 541: | ||
{{MoveData | {{MoveData | ||
|image=JJASBR_Jotaro_Part_4_Stand_2M.png | |image=JJASBR_Jotaro_Part_4_Stand_2M.png | ||
|caption= | |caption= | ||
|name=2M | |name=s.2M | ||
|subtitle= | |subtitle= | ||
|data= | |data= | ||
| Line 521: | Line 548: | ||
|damage=23 | |damage=23 | ||
|guard=Low | |guard=Low | ||
|startup= | |startup=6 | ||
|active=5 | |active=5 | ||
|recovery=15 | |recovery=15 | ||
|blockadv=-6 | |blockadv=-6 | ||
|hitadv= | |hitadv=-2 | ||
|description= | |description= | ||
Star Platinum attacks with a crouching uppercut. | Star Platinum attacks with a crouching uppercut. | ||
*Improved vertical reach compared to the Stand Off version, | *Improved vertical reach compared to the Stand Off version, so it can be used as an anti-air option against forward jumps. | ||
*Has a lot of pushback on hit and block, making it risky to use over s.5M in grounded chains. | |||
}} | }} | ||
}} | }} | ||
| Line 536: | Line 564: | ||
|image=JJASBR_Jotaro_Part_4_Stand_2H.png | |image=JJASBR_Jotaro_Part_4_Stand_2H.png | ||
|caption= | |caption= | ||
|name=2H | |name=s.2H | ||
|subtitle= | |subtitle= | ||
|data= | |data= | ||
| Line 542: | Line 570: | ||
|damage=36 | |damage=36 | ||
|guard=Low | |guard=Low | ||
|startup= | |startup=12 | ||
|active= | |active= | ||
|recovery= | |recovery= | ||
|blockadv=-8 | |blockadv=-8 | ||
|hitadv= | |hitadv=HKD | ||
|description= | |description= | ||
While crouching, Star Platinum strikes with a quick sideways chop. | While crouching, Star Platinum strikes with a quick sideways chop. | ||
| Line 556: | Line 584: | ||
{{MoveData | {{MoveData | ||
|image=JJASBR_Jotaro_Part_4_Stand_3H.png | |image=JJASBR_Jotaro_Part_4_Stand_3H.png | ||
|caption=It has four "A"s | |caption=It has four "A"s | ||
|name=3H | |name=s.3H | ||
|subtitle=ORAAAA! | |subtitle=ORAAAA! | ||
|data= | |data= | ||
| Line 563: | Line 591: | ||
|damage=44 (18, 26) | |damage=44 (18, 26) | ||
|guard=Mid | |guard=Mid | ||
|startup= | |startup=12 | ||
|active=5 | |active=5 | ||
|recovery=21 | |recovery=21 | ||
|blockadv=-4 | |blockadv=-4 | ||
|hitadv= | |hitadv=HKD | ||
|description= | |description= | ||
Star Platinum moves a great distance forward and delivers a | Star Platinum moves a great distance forward and delivers a downward punch. | ||
*The second hit launches the opponent away and causes a hard knockdown. | *The second hit launches the opponent away on hit, and causes a hard knockdown. | ||
* | *Jotaro's main combo starter, either used by itself or when paired with a poke (mainly s.2L), due to its incredible range and startup. | ||
*If this move connects, Jotaro can cancel into [[JoJo's Bizarre Adventure: All-Star Battle R/Jotaro Kujo (Part 4)#Stand 22X|s.22L/M]] to convert into a combo. | *If this move connects, Jotaro can cancel into [[JoJo's Bizarre Adventure: All-Star Battle R/Jotaro Kujo (Part 4)#Stand 22X|s.22L/M]] to convert into a combo, regardless of distance. | ||
* | *Fast enough to connect and convert into combos from anti-airing with normals as well as [[JoJo's Bizarre Adventure: All-Star Battle R/Jotaro Kujo (Part 4)#Stand 236X|236L/M/H]] > [[JoJo's Bizarre Adventure: All-Star Battle R/Jotaro Kujo (Part 4)#Stand 236-6X|6L]], but is mainly used to pick up after [[JoJo's Bizarre Adventure: All-Star Battle R/Jotaro Kujo (Part 4)#Stand 236X|236L/M/H]] > [[JoJo's Bizarre Adventure: All-Star Battle R/Jotaro Kujo (Part 4)#Stand 236-6X|6M]]. | ||
}} | }} | ||
}} | }} | ||
| Line 581: | Line 609: | ||
|image=JJASBR_Jotaro_Part_4_Stand_Jump_L.png | |image=JJASBR_Jotaro_Part_4_Stand_Jump_L.png | ||
|caption= | |caption= | ||
|name= | |name=s.jL | ||
|subtitle= | |subtitle= | ||
|data= | |data= | ||
| Line 587: | Line 615: | ||
|damage=18 | |damage=18 | ||
|guard=Overhead | |guard=Overhead | ||
|startup= | |startup=6 | ||
|active= | |active= | ||
|recovery= | |recovery= | ||
| Line 594: | Line 622: | ||
|description= | |description= | ||
Star Platinum extends its leg downwards. | Star Platinum extends its leg downwards. | ||
*Jotaro's best answer against opponents below him. | *One of the fastest aerials in the game, and thus a very strong air-to-air. | ||
*Jotaro's best answer against opponents below him, and can even cross up. | |||
}} | }} | ||
}} | }} | ||
| Line 602: | Line 631: | ||
|image=JJASBR_Jotaro_Part_4_Stand_Jump_M.png | |image=JJASBR_Jotaro_Part_4_Stand_Jump_M.png | ||
|caption= | |caption= | ||
|name= | |name=s.jM | ||
|subtitle= | |subtitle= | ||
|data= | |data= | ||
| Line 608: | Line 637: | ||
|damage=27 | |damage=27 | ||
|guard=Overhead | |guard=Overhead | ||
|startup= | |startup=10 | ||
|active= | |active= | ||
|recovery= | |recovery= | ||
| Line 615: | Line 644: | ||
|description= | |description= | ||
Star Platinum punches straight ahead. | Star Platinum punches straight ahead. | ||
*Can hit grounded opponents. | *Can hit grounded opponents. | ||
*Mainly used as a means to bait Stylish Guard, but is otherwise is outclassed by both s.jL and s.jH when it comes to air-to-airs and jump-ins. | |||
}} | }} | ||
}} | }} | ||
| Line 624: | Line 653: | ||
|image=JJASBR_Jotaro_Part_4_Stand_Jump_H.png | |image=JJASBR_Jotaro_Part_4_Stand_Jump_H.png | ||
|caption= | |caption= | ||
|name= | |name=s.jH | ||
|subtitle= | |subtitle= | ||
|data= | |data= | ||
| Line 630: | Line 659: | ||
|damage=38 | |damage=38 | ||
|guard=Overhead | |guard=Overhead | ||
|startup= | |startup=14 | ||
|active= | |active= | ||
|recovery= | |recovery= | ||
| Line 638: | Line 667: | ||
Star Platinum attacks with a downward punch. | Star Platinum attacks with a downward punch. | ||
*Essentially Stand Off j.H but with slightly more range. | *Essentially Stand Off j.H but with slightly more range. | ||
* | *The main jump-in button while in Stand On due to its massive hitbox. | ||
}} | }} | ||
}} | }} | ||
| Line 648: | Line 677: | ||
|caption= | |caption= | ||
|name=ORA ORA! | |name=ORA ORA! | ||
|input=236L/M/H | |input=s.236L/M/H | ||
|data= | |data= | ||
{{AttackData-ASBR | {{AttackData-ASBR | ||
| Line 654: | Line 683: | ||
|damage=64 (4, 5*10, 10) | |damage=64 (4, 5*10, 10) | ||
|guard=Mid | |guard=Mid | ||
|startup= | |startup=16 | ||
|active= | |active= | ||
|recovery= | |recovery= | ||
|blockadv=-12 | |blockadv=-12 | ||
|hitadv= | |hitadv=-6 | ||
|description= | |description= | ||
}} | }} | ||
| Line 666: | Line 695: | ||
|damage=64 (4, 5*10, 10) | |damage=64 (4, 5*10, 10) | ||
|guard=Mid | |guard=Mid | ||
|startup= | |startup=16 | ||
|active= | |active= | ||
|recovery= | |recovery= | ||
|blockadv=-12 | |blockadv=-12 | ||
|hitadv= | |hitadv=-6 | ||
|description= | |description= | ||
}} | }} | ||
| Line 678: | Line 707: | ||
|damage=64 (4, 5*10, 10) | |damage=64 (4, 5*10, 10) | ||
|guard=Mid | |guard=Mid | ||
|startup= | |startup=16 | ||
|active= | |active= | ||
|recovery= | |recovery= | ||
|blockadv=-16 | |blockadv=-16 | ||
|hitadv= | |hitadv=-10 | ||
|description= | |description= | ||
Star Platinum unleashes a | Star Platinum unleashes a barrage of punches. | ||
*The distance covered | *The distance covered by Star Platinum depends on the version used. | ||
* | *Leaves grounded opponents standing, while leaving airborne opponents mostly in place. | ||
*Cannot be Flash Canceled, but can be canceled into | *Cannot be Flash Canceled, but can be canceled into HHA. | ||
*Triggers [[JoJo's Bizarre Adventure: All-Star Battle R/System#Rush Mode|Rush Mode]]. | |||
---- | |||
'''L version:''' | |||
*Star Platinum doesn't move at all. | |||
---- | |||
'''M version:''' | |||
*Star Platinum moves a bit further, though still remaining close to Jotaro. | |||
---- | |||
'''H version:''' | |||
*Star Platinum moves even further, though still remaining close to Jotaro. | |||
}} | }} | ||
}} | }} | ||
| Line 699: | Line 738: | ||
|image3=JJASBR_Jotaro_Part_4_Stand_236X-6H.png | |image3=JJASBR_Jotaro_Part_4_Stand_236X-6H.png | ||
|caption3=Heavy | |caption3=Heavy | ||
|caption4=That's three "A"s | |caption4=That's three "A"s | ||
|name=ORAAA! | |name=ORAAA! | ||
|input=236L/M/H > 6L/M/H | |input=s.236L/M/H > 6L/M/H | ||
|data= | |data= | ||
{{AttackData-ASBR | {{AttackData-ASBR | ||
| Line 707: | Line 746: | ||
|damage=20 | |damage=20 | ||
|guard=Mid | |guard=Mid | ||
|startup= | |startup=10 | ||
|active= | |active= | ||
|recovery= | |recovery= | ||
|blockadv=-4 | |blockadv=-4 | ||
|hitadv= | |hitadv=KD | ||
|description= | |description= | ||
}} | }} | ||
| Line 719: | Line 758: | ||
|damage=30 | |damage=30 | ||
|guard=Overhead | |guard=Overhead | ||
|startup= | |startup=20 | ||
|active= | |active= | ||
|recovery= | |recovery= | ||
|blockadv=-16 | |blockadv=-16 | ||
|hitadv= | |hitadv=Groundbounce | ||
|description= | |description= | ||
}} | }} | ||
| Line 731: | Line 770: | ||
|damage=60 | |damage=60 | ||
|guard=Low | |guard=Low | ||
|startup= | |startup=12 | ||
|active= | |active= | ||
|recovery= | |recovery= | ||
|blockadv=-8 | |blockadv=-8 | ||
|hitadv= | |hitadv=HKD | ||
|description= | |description= | ||
Star Platinum winds up and delivers a finishing punch. | Star Platinum winds up and delivers a finishing punch. | ||
| Line 745: | Line 784: | ||
Star Platinum extends a slight bit and follows up with an uppercut. | Star Platinum extends a slight bit and follows up with an uppercut. | ||
*Launches on hit. | *Launches on hit. | ||
*Fast enough to lead into combos if "ORA ORA" lands as an anti-air. | |||
*The only Stand Rush-compatible attack in Jotaro's moveset; a quintessential combo piece because of this. | *The only Stand Rush-compatible attack in Jotaro's moveset; a quintessential combo piece because of this. | ||
---- | ---- | ||
| Line 753: | Line 793: | ||
*Cannot be Flash Canceled, but can be canceled into an HHA. | *Cannot be Flash Canceled, but can be canceled into an HHA. | ||
*Will combo from "ORA ORA", and will catch opponents attempting to jump out. | *Will combo from "ORA ORA", and will catch opponents attempting to jump out. | ||
* | *Against grounded opponents, it can be converted into a combo with a launching Assist, such as [[JoJo's Bizarre Adventure: All-Star Battle R/Jonathan Joestar#Assist|Jonathan]]. | ||
*If it hits an airborne opponent, Jotaro can | *If it hits an airborne opponent mid-combo, Jotaro can continue the combo with [[JoJo's Bizarre Adventure: All-Star Battle R/Jotaro Kujo (Part 4)#Stand 3H|s.3H]] > [[JoJo's Bizarre Adventure: All-Star Battle R/Jotaro Kujo (Part 4)#Stand 22X|s.22L/M]]. | ||
---- | ---- | ||
'''H version:''' | '''H version:''' | ||
Star Platinum attacks with a crouching fist | Star Platinum attacks with a crouching fist. | ||
*Causes hard knockdown. | *Causes hard knockdown. | ||
**Because of its knockdown, canceling into HHA will not connect if used against grounded opponents. | **Because of its knockdown, canceling into HHA will not connect if used against grounded opponents. | ||
| Line 771: | Line 810: | ||
|caption= | |caption= | ||
|name=Where'd all that time go? | |name=Where'd all that time go? | ||
|input= | |input=s.236L/M/H > 4L/M/H<br/>or<br/>s.22L/M/H | ||
|data= | |data= | ||
{{AttackData-ASBR | {{AttackData-ASBR | ||
| Line 807: | Line 846: | ||
|hitadv= | |hitadv= | ||
|description= | |description= | ||
Star Platinum briefly stops time and, alongside Jotaro, "teleports" to another location. | |||
*Requires 0.2 HH Gauge to be used. | *Requires 0.2 HH Gauge to be used. | ||
* | *The point where Jotaro and Star Platinum reappear depends on the version used. | ||
*Mainly used to pick up a combo after [[JoJo's Bizarre Adventure: All-Star Battle R/Jotaro Kujo (Part 4)#Stand 3H|s.3H]]. | *Mainly used to pick up a combo after [[JoJo's Bizarre Adventure: All-Star Battle R/Jotaro Kujo (Part 4)#Stand 3H|s.3H]]. | ||
*When chained from "ORA ORA": | |||
**Requires 0.4 HH Gauge to be used. | |||
**Total move duration is reduced by 4 frames. | |||
---- | ---- | ||
'''L version:''' | '''L version:''' | ||
| Line 818: | Line 858: | ||
---- | ---- | ||
'''M version:''' | '''M version:''' | ||
*Teleports behind the opponent | *Teleports behind the opponent unless their back is against the wall. | ||
---- | ---- | ||
'''H version:''' | '''H version:''' | ||
| Line 835: | Line 872: | ||
|caption2= | |caption2= | ||
|name=So I'm gonna bust you up! | |name=So I'm gonna bust you up! | ||
|input=63214L/M/H | |input=s.63214L/M/H | ||
|data= | |data= | ||
{{AttackData-ASBR | {{AttackData-ASBR | ||
| Line 841: | Line 878: | ||
|damage=95 (15, 10*6, 20) | |damage=95 (15, 10*6, 20) | ||
|guard=Throw | |guard=Throw | ||
|startup= | |startup=20 | ||
|active= | |active= | ||
|recovery= | |recovery= | ||
|blockadv= | |blockadv= | ||
|hitadv= | |hitadv=HKD | ||
|description= | |description= | ||
}} | }} | ||
| Line 853: | Line 890: | ||
|damage=120 (15, 10*8, 25) | |damage=120 (15, 10*8, 25) | ||
|guard=Throw | |guard=Throw | ||
|startup= | |startup=22 | ||
|active= | |active= | ||
|recovery= | |recovery= | ||
|blockadv= | |blockadv= | ||
|hitadv= | |hitadv=HKD | ||
|description= | |description= | ||
}} | }} | ||
| Line 865: | Line 902: | ||
|damage=145 (15, 10*10, 30) | |damage=145 (15, 10*10, 30) | ||
|guard=Throw | |guard=Throw | ||
|startup= | |startup=24 | ||
|active= | |active= | ||
|recovery= | |recovery= | ||
|blockadv= | |blockadv= | ||
|hitadv= | |hitadv=HKD | ||
|description= | |description= | ||
Star Platinum moves forward and extends its hand | Star Platinum moves forward and extends its hand to grab the opponent. If successful, Star Platinum will pick them up and punch them several times before knocking them away. | ||
* | *How far Star Platinum moves, as well as how far the opponent ends up, depend on the version used. | ||
*Launches the opponent | *Launches the opponent away and causes hard knockdown on a successful Throw. | ||
*A ranged command grab that grants Jotaro an option to open up the opponent from a fair distance away. This can catch the opponent by surprise at ranges his standard Throw won't connect. | *A ranged command grab that grants Jotaro an option to open up the opponent from a fair distance away. This can catch the opponent by surprise at ranges his standard Throw won't connect. | ||
---- | |||
'''L version:''' | |||
*Shortest range, fastest recovery. | |||
*Leaves the opponent close to Jotaro. | |||
---- | |||
'''M version:''' | |||
*Intermediate startup and recovery. | |||
*Leaves the opponent far from Jotaro. | |||
---- | |||
'''H version:''' | |||
*Longest range, slowest recovery. | |||
*Leaves the opponent much farther from Jotaro. | |||
}} | }} | ||
}} | }} | ||
| Line 893: | Line 941: | ||
|damage=140 | |damage=140 | ||
|guard=Throw | |guard=Throw | ||
|startup= | |startup=6 | ||
|active=3 | |active=3 | ||
|recovery= | |recovery= | ||
|blockadv= | |blockadv= | ||
|hitadv= | |hitadv=HKD | ||
|description= | |description= | ||
Star Platinum picks the opponent up and slams them into the ground. | Star Platinum picks the opponent up and slams them into the ground. | ||
| Line 911: | Line 959: | ||
|caption= | |caption= | ||
|name=Assist | |name=Assist | ||
|subtitle=If I throw this bearing... | |subtitle=If I throw this bearing...<br>{{NotationIcon-ASBR|Assault}}{{NotationIcon-ASBR|Assault}}{{NotationIcon-ASBR|Burst}} | ||
|data= | |data= | ||
{{AttackData-ASBR | {{AttackData-ASBR | ||
| Line 920: | Line 968: | ||
|recovery= | |recovery= | ||
|blockadv= | |blockadv= | ||
|hitadv= | |hitadv=KD | ||
|description= | |description= | ||
Jotaro summons Star Platinum and commands it to fire 3 ball bearings at high speed. | Jotaro summons Star Platinum and commands it to fire 3 ball bearings at high speed. | ||
*Assault Assist Stocks: 2 | *Assault Assist Stocks: 2 | ||
*Reversal Assist Stocks: | *Reversal Assist Stocks: 1 | ||
*Based on [[JoJo's Bizarre Adventure: All-Star Battle R/Jotaro Kujo (Part 4)#236X|236H]]. | *Based on [[JoJo's Bizarre Adventure: All-Star Battle R/Jotaro Kujo (Part 4)#236X|236H]]. | ||
*The final hit launches opponents away. | *The final hit launches opponents away. | ||
| Line 945: | Line 993: | ||
|startup= | |startup= | ||
|active= | |active= | ||
|recovery= | |recovery=Total XX | ||
|blockadv= | |blockadv= | ||
|hitadv= | |hitadv= | ||
| Line 967: | Line 1,015: | ||
|damage= | |damage= | ||
|guard= | |guard= | ||
|startup= | |startup=202~103 | ||
|active= | |active= | ||
|recovery= | |recovery= | ||
| Line 973: | Line 1,021: | ||
|hitadv= | |hitadv= | ||
|description= | |description= | ||
After a lenghty startup, Jotaro stops time, freezing the stage effects, the battle timer, and the opponent | After a lenghty startup, Jotaro stops time, freezing the stage effects, the battle timer, and the opponent. | ||
*Requires 1.5 HH Gauges to be used; startup accelerates | *Requires 1.5 HH Gauges to be used; startup accelerates if 3 HH Gauges have been accumulated before use. | ||
* | *Starting a cutscene with a Throw, an HHA or a GHA will instantly end the Time Stop and take away the rest of Jotaro's meter. | ||
*Projectiles fired by "[[JoJo's Bizarre Adventure: All-Star Battle R/Jotaro Kujo (Part 4)#236X|If I throw this bearing...]]" hang in the air during the Time Stop. | |||
*Damage dealt to the opponent during the Time Stop is reduced. When the ability ends and time resumes, the opponent will suffer all damage dealt to them at once. | *Damage dealt to the opponent during the Time Stop is reduced. When the ability ends and time resumes, the opponent will suffer all damage dealt to them at once. | ||
*All attacks can OTG during Time Stop, restanding the opponent if they can reach. This allows setting up for juggles post-Time Stop, although normal IPS rules will still apply. | |||
*All attacks can OTG during Time Stop, restanding the opponent if they can reach. | *After the Time Stop ends, there is a ~5 second period where Jotaro cannot gain any HH Gauge (with {{NotationIcon-ASBR|AkiraMini}}'s [[JoJo's Bizarre Adventure: All-Star Battle R/Akira Otoishi#Assist|Assist]] providing the only exception). | ||
* | *Against himself, {{NotationIcon-ASBR|Jotaro3Mini}}, {{NotationIcon-ASBR|DIO}}, and {{NotationIcon-ASBR|AWDiegoMini}}, Jotaro can use this ability to move within their Time Stop for the minimum requirement of 1 HH Gauge. If their Time Stop runs out before Jotaro's does, they will be frozen instead. | ||
}} | }} | ||
}} | }} | ||
| Line 997: | Line 1,046: | ||
|damage=215 (45+5*20+70) | |damage=215 (45+5*20+70) | ||
|guard=Mid | |guard=Mid | ||
|startup= | |startup=2+12 | ||
|active= | |active= | ||
|recovery= | |recovery= | ||
|blockadv= | |blockadv=-42 | ||
|hitadv= | |hitadv=HKD (+2) | ||
|description= | |description= | ||
Star Platinum flies a moderate distance forward to throw a heavy punch. If it connects, Star Platinum unleashes a barrage of punches on the opponent before knocking them away. | Star Platinum flies a moderate distance forward to throw a heavy punch. If it connects, Star Platinum unleashes a barrage of punches on the opponent before knocking them away. | ||
* | *Its great range, along with Jotaro's meter efficiency, make this the go-to ender in low-resource combos. | ||
*Not very useful as a defensive option due to very low invulnerability. | |||
}} | }} | ||
}} | }} | ||
| Line 1,022: | Line 1,072: | ||
|damage=325 (40+2*38+15+2*74+46) | |damage=325 (40+2*38+15+2*74+46) | ||
|guard=Mid | |guard=Mid | ||
|startup= | |startup=2+20 | ||
|active= | |active= | ||
|recovery= | |recovery= | ||
|blockadv= | |blockadv=-40 | ||
|hitadv= | |hitadv=HKD | ||
|description= | |description= | ||
Star Platinum flies a short distance forward to throw a heavy | Star Platinum flies a short distance forward to throw a heavy downward punch. On a successful hit, Star Platinum proceeds to viciously pummel the opponent before sending them flying. | ||
*Deceptive vertical range. | *Deceptive vertical range. | ||
*Jotaro's only move with full invincibility, granting it utility as an expensive reversal option. | |||
}} | }} | ||
}} | }} | ||
==Costumes== | ==Costumes== | ||
{{ColorGallery | filePrefix=JJASBR_Jotaro_Part_4_Color_ | imageFileTypes=png| imageWidths= | ===Normal=== | ||
{{ColorGallery | filePrefix=JJASBR_Jotaro_Part_4_Color_ | imageFileTypes=png| imageWidths=250 | colors= | |||
{{ColorGallery/Color|1| text=Normal (Color 1) }} | {{ColorGallery/Color|1| text=Normal (Color 1) }} | ||
{{ColorGallery/Color|2| text=Normal (Color 2) }} | {{ColorGallery/Color|2| text=Normal (Color 2) }} | ||
| Line 1,040: | Line 1,092: | ||
{{ColorGallery/Color|4| text=Normal (Color 4) }} | {{ColorGallery/Color|4| text=Normal (Color 4) }} | ||
}} | }} | ||
===Stand=== | |||
{{ColorGallery | filePrefix=JJASBR_Jotaro_Part_4_Color_ | imageFileTypes=png| imageWidths=250 | colors= | |||
{{ColorGallery/Color|Stand 1| text={{Tooltip|color=purple|text=Star Platinum (Color 1)|hovertext=Used for odd-numbered colors.}} }} | |||
{{ColorGallery/Color|Stand 2| text={{Tooltip|color=purple|text=Star Platinum (Color 2)|hovertext=Used for even-numbered colors.}} }} | |||
}} | |||
==Notable Players== | |||
:{{Template:PlayerListDisclaimer}} | |||
{| class="wikitable" style="text-align:center;" | |||
!width="95"|Name | |||
!width="90"|Usual Color | |||
!width="125"|Region | |||
!Contact | |||
!Example Play | |||
|- | |||
|Bannock Meatball | |||
|[[File:JJASBR Jotaro Part 4 Color 3.png|200x200px|Normal (Color 3)]] | |||
|[[File:Flag_ca.png]]<br>Canada | |||
|[https://twitter.com/BannockMeatball @BannockMeatball] | |||
|[https://www.youtube.com/watch?v=LSbnuou2u8g Exhibition Footage]<br>[https://www.youtube.com/@BannockMeatball YouTube Channel] | |||
|- | |||
|ポム (POM) | |||
|[[File:JJASBR Jotaro Part 4 Color 2.png|200x200px|Normal (Color 2)]] | |||
|[[File:Flag_jp.png]]<br>Japan | |||
|[https://twitter.com/Pom_0000 @Pom_0000] | |||
|[https://www.youtube.com/watch?v=VU7svZMAdaU Tournament Footage]<br>[https://www.youtube.com/@pompompom996/streams YouTube Channel] | |||
|} | |||
==Navigation== | ==Navigation== | ||
Latest revision as of 08:25, 9 June 2024
Introduction
- This article is about Jotaro Kujo's Diamond is Unbreakable incarnation, primarily known as "Jotaro 4". For information about his Stardust Crusaders incarnation, see Jotaro Kujo (Part 3).
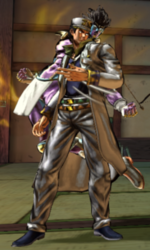
In his incarnation as a major character in Diamond is Unbreakable, the fourth part of JoJo's Bizarre Adventure, Jotaro Kujo mellows out and takes on the role of a mentor, though his ferocity still remains. These aspects are shown through his moveset in this form, being an all-rounder with one or two tricks under his sleeve.
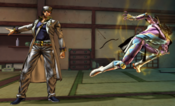
Jotaro's versatility begins while in Stand Off, where his more passive tools lie. This is seen in special moves like "If I throw this bearing...", a projectile that can be used to pester the opponent from afar; and "Star Finger", a poke and pressure tool that can be used from respectable ranges, which provides good pressure on block thanks to its good frame advantage. While both of these moves allow Jotaro to play safely, they can also be combo starters, allowing Jotaro to easily capitalize on his opponent's mistakes. In combination with his normals, these tools lead to a more patient playstyle rather than an offensive one.
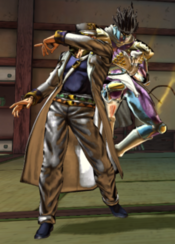
It is while in Stand On, however, where Jotaro more than makes up for this with improved offensive capabilities. In this form, Jotaro wields normals with incredible range (especially when compared to their Stand Off counterparts), with notable examples including s.2L (a very long and very quick button that enables strong strike/throw mix-ups) and s.3H (an extremely large and fast command normal). His special moves in this mode also take on a much more aggressive focus: "Where'd all that time go?" is a teleport that lets Jotaro instantly approach while also allowing combo conversions from incredible ranges, "ORA ORA!" is a persistent hitbox with a variety of follow-ups which help with pressure and combos, and "So I'm gonna bust you up!" is a command grab with sizeable range that can help open his opponent up and improves his general strike/throw gameplan.
Jotaro's versatility is paid with a price, however: very slow mobility and a near-complete lack of reversal options leave him heavily reliant on universal mechanics. Adding on to this, Jotaro's strongest tools are only present while in Stand On, so if the opponent manages to get a lead and/or maintains constant pressure, there's not a lot Jotaro can do on his own. Jotaro thrives when playing from ahead, but struggles with playing from behind, so finding balance between his passive and aggressive tools is key to succeeding with this character.
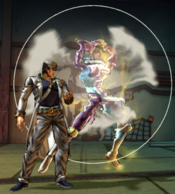
- Star Platinum, The World!: Jotaro has the ability to stop time, rendering the opponent completely unable to act. It is similar to Axl Low's "One Vision" Overdrive from Guilty Gear -Strive-.
|
|
|
| Pros | Cons |
|
|
Stats
| Style | Health | Low Health Mode | Hashtag(s) |
|---|---|---|---|
| Stand | 1000 | Rumble | #ASBR_4JO #ASBR_JTR4 |
Move List
Stand Off
Normal Moves
5L
5L
|
|---|
5M
5M As Jotaro matured, so did his command normal As Jotaro matured, so did his command normal
|
|---|
5H
5H A giant button that's great for any scenario A giant button that's great for any scenario
|
|---|
2L
2L
|
|---|
2M
2M
|
|---|
2H
2H
|
|---|
3H
3H
Just shut up! |
|---|
JL
j.L
|
|---|
JM
j.M
|
|---|
JH
j.H Criminal Criminal
|
|---|
Special Moves
236X
If I throw this bearing...
236L/M/H |
|---|
623X
I'm going to break you into pieces.
623L/M/H |
|---|
214X
Star Finger
214L/M/H |
|---|
Stand On
Normal Moves
Stand 5L
s.5L
|
|---|
Stand 5M
s.5M
|
|---|
Stand 5H
s.5H
|
|---|
Stand 2L
s.2L
|
|---|
Stand 2M
s.2M
|
|---|
Stand 2H
s.2H
|
|---|
Stand 3H
s.3H ORAAAA! It has four "A"s It has four "A"s
|
|---|
Stand JL
s.jL
|
|---|
Stand JM
s.jM
|
|---|
Stand JH
s.jH
|
|---|
Special Moves
Stand 236X
ORA ORA!
s.236L/M/H |
|---|
Stand 236X-6X
ORAAA! s.236L/M/H > 6L/M/H Light Light Medium Medium Heavy Heavy That's three "A"s That's three "A"s
|
|---|
Stand 22X
Where'd all that time go?
s.236L/M/H > 4L/M/H or s.22L/M/H |
|---|
Stand 63214X
So I'm gonna bust you up!
s.63214L/M/H |
|---|
System Mechanics
Throw
Throw
UUORA! 5/4 + Any Two Attack Buttons |
|---|
Assist
Assist
If I throw this bearing... |
|---|
5S
Stand On/Off 5S Stand On Stand On Stand Off Stand Off
|
|---|
22S
Star Platinum, The World!
22S |
|---|
Heart Heat Attack
I'm going to break it... And by "it," I mean your face.
236 + Any Two Attack Buttons |
|---|
Great Heat Attack
I hate things that are a pain in the ass...
236L+M+H |
|---|
Costumes
Normal
Stand
Notable Players
- Disclaimer: This list is derived from community input and is in no way comprehensive or a form of ranking of any kind. Our community criteria can be found here.
| Name | Usual Color | Region | Contact | Example Play |
|---|---|---|---|---|
| Bannock Meatball | 
|
Canada |
@BannockMeatball | Exhibition Footage YouTube Channel |
| ポム (POM) | 
|
Japan |
@Pom_0000 | Tournament Footage YouTube Channel |
