JoJo's Bizarre Adventure: All-Star Battle R/Kosaku Kawajiri: Difference between revisions
MrGuySenpai (talk | contribs) (→623X) |
(→Assist) |
||
| (71 intermediate revisions by 8 users not shown) | |||
| Line 1: | Line 1: | ||
{{ASBR Character Intro|char=Kosaku|short=kos|content= | {{ASBR Character Intro|char=Kosaku|short=kos|content= | ||
==Introduction== | ==Introduction== | ||
:''This article is about Yoshikage Kira's second incarnation, primarily known as "Kosaku". For information about his original incarnation, see [[JoJo's Bizarre Adventure: All-Star Battle R/Yoshikage Kira|Yoshikage Kira]].'' | |||
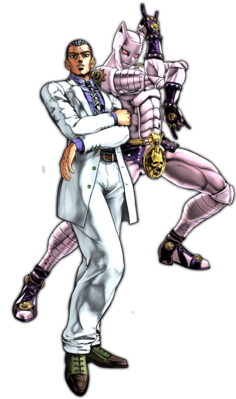
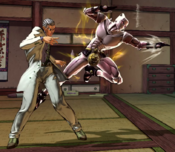
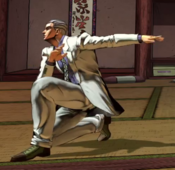
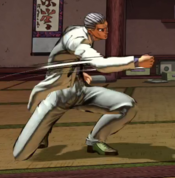
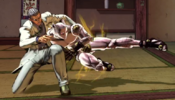
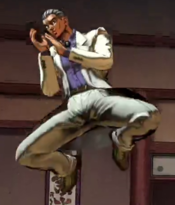
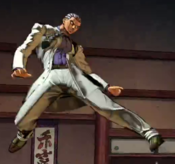
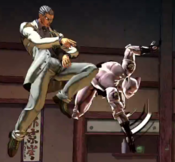
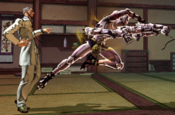
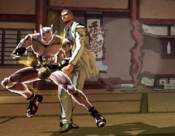
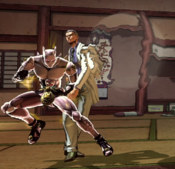
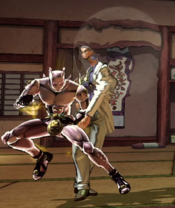
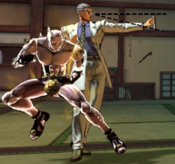
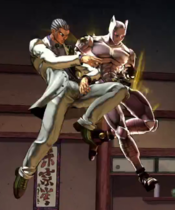
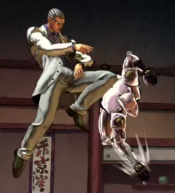
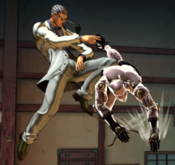
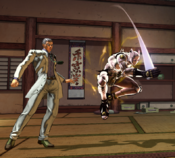
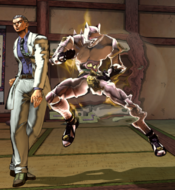
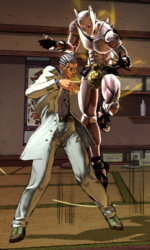
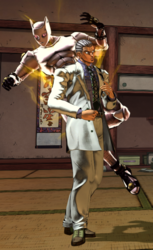
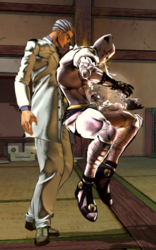
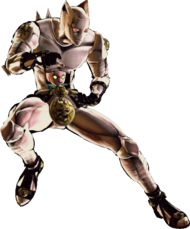
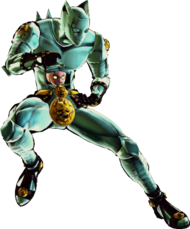
Kosaku Kawajiri is a character in the fourth part of ''JoJo's Bizarre Adventure'', ''Diamond is Unbreakable''. Intent with preserving his quiet lifestyle at all costs, Yoshikage Kira (the main antagonist of the part) steals the identity of this man with the goal of concealing his own. | |||
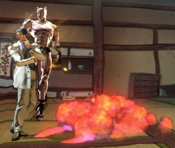
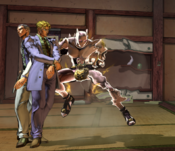
*'''Only one bomb at a time''': If bomb-related special moves are used in succession, the previous bomb will be nullified, | While inheriting Killer Queen from his previous form, Kosaku is a very different character despite the similarities; he is a sluggish powerhouse capable of dealing some of the highest damage in the game, with a strong emphasis on inflicting Guard Breaks to his opponents that lead into explosive combos. Both Stand Off and Stand On give him a toolbox of options to work with, with the latter being the scarier one of the two as this is where his Guard Breaks will usually be coming from. With all of this together, Kosaku is one of the most terrifying characters in the game, blowing his opponent to smithereens for making even the smallest mistake against him. | ||
*'''Air Bomb Cushion''': While in Stand On, Kosaku has access to a pushblock for the cost of 0.5 HH Gauge. | |||
*'''Only one bomb at a time''': If bomb-related special moves are used in succession, the previous bomb will be nullified. In addition, the explosions generated by Kosaku's special moves can damage (and kill) him. | |||
*'''[[JoJo's Bizarre Adventure: All-Star Battle R/Kosaku Kawajiri#Stand Guard 6X|Air Bomb Cushion]]''': While in Stand On, Kosaku has access to a pushblock for the cost of 0.5 HH Gauge. | |||
{{StrengthsAndWeaknesses | {{StrengthsAndWeaknesses | ||
| intro = [[file:JJASBR_Kosaku_Small_Icon.png|50px]] '''Kosaku Kawajiri''' is a Stand character that boasts explosive damage and devastating Guard Damage. | | intro = [[file:JJASBR_Kosaku_Small_Icon.png|50px]] '''Kosaku Kawajiri''' is a Stand character that boasts explosive damage and devastating Guard Damage. | ||
| pros = | | pros = | ||
* '''Catastrophic Damage:''' Kosaku boasts some of the highest damage in the game, being able to pump out touch of death combos | * '''Catastrophic Damage:''' Kosaku boasts some of the highest damage in the game, being able to pump out touch of death combos off of nearly any starter. | ||
* '''Guard Gauge Destroyer:''' Kosaku also has some of the highest Guard Damage in the game with his "[[JoJo's Bizarre Adventure: All-Star Battle R/Kosaku Kawajiri#Stand 214X|Contact Bomb]]". | * '''Guard Gauge Destroyer:''' Kosaku also has some of the highest Guard Damage in the game with his "[[JoJo's Bizarre Adventure: All-Star Battle R/Kosaku Kawajiri#Stand 214X|Contact Bomb]]". This allows him to melt through the opponent's Guard Gauge and threaten with his dangerous strike/throw game, as even the tiniest gap he allows will end up in an unreactable mix-up. | ||
* '''Okizeme:''' Kosaku can easily score hard knockdowns off of | * '''Okizeme:''' Kosaku can easily score hard knockdowns off of moves such as [[JoJo's Bizarre Adventure: All-Star Battle R/Kosaku Kawajiri#2H|2H]], [[JoJo's Bizarre Adventure: All-Star Battle R/Kosaku Kawajiri#Stand 3M|s.3M]], and his [[JoJo's Bizarre Adventure: All-Star Battle R/Kosaku Kawajiri#Throw|Forward Throw]]. From these options, he has a diverse set of tools to work with for formidable okizeme such as [[JoJo's Bizarre Adventure: All-Star Battle R/Kosaku Kawajiri#JL|j.L]], "[[JoJo's Bizarre Adventure: All-Star Battle R/Kosaku Kawajiri#214X|Impact Ignition Bomb]]", and "[[JoJo's Bizarre Adventure: All-Star Battle R/Kosaku Kawajiri#Stand 214X|Contact Bomb]]". | ||
|cons = | |cons = | ||
* '''Self-Damage:''' Kosaku's explosions can damage and kill him, | * '''Self-Damage:''' Kosaku's explosions can damage and kill him, which makes using certain moves at specific ranges or performing certain routes very risky when Kosaku is at low health. Opponents can take advantage of this as well, as they can also combo Kosaku from his own explosives. | ||
* '''Meterless Anti-Airs:''' Kosaku lacks any real meterless anti-airs, making jump-ins against him rather effective as HHA and GHA can always be baited. His air-to-air game is also rather weak, as he has very low hitstun on his aerials, leaving him minus in most cases. | * '''Meterless Anti-Airs:''' Kosaku lacks any real meterless anti-airs, making jump-ins against him rather effective as [[JoJo's Bizarre Adventure: All-Star Battle R/Kosaku Kawajiri#Heart Heat Attack|HHA]] and [[JoJo's Bizarre Adventure: All-Star Battle R/Kosaku Kawajiri#Great Heat Attack|GHA]] can always be baited. His air-to-air game is also rather weak, as he has very low hitstun on his aerials, leaving him minus in most cases. | ||
* '''Neutral:''' Kosaku's neutral is rather poor as he has very slow movement and lackluster projectiles. This leaves him highly susceptible to zoning which he struggles to deal with. | * '''Neutral:''' Kosaku's neutral is rather poor as he has very slow movement and lackluster projectiles. This leaves him highly susceptible to zoning, which he struggles to deal with. | ||
| tablewidth = 80 | | tablewidth = 80 | ||
}} | }} | ||
| Line 45: | Line 48: | ||
|damage=15 | |damage=15 | ||
|guard=Mid | |guard=Mid | ||
|startup= | |startup=4 | ||
|active= | |active= | ||
|recovery= | |recovery= | ||
| Line 52: | Line 55: | ||
|description= | |description= | ||
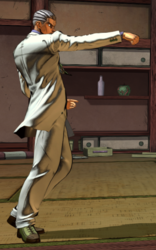
Kosaku performs a jab outwards. | Kosaku performs a jab outwards. | ||
*Standard jab, good at stopping dash jumps. | *Standard jab, good at stopping dash-jumps. | ||
}} | }} | ||
}} | }} | ||
| Line 66: | Line 69: | ||
|damage=23 | |damage=23 | ||
|guard=Mid | |guard=Mid | ||
|startup= | |startup=6 | ||
|active= | |active= | ||
|recovery= | |recovery= | ||
| Line 90: | Line 93: | ||
|damage=30 (10, 20) | |damage=30 (10, 20) | ||
|guard=Mid | |guard=Mid | ||
|startup= | |startup=12 | ||
|active= | |active= | ||
|recovery= | |recovery= | ||
| Line 97: | Line 100: | ||
|description= | |description= | ||
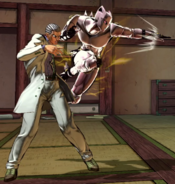
Kosaku summons Killer Queen to perform two stabs with its hands. | Kosaku summons Killer Queen to perform two stabs with its hands. | ||
*The first hit causes crumple. | |||
*Both hits are special-cancelable. | *Both hits are special-cancelable. | ||
*Good range for counter-pokes and confirms. | *Good range for counter-pokes and confirms. | ||
}} | }} | ||
| Line 113: | Line 116: | ||
|damage=14 | |damage=14 | ||
|guard=Low | |guard=Low | ||
|startup= | |startup=6 | ||
|active= | |active= | ||
|recovery= | |recovery= | ||
| Line 120: | Line 123: | ||
|description= | |description= | ||
Kosaku performs a crouching jab. | Kosaku performs a crouching jab. | ||
*Standard jab | *Standard crouching jab. | ||
}} | }} | ||
}} | }} | ||
| Line 135: | Line 137: | ||
|damage=23 | |damage=23 | ||
|guard=Low | |guard=Low | ||
|startup= | |startup=6 | ||
|active= | |active= | ||
|recovery= | |recovery= | ||
| Line 141: | Line 143: | ||
|hitadv= | |hitadv= | ||
|description= | |description= | ||
Kosaku | While kneeling, Kosaku leans forward with a punch. | ||
*Moves Kosaku forward. | *Moves Kosaku forward. | ||
*Good range for pokes and counter-pokes. | *Good range for pokes and counter-pokes. | ||
| Line 157: | Line 159: | ||
|damage=34 | |damage=34 | ||
|guard=Low | |guard=Low | ||
|startup= | |startup=12 | ||
|active= | |active= | ||
|recovery= | |recovery= | ||
|blockadv=-8 | |blockadv=-8 | ||
|hitadv= | |hitadv=HKD | ||
|description= | |description= | ||
Kosaku summons Killer Queen, who performs a sweeping kick. | Kosaku summons Killer Queen, who performs a sweeping kick. | ||
* | *Causes hard knockdown. | ||
* | *Has the greatest range of Kosaku's normals while in Stand Off. | ||
}} | }} | ||
}} | }} | ||
| Line 179: | Line 181: | ||
|damage=18 | |damage=18 | ||
|guard=Overhead | |guard=Overhead | ||
|startup= | |startup=8 | ||
|active= | |active= | ||
|recovery= | |recovery= | ||
| Line 186: | Line 188: | ||
|description= | |description= | ||
Kosaku performs an attack with both knees. | Kosaku performs an attack with both knees. | ||
*Good for | *Good for okizeme if used as a meaty. | ||
*Hits in front, below, and behind Kosaku, making it good for cross-ups. | |||
}} | }} | ||
}} | }} | ||
| Line 200: | Line 203: | ||
|damage=28 | |damage=28 | ||
|guard=Overhead | |guard=Overhead | ||
|startup= | |startup=10 | ||
|active= | |active= | ||
|recovery= | |recovery= | ||
| Line 207: | Line 210: | ||
|description= | |description= | ||
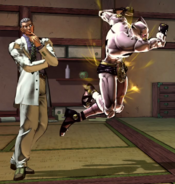
Kosaku performs a kick downwards. | Kosaku performs a kick downwards. | ||
*Good for jump-ins | *Good for jump-ins, combo filler, and cross-ups. | ||
}} | }} | ||
}} | }} | ||
| Line 221: | Line 224: | ||
|damage=40 | |damage=40 | ||
|guard=Overhead | |guard=Overhead | ||
|startup= | |startup=12 | ||
|active= | |active= | ||
|recovery= | |recovery= | ||
| Line 244: | Line 247: | ||
|damage=50 (4*5, 30) | |damage=50 (4*5, 30) | ||
|guard=Mid | |guard=Mid | ||
|startup= | |startup=12 | ||
|active=20 | |active=20 | ||
|recovery=63 | |recovery=63 | ||
|blockadv=-28 | |blockadv=-28 | ||
|hitadv=+26 | |hitadv=KD (+26) | ||
|description= | |description= | ||
}} | }} | ||
| Line 256: | Line 259: | ||
|damage=55 (5*5, 30) | |damage=55 (5*5, 30) | ||
|guard=Mid | |guard=Mid | ||
|startup= | |startup=12 | ||
|active=20 | |active=20 | ||
|recovery=70 | |recovery=70 | ||
|blockadv=-36 | |blockadv=-36 | ||
|hitadv=+ | |hitadv=KD (+18) | ||
|description= | |description= | ||
}} | }} | ||
| Line 268: | Line 271: | ||
|damage=60 (6*5, 30) | |damage=60 (6*5, 30) | ||
|guard=Mid | |guard=Mid | ||
|startup= | |startup=12 | ||
|active=20 | |active=20 | ||
|recovery=77 | |recovery=77 | ||
|blockadv=-40 | |blockadv=-40 | ||
|hitadv=+ | |hitadv=KD (+10) | ||
|description= | |description= | ||
Kosaku summons Killer Queen, who performs an advancing barrage of punches. | Kosaku summons Killer Queen, who performs an advancing barrage of punches. | ||
* | *The version used alters the distance covered by Killer Queen. | ||
*Good at stopping dash jumps. | *The final hit launches. | ||
*Good at stopping dash-jumps. | |||
---- | |||
'''L version:''' | |||
*Killer Queen moves the least far. | |||
---- | |||
'''M version:''' | |||
*Killer Queen moves further. | |||
---- | |||
'''H version:''' | |||
*Killer Queen moves the furthest. | |||
}} | }} | ||
}} | }} | ||
| Line 305: | Line 296: | ||
{{MoveData | {{MoveData | ||
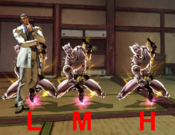
|image=JJASBR_Kosaku_214L.png | |image=JJASBR_Kosaku_214L.png | ||
|caption= | |caption=Light | ||
|image2=JJASBR_Kosaku_214M.png | |image2=JJASBR_Kosaku_214M.png | ||
|caption2= | |caption2=Medium | ||
|image3=JJASBR_Kosaku_214H.png | |image3=JJASBR_Kosaku_214H.png | ||
|caption3= | |caption3=Heavy | ||
|name=Impact Ignition Bomb | |name=Impact Ignition Bomb | ||
|input=214L/M/H | |input=214L/M/H | ||
| Line 315: | Line 306: | ||
{{AttackData-ASBR | {{AttackData-ASBR | ||
|version=Light | |version=Light | ||
|damage= | |damage=120 (40*3) | ||
|guard= | |guard= | ||
|startup= | |startup=15 | ||
|active= | |active= | ||
|recovery= | |recovery= | ||
|blockadv= | |blockadv= | ||
|hitadv= | |hitadv=KD | ||
|description= | |description= | ||
}} | }} | ||
| Line 327: | Line 318: | ||
|version=Medium | |version=Medium | ||
|header=no | |header=no | ||
|damage= | |damage=120 (40*3) | ||
|guard= | |guard= | ||
|startup= | |startup=13 | ||
|active= | |active= | ||
|recovery= | |recovery= | ||
|blockadv= | |blockadv= | ||
|hitadv= | |hitadv=KD | ||
|description= | |description= | ||
}} | }} | ||
| Line 339: | Line 330: | ||
|version=Heavy | |version=Heavy | ||
|header=no | |header=no | ||
|damage= | |damage=120 (40*3) | ||
|guard= | |guard= | ||
|startup= | |startup=11 | ||
|active= | |active= | ||
|recovery= | |recovery= | ||
|blockadv= | |blockadv= | ||
|hitadv= | |hitadv=KD | ||
|description= | |description= | ||
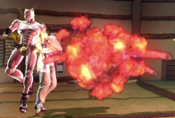
After Kosaku summons Killer Queen, Stray Cat launches an air bubble from inside it that is turned into a bomb. | After Kosaku summons Killer Queen, Stray Cat launches an air bubble from inside it that is turned into a bomb. | ||
* | *The trajectory taken by the bubble depends on the version used. | ||
*Kosaku is forced to remain stationary while the bubble is on the screen, and must detonate it manually for it to deal damage. | |||
*Launches on hit. | |||
*Deals 50% worth of Guard Damage. | |||
*The bubble will disappear if Kosaku uses a Flash Cancel during the move. | |||
---- | ---- | ||
'''L version:''' | '''L version:''' | ||
| Line 354: | Line 349: | ||
---- | ---- | ||
'''M version:''' | '''M version:''' | ||
*Fires the bubble at a | *Fires the bubble at a 45° angle upwards. | ||
---- | ---- | ||
'''H version:''' | '''H version:''' | ||
| Line 369: | Line 364: | ||
|data= | |data= | ||
{{AttackData-ASBR | {{AttackData-ASBR | ||
|damage= | |damage= | ||
|guard= | |guard= | ||
|startup= | |startup= | ||
|active= | |active= | ||
|recovery= | |recovery=Total XX | ||
|blockadv= | |blockadv= | ||
|hitadv= | |hitadv= | ||
|description= | |description= | ||
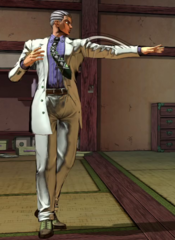
With his math skills, Kosaku alters the trajectory of an in-flight Impact Ignition Bomb | With his math skills, Kosaku alters the trajectory of an in-flight Impact Ignition Bomb. | ||
*Bubbles that have their trajectory changed will move towards the opponent; the movement pattern is determined by the bubble's own path. | *Bubbles that have their trajectory changed will move towards the opponent; the movement pattern is determined by the bubble's own path. | ||
*Changing a bubble's trajectory decreases its size, but increases its speed slightly. | *Changing a bubble's trajectory decreases its size, but increases its speed slightly. | ||
*Can be used up to three times before the bubble is locked on to its current trajectory. | |||
*Can be cancelled into special moves, except into itself. | |||
**If canceled into "I'll have to fight it out!", the bubble will still remain on-screen while Kosaku is free to move. | |||
}} | }} | ||
}} | }} | ||
| Line 393: | Line 390: | ||
{{AttackData-ASBR | {{AttackData-ASBR | ||
|version=Light | |version=Light | ||
|damage= | |damage=100 (80, 20) | ||
|guard=Mid | |guard=Mid | ||
|startup= | |startup=36 | ||
|active= | |active= | ||
|recovery= | |recovery= | ||
|blockadv= | |blockadv= | ||
|hitadv= | |hitadv=KD | ||
|description= | |description= | ||
}} | }} | ||
| Line 405: | Line 402: | ||
|version=Medium | |version=Medium | ||
|header=no | |header=no | ||
|damage= | |damage=100 (80, 20) | ||
|guard=Mid | |guard=Mid | ||
|startup= | |startup=36 | ||
|active= | |active= | ||
|recovery= | |recovery= | ||
|blockadv= | |blockadv= | ||
|hitadv= | |hitadv=KD | ||
|description= | |description= | ||
}} | }} | ||
| Line 417: | Line 414: | ||
|version=Heavy | |version=Heavy | ||
|header=no | |header=no | ||
|damage= | |damage=100 (80, 20) | ||
|guard=Mid | |guard=Mid | ||
|startup= | |startup=36 | ||
|active= | |active= | ||
|recovery= | |recovery= | ||
|blockadv= | |blockadv= | ||
|hitadv= | |hitadv=KD | ||
|description= | |description= | ||
Kosaku summons Killer Queen, who places a stone that it has turned into a bomb onto the ground | Kosaku summons Killer Queen, who places a stone that it has turned into a bomb onto the ground. | ||
* | *The spot where Kosaku places the stone depends on the version used. | ||
* | *Launches on hit. | ||
* | **If the opponent is hit by the move while in a juggle state, the explosion causes knockback on hit. | ||
*Can hit OTG, and is capable of relaunching downed opponents. | |||
*Neither the stone nor the detonation are considered projectiles. | *Neither the stone nor the detonation are considered projectiles. | ||
*The stone will remain on the field for ~10 seconds before disengaging, but will disappear immediately if Kosaku is hit. | |||
**The explosion cannot be triggered by Kosaku stepping on the stone. | |||
---- | |||
'''L version:''' | |||
*Killer Queen places the stone right below Kosaku. | |||
---- | |||
'''M version:''' | |||
*Killer Queen places the stone in front of Kosaku. | |||
---- | |||
'''H version:''' | |||
*Killer Queen places the stone further away from Kosaku. | |||
}} | |||
}} | |||
====== <font style="visibility:hidden" size="0">623X</font> ====== | |||
{{MoveData | |||
|image=JJASBR_Kosaku_623X.png | |||
|caption= | |||
|name=Ignition | |||
|input=623L/M/H while a bomb is active | |||
|data= | |||
{{AttackData-ASBR | |||
|damage= | |||
|guard=Mid | |||
|startup=12 | |||
|active= | |||
|recovery= | |||
|blockadv=+2 | |||
|hitadv=KD | |||
|description= | |||
Kosaku summons Killer Queen, who detonates the current bomb. | |||
*Move performance is identical across all versions. | |||
*Can hit OTG. | |||
*Always launches the opponent away from Kosaku on hit, regardless of Kosaku's own position. | |||
*If used to detonate an application of "The First Bomb" within the same combo it was applied in, the move does not count as an input for the purposes of damage scaling. | |||
}} | }} | ||
}} | }} | ||
| Line 440: | Line 473: | ||
|image=JJASBR_Kosaku_Stand_5L.png | |image=JJASBR_Kosaku_Stand_5L.png | ||
|caption= | |caption= | ||
|name=5L | |name=s.5L | ||
|subtitle= | |subtitle= | ||
|data= | |data= | ||
| Line 446: | Line 479: | ||
|damage=14 | |damage=14 | ||
|guard=Mid | |guard=Mid | ||
|startup= | |startup=4 | ||
|active= | |active= | ||
|recovery= | |recovery= | ||
|blockadv= | |blockadv=-2 | ||
|hitadv= | |hitadv= | ||
|description= | |description= | ||
Killer Queen performs a jab. | Killer Queen performs a jab. | ||
*Standard jab, good for stopping dash jumps. | *Standard jab, good for stopping dash-jumps. | ||
}} | }} | ||
}} | }} | ||
| Line 461: | Line 494: | ||
|image=JJASBR_Kosaku_Stand_5M.png | |image=JJASBR_Kosaku_Stand_5M.png | ||
|caption= | |caption= | ||
|name=5M | |name=s.5M | ||
|subtitle= | |subtitle= | ||
|data= | |data= | ||
| Line 467: | Line 500: | ||
|damage=23 | |damage=23 | ||
|guard=Mid | |guard=Mid | ||
|startup= | |startup=10 | ||
|active= | |active= | ||
|recovery= | |recovery= | ||
|blockadv= | |blockadv=-2 | ||
|hitadv= | |hitadv= | ||
|description= | |description= | ||
| Line 482: | Line 515: | ||
|image=JJASBR_Kosaku_Stand_5H.png | |image=JJASBR_Kosaku_Stand_5H.png | ||
|caption= | |caption= | ||
|name=5H | |name=s.5H | ||
|subtitle= | |subtitle= | ||
|data= | |data= | ||
| Line 488: | Line 521: | ||
|damage=52 (12, 40) | |damage=52 (12, 40) | ||
|guard=Mid | |guard=Mid | ||
|startup= | |startup=12 | ||
|active= | |active= | ||
|recovery= | |recovery= | ||
|blockadv= | |blockadv=-2 | ||
|hitadv= | |hitadv= | ||
|description= | |description= | ||
| Line 504: | Line 537: | ||
|image=JJASBR_Kosaku_Stand_2L.png | |image=JJASBR_Kosaku_Stand_2L.png | ||
|caption= | |caption= | ||
|name=2L | |name=s.2L | ||
|subtitle= | |subtitle= | ||
|data= | |data= | ||
| Line 510: | Line 543: | ||
|damage=13 | |damage=13 | ||
|guard=Low | |guard=Low | ||
|startup= | |startup=6 | ||
|active= | |active= | ||
|recovery= | |recovery= | ||
|blockadv= | |blockadv=0 | ||
|hitadv= | |hitadv= | ||
|description= | |description= | ||
Killer Queen performs a crouching jab. | Killer Queen performs a crouching jab. | ||
*Standard jab. | *Standard jab. | ||
}} | }} | ||
}} | }} | ||
| Line 526: | Line 558: | ||
|image=JJASBR_Kosaku_Stand_2M.png | |image=JJASBR_Kosaku_Stand_2M.png | ||
|caption= | |caption= | ||
|name=2M | |name=s.2M | ||
|subtitle= | |subtitle= | ||
|data= | |data= | ||
| Line 532: | Line 564: | ||
|damage=21 | |damage=21 | ||
|guard=Low | |guard=Low | ||
|startup= | |startup=6 | ||
|active= | |active= | ||
|recovery= | |recovery= | ||
|blockadv= | |blockadv=-4 | ||
|hitadv= | |hitadv= | ||
|description= | |description= | ||
| Line 547: | Line 579: | ||
|image=JJASBR_Kosaku_Stand_2H.png | |image=JJASBR_Kosaku_Stand_2H.png | ||
|caption= | |caption= | ||
|name=2H | |name=s.2H | ||
|subtitle= | |subtitle= | ||
|data= | |data= | ||
| Line 553: | Line 585: | ||
|damage=34 | |damage=34 | ||
|guard=Low | |guard=Low | ||
|startup= | |startup=12 | ||
|active= | |active= | ||
|recovery= | |recovery= | ||
|blockadv= | |blockadv=-8 | ||
|hitadv= | |hitadv=HKD | ||
|description= | |description= | ||
Killer Queen performs a sweeping kick. | Killer Queen performs a sweeping kick. | ||
* | *Causes hard knockdown. | ||
*Good range for pokes. | *Good range for pokes and counter-pokes. | ||
}} | }} | ||
}} | }} | ||
| Line 569: | Line 601: | ||
|image=JJASBR_Kosaku_Stand_3M.png | |image=JJASBR_Kosaku_Stand_3M.png | ||
|caption= | |caption= | ||
|name=3M | |name=s.3M | ||
|subtitle=I'll crush you! | |subtitle=I'll crush you! | ||
|data= | |data= | ||
| Line 575: | Line 607: | ||
|damage=35 | |damage=35 | ||
|guard=Overhead | |guard=Overhead | ||
|startup= | |startup=22 | ||
|active= | |active= | ||
|recovery= | |recovery= | ||
|blockadv= | |blockadv=-8 | ||
|hitadv= | |hitadv=HKD | ||
|description= | |description= | ||
Killer Queen stomps down on the opponent. | Killer Queen stomps down on the opponent. | ||
*Launches on hit | *Launches on hit and causes hard knockdown. | ||
*Can hit OTG. | *Can hit OTG. | ||
}} | }} | ||
| Line 592: | Line 623: | ||
|image=JJASBR_Kosaku_Stand_Jump_L.png | |image=JJASBR_Kosaku_Stand_Jump_L.png | ||
|caption= | |caption= | ||
|name= | |name=s.jL | ||
|subtitle= | |subtitle= | ||
|data= | |data= | ||
| Line 598: | Line 629: | ||
|damage=17 | |damage=17 | ||
|guard=Overhead | |guard=Overhead | ||
|startup= | |startup=8 | ||
|active= | |active= | ||
|recovery= | |recovery= | ||
| Line 613: | Line 644: | ||
|image=JJASBR_Kosaku_Stand_Jump_M.png | |image=JJASBR_Kosaku_Stand_Jump_M.png | ||
|caption= | |caption= | ||
|name= | |name=s.jM | ||
|subtitle= | |subtitle= | ||
|data= | |data= | ||
| Line 619: | Line 650: | ||
|damage=26 | |damage=26 | ||
|guard=Overhead | |guard=Overhead | ||
|startup= | |startup=10 | ||
|active= | |active= | ||
|recovery= | |recovery= | ||
| Line 627: | Line 658: | ||
Killer Queen performs a kick downwards. | Killer Queen performs a kick downwards. | ||
*Good for jump-ins. | *Good for jump-ins. | ||
*Very active. | |||
}} | }} | ||
}} | }} | ||
| Line 636: | Line 668: | ||
|image2=JJASBR_Kosaku_Stand_Jump_H_(2).png | |image2=JJASBR_Kosaku_Stand_Jump_H_(2).png | ||
|caption2= | |caption2= | ||
|name= | |name=s.jH | ||
|subtitle= | |subtitle= | ||
|data= | |data= | ||
| Line 642: | Line 674: | ||
|damage=45 (15, 30) | |damage=45 (15, 30) | ||
|guard=Overhead | |guard=Overhead | ||
|startup= | |startup=14 | ||
|active= | |active= | ||
|recovery= | |recovery= | ||
| Line 648: | Line 680: | ||
|hitadv= | |hitadv= | ||
|description= | |description= | ||
Killer Queen | Killer Queen stabs downwards twice with its hands. | ||
*Good for jump-ins. | *Good for jump-ins. | ||
}} | }} | ||
| Line 659: | Line 691: | ||
|caption= | |caption= | ||
|name=The First Bomb | |name=The First Bomb | ||
|input=236L/M/H | |input=s.236L/M/H | ||
|data= | |data= | ||
{{AttackData-ASBR | {{AttackData-ASBR | ||
|version=Light | |version=Light | ||
|damage= | |damage=20 | ||
|guard=Mid | |guard=Mid | ||
|startup= | |startup=22 | ||
|active= | |active= | ||
|recovery= | |recovery= | ||
|blockadv= | |blockadv=-8 | ||
|hitadv= | |hitadv= | ||
|description= | |description= | ||
| Line 675: | Line 707: | ||
|version=Medium | |version=Medium | ||
|header=no | |header=no | ||
|damage= | |damage=20 | ||
|guard=Mid | |guard=Mid | ||
|startup= | |startup=30 | ||
|active= | |active= | ||
|recovery= | |recovery= | ||
|blockadv= | |blockadv=-8 | ||
|hitadv= | |hitadv= | ||
|description= | |description= | ||
| Line 687: | Line 719: | ||
|version=Heavy | |version=Heavy | ||
|header=no | |header=no | ||
|damage= | |damage=20 | ||
|guard=Mid | |||
|startup=38 | |||
|active= | |||
|recovery= | |||
|blockadv=-8 | |||
|hitadv= | |||
|description= | |||
}} | |||
{{AttackData-ASBR | |||
|version=Detonation | |||
|header=no | |||
|damage=90 (40, 50) | |||
|guard=Mid | |guard=Mid | ||
|startup= | |startup= | ||
| Line 693: | Line 737: | ||
|recovery= | |recovery= | ||
|blockadv= | |blockadv= | ||
|hitadv= | |hitadv=KD | ||
|description= | |description= | ||
Killer Queen performs | Killer Queen performs a downwards chop, turning the opponent into a bomb to detonate. | ||
* | *Killer Queen's movement distance changes depending on the version used. | ||
*Leaves grounded opponents standing. | |||
* | |||
*Stand Rush-compatible. | *Stand Rush-compatible. | ||
* | *Cannot be Flash Canceled. | ||
*On a successful hit, the opponent is turned into a bomb for 12 seconds. When the bomb is applied, the effect will stay on them even if Kosaku is hit (unless he is knocked down). | |||
**Can be directly chained into "[[JoJo's Bizarre Adventure: All-Star Battle R/Kosaku Kawajiri#Stand 623X|Ignition]]" on hit. | |||
---- | ---- | ||
'''L version:''' | '''L version:''' | ||
* | *Killer Queen remains near Kosaku. | ||
---- | ---- | ||
'''M version:''' | '''M version:''' | ||
* | *Killer Queen moves forward. | ||
---- | ---- | ||
'''H version:''' | '''H version:''' | ||
* | *Killer Queen moves forward more. | ||
}} | }} | ||
}} | }} | ||
| Line 742: | Line 763: | ||
|caption= | |caption= | ||
|name=Contact Bomb | |name=Contact Bomb | ||
|input=214L/M/H | |input=s.214L/M/H | ||
|data= | |data= | ||
{{AttackData-ASBR | {{AttackData-ASBR | ||
|version=Light | |version=Light | ||
|damage= | |damage=100 (40, 60) | ||
|guard=Mid | |guard=Mid | ||
|startup= | |startup=18 | ||
|active= | |active= | ||
|recovery= | |recovery= | ||
|blockadv= | |blockadv= | ||
|hitadv= | |hitadv=KD | ||
|description= | |description= | ||
}} | }} | ||
| Line 758: | Line 779: | ||
|version=Medium | |version=Medium | ||
|header=no | |header=no | ||
|damage= | |damage=100 (40, 60) | ||
|guard= | |guard=Mid | ||
|startup= | |startup=18 | ||
|active= | |active= | ||
|recovery= | |recovery= | ||
|blockadv= | |blockadv= | ||
|hitadv= | |hitadv=KD | ||
|description= | |description= | ||
}} | }} | ||
| Line 770: | Line 791: | ||
|version=Heavy | |version=Heavy | ||
|header=no | |header=no | ||
|damage= | |damage=100 (40, 60) | ||
|guard= | |guard=Mid | ||
|startup= | |startup=18 | ||
|active= | |active= | ||
|recovery= | |recovery= | ||
|blockadv= | |blockadv= | ||
|hitadv= | |hitadv=KD | ||
|description= | |description= | ||
Stray Cat launches an air bubble from inside Killer Queen | Stray Cat launches an air bubble from inside Killer Queen, who turns it into a contact-detonated bomb. | ||
* | *The bubble's travel speed changes depending on the version used. | ||
* | *Causes knockback on hit. | ||
*Stand Rush-compatible. | *Stand Rush-compatible. | ||
* | *Deals 50% worth of Guard Damage. | ||
*One of the only moves in the entire game that can be used only once per combo. | |||
---- | |||
'''L version:''' | |||
*Slowest version with the least recovery. | |||
*Recovers fast enough to allow Kosaku to run behind the bomb. | |||
---- | |||
'''M version:''' | |||
*Balanced startup and recovery. | |||
---- | |||
'''H version:''' | |||
*Fastest version with the most recovery. | |||
}} | }} | ||
}} | }} | ||
====== <font style="visibility:hidden" size="0">Guard 6X</font> ====== | ====== <font style="visibility:hidden" size="0">Stand 623X</font> ====== | ||
{{MoveData | |||
|image=JJASBR_Kosaku_Stand_623X.png | |||
|caption= | |||
|name=Ignition | |||
|input=s.623L/M/H while a bomb is active | |||
|data= | |||
{{AttackData-ASBR | |||
|damage= | |||
|guard=Mid | |||
|startup=12 | |||
|active= | |||
|recovery= | |||
|blockadv=+2 | |||
|hitadv=KD | |||
|description= | |||
Killer Queen detonates the current bomb. | |||
*Move performance is identical across all versions. | |||
*Can hit OTG. | |||
*Always launches the opponent away from Kosaku on hit, regardless of Kosaku's own position. | |||
*If "The First Bomb" is chained into this move within the same combo it was applied in, the move does not count as an input for the purposes of damage scaling. | |||
}} | |||
}} | |||
====== <font style="visibility:hidden" size="0">Stand Guard 6X</font> ====== | |||
{{MoveData | {{MoveData | ||
|image=JJASBR_Kosaku_Guard_6X.png | |image=JJASBR_Kosaku_Guard_6X.png | ||
|caption= | |caption= | ||
|name=Air Bomb Cushion | |name=Air Bomb Cushion | ||
|input=6+Any Two Attack Buttons while Guarding | |input=s.6+Any Two Attack Buttons while Guarding | ||
|data= | |data= | ||
{{AttackData-ASBR | {{AttackData-ASBR | ||
| Line 805: | Line 861: | ||
*Requires 0.5 HH Gauge. | *Requires 0.5 HH Gauge. | ||
*Staggers the opponent on hit. | *Staggers the opponent on hit. | ||
**Should an airborne opponent be hit by this move while at a sufficiently low altitude, they will experience a hard knockdown instead. | |||
}} | }} | ||
}} | }} | ||
| Line 824: | Line 881: | ||
|damage=120 | |damage=120 | ||
|guard=Throw | |guard=Throw | ||
|startup= | |startup=6 | ||
|active= | |active= | ||
|recovery= | |recovery= | ||
| Line 831: | Line 888: | ||
|description= | |description= | ||
Kosaku grabs the opponent before blowing them up. | Kosaku grabs the opponent before blowing them up. | ||
*Forward Throw leaves the opponent far away, gives Kosaku good frame advantage. | *Forward Throw leaves the opponent far away, and gives Kosaku good frame advantage. | ||
*Back Throw leaves the opponent closer to Kosaku, but gives him worse frame advantage than Forward Throw. | *Back Throw leaves the opponent closer to Kosaku, but gives him worse frame advantage than Forward Throw. | ||
}} | }} | ||
| Line 841: | Line 898: | ||
|caption= | |caption= | ||
|name=Assist | |name=Assist | ||
|subtitle=Contact Bomb | |subtitle=Contact Bomb<br>{{NotationIcon-ASBR|Assault}}{{NotationIcon-ASBR|Assault}}{{NotationIcon-ASBR|Assault}}{{NotationIcon-ASBR|Burst}} | ||
|data= | |data= | ||
{{AttackData-ASBR | {{AttackData-ASBR | ||
| Line 852: | Line 909: | ||
|hitadv= | |hitadv= | ||
|description= | |description= | ||
Kosaku summons Killer Queen, after which Stray Cat launches an air bubble from inside it that is turned into a bomb. | Kosaku summons Killer Queen, after which Stray Cat launches an air bubble from inside it that is turned into a contact-detonated bomb. | ||
*Assault Assist Stocks: | *Assault Assist Stocks: 3 | ||
*Reversal Assist Stocks: 1 | *Reversal Assist Stocks: 1 | ||
*Based on [[JoJo's Bizarre Adventure: All-Star Battle R/Kosaku Kawajiri#Stand 214X|s.214L]] | *Based on [[JoJo's Bizarre Adventure: All-Star Battle R/Kosaku Kawajiri#Stand 214X|s.214L]] | ||
*Launches on hit. | *Launches the opponent away on hit. | ||
*Can hurt (and kill) the point character. | *Can hurt (and kill) the point character, but not if the projectile explodes at point-blank range. | ||
*Unlike the original move, the Assist possesses normal IPS restrictions (allowing it to be used twice in a combo). | |||
}} | }} | ||
}} | }} | ||
| Line 871: | Line 929: | ||
|data= | |data= | ||
{{AttackData-ASBR | {{AttackData-ASBR | ||
|damage= | |damage= | ||
|guard= | |guard= | ||
|startup= | |startup= | ||
|active= | |active= | ||
|recovery= | |recovery=Total XX | ||
|blockadv= | |blockadv= | ||
|hitadv= | |hitadv= | ||
| Line 897: | Line 955: | ||
|damage=220 (60+160) | |damage=220 (60+160) | ||
|guard= | |guard= | ||
|startup= | |startup=2 | ||
|active=160 | |active=160 | ||
|recovery=60 | |recovery=60 | ||
| Line 903: | Line 961: | ||
|hitadv= | |hitadv= | ||
|description= | |description= | ||
Stray Cat creates an air bubble in front of Killer Queen that, when hit, | Stray Cat creates an air bubble in front of Killer Queen that, when hit, pushes the opponent back before launching another bubble that Killer Queen detonates as a bomb. | ||
*A counter, and one of Kosaku's few anti-air options. | *A counter, and one of Kosaku's few anti-air options. | ||
*Launches the opponent away and causes hard knockdown on a successful activation. | |||
*Always leaves Kosaku at the center of the stage after the cutscene. | |||
*Hits do not combo during the animation, but it cannot be escaped once activated. | *Hits do not combo during the animation, but it cannot be escaped once activated. | ||
}} | }} | ||
}} | }} | ||
| Line 924: | Line 983: | ||
|damage=252 (12+240) | |damage=252 (12+240) | ||
|guard=Unblockable | |guard=Unblockable | ||
|startup= | |startup=2+40 | ||
|active= | |active= | ||
|recovery=90 | |recovery=90 | ||
| Line 930: | Line 989: | ||
|hitadv=0 | |hitadv=0 | ||
|description= | |description= | ||
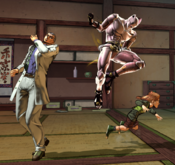
Kosaku pushes Hayato Kawajiri, the son of Kira's stolen identity, towards the opponent. When he bumps into them, Killer Queen comes out from within his eye and travels into the opponent's own eye, detonating them from inside and rewinding time | Kosaku pushes Hayato Kawajiri, the son of Kira's stolen identity, towards the opponent. When he bumps into them, Killer Queen comes out from within his eye and travels into the opponent's own eye, detonating them from inside and rewinding time afterwards. | ||
* | *''The'' lowest damaging GHA in the entire game. | ||
*Hayato, despite trying to run away from Kosaku, does not run very far or very fast. | *Hayato, despite trying to run away from Kosaku, does not run very far or very fast. | ||
*If Bites The Dust successfully lands, the timer gets rewinded by 10 seconds and both characters are returned to round start positions. In addition, the following statuses will be reversed: | *If Bites The Dust successfully lands, the timer gets rewinded by 10 seconds, Kosaku regenerates 200 health (regardless of GHA LV damage boost), and both characters are returned to round start positions. In addition, the following statuses will be reversed: | ||
**Installs ( | **Installs ([[JoJo's Bizarre Adventure: All-Star Battle R/Giorno Giovanna#Gold Experience Requiem|Gold Experience Requiem]], [[JoJo's Bizarre Adventure: All-Star Battle R/Diavolo#Heart Heat Attack|Epitaph]], [[JoJo's Bizarre Adventure: All-Star Battle R/Enrico Pucci (Final)#Made in Heaven Mode|Made in Heaven Mode]], etc.) | ||
**Evolutions (Kars | **Evolutions ([[JoJo's Bizarre Adventure: All-Star Battle R/Kars#Ultimate Life Form|Ultimate Life Form]], [[JoJo's Bizarre Adventure: All-Star Battle R/Enrico Pucci (Final)#C-MOON|C-MOON]], [[JoJo's Bizarre Adventure: All-Star Battle R/Johnny Joestar#Tusk's Growth|Tusk's Growth]], etc.) | ||
**Destroyed HH Gauges (Jonathan, Stroheim, Yukako, Valentine) | **Destroyed HH Gauges ([[JoJo's Bizarre Adventure: All-Star Battle R/Jonathan Joestar#22LMH|Jonathan]], [[JoJo's Bizarre Adventure: All-Star Battle R/Rudol von Stroheim#HMG 22S|Stroheim]], [[JoJo's Bizarre Adventure: All-Star Battle R/Yukako Yamagishi#My precious hair! It's turned completely white!|Yukako]], [[JoJo's Bizarre Adventure: All-Star Battle R/Funny Valentine#214LMH|Valentine]]) | ||
**Character-specific resources ( | **Character-specific resources ([[JoJo's Bizarre Adventure: All-Star Battle R/Mariah#The magnetic force will just keep on increasing...|Magnetization Gauge]], [[JoJo's Bizarre Adventure: All-Star Battle R/Prosciutto & Pesci#Aging Gauge|Aging Gauge]], [[JoJo's Bizarre Adventure: All-Star Battle R/Enrico Pucci (Final)#The Green Baby Gauge|The Green Baby Gauge]], [[JoJo's Bizarre Adventure: All-Star Battle R/Johnny Joestar#Holy Corpse|collection]] [[JoJo's Bizarre Adventure: All-Star Battle R/Gyro Zeppeli#Holy Corpse|of]] [[JoJo's Bizarre Adventure: All-Star Battle R/Diego Brando#Holy Corpse|Holy]] [[JoJo's Bizarre Adventure: All-Star Battle R/Alternate World Diego#Holy Corpse|Corpse]] [[JoJo's Bizarre Adventure: All-Star Battle R/Funny Valentine#Holy Corpse|parts]], etc.) | ||
}} | }} | ||
}} | }} | ||
| Line 943: | Line 1,002: | ||
==Costumes== | ==Costumes== | ||
===Normal=== | ===Normal=== | ||
{{ColorGallery | filePrefix=JJASBR_Kosaku_Color_ | imageFileTypes=png| imageWidths= | {{ColorGallery | filePrefix=JJASBR_Kosaku_Color_ | imageFileTypes=png| imageWidths=250 | colors= | ||
{{ColorGallery/Color|1| text=Normal (Color 1) }} | {{ColorGallery/Color|1| text=Normal (Color 1) }} | ||
{{ColorGallery/Color|2| text=Normal (Color 2) }} | {{ColorGallery/Color|2| text=Normal (Color 2) }} | ||
| Line 951: | Line 1,010: | ||
===Special=== | ===Special=== | ||
{{ColorGallery | filePrefix=JJASBR_Kosaku_Color_ | imageFileTypes=png| imageWidths= | {{ColorGallery | filePrefix=JJASBR_Kosaku_Color_ | imageFileTypes=png| imageWidths=250 | colors= | ||
{{ColorGallery/Color|Special A 1| text=Special A (Color 1) }} | {{ColorGallery/Color|Special A 1| text=Special A (Color 1) }} | ||
{{ColorGallery/Color|Special A 2| text=Special A (Color 2) }} | {{ColorGallery/Color|Special A 2| text=Special A (Color 2) }} | ||
| Line 957: | Line 1,016: | ||
{{ColorGallery/Color|Special B 2| text=Special B (Color 2) }} | {{ColorGallery/Color|Special B 2| text=Special B (Color 2) }} | ||
}} | }} | ||
===Stand=== | |||
{{ColorGallery | filePrefix=JJASBR_Kosaku_Color_ | imageFileTypes=png| imageWidths=250 | colors= | |||
{{ColorGallery/Color|Stand 1| text={{Tooltip|color=purple|text=Killer Queen / Stray Cat (Color 1)|hovertext=Used for odd-numbered colors.}} }} | |||
{{ColorGallery/Color|Stand 2| text={{Tooltip|color=purple|text=Killer Queen / Stray Cat (Color 2)|hovertext=Used for even-numbered colors.}} }} | |||
}} | |||
==Notable Players== | |||
:{{Template:PlayerListDisclaimer}} | |||
{| class="wikitable" style="text-align:center;" | |||
!width="95"|Name | |||
!width="90"|Usual Color | |||
!width="125"|Region | |||
!Contact | |||
!Example Play | |||
|- | |||
|팬텀 (Phantom) | |||
|[[File:JJASBR Kosaku Color Special A 2.png|200x200px|Special A (Color 2)]] | |||
|[[File:Flag_kr.png]]<br>South Korea | |||
|Unavailable | |||
|[https://www.youtube.com/live/n5wnWuW9i6Y?t=13074s Tournament Footage]<br>[https://www.youtube.com/channel/UCRvp72r2DdbaEMoEr2oeUEA YouTube Channel] | |||
|} | |||
==Navigation== | ==Navigation== | ||
Latest revision as of 03:33, 21 May 2024
Introduction
- This article is about Yoshikage Kira's second incarnation, primarily known as "Kosaku". For information about his original incarnation, see Yoshikage Kira.
Kosaku Kawajiri is a character in the fourth part of JoJo's Bizarre Adventure, Diamond is Unbreakable. Intent with preserving his quiet lifestyle at all costs, Yoshikage Kira (the main antagonist of the part) steals the identity of this man with the goal of concealing his own.
While inheriting Killer Queen from his previous form, Kosaku is a very different character despite the similarities; he is a sluggish powerhouse capable of dealing some of the highest damage in the game, with a strong emphasis on inflicting Guard Breaks to his opponents that lead into explosive combos. Both Stand Off and Stand On give him a toolbox of options to work with, with the latter being the scarier one of the two as this is where his Guard Breaks will usually be coming from. With all of this together, Kosaku is one of the most terrifying characters in the game, blowing his opponent to smithereens for making even the smallest mistake against him.
- Only one bomb at a time: If bomb-related special moves are used in succession, the previous bomb will be nullified. In addition, the explosions generated by Kosaku's special moves can damage (and kill) him.
- Air Bomb Cushion: While in Stand On, Kosaku has access to a pushblock for the cost of 0.5 HH Gauge.
|
|
|
| Pros | Cons |
|
|
Stats
| Style | Health | Low Health Mode | Hashtag(s) |
|---|---|---|---|
| Stand | 900 | Rumble | #ASBR_KOS #ASBR_KAW |
Move List
Stand Off
Normal Moves
5L
5L
|
|---|
5M
5M
|
|---|
5H
5H
|
|---|
2L
2L
|
|---|
2M
2M
|
|---|
2H
2H
|
|---|
JL
j.L
|
|---|
JM
j.M
|
|---|
JH
j.H
|
|---|
Special Moves
236X
I'll have to fight it out!
236L/M/H |
|---|
214X
Impact Ignition Bomb 214L/M/H Light Light Medium Medium Heavy Heavy
|
|---|
214X-XX
Trajectory Change
Any Two Attack Buttons during Impact Ignition Bomb |
|---|
22X
This stone is a bomb!
22L/M/H |
|---|
623X
Ignition
623L/M/H while a bomb is active |
|---|
Stand On
Normal Moves
Stand 5L
s.5L
|
|---|
Stand 5M
s.5M
|
|---|
Stand 5H
s.5H
|
|---|
Stand 2L
s.2L
|
|---|
Stand 2M
s.2M
|
|---|
Stand 2H
s.2H
|
|---|
Stand 3M
s.3M
I'll crush you! |
|---|
Stand JL
s.jL
|
|---|
Stand JM
s.jM
|
|---|
Stand JH
s.jH
|
|---|
Special Moves
Stand 236X
The First Bomb
s.236L/M/H |
|---|
Stand 214X
Contact Bomb
s.214L/M/H |
|---|
Stand 623X
Ignition
s.623L/M/H while a bomb is active |
|---|
Stand Guard 6X
Air Bomb Cushion
s.6+Any Two Attack Buttons while Guarding |
|---|
System Mechanics
Throw
Throw Can I ask your name? 5/4 + Any Two Attack Buttons Forward Forward Back Back
|
|---|
Assist
Assist
Contact Bomb |
|---|
5S
Stand On/Off 5S Stand On Stand On Stand Off Stand Off
|
|---|
Heart Heat Attack
Stray Cat's protecting me now!
236 + Any Two Attack Buttons |
|---|
Great Heat Attack
Bites The Dust 236L+M+H And another one gone And another one gone And another one gone And another one gone Another one bites the dust Another one bites the dust
|
|---|
Costumes
Normal
Special
Stand
Notable Players
- Disclaimer: This list is derived from community input and is in no way comprehensive or a form of ranking of any kind. Our community criteria can be found here.
| Name | Usual Color | Region | Contact | Example Play |
|---|---|---|---|---|
| 팬텀 (Phantom) | South Korea |
Unavailable | Tournament Footage YouTube Channel |
