Melty Blood/MBTL/Kouma Kishima: Difference between revisions
(→Crushing Blow: small correction) |
No edit summary |
||
| Line 27: | Line 27: | ||
{{Content Box|content= | {{Content Box|content= | ||
<center><youtube>https://youtu.be/MU4BCq07XVo</youtube></center> | <center><youtube>https://youtu.be/MU4BCq07XVo</youtube></center> | ||
}} | |||
{{Content Box|content= | |||
<center>HP Value: - | |||
Backdash: - | |||
Movement Speed: -</center> | |||
}} | }} | ||
}} | }} | ||
Revision as of 02:24, 19 August 2022
Story
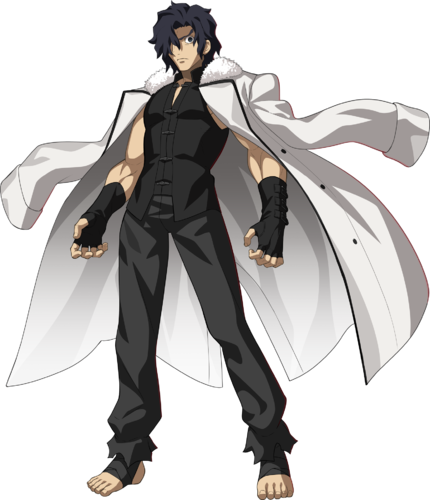
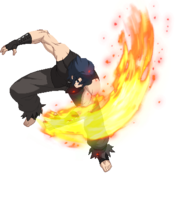
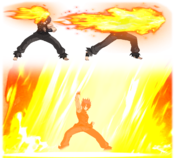
Head of the Kishima clan, a branch of the Tohno family. He is half demon. Even among mixed-bloods, his demon blood is strong, making him only barely human. Usually very quiet, he chooses to live as a hermit in a remote area of the mountains where he seeks to achieve spiritual enlightenment. Because of this, he often speaks of worldly ties and spirituality. His demeanor in battle, however, reflects his innate strength and demon blood. His ability to use Scorching Heat means those in his way are often burned to ash.
Gameplay
Kouma is a grounded brawler/grappler with an armor gimmick who plays a close-ranged punish game.
He is a hard-hitting character who boasts many options when he's up close to the opponent, from 2 command grabs (one fast, one delayed) to scare overly defensive opponents, a meterless DP reversal, Double Comet, that can be used while airborne, and various armored normals and specials that allow him to take hits and still lands punishes in ways most other characters can only dream of.
His air game, on the other hand, is quite limited; he has slow air-dashes, he can't chain his air normal attacks together, and he loses his air options after whiffing a j.A. With no reliable ranged tools, he has to stay mostly on the ground and fish for the opponent's mistakes in neutral in order to approach. Thankfully, he has many ways to convert stray hits into knockdown/corner carry thanks to his vast array of ground-bounce specials and Moon Skills at his disposal. His damage output per hit is also top-notch, turning the tide of battle on a good read with an explosive combo.
Aspiring Kouma players who take the time to learn his matchups and the fighting game concept of conditioning will be richly rewarded.
| Strengths | Weaknesses |
|---|---|
|
|
Backdash: -
Movement Speed: -Character Summary
- Moon Skill
- 6B+C - Triple Comet
- 3B+C - Double Comet
- 4B+C - Crushing Blow
- 2B+C - Godly Armor
- j.6B+C - Double Comet
- Special Attacks
- 236A/B/C (EX OK) - Triple Comet
- > A/B/C - Additional input 1
- > 4A/B/C - Additional input 2
- > A/B/C - Additional input 3
- > 4A/B/C - Additional input 4
- 623A/B/C (EX OK) - Double Comet
- > A/B/C - Additional input 1
- 214A/B/C (EX OK) - Crushing Blow
- > 4A/B/C - Crushing Blow - Wandering Monk
- > 236C/214C (EX-Only) - Unicorn - Purifying Flame
- 22A/B/C (EX OK) - Godly Armor
- j.236A/B/C (EX OK) - Double Comet
- > A/B/C - Additional input
- Arc Drive
- 236B+C - Unicorn - Flame Waltz
- Last Arc
- A+B+C+D / D in Blood Heat - Judgement of Yama
- Unique Attacks
- 3C
- Blowback Edge Moves
- 5[C], 2[C], j.[C]
Dash startup: 7
Dash actionable: 9
Jump startup: 5
Jump airtime: 37
2A Universal BnB: 2A > 2C > 5C > 5B > 236A~A~A, 2B > 2C > 5CC > 214A
Basic Shield Counter combo: D > A > jB > j6BC, land 2A > 5CCC > 214A
Basic 2B Anti-Air combo: 2B > dl.5B > dl.5C > dl.236BBB > Ender
Move Analysis
Normal Moves
Standing Normals
5A
| Damage | Guard | Cancel | Property | Cost | Attribute |
|---|---|---|---|---|---|
| 190 | LH | N, SP, EX, MD | - | - | Whiff OK |
| First Active | Active | Recovery | Overall | Advantage | Invul |
| 5 | 2 | 11 | 17 | -1 | - |
Kouma's fastest normal together with 2A. Due to the nature of Rebeat, you'll be spending a lot of time canceling back into this normal for better frame advantage in blockstrings.
While most of the time you'll be using 2A due to it sharing the same framedata, 5A has a few of strengths on it's own. It's high hitbox and speed lets you hit the opponent out of the air where other normals won't hit, and it deals marginally better damage than 2A making it more optimal for Punishes. Of course it's also a prime normal to tick throw with, and with proper conditioning it can make your opponent (quite literally) jumpy which opens them up to Lows and other options.
- Whiff cancels available from frame 10 onwards (frame 10 is the first frame of the whiff cancelled move).
5B
| Damage | Guard | Cancel | Property | Cost | Attribute |
|---|---|---|---|---|---|
| 510 | LH | N, SP, EX, MD | - | - | - |
| First Active | Active | Recovery | Overall | Advantage | Invul |
| 11 | 4 | 17 | 31 | -6 | - |
Relatively slow, forward moving normal. Even at max range will connect into 5C and 2C for pressure or hitconfirms. True blockstring from A normals, with just a slight delay becomes a frametrap.
Combo material, as it deals good damage and it moving forward makes it useful in Rekka juggles for spacing and height.5C
| Damage | Guard | Cancel | Property | Cost | Attribute |
|---|---|---|---|---|---|
| 680 | LH | N, SP, EX, MD | - | - | - |
| First Active | Active | Recovery | Overall | Advantage | Invul |
| 9 ~ 19 | 8 | 22 | 38 ~ 48 | -13 | - |
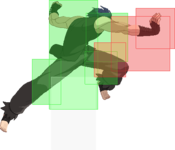
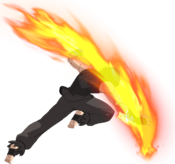
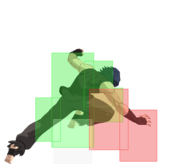
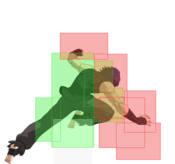
Fast, forward moving normal. Faster than 5B and longer reach, but higher recovery. At max distance, Reverse Beating into 5B won't connect, but 2C does. VERY long active frames, which allows for an easy emergency meaty or punishing backdashes in re-beat situations (i.e. 5B > 5A > delay 5C).
Good normal for damage in Punishes, and a big hitbox making it consistent in combos. Due to the high recovery, poking is risky and it's very negative on block.
| Damage | Guard | Cancel | Property | Cost | Attribute |
|---|---|---|---|---|---|
| 1767 | U | - | WB, SK | - | - |
| First Active | Active | Recovery | Overall | Advantage | Invul |
| 28 | 4 | 26 | 57 | N/A | 18-28 Armor |
- Can be Shielded standing (5D)
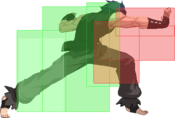
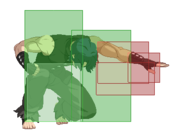
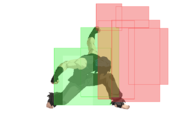
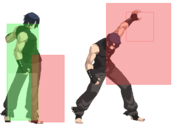
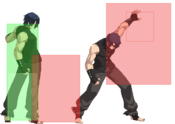
Charged 5C is an unblockable hitgrab with Armor. The start-up is significantly longer, and when it connects it throws the opponent a long distance behind Kouma into a techable Knockdown. If Kouma's back is to the wall, it's possible to get a combo, but it is range specific. Can still catch backdashes, albeit with different setups. Mashing and meterless reversals are also rather ineffective against this move due to the armor.
Can act as a knowledge check when used as a meaty against people waking up since blocking, jumping, low shield, any non-invincible button and even heat activation when spaced correctly will lose against it.
Due to it throwing the opponent away from Kouma with no chance of a follow-up, it's a rather gimmicky move, but still useful for checking your opponent's reactions and closing out rounds.Crouching Normals
2A
| Damage | Guard | Cancel | Property | Cost | Attribute |
|---|---|---|---|---|---|
| 180 | L | N, SP, EX, MD | - | - | Whiff OK |
| First Active | Active | Recovery | Overall | Advantage | Invul |
| 5 | 2 | 11 | 17 | -1 | - |
Kouma's fastest normal together with 5A. Same deal with 5A, Rebeating into this normal to improve frame advantage. Can be done 3 times in a row before it goes into Rapid.
Having access to a fast repeatable Low is quite a blessing for a Grappler as the opponent is naturally inclined to try and jump or backdash out of pressure, both of which requires them to stop holding down. 2A is only -1 on block, which lets Kouma threaten with pressure resets and tick throws. Even if multiple 2As are used as a hit confirm, Kouma's combos are incredibly consistent and will work regardless.
- Whiff cancels available from frame 10 onwards (frame 10 is the first frame of the whiff cancelled move).
2B
| Damage | Guard | Cancel | Property | Cost | Attribute |
|---|---|---|---|---|---|
| 460 | LH | N, SP, EX, MD | - | - | - |
| First Active | Active | Recovery | Overall | Advantage | Invul |
| 7 | 4 | 16 | 26 | -5 | Air 5-10 |
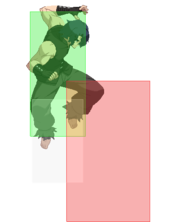
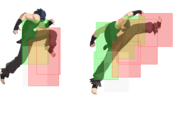
A fast Anti-Air and useful combo tool. Strong hitbox, but doesn't cover directly above Kouma leaving him open to cross-ups and approaches from that angle. Generally one of Kouma's best normals.
Has numerous uses, but most notable as an alternative to 3C as it is faster, safer on whiff and block, grants greater reward on hit, and has a strong hitbox to hurtbox ratio. On top of being really strong at shutting down air approaches, it's also useful in combos as a filler to move the opponent upwards to optimal Rekka height and being able to pick up the opponent after such combos into his 214A ender.2C
| Damage | Guard | Cancel | Property | Cost | Attribute |
|---|---|---|---|---|---|
| 680 | L | N, SP, EX, MD | HK, L | - | - |
| First Active | Active | Recovery | Overall | Advantage | Invul |
| 10 ~ 16 | 5 | 21 | 35 ~ 41 | -9 | - |
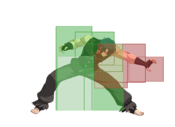
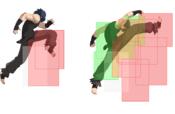
A fast, forward moving sweep. At max range connects to 5B and 5C on hit, but not 5B on block. Also inexplicably has a hitbox that can hit behind himself. Very nice for footsies, and all rebeats whiffs to 5A/2A from this button are -1, but still mind the recovery on whiff and low hitbox.
Also incredibly good for catching backdashes in pressure due to its range, and in such a situation it can still go into a full combo easily.
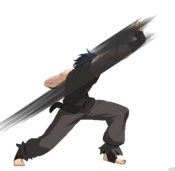
Kouma's primary combo tool. Launches the opponent and sets up for both Rekka and IAD combos.
| Damage | Guard | Cancel | Property | Cost | Attribute |
|---|---|---|---|---|---|
| 1000 | L | N, SP, EX, MD | HK, L | - | - |
| First Active | Active | Recovery | Overall | Advantage | Invul |
| 24 | 6 | 18 | 47 | -7 | 15-24 Armor |
- Moves Kouma forward further than 2C
Charged 2C has armor, increased range, and damage at the cost of significantly longer start-up. Still retains the reverse hitbox.
A slow but powerful low. Can be used to catch people in neutral by brute forcing your way in and to tech chase. When paired with the threat of IAD it becomes more potent, just be careful about whiffing the move and take care so the opponent doesn't Shield it.Jumping Normals
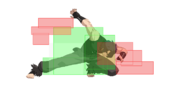
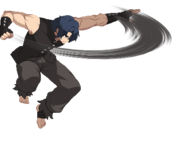
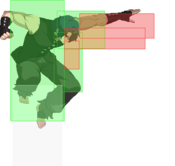
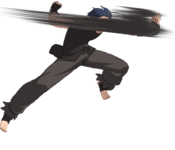
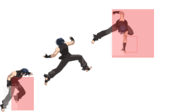
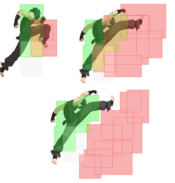
Kouma's Air normals can not be chained together. Any Attack Button after the initial one will result in Air Throw. It's possible for the Air Throw to whiff due to Kouma's Air Normals having longer range and hitting higher than the Air Throw Range. Additionally, he cannot jump cancel any of his air normals. Because of his inability to create air blockstrings and hitconfirms, he can't really threaten the opponent the same way other characters can and will be forced to either just take the air throw ender, commit to j.6B+C, or rely on getting air Counter Hits. Despite this, Kouma has access to some strong Air Normals to poke with or create a wall of Hitboxes to make it difficult to go through.
j.A
| Damage | Guard | Cancel | Property | Cost | Attribute |
|---|---|---|---|---|---|
| 370 | HA | SP, EX, MD, TH | - | - | - |
| First Active | Active | Recovery | Overall | Advantage | Invul |
| 5 | 4 | 20 | 28 | - | - |
Fastest air normal. Long range for an A normal with an upwards facing hitbox. As Kouma's fastest normal with good range, it's his best way to snipe an opponents above him. Has a tendency to whiff on crouchers unless performed very late into a jump or IAD.
Can also be used when you intentionally don't want the opponent to be stuck in Blockstun for too long. A common strategy against Grapplers, especially in games with plenty of Throw Invul after Blockstun and Knockdown, is to block for a few frames and then commit to a reversal or escape option while in Blockstun. This lets them relatively safely block a Hit coming in while at the same time letting them either punish or avoid Throws. So a good way to deal with this is vary up the timing as much as possible to throw them off.
This is where j.A and the like come in. After IADs, Safe Jumps, or Oki by mixing up what normals you use the opponent will have a much harder time setting up a response to your Offense.j.B
| Damage | Guard | Cancel | Property | Cost | Attribute |
|---|---|---|---|---|---|
| 510 | HA | SP, EX, MD, TH | - | - | - |
| First Active | Active | Recovery | Overall | Advantage | Invul |
| 6 | 6 | 24 | 35 | - | - |
j.C
| Damage | Guard | Cancel | Property | Cost | Attribute |
|---|---|---|---|---|---|
| 650 | HA | SP, EX, MD, TH | - | - | - |
| First Active | Active | Recovery | Overall | Advantage | Invul |
| 11 ~ 17 | 6 | 22 | 38 ~ 44 | - | - |
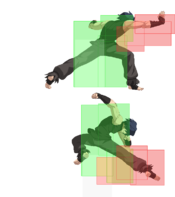
Slow and large air normal. Hitbox reaching downwards. Kouma's proper jump-in normal and IAD air normal.
As Kouma's biggest air normal, it commands a lot of presence when paired with j.[C], and smart use of both will let Kouma have a rather basic but powerful air approach.
| Damage | Guard | Cancel | Property | Cost | Attribute |
|---|---|---|---|---|---|
| 1300 | HA | SP, EX, MD, TH | GB, L | - | - |
| First Active | Active | Recovery | Overall | Advantage | Invul |
| 20 | 6 | 22 | 47 | - | 15-20 Armor |
- Ground Bounces
Charged j.C has armor, increased range, and damage at the cost of significantly longer start-up.
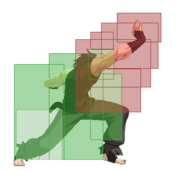
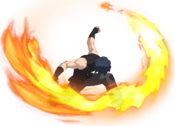
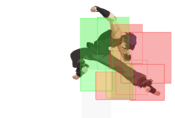
The big one, the Online Special. Kouma can seemingly force himself in through just about everything with this move thanks to the large hitbox and armor. On hit it launches the opponent for big damage without consuming his Ground Bounce. However, keep in mind that the Armor takes a while to begin and during that time Kouma is completely open to be attacked. On top of that EX Moves, Shield, and Air Throw will completely beat the armor. It being a Charge normal also lets you pull off some sneaky attacks. You can intentionally do a fake out by charging the move and landing before it hits, such as after an IAD. If the opponent is conditioned to block the move or retaliate with a Shield, it leaves them open to be grabbed or hit by Lows.
By properly mixing it up with j.C and other normals it can be become quite difficult to safely stop Kouma, forcing the opponent to take bigger reads against him.Command Normals
3C
| Damage | Guard | Cancel | Property | Cost | Attribute |
|---|---|---|---|---|---|
| 780 | LH | - | LR | - | - |
| First Active | Active | Recovery | Overall | Advantage | Invul |
| 10 | 3 | 24 | 36 | -10 | Air 5-12 |
- Slightly lower hurtbox on frames 7-11
- Has some head invulnerability
Generic Launcher, special cancelable on block.
Important in specific long combos where the opponent drops out of the Rapid launcher. Even in high hitstun decay, it will connect after 2C and 5C for optimal damage. Keep in mind that due to Kouma's lack of air combos and no real air combo ender outside Air Throw, his oki options afterward will be limited.Universal Mechanics
Rapid Beat 2
Ground Bounces R Us
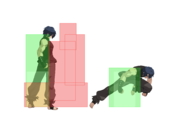
The first hit of Rapid Beat performed by pressing an attack button you have already used in the current string. Ground bounces the opponent on both ground or air hit. Inputting any normal after this move will perform the launcher ender. Has a high hitbox.
Primarily combo filler to confirm into 214A, but due to launching the opponent it's possible to get midscreen Rekka confirms off it.Rapid Beat 3
Last hit of Rapid. Same animation as 3C.
In high hitstun decay, it won't reliably connect after Rapid 2 unless it hits high up. Generally, Kouma doesn't have much use for this launcher except in certain optimal damage combos.Ground Throw
| Damage | Guard | Cancel | Property | Cost | Attribute |
|---|---|---|---|---|---|
| 1500/1875 | N/A | - | HK | - | - |
| First Active | Active | Recovery | Overall | Advantage | Invul |
| 4 | 3 | 19 | 25 | +55 | - |
Generic normal throw. Drops the opponent in front and close to Kouma.
Due to having access to multiple Command Grabs with greater reward, Kouma generally doesn't see much use out of his Throw. It's however less committal than the Grabs, slightly faster, and the short auto run it does ensures that it will reliably connect, making it a safe option for when you're not sure if the opponent will jump or not.Air Throw
| Damage | Guard | Cancel | Property | Cost | Attribute |
|---|---|---|---|---|---|
| 1200 | U | - | HK | - | - |
| First Active | Active | Recovery | Overall | Advantage | Invul |
| 1 | 3 | - | - | - | - |
- Does more damage when performed raw
Standard Melty Air Throw. Throws the opponent straight down while Kouma gets launch backwards a bit. The lower to the ground it connects, the better frame advantage Kouma gets afterwards.
Universal air combo ender. Deals good damage, but poor oki afterwards.Special Moves
Triple Comet
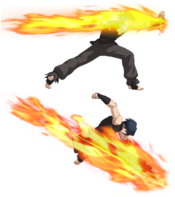
Kouma's Rekka series. His primary combo tool. Proper use of Triple Comet will let Kouma deal high damage and loop back to his preferred combo ender of choice. The different versions of Triple Comet are mostly the same with the largest difference being the length they travel, with some small changes to frame data. Most combos use one of the two version depending on range and timing, and such things will be detailed in the combo section. The entire Rekka, regardless of what version is used, can be a true blockstring.
| Damage | Guard | Cancel | Property | Cost | Attribute |
|---|---|---|---|---|---|
| 1000 | LH | EX, MD | - | - | - |
| First Active | Active | Recovery | Overall | Advantage | Invul |
| 10 | 4 | 22 | 35 | -7 | - |
- Press any button with the stick in neutral or while holding 4 up to two more times to continue the rekka series.
Your average rekka. Kouma uses these for some mild midscreen control and pressure extension.
This rekka starter will most likely be the one you'll be using most of the time in combos. Combos cleanly from all of Kouma's normals on both standing and airborne hit.
| Damage | Guard | Cancel | Property | Cost | Attribute |
|---|---|---|---|---|---|
| 1000 | LH | EX, MD | - | - | - |
| First Active | Active | Recovery | Overall | Advantage | Invul |
| 11 ~ 18 | 4 | 22 | 36 ~ 43 | -7 | - |
- B Rekka starter. Minutely slower than the A version, and it travels further.
The increased travel allows it extend combos at ranges where 236A~X~X will not.
| Damage | Guard | Cancel | Property | Cost | Attribute |
|---|---|---|---|---|---|
| 1000 | LH | EX, MD | - | - | - |
| First Active | Active | Recovery | Overall | Advantage | Invul |
| 11 | 3 | 25 | 38 | -9 | - |
- Rekka extender. No difference depending on what button is pressed. Not very special, unique use is for frametrapping after the rekka starter is blocked.
| Damage | Guard | Cancel | Property | Cost | Attribute |
|---|---|---|---|---|---|
| 1000 | LH | EX, MD | - | - | - |
| First Active | Active | Recovery | Overall | Advantage | Invul |
| 11 | 3 | 23 | 36 | -7 | - |
- Rekka extender. No difference depending on what button is pressed. Same as 236X~X, except travels less distance and better frame data on block.
| Damage | Guard | Cancel | Property | Cost | Attribute |
|---|---|---|---|---|---|
| 1100 | H | EX, MD | GB, L | - | - |
| First Active | Active | Recovery | Overall | Advantage | Invul |
| 14 | 5 | A7 + 12L (19 Total) | 37 | -7 | - |
- Rekka ender. Overhead. Consumes Ground Bounce if available. Sends the opponent away.
A Version: Less distance traveled. B Version: More distance traveled.
Key part of Kouma's combos, as the ground bounce allows for a pick-up at sufficient height. Normally this won't allow for a combo after outside the corner, but most combos utilizing this move have it travel under the opponent for a side-switch and hit them from behind, resulting in the opponent landing right next to Kouma allowing for a follow-up. On Counter Hit, allows for a follow-up in the corner.
| Damage | Guard | Cancel | Property | Cost | Attribute |
|---|---|---|---|---|---|
| 1000 | H | EX, MD | GB, L | - | - |
| First Active | Active | Recovery | Overall | Advantage | Invul |
| 14 | 5 | A4 + 12L (16 Total) | 34 | -4 | - |
- Rekka ender. Overhead. Consumes Ground Bounce if available. Safer on block. Travels less distance. Deals less damage. Sends the opponent away significantly less distance.
Same as the other version, this one allows for a pick-up on hit at sufficient height. The main difference is that it doesn't require a side-switch nor a back hit for it to work, letting Kouma get midscreen combos without losing corner carry. This version also has the added benefit of being safe on block due to the improved frame data and less distance traveled, acting as Kouma's safe pressure ender if need be.
| Damage | Guard | Cancel | Property | Cost | Attribute |
|---|---|---|---|---|---|
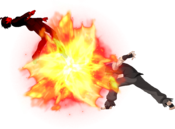
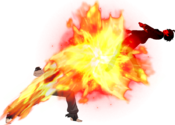
| 1080*3 (2602) | LH | AD, MD | WB+, BS, HK, L | 1 Magic Circuit | - |
| First Active | Active | Recovery | Overall | Advantage | Invul |
| 4+7 | 8 | 23 | 41 | -15/-10 | 3-15 Armor |
- EX Edge. No Rekka follow-ups. Wall Bounces the opponent.
Unlike the normal versions, 236C is just one move with no follow-ups. Sends the opponent far away for a knockdown. Will wall bounce if they reach the corner, allowing for a pick-up.
Deals a lot of damage, and can be used in dump meter in combos for high damage.Double Comet
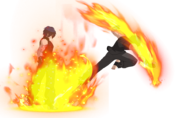
Kouma's DP. Mostly useful as a reversal but can be used as a high reaching anti-air and the EX version has use as a combo ender in long combos. Meterless versions have a followup that can be used to add more damage or catch opponents attempting to punish the A version. Meterless versions can be comboed off if they fatal counter a high up opponent.
| Damage | Guard | Cancel | Property | Cost | Attribute |
|---|---|---|---|---|---|
| 550*2 (1039) | LH | EX, MD | L | - | - |
| First Active | Active | Recovery | Overall | Advantage | Invul |
| 6 | 6 (2) 3 | 18A + 12L (30 Total) | 47 | -17 | - |
Has no invincibility and doesn't go as high, but can be whiff canceled into the followup or j.236C. Mainly useful as an anti-air but can link into lights from the A followup.
| Damage | Guard | Cancel | Property | Cost | Attribute |
|---|---|---|---|---|---|
| 700*2 (1302) | LH | EX, MD | L | - | - |
| First Active | Active | Recovery | Overall | Advantage | Invul |
| 6 | 6 (2) 3 | 27A + 12L (39 Total) | 55 | -25 | 1-13 All |
Fully invincible reversal. Goes higher into the air than 623A, but cannot be whiff canceled making it incredibly punishable. Useful for obvious reasons. On hit it can be confirmed into j.236C for a combo into oki, although it will be heavily scaled.
| Damage | Guard | Cancel | Property | Cost | Attribute |
|---|---|---|---|---|---|
| 640*7 (2098) | LH | MD | L, HK | 1 Magic Circuit | - |
| First Active | Active | Recovery | Overall | Advantage | Invul |
| 4+1 | 6 (2) 4 10 | 42A + 18L (60 Total) | 76 | -23 | 1-16 All |
High hitting fully invincible reversal. Does a good amount of damage and gives a hard knockdown on grounded opponents. Can be used situationally after two rekkas to get a hard knockdown. Has a tendency to miss opponents when used out of the corner.
Followup kick. Mainly just to add damage, confirm a combo, or catch an opponent after 623A.Crushing Blow
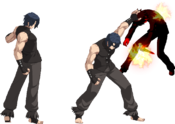
Kouma's Command Grab series. This very well may be the most important special in his moveset. As always, it's a potent mix-up option, but finds new utility in this game as it can now grab opponents in hitstun, making it an important tool in combos. His command grabs can be used to break through the defense of respectful players, force its way through disrespectful ones, create strong okizeme situations, be used as a combo extender and ender, or as a defensive measure to punish gaps in pressure or unsafe moves. His command grabs also innately serve as one of his best ways to call out Shield attempts. All command throws grant a hard knockdown on their own. This move will be your BNB, even after you learn the BNB.
| Damage | Guard | Cancel | Property | Cost | Attribute |
|---|---|---|---|---|---|
| 1400/1540 | U | - | HK | - | - |
| First Active | Active | Recovery | Overall | Advantage | Invul |
| 5/6 | 1/1 | 25 | 31 | +65 | 1-6 Throw |
- Quick command grab
- Range is shorter than it appears
- Can be combo'd into on opponents in hitstun
- Can cancel into followups immediately on hit
214A is Kouma's fastest command grab, and serves as a respectable mix-up tool and combo option. This is the one that you'll be using a majority of the time, due to the utility. It should also be noted that it is just as fast as A normals, and will out-prioritize them within the right ranges, but when used this way is a big risk and should NOT be used to replace your 5A/2A.
Once you manage to get an opponent blocking, 214A is very useful for tick throws as it can demand some risky or expensive options to avoid that Kouma can exploit. It's also particularly good for calling out opponents who like to Shield on defense, as it's one of Kouma's few moves that don't require a proper guess or read to punish that option. Note however that the long throw protection on wakeup and from blockstun means meaty throws will get you punished, and tick throws are hard to time.
In combos, this move is an absolute staple. It can be used to start combos if Kouma has his back to a corner close enough, and can be used mid-combo to sideswitch to gain better positioning and still continue. Specifically as a combo ender, it is his best meterless ender, as it can easily be used at almost any point in a combo by chaining into Rapid Beat normal 1, and then into 214A, with the resulting okizeme situation allowing him to time safejumps and potential mix-ups afterward.
| Damage | Guard | Cancel | Property | Cost | Attribute |
|---|---|---|---|---|---|
| 1400/1540 | U | - | HK | - | - |
| First Active | Active | Recovery | Overall | Advantage | Invul |
| 21/22 | 1/1 | 23 | 45 | +65 | 1-22 Throw, 9-23 Armor |
- Delayed, super-armored grab
- Slightly more range than 214A
Armored delay grab. Has use in calling out opponents who like to mash and/or shield on wakeup or from pressure. Significantly easier to "tick throw" with than 214A, although good players will know how to break the armor. Particularly weak to metered options, but making your opponent feel inclined to burn resources in fear of one move or situation is a benefit nonetheless.
Far too slow to be useful in combos, stick to 214A for that.
| Damage | Guard | Cancel | Property | Cost | Attribute |
|---|---|---|---|---|---|
| 2300/2530 | U | MD | HK, GB | 1 Magic Circuit | - |
| First Active | Active | Recovery | Overall | Advantage | Invul |
| 4+1/2 | 1/1 | 32 | 38 | +55 | 1-6 All |
- Reversal grab
- Furthest range grab
- Moon Drive cancellable on dunk
Very long range invincible command grab, the fabled slam dunk. It is not 0 after superflash, reducing it's use to reversals and ending combos, although it still does a great job of both of those. Has incredible range so it can catch even spaced normals. Great at catching opponents who like to stagger normals during pressure, and punishing safejump setups and Option Selects that 22C or 623B/C would lose to.
In combos, it works as a high damage ender that leads to hard knock down, albeit weaker than 214A/B. At the cost of Moon Gauge, it can even be used as an expensive reversal starter, since it is surprisingly Kouma's only command grab that can be Moon Drive cancelled.
| Damage | Guard | Cancel | Property | Cost | Attribute |
|---|---|---|---|---|---|
| 1600/1760 | - | - | WB, SK | - | - |
| First Active | Active | Recovery | Overall | Advantage | Invul |
| 14 | 4 | 22 | 49 | +4 ~ Tech Option | - |
- Side-switch followup
Followup from the regular throws. When used in midscreen it can be teched, but with your back to the corner, it causes a wall bounce leading to a combo. This can be done to extend BNBs even and is great for damage.
| Damage | Guard | Cancel | Property | Cost | Attribute |
|---|---|---|---|---|---|
| 2000/2200 | MD | - | HK | - | - |
| First Active | Active | Recovery | Overall | Advantage | Invul |
| 10+24 | 3 | 34 | 70 | +66 | - |
- Meter burn followup
1 bar followup to regular throws. Adds a good amount of damage that has a high minimum scaling, but it's only really worth using if you think it'll add enough damage to kill.
Launches the opponent far away for a long knockdown regardless of how long the preceding combo was, leading to good okizeme in or near the corner.Godly Armor
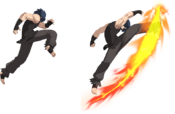
Kouma's armored anti-air. It retains the same uses it had in older games as an armored crossup anti-air, gimmicky command dash, and even more gimmicky armor. However, it has new use as a combo extender and semi-invincible reversal.
| Damage | Guard | Cancel | Property | Cost | Attribute |
|---|---|---|---|---|---|
| 1200 | LH | EX, MD | L, SK | - | - |
| First Active | Active | Recovery | Overall | Advantage | Invul |
| 10 | 4 | 24 | 37 | +1 | 8-17 Armor |
- Armored, advantageous stomp
Base version. Primary version to use as an anti-air since it's less committal and is air unblockable. However, it can only be comboed off on counter hit.
It also serves the purpose of being Kouma's only plus on block move, although this is somewhat hard to use thanks to the moves short horizontal range and pushback.
It's one of his only ways to true blockstring into 22C if you want the armor.
| Damage | Guard | Cancel | Property | Cost | Attribute |
|---|---|---|---|---|---|
| 1200 | LH | EX, MD | L, SK | - | - |
| First Active | Active | Recovery | Overall | Advantage | Invul |
| 10 | 4 | 28 | 41 | -3 | 8-37 Armor |
- Command dash stomp
The same as 22A but with an added command dash. The dash has some super armor although this is very easy to beat, making it not that good as a mobility tool, but it can still be useful for going through projectiles in neutral. On anti-air, if gotten low enough to the ground it's possible to combo it into 5A.
During pressure, if your opponent is conditioned enough, you can mix up your pressure resets by adding 22A (+1, no dash) and this move (-3, advances), since those two moves look the same on startup but require two different responses. 22B can also set up for a tick command throws that will go through mashing with either 22C armor active, or 214C, putting your opponent into more guessing game situations.
Its more common use is as a combo extender. From starters that use up a ground bounce, such as 6BC, rekka can't be used as an extender. Instead, 22B can be used during a juggle to link into 5A, adding more damage. Make sure to check the combo section to see which starters require you to use it.
| Damage | Guard | Cancel | Property | Cost | Attribute |
|---|---|---|---|---|---|
| 920*3 (2308) | LHA | AD, MD | L, HK | 1 Magic Circuit | - |
| First Active | Active | Recovery | Overall | Advantage | Invul |
| 4+19 | 8 | 23 | 53 | +0 | 1-12 All, 13-276 Armor |
- Reversal and install stomp
- Large hitbox that fully surrounds Kouma
- Grants super armor for 4 seconds
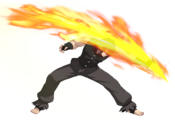
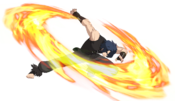
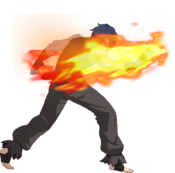
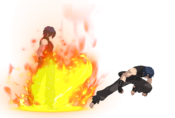
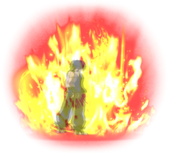
Kouma's biggest gimmick move. 22C is invincible for half of its startup before switching to Armor, giving it some use as a reversal, although it's so slow that outside of air dashes and particularly committal moves to whiff it can be Shielded or thrown on reaction. However, it's only 0 on block and gives Kouma 4 seconds of armor (indicated with an orange glow), quickly turning initiative onto him if respected. If the stomp manages to hit an opponent, it can deal over 2000 damage raw, to compound to its utility. This is mostly a knowledge check, as he can still be thrown or hit with an EX move or super, but it can be used to force your way in if the opponent doesn't have meter and act ignorant against unaware opponents. This move is a part of why Kouma is so proficient in using his meter; he can use 22C in almost any advantageous position to gain the armor and seal up a lot of natural holes in both pressure and okizeme for Kouma that no other character can match, and force the opponent to take committal and potentially expensive measures to fight back.
It is important that you remember that you are mortal; Kouma still receives full damage and can die in this state. Don't get careless on your approach, the armor does not replace blocking. Past the standard counterplay, your opponent can still keep you locked in hitstop with projectiles and rack up damage if you choose not to block, or kill you before you can blow through their moves if you're at low health.
On hit, it will launch the opponent into the air where they can tech and get away, but you can get a combo if you are willing to spend Moon Drive.Double Comet (air)
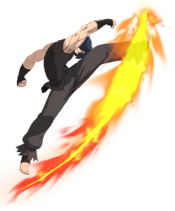
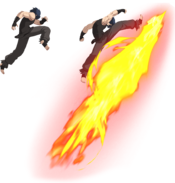
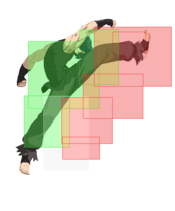
Unlike it's grounded counterpart, the air DP has no invincinbility on any version while retaining the same long recovery. However, both A and B can be whiff canceled. Mainly used as an air combo extender when you really need the extra damage to kill. j.236C however is a multi-use move that is integral to his pressure.
| Damage | Guard | Cancel | Property | Cost | Attribute |
|---|---|---|---|---|---|
| 690*2 (1283) | LHA | EX, MD | L | - | - |
| First Active | Active | Recovery | Overall | Advantage | Invul |
| 6 | 5 | 18A (TK) + 12L | 40 (TK) | -16 (TK) | - |
Lowest damage and reaching version. Only used when scaling is so high j.236B won't combo.
| Damage | Guard | Cancel | Property | Cost | Attribute |
|---|---|---|---|---|---|
| 710*2 (1313) | LHA | EX, MD | L | - | - |
| First Active | Active | Recovery | Overall | Advantage | Invul |
| 8 | 5 | 23A(TK) + 12L | 47(TK) | -21(TK) | - |
More damage and further reach.
| Damage | Guard | Cancel | Property | Cost | Attribute |
|---|---|---|---|---|---|
| 640*7 (2132) | LHA | MD | L, HK | 1 Magic Circuit | - |
| First Active | Active | Recovery | Overall | Advantage | Invul |
| 4+3 | 2 (2) 3 (1) 10 | 21A(TK) + 12L | 46(TK) | +4(TK) | - |
- Leaves a lingering multi-hit projectile
Very good move that has several uses. When done off a tk, 623A, or the last rekka, it's +1-2 on block. Additionally, when done in these situations you can activate Moon Drive to set up a high low 50/50.
It can also be used as a combo extender off situational starters. These include 623B and the last hit of rekka. On hit, it's possible to dash forward and continue a combo into 214A oki.
It's also used as a high damage combo ender. When you really need a kill for one bar, j.236B ~ B > j.236C will often get the job done.
| Damage | Guard | Cancel | Property | Cost | Attribute |
|---|---|---|---|---|---|
| 1500 | LHA | EX, MD | L, SK | - | - |
| First Active | Active | Recovery | Overall | Advantage | Invul |
| 12 | 2 | 14A ~ N + 12L | 39 ~ N | -11 ~ -N | - |
- Followup
Moon Skills
Triple Comet
| Damage | Guard | Cancel | Property | Cost | Attribute |
|---|---|---|---|---|---|
| 750*2 (1357) | LH, H | EX, MD | L, GB
(second hit) |
3 Moon Icons | - |
| First Active | Active | Recovery | Overall | Advantage | Invul |
| 15 | 5 (14) 5 | 5A + 12L (17 Total) | 55 | -3 | 1-11 MD Clash |
Moon skill version of rekka. Long range first rekka into immediate falcon kick. Covers a lot of ground quickly while only being -3, making it useful for quick approaches, long range confirms, and intercepting run ups and jump ins.
On hit it causes a ground bounce, leading to a 22B extension for pretty good damage. Note when it counter hits or hits an aerial opponent, the ground bounce will launch them higher slightly affecting routing.Double Comet
| Damage | Guard | Cancel | Property | Cost | Attribute |
|---|---|---|---|---|---|
| 640*2 (1196) | LHA | J, EX, MD | L | 3 Moon Icons | - |
| First Active | Active | Recovery | Overall | Advantage | Invul |
| 7 | 6 4 3 | - | - | - | 1-5 MD Clash |
- Jump cancellable on recovery and hit.
Moon skill version of DP. While it's not invincible, it works as a good long range anti-air that's safe on whiff and leads to a combo on hit. During Moon Drive the frame 1 clash makes it an incredibly effective reversal that's almost impossible to deal with outside of shield.
Thanks to the jump cancel, on hit it can be comboed into j.6BC or j.[C] for further comboing.Crushing Blow
| Damage | Guard | Cancel | Property | Cost | Attribute |
|---|---|---|---|---|---|
| 1400/1540 | U | - | WB, HK | 3 Moon Icons | - |
| First Active | Active | Recovery | Overall | Advantage | Invul |
| 21/33 | 12/1 | 21 | 56 | +65 | 1-11 MD Clash, 18-36 Throw |
- Advancing, delayed command grab
- Combo throw hitboxes appear after 23F
- Raw command throw hitbox appears after 35F
- Clashes with strikes/projectiles on frames 1-17 while in Moon Drive
- Can only be combo'd into on opponents who are both airborne and in hitstun.
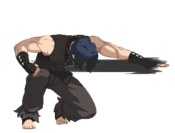
Kouma crouches down, then lunges at the enemy before grabbing them, and launching them away for a hard knockdown. Very slow, has no armor, and inexplicably limited clash frames in Moon Drive. For these reasons, this move is very risky to use in most circumstances without conditioning or a 22C armor buff active, because in pressure it does not cancel well as a tick throw from any of Kouma's normals (leaves large gaps, thus very vulnerable to mashing or escape), and is easy to avoid in neutral due to the nature of Melty Blood's "air footsies".
This move is also not very serviceable as a pseudo-reversal via Moon Drive activation > Moon Skill, because it loses its clash frames as soon as Kouma starts moving, and doesn't grab any sooner if Kouma is closer the opponent. Despite this, if your opponent is inclined to block or Shield when they see a Moon Drive activation in anticipation of a reversal attempt, you can use this move to call them out for doing so, potentially turning every Moon Drive reversal situation into a guessing game.
It is possible to use this move as a combo tool, but combos starting with or using this move are limited to the corner as you cannot combo out of it midscreen. Pickups with any normal are possible in such situations though, leading to good damage.
Overall, you may not see or find common use in this move over Kouma's myriad of other grabs, but don't discount the gimmicks, as you are playing Kouma and Melty Blood after all.Godly Armor
| Damage | Guard | Cancel | Property | Cost | Attribute |
|---|---|---|---|---|---|
| 700, 600 (1228) | LH, HA | EX, MD | L (both hits), GB (second hit) | 3 Moon Icons | - |
| First Active | Active | Recovery | Overall | Advantage | Invul |
| 11 | 4 (24) 6 | 1A + 12L | 57 | -2 | 1-11 MD Clash, 9-38 Armor |
- Clashes with strikes/projectiles on frames 1-17 while in Moon Drive
Moon Skill 22X. Armored anti-air, with a j.C looking followup that hits overhead. On hit, the followup will normally hit and cause a ground bounce, leading to a 22B extension. Sometimes when hitting particularly high opponents, the followup whiffs.
While it is -2 on block, there's a gap between the first and second hit, meaning opponents can get a Fatal Counter or Shield it.
While in Moon Drive, the Clash Frames will cover you until the armor frames kick in, making this move very potent in winning "Clash Wars".Double Comet (air)
| Damage | Guard | Cancel | Property | Cost | Attribute |
|---|---|---|---|---|---|
| 1300 | LHA | EX, MD | L, GB | 3 Moon Icons | - |
| First Active | Active | Recovery | Overall | Advantage | Invul |
| 16 | 9 | 17L | - | -2 ~ -7 | - |
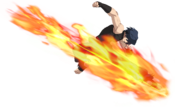
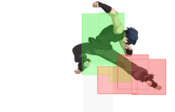
Kouma's old falcon kick is a Moon Skill now. Very useful as you'd expect a divekick to be. Allows you to cover a large amount of distance from the air with a hitbox and can bait anti-airs due to the slight delay. Also a situational air to air. The extra movement can also be used to get some distance from the opponent, especially when escaping from the corner.
On hit it causes a ground bounce for a 22B extension. It's great for extending your A Shield Counter combos so they do a lot more damage.
It has a lot of recovery, so on block it can range from safe to very unsafe depending on spacing and how the opponent blocks it. Additionally, if done particularly high into the air the hitbox will disappear before you reach the opponent but will still have the landing recovery, making it extra punishable. However, when it is blocked, you can cancel it into j.236C or Moon Drive to put yourself in an advantageous situation, provided you have the meter to do it.Super Moves
Unicorn - Flame Waltz
| Damage | Guard | Cancel | Property | Cost | Attribute |
|---|---|---|---|---|---|
| 3500/3850 | U | - | HK | 3 Magic Circuit | - |
| First Active | Active | Recovery | Overall | Advantage | Invul |
| 5+0 | 15 | 30 | 50 | +65 | 1-20 All, 21-27 Throw |
- Frame 0 from superflash up close
- Fully invincible until recovery frames
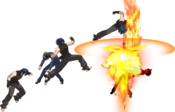
Kouma has a very powerful arc drive with lots of utility. An obvious use is as a combo ender, as it has great minimum scaling. On top of that the oki is good enough for a safe jump setup.
The long invincibility combined with the distance travel also makes it a strong neutral tool in midrange, particularly against characters with strong projectiles. Once you're in range, you can use it to go through anything the oppponent throws out and hit them hard. You can also just use it as a reversal, which is especially effective against characters who stay on the ground for their oki since it's a frame 0 command grab, meaning they won't have time to react and jump.
It's also a strong mixup tool. Since it's frame 0 as well as fully invincible, it can be used against wakeup or in a blockstring to call out any option the opponent does. It can't be shielded, mashed on, or blocked. The only way to avoid it is to jump or do an invincible move, although with invincible moves it'll often only return to neutral rather than punish. There's many ways to setup a frame 0 236BC, some of which are gimmicky, such as whiff canceling from rekka or 22A, or doing a more typical 2A > 236BC.Judgement of Yama
| Damage | Guard | Cancel | Property | Cost | Attribute |
|---|---|---|---|---|---|
| 4800 | - | - | HK | 4 Magic Circuit | - |
| First Active | Active | Recovery | Overall | Advantage | Invul |
| 22 | 4 | 26 | 52 | -14 | 0-25 All |
- Can be performed by inputting A+B+C+D with 4 bars in neutral, or by Shielding an attack while in Blood Heat!
Reverse Beats
| Attack | Chain | Advantage |
|---|---|---|
| 5B/2B | 5A/2A | -3 |
| 5C/2C | 5A/2A | -1 |
| Attack | Chain | Frame Gap |
|---|---|---|
Customization
Palette options
Kouma Kishima Wiki Roadmap
| 72% complete | ||
|
|
| Page | Completed | To-do | Score |
|---|---|---|---|
|
Mostly finished at the moment, just stuff that is generally universally missing left (such as movement data). |
Add data that hasn't been filled in yet. |
23/25 | |
| Strategy |
Slightly unfinished. Needs some more stuff added in order to be considered complete. |
Update/Review "Neutral", "Fundamental Strategy" and "Defense" Section to be in-line with the August Patch. Proper Writeup on how to fight Kouma. |
20/25 |
| Combos |
Finished. |
25/25 | |
| Matchups |
VERY unfinished. Needs proper work done for all matchups. |
Actually write something for most MUs, add new characters as slots. |
4/25 |
