JoJo's Bizarre Adventure: All-Star Battle R/Ermes Costello: Difference between revisions

From Mizuumi Wiki
Jump to navigation Jump to search
No edit summary
Line 1,108: Line 1,108:
|caption2=
|caption2=
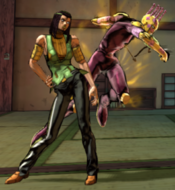
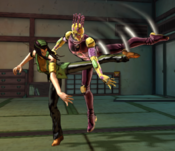
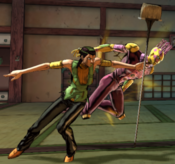
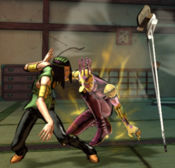
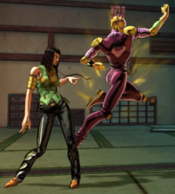
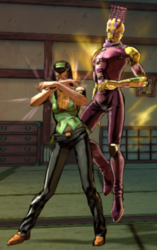
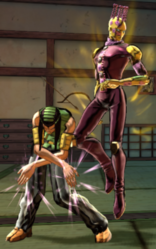
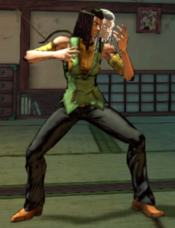
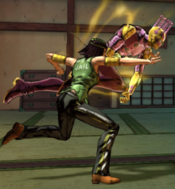
|image3=JJASBR_Ermes_HHA_(3).png
|image3=JJASBR_Ermes_HHA_(3).png
|caption3=
|caption3=My Sister Is Dead
|name=I know what you're after!
|name=I know what you're after!
|input=236 + Any Two Attack Buttons
|input=236 + Any Two Attack Buttons

Revision as of 08:35, 15 March 2023

Introduction

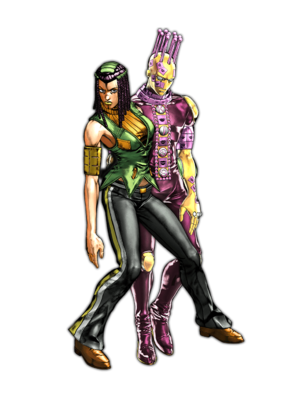
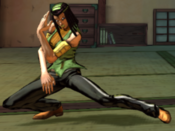
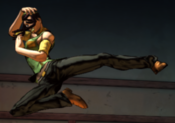
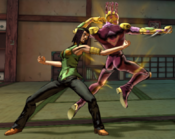
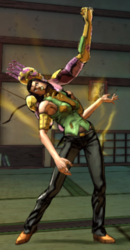
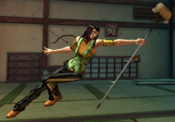
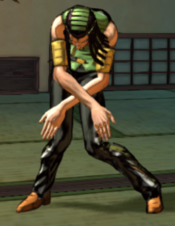
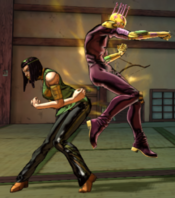
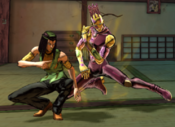
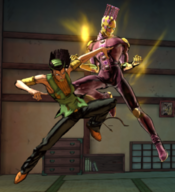
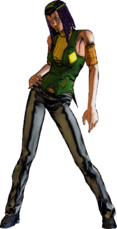
Ermes Costello, a major ally in Stone Ocean, the sixth part of JoJo's Bizarre Adventure, is a powerful rushdown character with short range in exchange for high damage. Ermes has access to a unique mechanic in her Kiss Stickers: she applies these to herself in order to add a second hit to either her punches or kicks, changing how much damage she does and the properties of certain moves. While she does not excel with mixups, she makes up for it with explosive damage and oppressive pressure with safe enders to her blockstrings. On defense, Ermes has access to an invincible reversal in Stand Off and a counter with HHA, giving her some options to try to turn the tables back on the opponent.

  • Kiss Stickers: Ermes can apply stickers to herself in order to add a second hit to either her punches, kicks, or both.
  • Feint Cancels: Ermes has access to a feint attack, allowing her to cancel the recovery of her moves for either offensive or defensive purposes.
Playstyle
JJASBR Ermes Small Icon.png Ermes Costello is a Stand character who utilizes her Stickers and Feint Cancels to keep up pressure or increase the damage and length of her combos.
Pros Cons
  • Kiss Stickers: Ermes' kit gets significantly better while she has both Stickers applied, making it easier for her to keep momentum and pressure up.
  • High Damage: Ermes' combos can lead to large amounts of damage, leading to rounds where Ermes doesn't need to interact with the opponent many times before winning.
  • Strong, Safe Pressure: Ermes can make her Stand Off heavy normals safe on block with feint cancels via "It's quite useful..." (Heavy), allowing her to use them with lower risk than other characters. She also has easy access to stagger pressure with it, as she can either stagger with light normals into a feint cancel or cancel into the actual attack instead.
  • High Health: Ermes has the highest health in the game, allowing her to live through more combos than other characters. This, combined with her Resolve Mode, allows her to turn the tide of the match when she starts to get low on health.
  • Loose Stickers: Ermes' Stickers can be hard to maintain as they will fall off of her as soon as she is knocked down, taking away a lot of her momentum and forcing her to shift her gameplan.
  • Self-Damage: While it is not a significant amount of health lost, Ermes damages herself whenever she is knocked down and loses a Sticker or uses her HHA.
  • Inconsistent Combos: Due to Ermes moving a lot with her attacks, the wall will often mess up the combo she is performing and force the opponent out of the way of her attack, causing combos to be inconsistent.
  • Zoning Troubles: Ermes does not have any long-ranged moves, making it hard for her to fight against characters who have a tool that allows them to zone efficiently.

Kiss Stickers

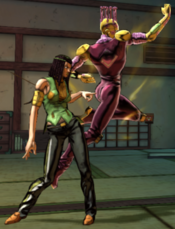
Ermes can use "Here's where ya stick it!" in order to apply Kiss Stickers to herself, represented by the Sticker Icons above her HH Gauge (which can also be seen on her character model). These add a second hit to either her punches or kicks, depending on the sticker applied; this second hit manifests as a spectral copy of the respective limb. She can apply both stickers at the same time, whether they are both applied with the H version of the special move or done individually. The stickers will fall off when Ermes is knocked down, leaving some White Damage.

Stats

Style Health Low Health Mode Hashtag(s)
Stand 1050 Resolve #ASBR_HER

Move List

JJASBR User Icon.png
JJASBR Stand Icon.png

Stand Off

  • [] is for Kiss Stickers damage.

Normal Moves

5L
5L
JJASBR Ermes 5L.png
Damage Guard Startup Active Recovery Block Adv. Hit Adv.
10 [14 (7*2)] Mid - - - - -

Ermes performs a backhanded attack.

  • A standard jab, good for stopping dash jumps.
5M
5M
JJASBR Ermes 5M.png
Damage Guard Startup Active Recovery Block Adv. Hit Adv.
18 [24 (12*2)] Mid - - - - -

Ermes performs a right hook.

  • Moves Ermes forward.
  • Otherwise fairly stubby.
5H
5H
JJASBR Ermes 5H.png
Damage Guard Startup Active Recovery Block Adv. Hit Adv.
31 [36 (18*2)] Mid - - - - -

Ermes summons Kiss, who performs a left hook.

  • Good range for a poke.
2L
2L
JJASBR Ermes 2L.png
Damage Guard Startup Active Recovery Block Adv. Hit Adv.
9 [12 (6*2)] Low - - - - -

Ermes performs a stationary crouching kick.

  • Good range for a poke.
2M
2M
JJASBR Ermes 2M.png
Damage Guard Startup Active Recovery Block Adv. Hit Adv.
15 [22 (11*2)] Low - - - - -

Ermes performs a sliding kick.

  • Good range for a poke.
2H
2H
JJASBR Ermes 2H.png
Damage Guard Startup Active Recovery Block Adv. Hit Adv.
30 (10, 20) [32 (5*2, 11*2)] Low, Mid - - - - -

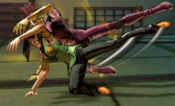
Ermes and Kiss slide forward and perform a sweeping kick followed by a kick upwards.

  • Provides hard knockdown.
  • Unlike other sweeps, this can be combo'd out of.
3H
3H
Outta my way!
JJASBR Ermes 3H.png
Damage Guard Startup Active Recovery Block Adv. Hit Adv.
25 [48 (24*2)] Mid - - - - -

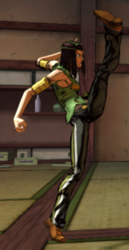
Ermes performs a high kick, launching the opponent.

  • Launches the opponent upwards.
  • Can be combo'd after if cancelled into 214H.
JL
j.L
JJASBR Ermes Jump L.png
Damage Guard Startup Active Recovery Block Adv. Hit Adv.
13 [16 (8*2)] Overhead - - - - -

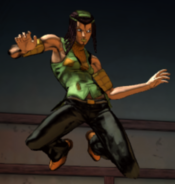
Ermes performs an attack with the tip of her knee.

  • Stubby aerial, but can cross up.
  • Good for air-to-airs.
JM
j.M
JJASBR Ermes Jump M.png
Damage Guard Startup Active Recovery Block Adv. Hit Adv.
21 [26 (13*2)] Overhead - - - - -

Ermes performs a kick outwards.

  • Good for air-to-airs.
  • Good combo filler with Kiss Stickers applied.
JH
j.H
JJASBR Ermes Jump H.png
Damage Guard Startup Active Recovery Block Adv. Hit Adv.
33 [38 (19*2)] Overhead - - - - -

Ermes summons Kiss, who performs a kick downwards.

  • Good button for jump-ins.

Special Moves

236X
USHAAAA!
236L/M/H
Light
Light
JJASBR Ermes 236M.png
Medium
Medium
JJASBR Ermes 236H.png
Heavy
Heavy
Version Damage Guard Startup Active Recovery Block Adv. Hit Adv.
Light 45 [59 (27, 32)] Mid - - - - -
Medium 66 (28, 8, 30) [90 (19*2, 6*2, 20*2)] Mid - - - - -
Heavy 95 (33, 10*2, 12, 30) [105 (20*2, 7*4, 8*2, 15, 20)] Mid - - - - -

Ermes and Kiss both punch the opponent.


L Version:

Ermes punches upwards once.

  • Mainly used for combo filler, although it cannot be combo'd out of without a Flash Cancel.

M Version:

Kiss performs more punches.


H Version:

Kiss punches more and then finishes with an uppercut.

  • Launches the opponent away.
  • Does not provide hard knockdown.
623X
Uryaaaaa!
623L/M/H
JJASBR Ermes 623X.png
Version Damage Guard Startup Active Recovery Block Adv. Hit Adv.
Light 60 [70 (35*2)] Mid - - - - -
Medium 70 [90 (45*2)] Mid - - - - -
Heavy 80 [110 (55*2)] Mid - - - - -

Ermes summons and orders Kiss to perform an uppercut.

  • Reaches very high.

L Version:

  • Ermes stays in place.
  • Good for anti-airs.

M Version:

  • Ermes slides forward slightly.
  • Has invul on startup.
  • Cannot be Flash Canceled.

H Version:

  • Ermes slides forward.
  • Has invul on startup.
  • Cannot be Flash Canceled.
214X
It's quite useful...
214L/M/H
JJASBR Ermes 214X (1).png
Start
Start
JJASBR Ermes 214X (2).png
End
End
JJASBR Ermes 214X (3).png
Feint
Feint
Version Damage Guard Startup Active Recovery Block Adv. Hit Adv.
Light 30 (20, 10) Mid - - - - -
Medium 35 (25, 10) Mid - - - - -
Heavy 0 - - - - - -

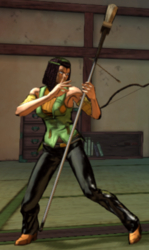
Ermes takes out a broom, moving towards a second broom created with a Kiss Sticker before they combine.

  • Unaffected by Kiss Stickers.

L Version:

  • Travels the shortest distance.

M Version:

  • Travels further than the L version.

H Version:

  • Ermes takes out the broom, but immediately puts it away.
  • Ermes' feint attack, useful for both offensive and defensive purposes.
421X
Peel it off and it merges back into one!
421L/M/H
JJASBR Ermes 421X (1).png
JJASBR Ermes 421X (2).png
Version Damage Guard Startup Active Recovery Block Adv. Hit Adv.
Light 95 (65, 30) Mid - - - - -
Medium 110 (80, 30) Mid - - - - -
Heavy 125 (95, 30) Mid - - - - -

Kiss grabs the opponent, applying a Kiss Sticker before Ermes removes it, dealing damage to the opponent.

  • This is a hitgrab.
  • Provides hard knockdown.
  • Unaffected by Kiss Stickers.
  • Performing Dodge > Stand On > 2M auto-times a meaty attack.
22X
Here's where ya stick it!
22L/M/H
JJASBR Ermes 22L.png
Arms
Arms
JJASBR Ermes 22M.png
Legs
Legs
Version Damage Guard Startup Active Recovery Block Adv. Hit Adv.
Light 0 - - - - - -
Medium 0 - - - - - -
Heavy 0 - - - - - -

Ermes applies Kiss Stickers to herself.

  • All versions can be special-cancelled after the sticker is applied.

L Version:

  • Applies Kiss Stickers to her arms.

M Version:

  • Applies Kiss Stickers to her legs.

H Version:

  • Applies Kiss Stickers to both her arms and legs.

Stand On

  • [] is for Kiss Stickers damage.

Normal Moves

Stand 5L
5L
JJASBR Ermes Stand 5L.png
Damage Guard Startup Active Recovery Block Adv. Hit Adv.
10 [14 (7*2)] Mid - - - - -

Kiss performs a backhand attack.

  • A standard jab, good for stopping dash jumps.
Stand 5M
5M
JJASBR Ermes Stand 5M.png
Damage Guard Startup Active Recovery Block Adv. Hit Adv.
14 [24 (12*2)] Mid - - - - -

Kiss performs a cross punch.

  • Good range for a poke.
Stand 5H
5H
JJASBR Ermes Stand 5H (1).png
JJASBR Ermes Stand 5H (2).png
Damage Guard Startup Active Recovery Block Adv. Hit Adv.
27 (12, 15) [38 (8*2, 11*2)] Mid - - - - -

Kiss performs a hook before following up with a spinning backfist.

  • Good range for a poke.
  • Harder to use in juggle combos.
Stand 2L
2L
JJASBR Ermes Stand 2L.png
Damage Guard Startup Active Recovery Block Adv. Hit Adv.
9 [12 (6*2)] Low - - - - -

Kiss performs a stationary crouching kick.

  • Good range for a poke.
Stand 2M
2M
JJASBR Ermes Stand 2M.png
Damage Guard Startup Active Recovery Block Adv. Hit Adv.
13 [22 (11*2)] Low - - - - -

Kiss performs a crouching kick while laying down.

  • Very good range.
  • One of Ermes' best buttons for pressure.
  • Can be made plus if timed to be meaty.
Stand 2H
2H
JJASBR Ermes Stand 2H.png
Damage Guard Startup Active Recovery Block Adv. Hit Adv.
31 (11, 20) [34 (6*2, 11*2)] Low, Mid - - - - -

Ermes and Kiss slide forward and perform a sweeping kick followed by a kick upwards.

  • Does not launch as far as the Stand Off variant, but is otherwise identical.
  • Does not lead to combos without leg Stickers.
Stand JL
j.L
JJASBR Ermes Stand Jump L.png
Damage Guard Startup Active Recovery Block Adv. Hit Adv.
14 [18 (9*2)] Overhead - - - - -

Kiss performs an attack with the tip of its knee.

  • Stubby aerial, good for air-to-airs.
Stand JM
j.M
JJASBR Ermes Stand Jump M.png
Damage Guard Startup Active Recovery Block Adv. Hit Adv.
22 [28 (14*2)] Overhead - - - - -

Kiss performs a kick at a steep angle downwards.

  • Good for jump-ins.
Stand JH
j.H
JJASBR Ermes Stand Jump H.png
Damage Guard Startup Active Recovery Block Adv. Hit Adv.
34 [40 (20*2)] Overhead - - - - -

Kiss performs an aerial kick upwards.

  • Good for combo filler.

Special Moves

Stand 236X
Uryaaaaaaaaaaa!
236L/M/H
JJASBR Ermes Stand 236X.png
Version Damage Guard Startup Active Recovery Block Adv. Hit Adv.
Light 32 (8*4) [40 (5*8)] Mid - - - - -
Medium 58 (8*6, 10) [71 (5*11, 8*2)] Mid - - - - -
Heavy 93 (8*6, 10, 35) [147 (5*11, 8*2, 38*2)] Mid - - - - -

Kiss performs a barrage of punches.

  • Kiss Stickers damage listed considers both sets of Stickers.

L Version:

Kiss performs a barrage of punches.

  • Good for combo filler.
  • Stand Rush-compatible.

M Version:

On hit, Kiss adds more punches and a kick upwards.

  • Launches the opponent upwards on hit.
  • Stand Rush-compatible.

H Version:

On hit (and continuing from the M version), Kiss adds a final backfist attack.

  • Launches the opponent away on hit.
  • Provides hard knockdown.
  • Final hit is NOT Stand Rush-compatible and CANNOT be Flash Canceled.
Stand 623X
On his face! Just above the middle!
623L/M/H
JJASBR Ermes Stand 623X.png
Version Damage Guard Startup Active Recovery Block Adv. Hit Adv.
Light 50 [80 (30, 50)] Overhead - - - - -
Medium 60 [90 (30, 60)] Overhead - - - - -
Heavy 70 [100 (30, 70)] Overhead - - - - -

Ermes and Kiss perform an overhead kick in unison.

  • Causes crumple on hit.
  • Different variations move Ermes forward in proportion to the button pressed, increasing with the strength of the button.
Stand 214X
It's quite useful...
214L/M/H
JJASBR Ermes Stand 214X (1).png
JJASBR Ermes Stand 214X (2).png
Version Damage Guard Startup Active Recovery Block Adv. Hit Adv.
Light 75 (30, 35, 10) Mid - - - - -
Medium 95 (35, 50, 10) Mid - - - - -
Heavy 115 (40, 65, 10) Mid - - - - -

Ermes takes out a broom, moving towards a second broom created with a Kiss Sticker before they combine.

  • Nearly identical to the Stand Off variant.
  • Unaffected by Kiss Stickers.

L Version:

  • Travels the shortest distance.

M Version:

  • Travels further than the L version.

H Version:

  • Travels the furthest.
  • Not a feint attack, unlike the Stand Off variant.
Stand 421X
Peel it off and it merges back into one!
421L/M/H
JJASBR Ermes Stand 421X (1).png
JJASBR Ermes 421X (2).png
Version Damage Guard Startup Active Recovery Block Adv. Hit Adv.
Light 95 (65, 30) Mid - - - - -
Medium 110 (80, 30) Mid - - - - -
Heavy 125 (95, 30) Mid - - - - -

Kiss grabs the opponent, applying a Kiss Sticker before Ermes removes it, dealing damage to the opponent.

  • Mostly identical to the Stand Off version, but covers a longer range.
  • This is a hitgrab.
  • Provides hard knockdown.
  • Unaffected by Kiss Stickers.
  • Performing Dodge > Whiff 5L > 2M auto-times a meaty attack.
Stand 22X
Here's where ya stick it!
22L/M/H
JJASBR Ermes Stand 22L.png
Arms
Arms
JJASBR Ermes Stand 22M.png
Legs
Legs
Version Damage Guard Startup Active Recovery Block Adv. Hit Adv.
Light 0 - - - - - -
Medium 0 - - - - - -
Heavy 0 - - - - - -

Ermes applies Kiss Stickers to herself.

  • Completely identical to the Stand Off version.
  • All versions can be special-cancelled after the sticker is applied.

L Version:

  • Applies Kiss Stickers to her arms.

M Version:

  • Applies Kiss Stickers to her legs.

H Version:

  • Applies Kiss Stickers to both her arms and legs.

System Mechanics

Throw
Throw
Asshole!
5/4 + Any Two Attack Buttons
JJASBR Ermes Throw (1).png
JJASBR Ermes Throw (2).png
Damage Guard Startup Active Recovery Block Adv. Hit Adv.
130 Throw - - - - -

Ermes takes the sticker off of a broom, squishing the opponent between the two versions.

  • Forward Throw leaves the opponent far away, allowing Ermes to use 22H to apply both Kiss Stickers to herself.
  • Back Throw leaves the opponent closer to Ermes.
Assist
Assist
It's quite useful...
JJASBR Ermes Assist.png
Damage Guard Startup Active Recovery Block Adv. Hit Adv.
30 (20, 10) Mid - - - - -
  • Assault Assist Stocks:2
  • Reversal Assist Stocks:1
  • Based on 214M
Stand On
Stand On/Off
5S
JJASBR Ermes Stand On.png
Stand On
Stand On
JJASBR Ermes Stand Off.png
Stand Off
Stand Off
Damage Guard Startup Active Recovery Block Adv. Hit Adv.
- - - - - - -

(Un)Summons Kiss, altering Ermes' moveset and abilities.

Heart Heat Attack

I know what you're after!
236 + Any Two Attack Buttons
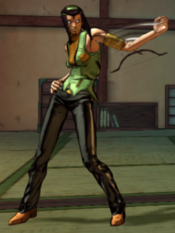
JJASBR Ermes HHA (1).png
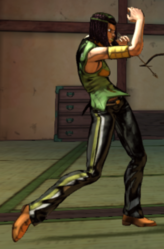
JJASBR Ermes HHA (2).png
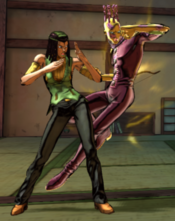
JJASBR Ermes HHA (3).png
My Sister Is Dead
My Sister Is Dead
Damage Guard Startup Active Recovery Block Adv. Hit Adv.
200 (40, 10*10, 60) - - - - - -

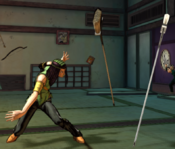
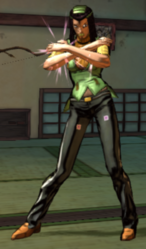
Ermes puts a sticker on her head, entering a counter stance. Upon activation, Ermes kicks the opponent before Kiss barrages them with attacks.

  • Deals silver damage to herself regardless of success or failure.
  • Leaves Ermes in Stand On, regardless of the mode she was in previously.
  • Affected by Kiss Stickers.
    • With arms stickers: 250 (40, 15*10, 60)
    • With legs stickers: 220 (60, 15*10, 60)
    • With both stickers: 310 (40, 45, 15*9, 10, 80)

Great Heat Attack

Eat this! And this! And this!
236L+M+H
JJASBR Ermes GHA (1).png
JJASBR Ermes GHA (2).png
JJASBR Ermes GHA (3).png
The kiss of love and revenge!
Damage Guard Startup Active Recovery Block Adv. Hit Adv.
336 (60+12*8+16+12*4+18*5+26) Mid - - - - -

Ermes places a sticker on the opponent's head, with Kiss then following up with a barrage of attacks alongside Ermes before Ermes removes the sticker, dealing damage to the opponent.

  • Unaffected by Kiss Stickers.
  • Just make sure it hits.

Costumes

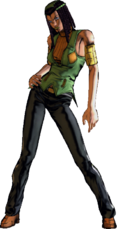
Normal

Normal (Color 1)
Normal (Color 2)
Normal (Color 3)
Normal (Color 4)

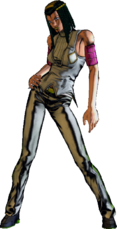
Special

Special A (Color 1)
Special A (Color 2)

Navigation

General
FAQ
Controls
Stages
HUD
System
Esoterics
Character Data
Patch Notes
Glossary
JJASBR Part 1 Emblem.png
Phantom Blood
Jonathan
Zeppeli
Speedwagon
Dio Brando
JJASBR Part 2 Emblem.png
Battle Tendency
Joseph
Caesar
Lisa Lisa
Stroheim
Wamuu
Esidisi
Kars
JJASBR Part 3 Emblem.png
Stardust Crusaders
Jotaro (Part 3)
Old Joseph
Avdol
Kakyoin
Polnareff
Iggy
Hol Horse
Mariah
Pet Shop
Vanilla Ice
DIO
JJASBR Part 4 Emblem.png
Diamond is Unbreakable
Josuke (Part 4)
Jotaro (Part 4)
Koichi
Okuyasu
Yukako
Rohan
Shigechi
Yuya
Keicho
Akira
Kira
Kosaku
JJASBR Part 5 Emblem.png
Vento Aureo
Giorno
Bucciarati
Mista
Narancia
Fugo
Trish
Abbacchio
Prosciutto
Ghiaccio
Risotto
Diavolo
JJASBR Part 6 Emblem.png
Stone Ocean
Jolyne
Ermes
Foo Fighters
Anasui
Weather
Pucci (WS)
Pucci (Final)
JJASBR Part 7 Emblem.png
Steel Ball Run
Johnny
Gyro
Diego
AW Diego
Valentine
JJASBR Part 8 Emblem.png
JoJolion
Josuke (Part 8)
Wonder of U
Baoh the Visitor
Baoh