JoJo's Bizarre Adventure: All-Star Battle R/Shigekiyo Yangu

From Mizuumi Wiki
Jump to navigation Jump to search

Introduction

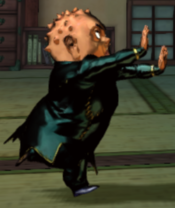
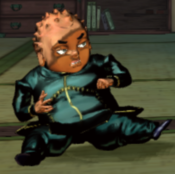
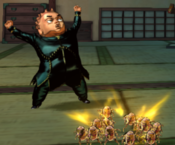
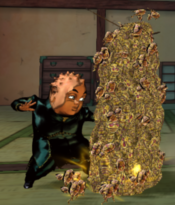
Shigekiyo Yangu, best known as Shigechi, is a secondary ally in Diamond is Unbreakable, the fourth part of JoJo's Bizarre Adventure. He uses his Stand, Harvest, to make the opponent move to him and overwhelm them on offense.

Despite being a Stand User, Shigechi does not follow the typical rules of Stand characters. Instead of switching between Stand Off and Stand On modes, Shigechi can put Harvest in Defensive and Offensive Formations: this gives him access to different special moves based on what Formation he is in. Other than that, all of these special moves cost him Harvest stacks which he'll need to keep up with 5S and 4/6S to get to use them.

While his normals may be small, he can force his enemies to come towards him by harassing them with "I can get anything I want!", wait for your opponent to make mistakes and punish them with high pressure strings. His main combos come from Defensive Formation, where he uses "So itchy!" and "I'll protect them!" (Medium) to extend his combos, and then switches to Offensive Formation to hit them on the ground with "Mess with me and you're gonna get hurt!".

  • Mode Switching: Because Shigechi has Harvest active at all times, instead of the typical mode-switching of Stand On and Stand Off, Shigechi can switch between Offensive and Defensive Harvest formations as modes to get access to different special moves; this maneuver can be canceled into special moves as well, allowing you to quickly do this in strings. Harvest formations do not change anything other than the special moves you have access to.
Playstyle
JJASBR Shigechi Small Icon.png Shigekiyo Yangu is a Stance character who utilizes his special moves to pester and mix up the opponent.
Pros Cons
  • Great OTG Damage: Can hit the opponent OTG with special moves and his HHA, allowing him to combo after knockdowns, even at range.
  • Low Recovery Options: Access to "I can get anything I want!" and 4S/6S to end strings in low recovery, as well as throwing projectiles to stay at advantage or getting resources back.
  • Oppressive Strings: While spending your Harvest stacks on your offense you can create long strings with small gaps leaving your opponent guessing for the next strike or throw mixup.
  • Anti-Zoning Tool: Despite his poor normals, he can use "I can get anything I want!" as an Anti-Zoning Tool, summoning the projectile directly above the opponent with very little recovery. Doesn't track very well, but stationary zoning opponents are forced to block, stop zoning, or take the hit.
  • TERRIBLE Normals: Abysmal range on his normals and a lack of 5f move in general make him an absolute hell to play as in neutral, you're better off letting your opponent engage you.
  • Hard to Master: A character you really have to spend time on to get the most out of. During advantage you'll be continuously performing inputs and keeping track of Harvest stacks and Formation. Will need time and practice to get the good stuff out of him.
  • Useless without Harvest: Heavily relies on his Harvest stacks to do anything. Without them he needs to confirm into 2H to get them back, hard to do with his poor normals.
  • Bad grabs: Low damage and lacking advantage to set up on oki, forward throw will not give you enough time to hit the opponent meaty at all, and a backthrow only gives you a dashjump jH at best.
  • OTG HHA Neutral on Hit: While OTG HHA is a great tool to end your combos and refill your Harvest stacks, it leaves you neutral on hit meaning you can't keep your advantage going. Normal HHA isn't a much better option either, you'll be losing out on damage and meter gain, and it'll launch away and reset the opponent to neutral.

Herd of Harvests

Unlike other Stand characters, Shigechi's Stand, Harvest, is always active. This repurposes his S button to summon a Herd of Harvests.

Shigechi has access to a maximum of 3 Harvest stacks, which he can use on special moves. Depending on the button used, the special will get different properties and use a different amount of Harvest stacks: Light comsumes one stack, Medium uses two stacks and Heavy requires all three stacks.

All of Shigechi's special moves consume Harvest stacks, becoming completely unavailable without them. Additionally, if Shigechi attempts to perform a special move that consumes multiple Harvest stacks while he has an insufficient amount, the next best highest strength variation is chosen automatically.

Stats

Style Health Low Health Mode Hashtag(s)
Stand 900 Rumble #ASBR_SHI
#ASBR_SIG

Move List

Normal Moves

5L
5L
JJASBR Shigechi 5L.png
Damage Guard Startup Active Recovery Block Adv. Hit Adv.
13 Mid 7 - - +2 +6
  • Notes 1
  • Notes 2
5M
5M
JJASBR Shigechi 5M.png
Damage Guard Startup Active Recovery Block Adv. Hit Adv.
21 Mid 7 - - -2 +2
  • Notes 1
  • Notes 2
5H
5H
JJASBR Shigechi 5H.png
Damage Guard Startup Active Recovery Block Adv. Hit Adv.
34 Mid 13 - - -6 0
  • Notes 1
  • Notes 2
2L
2L
JJASBR Shigechi 2L.png
Damage Guard Startup Active Recovery Block Adv. Hit Adv.
12 Low 7 - - 0 +4
  • Notes 1
  • Notes 2
2M
2M
JJASBR Shigechi 2M.png
Damage Guard Startup Active Recovery Block Adv. Hit Adv.
20 Low 7 - - -2 +2
  • Notes 1
  • Notes 2
2H
2H
JJASBR Shigechi 2H.png
Damage Guard Startup Active Recovery Block Adv. Hit Adv.
32 Low 13 - - -6 -
  • Notes 1
  • Notes 2
4-6S
4S/6S
Defensive Formation
or
Offensive Formation
Damage Guard Startup Active Recovery Block Adv. Hit Adv.
- - 1 - 26 - -

Switches Offensive to Defensive Formation (4S), or Defensive to Offensive Formation (6S).

  • Cancel features of a Command Normal, can be canceled into from Normals and canceled into Specials.
JL
j.L
JJASBR Shigechi Jump L.png
Damage Guard Startup Active Recovery Block Adv. Hit Adv.
16 Overhead 9 - - - -
  • Notes 1
  • Notes 2
JM
j.M
JJASBR Shigechi Jump M.png
Damage Guard Startup Active Recovery Block Adv. Hit Adv.
24 Overhead 11 - - - -
  • Notes 1
  • Notes 2
JH
j.H
JJASBR Shigechi Jump H.png
Damage Guard Startup Active Recovery Block Adv. Hit Adv.
38 Overhead 15 - - - -
  • Notes 1
  • Notes 2

Special Moves

JJASBR Offensive Harvest Icon.png

Offensive Formation
JJASBR Defensive Harvest Icon.png

Defensive Formation

Offensive Formation

623X
I can get anything I want!
623L/M/H
JJASBR Shigechi 623X.png
Version Damage Guard Startup Active Recovery Block Adv. Hit Adv.
Light 11x6 Mid - - - - -
  • Notes 1
  • Notes 2
Medium 6x13 Mid - - - - -
  • Notes 1
  • Notes 2
Heavy 90 Mid - - - - -
  • Notes 1
  • Notes 2
236X
Don't underestimate Harvest!
236L/M/H
Version Damage Guard Startup Active Recovery Block Adv. Hit Adv.
Light 10x6 Mid 17 - - -8 -
  • Notes 1
  • Notes 2
Medium 7x12 Mid 17 - - -2 -
  • Notes 1
  • Notes 2
Heavy 6x18 Mid 17 - - +2 -
  • Notes 1
  • Notes 2
Offense 214X
Mess with me and you're gonna get hurt!
214L/M/H
JJASBR Shigechi Off 214X.png
Version Damage Guard Startup Active Recovery Block Adv. Hit Adv.
Light 9x6 Low 21 - - -34 -20
  • Notes 1
  • Notes 2
Medium 6x12 Low 21 - - -32 -18
  • Notes 1
  • Notes 2
Heavy 5x18 Low 21 - - -28 -16
  • Notes 1
  • Notes 2
Offense 41236X
Move and you'll regret it!
41236L/M/H
Version Damage Guard Startup Active Recovery Block Adv. Hit Adv.
Light 14, 5x4, 20 Throw 27 - - - -
  • Notes 1
  • Notes 2
Medium 14, 5x5, 25 Throw 27 - - - -
  • Notes 1
  • Notes 2
Heavy 14, 5x6, 30 Throw 27 - - - -
  • Notes 1
  • Notes 2

Defensive Formation

623X
I can get anything I want!
623L/M/H
JJASBR Shigechi 623X.png
Version Damage Guard Startup Active Recovery Block Adv. Hit Adv.
Light 11x6 Mid - - - - -
  • Notes 1
  • Notes 2
Medium 6x13 Mid - - - - -
  • Notes 1
  • Notes 2
Heavy 90 Mid - - - - -
  • Notes 1
  • Notes 2
Defense 214X
Don't come any closer!
214L/M/H
JJASBR Shigechi Def 214X.png
Damage Guard Startup Active Recovery Block Adv. Hit Adv.
- - - - - - -
  • Notes 1
  • Notes 2
Defense 214X-6X
I'll protect them!
214L/M/H>6 + Any Attack Button
Version Damage Guard Startup Active Recovery Block Adv. Hit Adv.
Light 35 Mid 5 - - -14 -
  • Notes 1
  • Notes 2
Medium 5x15 Mid 5 - - +18 +22
  • Notes 1
  • Notes 2
Heavy 40x2 Low 5 - - -12 -
  • Notes 1
  • Notes 2
Defense 41236X
So itchy!
41236L/M/H
JJASBR Shigechi Def 41236X.png
Version Damage Guard Startup Active Recovery Block Adv. Hit Adv.
Light 40 Low 19 - - -24 -
  • Notes 1
  • Notes 2
Medium 40 Low 19 - - -14 -
  • Notes 1
  • Notes 2
Heavy 40 Low 19 - - -8 -
  • Notes 1
  • Notes 2

System Mechanics

Throw
Throw
Don't move!
5/4 + Any Two Attack Buttons
Version Damage Guard Startup Active Recovery Block Adv. Hit Adv.
Forward 95 Throw - - - - 16
  • Notes 1
  • Notes 2
Back 95 Throw - - - - 20
  • Notes 1
  • Notes 2
Assist
Assist
Don't come any closer!
Damage Guard Startup Active Recovery Block Adv. Hit Adv.
- - - - - - -
  • Notes 1
  • Notes 2
66-44
Relay Race
66/44
Version Damage Guard Startup Active Recovery Block Adv. Hit Adv.
Forward - - - - - - -
  • Notes 1
  • Notes 2
Back - - - - - - -
  • Notes 1
  • Notes 2
5S
You can see my Harvest?!
5S
JJASBR Shigechi 5S.png
Damage Guard Startup Active Recovery Block Adv. Hit Adv.
- - 1 - 24 - -

Summons a stack of Harvest.

  • Notes 1
  • Notes 2

Heart Heat Attack

Now I'm real mad!
236 + Any Two Attack Buttons
Version Damage Guard Startup Active Recovery Block Adv. Hit Adv.
Normal 48x3, 42 Mid 1(4)1 - - -62 -
  • Notes 1
  • Notes 2
OTG 48x3, 42 Mid 1(2)1 - - - 0
  • Notes 1
  • Notes 2

Great Heat Attack

You want proof? Here it is!
236L+M+H
Damage Guard Startup Active Recovery Block Adv. Hit Adv.
60 + 294 Mid 1(26)1 - - -126 -
  • Notes 1
  • Notes 2

Navigation

General
FAQ
Controls
Stages
HUD
System
Esoterics
Character Data
Patch Notes
Glossary
JJASBR Part 1 Emblem.png
Phantom Blood
Jonathan
Zeppeli
Speedwagon
Dio Brando
JJASBR Part 2 Emblem.png
Battle Tendency
Joseph
Caesar
Lisa Lisa
Stroheim
Wamuu
Esidisi
Kars
JJASBR Part 3 Emblem.png
Stardust Crusaders
Jotaro (Part 3)
Old Joseph
Avdol
Kakyoin
Polnareff
Iggy
Hol Horse
Mariah
Pet Shop
Vanilla Ice
DIO
JJASBR Part 4 Emblem.png
Diamond is Unbreakable
Josuke (Part 4)
Jotaro (Part 4)
Koichi
Okuyasu
Yukako
Rohan
Shigechi
Yuya
Keicho
Akira
Kira
Kosaku
JJASBR Part 5 Emblem.png
Vento Aureo
Giorno
Bucciarati
Mista
Narancia
Fugo
Trish
Abbacchio
Prosciutto
Ghiaccio
Risotto
Diavolo
JJASBR Part 6 Emblem.png
Stone Ocean
Jolyne
Ermes
Foo Fighters
Anasui
Weather
Pucci (WS)
Pucci (Final)
JJASBR Part 7 Emblem.png
Steel Ball Run
Johnny
Gyro
Diego
AW Diego
Valentine
JJASBR Part 8 Emblem.png
JoJolion
Josuke (Part 8)
Wonder of U
Baoh the Visitor
Baoh