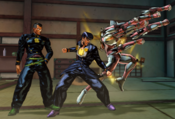
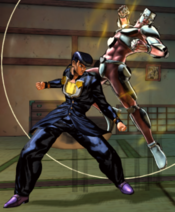
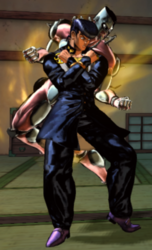
JoJo's Bizarre Adventure: All-Star Battle R/Josuke Higashikata (Part 4)

From Mizuumi Wiki
Jump to navigation Jump to search

Introduction

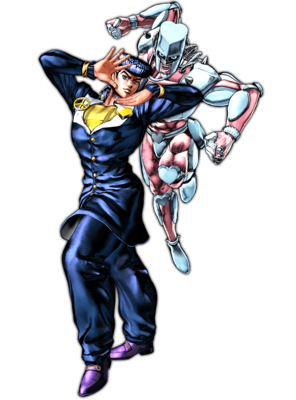
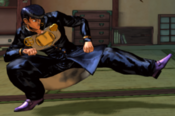
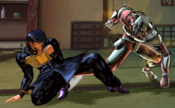
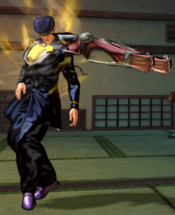
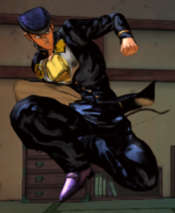
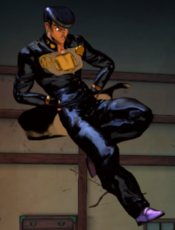
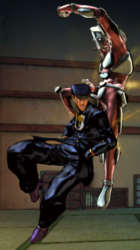
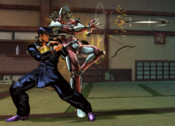
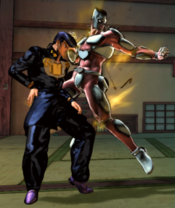
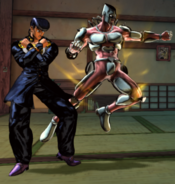
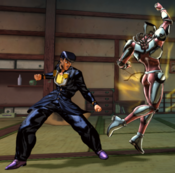
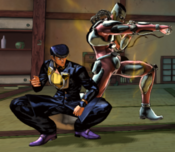
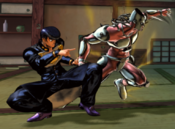
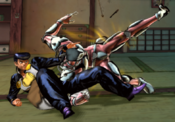
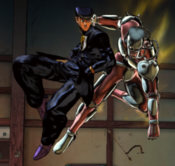
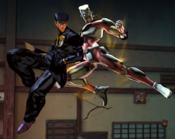
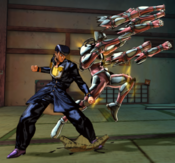
The primary protagonist of JJBA's fourth part, Diamond is Unbreakable, Josuke Higashikata is an up-close mixup character with a variety of powerful tools. He can play at a variety of ranges well and convert just about any hit into a knockdown, allowing him to set up his powerful offense.

On offense, he boasts a strong mixup game with his left-right setups. His guard damage also adds an additional threat of guard breaking to his pressure.

Playstyle
JJASBR Josuke Part 4 Small Icon.png Josuke Higashikata is a Stand character who does stuff sometimes.
Pros Cons
  • Stable Conversions: Just about anything can convert into 236L, letting him turn most hits in neutral into a longer combo.
  • Strong Oki: Good left-right mixups with his crossup j.L, allowing him to turn most knockdowns into a scary high-low-left-right-throw guessing game.
  • Guard Damage: Can deal a lot of damage to an opponent's guard, potentially letting him score guard breaks after the opponent successfully blocks his mixups.
  • Good Neutral: Has solid pokes with a good combination of speed and range, good jump-ins, decent mobility, and an acceptable projectile, letting him play at a variety of ranges and win neutral.
  • Damage: Has absurdly high damage, mostly thanks to his 214H. Deals more damage than nearly every other character in the game, only behind one or two other characters.

Watch Your Mouth!

A unique stance Josuke enters after blocking an attack with 22H. In this mode, Josuke will constantly walk towards the opponent, and cannot move backwards or crouch. However, Josuke gains perpetual hyper armor, the ability to chain normals into each other in any order, and a new un-OTG move in 3M.

Stats

Style Health Low Health Mode Hashtag(s)
Stand 1000 Rumble #ASBR_JOS
#ASBR_JSK4


Move List

JJASBR User Icon.png
JJASBR Stand Icon.png

Stand Off

Normal Moves

5L
5L
JJASBR Josuke Part 4 5L.png
Damage Guard Startup Active Recovery Block Adv. Hit Adv.
- - - - - - -

Pretty good range for a jab, but overshadowed in neutral and pressure by 2L.

5M
5M
JJASBR Josuke Part 4 5M.png
Damage Guard Startup Active Recovery Block Adv. Hit Adv.
- - - - - - -

Decent ranged normal with some significant forward movement. Combo and pressure filler.

5H
5H
JJASBR Josuke Part 4 5H.png
Damage Guard Startup Active Recovery Block Adv. Hit Adv.
- - - - - - -

Crazy Diamond pops out to take a swing at the opponent. Ok poke, and very good hitconfirm tool. Can combo out of things like max range 2L.

2L
2L
JJASBR Josuke Part 4 2L.png
Damage Guard Startup Active Recovery Block Adv. Hit Adv.
- - - - - - -

Low poke that's huge for its speed. Very good midrange tool, pressure tool, and mixup tool.

2M
2M
JJASBR Josuke Part 4 2M.png
Damage Guard Startup Active Recovery Block Adv. Hit Adv.
- - - - - - -

A sliding low with a lower profile than 2L and some forward movement. Scales less and reaches a bit farther, making it a potentially more rewarding starter.

2H
2H
JJASBR Josuke Part 4 2H.png
Damage Guard Startup Active Recovery Block Adv. Hit Adv.
- - - - - - -

Sweep with the same range as 2L and none of the safety or reward. Don't bother.

6H
6H
Get closer and pull 300km/h!
JJASBR Josuke Part 4 6H.png
Damage Guard Startup Active Recovery Block Adv. Hit Adv.
- - - - - - -

Does a lot of guard damage, making it very useful for guard break setups. However, there isn't a way to true blockstring into this with just Josuke's normals, so be wary of potential SGs and SDs.

Not something you want to actually hit your opponents with, since it uses up your one crumple for combo for whatever reason. This ends your combo pretty much immediately, since it robs you of the ability to use 236L's crumple as an extension tool.

JL
j.L
JJASBR Josuke Part 4 Jump L.png
Damage Guard Startup Active Recovery Block Adv. Hit Adv.
- - - - - - -

Fast, tiny normal that hits all around Josuke. Not much practicality in neutral, but very good for ambiguous crossups.

JM
j.M
JJASBR Josuke Part 4 Jump M.png
Damage Guard Startup Active Recovery Block Adv. Hit Adv.
- - - - - - -

Strong jump-in that reaches far down.

JH
j.H
JJASBR Josuke Part 4 Jump H.png
Damage Guard Startup Active Recovery Block Adv. Hit Adv.
- - - - - - -

Launches the opponent on hit, and can technically combo after an air-to-air, but its slow speed and short horizontal range make it unwieldly as an air-to-air.

Special Moves

236X
Break through, beat you up!
236L/M/H
Version Damage Guard Startup Active Recovery Block Adv. Hit Adv.
Light - - - - - - -

Very important move for Josuke. Crumples for combo extensions and combos out of basically any gatling. Lets you turn any hit from anywhere into a full combo. Also does a healthy amount of guard gauge.

Not safe on block at all, which makes it not ideal as a blockstring ender.

Medium - - - - - - -

The crumpling hit is replaced with an overhead that knocks down immediately. Not super rewarding most of the time.

Heavy - - - - - - -

Low that will never combo. Potentially rewarding launcher on hit, but since the overhead threat is so weak, this is mostly a knowledge check.

214X
DORA!
214L/M/H
Version Damage Guard Startup Active Recovery Block Adv. Hit Adv.
Light - - - - - - -

Josuke strikes the ground repeatedly, hitting opponents that are lying on the ground. In addition to tacking on extra OTG damage after any combo, it also leaves them in the perfect position for a left-right mixup.

Hits low, but it's never worth it to try and land this on a not-knocked-down opponent.

Medium - - - - - - -

Use run up 214M after landing HHA for the bit of extra damage and ideal mix.

Heavy - - - - - - -

This is the move that makes Josuke's damage go from good to nearly the best in the game. Always try to fit this in after a combo.

623X
As you were!
623L/M/H
JJASBR Josuke Part 4 623X.png
Damage Guard Startup Active Recovery Block Adv. Hit Adv.
- - - - - - -

No difference between button variations.

Josuke rapidly slides across the floor, back to the last spot where he used 214X. An overhead for some reason, but you need backwall and Flash Cancel to convert, so it's not really useful as a mixup. Can be used to get out of a sticky situation due to its speed and low profile.

421X
I'm a real Deadeye Dick!
421L/M/H
JJASBR Josuke Part 4 421X.png
Version Damage Guard Startup Active Recovery Block Adv. Hit Adv.
Light - - - - - - -

Usable in both S-Off and S-On. L and M both fire a quick projectile, with the M version traveling faster than the L version. Good as something to throw out at far ranges for that bit of extra damage and pressure.

Medium - - - - - - -

Another ok projectile.

Heavy - - - - - - -

Dramatically longer startup, but this projectile knocks down.

22H
Watch Your Mouth!
22H
Damage Guard Startup Active Recovery Block Adv. Hit Adv.
- - - - - - -

Costs 1 bar to use. Counter that puts you in hair mode on connect. Since hair mode is not very good, this counter is not very good by extension.

3M
I'm not done kicking your ass!
3M near downed opponent in Watch Your Mouth mode
Damage Guard Startup Active Recovery Block Adv. Hit Adv.
- - - - - - -

Un-OTGs your opponent. Short-ranged and tied to hair mode, so it doesn't come up much.

Stand On

Normal Moves

Stand 5L
5L
JJASBR Josuke Part 4 Stand 5L.png
Damage Guard Startup Active Recovery Block Adv. Hit Adv.
- - - - - - -

Similar to S-Off 5L, but slower and with a higher up hitbox.

Stand 5M
5M
JJASBR Josuke Part 4 Stand 5M.png
Damage Guard Startup Active Recovery Block Adv. Hit Adv.
- - - - - - -

Same range as s5L. combo filler.

Stand 5H
5H
JJASBR Josuke Part 4 Stand 5H.png
Damage Guard Startup Active Recovery Block Adv. Hit Adv.
- - - - - - -

Very good combo tool, since it's a two-hit normal that keeps opponents in the air in juggles.

Stand 2L
2L
JJASBR Josuke Part 4 Stand 2L.png
Damage Guard Startup Active Recovery Block Adv. Hit Adv.
- - - - - - -

A low, despite the animation hitting some characters' chests. Ok poking normal, but doesn't hold a candle to its S-Off competition.

Stand 2M
2M
JJASBR Josuke Part 4 Stand 2M.png
Damage Guard Startup Active Recovery Block Adv. Hit Adv.
- - - - - - -

Same range as s2L, and also a low. Better for juggles.

Stand 2H
2H
JJASBR Josuke Part 4 Stand 2H.png
Damage Guard Startup Active Recovery Block Adv. Hit Adv.
- - - - - - -

Same range as s2L with less reward. History repeats itself. Don't bother.

Stand 3H
3H
DORA...!
JJASBR Josuke Part 4 Stand 3H.png
Damage Guard Startup Active Recovery Block Adv. Hit Adv.
- - - - - - -

Good launcher for combos and conversions. Also quite a big normal, though Crazy Diamond's size mitigates its low profile.

Stand JL
j.L
JJASBR Josuke Part 4 Stand Jump L.png
Damage Guard Startup Active Recovery Block Adv. Hit Adv.
- - - - - - -

Definitely a move you can do.

Stand JM
j.M
JJASBR Josuke Part 4 Stand Jump M.png
Damage Guard Startup Active Recovery Block Adv. Hit Adv.
- - - - - - -

Gigantic air normal with a generous hitbox. Good for combos and for tagging people from far away.

Stand JH
j.H
Damage Guard Startup Active Recovery Block Adv. Hit Adv.
- - - - - - -

Beefy two-hit jump-in normal. Impractical to land both hits on a grounded opponent most of the time, so it's mostly just juggle filler.

Special Moves

Stand 236X
Rockabye baby!
236L/M/H
Version Damage Guard Startup Active Recovery Block Adv. Hit Adv.
Light - - - - - - -

Hitgrab into hard knockdown. Stronger button variations travel farther and do more damage at the cost of greater startup and recovery on both hit and whiff.

The knockdown doesn't give you enough time to OTG with S-Off 214X, but you can get a safejump.

Medium - - - - - - -

Another version of this move. Josuke doesn't use Stand-On much anyway, and his combos have better enders, so you won't have to agonize over whether to use s236L or s236M.

Heavy - - - - - - -

The animation you're locked into on hit doesn't give you enough time to actually pressure the opponent after the knockdown. Very bad.

Stand 214X
He heals pretty quick!
214L/M/H
Version Damage Guard Startup Active Recovery Block Adv. Hit Adv.
Light - - - - - - -

Josuke's classic barrier move. Spawns a barrier a set distance from Josuke, with it spawning further away based on button strength. The barrier becomes an active hitbox shortly after forming and can be Stand Rushed, making it a good combo extender. The barrier itself can also be used to block opponents' projectiles or limit their movement for resets.

Medium - - - - - - -

Same move as before.

Heavy - - - - - - -

Still the same move.

Stand 623X
DORARARARARARARA!
623L/M/H
JJASBR Josuke Part 4 Stand 623X.png
Version Damage Guard Startup Active Recovery Block Adv. Hit Adv.
Light - - - - - - -

Punch rush, but angled up. L version is the only one that isn't a true reversal. It can be Flash Cancelled, though, so it's good for combo extension.

Medium - - - - - - -

Real dp. Not that useful, since you can't use it on wakeup and Josuke isn't in S-On much in neutral.

Heavy - - - - - - -

See M version.

Stand 421X
I'm a real Deadeye Dick!
421L/M/H
JJASBR Josuke Part 4 421X.png
Version Damage Guard Startup Active Recovery Block Adv. Hit Adv.
Light - - - - - - -

Usable in both S-Off and S-On. L and M both fire a quick projectile, with the M version traveling faster than the L version. Good as something to throw out at far ranges for that bit of extra damage and pressure.

Medium - - - - - - -

Another ok projectile.

Heavy - - - - - - -

Dramatically longer startup, but this projectile knocks down.

System Mechanics

Throw
Throw
Guess I wasn't mad enough
5/4 + Any Two Attack Buttons
Version Damage Guard Startup Active Recovery Block Adv. Hit Adv.
Forward - - - - - - -

Sure is a grab. Doesn't give you enough time to OTG after.

Back - - - - - - -

Same as above.

Assist
Assist
Assist Name
JJASBR Josuke Part 4 Assist.png
Damage Guard Startup Active Recovery Block Adv. Hit Adv.
- - - - - - -

Does 623L. Pretty good blockstun assist, but whiffs on crouchers and some short characters.

Stand On
Stand On/Off
5S
JJASBR Josuke Part 4 Stand On.png
Stand On
Stand On
JJASBR Josuke Part 4 Stand Off.png
Stand Off
Stand Off
Damage Guard Startup Active Recovery Block Adv. Hit Adv.
- - - - - - -

(Un)Summons Crazy Diamond, altering Josuke's moveset and abilities. Stick with S-Off outside of combos.

Heart Heat Attack

You're in my range...
236 + Any Two Attack Buttons
Damage Guard Startup Active Recovery Block Adv. Hit Adv.
- - - - - - -

Good for ending just about any combo. Gives you enough time to OTG 214M after.

Meet my homing missile!
236L/M/H during HHA
Damage Guard Startup Active Recovery Block Adv. Hit Adv.
- - - - - - -

Tacks on a bit of extra damage for an extra half a bar. Often does less damage than just HHA into 214M due to scaling. Not that useful.

Great Heat Attack

You're already fixed!
236L+M+H
Damage Guard Startup Active Recovery Block Adv. Hit Adv.
- - - - - - -

Good GHA that's easy to combo into. A reversal, too, but not an exceptionally fast one.


Navigation

General
FAQ
Controls
Stages
HUD
System
Esoterics
Character Data
Patch Notes
Glossary
JJASBR Part 1 Emblem.png
Phantom Blood
Jonathan
Zeppeli
Speedwagon
Dio Brando
JJASBR Part 2 Emblem.png
Battle Tendency
Joseph
Caesar
Lisa Lisa
Stroheim
Wamuu
Esidisi
Kars
JJASBR Part 3 Emblem.png
Stardust Crusaders
Jotaro (Part 3)
Old Joseph
Avdol
Kakyoin
Polnareff
Iggy
Hol Horse
Mariah
Pet Shop
Vanilla Ice
DIO
JJASBR Part 4 Emblem.png
Diamond is Unbreakable
Josuke (Part 4)
Jotaro (Part 4)
Koichi
Okuyasu
Yukako
Rohan
Shigechi
Yuya
Keicho
Akira
Kira
Kosaku
JJASBR Part 5 Emblem.png
Vento Aureo
Giorno
Bucciarati
Mista
Narancia
Fugo
Trish
Abbacchio
Prosciutto
Ghiaccio
Risotto
Diavolo
JJASBR Part 6 Emblem.png
Stone Ocean
Jolyne
Ermes
Foo Fighters
Anasui
Weather
Pucci (WS)
Pucci (Final)
JJASBR Part 7 Emblem.png
Steel Ball Run
Johnny
Gyro
Diego
AW Diego
Valentine
JJASBR Part 8 Emblem.png
JoJolion
Josuke (Part 8)
Wonder of U
Baoh the Visitor
Baoh