JoJo's Bizarre Adventure: All-Star Battle R/Jotaro Kujo (Part 3)

From Mizuumi Wiki
Jump to navigation Jump to search

Introduction

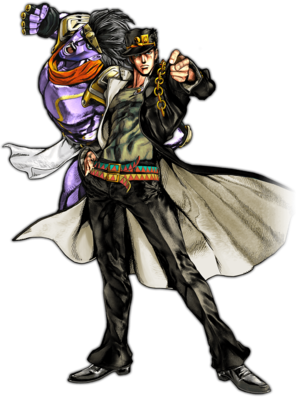
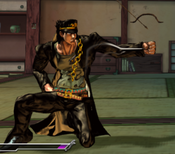
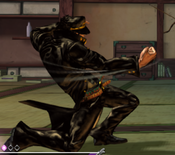
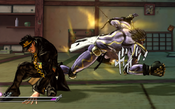
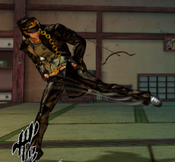
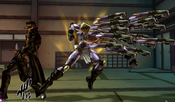
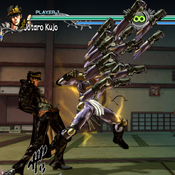
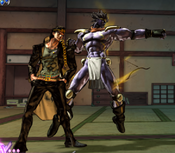
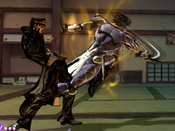
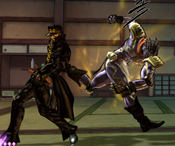
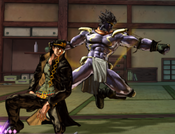
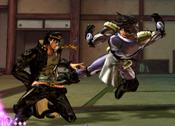
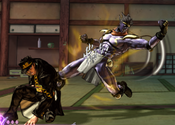
The primary protagonist from Stardust Crusaders, the third part of JoJo's Bizarre Adventure, Jotaro Kujo is one of the most well-rounded characters in the game, with a strong combination of normals and special moves that make his neutral game scary to play around. His air and ground buttons are fast and convert into high-damage combos, easy hard knockdowns, and simple loopable vortex pressure that closes out rounds in a pinch. While his Stand-Off buttons encourage you to use his smaller hurtbox to slip between the enemy's defenses to start your strings, Stand-On mode's buttons are much more oppressive and powerful, sacrificing a bit of speed and utility for sheer brute force and meter dump combos. Combined with his time-stop, Jotaro is one of the most fearsome characters to have to approach in ASBR.

  • Beginner Friendly: One of the simplest characters to start off with playing the game, big normals and simple combos make him fun to play even for beginners. He has access to most tools normal characters have meaning you're learning most of the basics of the game.
  • Time Stop: Jotaro is one of three characters in the game (along with his older incarnation and DIO) with the ability to stop time, with a very slow startup possible at 1.5 bars that gets faster with the more meter you have built. It is similar to Axl Low's One Vision timestop from Guilty Gear -Strive-, although all limits of the IPS still apply. All attacks can be performed in timestop, including grab, which automatically ends the timestop. More details included in the move's section.
Playstyle
JJASBR Jotaro Part 3 Small Icon.png Jotaro Kujo is a Stand character who utilizes his large normals and powerful neutral tools to control the midrange.
Pros Cons
  • Oppressive buttons: Incredibly good normals that allow him to force the opponent to play his game.
  • Ease of use: Easy combos, high damage, and versatility with nearly any assist, as well as an invincible reversal in the form of "Here's your receipt!".
  • Great cross-up game on HKD: Can set up nasty cross-ups using j.M and "Beat in a single breath!" (when combined with Stand Rush), hard to defend against even for experienced players.
  • Unblockable Special: Has access to an Unblockable Special in "Star Finger", a hard knowledge check against those unfamiliar with the matchup.
  • Weakness to zoning: Gets slightly countered by well-timed zoning and keepaway characters.
  • Predictable neutral: Predictable approach options, and usually has to rely on strike/throw mixups if not at a great advantage.
  • No fast button in S-Off: Lacks 5f button in S-Off, meaning he doesn't have much option other than "Here's your receipt!" on wakeup.

Stats

Style Health Low Health Mode Hashtag(s)
Stand 1000 Rumble #ASBR_JOT
#ASBR_JTR3

Move List

JJASBR User Icon.png
JJASBR Stand Icon.png

Stand Off

Normal Moves

5L
5L
JJASBR Jotaro 5L.png
Damage Guard Startup Active Recovery Block Adv. Hit Adv.
14 Mid 7 - - 0 +4

Jotaro raises his leg to do a small knee attack.

  • Slightly poor range, and not as good for neutral as his other grounded normals.
  • Jotaro's best S-Off tick throw option.
5M
5M
JJASBR Jotaro 5M.png
Damage Guard Startup Active Recovery Block Adv. Hit Adv.
24 Mid 7 - - -2 +2

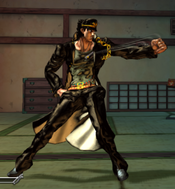
Jotaro does a backhanded fist attack.

  • One of Jotaro's best neutral tools, as it gives you medium scaling on it and can keep you relatively safe on block.
  • Compared to 5L it's generally the better option. Same speed, way bigger hitbox, and gets better damage.
5H
5H
JJASBR Jotaro 5H.png
Damage Guard Startup Active Recovery Block Adv. Hit Adv.
37 Mid 13 - - -6 0

Jotaro summons Star Platinum to attack with a fist from over his shoulder.

  • Another strong neutral option, though much less positive on block.
  • Needs to be made safe with a special move at point blank if blocked.
2L
2L
JJASBR Jotaro 2L.png
Damage Guard Startup Active Recovery Block Adv. Hit Adv.
13 Low 7 - - 0 +4

Jotaro attacks with a crouching backfist strike.

  • Easy way to confirm as it combos into itself and is very safe.
  • Pushes too far for tick throws.
2M
2M
JJASBR Jotaro 2M.png
Damage Guard Startup Active Recovery Block Adv. Hit Adv.
22 Low 7 - - -2 +2

A crouching underhand blow.

  • Decent low poke.
  • Has less pushback than 5M and hits Low, though with a lot less range.
2H
2H
JJASBR Jotaro 2H.png
Damage Guard Startup Active Recovery Block Adv. Hit Adv.
36 Low 13 - - -16 -

Jotaro summons Star Platinum to attack with a crouching fist, knocking the opponent down on hit.

  • VERY minus on block. Always cancel into 3H if possible.
  • Causes hard knockdown.
3H
3H
Back off.
JJASBR Jotaro 3H.png
Damage Guard Startup Active Recovery Block Adv. Hit Adv.
17 Low 13 - - -12 -6

Jotaro does a downwards kick with the tip of his boot.

  • Forward moving Command low. Very good way to catch your opponent not blocking low.
  • Minus on hit and very unsafe on block, so remember to either cancel into a special move that's safe or plus, or go into quick stand-on to continue pressure or the combo, at the cost of half a bar.
JL
j.L
Damage Guard Startup Active Recovery Block Adv. Hit Adv.
16 Overhead 11 - - - -

Jotaro attacks with the tip of his knee.

  • Small hitbox and not much hitstun. j.M and j.H are better as air-to-airs, so go with those in most situations.
  • Histun difference with j.M is minimal, not a better tick throw option.
JM
j.M
The god normal.
The god normal.
Damage Guard Startup Active Recovery Block Adv. Hit Adv.
21 Overhead 11 - - - -

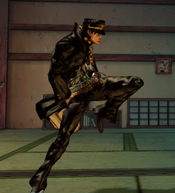
A diving kick with a lot of active frames.

  • The hitbox for this move covers both sides of Jotaro's leg, and even a little bit of his upper waist, so feel free to abuse it for crossups.
  • Amazing for okizeme, as the amount of active frames makes meaties easy to perform and allows you to vary your timing to watch for wakeup parry.
  • One of Jotaro's best air tools.
JH
j.H
Damage Guard Startup Active Recovery Block Adv. Hit Adv.
38 Overhead 19 - - - -

Star Platinum appears for a diving punch attack.

  • Insanely high amount of active frames + hitstun, allowing you to bully your way into neutral via repeatedly forcing your opponent to block this button.
  • Use this normal in combination with dash jumps to give Jotaro a terrifying presence midscreen, being able to jump at you with a full combo at almost any time.
  • Very slow startup for an aerial.

Special Moves

236X
ORA, ORA!
236L/M/H
JJASBR Jotaro 236M.png
Version Damage Guard Startup Active Recovery Block Adv. Hit Adv.
Light 4, 2*5, 58 Mid 21 - - -2 +4
  • Your safest ender S-Off on block, and for if you haven't confirmed.
  • Try to end in this version if possible.
Medium 4, 2*5, 58 Mid 21 - - -10 -4
  • Only pro is more range than the Light version.
  • Punishable on block by a fair amount of HHAs.
Heavy 4, 2*5, 58 Mid 21 - - -18 -12
  • Only pro is more range than Light and Medium versions.
  • Punishable on hit and block by a fair amount of HHAs.
623X
Here's your receipt!
623L/M/H
JJASBR Jotaro 623X.png
Version Damage Guard Startup Active Recovery Block Adv. Hit Adv.
Light 4*6, 17 Mid 11 - - -6 -
  • Good anti-air.
  • Very unsafe on block against most characters if they are crouching, dodges the final hit.
Medium 4*8, 37 Mid 15 - - -8 -
  • Invincibility during startup
  • Very unsafe on block against most characters if they are crouching, dodges the final hit.
Heavy 4*10, 47 Mid 21 - - -40 -
  • Full invincibility until final hit startup.
  • INCREDIBLY unsafe on block.
63214X
My Stand will be the judge!
63214L/M/H
Version Damage Guard Startup Active Recovery Block Adv. Hit Adv.
Light 18, 5*9, 19 Mid 25 - - -26 -
  • Jotaro's most consistent strong S-Off combo ender on hit.
  • Launches into hard knockdown.
Medium 18, 5*9, 29 Mid 29 - - -26 -
  • Can only combo into it during a juggle.
  • Launches into hard knockdown.
Heavy 18, 5*9, 39 Mid 35 - - -24 -
  • Can only combo into on very high juggle.
  • Jotaro's strongest S-Off combo ender on hit.
  • Launches into hard knockdown.

Stand On

Normal Moves

Stand 5L
5L
JJASBR Jotaro Stand 5L.png
Damage Guard Startup Active Recovery Block Adv. Hit Adv.
18 Mid 5 - - -2 +2

Star Platinum does a short-ranged jab.

  • Jotaro's fastest button, not every character has access to a 5f normal.
  • Due to being a mid, s.5L isn't Jotaro's best stand-on poking option, as he would prefer s.2L for that in most situations due to it being a low.
Stand 5M
5M
JJASBR Jotaro Stand 5M.png
Damage Guard Startup Active Recovery Block Adv. Hit Adv.
36 Mid 9 - - -8 -4

Star Platinum strikes with a quick hook.

  • Medium normal, meaning it gives some of the best possible scaling for a combo on hit if it connects.
  • Deceptive hitbox, allowing for cheesy counter hit openings from a distance your opponent may not expect.
Stand 5H
5H
JJASBR Jotaro Stand 5H.png
Formerly the animation for Jotaro's s.6H in vanilla ASB.
Damage Guard Startup Active Recovery Block Adv. Hit Adv.
44 Mid 15 - - -12 -6

Star Platinum swings down with an overhand punch.

  • Big range, good neutral tool if you're willing to 63214L or 236L after.
  • Can trade with jumping normals at range.
Stand 2L
2L
JJASBR Jotaro Stand 2L.png
Damage Guard Startup Active Recovery Block Adv. Hit Adv.
17 Low 7 - - 0 +4

A close-range crouching jab.

  • Big hitbox, and the universal hitstop being so high means that it's incredibly easy to convert into full combos from this move.
  • Feel free to abuse in neutral whenever possible, considering it's neutral on block.
  • Great for stagger pressure, due to the low hitstun. Needs to walk forward for tick throws.
Stand 2M
2M
JJASBR Jotaro Stand 2M.png
Damage Guard Startup Active Recovery Block Adv. Hit Adv.
30 Low 9 - - -6 -2

Star Platinum does a crouching uppercut.

  • Slightly less range, damage, and more pushback than s.5M, but safer on block.
Stand 2H
2H
JJASBR Jotaro Stand 2H.png
Damage Guard Startup Active Recovery Block Adv. Hit Adv.
20, 35 Mid 13(2)1 - - -4 +2
  • Doesn't hit low and doesn't hard knockdown.
  • Higher damage than s.5H, but more pushback and less range.
Stand 3H
3H
ORAAAA!
JJASBR Jotaro Stand 3H.png
Damage Guard Startup Active Recovery Block Adv. Hit Adv.
40 Mid 13 - - -2 -
  • One of your safest enders, but does not have a lot of range.
  • Launches the opponent up on hit
  • Can be Jump-Canceled
    • Can combo after with s.j.M depending on range and character.
    • +20 on block with Jump Cancel, still gives the opponent enough time to counterplay an aerial attack however.
Stand JL
j.L
Damage Guard Startup Active Recovery Block Adv. Hit Adv.
21 Overhead 9 - - - -
  • Best tick throw aerial as s.j.M launches on hit.
  • Works as air to air, but s.j.M is better.
Stand JM
j.M
Damage Guard Startup Active Recovery Block Adv. Hit Adv.
16, 22 Overhead 9(2)1 - - - -
  • Launches opponent on hit.
  • Good air to air.
  • Whiffs on most crouching opponents, and needs good timing to get both hits on a standing opponent.
  • Mostly used in combo after s.3H.
Stand JH
j.H
Damage Guard Startup Active Recovery Block Adv. Hit Adv.
40 Overhead 15 - - - -
  • Jotaro's best jumping normal in S-On, long active frames, big damage and good hitbox.
  • Spikes the opponent down if in the air.

Special Moves

Stand 236X
ORA, ORA!
236L/M/H
Version Damage Guard Startup Active Recovery Block Adv. Hit Adv.
Light 4*12, 15 Mid 9 - - -28 -22
Light (Extended) 4*22, 15 Mid 9 - - -12 -6
  • Can be extended by repeatedly pressing attack buttons, increasing number of hits. You should almost always do this.
  • This is the version you should go for unless you need more range.
Medium 4*12, 15 Mid 13 - - -24 -18
Medium (Extended) 4*22, 15 Mid 13 - - -14 -8
  • Can be extended by repeatedly pressing attack buttons, increasing number of hits. You should almost always do this.
  • Punishable on hit unless canceled.
  • Only go for this version if you need more range.
Heavy 4*12, 15 Mid 17 - - -20 -14
Heavy (Extended) 4*22, 15 Mid 17 - - -16 -10
  • Can be extended by repeatedly pressing attack buttons, increasing number of hits. You should almost always do this.
  • Punishable on hit unless canceled.
  • Only go for this version if you need more range.
Stand 236X-6X
ORAAA!
236L/M/H>6L/M/H
Damage Guard Startup Active Recovery Block Adv. Hit Adv.
1, 46 Mid 11 - - -26 -
  • Move performance is identical across versions.
  • Launches your opponent away.
    • Can combo after with Flash Cancel.
  • Always use this as your s.236X ender on hit, but never use it on block.
Stand 623X
Star Finger
623L/M/H
Version Damage Guard Startup Active Recovery Block Adv. Hit Adv.
Light 26, 19 Unblockable 41(14)1 - - - -
Medium 26, 22 Unblockable 51(14)1 - - - -
Heavy 26, 25 Unblockable 61(14)1 - - - -
  • Stand Rushable
  • Can lock your opponent into an Unblockable on block with SR.
    • Can't true blockstring into it without Assist.
Stand 63214X
Beat in a single breath!
63214L/M/H
Version Damage Guard Startup Active Recovery Block Adv. Hit Adv.
Light 0 Mid 25 - - 0 +4
Medium 0 Mid 31 - - 0 +4
Heavy 0 Mid 41 - - 0 +4
  • Stand Rushable
  • Pulls the opponent in from anywhere on the screen in front of you, hits from maximum half the stage away.
    • The higher the button, the more it pulls in.
    • Can be used in neutral to mess with your opponents timings, or combo from pretty far on hit with SR.
  • Starts pulling the opponent in 2f before startup.
  • Can't true blockstring into it without Assist.
  • Also pulls in opponents OTG, good for setting up cross-ups on knockdown with SR.
  • Light version is great for resets on hit or block, as Jotaro has access to a 5f normal in S-On.

System Mechanics

Throw
Throw
This incredible power...!
5/4 + Any Two Attack Buttons
Damage Guard Startup Active Recovery Block Adv. Hit Adv.
140 Throw 7 - - - -
  • S-Off Forward and Back Throw should be identical other than direction.
  • S-On Forward Throw throws them farther than S-Off.
    • Sets up for Dash Jump j.M cross-up if you go S-Off.
  • S-On Back Throw throws them closer to you than S-Off.
    • Sets up for Forward Jump j.M cross-up if you go S-Off.
Assist
Assist
ORA, ORA!
JJASBR Jotaro Assist.png
Damage Guard Startup Active Recovery Block Adv. Hit Adv.
4*22, 15 Mid 42 - - - -
  • Assault Assist Stocks: 2
  • Reversal Assist Stocks: 1
  • Based on s.236H.
  • Leaves grounded opponents standing.
I stopped time...
I stopped time...
22S
Damage Guard Startup Active Recovery Block Adv. Hit Adv.
0 - 202~103 - - - -
  • VERY slow startup, only guaranteed setups exist with 3 Gauge or Assist.
    • 2 Gauge version has 202f startup, 3 Gauge has 103f startup.
  • Can set up for juggles post Time Stop.

Heart Heat Attack

ORA ORA ORA ORA!
236 + Any Two Attack Buttons
Version Damage Guard Startup Active Recovery Block Adv. Hit Adv.
Normal 20, 3*10, 50 Mid 1(4)1 - - -24 -
  • You should always go for Extended except for on block.
    • Still very unsafe on block.
Extended 20, 3*41, 60 Mid 1(4)1(18)1 - - -34 -
  • This version is achieved by repeatedly pressing attack buttons, which increases damage and hits. This version also features a different, stronger ender that leaves the opponent much closer.
  • DO NOT use on block, opponent can SG/SD the final hit on block for a full punish.

Great Heat Attack

You pissed me off!
236L+M+H
Damage Guard Startup Active Recovery Block Adv. Hit Adv.
360 (60+300) Mid 1(16)1 - - -44 -
  • Just make sure it's gonna hit.
  • Only doubles the damage of the first hit (60) on Counter Hit.

Navigation

General
FAQ
Controls
Stages
HUD
System
Esoterics
Character Data
Patch Notes
Glossary
JJASBR Part 1 Emblem.png
Phantom Blood
Jonathan
Zeppeli
Speedwagon
Dio Brando
JJASBR Part 2 Emblem.png
Battle Tendency
Joseph
Caesar
Lisa Lisa
Stroheim
Wamuu
Esidisi
Kars
JJASBR Part 3 Emblem.png
Stardust Crusaders
Jotaro (Part 3)
Old Joseph
Avdol
Kakyoin
Polnareff
Iggy
Hol Horse
Mariah
Pet Shop
Vanilla Ice
DIO
JJASBR Part 4 Emblem.png
Diamond is Unbreakable
Josuke (Part 4)
Jotaro (Part 4)
Koichi
Okuyasu
Yukako
Rohan
Shigechi
Yuya
Keicho
Akira
Kira
Kosaku
JJASBR Part 5 Emblem.png
Vento Aureo
Giorno
Bucciarati
Mista
Narancia
Fugo
Trish
Abbacchio
Prosciutto
Ghiaccio
Risotto
Diavolo
JJASBR Part 6 Emblem.png
Stone Ocean
Jolyne
Ermes
Foo Fighters
Anasui
Weather
Pucci (WS)
Pucci (Final)
JJASBR Part 7 Emblem.png
Steel Ball Run
Johnny
Gyro
Diego
AW Diego
Valentine
JJASBR Part 8 Emblem.png
JoJolion
Josuke (Part 8)
Wonder of U
Baoh the Visitor
Baoh