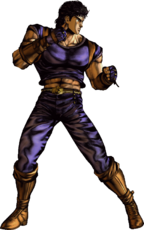
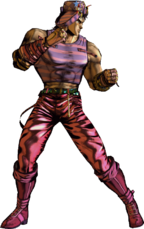
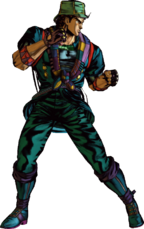
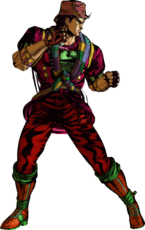
JoJo's Bizarre Adventure: All-Star Battle R/Jonathan Joestar

From Mizuumi Wiki
Jump to navigation Jump to search

Introduction

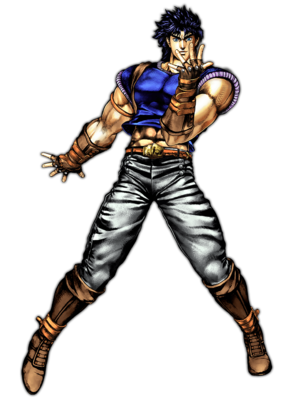
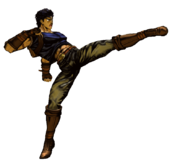
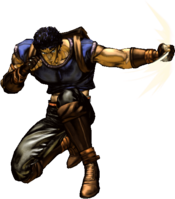
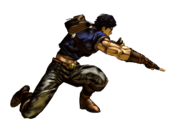
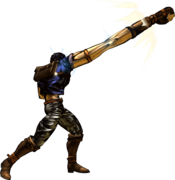
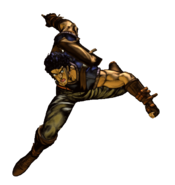
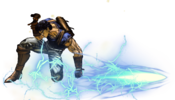
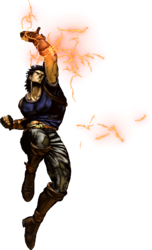
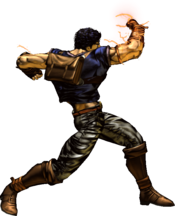
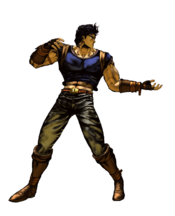
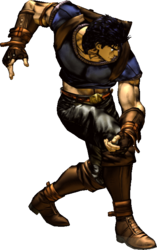
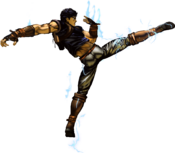
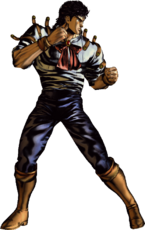
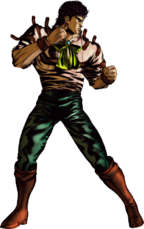
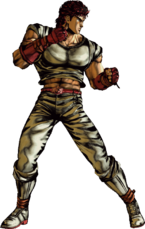
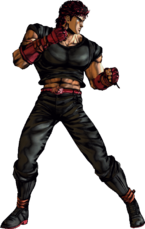
Jonathan Joestar, the protagonist of Phantom Blood, the first part of JoJo’s Bizarre Adventure, is a versatile character who is good at many things. He excels at extending combos and pressure using Hamon specials, the main gimmick of Hamon Style characters. His neutral shines around mid-range, where his "Sendo Overdrive" projectiles reach, 6M will poke, and "The Sword of Luck and Pluck" will reach. Jonathan will almost always have a solid knockdown off of any hit, as if he confirms into 6M, he is guaranteed to get a followup. Up close, this can lead to a full combo, but can also be used to build meter with "Hamon Breathing" if too far away.

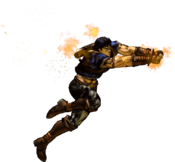
On offense, Jonathan has some fairly safe options, with "Overdrive Barrage" or "Sendo Overdrive" being used to end blockstrings: both options will create some distance between himself and the opponent, and the former will provide a soft launch on hit. Ending blockstrings with the Hamon versions of these moves also opens the opportunity to get a combo off of a stray hit in said blockstring, as both launch the opponent high into the air. Jonathan has a lot of opportunities to spend meter to extend his combos, leading him to have above average damage with the cost of sometimes running out of meter.

On defense, Jonathan has a meterless invincible reversal with "Scarlet Overdrive": each version has varying degrees of invincibility, making it very versatile in different situations. The M, H, and S variants all add a hit before the uppercut, which can either hit Assists out of the way or be used to add more damage to the move. This makes it a bit more tricky for the opponent to attack on his wakeup, as there is always the chance that Jonathan switches the variation of "Scarlet Overdrive" he uses to turn the tide of battle back to his favor.

  • Hamon Specials: For the cost of 0.5 bars, Jonathan can perform enhanced versions of his special moves, which will also cause Hamon Damage when used against Stone Mask characters.
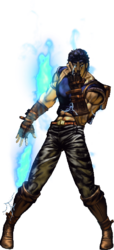
  • This is my final Hamon!: For the cost of all meter available (and a requirement of 1 bar), Jonathan can prepare a resurrection that replaces his special moves with their Hamon versions.
Playstyle
JJASBR Jonathan Small Icon.png Jonathan Joestar is a Hamon character who utilizes his diverse moveset to work in any situation and drive the battle in his favor.
Pros Cons
  • Jack of All Trades: Jonathan can do almost anything, whether on offense or defense. He is able to close the gap or create distance at his choosing, making anything and everything he does a dangerous option for the opponent.
  • Combo Starter: Jonathan can get combos off of almost any hit, and due to being a Hamon Style character, he can almost always extend combos with his Hamon Specials, resulting in a significant increase in damage.
  • Scary Pressure: Because he is able to combo off of almost any hit, Jonathan’s pressure can be very scary the moment he begins to stagger his options on block, making it very easy to heavily punish mashing.
  • Second Chance: If Jonathan sets up "This is my final Hamon!" before he is to lose the round, he will revive upon losing, giving him a second chance to even the score.
  • Meter Hungry: Being a Hamon Style character, Jonathan can spend half a bar to make a special better, but this can start to be very costly in combos. By using just 2 Hamon Specials in a combo, he will have already spent a bar, leaving him with less resources.
  • Gimmicky Mixups: "The Sword of Luck and Pluck" is Jonathan's only grounded Overhead, but its slow speed makes it a bit harder to use as a mixup tool. This is further compounded by the fact that the move is also unsafe on block.

Stats

Style Health Low Health Mode Hashtag(s)
Hamon 1000 Rumble #ASBR_JON
#ASBR_JNT

Move List

Normal Moves

5L
5L
JJASBR Jonathan 5L.png
Damage Guard Startup Active Recovery Block Adv. Hit Adv.
12 Mid 5 - - -2 +4

Jonathan performs a quick standing jab.

  • Good for stopping dash jump attempts.
5M
5M
JJASBR Jonathan 5M.png
Damage Guard Startup Active Recovery Block Adv. Hit Adv.
20 Mid 7 - - -4 +2

Jonathan performs a forward-moving hook.

  • Good poke and punish starter.
  • Not as much range as other 5Ms, despite forward momentum.
  • Confirms into GHA.
5H
5H
JJASBR Jonathan 5H.png
Damage Guard Startup Active Recovery Block Adv. Hit Adv.
32 (16*2) Mid 13(4)1 - - -4 +4

Jonathan performs a double-hitting roundhouse kick.

  • Moves Jonathan forward.
  • Confirms into GHA.
2L
2L
JJASBR Jonathan 2L.png
Damage Guard Startup Active Recovery Block Adv. Hit Adv.
11 Low 7 - - -2 +4

Jonathan performs a quick crouching jab.

  • Reaches around the same distance as 5L.
  • Not as good for stopping dash jumps, but still a fast button.
2M
2M
JJASBR Jonathan 2M.png
Damage Guard Startup Active Recovery Block Adv. Hit Adv.
24 Low 7 - - -6 0

Jonathan performs a crouching chop.

  • Reaches further than 5M.
  • Good for pokes and counter-pokes.
  • Confirms into GHA.
2H
2H
JJASBR Jonathan 2H.png
Damage Guard Startup Active Recovery Block Adv. Hit Adv.
35 Low 13 - - -8 -

Jonathan performs an advancing sweep kick.

  • Provides hard knockdown.
  • Less reach than 5H.
6L
6L
Zoom Punch
JJASBR Jonathan 6L.png
Damage Guard Startup Active Recovery Block Adv. Hit Adv.
30 Mid 11 - - - -

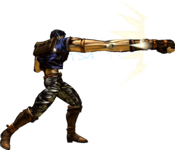
Jonathan extends his arm forward and performs a long-ranged punch at an upwards angle.

  • Great for anti-airing opponents.
  • Works well as combo filler.
6M
6M
Zoom Punch
JJASBR Jonathan 6M.png
Damage Guard Startup Active Recovery Block Adv. Hit Adv.
20 Mid 23 - - -12 -

Jonathan extends his arm forward and performs a long-ranged punch straight forward.

  • Great for pokes and combo confirms, as it causes crumple.
  • Can work well as combo filler.
6H
6H
Tackle
JJASBR Jonathan 6H.png
Damage Guard Startup Active Recovery Block Adv. Hit Adv.
75 Mid 19 - - -34 -

Jonathan performs a shoulder tackle that launches the opponent away on hit.

  • Has Super Armor during Active frames.
  • Causes knockback on hit and triggers a wallbounce.
  • Hard to confirm off of due to the hit effect.
  • Best used in corner combos or as a poke.
JL
j.L
JJASBR Jonathan Jump L.png
Damage Guard Startup Active Recovery Block Adv. Hit Adv.
12 Overhead 9 - - - -

Jonathan performs a quick jumping chop.

  • Good speed for air-to-airs.
  • Can be used as a very low-altitude overhead.
JM
j.M
JJASBR Jonathan Jump M.png
Damage Guard Startup Active Recovery Block Adv. Hit Adv.
26 Overhead 11 - - - -

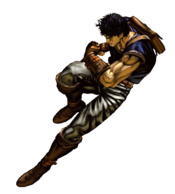
Jonathan twists his body and kicks backwards, resulting in the kick going forwards.

  • Very good jump in, as it is quick and can cross up ambiguously.
JH
j.H
JJASBR Jonathan Jump H.png
Cross up of HEROES
Cross up of HEROES
Damage Guard Startup Active Recovery Block Adv. Hit Adv.
40 Overhead 13 - - - -

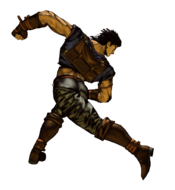
Jonathan performs a jumping punch downwards.

  • Slow, but can also provide ambiguous crossups.

Special Moves

236X
Sendo Overdrive
236L/M/H/S
JJASBR Jonathan 236X.png
Version Damage Guard Startup Active Recovery Block Adv. Hit Adv.
Light 30 Low 19 - - -12 -4
Medium 35 Low 21 - - -10 -2
Heavy 40 Low 23 - - -8 0
Style 40 Low 19 - - -8 -

Jonathan punches the ground, sending a wave of Hamon along the ground.


L version:

  • Travels to just past midscreen.

M version:

  • Travels to about midscreen.

H version:

  • Travels to a little before midscreen.

S version:

  • Costs 0.5 HH Gauge.
  • Launches on hit.
  • Travels fullscreen.
623X
Scarlet Overdrive
623L/M/H/S
JJASBR Jonathan 623X (1).png
Light version
Light version
JJASBR Jonathan 623X (2).png
First hit of M/H/S versions
Version Damage Guard Startup Active Recovery Block Adv. Hit Adv.
Light 60 Mid 7 - - -12 -
Medium 80 (20, 60) Mid 5(12)1 - - -26 -
Heavy 100 (20*2, 60) Mid 7(12)1(2)1 - - -36 -
Style 140 (20, 40, 80) Mid 5(12)1(2)1 - - -34 -

Jonathan performs a quick, rising uppercut.


L version:

  • No invul, but is very fast.
  • Only hits once.

M version:

  • Has two hits.

H version:

  • Two punches, three hits.

S version:

  • Costs 0.5 HH Gauge.
  • This variant is invul during startup and active frames.
  • Triggers a camera effect only if the first hit connects.
  • Otherwise identical to H variant.
214X
The Sword of Luck and Pluck
214L/M/H/S
JJASBR Jonathan 214X (1).png
JJASBR Jonathan 214X (2).png
Version Damage Guard Startup Active Recovery Block Adv. Hit Adv.
Light 50 (10, 15, 25) Overhead, Mid 25(18)1(16)1 - - -14 -
Medium 65 (15, 20, 30) Overhead, Mid 27(18)1(16)1 - - -18 -
Heavy 80 (20, 25, 35) Overhead, Mid 29(18)1(16)1 - - -24 -
Style 95 (25, 30, 40) Overhead, Mid 31(18)1(16)1 - - -14 -

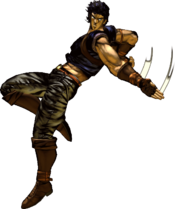
Jonathan jumps up with his sword and slashes three times.

  • Final hit causes a groundbounce.

L version:

  • Travels the least.
  • Can confirm into 623X or 236X.

M version:

  • Travels farther than the L variant.

H version:

  • Travels the farthest.

S version:

  • Costs 0.5 HH Gauge.
  • This variant is armored.
  • Travels the same distance as the H variant.
22X
Overdrive Barrage
22L/M/H/S
JJASBR Jonathan 22X (1).png
JJASBR Jonathan 22X (2).png
Version Damage Guard Startup Active Recovery Block Adv. Hit Adv.
Light 50 (5*5, 25) Mid 19(4)1 - - -4 -
Medium 65 (5*6, 35) Mid 19(4)1 - - -6 -
Heavy 80 (5*7, 45) Mid 19(4)1 - - -8 -
Style 120 (5*13, 55) Mid 19(4)1 - - -4 -

Jonathan unleashes a barrage of punches and finishes with an uppercut.

  • Launches on hit.

L version:

  • Fastest startup, but shortest range.

M version:

  • Balanced startup and range.

H version:

  • Slowest startup, but longest range.

S version:

  • Costs 0.5 HH Gauge.
  • Launches the opponent higher.
  • Confirms into combos.

System Mechanics

Throw
Throw
I will protect my father!
5/4 + Any Two Attack Buttons
JJASBR Jonathan Throw (1).png
JJASBR Jonathan Throw (2).png
Damage Guard Startup Active Recovery Block Adv. Hit Adv.
130 Throw 7 - - - +90

Jonathan picks up the opponent with one hand and slams them to the ground.

  • Forward Throw leaves the opponent just outside of 6M range.
  • Back Throw leaves the opponent slightly farther than Forward Throw.
  • 5L > Dodge auto-times a safejump for both Throws.
Assist
Assist
Scarlet Overdrive
Damage Guard Startup Active Recovery Block Adv. Hit Adv.
100 (20*2, 60) Mid - - - - -

Jonathan performs a quick, rising uppercut.

  • Assault Assist Stocks: 1
  • Reversal Assist Stocks: 2
  • Based on 623H
5S
Hamon Breathing
5S
JJASBR Jonathan 5S.png
Damage Guard Startup Active Recovery Block Adv. Hit Adv.
- - - - - - -

Jonathan uses Hamon Breathing to charge his HH Gauge.

  • Takes 20.2 seconds to charge from 0 to 3 bars.
  • Cannot be cancelled into or out of.
  • Animation changes on each use; purely aesthetic.
22LMH
This is my final Hamon!
22L+M+H
Damage Guard Startup Active Recovery Block Adv. Hit Adv.
- - - - - - -

Jonathan focuses and makes a pose.

  • Requires 1 HH Gauge to use; consumes all available.
  • Disables usage of Hamon Specials.
  • Revives Jonathan with 100 Health.
  • After reviving, the HH Gauge is fully destroyed, and Jonathan's special moves will be replaced by their Hamon variants.

Heart Heat Attack

Who'll be the last one standing?
236 + Any Two Attack Buttons
JJASBR Jonathan HHA (1).png
JJASBR Jonathan HHA (2).png
JJASBR Jonathan HHA (3).png
Damage Guard Startup Active Recovery Block Adv. Hit Adv.
190 (30+160) Mid 1(12)1 - - -50 -

Jonathan slides forward with his arms extended, empowered with Hamon. On hit, Jonathan launches the opponent with an uppercut.

  • This is a hitgrab.
  • Provides hard knockdown.
  • Does not deal Hamon damage.

Great Heat Attack

Sunlight Yellow Overdrive
236L+M+H
JJASBR Jonathan GHA (1).png
My heart resonates! The heat's enough to burn!
JJASBR Jonathan GHA (2).png
Cut him, beat of my blood!
JJASBR Jonathan GHA (3).png
Sunlight Yellow... Overdrive!
Damage Guard Startup Active Recovery Block Adv. Hit Adv.
340 (60+43+15+26+24*4+1*64+36) Mid 1(16)1 - - -118 -

Jonathan performs a roundhouse kick, followed by a flurry of attacks.

  • Very fast GHA activation.
  • Can be used to avoid assists easily due to its speed.
  • Does not deal Hamon damage.

Costumes

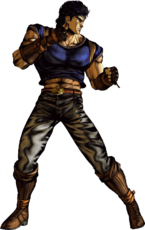
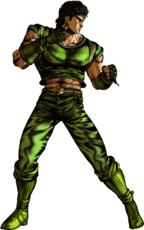
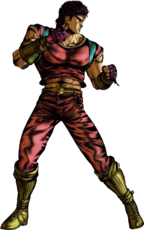
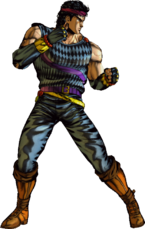
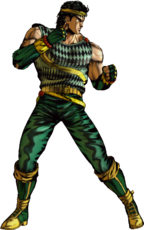
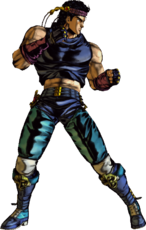
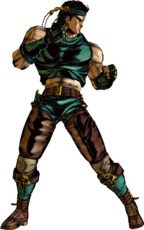
Normal

Normal (Color 1)
Normal (Color 2)
Normal (Color 3)
Normal (Color 4)

Special

Special A (Color 1)
Special A (Color 2)
Special B (Color 1)
Special B (Color 2)
Special C (Color 1)
Special C (Color 2)
Special D (Color 1)
Special D (Color 2)
Special E (Color 1)
Special E (Color 2)

Extra

Extra A (Color 1)
Extra A (Color 2)

Notable Players

Disclaimer: This list is derived from community input and is in no way comprehensive or a form of ranking of any kind. Our community criteria can be found here.
Name Usual Color Region Contact Example Play
なまこ (Namako) JJASBR Jonathan Color Special A 1.png Flag jp.png
Japan
@deyurandaru00 YouTube Channel

Navigation

General
FAQ
Controls
Stages
HUD
System
Esoterics
Character Data
Patch Notes
Glossary
JJASBR Part 1 Emblem.png
Phantom Blood
Jonathan
Zeppeli
Speedwagon
Dio Brando
JJASBR Part 2 Emblem.png
Battle Tendency
Joseph
Caesar
Lisa Lisa
Stroheim
Wamuu
Esidisi
Kars
JJASBR Part 3 Emblem.png
Stardust Crusaders
Jotaro (Part 3)
Old Joseph
Avdol
Kakyoin
Polnareff
Iggy
Hol Horse
Mariah
Pet Shop
Vanilla Ice
DIO
JJASBR Part 4 Emblem.png
Diamond is Unbreakable
Josuke (Part 4)
Jotaro (Part 4)
Koichi
Okuyasu
Yukako
Rohan
Shigechi
Yuya
Keicho
Akira
Kira
Kosaku
JJASBR Part 5 Emblem.png
Vento Aureo
Giorno
Bucciarati
Mista
Narancia
Fugo
Trish
Abbacchio
Prosciutto
Ghiaccio
Risotto
Diavolo
JJASBR Part 6 Emblem.png
Stone Ocean
Jolyne
Ermes
Foo Fighters
Anasui
Weather
Pucci (WS)
Pucci (Final)
JJASBR Part 7 Emblem.png
Steel Ball Run
Johnny
Gyro
Diego
AW Diego
Valentine
JJASBR Part 8 Emblem.png
JoJolion
Josuke (Part 8)
Wonder of U
Baoh the Visitor
Baoh