Story
Ka-KaKaKa!
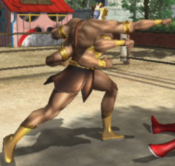
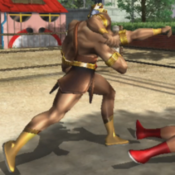
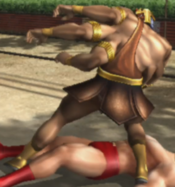
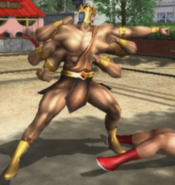
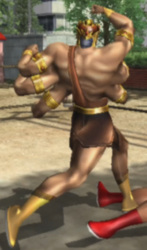
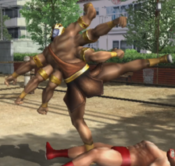
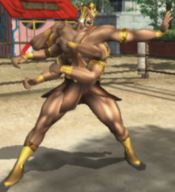
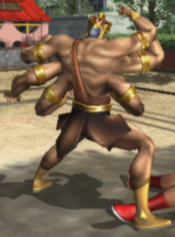
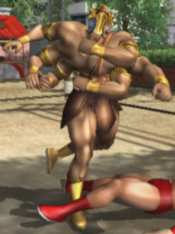
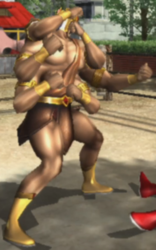
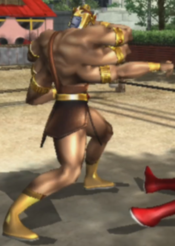
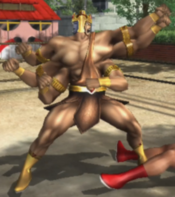
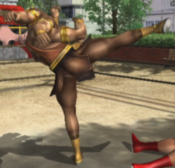
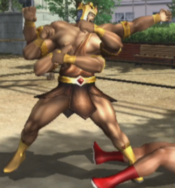
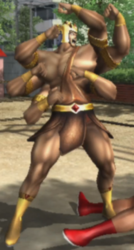
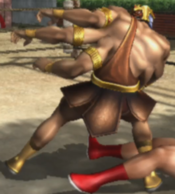
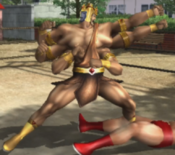
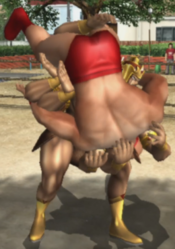
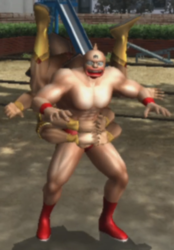
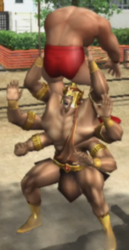
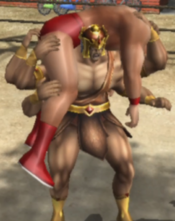
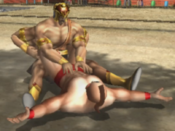
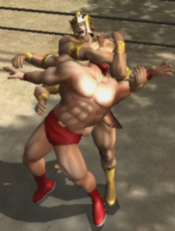
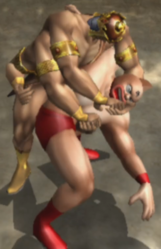
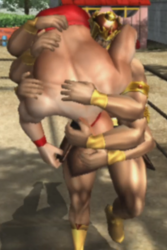
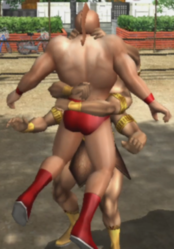
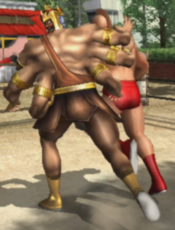
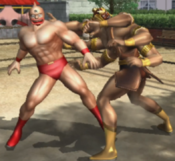
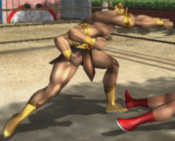
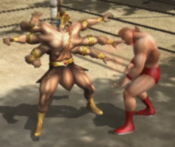
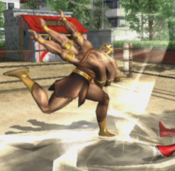
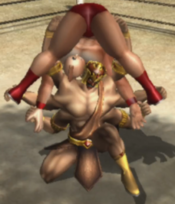
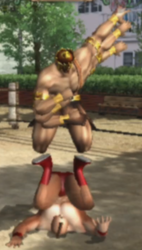
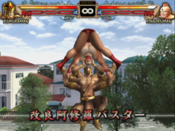
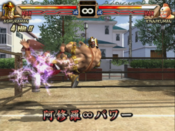
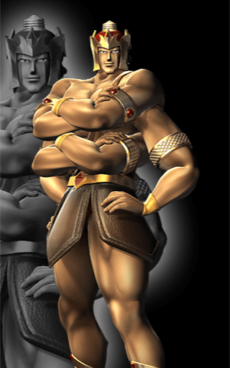
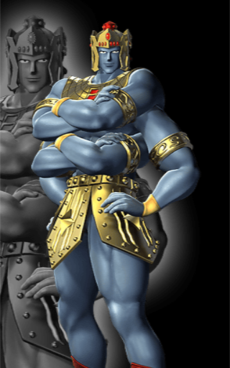
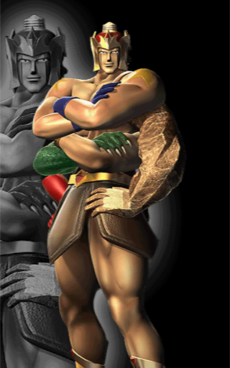
The 6-armed, 3-faced, Ashuraman is one of the Devil Knights, and the prince of the Demon World. When one of his own arms are lost or broken, he has the ability to steal the arms of his dead Devil Choujin comrades as replacements (because they sure don’t need it anymore). As a child, he was taught that friendship and kindness is a lie invented by the good guys, but eventually he realizes that even bad guys can be friends and be nice to one another.
Ashuraman is best friends with Sunshine (though it took a particularly emotional tag match for Ashuraman to openly admit this), and the two regularly tag-team together as the "Stray Devil Choujin Combo".
Gameplay
Ashuraman is a defensive, neutral-focused character defined by solid buttons and strong confirms. His throws are on the slow side, but have very good range; this make them somewhat poor for mixups, but make them great as neutral/whiff-punish tools. Between his key natural combos, damaging throws and consistent juggles, Ashuraman does relatively good damage, especially for a character without an air throw. To top it all of is his 46S special, Tornado Hell, a ridiculously versatile projectile (in a game where projectiles are very few and far between) that is a whiff punish/neutral tool, combo starter, combo ender and OTG tool all in one.
| Strengths |
Weaknesses
|
- Large throw range, tied for largest among the whole cast.
- Above average throw-punish.
- Low-damage, multi-hit normals makes scaling hurt his juggles less.
- Tornado Hell.
- Has an infinite (in the arcade version only).
|
- Limited strings and slow throws make for below-average mixups.
- Supers are inconsistent at the ropes.
- Combos are reliant on heavy stun; becomes less effective with optimal mashing.
|
Character Stats
- Health: 1050
- Damage rating: 14
- Size/weight: Medium/Middleweight
- Movement speed: B
Strikes
A
A
|
| Damage
|
Guard
|
Attribute
|
Property
|
Cancel
|
Cost
|
Meter Gain
|
| 28
|
Block/Parry
|
LS
|
-
|
20-30, 27-29 Sp, 17-32 KKD
|
-
|
13/41
|
| Startup
|
Active
|
Recovery
|
Guard Adv
|
Parry Adv
|
Hit Adv
|
Invul
|
| 12
|
3
|
15 (19)
|
-10
|
+2
|
+6
|
-
|
|
Slightly below average jab.
- Ashuraman has no natural combos from this button, limiting its usefulness, especially compared to 6A.
- This button is 1f faster than 6A, and is actually Ashuraman's fastest button. This can be relevant for punishing specifically -12~13 moves.
|
|
A,A
|
| Damage
|
Guard
|
Attribute
|
Property
|
Cancel
|
Cost
|
Meter Gain
|
| 28
|
Block/Parry
|
LS
|
-
|
28-33, 30-32 Sp, 24-44 KKD
|
-
|
23/41
|
| Startup
|
Active
|
Recovery
|
Guard Adv
|
Parry Adv
|
Hit Adv
|
Invul
|
| 20
|
3
|
19 (23)
|
-14
|
-2
|
+2
|
-
|
|
Followup to A.
- Unlike most A,As, this is not a natural combo from A; this relegates is use mainly as combo filler in juggles.
|
|
A,A,A
One-Two-Shoulder
|
| Damage
|
Guard
|
Attribute
|
Property
|
Cancel
|
Cost
|
Meter Gain
|
| 84
|
Block/Parry
|
MS
|
-
|
47-59 KKD
|
-
|
32/69
|
| Startup
|
Active
|
Recovery
|
Guard Adv
|
Parry Adv
|
Hit Adv
|
Invul
|
| 22
|
3
|
32 (36)
|
-21
|
-15
|
+3
|
-
|
|
Shoulder ender with the same animation as 46A.
- Similarly not a natural combo from A,A either.
- This move's lengthy recovery makes it hardly plus despite the medium stun, and decidedly punishable on block/parry.
|
|
A,A,4A
|
| Damage
|
Guard
|
Attribute
|
Property
|
Cancel
|
Cost
|
Meter Gain
|
| 42
|
Block/Parry
|
LS
|
-
|
21-35, 34 Sp, 18-33 KKD
|
-
|
32/59
|
| Startup
|
Active
|
Recovery
|
Guard Adv
|
Parry Adv
|
Hit Adv
|
Invul
|
| 13
|
3
|
15 (19)
|
-10
|
+2
|
+6
|
-
|
|
Alternative follow-up to A,A,A.
- This natural combos from the previous hit, but as the 1st to 2nd hit does not, this is not a particularly useful property.
|
|
A,A,4A,A
Upper Combo
|
| Damage
|
Guard
|
Attribute
|
Property
|
Cancel
|
Cost
|
Meter Gain
|
| 56
|
Block/Parry
|
LS
|
-
|
26-32, 29-30 Sp, 25-48 KKD
|
-
|
32/59
|
| Startup
|
Active
|
Recovery
|
Guard Adv
|
Parry Adv
|
Hit Adv
|
Invul
|
| 19
|
4
|
23 (27)
|
-19
|
-7
|
-3
|
-
|
|
Adds a followup upper to the above.
- Not a natural combo; generally relegated as combo filler in juggles.
|
|
A,A,4A,A,6A
Roundhouse Combo
|
| Damage
|
Guard
|
Attribute
|
Property
|
Cancel
|
Cost
|
Meter Gain
|
| 70
|
Block/Parry
|
KD
|
SKD,MBU
|
46-62 KKD
|
-
|
29/53
|
| Startup
|
Active
|
Recovery
|
Guard Adv
|
Parry Adv
|
Hit Adv
|
Invul
|
| 23
|
3
|
34 (38)
|
-7
|
-17
|
-
|
-
|
|
Decently damaging knockdown ender to the string.
- This attack SKDs on air hit, making it Ashuraman's go-to ender in juggles to score a knockdown.
- This string as a whole is integral to Ashuraman's juggle bnbs, due to its overall damage and being able to consistently connect fully in juggles.
|
|
6A
6A
|
| Damage
|
Guard
|
Attribute
|
Property
|
Cancel
|
Cost
|
Meter Gain
|
| 42
|
Block/Parry
|
LS
|
-
|
16-30, 16-29 Sp, 16-38 KKD
|
-
|
13/41
|
| Startup
|
Active
|
Recovery
|
Guard Adv
|
Parry Adv
|
Hit Adv
|
Invul
|
| 13
|
3
|
20 (24)
|
-15
|
-3
|
+1
|
-
|
|
An alternative jab, slightly slower but dealing more damage.
- This button has earlier cancel windows than A, especially for the special cancel. This lets it natural combo when cancelled into the next hit or into S.
- Its respectable speed and strong reward makes this button Ashuraman's go-to punish. Notably, this can be used to punish teched throws reliably.
|
|
6A,A
|
| Damage
|
Guard
|
Attribute
|
Property
|
Cancel
|
Cost
|
Meter Gain
|
| 14x2
|
Block/Parry
|
LSx2
|
SKD
|
30-40, 38-39 Sp, 29-50 KKD
|
-
|
12x2/23x2
|
| Startup
|
Active
|
Recovery
|
Guard Adv
|
Parry Adv
|
Hit Adv
|
Invul
|
| 21
|
6 (3)
|
21 (25)
|
-14
|
-7
|
+2
|
-
|
|
Natural combo two-hit followup to 6A.
- Though generally combo filler, its SKD property comes in handy in awkward juggles where it is ambiguous if the opponent is high enough to juggle with the next hit, as Ashuraman would still score the SKD even if the next hit whiffs.
|
|
6A,A,A
Lotus Palm Combo
|
| Damage
|
Guard
|
Attribute
|
Property
|
Cancel
|
Cost
|
Meter Gain
|
| 14x2
|
Block/Parry
|
LSx2
|
SKD
|
28-49 KKD
|
-
|
12x2/23x2
|
| Startup
|
Active
|
Recovery
|
Guard Adv
|
Parry Adv
|
Hit Adv
|
Invul
|
| 15
|
6 (3)
|
26 (30)
|
-19
|
-12
|
-3
|
-
|
|
Ender to the string, being a two-hit strike like the previous attack.
- The whole string is a natural combo, making it a decent meterless punish option. However, this does leave Ashuraman negative on hit.
- This move is also good as an ender for very long corner juggles, not only because it SKDs but also because its relative speed lets it pick up awkward juggles. The string's low-damage, multi-hit nature also means it is less affected by the damage scaling that comes with lengthy juggles.
|
|
236A
236A
Six Realms Lotus 1
|
| Damage
|
Guard
|
Attribute
|
Property
|
Cancel
|
Cost
|
Meter Gain
|
| 14x3
|
Block/Parry
|
MS,LS,MS
|
-
|
43-53, 51-52 Sp, 43-64 KKD
|
-
|
8x3/21x3
|
| Startup
|
Active
|
Recovery
|
Guard Adv
|
Parry Adv
|
Hit Adv
|
Invul
|
| 17
|
24 (10)
|
21 (25)
|
-8
|
-3
|
+16
|
-
|
|
3-hit attack with tiny range, such that it tends to whiff anywhere further than point blank.
- All 3 hits natural combo, and further combos into (Medium Stun) 5T.
- Unlike most moves that causes MS, this move will not knock down a rope bounced opponent.
|
|
236A,A
Six Realms Lotus 2
|
| Damage
|
Guard
|
Attribute
|
Property
|
Cancel
|
Cost
|
Meter Gain
|
| 14x2
|
Block/Parry
|
MSx2
|
-
|
25-35, 33-34 Sp, 27-45 KKD
|
-
|
11x2/21x2
|
| Startup
|
Active
|
Recovery
|
Guard Adv
|
Parry Adv
|
Hit Adv
|
Invul
|
| 14
|
11 (7)
|
17 (21)
|
-6
|
-9
|
+18
|
-
|
|
2-hit natural combo followup to 236A.
- Although it should combo on paper, getting this to combo properly in practice is even more restrictive; getting all 5 hits on a standing opponent is only possible in the corner.
- This string shines in corner juggles, as with charge-cancelling, Ashuraman can link into another 236A,A and loop it, juggling the opponent for a long time.
- Similar to the 6A,A,A string, its multi-hit, low-damage nature makes it scale very well in juggles.
|
|
236A,A,66A
Six Realms Lotus 3
|
| Damage
|
Guard
|
Attribute
|
Property
|
Cancel
|
Cost
|
Meter Gain
|
| 84
|
Block/Parry
|
HS-5
|
MBU
|
22-39 KKD
|
-
|
28/61
|
| Startup
|
Active
|
Recovery
|
Guard Adv
|
Parry Adv
|
Hit Adv
|
Invul
|
| 17
|
3
|
17 (21)
|
+10
|
±0
|
+21~54
|
-
|
|
Heavy-stunning ender to the string, visually similar to (While Running A).
- The whole string is a natural combo, but in practice, the short range of the previous hits means this will only properly connect at the ropes.
- This attack still has some use as a mixup option after 236A,A, or as a meterless juggle ender which does not SKD.
|
|
44A
44A
High Kick
|
| Damage
|
Guard
|
Attribute
|
Property
|
Cancel
|
Cost
|
Meter Gain
|
| 42
|
Block/Parry
|
LS
|
-
|
34-39, 36-38 Sp, 34-50 KKD
|
-
|
9/23
|
| Startup
|
Active
|
Recovery
|
Guard Adv
|
Parry Adv
|
Hit Adv
|
Invul
|
| 20
|
3
|
25 (29)
|
-20
|
-8
|
-4
|
-
|
|
A spinning kick with the same animation as the last hit of the A,A,4A,A,6A string. Unlike the string version, this move only does LS, and does not SKD.
- This move has a late cancel window, making any mixup attempts after it (be it a throw, special or this move's built-in followup) very telegraphed, and even interruptable by most characters.
- If Ashuraman charge-cancels this move, he recovers backturned.
|
|
44A,6A
Kick-Knuckle Combo
|
| Damage
|
Guard
|
Attribute
|
Property
|
Cancel
|
Cost
|
Meter Gain
|
| 14x3
|
Block/Parry
|
MSx3
|
-
|
34-39, 36-38 Sp, 27-42 KKD
|
-
|
8x3/21x3
|
| Startup
|
Active
|
Recovery
|
Guard Adv
|
Parry Adv
|
Hit Adv
|
Invul
|
| 13
|
10 (3)
|
17 (21)
|
-4
|
-6
|
+20
|
-
|
|
3-hit backfist followup.
- Due to the late cancel window of 44A, this is not a natural combo.
- On hit, this move is very plus; Ashuraman can link into A or 6A afterwards for a stun overflow knockdown (and into a small juggle at the ropes, with 6A,A).
- This move's late cancel window means Ashuraman does not get as much off of this attack on hit despite what the plus frames might imply: He can cancel into neutral S for a knockdown, or 66S for optimal damage. Cancelling into a throw, special or otherwise, is too slow to be a true combo.
|
|
8A
8A
Triple Elbow
|
| Damage
|
Guard
|
Attribute
|
Property
|
Cancel
|
Cost
|
Meter Gain
|
| 84
|
Block/Parry
|
KD
|
OTG,MBU
|
70-81 KKD
|
-
|
20/85
|
| Startup
|
Active
|
Recovery
|
Guard Adv
|
Parry Adv
|
Hit Adv
|
Invul
|
| 20
|
12
|
47 (51)
|
-29
|
-39
|
-
|
5-35 Throw
|
|
Standard 8A, used to add extra damage to certain knockdowns and discouraging delayed wakeups.
- This is Ashuraman's only meterless move that goes airborne, and has throw-invuln properties to call out throws. However, 2A is generally a significantly less committal option for this.
- Guaranteed as an OTG after 66T, 46T, 236S and 214S.
|
|
2A
2A
Low Dropkick
|
| Damage
|
Guard
|
Attribute
|
Property
|
Cancel
|
Cost
|
Meter Gain
|
| 42
|
Block/Parry
|
MS
|
OTG
|
53-58 KKD
|
-
|
8/21
|
| Startup
|
Active
|
Recovery
|
Guard Adv
|
Parry Adv
|
Hit Adv
|
Invul
|
| 23
|
3
|
32 (34)
|
-21
|
-15
|
+3
|
1-26 Throw
|
|
Average 2A that can OTG and has throw-invuln frames.
- Like most 2As, this is throw-invulnerable from frame 1, so can be used to reactively beat throws. However, considering Ashuraman's strong throw punish, teching the throw would usually net better reward.
- The OTG property is helpful as well, as there are several throws such as (Medium Stun) T where Ashuraman can get a 2A OTG but not 8A, and some throws like 66T where a 2A OTG is more consistent.
|
|
66A
66A
Upper
|
| Damage
|
Guard
|
Attribute
|
Property
|
Cancel
|
Cost
|
Meter Gain
|
| 56
|
Block/Parry
|
Launch
|
MBU
|
31-46 KKD
|
-
|
6/9
|
| Startup
|
Active
|
Recovery
|
Guard Adv
|
Parry Adv
|
Hit Adv
|
Invul
|
| 20
|
6
|
18 (22)
|
+6
|
-4
|
-
|
-
|
|
Ashuraman's launcher.
- Although the startup is a little slow, it's range is above average, which makes it easier to combo into or to use as a whiff punish.
- It's recovery is quite fast, letting it function as a combo filler in juggles, usually by doing an extra 66A or two after the initial 66A.
|
|
46A
46A
Shoulder Tackle
|
| Damage
|
Guard
|
Attribute
|
Property
|
Cancel
|
Cost
|
Meter Gain
|
| 84
|
Block/Parry
|
HS-5
|
MBU
|
46-58 KKD
|
-
|
32/69
|
| Startup
|
Active
|
Recovery
|
Guard Adv
|
Parry Adv
|
Hit Adv
|
Invul
|
| 21
|
3
|
32 (36)
|
-5
|
-15
|
+6~39
|
-
|
|
Heavy-stunning, forward-moving shoulder.
- Decent startup, and its forward movement usually leaves Ashuraman closer to the opponent than most heavy stuns.
- This move has deceptively long recovery, and as a result, it is Ashuraman's least advantageous heavy stun on hit/block, to the point of being the only one that is minus (albeit safe) on block.
|
|
WRA
(While Running) A
Dash Smash
|
| Damage
|
Guard
|
Attribute
|
Property
|
Cancel
|
Cost
|
Meter Gain
|
| 84
|
Block/Parry
|
HS-5
|
MBU
|
-
|
-
|
54/36
|
| Startup
|
Active
|
Recovery
|
Guard Adv
|
Parry Adv
|
Hit Adv
|
Invul
|
| 18
|
4
|
21
|
+5
|
-5
|
+16~49
|
-
|
|
Solid running attack that heavy stuns, with respectable frame advantage on hit/block.
- This move has rather significant pushback, making comboing off of it outside of the ropes difficult.
- As Ashuraman's combos frequently involve a dash-up 66A, misinputting that would frequently result in this move instead.
|
|
WGA
(While Grounded) A
|
| Damage
|
Guard
|
Attribute
|
Property
|
Cancel
|
Cost
|
Meter Gain
|
| 28
|
Block/Parry
|
MS
|
SKD,OTG
|
-
|
-
|
42/21
|
| Startup
|
Active
|
Recovery
|
Guard Adv
|
Parry Adv
|
Hit Adv
|
Invul
|
| 22
|
14
|
12 (16)
|
-10
|
-6
|
+12
|
1-21 Full, 22 Throw
|
|
Generic wakeup sweep.
- Unlike a lot of characters, Ashuraman has few ways to capitalize off of this move on hit, even if it hits late, owing to his limited number of fast buttons.
|
|
Throws
T
Triple Body Press
T
|
| Damage
|
Guard
|
Attribute
|
Property
|
Cancel
|
Cost
|
Meter Gain
|
| 168
|
Tech
|
KD
|
-
|
-
|
-
|
102/54
|
| Startup
|
Active
|
Recovery
|
Guard Adv
|
Parry Adv
|
Hit Adv
|
Invul
|
| 26
|
3
|
24
|
-16
|
-
|
-
|
-
|
|
Ashuraman's default throw, with his trademark long throw range.
- This throw does not side switch, and guarantees no OTGs.
|
|
6T
Prawn Hold
6T
|
| Damage
|
Guard
|
Attribute
|
Property
|
Cancel
|
Cost
|
Meter Gain
|
| 140
|
Tech
|
KD
|
-
|
-
|
-
|
90/47
|
| Startup
|
Active
|
Recovery
|
Guard Adv
|
Parry Adv
|
Hit Adv
|
Invul
|
| 26
|
3
|
24
|
-16
|
-
|
-
|
-
|
|
Throw that stays same-side, but does decent corner carry.
- Like most 6Ts, this has the lowest damage among Ashuraman's throws, made worse by the fact that it guarantees no OTGs.
|
|
66T
Power Bomb
66T
|
| Damage
|
Guard
|
Attribute
|
Property
|
Cancel
|
Cost
|
Meter Gain
|
| 140
|
Tech
|
KD
|
-
|
-
|
-
|
94/49
|
| Startup
|
Active
|
Recovery
|
Guard Adv
|
Parry Adv
|
Hit Adv
|
Invul
|
| 26
|
3
|
24
|
-16
|
-
|
-
|
-
|
|
Throw that stays same-side with a relatively advantageous post-throw situation.
- Although this throw is tied damage-wise with 6T, this throw consistently guarantees a 2A or 46S OTG, giving it the highest damage among Ashuraman's neutral throws aside from 46T.
- At the ropes, the negated pushback allows Ashuraman to OTG with 8A as well (though this is a somewhat tight link), bumping up the throw's damage to 224.
- Overall, the OTG possibilities of this throw makes it the 2nd best throw in terms of damage after 46T, and makes it Ashuraman's go-to throw that does not side switch.
|
|
46T
Death Valley Bomb
46T
|
| Damage
|
Guard
|
Attribute
|
Property
|
Cancel
|
Cost
|
Meter Gain
|
| 196
|
Tech
|
KD
|
-
|
-
|
-
|
110/60
|
| Startup
|
Active
|
Recovery
|
Guard Adv
|
Parry Adv
|
Hit Adv
|
Invul
|
| 26
|
3
|
24
|
-16
|
-
|
-
|
-
|
|
Damaging throw that side-switches.
- This throw further guarantees an 8A OTG, bringing its overall damage to 280. Combined with Ashuraman's great throw range, this throw becomes an excellent whiff-punish/neutral tool, as each successful throw would shave off over 25% of most characters' lifebars.
- As a whole, this is generally Ashuraman's go-to throw in neutral. During situations where the side-switch is undesirable, 66T is the next best option.
|
|
MST
Neck-Hanging Bear Hug
(Medium Stun) T
|
| Damage
|
Guard
|
Attribute
|
Property
|
Cancel
|
Cost
|
Meter Gain
|
| 168
|
N/A
|
KD
|
-
|
-
|
-
|
111/51
|
| Startup
|
Active
|
Recovery
|
Guard Adv
|
Parry Adv
|
Hit Adv
|
Invul
|
| 26
|
3
|
24
|
-
|
-
|
-
|
-
|
|
Average medium stun throw that stays same side.
- Ashuraman can get a guaranteed 2A OTG after this throw, but the timing is relatively strict.
- As Ashuraman has no ways to natural combo into this throw, this option is strictly relegated to after a rope bounce or a heavy stun, where Ashuraman has generally better options to go for.
|
|
HST
Neck-Hanging Buster
(Heavy Stun) T
|
| Damage
|
Guard
|
Attribute
|
Property
|
Cancel
|
Cost
|
Meter Gain
|
| 182
|
N/A
|
KD
|
-
|
-
|
-
|
130/55
|
| Startup
|
Active
|
Recovery
|
Guard Adv
|
Parry Adv
|
Hit Adv
|
Invul
|
| 26
|
3
|
24
|
-
|
-
|
-
|
-
|
|
Standard heavy stun throw that stays same-side.
- Ashuraman's throw speed can make comboing into this throw more difficult, but on the other hand, his throw range helps to somewhat negate the large pushback of heavy stuns.
- This throw guarantees no OTGs.
- Compared to other options Ashuraman has off of heavy stun, this does the least damage, but is meterless unlike a special throw, and builds less meter for the opponent compared to his juggle bnb.
|
|
FBT
Triple Sleeper
(From Behind) T
|
| Damage
|
Guard
|
Attribute
|
Property
|
Cancel
|
Cost
|
Meter Gain
|
| 196
|
Tech
|
KD
|
-
|
-
|
-
|
90/60
|
| Startup
|
Active
|
Recovery
|
Guard Adv
|
Parry Adv
|
Hit Adv
|
Invul
|
| 26
|
3
|
24
|
-16
|
-
|
-
|
-
|
|
Standard from behind throw, with the expected high damage.
- This throw does not side switch, and consistently guarantees a 2A or 46S OTG.
- As Ashuraman does not really have ways to end up behind the opponent or access to notable backhit combos, this throw is seen rarely.
|
|
FB6T
Cobra Twist
(From Behind) 6T
|
| Damage
|
Guard
|
Attribute
|
Property
|
Cancel
|
Cost
|
Meter Gain
|
| 168
|
Tech
|
KD
|
-
|
-
|
-
|
80/54
|
| Startup
|
Active
|
Recovery
|
Guard Adv
|
Parry Adv
|
Hit Adv
|
Invul
|
| 26
|
3
|
24
|
-16
|
-
|
-
|
-
|
|
The 6T counterpart to his from behind throw, doing quite a lot less damage.
- This leaves the opponent relatively far away post-throw, and guarantees no OTGs.
- In general, this is a strictly worse throw than (From Behind) T; its only real advantage over it is that it builds less meter for the opponent.
|
|
RT
Oklahoma Stampede
(Running) T
|
| Damage
|
Guard
|
Attribute
|
Property
|
Cancel
|
Cost
|
Meter Gain
|
| 140
|
N/A
|
KD
|
MD
|
-
|
-
|
36/-100
|
| Startup
|
Active
|
Recovery
|
Guard Adv
|
Parry Adv
|
Hit Adv
|
Invul
|
| 12
|
23
|
7
|
-
|
-
|
-
|
-
|
|
Ashuraman's throw on a running or rope-bounced opponent, doing low damage but draining some meter.
- This throw does decent corner carry, though this property is rarely relevant, due to its nature of being a rope bounce throw.
- The throw randomly switches the player-side, but it will always leave Ashuraman to the right of where he started the throw; in other words, it will be as if he had side-stepped to the right. This means that if Ashuraman initiates the throw with the ropes to his right, he would end up with his back to the ropes (or even cornered) after this throw.
- A 2A OTG after this throw is possible, though it is very strict.
|
|
WGT
Neck-Hanging Bear Hug
(While Grounded) T
|
| Damage
|
Guard
|
Attribute
|
Property
|
Cancel
|
Cost
|
Meter Gain
|
| 168
|
Tech
|
KD
|
-
|
-
|
-
|
111/51
|
| Startup
|
Active
|
Recovery
|
Guard Adv
|
Parry Adv
|
Hit Adv
|
Invul
|
| 39
|
3
|
28
|
-16
|
-
|
-
|
1-33 Full, 34-40 Throw
|
|
Ashuraman's wake up throw.
- This move borrows the animation, damage and meter gain values as his (Medium Stun) T.
- Ashuraman's large throw range applies to this throw, though this property is less important within the context of a wake-up reversal.
|
|
4T
Irish Whip
4T
|
| Damage
|
Guard
|
Attribute
|
Property
|
Cancel
|
Cost
|
Meter Gain
|
| 0
|
Tech
|
Run
|
-
|
-
|
-
|
0/0
|
| Startup
|
Active
|
Recovery
|
Guard Adv
|
Parry Adv
|
Hit Adv
|
Invul
|
| 21
|
3
|
28
|
-16
|
-
|
+17~35
|
-
|
|
Universal Irish Whip, sending opponents running behind Ashuraman.
- Notably, this is Ashuraman's only throw without his massive throw range.
- Like most characters with their 4Ts, Ashuraman's is a strong combo starter if he could get a rope bounce; he can easily combo into his special throws for True KKD-proof damage, and in the arcade version, this sets up his infinite.
|
|
44T
Side Switch
44T
|
| Damage
|
Guard
|
Attribute
|
Property
|
Cancel
|
Cost
|
Meter Gain
|
| 0
|
Tech
|
Special
|
-
|
-
|
-
|
0/0
|
| Startup
|
Active
|
Recovery
|
Guard Adv
|
Parry Adv
|
Hit Adv
|
Invul
|
| 26
|
3
|
24
|
-16
|
-
|
+10
|
-
|
|
Universal side switch throw.
|
|
Specials
S
Double Punch
S
|
| Damage
|
Guard
|
Attribute
|
Property
|
Cancel
|
Cost
|
Meter Gain
|
| 112
|
Block/Parry
|
HS-5
|
MBU
|
29-45 KKD
|
1
|
-100/80
|
| Startup
|
Active
|
Recovery
|
Guard Adv
|
Parry Adv
|
Hit Adv
|
Invul
|
| 19
|
3
|
22 (25)
|
+5
|
-5
|
+16~49
|
-
|
|
Fairly standard heavy-stunning neutral S.
- 6A into S is a natural combo, which allows for strong conversions off of the fairly low-committal 6A.
- Aside from this, S will also combo from 44A,6A (although this will knock down), and it has some uses in True KKD combos.
|
|
66S
Six Arms Flurry
66S
|
| Damage
|
Guard
|
Attribute
|
Property
|
Cancel
|
Cost
|
Meter Gain
|
| 154
|
Block/Parry
|
KD
|
MBU
|
-
|
2
|
-200/130
|
| Startup
|
Active
|
Recovery
|
Guard Adv
|
Parry Adv
|
Hit Adv
|
Invul
|
| 20
|
3
|
25 (29)
|
-20
|
-8
|
-
|
1-3 Full
|
|
Hitgrab, where if the initial hit connects, it transitions into an animation.
- Like most hitgrabs in this game, the damage is subpar for the meter spent, and for confirm purposes, Ashuraman's special throws do significantly more damage for only 1 more meter.
- This move still has a few niche uses: It has the 3f of startup invuln that is typically only found in special throws, and it is faster than the special throws by 4 frames; in very specific cases, such as off of 44A,6A, this lets Ashuraman combo into this move, but not into his special throws.
- Ashuraman gets no guaranted OTGs after the hitgrab animation.
- If this move hits on a non-standing opponent (e.g. in a juggle), the animation will not trigger, and the initial hit will only do 28 damage.
|
|
44S
Ashura Torpedo
44S
|
| Damage
|
Guard
|
Attribute
|
Property
|
Cancel
|
Cost
|
Meter Gain
|
| 28x4
|
Block/Parry
|
KDx4
|
-
|
65-76 KKD
|
1
|
-100/23x4
|
| Startup
|
Active
|
Recovery
|
Guard Adv
|
Parry Adv
|
Hit Adv
|
Invul
|
| 26
|
12 (2)
|
36 (40)
|
-8
|
-28
|
-
|
1-2 Strike, 3 Full, 4-41 Throw
|
|
A gimmicky, evasive move that goes airborne and moves forward quickly, making for a decent panic move or surprise round ender.
- This move can hit up to 4 times on paper, though it will generally hit only up to 3 times. On a standing opponent, only 1-hit will cause a proper knockdown, as 2 or 3 hits will float and allow the opponent to tech roll. This move typically hits once when used at max range, two times when used point blank, and three times when used around midscreen.
- The move itself is quite linear, and technically unsafe on parry; that said, the attack's forward movement means even if sidestepped or parried successfully, the move is usually safe due to Ashuraman ending up too far away to be punished reliably.
- It's multi-hitting property also means parrying it can result in the defender getting hit anyways, although this is inconsistent.
|
|
46S
Tornado Hell
46S Tatsumaki Jigoku! Tatsumaki Jigoku!
|
| Damage
|
Guard
|
Attribute
|
Property
|
Cancel
|
Cost
|
Meter Gain
|
| 70
|
Block/Parry
|
Launch
|
SKD,OTG,MBU
|
-
|
2
|
-200/125
|
| Startup
|
Active
|
Recovery
|
Guard Adv
|
Parry Adv
|
Hit Adv
|
Invul
|
| 26
|
72
|
65 (69) Total
|
-9
|
-19
|
-
|
1-3 Full
|
|
Ashuraman chucks a rather large, full-screen projectile with a whole host of versatile applications.
- The tornado launches on hit, which Ashuraman is able to pick up comfortably for a juggle from anywhere closer than full-screen with a dash/run up 66A into his standard launch bnb combo.
- This special also has the SKD property. Although Ashuraman does not struggle to SKD in his juggles, this property still comes up from time to time, since being able to cancel into the SKD-causing move opens up combo options. In particular, 46S can be useful as a combo ender in corner 236A,A juggles.
- On top of this, the move is also an excellent OTG. Although it costs meter and 8A outdamages it, 46S recovers a lot faster, meaning Ashuraman is at significantly more frame advantage when he OTGs with 46S instead of 8A; at worst, even if 46S hits on its 1st active frame, Ashuraman is only -7, compared to 8A being at best -15 if it hits on its last active frame. On the flipside, being a projectile, Ashuraman can end up very plus after this OTG if it hits late enough (such as on a faraway SKD), a rarity for OTGs in MGP2.
- Another perk of being a projectile OTG is that 46S is very active and can OTG for its entire active duration; this makes timing strict OTGs (such as after an SKD) much more lenient and consistent.
- The move is not without its faults: being a typical projectile, 46S is very linear, and can be reactively side-stepped or parried fairly easily. Unless used point-blank, it is generally safe or even plus on block, but its safety on parry/sidestep is very dependent on the range it is used from. Using it from full-screen makes the move almost risk-free, but it gives more time to reactively parry or sidestep the move.
|
|
236S
Ashura Buster
236S
|
| Damage
|
Guard
|
Attribute
|
Property
|
Cancel
|
Cost
|
Meter Gain
|
| 322
|
Tech
|
KD
|
-
|
129-130*
|
3
|
-300/180
|
| Startup
|
Active
|
Recovery
|
Guard Adv
|
Parry Adv
|
Hit Adv
|
Invul
|
| 24
|
3
|
26
|
-16
|
-
|
-
|
1-3 Full
|
|
The first of Ashuraman's two special throws. Does not side switch, but leaves the opponent a bit far away post-throw.
- This throw allows for a guaranteed 8A or 46S OTG, though midscreen, the former needs a dash-up first on everyone but the super-large characters. At the ropes, the negated pushback means Ashuraman can just OTG with 8A immediately.
- Comparing to his other special throw, 214S does 14 more damage and similarly grants an 8A OTG, but has a more unwieldy post-throw situation. This gives 236S a niche for ropes/corner confirms, as this throw consistently keeps the opponent at the ropes/corner to keep the pressure going.
- If Kinnikuman techs this throw, he will reverse it instead. Cancel frames represent when during the animation does Kinnikuman's reversal starts.
|
|
214S
Ashura Izuna Drop
214S
|
| Damage
|
Guard
|
Attribute
|
Property
|
Cancel
|
Cost
|
Meter Gain
|
| 336
|
Tech
|
KD
|
-
|
-
|
3
|
-300/212
|
| Startup
|
Active
|
Recovery
|
Guard Adv
|
Parry Adv
|
Hit Adv
|
Invul
|
| 24
|
3
|
26
|
-16
|
-
|
-
|
1-3 Full
|
|
Ashuraman's other special throw.
- This throw also guarantees an 8A and 46S OTG, and the opponent ending up closer to Ashuraman means that midscreen, he does not need to dash up to OTG with 8A.
- The post-throw situation after this special is rather awkward; though Ashuraman will stay on the same player-side where he initiated this move, he would end up to the left of where he started, a bit over one sidestep-left away. This means when used at the ropes/corner, Ashuraman might end up taking the opponent away from the ropes/corner, or worse, if he were to use it with the ropes to his left, Ashuraman may end up cornering himself.
- The higher damage of this throw over 236S, though marginal, generally makes this Ashuraman's special throw of choice, though a case can be made to opt for 236S instead at the ropes/corner.
|
|
Supers
41236A+S
Improved Ashura Buster
41236A+S
|
| Damage
|
Guard
|
Attribute
|
Property
|
Cancel
|
Cost
|
Meter Gain
|
| 434
|
Block/Parry
|
KD
|
-
|
-
|
9
|
-900/480
|
| Startup
|
Active
|
Recovery
|
Guard Adv
|
Parry Adv
|
Hit Adv
|
Invul
|
| 20
|
5
|
40
|
-15
|
-25
|
-
|
1-18 Full
|
|
Ashuraman throws out a tornado that transitions into a cinematic on hit.
- This super has above average range for a strike super, as Ashuraman takes a noticeable step forward prior to the move becoming active.
- However, this step forward causes the super to have the annoying tendency of whiffing post rope-bounce. If the super is used too close to the ropes after a rope bounce, the opponent would pass through Ashuraman, and the super would whiff. Consequently, unlike most characters, rope bounce into super is not something Ashuraman can reliably do.
- After the cinematic, this super leaves Ashuraman approximately midscreen, with the opponent one backdash away, and with no followup OTG possible.
|
|
63214A+S
Ashura Infinity Power
63214A+S
|
| Damage
|
Guard
|
Attribute
|
Property
|
Cancel
|
Cost
|
Meter Gain
|
| 434
|
Block/Parry
|
KD
|
-
|
-
|
9
|
-900/480
|
| Startup
|
Active
|
Recovery
|
Guard Adv
|
Parry Adv
|
Hit Adv
|
Invul
|
| 20
|
5
|
40
|
-15
|
-25
|
-
|
1-18 Full
|
|
Ashuraman's alternate super, with the similar initial tornado hit but with a different cinematic and post-super situation.
- As the actual attack portion of this super is identical with 41236A+S, this super shares the same problem of passing through a too-close rope-bounced opponent.
- The post-cinematic situation leaves ghe opponent just about cornered, with Ashuraman about a backdash away. This generally more advantageous position makes this super arguably the superior one, though this is not by a wide margin.
|
|
Strategy
6A is one of Ashuraman's most important buttons in neutral and pressure, as on hit it allows him to convert to over 300 damage for one bar. Hitconfirming 6A xx S consistently is one of the most important things to learn with the character. Throwing is also a significant component to Ashuraman's gameplan in neutral, due to their excellent range and good reward. 46T is generally the best throw to go for, as the OTG it guarantees allow for high damage. However, if you wish to avoid 46T's side switching property, 66T is the best alternative. 46S is also a relatively low-committal option to use in neutral, though a ready opponent can quickly call it out by running towards Ashuraman and hitting him out of startup. When under pressure, Ashuraman's A and 6A are relatively fast enough to jab out of pressure after a successful parry, and 44S can be used as a "panic button" of sorts.
Ashuraman is not particularly dependent on meter to function, since as long as he has 1 bar of meter, he is able to do his 6A xx S confirm. More meter is useful to use 46S in neutral or his special throws for confirms, but these are relatively low-cost specials.
Ashuraman works well with all KKD types. All of the low-health buffs are useful, although Ashuraman rarely needs the extra meter build of Red KKD unless you are going for his supers often. With True KKD activated, He can get some unique combos in Blue KKD, and Red KKD can let him abuse specials such as 46S. Green KKD activation is comparatively the least useful, as Ashuraman tend to be strong in neutral anyways that Green KKD's super armor does not mark a significant upgrade for his neutral game.
Combos
Combo Theory
Ashuraman is a character with stable, straightforward combos, at least outside of the corner. As far as standing combos go, 6A xx S is Ashuraman's most important confirm. As neutral S is a heavy stun, this comes with the significant asterisk of being mashable, making certain combos more difficult/impossible against better mashing. Despite this, it is still a strong hitconfirm, as at the very least it does decent damage while leaving Ashuraman plus. Typically, Ashuraman wants to confirm the heavy stun into a dashing 66A. Dashing deep enough is important to get Ashuraman as close as possible to the launched opponent, as this makes his juggles more consistent; it is also easy to misinput this as (While Running) A, so practicing to avoid this can be helpful. Aside from 6A xx S, Ashuraman's next most important standing combos are getting 8A or 46S OTG off of the throws that guarantee them; this is only somewhat tricky with 66T.
Ashuraman's midscreen juggles are very canned in nature, owing to the strength of the A,A,4A,A,6A string. The string is fairly forgiving in terms of height, and getting a feeling for it is relatively easy. Distance can mess up the juggle, as it can cause the last hit or two to whiff if Ashuraman is too far away. However, with every launcher aside from raw 66A, Ashuraman should have the time to get closer if he is too far. Being off-axis has the tendency of causing the string to whiff more often than not; in this case, it's better to opt for the 6A,A,A string to juggle instead for the consistency. Another component of Ashuraman's juggles is the use of 66A as combo filler; Ashuraman can get an extra 66A or 2 after the initial launch before going into the A,A,4A,A,6A string, though the scaling usually makes the 2nd 66A hardly if ever worth it. The extra 66As also has the added benefit of moving Ashuraman forwards a little bit, which is handy if he is too far from the opponent after the initial launch.
Ashuraman has a few new combo opportunities at the ropes/corner. Aside from a modified juggle bnb accounting for the 66A combo filler messing up the juggle, Ashuraman gains the ability to loop 236A,A (cc). These can be started off of a launch or a heavy stun, but they are extremely finicky; it requires very particular timing/rhythm to get the height right, and Ashuraman getting pushed off-axis will functionally almost always kill the combo. However, they can still be worth learning, as being able to get in 5-6 reps can do upwards of 500 damage. However, they should not be a priority when starting off with Ashuraman. Aside from this, Ashuraman has the arcade-only infinite, which is certainly worth practicing in the arcade version. Additionally, even without doing the full infinite, one rep of it can be used as a starter of the 236A,A (cc) loop.
As a character without an air throw that relies on SKDs, Ashuraman can get an OTG after his juggles. Like most practical SKD moves, A,A,4A,A,6A and 46S have relatively low grounded untech time; this makes linking his 8A slow OTG difficult, but not impossible to do consistently with practice. Ashuraman has the unique option of using his 46S special as an OTG, and although this is less damaging than 8A and costs meter, it is far easier to time, and leaves Ashuraman much more advantageous upon OTG. Doing either OTG brings up the damage of Ashuraman's bnb to the high 400s.
Midscreen
- (66T/46T/236S/214S), 8A/46S
Throws allowing an 8A or 46S OTG. 66T is only possible at the ropes, and 236S requires a dash-up midscreen.
- 6A xx 5S, (dash) 66A, 66A, 6A,A,A
Highly consistent, easy day 1 bnb.
- 6A xx 5S, (dash) 66A, 66A, A,A,4A,A,6A
Standard midscreen bnb.
- 46S, (dash/run) 66A, A,A,4A,A,6A
Standard bnb off of Tornado Hell.
Ropes
- 6A xx 5S, 66A, A,A,4A,A (cc), A,A,4A,A,6A
Ropes/Corner bnb, since double 66A drops at the ropes.
Corner
- (Heavy Stun) 236A,A, 236A,A, 236A,A (,66A/xx 46S/xx 44S)
A 236A loop variant. 66A is the built-in meterless ender that does not knock down, 46S does the same damage but knocks down for 2 bars, and 44S does the most damage with no knockdown for 1 bar.
- (Launch) (236A,A (cc))xN (, 6A,A/xx 46S)
236A loop. Pseudo-infinite, but with strict timing.
- (Rope Bounce) (A, 6A (cc))xN (ARCADE ONLY)
Arcade-only infinite.
Colors
External Links

