Akatsuki Blitzkampf/Akatsuki: Difference between revisions
(→Combos) |
m (→Frame Data) |
||
| Line 637: | Line 637: | ||
<br>'''KD''' - Knockdown | <br>'''KD''' - Knockdown | ||
<br>'''VA''' - Variable | <br>'''VA''' - Variable | ||
<br>'''*UV''' - | <br>'''*UV''' - value(s) marked with "'''?'''" in the table is/are unverified | ||
<br>'''x~yF''' - a period from frame "'''x'''" till frame "'''y'''" | <br>'''x~yF''' - a period from frame "'''x'''" till frame "'''y'''" | ||
Revision as of 17:06, 25 July 2020
Background
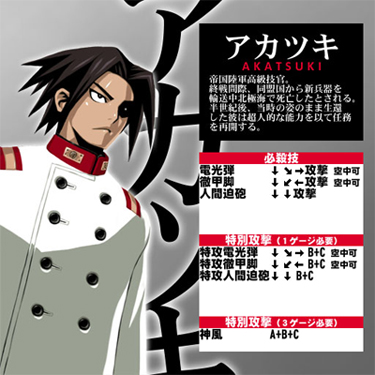
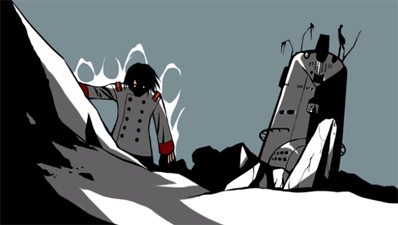
High class technical officer of the Imperial army. Believed to have died at the critical times of War coming to its end, in the Arctic ocean, during the transportation of a new military unit from an allied country. 50 years after, returning alive and unchanged in appearance, he, wielding superhuman abilities, resumes his mission. (from character selection screen)
Introduction
Akatsuki is the main character of the game so it's no surprise that he is one of the fireball archetypes with a special moveset consisting of a fireball, uppercut, and flying kick. Following the tradition of many fireball archetypes, Akatsuki is a well-rounded character with moves for practically every situation. He can convert random pokes into big damage with the opponent in and away from the corner using his devastating 6C or his 6B overhead. With his combo potential, high damage, and a moveset that covers practically all the bases, Akatsuki poses a major threat to any character in the hands of a skilled player.
- Armor Ratio = 1.000
Normal Moves
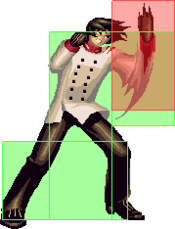
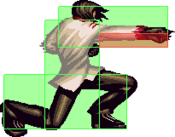
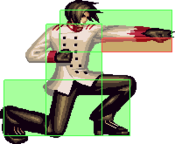
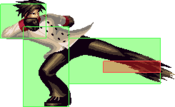
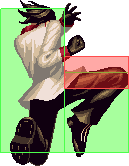
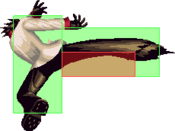
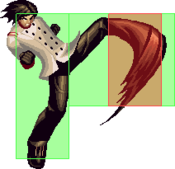
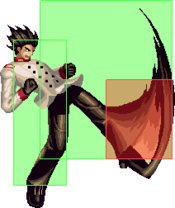
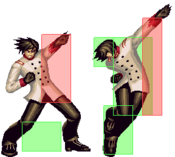
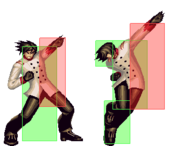
5A 5AA 5AA
|
|---|
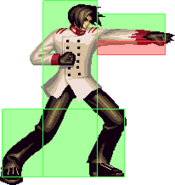
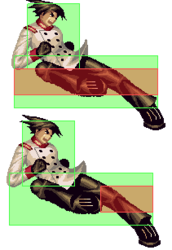
5B (close)
|
|---|
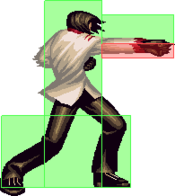
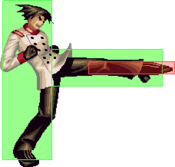
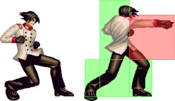
5B (far) Tippytoes Tippytoes
|
|---|
5C (close)
|
|---|
5C (far)
|
|---|
2A
|
|---|
2B
|
|---|
2C
|
|---|
j.A
|
|---|
j.B
|
|---|
nj.B
|
|---|
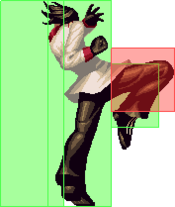
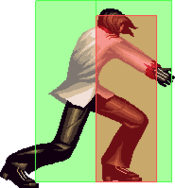
j.C Get used to this sprite. You'll see it here a lot. Get used to this sprite. You'll see it here a lot.
|
|---|
nj.C
|
|---|
Command Normals
兜割リ - Kabuto Wari
6B |
|---|
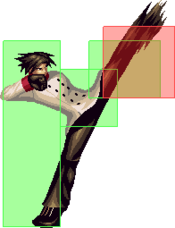
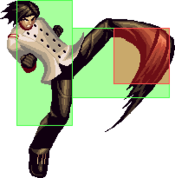
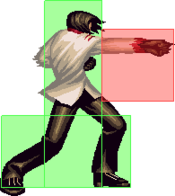
顎割リ - Agito Wari 6C Miss this and you're dead Miss this and you're dead
|
|---|
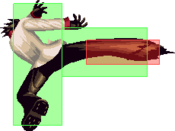
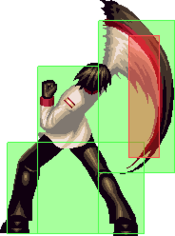
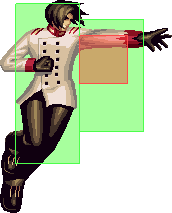
瓦割リ - Kawara Wari j.2C Can you call this a divekick? Can you call this a divekick?
|
|---|
Special Moves
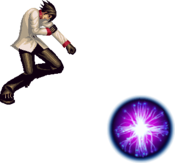
電光弾 - Denkoudan 236 A/B/C/B+C (Air OK!) Hadouken! Hadouken!
|
|---|
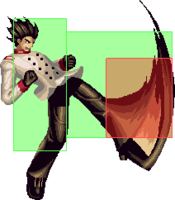
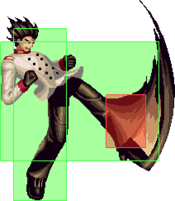
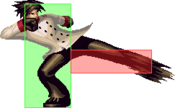
徹甲脚 - Tekkoukyaku 214 A/B/C/B+C (Air OK!) Che- Che- Che- Che- Chesto! Chesto!
|
|---|
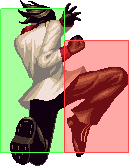
人間迫砲 - Ningen Hakubou 22 A/B/C/B+C It's no shoryuken but it's cute anyways. It's no shoryuken but it's cute anyways.
|
|---|
Super Move
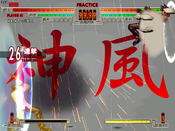
神風 - Kamikaze A+B+C 5AA c.5B c.5C f.5B f.5C 6B 2AA 2B 2C c.5B 6C 236 BOOM 5AA c.5B c.5C f.5B f.5C 6B 2AA 2B 2C c.5B 6C 236 BOOM
|
|---|
Universal Mechanics
Throws
Ground Throw 4/5/6 A+B Bzzt Bzzt
|
|---|
Air Throw
j.4/5/6 A+B |
|---|
Reflector
Standing Reflector 5B+C It's just a thicc 5A. It's just a thicc 5A.
|
|---|
Crouching Reflector
2B+C |
|---|
Jumping Reflector
j.B+C |
|---|
General Strategy
Overview
In spite of having the movelist of a shoto, Akatsuki can not be played like one. He can not spam projectiles and wait for the opponent to jump at him so he can score an anti-air. The reflector system absolutely kills that style of play. However, Akatsuki is a very flexible character with great normals, solid mixups, and powerful combos. His moves allow him to punish mistakes on the fly with oftentimes devastating results.
Basics
Since Akatsuki is a well-rounded character, he isn't all that confusing to use effectively. Every one of his moves have a specific application, some of which can be used in more than one situation. Knowing how each move can be utilized in each of the many different situations is essential for success just like with any other character.
Pokes/Footsies
Akatsuki is equipped with very useful pokes. These pokes are: 5A, 2A, 5B, 2B. The A attacks are best utilized up-close because they are quick and have short range. The B attacks are best utilized with a little more space between you and the opponent. The B attacks are great for footsies because of their range and speed. On hit you can turn them into a combo depending on your spacing. Or block, you can cancel into a 236_(to create space) or a 214A to stay within close proximities.
Anti-Air
Akatsuki has a nice variety of moves which can be used for anti-air. However, due to the simplistic parrying system in the game, it isn't always wise to attempt an anti-air because not all of his anti-air options are parry-proof. This section lists his anti-airs and specific situations in which they may be used. As usual, mixing them up will yield better results.
- 22A/B/C: This is perhaps the most obvious one since it acts like a Shoryuken. It will beat out a lot of attacks provided that you do not attempt it too early. Mixing in the different versions can help throw off the opponent's parry timing. eg: You do 22A but the opponent was expecting a 22B/C and ends up doing an extra parry. This allows you to land without taking damage and the situation ends neutral.
- 22+B+C: This one can be used much like the one above. It deals much greater damage but it is also a lot riskier to use since if it gets blocked or parried, you are left completely vulnerable on the way down. It is best utilized if the opponent mistimes their meaty jump-in. Use this one with caution.
- 5C: This attack hits at a nice upward angle making it a pretty good anti-air. If the opponent takes the hit, it will knock them down allowing you to close the gap between you. If they block it, it will push them back a bit leaving you safe.
The following can be used in situations in which the opponent jumps at you but none of the above will hit them reliably:
- 5A: This can work against close empty jumps if you weren't quick enough to pull off a 22_ and are too close to hit a 5C. Hitting the opponent with one of these will cause them to quickly land on their feet which allows you to play a high-low upon their landing. You can also do this if they decided to block the 5A instead.
- 5B: This may not look like an anti-air, but it can be used as one. This will hit opponents if they are outside your normal anti-air range but happen to stick out an attack pretty late. If they decided to block instead, it will push them back at a safe distance.
- 2C: If the opponent sticks out a move, you might get hit, but otherwise this move will knock them down if they weren't holding crouch guard upon landing.
Mixups
Once Akatsuki gets a knockdown, he can continue to pressure his opponents as they are standing up.
High/Low
Akatsuki's 6B is an overhead and as a result, it must be blocked standing. On hit, you can link a 5A/2A into a combo for a knockdown and sometimes a corner situation. Alternatively, after a knockdown you can attempt this early and whiff it on purpose and as a result you can bait any wakeup attacks and block them in time. You can also use a meaty 2B after a whiffed 6B which must be blocked low and turn it into a combo which will also result in another knockdown or a tech punish. If the 6B gets blocked, you are relatively safe from punishment.
Crossups
Akatsuki's j.B is a great crossup. When done correctly, the opponent must block in the opposite direction from which they are facing because he is no longer in front of them when the j.B connects. Because of the position and timing, it can be a difficult attack to parry consistently. If you can aim your jump in such a way that you are at the very top of the opponent's hitbox, you can confuse the opponent into thinking whether or not the j.B will cross them up. When the j.B does hit (crossup or not), you can turn it into a damaging combo.
Guard Break
Also worth mentioning is Akatsuki's amazing guard damage, especially in the corner. Whenever you're not outright opening your opponent up, you will at least be close to breaking his guard, unless he's parrying.
214A > 22C(2) > 236BC alone eats up almost half of the guard gauge, with no gap to parry the 236BC once the DP has been blocked, while also checking for mashing. A good use of meter for when you really need the pressure.
Tick Throw Setups
Tick throws will normally come off blocked attacks. But most of these will also work in the case that the initial attack hits the opponent and they don't poke out in time.
- 2A -> throw
- 6B -> [2A] -> throw (The 2A is optional)
- j.B -> throw (This also work if the j.B crosses them up)
- 5A (air blocked) -> dash -> throw
Combos
Midscreen Combos
- 2B5B -> 214C / 214+B+C / ABC or 2B5B6C -> j.B, j.214C
- The most basic 214C confirm is also your only option outside of 6C range (e.g. tip 2B/5B range). The latter variation works at 6C tip range.
- [j.C] 2A5B6C -> j.A, j.B, -> land 214C
- An easy combo that does fair damage for no meter. To get the combo to work, pause slightly between the two jumping attacks. 214C upon landing does more damage than the air version. This is the basic template for most of Akatsuki's juggles.
- launch -> j.A, j.B -> land 5B/214A, ABC
- Same combo as the one above although it ends in his level 3. His level 3 combos nicely off his B attacks both on the ground and in juggles, so use it if you need to make a comeback and establish some momentum.
- launch -> j.A, pause, AB
- Alternative to the basic meterless combo. This combo gives more momentum at the expense of damage. The more hits before the launcher, the wider the damage gap.
- 6B -> 5AB, 214C
- Standard combo from the 6B overhead.
- 6B -> 5A6C -> j.A, j.B -> 214C
- More damaging version of the one above.
- 22C(2), 236+B+C
- This is more of a way to have a safe wakeup attempt/deal guard damage in the corner. You can super cancel up to the second hit of the 22C but beware of reflector-happy opponents as you are unable to super cancel the attack if the 22C gets reflected at any point.
- (reflector) 5B, 214C
- Simple combo off the reflector. This works if you reflect the opponent's air attack or if you're in the air and you reflect the opponent's ground attack.
- 8j.C -> 66 5B 214C
- nj.C lets you juggle afterwards.
Corner Combos
All of these combos can be finished with A+B+C instead of 236+B+C if you have enough meter, or with 22A instead of 22C if you have none.
- [j.C] 5BB6C -> j.8A, j.8C -> j.A, j.B -> 5BB,22C -> 236+B+C
- In the corner, Akatsuki can do longer and more damaging juggle combos. Be sure to super cancel the 22C on the second hit since the 236+B+C super does more damage on the ground than it does in the air.
- [j.C] 5BB6C -> j.A, j.B -> 5C(c), (delay)214A -> (5ABB 22A) OR (5AB 22C -> 236+B+C)
- 214A juggle that also works slightly further away from the corner. Use f.B if not in 5C(c) range.
- [j.C] 5C(c)6C, 214A -> 5C(c), (delay)214A -> 5ABB, 22C -> 236+B+C
- This combo is the 214A loop. It requires a bit of timing and precision but is among one of the most damaging corner combos he has. Use f.B instead of 5C(c) if you're not close enough, the combo still works. See it here.
- 2AB5B -> 214B -> 2A5B -> 214A -> 5ABB,22C -> 236+B+C
- A shortened version of the 214A loop that can be setup from outside of the corner. Use this if you are out of range to land his 6C launcher. The 2A after 214B is a fairly tight link.
- (reflector) 5B, 214A -> 5B, 22C, 236+B+C
- A longer combo that does more damage than the midscreen reflector combo. This one can do upwards of about ~3000+ damage which isn't bad off a reflector.
- 22C(2), 236+B+C -> 2A5BB 22A (OR) 22C(1), 236+B+C -> 5B 214A -> 2A5BB 22A
- For when your guard break setup catches mashing.
Frame Data
source
KD - Knockdown
VA - Variable
*UV - value(s) marked with "?" in the table is/are unverified
x~yF - a period from frame "x" till frame "y"
                       |     Frames      |  Frame Advantage  |
               Attack  | Total | Startup | On Hit | On Block | Notes
Throws and Reflectors  ---------------------------------------
            4/5/6+A+B  |  21   |    5    |   KD   |    --    |
          j.4/5/6+A+B  |  21   |    3    |   KD   |    --    |
                5+B+C  |  17   |    7    |   KD   |    +3    |
                c.B+C  |  17   |    7    |   KD   |    +3    |
                j.B+C  |  16   |    6    |   KD   |    +3    |
                  A+C  |  44   |   --    |   --   |    --    | cancellable after 28F
              Normals  ---------------------------------------
                   5A  |  15   |    4    |   +0   |    +0    |
             close 5B  |  24   |    5    |   -4   |    -6    |
               far 5B  |  25   |    7    |   -3   |    -5    |
             close 5C  |  25   |    6    |   +0   |    -4    |
               far 5C  |  31   |    8    |   KD   |    -8    |
                  c.A  |  14   |    4    |   +1   |    +1    |
                  c.B  |  25   |    7    |   -3   |    -5    |
                  c.C  |  32   |    9    |   KD   |    -8    |
                  j.A  |  15   |    4    |   +0   |    +0    |
                 7/9B  |  25   |    6    |   VA   |    VA    |
                   8B  |  24   |    5    |   VA   |    VA    |
                 7/9C  |  20   |    9    |   VA   |    VA    |
                   8C  |  21   |    7    |   KD   |    VA    |
           c./5A > 5A  |  15   |    4    |   +0   |    +0    |
          c./5A > c.A  |  15   |    4    |   +0   |    +0    |
      Command Normals  ---------------------------------------
                   6B  |  30   |   21    |   +6   |    +4    |
                   6C  |  41   |   10    |   KD   |   -16    |
                 j.2C  |  VA   |   15    |   VA   |    VA    | landing recovery 7F
             Specials  ---------------------------------------
                 236A  |  48   |   10    |   -8   |   -12    |
                 236B  |  48   |   11    |   -7   |   -11    |
                 236C  |  48   |   12    |   KD   |   -10    |
               j.236A  |  VA   |   11    |   VA   |    VA    | landing recovery 14F
               j.236B  |  VA   |   12    |   VA   |    VA    | landing recovery 15F
               j.236C  |  VA   |   13    |   KD   |    VA    | landing recovery 16F
                 214A  |  26   |   11    |   +0   |    -2    |
                 214B  |  50   |   11    |   KD   |   -15    |
                 214C  |  60   |   11    |   KD   |   -14    |
               j.214A  |  VA   |    8    |   VA   |    VA    | landing recovery 10F
               j.214B  |  VA   |    8    |   KD   |    VA    | landing recovery 10F
               j.214C  |  VA   |    8    |   KD   |    VA    | landing recovery 12F
                  22A  |  41   |    3    |   KD   |   -23    | 1~3F invincible? *UV
                  22B  |  52   |    4    |   KD   |   -32    | 1~4F invincible? *UV
                  22C  |  61   |    5    |   KD   |   -39    | 1~5F invincible? *UV
       EX and Level 3  ---------------------------------------
              236+B+C  |  51   |   13    |   KD   |    +0    | 1~4F invincible? *UV
            j.236+B+C  |  VA   |    5    |   KD   |    VA    | 1~2F invincible? *UV, landing recovery 18F
              214+B+C  | 100   |   13    |   KD   |   -25    | 1~5F invincible
            j.214+B+C  |  VA   |    4    |   KD   |    VA    | 1~2F invincible, landing recovery 14F
               22+B+C  |  72   |    5    |   KD   |   -50*   | 1~6F invincible, *if 3 hits were blocked
                A+B+C  |  38   |   15    |   KD   |   -20    | superflash 40F, 1~5F invincible
               (1st hits connect)
                A+B+C  |  ""   |   ""    |   KD   |   -10    | ""
               (1st hits are guarded/reflected)
Trivia
Akatsuki's Story (it's a pretty rough translation done way back in 2008, feel free to edit - nekich)
 Prologue:
 紀元二六六X年… Year 266X A.D.
 前大戦末期、同盟国から At the end of the previous War, during the transportation
 新兵器を輸送中に of a new military unit from an allied country
 北極海が突如浮上した From a suddenly surfaced in Arctic ocean sub,
 その中から現れたのは appears
 技術研究のため派遣された an ex military officer of the imperial army Akatsuki,
 旧帝国陸軍技官アカツキであった sent for a technological research
 冬眠制御によって thanks to hibernation control
 平世紀の間年き長らえた彼は he lived through the whole Heisei era
 覚醒と同時に and awaken and at the same time he
 残された任務を再開する… resumes an abandoned mission
 Marilyn pre-battle:
 <上海港> Shanghai Harbor
 大陸を南下するアカツキに As Akatsuki travels south continent
 電光機関を狙うマフィアの an assassin who wants to steal
 兇手が待ち受ける… the Blitz Engine awaits him
 Wei pre-battle:
 <上海臨港新城> Walls facing the Shanghai Harbor (Xinsheng)
 中国最大のマフィア・黒手会 From the chinese largest mafia, the Black Hand,
 大陸最強と謳われた兇手が an assassin, admired as the strongest one,
 アカツキの前に立ち塞がった stands in Akatsuki's way
 Kanae pre-battle:
 <富士・陸軍研究所跡> Mt Fuji - Military Research Lab Ruins
 帰国したアカツキを Akatsuki, returned to his country,
 待ち受けていたのは is awaited by a ground special task operative
 任務解除命令を持つ who holds the cancellation orders
 陸幕の特殊工作員だった…
 Fritz pre-battle
 <富士ヶ嶺> Mt Fuji Peak
 遂に現れた使者は Finally, the messenger is seen,
 かっての同僚、不律だった the former colleague, Fritz
 平世紀の時を経て Hell that passed over the Heisei era
 地獄の釜は再び開く… breaks loose once more
 Fritz encounter:
 ア:不律…達者のようだな Fritz...doesn't look like you're in good health.
 不:…気付いてあったか You noticed, huh?
 ア:研究所に行けば decided that if i'm going to the research lab
   必ず接触があると踏んだ there is always a contact.
 不:あの状況でよく生き延びた Hm, in those circumstances you've survived well enough
   と言いたい所じゃが…  to want to talk about that place...
 ア:やはり何か知ってりるのか…  So you know something...?
 Sai pre-battle:
 <香港・銅鑼湾> Hong Kong - Causeway Bay (To'ng luo' Wa-n)
 再び大陸へ向かうアカツキに Once again travelling to continent
 接触するエージェント・塞 Akatsuki is contacted by an agent - Sai.
 彼もまた電光機関を And he too seeks for the Blitz Engine...
 狙っていた…
 Anonym pre-battle:
 <香港・神聖クラブ教会> Hong Kong - Church of the Sacred Club
 修道女姿のエージェントは A figure of a nun agent
 神の名を唱えながら while chanting the name of God
 銀の引鉄に指をかけた… puts fingers upon silver metal
 E-Soldat pre-battle:
 <チベット・ツァンポ峡谷> Thibet - Tsuanpo ravine
 第三帝国最大の研究機関 The largest research facility of the Third Reich,
 秘密結社「ゲゼルシャフト」 a secret society "Gesseleschaft"
 戦後、彼らはアジアの秘境に Postwar, they have amassed in this base,
 その拠点を築いていた… in this secluded part of Asia
 Adler encounter:
 アド:侵入者…誰かと思えばIntruder...Come to think of it,
     死に損ないのサルではないか aren't you that monkey who escaped death?
 アカ:親衛隊か… Bodyguard?
     そこをだけ only here?
 アド:フ… Hmph...
     俺は衛兵のようにはいかんぞ My duty is that of a sentinel.
 Perfecti pre-battle:
 <ペルフェクティ祭壇> Altar of Perfecti
 ゲゼルシャフト基地の中枢 The center of Gesselschaft base.
 そこには「完全者」と名乗る Here, announcing herself as a "Perfect One",
 少女が立っていた… a young lady stands up.
 Blitztank pre-battle:
 <ゲゼルシャフト兵器工廠> Gesselschaft Armory
 大戦末期に開発を中止された It's development was cancelled at the end of the war,
 禁断の決戦兵器… a prohibited last-resort weapon.
 ゲゼルシャフトは既に Gesselschaft has already
 その復元を完了していた completed its restoration
 Murakumo pre-battle:
 <電光機関> Blitz Engine
 基地最深部で稼働する In the very depths of the base,
 巨大な電光機関 a huge working Blitz Engine.
 そこで待っていた者は… A person waiting here is...
 Murakumo encounter:
 ア:何故お前がWhy are you here?
   こんな所にいる
 ム:それはこっちの台詞だ Those are my words,
   試製一號… Experiment 1
 ア:「任務二失敗セシ時八 "When mission fails twice,
   電光機関ヲ総テ破壊セヨ」Destroy all 8 Blitz Engines!"
   お前の命令だったな weren't those your orders?
   「アカツキ零號」よAkatsuki Zero?!
 ム:まさか生還する者がいるとは Well, i've never expected you
   思っていなかったのでな to return alive
 ア:やはり全滅を承知で So the North Pole route was picked
   北極航路をとらせたのか… knowing it would lead to destruction?
 ム:無限の電力で装甲を溶かし Melting armor with the infinite power of electricity,
   電子兵器を無力化する… disabling electronic weapons...
   電光機関を独占した我らが After monopolyzing the Blitz Engine
   最終戦争に勝利し I will win the final war
   新世界秩序における and within the New World Order
   「現人神」となるのだwill become the human God.
 ア:世迷言を… Nonsense...
   電光機関は全て破壊するI'll destroy all of the Blitz Engine.
 ム:ほう…やる気か Oh..are you willing to?
   完成なったこの六〇式… This sixties model? That has reached perfection?..
   旧式の貴様に勝機は無い  You, the old type, cannot win
 Epilogue:
 ム:グハァッ!… Gahh!.. Hah....hah....
   ハァッ…ハァッ…ハァッ…
 ア:やはりその白髮 So, this white hair
   結果は分かっていた筈だ Should've realised the consequences
 ム:否…この死の力…私は… No...this power of death....i've...
   …乗り越え…た…  over...came...
 ア:人は神でも機械でもない… Human is neither a god nor a machine...
   これで終わりだ It ends here.
 紀元二六六X年X月… 266X A.D. month X
 チベット奥地で大規模な A large Tibetan hinterland had collpased
 崩落事故が発生した
 名国の調査隊が派遣されるも A group sent to investigate
 巨大な岩塊以外に couldn't find anything except rocks...
 何も発見する事は
 出来なかった…
