Akatsuki Blitzkampf/Sai
Background
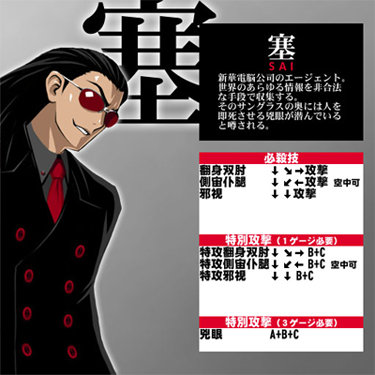
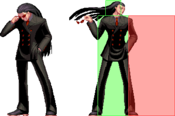
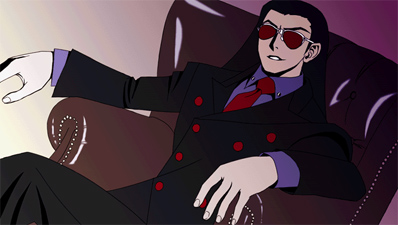
An agent of the Xīnhuá Computer Company. He gathers all sorts of information throughout the world by illegal means. It's rumored that hidden behind his sunglasses there's a wicked eye that can kill a person instantly. (from character selection screen) Read the translation of his arcade mode!
Introduction
Sai, the secret agent with an eye that can supposedly kill a man with one look.
Sai is a very strong member of the ABK cast, with great neutral and offense but weak defense. Sai's normals have good range with low whiff recovery and his mixups are some of the best in the game. Making this stronger is his consistently high combo damage and the ability to carry an opponent from one corner to the other with one bar. However, a lack of a good anti-air makes dealing with jump-ins difficult. In addition, he has no reversal without meter. Still, with his deceivingly good neutral and incredible offense, he's a powerful threat in any matchup.
Similar to: Yun, Fei-Long, Slayer
| Strengths | Weaknesses |
|---|---|
|
|
All damage values below were tested on Akatsuki with 1.000 armor ratio and full life on both sides (remember about "Health difference" and "Guts" systems)
Character Summary
- Special Moves
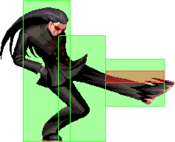
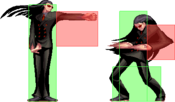
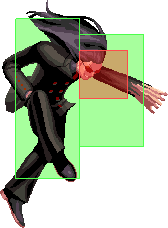
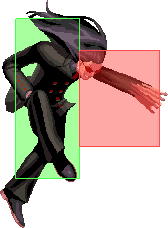
- 236A/B/C (EX OK) - Honshin Souchuu: Quick elbow bash
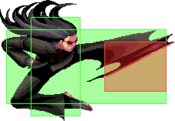
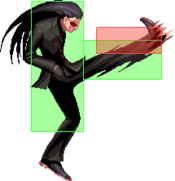
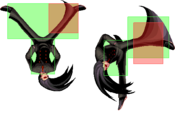
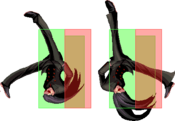
- 214A/B/C (EX OK, Air OK) - Sokuchuu Hokutai: Overhead flip kick
- 22A/B/C (EX OK) - Jyashi: Command grab debuff curse
- Level 3 Super
- A+B+C - Kyougan: Command grab that deals high damage, applies all debuffs and steals life
- Unique Attacks
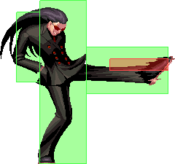
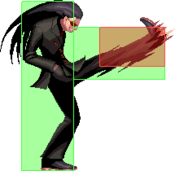
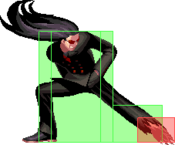
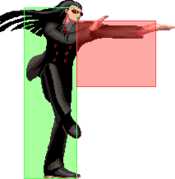
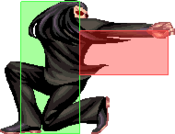
- 6B, 4C
- Armor Ratio = 1.000 (Average armor value)
- Forward Speed = 6.0 dots/F (Second fastest unbuffed value)
- Backwards Speed = 5.0 dots/F (Fastest unbuffed value)
- Jump Startup = 4F (Second slowest value)
- Backdash Duration = 20F (Third fastest value)
Basic BNB: 2A > 2B > 5C
Metered BNB: 2A > 5B > 236A > 236B+C > 236B > 214B+C
Corner BNB: (6B >) 5A > 5B > 4C > 5B > 236C > 5A > 5B > 236B (> 236B+C)
Reflector: B+C > 236C (>5A > 236B)
Notes on Ausf. Achse
Universal Changes
Weakened reflectors hurt Sai more since he had great reflector combos. Relative to Ausf Achse he still has good reflector combos but it hurts.
Character Changes
There were animation changes to his walking, dashes, and 236X. This doesn't matter for the most part, but on 236X, the part where Sai dashes forward was shortened without changing the frame data. Basically, he can sometimes get hit by things during the startup of 236X he wouldn't get hit by in PC. Additionally, his backdash no longer low profiles although it's still very good.
5C has multiple changes. It now has more recovery (-6 to -8). This makes it easier to punish and it no longer combos into 2B, hurting his midscreen routes heavily (it can still combo into 2A but only if Sai's close to the opponent). As a small buff, it deals higher guard damage.
2C no longer launches opponents for a combo and simply gives a knockdown. This makes it almost useless in his kit.
j.C does two hits instead of three (the damage has been changed from 600x3 to 800x2). This makes it much easier to anti-air reflect and also means he can't get triple overheads. It's just as active so it's still incredible at anti-air and can still beat anti-air reflectors.
6B has been turned into a new move. It only hits once so it's easier to parry. It does 1000 damage which is better since the single hit means you get better scaling. It has more frame advantage on hit, making it significantly easier to combo off and can even combo into 5B or 2B when meatied or landed on a crouching opponent.
4C does 100 less damage (1200-1100). It's now -6 instead of -4, so while the pushback still means it's mostly unpunishable, it's harder to do RPS after.
The movement speed and distance of 236X has been reduced across the board. Additionally, 236C has 2 more frames of recovery, making it -4 as opposed to 0 on block. This has multiple implications, such as it being punishable under some circumstances and Sai's RPS options are much worse. It's a lot harder for him to take his turn from it, and it's a lot less of a neutral skip. It also makes some combos tighter and a few straight up impossible. 236C also launches differently on hit, causing it to have better combo options compared to PC in midscreen but worse in the corner. Additionally, 236B no longer can be comboed off in the corner.
22X was buffed and now does damage. The normal versions do 600 damage while the EX version does 1200 damage.
Normal Moves
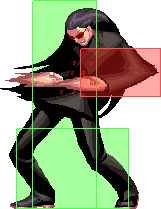
5A
|
|---|
5B
|
|---|
5C
|
|---|
2A
|
|---|
2B
|
|---|
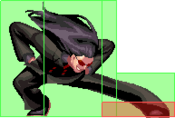
2C
|
|---|
j.A
|
|---|
j.B
|
|---|
j.C Bask in the energy this move emanates. Bask in the energy this move emanates.
|
|---|
Command Normals
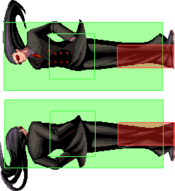
側宙 - Sokuchuu
6B |
|---|
仆腿避勢廻拳 - Hokutai Hisei Kaiken
4C |
|---|
Special Moves
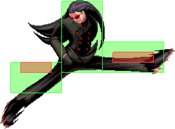
翻身双肘 - Honshin Souchuu 236+A/B/C/B+C Eat Elbow Eat Elbow
|
|---|
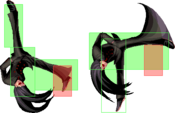
側宙仆腿 - Sokuchuu Hokutai
214+A/B/C/B+C (Air OK!) |
|---|
邪視 - Jyashi 22+A/B/C/B+C Jump Hazard is way funnier than Tank, don't @ me. Jump Hazard is way funnier than Tank, don't @ me.
|
|---|
Universal Mechanics
Throws
Forward Throw
4/5/6+A+B |
|---|
Air Throw
j.4/5/6+A+B |
|---|
Reflectors
Standing Reflector
4/5/6+B+C |
|---|
Crouching Reflector
1/2/3+B+C |
|---|
Jumping Reflector
7/8/9+B+C |
|---|
Super Move
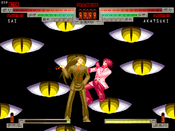
兇眼 - Kyougan A+B+C "A wicked eye that can kill a man instantly." If that man has 4625 health. "A wicked eye that can kill a man instantly." If that man has 4625 health.
|
|---|
General Strategy
Neutral
In neutral, Sai has to take advantage of the range of his normals, such as 5B, 2B, and 5C, and take a combo off any of these whenever he can. 2B in particular has great range and isn't punishable with the exception of specific moves in some matchups. In addition, Sai can occasionally throw it 236 or 214 to catch an opponent off guard or get a more distant whiff punish. However, it can be dangerous to just throw out these moves, especially 236C, since sometimes you can run straight into a projectile or an opponent's normal. To avoid projectiles, Sai can use aerial 214 to quickly gain distance to where his opponent is, and if it hits, force the opponent into an oki situation. However, relying too much on aerial 214 can become predictable, and is punishable. Additionally, Sai has one of the best backdashes in the game, allowing him to dash away to avoid punishes or get out of pressure with relative ease.
Air Game
Jumping can be risky as Sai, since Sai has a floaty jump and none of his aerials are great for landing. j.B is the preferred aerial for landing but even it isn't great. j.C is an amazing air-to-air and can almost always be comboed off when used as such, and has great use on landing too since it is practically immune to anti-air reflectors, but is almost completely lacking vertical reach. 214 can be used to counter anti-airs, but isn't perfect for it and can be punished if blocked too close to the opponent. As a result of this, Sai generally wants to play more grounded overall.
Anti-Air
Sai's anti-air is one of his weakest aspects, as he has none of his anti-airs are especially good and don't work in every situation. 4C is the easiest to use in most situations. It can low profile aerials and has good enough vertical range. However, particularly big and active aerials, especially when done late in a jump, will beat 4C even if it is well timed. Also, 4C is not rewarding at all, launching the opponent full screen and not allowing for follow-ups unless it's hit in corner. 5B is his other main anti-air, and while it his better horizontal reach, it's vertical reach also leaves a lot to be desired. While it is more rewarding than 4C, 5B loses to even more aerials since it doesn't even low profile, and while it can be more rewarding it's not worth using in most situations. 214 can be used as an anti-air, and purely in terms of vertical reach it's Sai's best option. It's also more rewarding than 4C since it leaves the opponent in knockdown right next to Sai. However, it's startup is too slow to be used consistently for this so while in many situations it's the desired anti-air, it's not available often. His final anti-air option is 5C, and while it isn't good at catching high up opponents since like the others it is lacking in vertical reach, it is good at catching opponents early in a jump. When hit, it can often be juggled into 2B, making it very rewarding when compared to his other options. Sai has great air to air options that are far more rewarding than his anti-airs, with j.C and j.A both having good hitboxes for this and leading to high damage, so there are many times where you will want to air to air the opponent as opposed to anti-airing. However air to airing comes wit it's own risks, as Sai's aerials leave him wide open to being air thrown if they whiff, and you won't always have enough time to get an air to air off. Overall, Sai mainly wants to look for air to airs and 214 anti-airs, but often has to rely on weaker options like 4C which itself can be beaten out.
Combo Game
Sai has above average combo game and some of the best corner carry in the game, with midscreen combos that can go from corner to corner. His combos, while not especially high damaging like Wei or Marilyn are all around the 4k range, nothing to scoff at. However, all of his better combos require at least one link, and his harder corner combos can have as many as 3 tight links in one combo. Luckily, Sai has a number of ways to open up opponents, being able to combo off almost all of his moves.
Offensive Pressure
Sai has a number of ways to open up his opponent in a block string. 2B, a low, and 6B, an overhead, can both be chained into from other moves, and can both be comboed from. If you're unable to open them up with a normal, Sai can cancel into 214 to catch an opponent of guard since it's also an overhead and due to it being hard to tech, it can often be safe jumped after. Additionally, Sai can cancel into 22, and since it functions as a standing grab, it can catch an opponent off guard and give them a debuff. However, it should be used sparingly due to it's incredibly long startup, and EX 22 should be used in most situations you plan on using it. These all make being in a block string against Sai dangerous if the Sai player knows what they're doing. Sai also has great throw mixups thanks to his quick walk speed and tick throw setups off landing aerials, 5A/2A, and 6B (since 6B is plus on block).
Okizeme
Sai has fairly strong oki options by mixing up the following moves.
- throw
- 2B
- 2C
- 2B -> delayed 5C (frame trap if the opponent decides to mash, jump, or backdash)
- 2A -> 2A -> ...
- 5A/2A -> walk forward and throw
- 5C
- 6B (-> Throw or 5A if blocked)
- 214
- 22
- Crossup j.B
- Blocked j.B -> j.214A
2C is unsafe on block, but launches if it hits early to be comboed from. Its long active frames also make it very easy to meaty with, although meaty 2B is generally a better option in this respect. If spaced correctly 2C can be safe, although this sacrifices its combo potential.
22, while incredibly slow, has a very deceiving startup and doing it on wakeup can help mitigate said startup. However, it isn't particularly rewarding as the debuffs are only so useful, and even when timed well the opponent can normally mash on it, although it's very long range can sometimes get you out of range of a mashing player. EX 22 removes most of these issues, being much faster, giving all the debuffs, and being incredibly long ranged to an almost ridiculous point. However, EX 22 has the weakness that it can be jumped upon seeing the super flash, although the opponent has to jump almost immediately.
While both 6B and 214 can be meatied, they have separate advantages. In midscreen, mixing meaty 214 and 2C allows Sai to high low mix at distances where 6B won't reach. 214 is also significantly faster than 6B, making it much harder to react to in blockstrings or on wakeup. 6B on the other hand can be linked into 5A/2A on hit, making it far more reward since it leads to a full combo. 6B is also plus on block, allowing him to continue his pressure after and even get a tick throw setup. Knowing when to use which overhead is important to mastering Sai's pressure.
Safe Jump Setups
Midscreen
- ~5C > 2A > 236B > Forward Jump j.C - While it sacrifices damage and corner carry, this combo assures a safe jump in midscreen. It may require a slight delay before the jump sometimes for it to be a true safe jump.
- ~236+B+C > 5A (Whiff) > Forward Jump j.C - A safe jump off of 236+B+C on a standing opponent. This won't be used too often since it sacrifices a decent bit of damage, but it is also consistent.
- 214X > Forward Jump j.B - A safe jump for when the opponent gets hit by 214 and fails to tech. Because the move puts you close to the opponent, outside of corner this setup requires you to side switch with j.B. This is hard to time as unlike the other setups and it needs a very slight delay before the forward jump to make it a proper safe jump.
Corner
- ~4C > 5B > 236C > 5A > 5B > 236C > Forward Jump j.C - A very easy safe jump to get since it's just the typical meterless corner combo minus EX 236 at the end. Doesn't require any additional timing and only sacrifices the damage from the EX move so there's many situations where it's good to go for.
- ~5C > 2A > 5A > 5B > 236B > Forward Jump j.C - A safe jump for setup for the alternative corner combo. It also only sacrifices the damage from EX 236 so it's good to go for somewhat often. Does actually require a slight delay, but this is easily done by slightly delaying the 5A or 5B in the combo.
- 214X > Forward Jump j.C - The same as the midscreen 214 safe jump but you can use j.C since it doesn't side switch.
Reversal Options
214+B+C serves as both a reversal and an anti-air. However, it is incredibly slow and very easy to safe jump, even off setups that wouldn't safe jump other reversals. A+B+C can sometimes be used as a reversal, though there is an obvious risk involved, as it requires all 3 super bars and has lots of recovery. In addition, its startup is slow enough that an opponent is capable of jumping on reaction to the super flash and it's abysmal range can make it hard to use. Wakeup reflector can be good, but that comes with the caveats it has for everyone else. Raw 214A on wakeup can sometimes work if the opponent goes low on wakeup, as it beats lows almost immediately, and may catch the opponent off guard they expect a wakeup reversal. Obviously though, this option will get snuffed by meaties and attacks that don't have a lower hitbox, so only try it if you're confident it will work. The lack of a true reversal makes Sai's ability to deal with pressure weaker than other members of the cast.
Matchups
- Note: Some matchups have changed in Ausf Achse. Fritz, Anonym, Kanae, and Soldat all have slightly better matchups versus Sai, although the way you play them is effectively the same.
Serious Advantage:
- Fritz - This is one of Sai's best matchups, since thanks to 236C Sai can easily whiff punish almost all of Fritz's moveset for high damage, and when attempting to escape corner 236C can also be used to force Fritz to block if he uses EX 236. Sai's backdash also allows him to avoid dealing with Fritz's pressure fairly easily. Finally, Fritz's lack of a traditional reversal means that outside of EX 236 he has to deal with all of Sai's mixups.
- Mycale - While Sai on paper struggles with zoners, that doesn't pan out in practice. None of Mycale's projectiles are that good at slowing down or stopping Sai from just running in and hitting her, with the only one he needs to watch out for being 214. It's not uncommon for Mycale to get hit in the startup of one of her projectiles by Sai doing 236C or 214C and then eat a ton of damage as a result. Plus Mycale's weak defensive options means she often has to respect Sai on defense, which is exactly what Sai wants. A good Mycale player that knows how to use her tools very well can force Sai to play more patiently, but even then it's impossible to keep him out forever, and Mycale can die very fast once he does get in.
- Perfecti (in AA only) - Essentially the same as the Mycale matchup except maybe a little harder since Perfecti's big normals can pose more of a threat to Sai than some of Mycale's tools. Still, Sai can play somewhat ignorant in spite of her zoning and once he gets in it's very hard for Perfecti to do something about it.
- Blitztank - Unsurprisingly Sai has a very good matchup versus Tank. All of Sai's main mixup tools excluding 2B will break Tank's armor, and same applies to 236C and 214C, meaning he can do his usual full screen threatening. This means that Tank can't simply rely on his armor to get out of his mixups. Sai also has j.C, a multi-hit aerial, which is possibly the worst thing Tank could ever have to deal with. Additionally, Sai's ability to weave around, just like with the other zoners, means that he can play relatively ignorant against Tank's zoning, making the matchup ever more favorable. Overall, Sai just gets to play his game versus Tank, making the matchup absolutely in his favor.
- Anonym - Anonym is definitely a better zoner than the other three, but she still struggles versus Sai. Once again Sai can play relatively ignorant like the other zoners, and since Anonym's bullets require a better level of precision than the other zoners projectiles, good use of 236, 214, and backdash can make it hard for her to both get damage in and keep Sai out. Sai can also very easily punish poorly timed reloads thanks to '236C, and even if they managed to block it in time, Sai's now in on them. Anonym's lack of strong offensive pressure means that Sai doesn't have to worry about being vortexed, one of his biggest disadvantages. Anonym's weak defense works greatly to his benefit, just like the other zoners, as it means his many powerful mixups have to be respected. The only true advantage Anonym has is that if a player with her has a good read on the Sai player, then they can counter his options to get in very well. Besides that though the matchup can be very rough.
Advantage:
- Kanae - While Kanae can be terrifying for Sai to defend against in the corner, this matchup is tough for Kanae. Sai's backdash can nullify most of Kanae's midscreen pressure unless she hard reads it with dash 5C. Sai's ability to weave in and out of pressure with 214 and 236 too lets him deal with Kanae's strong normals pretty easily. Sai also has counters for all of her defensive options although for the most part he still has to deal with them like everyone else. Overall a pretty good matchup, one that could be argued to be serious advantage, although Sai's weak defense means that the Kanae does have the potential to vortex Sai to death if she gets him in the corner.
- Elektrosoldat - This is possibly slightly Sai favored since Sai has ways to play around all of Soldat's tools. Soldat's projectiles ([4]6) can be annoying for Sai to deal with but not to the same degree as Adler's projectile, as Sai can very easily 214 around them. The main factor that works in Soldat's favor is his strong defensive options thanks to his flashkick ([2]8), meaning Sai has to respect his wakeup more than other characters. Besides this however, Sai has some unique strengths versus Soldat. Soldat's 6C can be consistently punished on block by Sai with 236, and Soldat's relatively weak offense means that Sai doesn't have to worry too much about getting put into the corner and dying there. This matchup is very bad for Soldat according to his players, but from my experience I don't see it.
Even
- Wei - Wei's tools are good at meeting Sai head to head in neutral, and they both have the ability to convert off almost anything for big damage. The matchup is in Sai's favor overall for most of a match, but if Wei gets the speed buff then it goes in his favor. Wei's underwhelming mixups can make it harder for him, although they're good enough to threaten Sai with his weaker defense. In turn, Wei's weaker defensive options mean Sai can vortex Wei if he gets the opportunity. Possibly a slight Sai favored but not enough info to tell.
- Adler - Sai and Adler play a similar game of trying to get knockdown in the corner then vortex the opponent to hell and back with their strong offensive tools. Sai has more consistent and safer ways of getting damage and neutral play, while Adler has strong setplay tools and powerful setups. In particular, Adler's slow moving projectile (236) can be difficult for Sai to play around, so Sai has to play a bit more patient. Neither of them have strong defense so they're both susceptible to getting vortexed. Probably slight Adler favored.
Slight Disadvantage
- Akatsuki - The main character of the game is one of Sai's only losing matchups, albeit only slightly. While Akatsuki's projectile is pretty weak, almost everything else Akatsuki has makes things hard for Sai. Akatsuki's pokes, f.5B in particular, outrange Sai's 5B and 2B which hurts his general gameplan of poking in neutral. And unlike with other characters who are better at poking, Akatsuki is hard to whiff punish and has strong anti-airs. Akatsuki also has his dp (22), a meterless reversal. Sai has to respect his wakeup and use safe jumps, although it's also possible to space a meaty 2B to avoid the reversal. Making it more annoying is that Akatsuki's offensive pressure is very strong, with his plus overhead and strong damage off conversions making things difficult for Sai once he's forced to defend. However, the matchup isn't terrible since Sai can make strong use of 236 in neutral versus Akatsuki. Sai also has good tools for dealing with Akatsuki's neutral tools besides his pokes, and like anyone else, once Sai is on top of Akatsuki he still has to deal with a lot of what he does.
- Murakumo - This is very slight Murakumo favored. Murakumo possesses a lot of tools that seem really hard to deal with at an initial glance. His normals can be annoying to deal with since they outrange Sai's, but they can be whiff punished. It also means that he won't have time to charge [2]8X so you can jump in without fear of anti-airs. His run can be annoying but checking it isn't hard as long as your reactions are decent. Mines in neutral are not hard for Sai to deal with thanks to 214 among other tools (because 214 is airborne, you can reflector the mine). However, catching a relaxed Murakumo with 236C when they try to plant a mine can lead to good reward. Just be careful as in Vanilla, 236C will get punished on hit by one. Murakumo's fireball is one of the easiest to reflect on reaction in the game, and while Sai does get hit standing by anti-air fireball, a common way around this is to purposely jump reflect it then pick a landing option. This is especially good with Sai since he can mix in j.214. Most important though, thanks to his [2]8+A and [2]8B+C, Murakumo is capable of punishing all of Sai's main pokes (those being 5B, 2B, and 5C) on block fairly easily. While this is scary, it means that he has to hold crouch, leaving him open to overheads. Murakumo's powerful offense in the corner is very annoying for Sai to get out of with his awful defensive tools, but it's nowhere near unstoppable and good use of reflector will help a lot. Helping with this is Murakumo's lackluster damage, which makes it very easy for Sai to mount a comeback since Murakumo is another character who must spend meter to reversal for offensive pressure, Sai's best option is to use overheads frequently so that Murakumo can't just down charge all the time, although watch for reversal [2]8BC. This matchup overall is annoying and can seem very hard when you're new to it, but it's very winnable.
Disadvantage
- Marilyn - The other top tier of the game naturally wins against Sai too. Marilyn's neutral is very hard for Sai to fight. He can't jump in because of her excellent anti-airs, 236 is easily interrupted, her walk speed is just as good as his, and his normals can't beat hers. 214 can work against 2C, but this requires a good read and it's possible for her to throw it out and recover by the time 214 hits, letting her block it. Winning neutral against her requires a good read, either with getting her to block a 236C, jump in, or landing a 214. Once you're in, you have to be careful fighting her on defense. Her [2]8 will low profile all your meaty normals except 2B and 2C. This means you must carefully consider when you meaty 6B, especially if the opponent has good reactions. Her [2]8BC can be spaced with 2B so it's not that scary although you should still watch for it. She also has some of the best reward from reflectors in the game, even having side switch combos, so watch out. She does die faster than other characters so make sure you get your hits in. When Marilyn gets a good conversion on you, you're going to be taken straight to the corner. This makes things especially hard for Sai thanks to his really bad defense. Her mixups are good and let her keep pressure so try to hold out and watch for a normal you can reflect. Be careful though, as she's very good at mixing up reflectors with 5B and 2B, which look similar to other normals but hit twice. This matchup is rough but you can definitely make it work, so try your best.
Overview
Overall, Sai is strong character with lots of mix-up options and an above average combo game that makes full use of his kit. However, without bar, his ability to deal with an opponents pressure, especially in corner, is weaker than the rest of the cast, and his neutral, while good, has its weaknesses. Still, Sai's pressure and above average combos make him one of the strongest characters of the cast, albeit one with his fair share of weaknesses.
Other Resources
A video demonstrating most of Sai's basic combos.
AA Sai tutorial video. There are many changes for Sai in AA but a lot of the general aspects are unchanged.
Combos
Combo terminology
| Symbol | Meaning |
|---|---|
| > | Cancel from the previous move to the following move |
| land | The player must land |
| , | Link from the previous move to the following move |
| dl./delay | Delay before using the following move |
| nj.X | Neutral Jump |
| AA | Anti-Air, must hit an airborne opponent |
| [X] | Hold the input |
| (X) | Optional input |
| [X]*N | Repeat (sequence) N number of times |
Midscreen Combos
If you don't have meter or don't want to use it, remove 236BC/214BC super at the end of these combos. However using this super as a finisher leads to very solid damage (around 4000 or more in most cases) and will most likely put your opponent in the corner. Generally you want to use 236BC since it does more damage, but some specific combos with less juggle hits have issues comboing into it so you have to use 214BC.
| Combo | Damage | Video | Notes |
|---|---|---|---|
| (j.B/C) > 5A/5A > 5B > 5C, 2B > 236B > 236BC | 3733 | - |
The 2B after the 5C requires a bit of timing, but nothing overly difficult. You can replace the 2B juggle hit with 2A if you're having trouble and the combo will still work. |
| 2B > 5C, 2B > 236B > 236BC | 3843 | - |
A shortened version of the previous combo that works as a hit confirm. |
| 6B, 5A/2A > 5B > 5C, 2B > 236B > 236BC | 3739 | - |
Standard midscreen combo off 6B overhead. |
| 5A/2A > 5B > 236A > 236BC, 236B > 214BC | 4874 | - |
2 meters midscreen combo. This combo only works if the opponent doesn't end up too close to the corner. Very good damage and can carry corner to corner. |
| 236C, dl.236B > 214BC | 3932 | - |
A combo generally only used on a whiff punish with 236C. Not delaying 236B will make 214BC's first hit whiff. |
| 2C, 5B > 236C > 236BC | 3940 | - |
Maximum damage sweep combo in midscreen. You can add a 5A before 5B to make it slightly easier. ONLY WORKS IN VANILLA ABK, DON'T DO THIS IN AUSF ACHSE |
Level 3 Confirms
Some of the few ways to successfully combo into his lvl3. However, the damage is severely scaled down.
| Combo | Damage |
|---|---|
| j.B > ABC | 4391 |
| j.C > ABC | 3355 |
| 2A > ABC | 3828 |
| 5A > ABC | 3922 |
| 5B > ABC | 4391 |
| 2B > ABC | 4204 |
Corner Combos
214BC will rarely connect all hits at the end of such long combos. If you want to ensure good damage, it is better to do 236BC because it will connect almost all the time.
| Combo | Damage | Video | Notes |
|---|---|---|---|
| 2C, 5A > 5B > 236C, 5AA > 5B > 236B | 3017 | - |
A meterless corner combo that does decent damage. ONLY WORKS IN VANILLA ABK, DON'T DO THIS IN AUSF ACHSE |
| 2C, 5A > 5B > 4C, 5A > 236B > 236BC | 4063 | - |
A 2C corner combo with relatively strict timing that gives about as much damage as the 4C corner combo with 2A starter. If your input isn't quick enough, the last hit of 236BC may not hit. ONLY WORKS IN VANILLA ABK, DON'T DO THIS IN AUSF ACHSE |
| (j.B) > 5B > 4C, dl.5B > 236C, (5A) > 5B > 236B > 236BC | 4360 | - |
Basic corner combo off 4C launch in the corner. If the 236B near the end hits too early, then some of the hits from 236BC might miss. For a more reliable method to get all the hits from the 236BC to connect, omit the 5A after the 236C. |
| 2A > 5B > 4C, dl.5B > 236C, (5A) > 5B > 236B > 236BC | 4289 | - |
Similar to the previous combo, same rules apply |
| 2B > 4C, dl.5B > 236C, (5A) > 5B > 236B > 236BC | 4481 | - |
Corner hit confirm. 4C is quite hard to hit confirm from 2B because for some reason, if you do it too late 5C will come out instead (but it might still connect). |
| 2B > 5C, 5A/2A > 5A > 5B > 236C, (2A/5A > 5A > 5B > 236A) | 3359 | - |
Meterless failsafe combo for when 5C comes out instead of 4C after hitconfirming 2B. Also Sai's highest meterless damage combo if you add the second section, but it's very tight to get that part. |
| 2B > 5C, 5A/2A > 5A > 5B > 236C > 236BC/214BC | 4040 | - |
Metered failsafe combo for when 5C comes out instead of 4C after hitconfirming 2B. |
| 6B, 5A > 5B > 4C, 5B > 236C, 5A > 5B > 236B > 236BC | 4183 | - |
Standard corner combo off 6B overhead. |
| 236C, 5B > 236C, 5AA > 5B > 236C | 3523 | - |
A combo you can use with a whiff punish 236C, or just by managing to hit it in corner. |
| 236C, dl.5B > 236C, 5A > 5B > 236BC | - | - |
Metered variant of the previous combo. |
| 236B, 2A > 5A > 5B > 236C, (2A > 5A > 5B > 236A) | 3005 | - |
A combo to use if you're able to whiff punish with 236B in a corner or decide to combo into it for some reason. Can be a little tight to land the 2A but it's easier than some of Sai's other combos. |
| 236B, 2A > 5A > 5B > 236C > 236BC | 3738 | - |
Metered variant of the previous combo. |
Ausf Achse Combos
Combos for Ausf Achse Sai. Unlike most characters, his combos were heavily affected in the transition. This is only listing routes that changed.
| Combo | Damage | Video | Notes |
|---|---|---|---|
| Starter > 236B > (214BC) | - | - |
Main midscreen combo now since extensions of 5C require 2A and to be very close to the opponent when it lands. |
| Starter > 5C, 2A > 236B > (236BC) | - | - |
Like the old midscreen combo but it's a lot tighter and requires you to be close to the opponent for it to land. |
| 236C, 2B > 236B > (dl.236BC/214BC) | - | - |
New 236C combo. Actually does more damage than the old one and is easier to hit confirm. Delaying 236BC is required for all hits to connect. If you find this difficult, you can do 214BC for slightly less damage. |
| Combo | Damage | Video | Notes |
|---|---|---|---|
| Starter > 4C, 5B > 236C, A > 5B > 236A > (236BC) | - | - |
The corner BnB is mostly unchanged, but it's a little tighter due to the recovery nerfs. Additionally, it's better to do 236A at the end since it's hard to confirm 236B into 236BC in Ausf Achse and the damage loss is minimal. |
| Starter > 5C, 2A > 5A > 5B > 236C > (236BC) | - | - |
The corner BnB failsafe is mostly unchanged. Comboing into 2A is a bit tighter, and you can't do further extensions after 236C so the meterless combo isn't worth it anymore. |
| 236C, 2A > 5A > 5B > 236C > (236BC) | - | - |
The new corner 236C combo. Actually does less damage but builds meter, provided you don't use 236BC at the end. |
| Combo | Damage | Video | Notes |
|---|---|---|---|
| Reflector, 5B > 236C | - | - |
Basic easy reflector combo. |
| Reflector, 236C, {5A > 236B}/214BC | - | - |
Harder but higher damage reflector combo. Has greate corner carry and damage relative to Ausf Achse reflector combos. Generally won't work after air reflector. |
Frame Data
source
KD - Knockdown
VB - Variable
*UV - value(s) marked with "?" in the table is/are unverified
x~yF - a period from frame "x" till frame "y"
                       |     Frames      |  Frame Advantage  |
               Attack  | Total | Startup | On Hit | On Block | Notes
Throws and Reflectors  ---------------------------------------
            4/5/6+A+B  |  20   |    5    |   KD   |    --    |
          j.4/5/6+A+B  |  20   |    3    |   KD   |    --    |
                5+B+C  |  17   |    7    |   KD   |    +3    |
                c.B+C  |  17   |    7    |   KD   |    +3    |
                j.B+C  |  17   |    7    |   KD   |    +3    |
                  A+C  |  60   |   --    |   --   |    --    | cancellable after 36F
              Normals  ---------------------------------------
                   5A  |  15   |    4    |   +0   |    +0    |
                   5B  |  25   |    6    |   -4   |    -6    |
                   5C  |  30   |   10?   |   KD   |    -6    | *UV
                  c.A  |  15   |    4    |   +0   |    +0    |
                  c.B  |  26   |    7    |   -4   |    -6    |
                  c.C  |  35   |    9    |   KD   |   -11    |
                  j.A  |  15   |    4    |   +0   |    +0    |
                  j.B  |  26   |    6    |   VB   |    VB    |
                  j.C  |  33   |    7    |   VB   |    VB    |
           c./5A > 5A  |  15   |    4    |   +0   |    +0    |
           c./5A > 2A  |  15   |    4    |   +0   |    +0    |
      Command Normals  ---------------------------------------
                   6B  |  36   |   21    |   +4   |    +2    |
                   4C  |  30   |   11    |   KD   |    -4    |
             Specials  ---------------------------------------
                236+A  |  38   |    7    |   -1   |   -16    |
                236+B  |  36   |   13    |   KD   |    -8    |
                236+C  |  34   |   19    |   KD   |    +0    |
                214+A  |  44   |   17    |   KD   |    -5    | attack starts on 26F
                214+B  |  44   |   17    |   KD   |    -5    | attack starts on 26F
                214+C  |  44   |   17    |   KD   |    -5    | attack starts on 26F
              j.214+A  |  VB   |   11    |   KD   |    VB    | landing recovery 14F
              j.214+B  |  VB   |   11    |   KD   |    VB    | landing recovery 14F
              j.214+C  |  VB   |   11    |   KD   |    VB    | landing recovery 14F
                 22+A  |  52   |   29    |   -3   |    --    | since Sai is invincible after
                 22+B  |  52   |   29    |   -3   |    --    |  a successful hit with the "curse",
                 22+C  |  52   |   29    |   -3   |    --    |   3F moves won't counter him
       EX and Level 3  ---------------------------------------
              236+B+C  |  83   |    6    |   KD   |   -20    | 1~3F invincible
              214+B+C  |  69   |   11    |   KD   |   -17    | 1~10F invincible
            j.214+B+C  |  VB   |    3    |   KD   |    VB    | 1~3F invincible, landing recovery 25F
               22+B+C  |  30   |   11    |   +1   |    --    | 1~2F invincible
                A+B+C  |  59   |    6    |   KD   |    --    | superflash 50F, 1~5F invincible
Maguro (aka Sky Fish)  |  --   |    1    |   --   |    --    | attack initiates 1F after the opponent had jumped
Trivia
- In some of Sai's moves, such as 236 and j.B, Sai will look briefly at the screen in the start-up and ending of the moves.
