Akatsuki Blitzkampf/Wei
Background
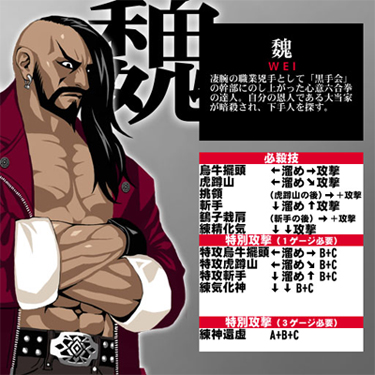
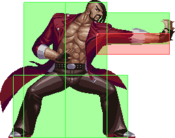
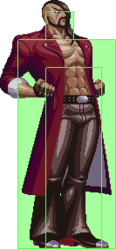
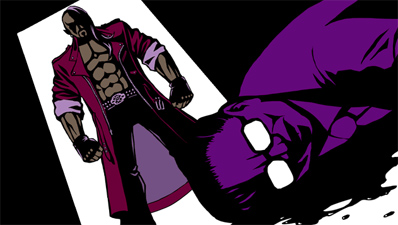
A brilliant professional assassin who has risen to the highest ranks of the Black Hand. He is a master of Xīnyì Liùhé Quán. After the assassination of his patron, the Big Boss, he searches for the murderer. (from character selection screen) Read the translation of his arcade mode!
Introduction
Wei is a boxer-type brawler who excels at close quarters and can use his charge special moves to check the opponent in neutral. His 22EX acts as a roman cancel that gives him plus frames and stat boosts, which increases his offensive potential as well.
Similar to: Balrog (Boxer), Wagner
| Strengths | Weaknesses |
|---|---|
|
|
All damage values below were tested on Akatsuki with 1.000 armor ratio and full life on both sides (remember about "Health difference" and "Guts" systems)
Character Summary
- Special Moves
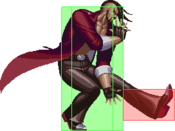
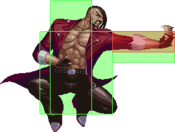
- [4]6A/B/C (EX OK) - Ugyuu Haitou: Dashing shoulder bash
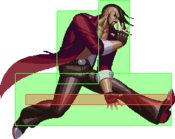
- [4]3A/B/C (EX OK) - Kosonzan: Dashing low kick
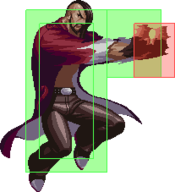
- [2]8A/B/C (EX OK) - Zanshu: Anti-air punch
- 22A/B/C (EX OK) - Rensei Kaki: Stat boost install
- Level 3 Super
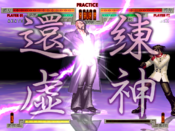
- A+B+C - Renshin Kankyo: Hypercharges all 3 stat boosts, giving high damage, speed, and super armor
- Unique Attacks
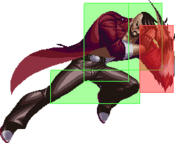
- j.6C
- Armor Ratio = 0.950, 0.750 during 22B/22+B+C, 0.500 during A+B+C
- Forward Speed = 3.5 dots/f, 7.0 sped up
- Backward Speed = 3.0 dots/f, 6.0 sped up
- Jump Startup = 4F, 1F sped up
- Backdash Duration = 20F
Basic BNB: 2A > 5B > [4]3A~6C
Metered BNB: 2A > 5B > ([4]6B > 22B+C, 2A > 5B) > [4]6B > [4]~3BC, [4]6B OTG
Reflector: B+C > [4]3C~6C
Notes on Ausf. Achse
Universal Changes
His reflector combos were hit fairly hard. Besides that, there's nothing of note.
Character Changes
The effect time of every version of 22X has been reduced by a second. This does not apply to his level 3.
Forward dash has a new animation and for some reason it's harder to do an option out of.
Universal Mechanics
Throws
Grounded Throw
4/5/6+A+B |
|---|
Air Throw
j.4/5/6+A+B |
|---|
Reflectors
Standing Reflector
4/5/6+B+C |
|---|
Crouching Reflector
1/2/3+B+C |
|---|
Aerial Reflector
7/8/9+B+C |
|---|
Normal Moves
5A
|
|---|
5B
|
|---|
5C
|
|---|
2A
|
|---|
2B
|
|---|
2C
|
|---|
j.A
|
|---|
j.B
|
|---|
j.C
|
|---|
Command Moves
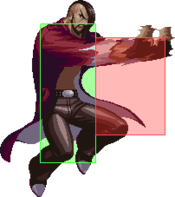
j.6C
|
|---|
Special moves
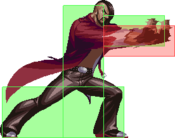
烏牛擺頭 -Ugyuu Haitou [4]6+A/B/C/B+C Normal version Normal version EX version EX version
|
|---|
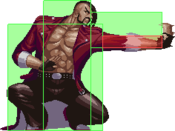
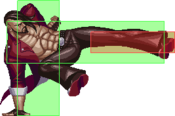
虎蹲山 - Kosonzan [4]3+A/B/C/B+C (> 6+A/B/C) Normal version Normal version EX version It almost looks like those cool Russian squat dances... EX version
It almost looks like those cool Russian squat dances... |
|---|
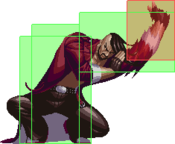
斬手 - Zanshu [2]8+A/B/C/B+C (> 6+A/B/C) Normal version Normal version EX version EX version
|
|---|
練精化気 - Rensei Kaki 22+A/B/C/B+C Exhibit A: "What defines a character" Exhibit A: "What defines a character"
|
|---|
Super
練神還虚 - Renshin Kankyo "Hamon Overdrive!" "Hamon Overdrive!"
|
|---|
General Strategy
Wei Tutorial Video One version behind, but pretty much all of it is still applicable. Doesn't have information on a lot of things like neutral and defense, but definitely still worth watching. Not all combos in the video are actually the optimal options.
Using Boosts (22X)
Wei's character-defining mechanic is his boosts system on his 22X. Each version buffs him in a different way for a set period of time, which is useful for different situations. Generally you should mainly be going for boosts after a knockdown that gives you some distance from the opponent, such as after Throw, Air Throw, 2C, 5C, j.6C, or a combo. Just using them in neutral can be done but is obviously very dangerous.
22A
22A is the best boost in most situations. This boost makes his movement go from the worst in the game to the best. This makes his neutral game and pressure way more threatening and powerful, as well as making his combo game stronger under specific situations. Use it whenever you get the chance.
22B
22B buffs Wei's armor rating to 0.750 (from 0.950) and gives him super armor against projectiles. Decent boost, but overshadowed by 22A in most situations. You generally want to use this buff against projectile-heavy characters such as Mycale, Anonym, Blitztank and Perfecti. The armor buff also makes comebacks significantly harder against Wei, which is nice at the end of the round.
22C
22C is his least useful boost. It applies a x1.30 multiplier on all of his attacks, making his damage output go through the roof. You will almost never use this boost, as Wei's damage is already pretty high without it. It also provides no utility outside of combos There's pretty much no situation where you should be using this boost over the other two.
22BC
22BC gives you all the buffs at once while also functioning as a pseudo-Roman Cancel. This gives it an incredible amount of utility beyond just buffing oneself in neutral. Since it's an EX move, it can be super canceled from other specials. This means you can cancel into it from [4]6X and [2]8X for very damaging combo extensions on hit. On block, Wei is plus, effectively securing Wei's turn (even from a random [4]6X in neutral) and/or a strike-throw mixup. This is one of Wei's strongest tools and is important to mastering the character.
ABC
ABC is effectively 22BC on steroids. It straight up gives him Blitztank armor, along with an even bigger defense and damage boost (the speed boost is unchanged). Most importantly though, unlike 22BC which has some recovery, A+B+C have no startup, as well as 1 frame of recovery. This allows for some tricky cancels and otherwise impossible conversions, and also for things like wake up ABC, react to what the opponent is doing, then act accordingly. Still though, ABC only really worth using over 22BC at the end of matches since Wei generally prefers to spend his meter for EX moves, on top of being a meter hungry character in the first place.
Neutral
In short
Wei wants to play neutral at a slower pace and wait for his opponents to approach him. His buttons are big and covers space very well, and his [4]6X/[4]3X specials allows him to quickly check a reckless dash/poke from the opponent. However, his air game leaves to be desired, unless 22A is active, in which case it becomes very good. 22A in general makes Wei's neutral way better.
Pokes
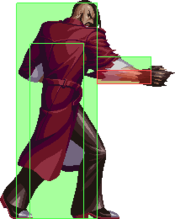
His normals are great for poking, 5B being the best for footsies in most situations. 5C can also be good a poke but it's a bit too slow and easy to whiff punish to be used much. 2C is also a decent tool in footsies since it's a very long ranged sweep, but it too is slow with long recovery. At closer ranges, 2A reaches pretty far, allowing Wei to quickly check a dash from the opponent.
Besides using his normals, similar to Boxer, Wei can make use of his rush attacks in neutral. [4]6A/B comes out quickly and while not especially long, they cover a decent distance. They are both -6 on block, which means they're unsafe, but just safe enough that it's hard to punish with most moves. Making them more of a threat though is that when you have meter, on hit or block they can be canceled into 22BC to either extend it into a combo or get a mixup. [4]6C goes a longer distance than the other two and is -4 on block, making it (mostly) safe, but is so incredibly slow that its rare you can use it without getting hit during startup, so it should be used sparingly.
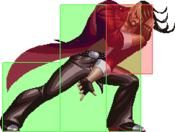
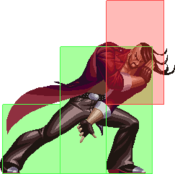
[4]3X go the near same distances as their mid hitting counterparts, but are slower while hitting low. They're good for catching opponents off guard with an unexpected low check, and have good meterless options on hit. They're all also -5 on block so they're fairly safe to use, and once again 22BC is always an option. However, they are fairly slow and don't have the biggest hitboxes, so it's not uncommon for them to be interrupted or whiff punished. Still they are a strong tool to throw out on occasion.
When Wei gains the speed boost (22A), then his neutral game becomes a lot stronger. His ridiculously fast movement lets him dash in and out very quickly and it's fairly easy to just walk up on the opponent with the speed boost active. This is the main reason you want to use 22A the most, since it makes his neutral so much better.
Air Game
Without 22A, Wei's air game is very mediocre. His jump isn't floaty but it also doesn't go very far, and having more prejump frames than average doesn't help.
His j.A is a decent air-to-air, j.B is solely useful for landing with a crossup, and j.C is also a strong air-to-air and landing option. He also has j.6C, which is a good air-to-air but is mostly used to change his air momentum. This has a few uses (some of which will be described below) but also can catch Air Throw and air-to-air happy opponents off guard. j.6C also can lead to a juggle in the corner, but that's a rare situation.
Once 22A is active. Wei's air game becomes significantly better. His jump, on top of being faster (and thus going further), now only has 1 frame of startup. This makes it a lot easier for him to jump in on opponents and air-to-air.
Offense
In short
Wei's offense relies around strike/throw mixups due to the lack of a standing overhead, making opening the opponent up harder than average. Thankfully for Wei, his strike/throw is among the best in the game, since both options leads to huge rewards, especially in the corner. On top of that, he has access to a very potent left/right mixup on midscreen, which tremendously helps him on oki
22X in offense
Two of Wei's boosts helps him in pressure: 22A and 22BC.
22A allows Wei to shimmy like crazy and bait a reaction from the opponent (such as a throw tech attempt). If the opponent takes the bait, Wei can punish them with a devastating 5C combo (which will also crush their guard gauge is they tried to air block), or a Throw if they tried to Reflector out of their way.
22BC is the key to Wei's pressure, and the reason he needs so much meter at all times. When cancelled into it from [4]6X or [4]3X, Wei becomes plus, even on block. This basically grants him a free strike/throw mixup, but better and more rewarding because of the speed and damage boost. However, it is a vert costly option, since Wei can't build meter while it's active, so it's best used sparingly.
Frame Traps
Wei has ways to punish opponents who don't pay enough attention to his blockstrings. In particular, he can use the followups from [4]3X and [2]8X. End a blockstring with [4]3A or [2]8A. Normally the opponent will take this opportunity to take their turn or punish if they have a fast enough move. However, if you follow the move with a delayed 6A, then if the opponent is attempt to punish they get hit by the followup instead. Once the opponent is aware of this, they may choose to respect you after seeing these options end a block string. From there you can take back your turn, or even throw the opponent.
Crossups
Wei has strong crossup mixups in midscreen. j.B is a pretty big crossup aerial, and as a result it's pretty easy to use it from many distances and doesn't require much setup (a midscreen BnB puts Wei at the perfect position to make his crossup more ambiguous). Adding further to this though is that he can fake a crossup. From a knockdown in crossup distance, jump forward and immediately whiff a j.A. From there, whiff cancel it into j.6C to launch yourself back, and if spaced correctly you will fly back into the opponent without actually hitting them. If the opponent respects you here, which they likely will, you can throw the opponent. Additionally, if they learn to recognize the j.6C, if they don't act fast enough to try and punish it then you can 2A to catch them and start a combo.
Anti-Reflector
Using Reflector against an airborne Wei is particularly dangerous, since all of his jumping normals can beat it in some way. j.A and j.C can be used to reliably safejump it (j.A whiffs on Crouching Reflector), while j.B can crossup, which invalidates Reflectors. On top of that, throwing a Reflector makes the throw deal more damage in Ausf. Achse, which makes his already strong strike/throw games even stronger, especially in the corner.
Defense
In short
Wei has generally subpar reversals, which makes escaping pressure/the corner pretty difficult. However, he is also the best anti-airing character in the game, easily beating most anti-anti-air attempts.
Anti-Air
Wei is possibly the best character at anti-airing in the game. Wei's main anti-air is of course his 2B. While it may not look like much when you first see it, it's probably the best anti-air in the game. It hits higher than it appears, has very good hitbox to hurtbox ratio, beats pretty much every aerial, and will beat every air reflector but Tank's as long as it's decently spaced. On block it leads to an air reset, which if canceled into 22BC can let you Air Throw the opponent (this can be teched). The same can be done on hit but if done fast enough the throw will be a true combo. Additionally, if you were crouching long enough, on hit it can be canceled into [2]8X for extra damage.
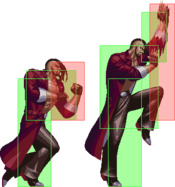
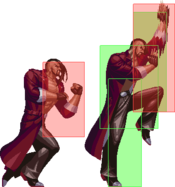
Besides just 2B, [2]8X can also be used as an anti-air. It will hit higher and does decent damage, and if it weren't for 2B it'd definitely be his go to anti-air. [2]8X can lead to huge combos if canceled into 22BC, but this requires it to hit. Overall 2B is just the better option.
Reversals
While Wei would rather have the opponent come to him than the other way around, that's because he's great at punishing jumping and reckless approaches. When he finds himself on the back foot, he doesn't have much options.
His only invincible option is [2]8BC, and while it's not the worst reversal, it has the annoying tendency of whiffing against crossups. Besides that, he only really has universal options (Reflector, 2A mash, Throw) and ABC. ABC can be a good wakeup option, since it's literal lack of startup lets you react to whatever oki the opponent decided to set up, but three bars for a somewhat gimmicky reversal is not worth it under most situations.
Defense with Wei is generally a matter of weathering the storm, and find a gap where he can mash his way out. In addition, his extra large hurtbox leaves him open to some unique mixups such as instant overheads.
Overall
Wei is a character with strong neutral presence, good normals, unique pressure tools, and a frightening damage output that, when pushed to their max potential, creates and incredibly powerful character. Despite this though, there is very little reason to block high against Wei, which can make finding openings in the opponent's defense harder than average without the use of a lot of tricks and gimmicks. His defensive options are also very lacking, being universal for the most part.
Combos
Combo terminology
| Symbol | Meaning |
|---|---|
| > | Cancel from the previous move to the following move |
| land | The player must land |
| , | Link from the previous move to the following move |
| dl./delay | Delay before using the following move |
| nj.X | Neutral Jump |
| X~Y | Use Y followup after hitting X move |
| AA | Anti-Air, must hit an airborne opponent |
| [X] | Hold the input |
| (X) | Optional input |
| [X]*N | Repeat (sequence) N number of times |
The tutorial video lists more combos than the ones shown here, but these are all the routes that you NEED to know with Wei. Additionally, some of the combos listed in the video aren't actually the optimal routes, or are routes you won't be able to use frequently in a match.
Notes:
- Starting combos with 2A > 2A > 5B allows Wei to combo into his specials without having to hold a charge. Use this string if you don't think you built enough charge before hitting the first 2A
- Starting the combo with j.C adds roughly 1000 damage to the combo
- Damage values does not includes 22C's (and 22BC's) damage buff at the start of the combo. The first value is the short version (without any optional input), while the second is the longest version
- Because Wei is a meter-hungry character, meter costs will be listed
Midscreen Combos
| Combo | Damage | Position | Meter Cost | Video | Notes |
|---|---|---|---|---|---|
| 2A > 5B > [4]3A~6C, (2C/22A) | 1815 1966 |
Anywhere | 0 | Link |
Easy BnB that grants a hard knockdown, which is extremely rare in ABK. This is also the go-to route when 2A was hit from further away. 22A is the preferred option after the knockdown because of the speed boost |
| 2A > 5B > [4]3A, 2A > [4]3B~6C | 2140 | Anywhere | 0 | Link |
Wei's actual midscreen BnB, which is a bit harder than the previous combo. Wei has less time to buff himself while maintaining oki using this route, but it's still the go-to one. A visual cue for the link is when Wei's jacket falls down |
| 5C, [4]6B | 2664 | Anywhere | 0 | Link |
Basically just bonus damage. The same jacket tip from the previous combo can be used here |
| 2A > 5B > [4]6B > [4]3BC, [4]6B OTG | 4127 | Anywhere | 1 | Link |
Basic and easy metered route. Does great damage for the meter cost |
| 5C, [4]6B > [4]6BC, [4]3A~6C | 4350 | Anywhere | 1 | Link |
Metered midscreen 5C route. Makes getting hit by 5C WAY scarier midscreen |
| 2A > 5B > [4]6B > [4]6BC, [4]6B > ([4]6BC, [4]3A~6C) | 2996 4032 |
Midscreen | 1-2 | Link |
Basic wall bounce route for when Wei is too far from the corner. Using a second bar is only worth it if the combo will put the opponent in the corner, as the damage stays lower compared to the previous combo |
| 2A > 5B > [4]6B > [4]6BC, j.A, j.B, 2B, 5A > 2B > [4]3B~6C | - | Midscreen to Corner | 1 | - |
Wall bounce route for when you're near but not too close to the corner (the spacing is throwing the opponent midscreen when they're cornered, then hit the dummy with 5B). Does pretty good damage, of top of looking sick |
| 2A > 5B > [4]6B > [4]6BC, 2B > [4]6B, 2AA > 5B > [4]3A~6A | 4000~ | Round Start | 1 | - |
Wall bounce route that only works at roughly round start (the spacing is throwing the opponent midscreen when they're cornered). Does pretty good damage |
| AA 2B > [2]8C(1) > 22BC, j.A*2, land, j.A, j.B, 2A > 5B > [4]3A~6C | - | Midscreen | 1 | - |
Very stylish anti-air combo. Delay the first j.A, and start charging after the second one |
| AA 2B > [2]8C(1) > 22BC, j.A, j.B, 2B > [4]3A~6C | - | Anywhere | 1 | - |
Alternative anti-air combo for when you cancel [2]8C after the first hit. Comboing into j.A can be tight at times |
| (2A > 5B) > [[4]6B > 22BC, 2A > 5B]*N > [4]3A~6C, (2C) | Min. 2924 Max. 4929 |
Anywhere | 1-3 | - |
Mostly done when [4]6B > 22BC hits the opponent in neutral. Greatly increases Wei's damage and corner carry, especially when combined with other EX moves |
| 2A > 5B > [4]5B > ABC, Dash 5AAA > 5B > [4]3A, 2B > [4]3B~6C | - | Anywhere | 3 | - |
Level 3 route. Generally inferior to the previous combo since it always costs more meter, but it's still an option |
| 2A > [5B > [4]6B > 22BC]*2, 5B > [4]6B > [4]6BC, j.A*2, land, j.A, j.B, 5AA > 5B > [4]3A~6C | - | Cornered | 3 | - |
Wei's max damage in midscreen. Very difficult and spacing dependent, but it is among the most damaging combos in the game. Do this if you feel like flexing hard on your execution. |
Corner Combos
| Combo | Damage | Meter Cost | Video | Notes |
|---|---|---|---|---|
| 2A > 5B > [4]3A, 2A > 2B > [2]8C~6B | 2582 | 0 | Link |
Beginner corner BnB. Stick to this one if you can't perform the following combo |
| 2A > 5B > [4]3A, 2A > 5B > [4]6B, 2A > (5A) > 5B > [4]3A~6C | 3081 3188 |
0 | Link |
Wei's actual corner BnB. Very hard to perform, but the damage is on par with some characters' metered routes. Omitting 5A makes the combo way easier. Can be ended with [4]3A~6A for an easier combo |
| 5C, dl.5B > [4]6B, 2AAA > 5B > [4]3A~6C | 3946 | 0 | Link |
Meterless corner 5C combo. Makes getting hit by 5C WAY scarier in the corner. If 5B is done immediately, omit a 2A, otherwise the third one will whiff |
| j.6C, 2A > 5B > [4]6B, 2AAA > 5B > [4]3A~6C | - | 0 | - |
A variant of the previous combo if you ever land j.6C in the corner |
| Throw, [4]3A~6A OTG, Dash | 2146 | 0 | Link |
Key corner pressure sequence |
| 2A > 5B > [4]3A, 2A > 2B > [2]8C > [2]8BC | 3693 | 1 | Link |
Easy metered BnB, which does decent damage. Requires some timing on [2]8BC in order to land all hits |
| 2A > 5B > [[4]6B > 22BC, (5AAA) > 2A > 5B]*N > [4]3A, 2A > 5B > [4]6B, 2A > (5A) > 5B > [4]3A~6C | - | 1-3 | - |
Corner version of the midscreen 22BC loop, that does bonkers damage due to having more hits. Same tricks used for the meterless version of this combo applies here |
| 5C, 5B > [4]6B, 2A > 2B > [2]8C > dl.[4]6BC/[2]8BC | 4416 5282 |
1 | - |
Corner metered 5C combo. Ending in [2]8BC is surprisingly hard, so use [4]6BC ender for an easier, but less damaging ender |
| 5C, 5B > [4]6B, 2A > 2B > [2]8C > 22BC, Air Throw | 4369 | 1 | - |
A variant of the 5C combo that gives better oki, in exchange of less damage |
| 5C, 5B > [4]6B > 22BC, 2A > 2B > [2]8C > [2]8BC | 5939 | 2 | - |
An easier version of the corner 5C combo. Generally not worth it, as it does subpar damage for the meter cost |
| AA [2]8C(1) > 22BC, j.A*2, land, j.A, j.B, 5AA > 5B > [4]3A~6C | - | 1 | - |
Corner version of the [2]8C combo. Comes with a slight damage increase |
Reflector Combos
Note: Damage values are for Ausf. Achse
| Combo | Damage | Position | Meter Cost | Video | Notes |
|---|---|---|---|---|---|
| Reflector, 2B > [4]3B~6C | 1036 | Midscreen | 0 | - |
Basic and easy Reflector combo. Doesn't work if hit from far away. |
| Reflector > [4]6C~6C | 969 | Midscreen | 0 | - |
Basic and easy Reflector combo if you have a back charge. |
| Reflector > [2]8C > [2]8BC | 1639 | Midscreen | 1 | - |
High damage, crouch only Reflector combo. Go for it when you get the opportunity. |
| Reflector > [4]6B > [4]6BC, [4]3A~(6C) | 2504 | Midscreen | 1 | - |
High damage Reflector combo that's mostly done on defense since Wei has to hold back a little bit before starting the combo. Go for it whenever you get the chance. |
| Reflector, 5A > 5B > [4]6B, 2A > 5A > 5B > [4]3A~6C | - | Corner | 0 | - |
Corner meterless Reflector combo that does impressive damage. |
| Reflector > [4]6B > 22BC, 5B > [4]6B, 2A > 5A > 5B > [4]3A~6C | - | Corner | 1 | - |
Metered variant of the previous combo. Very hard to perform, but does incredible damage for a Reflector combo. |
Ausf Achse Combos
This will only lists combos that changed.
- Reflector Combos
| Combo | Damage | Position | Meter Cost | Video | Notes |
|---|---|---|---|---|---|
| Reflector > [4]6B > (22BC), 2A > 2B > [2]8~C | 1976 | Corner | 0-1 | - |
New corner Reflector combo. Does less damage than in Vanilla. |
Frame Data
source
KD - Knockdown
VB - Variable
*UV - value(s) marked with "?" in the table is/are unverified
x~yF - a period from frame "x" till frame "y"
                       |     Frames      |  Frame Advantage  |
               Attack  | Total | Startup | On Hit | On Block | Notes
Throws and Reflectors  ---------------------------------------
            4/5/6+A+B  |  24   |    5    |   KD   |    --    |
          j.4/5/6+A+B  |  20   |    3    |   KD   |    --    |
                5+B+C  |  22   |    7    |   KD   |    -2    |
                c.B+C  |  17   |    7    |   KD   |    +3    |
                j.B+C  |  16   |    6    |   KD   |    +3    |
              Normals  ---------------------------------------
                   5A  |  19   |    4    |   -4   |    -4    |
                   5B  |  27   |    9    |   -3   |    -5    |
                   5C  |  32   |   13    |   KD   |    -4    |
                  c.A  |  15   |    4    |   +0   |    +0    |
                  c.B  |  21   |    6    |   +0   |    -2    |
                  c.C  |  35   |   11    |   KD   |    -9    |
                  j.A  |  19   |    4    |   -4   |    -4    |
                  j.B  |  22   |    7    |   VB   |    VB    |
                  j.C  |  28   |    9    |   VB   |    VB    |
           c./5A > 5A  |  19   |    4    |   -4   |    -4    |
           c./5A > 2A  |  15   |    4    |   +0   |    +0    |
      Command Normals  ---------------------------------------
                 j.6C  |  VB   |    9    |   KD   |    VB    | landing recovery is the same as usual jump's
             Specials  ---------------------------------------
               [4]6+A  |  30?  |    9    |   -2?  |    -6?   | *UV
               [4]6+B  |  34?  |   13    |   -2?  |    -6?   | *UV
               [4]6+C  |  42   |   43    |   +0   |    -4    |
               [4]3+A  |  35   |   15    |   KD   |    -5    |
               [4]3+B  |  39   |   19    |   KD   |    -5    |
               [4]3+C  |  47   |   27    |   KD   |    -5    |
           [4]3 > 6+A  |  34   |    3    |   KD   |   -16    |
           [4]3 > 6+B  |  36   |    5    |   KD   |   -16    |
           [4]3 > 6+C  |  38   |    7    |   KD   |   -16    |
               [2]8+A  |  36   |    5    |   KD   |   -14    |
               [2]8+B  |  40   |    7    |   KD   |   -14    |
               [2]8+C  |  44   |    9    |   KD   |   -14    |
           [2]8 > 6+A  |  33   |    5    |   KD   |   -13    |
           [2]8 > 6+B  |  37   |    9    |   KD   |   -13    |
           [2]8 > 6+C  |  41   |   13    |   KD   |   -13    |
                 22+A  |  55   |   --    |   --   |    --    |
                 22+B  |  55   |   --    |   --   |    --    |
                 22+C  |  55   |   --    |   --   |    --    |
       EX and Level 3  ---------------------------------------
             [4]6+B+C  |  41   |    9    |   KD   |   -17    | 1~4F invincible
             [4]3+B+C  | 105   |   11    |   KD   |   -20    | 1~8F invincible
             [2]8+B+C  |  68   |    5    |   KD   |   -21    | 1~6F invincible
               22+B+C  |  10   |   --    |   --   |    --    | 1F invincible? *UV
                A+B+C  |   1   |   --    |   --   |    --    | Superflash 60F, all frames invincible,
                                                               Wei can start moving 1F before superflash ends
Trivia
- His fighting style as stated in his background information is 心意六合拳 (xīnyì liùhé quán) - Xinyi Liuhe Quan literally "Fist of Mind, Intention and Six Harmonies" [1]
