|
|
| Line 444: |
Line 444: |
| |- | | |- |
|
| |
|
| | '''Onimaru'''</br>[[File:FS_icon_Onimaru_1.png|link=Fantasy_Strike/Onimaru]] | | | '''Onimaru'''</br>[[File:FS_icon_Onimaru.png|link=Fantasy_Strike/Onimaru]] |
| || Wild Card | | || Wild Card |
| || Onimaru's jump options are very vulnerable to Rook's landslide, and Oni's usual cancels and stance follow-ups are vulnerable to Rook's armored moves. Together this pushes Onimaru to adopt a grounded playstyle relying on safe pokes while stalling for air super. | | || Onimaru's jump options are very vulnerable to Rook's landslide, and Oni's usual cancels and stance follow-ups are vulnerable to Rook's armored moves. Together this pushes Onimaru to adopt a grounded playstyle relying on safe pokes while stalling for air super. |
| Line 451: |
Line 451: |
| |- | | |- |
|
| |
|
| | '''Quince'''</br>[[File:Quince.png|link=Fantasy_Strike/Quince]] | | | '''Quince'''</br>[[File:FS icon Quince.png|link=Fantasy_Strike/Quince]] |
| || Wild Card | | || Wild Card |
| || A common gameplan of Quince's is to wall with jC and poke with B. Both of these moves have a fairly large startup and can be stuffed pre-emptively by poking with Rook's faster kick. Landslide also works if Rook wants a riskier read with more reward. | | || A common gameplan of Quince's is to wall with jC and poke with B. Both of these moves have a fairly large startup and can be stuffed pre-emptively by poking with Rook's faster kick. Landslide also works if Rook wants a riskier read with more reward. |
Introduction
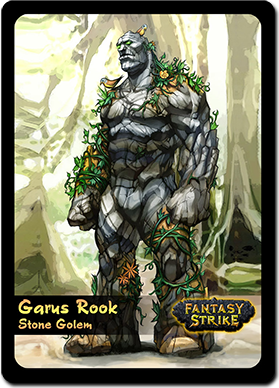
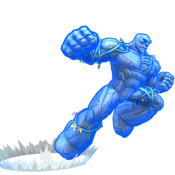
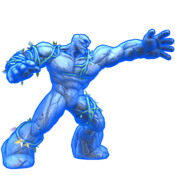
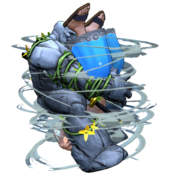
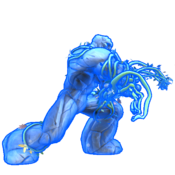
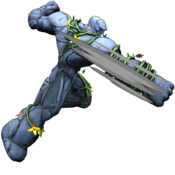
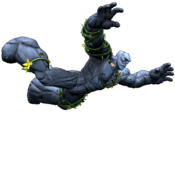
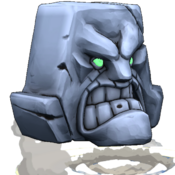
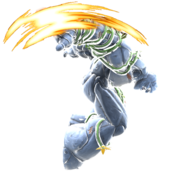
Rook is a stone golem who fights at close range by grappling his opponents. He created the Fantasy Strike tournament that the events of the story take place in.
Lore
"Rook was not always made of stone, though the circumstances of his transformation are little-known. What is known is that his stone form seems to have slowed his aging and provide incredible armor. Rook has always loved nature and felt close to it and now he is a force of nature. Towering, mighty, and dangerous, yet gentle and warm. (...) DeGrey suggested he (Rook) create an event that would bring together people from all over the many lands. To frame it as a competition, but to actually use it as a way of getting powerful warriors together so they’d talk about the injustices going in their respective lands. Rook created the Fantasy Strike tournament to this end" (source).
Overview
| Health |
Character Type |
Super Meter charge time
|
| 8 |
Grappler |
18 Seconds
|
General
Rook is the big grappler archetype and the character with the most health in the game. Very slow to move but if he gets a knockdown while close he can win the round off of that. This polarizing dynamic can cause rounds with Rook to appear lopsided. Sometimes Rook gets in and demolishes the opponent like it was nothing, and other times the opponent effortlessly denies all of Rook's approaches without giving him a chance to hit. A good Rook player will maintain a steady mindset through all this in order to come out on top.
Unique Traits
- Slow walk speed
- Short jump distance
- Tall hurtbox
- Large throw range
- Grounded normal attacks cause chip damage
- Normal throw and yomi counter deal 2 damage
Moves
Ground
Sweep
|
| Damage
|
Startup
|
Active
|
Recovery
|
Hit Advantage
|
Block Advantage
|
Counter Advantage
|
Properties
|
Attribute
|
| 1
|
8
|
8
|
18
|
KD
|
3
|
KD
|
Knockdown
|
Strike
|
Almost identical range to Rook's normal throw.
|
|
Kick + +
|
| Damage
|
Startup
|
Active
|
Recovery
|
Hit Advantage
|
Block Advantage
|
Counter Advantage
|
Properties
|
Attribute
|
| 2
|
7
|
5(7)14
|
19
|
7
|
-10
|
7
|
-
|
Strike
|
|
|
|
Thunderclap + + Clap Clap Throw Throw
|
| Damage
|
Startup
|
Active
|
Recovery
|
Hit Advantage
|
Block Advantage
|
Counter Advantage
|
Properties
|
Attribute
|
| 1
|
20
|
5
|
15
|
3
|
1
|
9
|
Cancellable
|
Strike
|
Creates a vacuum effect that pulls opponents closer to Rook. Can destroy projectiles. Can be canceled on hit, block or projectile clash into B or a special version of C that does 1 dmg. It combos into that special version of C.
|
|
Landslide
|
| Damage
|
Startup
|
Active
|
Recovery
|
Hit Advantage
|
Block Advantage
|
Counter Advantage
|
Properties
|
Attribute
|
| 2
|
21
|
17(0)5
|
17
|
KD
|
-4
|
KD
|
Knockdown
|
Strike
|
1 hit of armor on frames 1-54. Hits twice: once at the start, once at the end. Throw immune from the 17th frame of startup.
|
|
Windmill Crusher
|
| Damage
|
Startup
|
Active
|
Recovery
|
Hit Advantage
|
Block Advantage
|
Counter Advantage
|
Properties
|
Attribute
|
| 2
|
12
|
14
|
30
|
KD
|
-
|
KD
|
Knockdown
|
Command Throw
|
Throw invincible frames 1-26. 1 hit of armor on frames 2-23 (1-19 if cancelled from Thunderclap). Rook is +15 after succesful grab.
|
|
Throw
|
| Version
|
Damage
|
Startup
|
Active
|
Recovery
|
Hit Advantage
|
Block Advantage
|
Counter Advantage
|
Properties
|
Attribute
|
| Forward
|
2
|
3
|
4
|
16
|
KD
|
-
|
KD
|
Knockdown
|
Throw
|
|
|
| Back
|
2
|
3
|
4
|
16
|
KD
|
-
|
KD
|
Knockdown
|
Throw
|
|
|
|
Checkmate Buster
|
| Damage
|
Startup
|
Active
|
Recovery
|
Hit Advantage
|
Block Advantage
|
Counter Advantage
|
Properties
|
Attribute
|
| 3
|
6+0
|
23
|
26
|
KD
|
-
|
KD
|
Knockdown
|
Command Throw
|
Frames 1-6 Invincible, infinite super armor frames 7-23. If a grounded opponent does not jump before the flash, they cannot escape by jumping.
|
|
Air
Rock Punch Rock Punch Splash Splash
|
| Version
|
Damage
|
Startup
|
Active
|
Recovery
|
Hit Advantage
|
Block Advantage
|
Counter Advantage
|
Properties
|
Attribute
|

|
1
|
12
|
12
|
5
|
19
|
15
|
23
|
-
|
Strike
|
Large hitbox with a low recovery.
|
 + +
|
1
|
6
|
26
|
27
|
19
|
17
|
25
|
-
|
Strike
|
Very fast and active for a long time.
|
|
Vine Spiral
|
| Damage
|
Startup
|
Active
|
Recovery
|
Hit Advantage
|
Block Advantage
|
Counter Advantage
|
Properties
|
Attribute
|
| 1
|
7
|
29
|
27
|
KD
|
-13
|
KD
|
Projectile Invincible
|
Strike
|
Projectile immune frames ?-?. Breaks armor.
|
|
Earthquake
|
| Damage
|
Startup
|
Active
|
Recovery
|
Hit Advantage
|
Block Advantage
|
Counter Advantage
|
Properties
|
Attribute
|
| 1
|
11
|
15
|
40
|
KD
|
-17
|
KD
|
Hard Knockdown
|
Strike
|
On whiff, causes unblockable KD to grounded opponents that aren't currently in prejump frames (0 damage).
|
|
Head Crush
|
| Damage
|
Startup
|
Active
|
Recovery
|
Hit Advantage
|
Block Advantage
|
Counter Advantage
|
Properties
|
Attribute
|
| 1
|
0+5
|
3(0)20
|
9
|
16
|
12
|
26
|
-
|
Strike
|
Frames 1 - 9 invincible. Will turn into the cinematic version if the first 3 active frames hit.
|
| Damage
|
Startup
|
Active
|
Recovery
|
Hit Advantage
|
Block Advantage
|
Counter Advantage
|
Properties
|
Attribute
|
| 2
|
0+5
|
3
|
-
|
KD
|
12
|
KD
|
-
|
Strike
|
Breaks armor. Deals 2 damage total. Side switches with opponent and leaves them in a knockdown.
|
|
Combos
(Splash) =  +
+ +
+
Basic
(Splash),  +
+ (3 damage)
(Splash),  (2 damage, knockdown)
 +
+ >
>  (2 damage, knockdown)
Situational
Meaty  +
+ (Second-hit only),
  +
+ (3 damage)
Meaty + Counter hit  +
+ (Second-hit only),
  +
+ >
>  (3 damage, knockdown)
Counter hit  +
+ >
>  (3 damage, knockdown)
Counter hit (Splash),  +
+ >
>  (3 damage, knockdown)
Corner Only
Airborne opponent  +
+ ,
,  (2 damage, knockdown)
Airborne opponent  +
+ ,
,  (2 damage, knockdown)
 ,
,  (3 damage, knockdown)
Counter hit  +
+ >
>  ,
,  (4 damage, knockdown)
Strategy
General
Rook's goal is to get close to the opponent and knock them down. This is because Rook has the best close-range options in the game. This is so true that characters who normally play up-close, such as Valerie, no longer want to play close to Rook, and instead change play styles to keep Rook away. There are a variety of tools at Rook's disposal to help him get in. His biggest gap closer is to knockdown with earthquake then immediately landslide.
Once Rook gains a knockdown, he has a 66% chance to win the next exchange when there is no reversal involved. The mixup involves three meaty options:
- Sweep beats jump and yomi
- Throw beats block and jump
- Windmill Crusher beats block and yomi
All of these options cause knockdown and let Rook repeat the mixup until the opponent guesses correctly. This vortex is Rook's most dangerous tool. Rook's whole gameplan often depends upon landing that one good knockdown which can snowball into winning the entire round.
Note: After knocking down with windmill crusher, a microstep forward is required for throw and sweep to reach again. If the sweep is too hard to time, kick is easier and will work as a meaty 2 damage with no knockdown.
Meaty Throw Timings
After throw, press throw when the opponent's health bar just finishes depleting, or versus Onimaru and Rook at about 10% left, to land a meaty throw.
After windmill crusher, walk forward and press throw just as the knee of the back leg touches the back of the other leg to land a meaty throw.
After the bAC throw, jump immediately and then throw immediately on landing.
Post Earthquake Knockdown
After a landed EQ knockdown, doing landslide and then thunderclap immediately makes the thunderclap hit meaty if it was in range of the opponent.
Guides
Rook tutorial by shobbs
Random Rook Thoughts by professorplacid
Rook Safejump Guide by Simon Braendli (video)
Basics With Beav, Rook you like a hurricane by trapdoorbeaver
Basics by beav rook 2 electric rookalo match ups by trapdoorbeaver
Rook Guide by Zeus
Matchups
| Name |
Type |
Matchup Strategy
|
Argagarg

|
Zoner
|
Due to Rook's tall hurtbox, Arg's upward stretchy punch can hit grounded Rook from unusually far away. The lean back from thunderclap allows it to safely counter upward punch abuse.
If Arg gets rushing river or giant fish going, Rook has essentially lost his turn and has to play defense until the giant/goldfish is gone. Rook has to earthquake at random sometimes to discourage too much river, or earthquake immediately after blocking stretch punch if Arg likes to cancel into river. If Arg is knocked down but the river is still coming, it's better for Rook to jump over the river than to landslide.
One of Arg’s more troublesome tactics is blue flying fish followed immediately by upward punch. There is a spacing close enough where Rook can react to the blue fish and jump forward into earthquake. Done right, the earthquake starts soon enough to beat or trade with Arg’s upward punch. From further away Rook cannot safely jump over the blue fish without getting hit. That is unless Rook uses Head Crush to hit Arg’s extended hurtbox. Without super at this distance though, Rook has to block or thunderclap the blue fish.
|
DeGrey

|
Wild Card
|
Degray is putting himself in a 50/50 situation every time he uses counterpoint step from close up. Rook can block to punish justice kicks or tyrant crusher, or Rook can windmill to beat empty step and daggerfall. From long-range however Degray can space tyrant crusher to be safe on block against Rook.
Once Degray has air super, it’s better for Rook to not jump unless he has air super as well.
Degray may try to use ghost like he’s a zoner. Ghost has less recovery than other projectiles, making it more dangerous to jump over. Blocking ghost is okay though, as ghost can’t be resummoned for a while letting Rook safely approach again.
|
Geiger

|
Zoner
|
If Geiger gets a delayed time spiral or air super out then Rook needs to play defense until it’s gone, as there are few good ways for Rook to get past these if Geiger knows what to do. Rook needs to earthquake or kick at random to discourage too much delayed spiral.
Once Geiger can’t rely on delayed spiral he’ll switch to using normal time spirals. Rook can jump over these on reaction in mid-range. However, Geiger can followup a normal time spiral with one of three immediate options to prevent Rook's jump. One option for Geiger is to jump forward kick. If Rook predicts this he can get pass with Head Crush, or by thunderclapping the spiral and then using C to catch Geiger’s landing.
Geiger’s second option is to wait for Rook’s jump over the spiral, then catch him out of the air with backhand or flash gear. Rook can predict this and space an Earthquake just right to beat the backhand and avoid flash gear. Flash gear can also be defeated by a well-timed head crush.
If Rook is a bit closer, Geiger’s third option as Rook jumps over a spiral is to neutral jump kick or drop gear. Rook can defeat this by guessing with a well-spaced neutral jump vines, or forward jump head crush.
|
Grave

|
Zoner
|
Rook has a jump-in mixup in situations where Grave can't jump first. Vines will beat lightning cloud, spaced earthquake will defeat block/knifehand, and empty jump can defend against sword then punish. This mixup no longer works once Grave has super, as he can walk-forward dragonheart to defeat all three jump options.
At mid-range Rook can react to the start of lightning cloud by holding back to block and then pressing jump backward a moment later. This makes it so if Grave sent a fast small cloud Rook will block it, but if Grave sent a slow large cloud Rook will jump backward. If you see Rook jump backward you know you can then do earthquake to punish the large cloud.
During wind Rook needs to play defense until it's gone. Try to not let yourself get knocked down in the corner. If that happens Grave can initiate a strong fireball trap through repeated large clouds.
|
Jaina

|
Zoner
|
Rook’s tall hurtbox makes him vulnerable to Jaina’s air flame arrow even while standing on the ground. The way to duck under it is with landslide.
When an arc shot is coming down Rook’s best option is often to block until it’s gone or thunderclap. If Jaina commits to repeating arc shots, then Rook has to force his way in with Vine Spiral.
Ground flame arrow is a tricky projectile for Rook to navigate. There’s a spacing far away from Jaina where if you jump forward over the arrow, Jaina can react with dragonheart and hit Rook guaranteed. The way to avoid this is to instead neutral jump over the arrow.
Once closer it becomes possible to react to ground arrow, empty jump forward over it, and land in time to block the dragonheart. The danger is that at this closer range Jaina can instead use her faster knee to anti-air. To beat this Rook has to earthquake overtop Jaina as she moves forward with the knee, or use Head Crush. Jaina could once again use dragonheart at this closer range to beat earthquake, so Rook should still empty jump forward sometimes so he may block.
|
Lum

|
Wild Card
|
If Lum gets the right items going he can completely control the match. Because of this Rook has to play more aggressive than usual. Earthquake often to shutdown item toss, and use Vine Spiral when Lum might melon toss. Checkmate Buster will catch Lum’s Cartwheel, but be careful if it might cross up.
Pay close attention to what items are out. Sometimes the best move is to just wait.
Rook's sweep, thunderclap, and earthquake are safe ways to destroy mini-lums.
|
Midori

|
Grappler
|
This matchup involves a lot of jumping from both sides. Human Midori can safely attack Rook with neutral jump floating axe kick or the flying kick special move. Rook can keep Midori out with liberal use of neutral jump Rock Punch, but without any forward momentum, Midori is content to wait and build meter for dragon. This means Rook has to sometimes approach as well.
Once Midori has dragon form it is Rook who has to go on the defensive. Head crush is Rook’s best tool against dragon as it beats anything but block.
|
Onimaru

|
Wild Card
|
Onimaru's jump options are very vulnerable to Rook's landslide, and Oni's usual cancels and stance follow-ups are vulnerable to Rook's armored moves. Together this pushes Onimaru to adopt a grounded playstyle relying on safe pokes while stalling for air super.
Rook wants to knockdown Oni and get in before robots can be summoned. Earthquake is a good tool for this job, but Oni has a variety of grounded ways to avoid Earthquake (projectile immunity on B, anti-air C, parry). Rook can instead empty jump to bait one of these options, but be careful not to jump in range of Oni's anti-air ground super.
|
Quince

|
Wild Card
|
A common gameplan of Quince's is to wall with jC and poke with B. Both of these moves have a fairly large startup and can be stuffed pre-emptively by poking with Rook's faster kick. Landslide also works if Rook wants a riskier read with more reward.
If Quince manages to safely get a mirror out with jC, there are few ways Rook can destroy the mirror and not get punished on reaction by Quince. One way is for Rook to destroy the mirror with a neutral-jump Rock Punch spaced far away. Quince can in turn space Truth Geyser to hit Rook's outstretched arm, but Rook can then sometimes do neutral-jump Earthquake instead of destroying the mirror, and this way Rook will avoid the Geyser and knockdown Quince.
Much like with Degray, once Quince has super meter, Rook wants to avoid jumping unless he has meter as well to counter Quince's air super. In Two Truths mode Quince's special moves do not cause chip damage unless the real Quince commits. If Quince is not willing to take the risk, feel free to hold block until Quince's meter is drained.
|
Rook

|
Grappler
|
The Rook mirror is odd because many times if two players use the same move, the slower player wins. This is true for windmill crusher, air super, ground super, and earthquake.
Vine spiral actually becomes a decent tool in this matchup even though there are no projectiles. Vines in general breaks armor so it's safe from Rook's grabs. Early vines will win most encounters air-to-air, but be unsafe on block. Late vines will be vulnerable air-to-air, but be safe on block due to the extra pushback from hitting 3 times and Rook's lack of a fast poke.
|
Setsuki

|
Rushdown
|
Setsuki has trouble with Rook’s earthquake. Her cape and divekick often lose to Earthquake air-to-air, and her only reliable anti-air is her ground super. Without meter her best answer then becomes to wait for Earthquake and jump-in after, but if the Earthquake doesn’t come she’s letting Rook get closer.
Setsuki may also attempt to zone with Kunai. If the kunai is performed high in the air Rook can react with his kick. Rook will still get hit by the kunai, but Setuki will land on Rook’s foot and take damage as well. Trades are to Rook’s advantage as he has the most HP in the game while Setsuki has the least. She cannot win a battle of attrition. If the Kunai are too predictable Rook can instead use Vine Spiral.
|
Valerie

|
Rushdown
|
Val’s fA poke reaches far enough to safely beat all of Rook’s ground options if spaced well, and if timed well it can anti-air any of Rook’s aerial options. Rook can jump and mixup the timing of his descent with earthquake or splash to throw off Val’s timing for fA.
It’s important to note Val’s normal jumping attack works differently based on her timing. If she attacks early she will defeat Rook air-to-air, but be vulnerable to windmill crusher. If she delays her jump attack she can beat windmill crusher, but she’s then vulnerable to Rook air-to-air.
Things become tricky once Val gains super. Rook wants to jump attack so that Val can’t safely jump in with air super, but if Rook jumps too predictably Val can easily use her ground super to anti-air Rook.
|
![]() (2 damage, knockdown)
(2 damage, knockdown) ![]() +
+![]() (Second-hit only),
(Second-hit only), ![]() +
+![]() (3 damage)
(3 damage) ![]() +
+![]() (Second-hit only),
(Second-hit only), ![]() +
+![]() >
> ![]() (3 damage, knockdown)
(3 damage, knockdown)
![]() +
+![]() >
> ![]() (3 damage, knockdown)
(3 damage, knockdown)
![]() +
+![]() >
> ![]() (3 damage, knockdown)
(3 damage, knockdown)
![]() +
+![]() ,
, ![]() (2 damage, knockdown)
(2 damage, knockdown)
![]() +
+![]() ,
, ![]() (2 damage, knockdown)
(2 damage, knockdown)
![]() +
+![]() >
> ![]() ,
, ![]() (4 damage, knockdown)
(4 damage, knockdown)
