JoJo's Bizarre Adventure: All-Star Battle R/Shigekiyo Yangu: Difference between revisions
No edit summary |
mNo edit summary |
||
| (31 intermediate revisions by 4 users not shown) | |||
| Line 8: | Line 8: | ||
*'''Relay Race''': Shigechi is one of the only characters that is able to run both forward and backwards, giving him more maneuverability than most characters. | *'''Relay Race''': Shigechi is one of the only characters that is able to run both forward and backwards, giving him more maneuverability than most characters. | ||
*'''Herd of Harvests''': Shigechi's toolkit is governed by Harvest stacks, which are consumed when he uses his | *'''Herd of Harvests''': Shigechi's toolkit is governed by Harvest stacks, which are consumed when he uses his Special Moves. | ||
*'''Formation Changes''': Shigechi can switch between Offensive and Defensive Harvest formations as modes to get access to different | *'''Formation Changes''': Shigechi can switch between Offensive and Defensive Harvest formations as modes to get access to different Special Moves. | ||
{{StrengthsAndWeaknesses | {{StrengthsAndWeaknesses | ||
| intro = [[file: | | intro = [[file:JJASBR Shigechi Small Icon.png|50px]] '''Shigekiyo Yangu''' is a Stand character who utilizes his special moves to pester and pressure the opponent. | ||
| pros = | | pros = | ||
* '''Low Recovery Options:''' Access to [[JoJo' | * '''Neutral Skipping Projectile:''' In Defensive Formation, Shigechi has access to one of the best projectiles in the game: the M version of [[JoJo's Bizarre Adventure: All-Star Battle R/Shigekiyo Yangu#Defense 214X-6X|"I'll protect them!"]]. Leaving Shigechi with large frame advantage, this fast travelling, low startup projectile is one of his strongest tools. | ||
* '''Low Recovery Options:''' Access to [[JoJo's Bizarre Adventure: All-Star Battle R/Shigekiyo Yangu#623X|"I can get anything I want!"]] and [[JoJo's Bizarre Adventure: All-Star Battle R/Shigekiyo Yangu#4S-6S|Formation Changes]] allow Shigechi to end strings in low recovery, as well as throwing projectiles to stay at advantage or getting resources back. | |||
* '''Oppressive Strings:''' While spending Harvest stacks on offense, Shigechi can create long strings with small gaps, leaving the opponent guessing for the next strike/throw mixup. | * '''Oppressive Strings:''' While spending Harvest stacks on offense, Shigechi can create long strings with small gaps, leaving the opponent guessing for the next strike/throw mixup. | ||
* '''Anti-Zoning Tool:''' Despite his poor normals, Shigechi can use [[JoJo' | * '''Anti-Zoning Tool:''' Despite his poor normals, Shigechi can use [[JoJo's Bizarre Adventure: All-Star Battle R/Shigekiyo Yangu#623X|"I can get anything I want!"]] as an anti-zoning tool, summoning the projectile directly above the opponent with very little recovery. Although it doesn't track very well, stationary zoning opponents are forced to block, stop zoning, or take the hit. | ||
|cons = | |cons = | ||
* '''TERRIBLE Normals:''' Abysmal range on his normals and a lack of a | * '''TERRIBLE Normals:''' Abysmal range on his normals and a lack of a 4f move in general make him an absolute hell to punish with or play into pokes, requiring exceptional patience in these situations. | ||
* '''Hard to Master:''' During advantage, Shigechi will be continuously performing inputs and keeping track of Harvest stacks and Formation, requiring both execution and resource awareness. This makes him a character that really needs time and practice to get the good stuff out of him. | * '''Hard to Master:''' During advantage, Shigechi will be continuously performing inputs and keeping track of Harvest stacks and Formation, requiring both execution and resource awareness. This makes him a character that really needs time and practice to get the good stuff out of him. | ||
* ''' | * '''Harvest Dependency:''' Shigechi heavily relies on his Harvest stacks to do anything. Without them, he needs to confirm into 2H to get them back, which is hard to do with his poor normals. | ||
* '''Bad Throws:''' Shigechi's Throws deal low damage | * '''Bad Throws:''' Shigechi's Throws are among the worst in the game: not only do they deal particularly low damage, they are also lacking in advantage to set up on oki. As a result, Shigechi's Throw game is inherently weaker than other characters'. | ||
| tablewidth = 80 | | tablewidth = 80 | ||
}} | }} | ||
| Line 29: | Line 29: | ||
Unlike other Stand characters, Shigechi's Stand, Harvest, is always active. This causes the Stand to interact with Shigechi's moveset in unique ways. | Unlike other Stand characters, Shigechi's Stand, Harvest, is always active. This causes the Stand to interact with Shigechi's moveset in unique ways. | ||
Shigechi can put Harvest in either '''Offensive Formation''' or '''Defensive Formation''', doing so through [[JoJo's Bizarre Adventure: All-Star Battle R/Shigekiyo Yangu#4S-6S|Formation Changes]]; Shigechi will always start the match in Offensive Formation, but the chosen Formation will carry over between rounds. With the exception of [[JoJo' | Shigechi can put Harvest in either '''Offensive Formation''' or '''Defensive Formation''', doing so through [[JoJo's Bizarre Adventure: All-Star Battle R/Shigekiyo Yangu#4S-6S|Formation Changes]]; Shigechi will always start the match in Offensive Formation, but the chosen Formation will carry over between rounds. With the exception of [[JoJo's Bizarre Adventure: All-Star Battle R/Shigekiyo Yangu#623X|"I can get anything I want!"]], all of Shigechi's Special Moves change based on what Formation he is in: | ||
*{{NotationIcon- | *{{NotationIcon-ASBR|HarvestAtk}} '''Offensive Formation''' grants access to [[JoJo's Bizarre Adventure: All-Star Battle R/Shigekiyo Yangu#Offense 236X|"Don't underestimate Harvest!"]], [[JoJo's Bizarre Adventure: All-Star Battle R/Shigekiyo Yangu#Offense 214X|"Mess with me and you're gonna get hurt!"]], and [[JoJo's Bizarre Adventure: All-Star Battle R/Shigekiyo Yangu#Offense 41236X|"Move and you'll regret it!"]]. | ||
*{{NotationIcon- | *{{NotationIcon-ASBR|HarvestDef}} '''Defensive Formation''' grants access to [[JoJo's Bizarre Adventure: All-Star Battle R/Shigekiyo Yangu#Defense 214X|"Don't come any closer!"]], [[JoJo's Bizarre Adventure: All-Star Battle R/Shigekiyo Yangu#Defense 214X-6X|"I'll protect them!"]], and [[JoJo's Bizarre Adventure: All-Star Battle R/Shigekiyo Yangu#Defense 41236X|"So itchy!"]]. | ||
Shigechi's Special Moves are also governed by another mechanic: they will '''consume Harvest stacks upon use''', of which he has access to a | Shigechi's Special Moves are also governed by another mechanic: they will '''consume Harvest stacks upon use''', of which he has access to a '''maximum of three'''. Said Special Moves will consume a different amount of Harvest stacks depending on the version used (Light consumes one stack, Medium uses two stacks, and Heavy requires all three stacks). Should Shigechi not have the required amount of Harvest stacks to perform a specific version of a Special Move, said version will be locked out; as a result, these moves will become completely unavailable if Shigechi has no Harvest stacks at his disposal. | ||
The following maneuvers allow Shigechi to refill his Harvest stacks: | The following maneuvers allow Shigechi to refill his Harvest stacks: | ||
| Line 40: | Line 40: | ||
*[[JoJo's Bizarre Adventure: All-Star Battle R/Shigekiyo Yangu#5S|"You can see my Harvest?!"]] will summon a Harvest stack. | *[[JoJo's Bizarre Adventure: All-Star Battle R/Shigekiyo Yangu#5S|"You can see my Harvest?!"]] will summon a Harvest stack. | ||
*[[JoJo's Bizarre Adventure: All-Star Battle R/Shigekiyo Yangu#4S-6S|Formation Changes]] will summon a Harvest stack, in addition to changing Shigechi's current Formation. | *[[JoJo's Bizarre Adventure: All-Star Battle R/Shigekiyo Yangu#4S-6S|Formation Changes]] will summon a Harvest stack, in addition to changing Shigechi's current Formation. | ||
*[[JoJo's Bizarre Adventure: All-Star Battle R/Shigekiyo Yangu#Heart Heat Attack|"Now I'm real mad!"]] and [[JoJo's Bizarre Adventure: All-Star Battle R/Shigekiyo Yangu# | *[[JoJo's Bizarre Adventure: All-Star Battle R/Shigekiyo Yangu#Heart Heat Attack|"Now I'm real mad!"]] and [[JoJo's Bizarre Adventure: All-Star Battle R/Shigekiyo Yangu#Great Heat Attack|"You want proof? Here it is!"]] will summon all 3 Harvest stacks upon use. | ||
===Stats=== | ===Stats=== | ||
| Line 62: | Line 62: | ||
|damage=13 | |damage=13 | ||
|guard=Mid | |guard=Mid | ||
|startup= | |startup=6 | ||
|active= | |active= | ||
|recovery= | |recovery= | ||
|blockadv=0 | |blockadv=0 | ||
|hitadv=+ | |hitadv=+4 | ||
|description= | |description= | ||
Shigechi performs a quick kick in front of him. | Shigechi performs a quick kick in front of him. | ||
*Low horizontal range, equal to 2L. About halfway in the front stack of Offensive Formation. | *Low horizontal range, equal to 2L. About halfway in the front stack of Offensive Formation. | ||
*On hit sets up timing perfectly for a Throw after. Also a | *On hit, sets up timing perfectly for a Throw after. Also a frametrap with 5L and 2L. | ||
* | *Low pushback. Can be done 3 times on block without moving. | ||
**Neutral on block, but he doesn't have a | **Neutral on block, but he doesn't have a 4f normal, so opponents can beat him. | ||
}} | }} | ||
}} | }} | ||
| Line 86: | Line 86: | ||
|damage=21 | |damage=21 | ||
|guard=Mid | |guard=Mid | ||
|startup= | |startup=6 | ||
|active= | |active= | ||
|recovery= | |recovery= | ||
|blockadv=-4 | |blockadv=-4 | ||
|hitadv= | |hitadv=0 | ||
|description= | |description= | ||
Shigechi dashes forward while putting his hands in front of him, attempting to push the opponent away. | Shigechi dashes forward while putting his hands in front of him, attempting to push the opponent away. | ||
*Moves him forward a bit. | |||
*Medium horizontal range. A little more than the front stack of Offensive Formation, together with the movement. | *Medium horizontal range. A little more than the front stack of Offensive Formation, together with the movement. | ||
*Big pushback on hit and block. | *Big pushback on hit and block. | ||
}} | }} | ||
| Line 109: | Line 109: | ||
|damage=42 (21*2) | |damage=42 (21*2) | ||
|guard=Mid | |guard=Mid | ||
|startup= | |startup=10(5)1 | ||
|active= | |active= | ||
|recovery= | |recovery= | ||
|blockadv=-4 | |blockadv=-4 | ||
|hitadv=+ | |hitadv=+2 | ||
|description= | |description= | ||
Shigechi leaps forward horizontally with a headbutt. | Shigechi leaps forward horizontally with a headbutt. | ||
*Moves him forward a fair amount. | |||
*Large horizontal range. About two front stacks of Offensive Formation, together with movement. | *Large horizontal range. About two front stacks of Offensive Formation, together with movement. | ||
}} | }} | ||
}} | }} | ||
| Line 131: | Line 131: | ||
|damage=12 | |damage=12 | ||
|guard=Low | |guard=Low | ||
|startup= | |startup=6 | ||
|active= | |active= | ||
|recovery= | |recovery= | ||
|blockadv=-2 | |blockadv=-2 | ||
|hitadv=+ | |hitadv=+2 | ||
|description= | |description= | ||
Shigechi performs a sitting low kick. | Shigechi performs a sitting low kick. | ||
*Low horizontal range, equal to 5L. About halfway in the front stack of Offensive Formation. | *Low horizontal range, equal to 5L. About halfway in the front stack of Offensive Formation. | ||
*Very | *Very low pushback. Can be done 4 times on block without moving. | ||
}} | }} | ||
}} | }} | ||
| Line 154: | Line 153: | ||
|damage=20 | |damage=20 | ||
|guard=Low | |guard=Low | ||
|startup= | |startup=6 | ||
|active= | |active= | ||
|recovery= | |recovery= | ||
|blockadv=-4 | |blockadv=-4 | ||
|hitadv= | |hitadv=0 | ||
|description= | |description= | ||
Shigechi slides forward while sitting, performing an uppercut. | Shigechi slides forward while sitting, performing an uppercut. | ||
| Line 177: | Line 176: | ||
|damage=32 (4*3, 20) | |damage=32 (4*3, 20) | ||
|guard=Low | |guard=Low | ||
|startup= | |startup=12 | ||
|active= | |active= | ||
|recovery= | |recovery= | ||
|blockadv=-6 | |blockadv=-6 | ||
|hitadv= | |hitadv=HKD | ||
|description= | |description= | ||
Shigechi slides over the ground using his Harvest, sweeping the opponent. | Shigechi slides over the ground using his Harvest, sweeping the opponent. | ||
* | *Causes hard knockdown. | ||
*Can low-profile certain moves. | |||
*Large horizontal range. Slightly less than two front stacks of Offensive Formation, together with movement. | *Large horizontal range. Slightly less than two front stacks of Offensive Formation, together with movement. | ||
}} | }} | ||
}} | }} | ||
| Line 200: | Line 199: | ||
|damage=16 | |damage=16 | ||
|guard=Overhead | |guard=Overhead | ||
|startup= | |startup=8 | ||
|active= | |active= | ||
|recovery= | |recovery= | ||
| Line 207: | Line 206: | ||
|description= | |description= | ||
Shigechi pushes his arms out at an upwards angle. | Shigechi pushes his arms out at an upwards angle. | ||
*Good vertical hitbox against aerial opponents | *Good vertical hitbox against aerial opponents and has the biggest horizontal range out of all his aerials. | ||
*Fastest aerial option | *Fastest aerial option, but suffers from a short active duration and low hitstun. | ||
}} | }} | ||
}} | }} | ||
| Line 224: | Line 221: | ||
|damage=24 | |damage=24 | ||
|guard=Overhead | |guard=Overhead | ||
|startup= | |startup=10 | ||
|active= | |active= | ||
|recovery= | |recovery= | ||
| Line 232: | Line 229: | ||
Shigechi kicks at a downwards angle. | Shigechi kicks at a downwards angle. | ||
*Very low horizontal range, decent vertical range. | *Very low horizontal range, decent vertical range. | ||
*Long active duration. | *Long active duration with medium hitstun. | ||
*Can hit | *Good hitbox for cross-ups. | ||
*Can hit standing targets while rising, as well as specific crouchers. | |||
**Works well with 623L setup. | **Works well with 623L setup. | ||
}} | }} | ||
}} | }} | ||
| Line 250: | Line 246: | ||
|damage=38 | |damage=38 | ||
|guard=Overhead | |guard=Overhead | ||
|startup= | |startup=10 | ||
|active= | |active= | ||
|recovery= | |recovery= | ||
| Line 257: | Line 253: | ||
|description= | |description= | ||
Shigechi stretches out horizontally, kicking the opponent. | Shigechi stretches out horizontally, kicking the opponent. | ||
*Decent vertical and horizontal range, | *Decent vertical and horizontal range, hitting about where his shoes are horizontally. | ||
*Long hitstun, can combo after rising dash-jump. | *Long hitstun, can combo after rising dash-jump. | ||
*Considerably active, pairing well with its cross-up capabilities. | *Considerably active, pairing well with its cross-up capabilities. | ||
| Line 309: | Line 305: | ||
|recovery= | |recovery= | ||
|blockadv= | |blockadv= | ||
|hitadv= | |hitadv=Groundbounce | ||
|description= | |description= | ||
Shigechi uses his Harvest to drop objects from above the opponent. | Shigechi uses his Harvest to drop objects from above the opponent. | ||
| Line 319: | Line 315: | ||
---- | ---- | ||
'''L version:''' | '''L version:''' | ||
Harvest drops nuts and bolts. | |||
*Decides spawning location at '''frame 15'''. | *Decides spawning location at '''frame 15'''. | ||
*Cancels summoning the projectile if [[JoJo's Bizarre Adventure: All-Star Battle R/Shigekiyo Yangu#Defense 214X|Defense 214L/M/H]] is performed. | *Cancels summoning the projectile if [[JoJo's Bizarre Adventure: All-Star Battle R/Shigekiyo Yangu#Defense 214X|Defense 214L/M/H]] is performed. | ||
| Line 325: | Line 322: | ||
---- | ---- | ||
'''M version:''' | '''M version:''' | ||
Harvest drops more nuts and bolts. | |||
*Decides spawning location at '''frames 17-19'''. | *Decides spawning location at '''frames 17-19'''. | ||
*Has a ghost hitbox with no damage or hitstun that allows opponents to Stylish Evade or Stylish Guard the full move even after getting hit. | *Has a ghost hitbox with no damage or hitstun that allows opponents to Stylish Evade or Stylish Guard the full move even after getting hit. | ||
---- | ---- | ||
'''H version:''' | '''H version:''' | ||
Harvest drops construction pipes. | |||
*Causes a groundbounce on hit. | *Causes a groundbounce on hit. | ||
*Despite being considered a projectile, it cannot be reflected. | |||
*Decides spawning location at '''frame 19'''. | *Decides spawning location at '''frame 19'''. | ||
*If the opponent Stylish Evades or Stylish Guards, the 3D hitbox is wide and active enough to force them to defend again. | *If the opponent Stylish Evades or Stylish Guards, the 3D hitbox is wide and active enough to force them to defend again. | ||
| Line 339: | Line 339: | ||
<br> | <br> | ||
<div style="position: top: 0; display: flex; justify-content: center; background-color: #cacace;" class="movelist-toggles"> | <div style="position: top: 0; display: flex; justify-content: center; background-color: #cacace;" class="movelist-toggles"> | ||
<div id="movelist-toggle-1" class="movelist-toggle-button">[[File:JJASBR_Offensive_Harvest_Icon_(2).png | <div id="movelist-toggle-1" class="movelist-toggle-button">[[File:JJASBR_Offensive_Harvest_Icon.png|link=]][[File:JJASBR_Offensive_Harvest_Icon_(2).png|link=]]</div> | ||
<div id="movelist-toggle-2" class="movelist-toggle-button">[[File:JJASBR_Defensive_Harvest_Icon_(2).png | <div id="movelist-toggle-2" class="movelist-toggle-button">[[File:JJASBR_Defensive_Harvest_Icon.png|link=]][[File:JJASBR_Defensive_Harvest_Icon_(2).png|link=]]</div> | ||
</div> | </div> | ||
<div id="movelist-1" class="movelist"><!-- Offensive Formation Move List --> | <div id="movelist-1" class="movelist"><!-- Offensive Formation Move List --> | ||
| Line 348: | Line 348: | ||
|caption= | |caption= | ||
|name=Don't underestimate Harvest! | |name=Don't underestimate Harvest! | ||
|input=236L/M/H | |input=off.236L/M/H | ||
|data= | |data= | ||
{{AttackData-ASBR | {{AttackData-ASBR | ||
| Line 354: | Line 354: | ||
|damage=60 (10*6) | |damage=60 (10*6) | ||
|guard=Mid | |guard=Mid | ||
|startup= | |startup=16 | ||
|active= | |active= | ||
|recovery= | |recovery= | ||
|blockadv=-10 | |blockadv=-10 | ||
|hitadv= | |hitadv=KD | ||
|description= | |description= | ||
}} | }} | ||
| Line 366: | Line 366: | ||
|damage=84 (7*12) | |damage=84 (7*12) | ||
|guard=Mid | |guard=Mid | ||
|startup= | |startup=16 | ||
|active= | |active= | ||
|recovery= | |recovery= | ||
|blockadv=-4 | |blockadv=-4 | ||
|hitadv= | |hitadv=KD | ||
|description= | |description= | ||
}} | }} | ||
| Line 378: | Line 378: | ||
|damage=108 (6*18) | |damage=108 (6*18) | ||
|guard=Mid | |guard=Mid | ||
|startup= | |startup=16 | ||
|active= | |active= | ||
|recovery= | |recovery= | ||
|blockadv=0 | |blockadv=0 | ||
|hitadv= | |hitadv=KD | ||
|description= | |description= | ||
Shigechi sends one-to-three Harvest clusters flying forward as an arcing projectile in a spreading pattern. | Shigechi sends one-to-three Harvest clusters flying forward as an arcing projectile in a spreading pattern. | ||
*Damage and distance change depending on the version used. | *Damage and distance change depending on the version used. | ||
*Launches the opponent away on hit. | |||
*Despite being considered a projectile, it cannot be reflected. | |||
---- | ---- | ||
'''L version:''' | '''L version:''' | ||
* | *Fires a projectile that slowly descends. | ||
*Opponent is launched on hit. | *Opponent is launched the least high on hit. | ||
---- | ---- | ||
'''M version:''' | '''M version:''' | ||
* | *Fires two projectiles that slowly descend separately. | ||
*Projectiles travel further than the | *Projectiles travel further than the L version. | ||
*Opponent is launched | *Opponent is launched higher on hit. | ||
---- | ---- | ||
'''H version:''' | '''H version:''' | ||
* | *Fires three projectiles in a spread pattern. | ||
*Projectiles travel further than the | *Projectiles travel further than the L and M versions. | ||
*Opponent is launched significantly on hit. | *Opponent is launched significantly higher on hit. | ||
**Allows for 6[6] > 5M extension. | **Allows for 6[6] > 5M extension. | ||
}} | }} | ||
| Line 409: | Line 411: | ||
|caption= | |caption= | ||
|name=Mess with me and you're gonna get hurt! | |name=Mess with me and you're gonna get hurt! | ||
|input=214L/M/H | |input=off.214L/M/H | ||
|data= | |data= | ||
{{AttackData-ASBR | {{AttackData-ASBR | ||
| Line 415: | Line 417: | ||
|damage=54 (9*6) | |damage=54 (9*6) | ||
|guard=Low | |guard=Low | ||
|startup= | |startup=20 | ||
|active= | |active= | ||
|recovery= | |recovery= | ||
|blockadv=-36 | |blockadv=-36 | ||
|hitadv=- | |hitadv=-22 | ||
|description= | |description= | ||
}} | }} | ||
| Line 427: | Line 429: | ||
|damage=72 (6*12) | |damage=72 (6*12) | ||
|guard=Low | |guard=Low | ||
|startup= | |startup=20 | ||
|active= | |active= | ||
|recovery= | |recovery= | ||
|blockadv=-34 | |blockadv=-34 | ||
|hitadv=- | |hitadv=-20 | ||
|description= | |description= | ||
}} | }} | ||
| Line 439: | Line 441: | ||
|damage=90 (5*18) | |damage=90 (5*18) | ||
|guard=Low | |guard=Low | ||
|startup= | |startup=20 | ||
|active= | |active= | ||
|recovery= | |recovery= | ||
|blockadv=-30 | |blockadv=-30 | ||
|hitadv=- | |hitadv=-18 | ||
|description= | |description= | ||
Shigechi sends Harvest running at the opponent. | Shigechi sends Harvest running at the opponent. | ||
*Damage and | *Damage, speed, and tracking capabilities all change depending on the version used. | ||
*Reaches fullscreen. | *Reaches fullscreen. | ||
*Despite being considered a projectile, it cannot be reflected. | |||
*Can hit OTG. | *Can hit OTG. | ||
---- | ---- | ||
'''L version:''' | '''L version:''' | ||
*Sends one wave of Harvest. | *Sends one wave of Harvest. | ||
*Has the slowest travel speed. | *Has the slowest travel speed, as well as the least tracking. | ||
---- | ---- | ||
'''M version:''' | '''M version:''' | ||
*Sends two waves of Harvest. | *Sends two waves of Harvest. | ||
* | *Intermediate travel speed and tracking. | ||
---- | ---- | ||
'''H version:''' | '''H version:''' | ||
*Sends three waves of Harvest. | *Sends three waves of Harvest. | ||
*Has the fastest travel speed. | *Has the fastest travel speed and the most tracking. | ||
}} | }} | ||
}} | }} | ||
| Line 472: | Line 474: | ||
|caption2= | |caption2= | ||
|name=Move and you'll regret it! | |name=Move and you'll regret it! | ||
|input=41236L/M/H | |input=off.41236L/M/H | ||
|data= | |data= | ||
{{AttackData-ASBR | {{AttackData-ASBR | ||
| Line 478: | Line 480: | ||
|damage=54 (14, 5*4, 20) | |damage=54 (14, 5*4, 20) | ||
|guard=Throw | |guard=Throw | ||
|startup= | |startup=26 | ||
|active= | |active= | ||
|recovery= | |recovery= | ||
| Line 490: | Line 492: | ||
|damage=64 (14, 5*5, 25) | |damage=64 (14, 5*5, 25) | ||
|guard=Throw | |guard=Throw | ||
|startup= | |startup=26 | ||
|active= | |active= | ||
|recovery= | |recovery= | ||
| Line 502: | Line 504: | ||
|damage=74 (14, 5*6, 30) | |damage=74 (14, 5*6, 30) | ||
|guard=Throw | |guard=Throw | ||
|startup= | |startup=26 | ||
|active= | |active= | ||
|recovery= | |recovery= | ||
| Line 510: | Line 512: | ||
Shigechi has Harvest leap upwards in a falling arc. If they connect, a number of Harvests will hold the opponent still as a single one of them attacks their neck before throwing them away. | Shigechi has Harvest leap upwards in a falling arc. If they connect, a number of Harvests will hold the opponent still as a single one of them attacks their neck before throwing them away. | ||
*Damage and range change depending on the version used. | *Damage and range change depending on the version used. | ||
*Causes hard knockdown. | *Causes hard knockdown on a successful Throw. | ||
*Despite being considered a projectile, it cannot be reflected. | |||
---- | ---- | ||
'''L version:''' | '''L version:''' | ||
| Line 516: | Line 519: | ||
---- | ---- | ||
'''M version:''' | '''M version:''' | ||
* | *Intermediate horizontal range. | ||
*Gives the most advantage on a successful Throw. | *Gives the most advantage on a successful Throw. | ||
---- | ---- | ||
| Line 530: | Line 533: | ||
|caption= | |caption= | ||
|name=Don't come any closer! | |name=Don't come any closer! | ||
|input=214L/M/H | |input=def.214L/M/H | ||
|data= | |data= | ||
{{AttackData-ASBR | {{AttackData-ASBR | ||
| Line 537: | Line 540: | ||
|startup= | |startup= | ||
|active= | |active= | ||
|recovery= | |recovery=Total XX | ||
|blockadv= | |blockadv= | ||
|hitadv= | |hitadv= | ||
| Line 543: | Line 546: | ||
Harvest instantly forms a wall in front of Shigechi. | Harvest instantly forms a wall in front of Shigechi. | ||
*The version used, in addition to consuming the required amount of Harvest stacks, determines the follow-up used. | *The version used, in addition to consuming the required amount of Harvest stacks, determines the follow-up used. | ||
*Shigechi automatically turns around when the opponent Dodges or switches sides | *While active, Shigechi will take reduced Chip Damage, and will be protected from Guard Damage. Shigechi will also automatically defend against all attack attributes, including Unblockable attacks (except for {{NotationIcon-ASBR|RisottoMini}}'s "[[JoJo's Bizarre Adventure: All-Star Battle R/Risotto Nero#22X|Control iron within 5-10 meters]]"). | ||
**Shigechi automatically turns around when the opponent Dodges or switches sides. | |||
**If the hitbox of the opponent's attack is big enough, it can hit Shigechi from the other side of the wall. This happens rather inconsistently, making this move unreliable at times. | **If the hitbox of the opponent's attack is big enough, it can hit Shigechi from the other side of the wall. This happens rather inconsistently, making this move unreliable at times. | ||
}} | }} | ||
| Line 558: | Line 561: | ||
|caption3=Heavy | |caption3=Heavy | ||
|name=I'll protect them! | |name=I'll protect them! | ||
|input=214L/M/H > 6L/M/H | |input=def.214L/M/H > 6L/M/H | ||
|data= | |data= | ||
{{AttackData-ASBR | {{AttackData-ASBR | ||
| Line 565: | Line 568: | ||
|damage=35 | |damage=35 | ||
|guard=Mid | |guard=Mid | ||
|startup= | |startup=4 | ||
|active= | |active= | ||
|recovery= | |recovery= | ||
| Line 578: | Line 581: | ||
|damage=75 (5*15) | |damage=75 (5*15) | ||
|guard=Mid | |guard=Mid | ||
|startup= | |startup=4 | ||
|active= | |active= | ||
|recovery= | |recovery= | ||
|blockadv=+16 | |blockadv=+16 | ||
|hitadv=+ | |hitadv=+20 | ||
|description= | |description= | ||
}} | }} | ||
| Line 591: | Line 594: | ||
|damage=80 (40*2) | |damage=80 (40*2) | ||
|guard=Low | |guard=Low | ||
|startup= | |startup=4 | ||
|active= | |active= | ||
|recovery= | |recovery= | ||
| Line 599: | Line 602: | ||
Shigechi launches the Harvests making up the wall at the opponent. | Shigechi launches the Harvests making up the wall at the opponent. | ||
*The version of this move to be used is determined by the version of [[JoJo's Bizarre Adventure: All-Star Battle R/Shigekiyo Yangu#Defense 214X|"Don't come any closer!"]] that was used prior. | *The version of this move to be used is determined by the version of [[JoJo's Bizarre Adventure: All-Star Battle R/Shigekiyo Yangu#Defense 214X|"Don't come any closer!"]] that was used prior. | ||
*All versions are considered projectiles. | *All versions are considered projectiles, but cannot be reflected. | ||
---- | ---- | ||
'''L version:''' | '''L version:''' | ||
*Launches the projectile at an upwards angle. | *Launches the projectile at an upwards angle. | ||
*Causes a groundbounce on hit. | *Causes a groundbounce on hit. | ||
*Shigechi can [[JoJo's Bizarre Adventure: All-Star Battle R/System#Uses of the Heart Heat Gauge|Flash Cancel]] into [[JoJo's Bizarre Adventure: All-Star Battle R/Shigekiyo Yangu#Defense 41236X|def.41236L/M]] to confirm into a combo. | |||
---- | ---- | ||
'''M version:''' | '''M version:''' | ||
*Launches the projectile at a horizontal angle. | *Launches the projectile at a horizontal angle. | ||
*Leaves grounded opponents standing. | |||
*Gives considerably large advantage on hit and block. | *Gives considerably large advantage on hit and block. | ||
*Large damage and extension options make it a common combo tool. | *Large damage and extension options make it a common combo tool. | ||
---- | ---- | ||
'''H version:''' | '''H version:''' | ||
*Launches fast, | *Launches fast, Low-hitting projectiles over the ground. | ||
* | *Causes knockback on hit. | ||
*Can hit OTG. | *Can hit OTG. | ||
}} | }} | ||
| Line 623: | Line 627: | ||
|caption= | |caption= | ||
|name=So itchy! | |name=So itchy! | ||
|input=41236L/M/H | |input=def.41236L/M/H | ||
|data= | |data= | ||
{{AttackData-ASBR | {{AttackData-ASBR | ||
| Line 629: | Line 633: | ||
|damage=40 | |damage=40 | ||
|guard=Low | |guard=Low | ||
|startup= | |startup=18 | ||
|active= | |active= | ||
|recovery= | |recovery= | ||
| Line 641: | Line 645: | ||
|damage=40 | |damage=40 | ||
|guard=Low | |guard=Low | ||
|startup= | |startup=18 | ||
|active= | |active= | ||
|recovery= | |recovery= | ||
| Line 653: | Line 657: | ||
|damage=40 | |damage=40 | ||
|guard=Low | |guard=Low | ||
|startup= | |startup=18 | ||
|active= | |active= | ||
|recovery= | |recovery= | ||
| Line 659: | Line 663: | ||
|hitadv= | |hitadv= | ||
|description= | |description= | ||
Shigechi commands Harvest to run at the opponent. | Shigechi commands Harvest to run at the opponent and hold them in place. | ||
*Different versions alter Shigechi's recovery time. | *Different versions alter Shigechi's recovery time. | ||
*Binds the opponent, which transitions into a crumple against grounded opponents. | *Binds the opponent, which transitions into a crumple against grounded opponents. | ||
*Reaches fullscreen. | *Reaches fullscreen. | ||
*Despite being considered a projectile, it cannot be reflected. | |||
*Common combo tool, as it gives access to MANY different extensions (such as [[JoJo's Bizarre Adventure: All-Star Battle R/Shigekiyo Yangu#623X|623L/M/H]] and [[JoJo's Bizarre Adventure: All-Star Battle R/Shigekiyo Yangu#Great Heat Attack|GHA]]). | *Common combo tool, as it gives access to MANY different extensions (such as [[JoJo's Bizarre Adventure: All-Star Battle R/Shigekiyo Yangu#623X|623L/M/H]] and [[JoJo's Bizarre Adventure: All-Star Battle R/Shigekiyo Yangu#Great Heat Attack|GHA]]). | ||
---- | ---- | ||
| Line 670: | Line 674: | ||
---- | ---- | ||
'''M version:''' | '''M version:''' | ||
* | *Intermediate recovery. | ||
---- | ---- | ||
'''H version:''' | '''H version:''' | ||
| Line 689: | Line 693: | ||
|data= | |data= | ||
{{AttackData-ASBR | {{AttackData-ASBR | ||
|damage=95 | |damage=95 (15*4, 35) | ||
|guard=Throw | |guard=Throw | ||
|startup= | |startup=6 | ||
|active= | |active= | ||
|recovery= | |recovery= | ||
| Line 710: | Line 714: | ||
|caption2= | |caption2= | ||
|name=Assist | |name=Assist | ||
|subtitle=Don't come any closer! | |subtitle=Don't come any closer!<br>{{NotationIcon-ASBR|Assault}}{{NotationIcon-ASBR|Assault}}{{NotationIcon-ASBR|Burst}}{{NotationIcon-ASBR|Burst}} | ||
|data= | |data= | ||
{{AttackData-ASBR | {{AttackData-ASBR | ||
| Line 719: | Line 723: | ||
|recovery= | |recovery= | ||
|blockadv= | |blockadv= | ||
|hitadv= | |hitadv=KD | ||
|description= | |description= | ||
Harvest instantly forms a wall in front of Shigechi. If the wall is hit by the opponent, Shigechi launches the Harvests making it up towards them. | Harvest instantly forms a wall in front of Shigechi. If the wall is hit by the opponent, Shigechi launches the Harvests making it up towards them. | ||
| Line 725: | Line 729: | ||
*Reversal Assist Stocks: 2 | *Reversal Assist Stocks: 2 | ||
*Based on [[JoJo's Bizarre Adventure: All-Star Battle R/Shigekiyo Yangu#Defense 214X|Defense 214H]] > [[JoJo's Bizarre Adventure: All-Star Battle R/Shigekiyo Yangu#Defense 214X-6X|6L/M/H]] | *Based on [[JoJo's Bizarre Adventure: All-Star Battle R/Shigekiyo Yangu#Defense 214X|Defense 214H]] > [[JoJo's Bizarre Adventure: All-Star Battle R/Shigekiyo Yangu#Defense 214X-6X|6L/M/H]] | ||
* | *When triggered, the second portion causes knockback on hit. | ||
*The wall possesses Auto Guard rather than a proper | *The wall possesses Auto Guard rather than a proper Counter hitbox, allowing it to interact with [[JoJo's Bizarre Adventure: All-Star Battle R/Rohan Kishibe|Rohan]]'s Safety Locks. | ||
}} | }} | ||
}} | }} | ||
| Line 745: | Line 749: | ||
|startup= | |startup= | ||
|active= | |active= | ||
|recovery= | |recovery=Total XX | ||
|blockadv= | |blockadv= | ||
|hitadv= | |hitadv= | ||
| Line 757: | Line 761: | ||
|startup= | |startup= | ||
|active= | |active= | ||
|recovery= | |recovery=Total XX | ||
|blockadv= | |blockadv= | ||
|hitadv= | |hitadv= | ||
| Line 763: | Line 767: | ||
Harvest carries Shigechi in a caterpillar track-like fashion. | Harvest carries Shigechi in a caterpillar track-like fashion. | ||
*Allows Shigechi to run backwards, although at a slower speed than most forward dashes. | *Allows Shigechi to run backwards, although at a slower speed than most forward dashes. | ||
*While the run itself cannot be canceled into | *While the run itself cannot be canceled into Special Moves, Forward Dash can be canceled into "You can see my Harvest?!" and Formation Changes. | ||
}} | }} | ||
}} | }} | ||
| Line 777: | Line 781: | ||
|damage= | |damage= | ||
|guard= | |guard= | ||
|startup= | |startup= | ||
|active= | |active= | ||
|recovery=24 | |recovery=Total 24 | ||
|blockadv= | |blockadv= | ||
|hitadv= | |hitadv= | ||
| Line 795: | Line 799: | ||
|caption2=Defensive Formation | |caption2=Defensive Formation | ||
|name=Defensive Formation<br>Offensive Formation | |name=Defensive Formation<br>Offensive Formation | ||
|input= | |input=4/6S | ||
|data= | |data= | ||
{{AttackData-ASBR | {{AttackData-ASBR | ||
|version=Offensive Formation | |||
|subtitle=6S | |||
|damage= | |||
|guard= | |||
|startup= | |||
|active= | |||
|recovery=Total 26 | |||
|blockadv= | |||
|hitadv= | |||
|description= | |||
}} | |||
{{AttackData-ASBR | |||
|version=Defensive Formation | |||
|subtitle=4S | |||
|header=no | |||
|damage= | |damage= | ||
|guard= | |guard= | ||
|startup= | |startup= | ||
|active= | |active= | ||
|recovery=26 | |recovery=Total 26 | ||
|blockadv= | |blockadv= | ||
|hitadv= | |hitadv= | ||
|description= | |description= | ||
Shigechi commands Harvest to change its current formation. | Shigechi commands Harvest to change its current formation. | ||
*Switches Offensive | *Switches Defensive to Offensive Formation (6S), or Offensive to Defensive Formation (4S). | ||
*Both versions summon a Harvest stack | *Both versions summon a Harvest stack upon use. | ||
*Both have the same cancel features of a command normal, meaning they can be canceled | *Both have the same cancel features of a command normal, meaning they can be canceled from Normals and, in turn, canceled into Special Moves. | ||
}} | }} | ||
}} | }} | ||
| Line 823: | Line 842: | ||
|data= | |data= | ||
{{AttackData-ASBR | {{AttackData-ASBR | ||
|damage=186 (48*3, 42) | |||
|damage=186 (48*3 | |||
|guard=Mid | |guard=Mid | ||
|startup= | |startup=2+4 [2+2] | ||
|active= | |active= | ||
|recovery= | |recovery= | ||
|blockadv=-64 | |blockadv=-64 | ||
|hitadv= | |hitadv=KD [0] | ||
|description= | |description= | ||
Shigechi points and quickly sends out a large, dense wave of Harvests a long distance forward. | Shigechi points and quickly sends out a large, dense wave of Harvests a long distance forward. | ||
*Automatically summons 3 Harvest stacks upon use. | *Automatically summons 3 Harvest stacks upon use. | ||
* | *Launches opponent high and away on hit. | ||
*Does not cause a hard knockdown, unlike most HHAs. | |||
*Can hit OTG; data in [] applies to the OTG version. | |||
*Does not cause a hard knockdown. | |||
}} | }} | ||
}} | }} | ||
| Line 871: | Line 872: | ||
|damage=354 (60+12*9+6*21+60) | |damage=354 (60+12*9+6*21+60) | ||
|guard=Mid | |guard=Mid | ||
|startup= | |startup=2+26 | ||
|active= | |active= | ||
|recovery= | |recovery= | ||
|blockadv=-128 | |blockadv=-128 | ||
|hitadv= | |hitadv=Groundbounce | ||
|description= | |description= | ||
Shigechi calls forth a massive wave of Harvests that rapidly travel forward. If they connect, the Harvests will cover the opponent from head to toe as they pile on top of them, each one relentlessly punching the opponent before they all deliver an uppercut in unison. | Shigechi calls forth a massive wave of Harvests that rapidly travel forward. If they connect, the Harvests will cover the opponent from head to toe as they pile on top of them, each one relentlessly punching the opponent before they all deliver an uppercut in unison. | ||
*Automatically summons 3 Harvest stacks upon use. | *Automatically summons 3 Harvest stacks upon use. | ||
*Travels fullscreen. | *Travels fullscreen. | ||
*Causes | *Causes a groundbounce after the cutscene ends. | ||
}} | }} | ||
}} | }} | ||
==Costumes== | ==Costumes== | ||
{{ColorGallery | filePrefix=JJASBR_Shigechi_Color_ | imageFileTypes=png| imageWidths= | ===Normal=== | ||
{{ColorGallery | filePrefix=JJASBR_Shigechi_Color_ | imageFileTypes=png| imageWidths=250 | colors= | |||
{{ColorGallery/Color|1| text=Normal (Color 1) }} | {{ColorGallery/Color|1| text=Normal (Color 1) }} | ||
{{ColorGallery/Color|2| text=Normal (Color 2) }} | {{ColorGallery/Color|2| text=Normal (Color 2) }} | ||
| Line 891: | Line 893: | ||
{{ColorGallery/Color|4| text=Normal (Color 4) }} | {{ColorGallery/Color|4| text=Normal (Color 4) }} | ||
}} | }} | ||
===Stand=== | |||
{{ColorGallery | filePrefix=JJASBR_Shigechi_Color_ | imageFileTypes=png| imageWidths=250 | colors= | |||
{{ColorGallery/Color|Stand 1| text={{Tooltip|color=purple|text=Harvest (Color 1)|hovertext=Used for odd-numbered colors.}} }} | |||
{{ColorGallery/Color|Stand 2| text={{Tooltip|color=purple|text=Harvest (Color 2)|hovertext=Used for even-numbered colors.}} }} | |||
}} | |||
==Notable Players== | |||
:{{Template:PlayerListDisclaimer}} | |||
{| class="wikitable" style="text-align:center;" | |||
!width="95"|Name | |||
!width="90"|Usual Color | |||
!width="125"|Region | |||
!Contact | |||
!Example Play | |||
|- | |||
|orange | |||
|[[File:JJASBR Shigechi Color 4.png|200x200px|Normal (Color 4)]] | |||
|[[File:Flag_jp.png]]<br>Japan | |||
|[https://twitter.com/orange06165917 @orange06165917] | |||
|[https://www.youtube.com/live/kdCa7DgEs9c?t=1062s Exhibition Footage]<br>[https://www.youtube.com/@-orange5848 YouTube Channel] | |||
|} | |||
==Navigation== | ==Navigation== | ||
Latest revision as of 17:17, 4 June 2024
Introduction
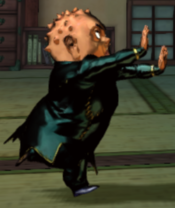
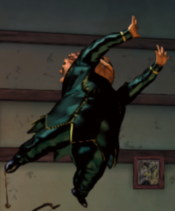
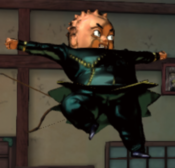
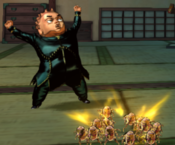
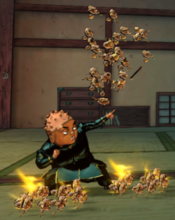
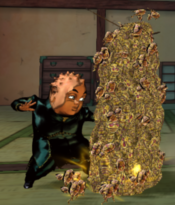
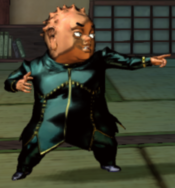
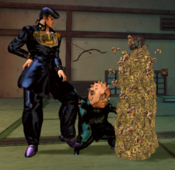
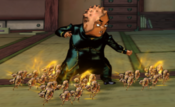
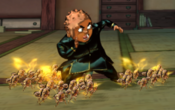
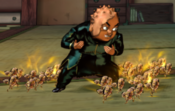
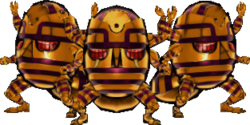
Shigekiyo Yangu, best known as Shigechi, is a secondary ally in Diamond is Unbreakable, the fourth part of JoJo's Bizarre Adventure. He uses his Stand, Harvest, to make the opponent move to him and overwhelm them on offense.
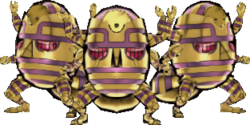
Despite being a Stand User, Shigechi does not follow the typical rules of Stand characters: instead of switching between Stand Off and Stand On modes, Shigechi can change Harvest's current Formation, giving him access to different special moves based on what Formation he is in. Other than that, all of these special moves cost him Harvest stacks, which he'll need to keep up with "You can see my Harvest?!" and Formation Changes to get to use them.
While his normals may be small, he can force his enemies to come towards him by harassing them with "I can get anything I want!", wait for the opponent to make mistakes and punish them with high pressure strings. His main combos come from Defensive Formation, where he uses "So itchy!" and "I'll protect them!" (Medium) to extend his combos, and then switches to Offensive Formation to hit them on the ground with "Mess with me and you're gonna get hurt!".
- Relay Race: Shigechi is one of the only characters that is able to run both forward and backwards, giving him more maneuverability than most characters.
- Herd of Harvests: Shigechi's toolkit is governed by Harvest stacks, which are consumed when he uses his Special Moves.
- Formation Changes: Shigechi can switch between Offensive and Defensive Harvest formations as modes to get access to different Special Moves.
|
|
|
| Pros | Cons |
|
|
Herd of Harvests
Unlike other Stand characters, Shigechi's Stand, Harvest, is always active. This causes the Stand to interact with Shigechi's moveset in unique ways.
Shigechi can put Harvest in either Offensive Formation or Defensive Formation, doing so through Formation Changes; Shigechi will always start the match in Offensive Formation, but the chosen Formation will carry over between rounds. With the exception of "I can get anything I want!", all of Shigechi's Special Moves change based on what Formation he is in:
 Offensive Formation grants access to "Don't underestimate Harvest!", "Mess with me and you're gonna get hurt!", and "Move and you'll regret it!".
 Defensive Formation grants access to "Don't come any closer!", "I'll protect them!", and "So itchy!".
Shigechi's Special Moves are also governed by another mechanic: they will consume Harvest stacks upon use, of which he has access to a maximum of three. Said Special Moves will consume a different amount of Harvest stacks depending on the version used (Light consumes one stack, Medium uses two stacks, and Heavy requires all three stacks). Should Shigechi not have the required amount of Harvest stacks to perform a specific version of a Special Move, said version will be locked out; as a result, these moves will become completely unavailable if Shigechi has no Harvest stacks at his disposal.
The following maneuvers allow Shigechi to refill his Harvest stacks:
- "You can see my Harvest?!" will summon a Harvest stack.
- Formation Changes will summon a Harvest stack, in addition to changing Shigechi's current Formation.
- "Now I'm real mad!" and "You want proof? Here it is!" will summon all 3 Harvest stacks upon use.
Stats
| Style | Health | Low Health Mode | Hashtag(s) |
|---|---|---|---|
| Stand | 900 | Rumble | #ASBR_SHI #ASBR_SIG |
Move List
Normal Moves
5L
5L
|
|---|
5M
5M
|
|---|
5H
5H
|
|---|
2L
2L
|
|---|
2M
2M
|
|---|
2H
2H
|
|---|
JL
j.L
|
|---|
JM
j.M
|
|---|
JH
j.H
|
|---|
Special Moves
623X
I can get anything I want! 623L/M/H Start Start Light Light Medium Medium Heavy Heavy
|
|---|
Offense 236X
Don't underestimate Harvest!
off.236L/M/H |
|---|
Offense 214X
Mess with me and you're gonna get hurt!
off.214L/M/H |
|---|
Offense 41236X
Move and you'll regret it!
off.41236L/M/H |
|---|
Defense 214X
Don't come any closer!
def.214L/M/H |
|---|
Defense 214X-6X
I'll protect them! def.214L/M/H > 6L/M/H Light Light Medium Medium Heavy Heavy
|
|---|
Defense 41236X
So itchy!
def.41236L/M/H |
|---|
System Mechanics
Throw
Throw
Don't move! 5/4 + Any Two Attack Buttons |
|---|
Assist
Assist
Don't come any closer! |
|---|
66-44
Relay Race 6[6] / 4[4] Forward Forward Back Back
|
|---|
5S
You can see my Harvest?!
5S |
|---|
4S-6S
Defensive Formation Offensive Formation 4/6S Offensive Formation Offensive Formation Defensive Formation Defensive Formation
|
|---|
Heart Heat Attack
Now I'm real mad!
236 + Any Two Attack Buttons |
|---|
Great Heat Attack
You want proof? Here it is!
236L+M+H |
|---|
Costumes
Normal
Stand
Notable Players
- Disclaimer: This list is derived from community input and is in no way comprehensive or a form of ranking of any kind. Our community criteria can be found here.
| Name | Usual Color | Region | Contact | Example Play |
|---|---|---|---|---|
| orange | 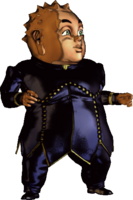
|
Japan |
@orange06165917 | Exhibition Footage YouTube Channel |

