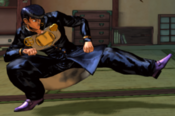
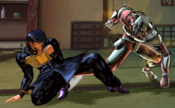
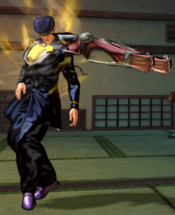
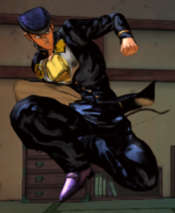
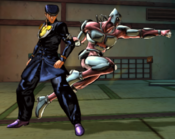
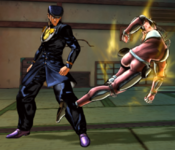
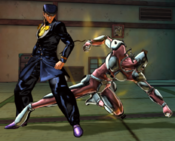
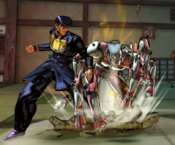
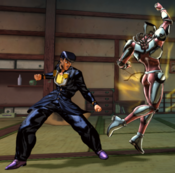
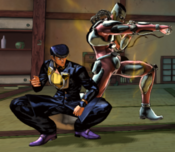
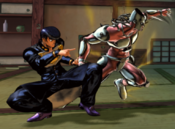
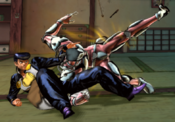
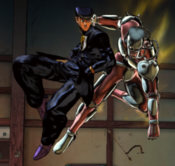
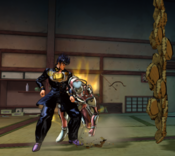
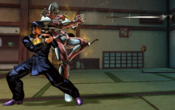
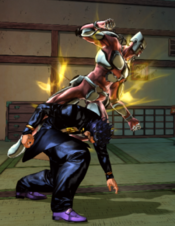
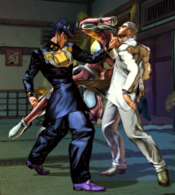
JoJo's Bizarre Adventure: All-Star Battle R/Josuke Higashikata (Part 4): Difference between revisions
(Added some rudimentary descriptions) |
|||
| (87 intermediate revisions by 11 users not shown) | |||
| Line 1: | Line 1: | ||
{{ASBR Character Intro|char=Josuke Part 4|short=js4|content= | {{ASBR Character Intro|char=Josuke Part 4|short=js4|content= | ||
==Introduction== | ==Introduction== | ||
The primary protagonist of | :''This article is about the character from Part 4, ''Diamond is Unbreakable'', primarily known as "Josuke 4". For information about the character from Part 8, ''JoJolion'', see [[JoJo's Bizarre Adventure: All-Star Battle R/Josuke Higashikata (Part 8)|Josuke Higashikata (Part 8)]].'' | ||
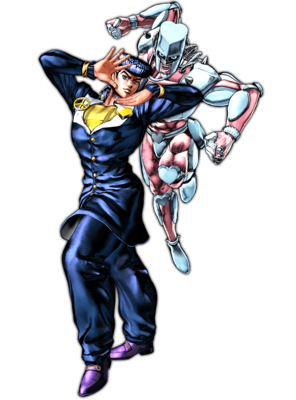
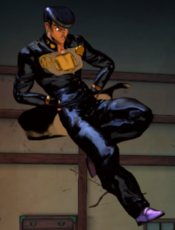
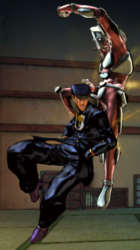
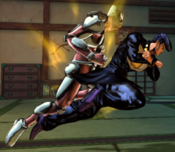
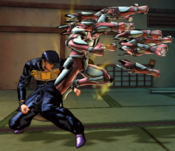
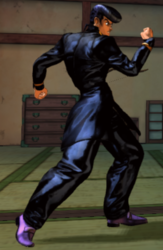
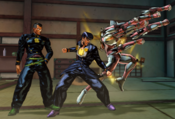
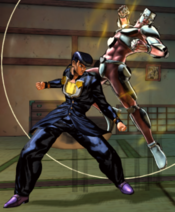
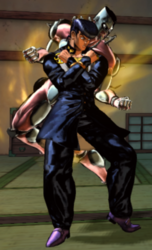
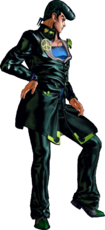
The primary protagonist of ''Diamond is Unbreakable'', the fourth part of ''JoJo's Bizarre Adventure'', Josuke Higashikata is a rushdown character with a variety of powerful tools. He can play at a variety of ranges well and convert just about any hit into a knockdown, allowing him to set up his powerful offense. | |||
On offense, he boasts a strong mixup game with his left-right setups. His | On offense, he boasts a strong mixup game with his left-right setups. His Guard Damage also adds an additional threat of guard breaking to his pressure. | ||
{{StrengthsAndWeaknesses | {{StrengthsAndWeaknesses | ||
| intro = [[file:JJASBR_Josuke_Part_4_Small_Icon.png| | | intro = [[file:JJASBR_Josuke_Part_4_Small_Icon.png|50px]] '''Josuke Higashikata 4''' is a Stand character who closes in on the opponent in order to break down both their Health and their Guard Gauge. | ||
| pros = | | pros = | ||
* '''Stable Conversions:''' Just about anything can convert into | * '''Stable Conversions:''' Just about anything can convert into "[[JoJo's Bizarre Adventure: All-Star Battle R/Josuke Higashikata (Part 4)#236X|Break through, beat you up!]]", letting him turn most hits in neutral into a longer combo. | ||
* ''Strong Oki:''' Good left-right mixups with his crossup j.L, allowing him to turn most knockdowns into a scary high-low-left-right-throw guessing game. | * '''Strong Oki:''' Good left-right mixups with his crossup [[JoJo's Bizarre Adventure: All-Star Battle R/Josuke Higashikata (Part 4)#JL|j.L]], allowing him to turn most knockdowns into a scary high-low-left-right-throw guessing game. | ||
* '''Guard Damage:''' Can deal a lot of damage to an opponent's | * '''Guard Damage:''' Can deal a lot of damage to an opponent's Guard Gauge, potentially letting him score Guard Breaks after the opponent successfully blocks his mixups. | ||
* '''Good Neutral:''' | * '''Good Neutral:''' Josuke has an array of solid pokes with a good combination of speed and range, good jump-ins, decent mobility, and an acceptable projectile, letting him play at a variety of ranges and make his way through neutral. | ||
* '''High Damage:''' Josuke has above average damage, allowing him to finish the opponent with relatively few interactions. | |||
| cons = | | cons = | ||
* ''' | * '''Unsafe Pressure:''' Almost all of Josuke's special moves are unsafe, resulting in him needing to be careful during blockstrings or use Flash Cancels to keep himself safe. | ||
|tablewidth=80 | |tablewidth=80 | ||
}} | }} | ||
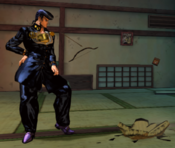
===Watch Your Mouth!=== | ===Watch Your Mouth! Mode=== | ||
After blocking an attack with "[[JoJo's Bizarre Adventure: All-Star Battle R/Josuke Higashikata (Part 4)#22H|Watch Your Mouth!]]", Josuke enters a unique state where he receives the following benefits: | |||
*Josuke features a special version of Super Armor that automatically escapes universal Throws and prevents the successful activation of Command Throws, as well as attacks with hitgrab properties, HHAs and GHAs. | |||
*All of Josuke's Normal Attacks have altered speed, damage and Guard Damage. | |||
*None of Josuke's moves will activate Counters. | |||
*Josuke is able to chain his ground attacks together indefinitely, including chaining the same normal repeatedly. | |||
**For the purposes of [[JoJo's Bizarre Adventure: All-Star Battle R/System#Infinite Prevention System|IPS]], each Normal Attack can be used up to 8 times in a single combo. | |||
*Gains access to "[[JoJo's Bizarre Adventure: All-Star Battle R/Josuke Higashikata (Part 4)#3M|I'm not done]] [[JoJo's Bizarre Adventure: All-Star Battle R/Josuke Higashikata (Part 4)#Stand 3M|kicking your ass!]]". | |||
*"[[JoJo's Bizarre Adventure: All-Star Battle R/Josuke Higashikata (Part 4)#Stand 214X|He heals pretty quickly!]]" is enhanced. | |||
In return, however, Josuke will be forced to walk towards the opponent, becoming unable to stop moving, crouch, run, move backwards, dodge, jump in any direction that isn't forward, or block. | |||
===Stats=== | ===Stats=== | ||
| Line 28: | Line 40: | ||
}} | }} | ||
}} | }} | ||
==Move List== | ==Move List== | ||
<div class="movelist-toggles"> | <div style="position: sticky; top: 0; display: flex; justify-content: center; background-color: #cacace;" class="movelist-toggles sticky"> | ||
<div id="movelist-toggle-1" class="movelist-toggle-button">[[File:JJASBR_User_Icon.png|link=]]</div> | <div id="movelist-toggle-1" class="movelist-toggle-button">[[File:JJASBR_User_Icon.png|link=]]</div> | ||
<div id="movelist-toggle-2" class="movelist-toggle-button">[[File:JJASBR_Stand_Icon.png|link=]]</div> | <div id="movelist-toggle-2" class="movelist-toggle-button">[[File:JJASBR_Stand_Icon.png|link=]]</div> | ||
| Line 36: | Line 47: | ||
<div id="movelist-1" class="movelist"><!-- Stand Off Move List --> | <div id="movelist-1" class="movelist"><!-- Stand Off Move List --> | ||
===Stand Off=== | ===Stand Off=== | ||
*Values in [] apply during Watch Your Mouth! Mode. | |||
====Normal Moves==== | ====Normal Moves==== | ||
====== <font style="visibility:hidden" size="0">5L</font> ====== | ====== <font style="visibility:hidden" size="0">5L</font> ====== | ||
| Line 45: | Line 57: | ||
|data= | |data= | ||
{{AttackData-ASBR | {{AttackData-ASBR | ||
|damage= | |damage=7 [14] | ||
|guard= | |guard=Mid | ||
|startup= | |startup=4 | ||
|active= | |active= | ||
|recovery= | |recovery= | ||
|blockadv= | |blockadv=-2 | ||
|hitadv= | |hitadv=+2 | ||
|description= | |description= | ||
Josuke performs a backhanded attack. | |||
*A standard jab, good for stopping dash jumps. | |||
}} | }} | ||
}} | }} | ||
| Line 65: | Line 78: | ||
|data= | |data= | ||
{{AttackData-ASBR | {{AttackData-ASBR | ||
|damage= | |damage=23 [11] | ||
|guard= | |guard=Mid | ||
|startup= | |startup=8 | ||
|active= | |active= | ||
|recovery= | |recovery= | ||
|blockadv= | |blockadv=-4 | ||
|hitadv= | |hitadv=0 | ||
|description= | |description= | ||
Josuke performs an advancing hook. | |||
*Good range for pokes and counter-pokes. | |||
*Mainly used as combo and pressure filler. | |||
}} | }} | ||
}} | }} | ||
| Line 85: | Line 100: | ||
|data= | |data= | ||
{{AttackData-ASBR | {{AttackData-ASBR | ||
|damage= | |damage=35 [17] | ||
|guard= | |guard=Mid | ||
|startup= | |startup=12 | ||
|active= | |active= | ||
|recovery= | |recovery= | ||
|blockadv= | |blockadv=-8 | ||
|hitadv= | |hitadv=-2 | ||
|description= | |description= | ||
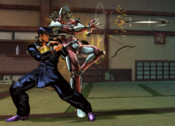
Crazy Diamond | Josuke summons Crazy Diamond, who performs a quick punch. | ||
*Good range for pokes and confirms. | |||
}} | }} | ||
}} | }} | ||
| Line 105: | Line 121: | ||
|data= | |data= | ||
{{AttackData-ASBR | {{AttackData-ASBR | ||
|damage= | |damage=13 | ||
|guard= | |guard=Low | ||
|startup= | |startup=6 | ||
|active= | |active= | ||
|recovery= | |recovery= | ||
|blockadv= | |blockadv=-2 | ||
|hitadv= | |hitadv=+2 | ||
|description= | |description= | ||
Josuke performs a stationary kick. | |||
*Very good range for pokes. | |||
}} | }} | ||
}} | }} | ||
| Line 125: | Line 142: | ||
|data= | |data= | ||
{{AttackData-ASBR | {{AttackData-ASBR | ||
|damage= | |damage=18 | ||
|guard= | |guard=Low | ||
|startup= | |startup=8 | ||
|active= | |active= | ||
|recovery= | |recovery= | ||
|blockadv= | |blockadv=-4 | ||
|hitadv= | |hitadv=0 | ||
|description= | |description= | ||
Josuke performs a sliding kick. | |||
*Good range for pokes and counter pokes. | |||
}} | }} | ||
}} | }} | ||
| Line 145: | Line 163: | ||
|data= | |data= | ||
{{AttackData-ASBR | {{AttackData-ASBR | ||
|damage= | |damage=33 | ||
|guard= | |guard=Low | ||
|startup= | |startup=12 | ||
|active= | |active= | ||
|recovery= | |recovery= | ||
|blockadv= | |blockadv=-8 | ||
|hitadv= | |hitadv=HKD | ||
|description= | |description= | ||
Josuke summons Crazy Diamond, who performs an overhead punch to the ground. | |||
*Causes hard knockdown. | |||
*Good range for pokes. | |||
}} | }} | ||
}} | }} | ||
| Line 165: | Line 185: | ||
|data= | |data= | ||
{{AttackData-ASBR | {{AttackData-ASBR | ||
|damage= | |damage=42 (10, 6*2, 10*2) | ||
|guard= | |guard=Mid | ||
|startup= | |startup=18 | ||
|active= | |active= | ||
|recovery= | |recovery= | ||
|blockadv= | |blockadv=-6 | ||
|hitadv= | |hitadv= | ||
|description= | |description= | ||
Josuke summons Crazy Diamond's fists to performs a barrage of punches. | |||
*The fourth hit causes crumple, causing the move to restand crouching opponents. | |||
**Because of this, canceling into [[JoJo's Bizarre Adventure: All-Star Battle R/Josuke Higashikata (Part 4)#236X|236L]] will knock the opponent down. | |||
*Cannot be canceled into [[JoJo's Bizarre Adventure: All-Star Battle R/System#Uses of the Heart Heat Gauge|Quick Stand On]]. | |||
*Does a lot of Guard Damage, making it very useful for Guard Break setups. However, it is difficult to true blockstring into this with just Josuke's normals, so be wary of potential SE/SG attempts. | |||
**Causes an instant Guard Break while [[JoJo's Bizarre Adventure: All-Star Battle R/Josuke Higashikata (Part 4)#Watch Your Mouth! Mode|Watch Your Mouth! Mode]] is active. | |||
}} | }} | ||
}} | }} | ||
| Line 187: | Line 210: | ||
|data= | |data= | ||
{{AttackData-ASBR | {{AttackData-ASBR | ||
|damage= | |damage=17 [8] | ||
|guard= | |guard=Overhead | ||
|startup= | |startup=8 | ||
|active= | |active= | ||
|recovery= | |recovery= | ||
| Line 195: | Line 218: | ||
|hitadv= | |hitadv= | ||
|description= | |description= | ||
Josuke performs an attack with his knees. | |||
*Small, but can cross up. | |||
*Good for air-to-airs and jump-ins. | |||
}} | }} | ||
}} | }} | ||
| Line 207: | Line 232: | ||
|data= | |data= | ||
{{AttackData-ASBR | {{AttackData-ASBR | ||
|damage= | |damage=26 [13] | ||
|guard= | |guard=Overhead | ||
|startup= | |startup=10 | ||
|active= | |active= | ||
|recovery= | |recovery= | ||
| Line 215: | Line 240: | ||
|hitadv= | |hitadv= | ||
|description= | |description= | ||
Josuke performs a kick downwards. | |||
*A good jump-in due to its angle. | |||
}} | }} | ||
}} | }} | ||
| Line 227: | Line 253: | ||
|data= | |data= | ||
{{AttackData-ASBR | {{AttackData-ASBR | ||
|damage= | |damage=30 [18] | ||
|guard= | |guard=Overhead | ||
|startup= | |startup=8 | ||
|active= | |active= | ||
|recovery= | |recovery= | ||
|blockadv= | |blockadv= | ||
|hitadv= | |hitadv=KD | ||
|description= | |description= | ||
Launches | Josuke summons Crazy Diamond, who performs an uppercut. | ||
*Launches on hit. | |||
*Does not reach very far downwards, but can be used as combo filler. | |||
}} | }} | ||
}} | }} | ||
| Line 242: | Line 270: | ||
====== <font style="visibility:hidden" size="0">236X</font> ====== | ====== <font style="visibility:hidden" size="0">236X</font> ====== | ||
{{MoveData | {{MoveData | ||
|image= | |image=JJASBR_Josuke_Part_4_236X_(1).png | ||
|caption= | |caption= | ||
|image2=JJASBR_Josuke_Part_4_236X_(2).png | |||
|caption2=Start | |||
|image3=JJASBR_Josuke_Part_4_236L.png | |||
|caption3=Light | |||
|image4=JJASBR_Josuke_Part_4_236M.png | |||
|caption4=Medium | |||
|image5=JJASBR_Josuke_Part_4_236H.png | |||
|caption5=Heavy | |||
|name=Break through, beat you up! | |name=Break through, beat you up! | ||
|input=236L/M/H | |input=236L/M/H | ||
| Line 249: | Line 285: | ||
{{AttackData-ASBR | {{AttackData-ASBR | ||
|version=Light | |version=Light | ||
|damage= | |damage=109 (10*4, 4*11, 5, 20) | ||
|guard= | |guard=Mid | ||
|startup= | |startup=12 | ||
|active= | |active= | ||
|recovery= | |recovery= | ||
|blockadv= | |blockadv=-22 | ||
|hitadv= | |hitadv=Crumple | ||
|description= | |description= | ||
}} | }} | ||
{{AttackData-ASBR | {{AttackData-ASBR | ||
|version=Medium | |version=Medium | ||
|header=no | |header=no | ||
|damage= | |damage=114 (10*4, 4*11, 30) | ||
|guard= | |guard=Mid, Overhead | ||
|startup= | |startup=12 | ||
|active= | |active= | ||
|recovery= | |recovery= | ||
|blockadv= | |blockadv=-22 | ||
|hitadv= | |hitadv=Groundbounce | ||
|description= | |description= | ||
}} | }} | ||
{{AttackData-ASBR | {{AttackData-ASBR | ||
|version=Heavy | |version=Heavy | ||
|header=no | |header=no | ||
|damage= | |damage=118 (10*4, 4*11, 34) | ||
|guard= | |guard=Mid, Low | ||
|startup= | |startup=12 | ||
|active= | |active= | ||
|recovery= | |recovery= | ||
|blockadv= | |blockadv=-18 | ||
|hitadv= | |hitadv=HKD | ||
|description= | |description= | ||
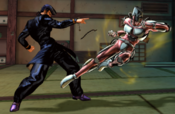
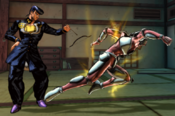
Josuke performs a shoulder tackle forward, with Crazy Diamond following up with a barrage of punches that ends with a final attack. | |||
*The final attack depends on the version used. | |||
*Triggers [[JoJo's Bizarre Adventure: All-Star Battle R/System#Rush Mode|Rush Mode]]. | |||
*Josuke's main combo tool while in Stand Off. | |||
---- | |||
'''L version:''' | |||
Josuke finishes the barrage with a straight punch. | |||
*Causes crumple on hit. | |||
*Can be followed up with a micro-dash 2L. | |||
---- | |||
'''M version:''' | |||
Josuke finishes the barrage with an overhead punch. | |||
*Causes a groundbounce on hit. | |||
*Cannot be followed up without spending meter or OTG. | |||
---- | |||
'''H version:''' | |||
Josuke finishes the barrage with a sweeping punch. | |||
*Launches on hit and causes hard knockdown. | |||
*Too large of a gap between the last hit and the previous ones to be a true combo against grounded opponents. Still, both portions can combo during a juggle. | |||
}} | }} | ||
}} | }} | ||
| Line 291: | Line 344: | ||
====== <font style="visibility:hidden" size="0">214X</font> ====== | ====== <font style="visibility:hidden" size="0">214X</font> ====== | ||
{{MoveData | {{MoveData | ||
|image= | |image=JJASBR_Josuke_Part_4_214X_(1).png | ||
|caption= | |caption=Attack | ||
|image2=JJASBR_Josuke_Part_4_214X_(2).png | |||
|caption2=Aftermath | |||
|name=DORA! | |name=DORA! | ||
|input=214L/M/H | |input=214L/M/H | ||
| Line 298: | Line 353: | ||
{{AttackData-ASBR | {{AttackData-ASBR | ||
|version=Light | |version=Light | ||
|damage= | |damage=60 (10*6) | ||
|guard= | |guard=Low | ||
|startup= | |startup=28 | ||
|active= | |active= | ||
|recovery= | |recovery= | ||
|blockadv= | |blockadv=-22 | ||
|hitadv= | |hitadv=HKD | ||
|description= | |description= | ||
}} | }} | ||
{{AttackData-ASBR | {{AttackData-ASBR | ||
|version=Medium | |version=Medium | ||
|header=no | |header=no | ||
|damage= | |damage=87 (12*6, 15) | ||
|guard= | |guard=Low | ||
|startup= | |startup=36 | ||
|active= | |active= | ||
|recovery= | |recovery= | ||
|blockadv= | |blockadv=-22 | ||
|hitadv= | |hitadv=HKD | ||
|description= | |description= | ||
}} | }} | ||
{{AttackData-ASBR | {{AttackData-ASBR | ||
|version=Heavy | |version=Heavy | ||
|header=no | |header=no | ||
|damage= | |damage=118 (14*7, 20) | ||
|guard= | |guard=Low | ||
|startup= | |startup=48 | ||
|active= | |active= | ||
|recovery= | |recovery= | ||
|blockadv= | |blockadv=-22 | ||
|hitadv= | |hitadv=HKD | ||
|description= | |description= | ||
Josuke summons Crazy Diamond, who rapidly punches the ground, breaking it and leaving a small hole. | |||
*The amount of hits, as well as the startup, depends on the version used. | |||
*Causes hard knockdown. | |||
*Can hit OTG. | |||
*Leaves some rubble on the floor, which remains for the rest of the round or until "[[JoJo's Bizarre Adventure: All-Star Battle R/Josuke Higashikata (Part 4)#623X|As you were!]]" is used. | |||
**If the move is used again with rubble already present on the field, the previous rubble will be removed. | |||
---- | |||
'''L version:''' | |||
*Fastest version with the least damage. | |||
*Can OTG after [[JoJo's Bizarre Adventure: All-Star Battle R/Josuke Higashikata (Part 4)#Stand 236X|s.236L/M/H]] in the corner. | |||
---- | |||
'''M version:''' | |||
*Balanced speed and damage. | |||
*Not particularly useful. | |||
---- | |||
'''H version:''' | |||
*Slowest version with the most damage. | |||
*The most used version, as it can OTG after [[JoJo's Bizarre Adventure: All-Star Battle R/Josuke Higashikata (Part 4)#236X|236L/M]] and both versions of [[JoJo's Bizarre Adventure: All-Star Battle R/Josuke Higashikata (Part 4)#Heart Heat Attack|HHA]]. | |||
}} | }} | ||
}} | }} | ||
| Line 346: | Line 414: | ||
|data= | |data= | ||
{{AttackData-ASBR | {{AttackData-ASBR | ||
|damage= | |damage=10 | ||
|guard= | |guard=Overhead | ||
|startup= | |startup=8 | ||
|active= | |active= | ||
|recovery= | |recovery= | ||
|blockadv= | |blockadv=-14 | ||
|hitadv= | |hitadv=HKD | ||
|description= | |description= | ||
Josuke rapidly slides across the floor, back to the spot where he last used "[[JoJo's Bizarre Adventure: All-Star Battle R/Josuke Higashikata (Part 4)#214X|DORA!]]". | |||
*Move performance is identical across all versions. | |||
Josuke rapidly slides across the floor, back to the | *Causes knockback on hit and triggers a wallbounce, in addition to causing hard knockdown. | ||
*Incredibly active, making it usable as a meaty. | |||
}} | }} | ||
}} | }} | ||
| Line 369: | Line 438: | ||
{{AttackData-ASBR | {{AttackData-ASBR | ||
|version=Light | |version=Light | ||
|damage= | |damage=50 | ||
|guard= | |guard=Mid | ||
|startup= | |startup=12 | ||
|active= | |active= | ||
|recovery= | |recovery= | ||
|blockadv= | |blockadv=-8 | ||
|hitadv= | |hitadv=-4 | ||
|description= | |description= | ||
}} | }} | ||
{{AttackData-ASBR | {{AttackData-ASBR | ||
|version=Medium | |version=Medium | ||
|header=no | |header=no | ||
|damage= | |damage=60 | ||
|guard= | |guard=Mid | ||
|startup= | |startup=16 | ||
|active= | |active= | ||
|recovery= | |recovery= | ||
|blockadv= | |blockadv=-16 | ||
|hitadv= | |hitadv=-10 | ||
|description= | |description= | ||
}} | }} | ||
{{AttackData-ASBR | {{AttackData-ASBR | ||
|version=Heavy | |version=Heavy | ||
|header=no | |header=no | ||
|damage= | |damage=70 | ||
|guard= | |guard=Mid | ||
|startup= | |startup=20 | ||
|active= | |active= | ||
|recovery= | |recovery= | ||
|blockadv= | |blockadv=-18 | ||
|hitadv= | |hitadv=KD | ||
|description= | |description= | ||
Josuke summons Crazy Diamond, who flicks an object at the opponent. | |||
*The version used alters the speed of the projectile. | |||
*Shares IPS with the Stand On version. | |||
*Reaches very high, so it can be crouched under. | |||
---- | |||
'''L version:''' | |||
*Crazy Diamond fires a bearing. | |||
*Travels at a slow speed. | |||
---- | |||
'''M version:''' | |||
*Crazy Diamond fires a bearing. | |||
*Travels faster than the L version. | |||
---- | |||
'''H version:''' | |||
*Crazy Diamond fires a bullet. | |||
*Travels the fastest. | |||
*Launches the opponent away on hit. | |||
}} | }} | ||
}} | }} | ||
| Line 409: | Line 492: | ||
====== <font style="visibility:hidden" size="0">22H</font> ====== | ====== <font style="visibility:hidden" size="0">22H</font> ====== | ||
{{MoveData | {{MoveData | ||
|image= | |image=JJASBR_Josuke_Part_4_22H_(1).png | ||
|caption= | |caption= | ||
|image2=JJASBR_Josuke_Part_4_22H_(2).png | |||
|caption2= | |||
|image3=JJASBR_Josuke_Part_4_22H_(3).png | |||
|caption3=''WHAT DID YOU SAY ABOUT MY HAIR?!'' | |||
|name=Watch Your Mouth! | |name=Watch Your Mouth! | ||
|input=22H | |input=22H | ||
|data= | |data= | ||
{{AttackData-ASBR | {{AttackData-ASBR | ||
|damage= | |damage=0 | ||
|guard= | |guard= | ||
|startup= | |startup= | ||
| Line 423: | Line 510: | ||
|hitadv= | |hitadv= | ||
|description= | |description= | ||
Josuke stops and fixes his hair. If the opponent directly attacks him, they will instead insult his hair and enrage him, sending Josuke into a blind rage as his hair spikes upward. | |||
*Requires 1 HH Gauge to be used, consuming it only during a successful activation. | |||
*Triggers [[JoJo's Bizarre Adventure: All-Star Battle R/Josuke Higashikata (Part 4)#Watch Your Mouth! Mode|Watch Your Mouth! Mode]]. | |||
*Every character has a unique quote for falling victim to this attack. | |||
}} | }} | ||
}} | }} | ||
| Line 429: | Line 519: | ||
====== <font style="visibility:hidden" size="0">3M</font> ====== | ====== <font style="visibility:hidden" size="0">3M</font> ====== | ||
{{MoveData | {{MoveData | ||
|image= | |image=JJASBR_Josuke_Part_4_22H-3M_(1).png | ||
|caption= | |caption= | ||
|image2=JJASBR_Josuke_Part_4_22H-3M_(2).png | |||
|caption2= | |||
|name=I'm not done kicking your ass! | |name=I'm not done kicking your ass! | ||
|input=3M | |input=3M during Watch Your Mouth! Mode | ||
|data= | |data= | ||
{{AttackData-ASBR | {{AttackData-ASBR | ||
|damage= | |damage=0 | ||
|guard= | |guard=Mid | ||
|startup= | |startup= | ||
|active= | |active= | ||
| Line 443: | Line 535: | ||
|hitadv= | |hitadv= | ||
|description= | |description= | ||
Josuke grabs the opponent off the ground, allowing him to continue his enraged assault. | |||
*Can only be used when the opponent is downed, but Josuke does not have to be near them to do so. | |||
*Restands the opponent. | |||
}} | }} | ||
}} | }} | ||
</div> | </div> | ||
<div id="movelist-2" class="movelist"><!-- Stand On Move List --> | <div id="movelist-2" class="movelist"><!-- Stand On Move List --> | ||
===Stand On=== | ===Stand On=== | ||
*Values in [] apply during Watch Your Mouth! Mode. | |||
====Normal Moves==== | ====Normal Moves==== | ||
====== <font style="visibility:hidden" size="0">Stand 5L</font> ====== | ====== <font style="visibility:hidden" size="0">Stand 5L</font> ====== | ||
| Line 455: | Line 549: | ||
|image=JJASBR_Josuke_Part_4_Stand_5L.png | |image=JJASBR_Josuke_Part_4_Stand_5L.png | ||
|caption= | |caption= | ||
|name=5L | |name=s.5L | ||
|subtitle= | |subtitle= | ||
|data= | |data= | ||
{{AttackData-ASBR | {{AttackData-ASBR | ||
|damage= | |damage=15 [7] | ||
|guard= | |guard=Mid | ||
|startup= | |startup=4 | ||
|active= | |active= | ||
|recovery= | |recovery= | ||
|blockadv= | |blockadv=-2 | ||
|hitadv= | |hitadv=+2 | ||
|description= | |description= | ||
Crazy Diamond performs a quick backhanded attack. | |||
*Standard jab, good at stopping dash-jumps. | |||
*Short range, but fast. | |||
}} | }} | ||
}} | }} | ||
| Line 475: | Line 571: | ||
|image=JJASBR_Josuke_Part_4_Stand_5M.png | |image=JJASBR_Josuke_Part_4_Stand_5M.png | ||
|caption= | |caption= | ||
|name=5M | |name=s.5M | ||
|subtitle= | |subtitle= | ||
|data= | |data= | ||
{{AttackData-ASBR | {{AttackData-ASBR | ||
|damage= | |damage=25 [12] | ||
|guard= | |guard=Mid | ||
|startup= | |startup=7 | ||
|active= | |active= | ||
|recovery= | |recovery= | ||
|blockadv= | |blockadv=-8 | ||
|hitadv= | |hitadv=-4 | ||
|description= | |description= | ||
Crazy Diamond performs backhanded attack that reaches further out. | |||
*Faster and bigger than it seems at first glance. | |||
*Hits high up in juggles, but doesn’t launch very high. | |||
}} | }} | ||
}} | }} | ||
| Line 495: | Line 593: | ||
|image=JJASBR_Josuke_Part_4_Stand_5H.png | |image=JJASBR_Josuke_Part_4_Stand_5H.png | ||
|caption= | |caption= | ||
|name=5H | |name=s.5H | ||
|subtitle= | |subtitle= | ||
|data= | |data= | ||
{{AttackData-ASBR | {{AttackData-ASBR | ||
|damage= | |damage=36 (12, 24) [18 (8, 10)] | ||
|guard= | |guard=Mid | ||
|startup= | |startup=11 | ||
|active= | |active= | ||
|recovery= | |recovery= | ||
|blockadv= | |blockadv=-10 | ||
|hitadv= | |hitadv=-4 | ||
|description= | |description= | ||
Crazy Diamond moves forward and attacks with an uppercut. | |||
*Can convert into a combo when used as an anti-air if quickly canceled into [[JoJo's Bizarre Adventure: All-Star Battle R/Josuke Higashikata (Part 4)#Stand 623X|s.623L]]. | |||
*Great as combo filler for juggles, as it hits very high and launches very high as well. | |||
}} | }} | ||
}} | }} | ||
| Line 515: | Line 615: | ||
|image=JJASBR_Josuke_Part_4_Stand_2L.png | |image=JJASBR_Josuke_Part_4_Stand_2L.png | ||
|caption= | |caption= | ||
|name=2L | |name=s.2L | ||
|subtitle= | |subtitle= | ||
|data= | |data= | ||
{{AttackData-ASBR | {{AttackData-ASBR | ||
|damage= | |damage=14 | ||
|guard= | |guard=Low | ||
|startup= | |startup=7 | ||
|active= | |active= | ||
|recovery= | |recovery= | ||
|blockadv= | |blockadv=-2 | ||
|hitadv= | |hitadv=+2 | ||
|description= | |description= | ||
Crazy Diamond performs a crouching jab. | |||
*Despite its animation, hits Low. | |||
*Bigger than 5L, but still below average in range for a move of its kind. | |||
}} | }} | ||
}} | }} | ||
| Line 535: | Line 637: | ||
|image=JJASBR_Josuke_Part_4_Stand_2M.png | |image=JJASBR_Josuke_Part_4_Stand_2M.png | ||
|caption= | |caption= | ||
|name=2M | |name=s.2M | ||
|subtitle= | |subtitle= | ||
|data= | |data= | ||
{{AttackData-ASBR | {{AttackData-ASBR | ||
|damage= | |damage=23 | ||
|guard= | |guard=Low | ||
|startup= | |startup=9 | ||
|active= | |active= | ||
|recovery= | |recovery= | ||
|blockadv= | |blockadv=-4 | ||
|hitadv= | |hitadv=0 | ||
|description= | |description= | ||
Crazy Diamond performs a backhanded attack that reaches slightly upwards. | |||
*Good range for pokes and counter-pokes. | |||
*Shorter than s.5M and doesn’t hit as high up, but launches much higher in comparison. | |||
}} | }} | ||
}} | }} | ||
| Line 555: | Line 659: | ||
|image=JJASBR_Josuke_Part_4_Stand_2H.png | |image=JJASBR_Josuke_Part_4_Stand_2H.png | ||
|caption= | |caption= | ||
|name=2H | |name=s.2H | ||
|subtitle= | |subtitle= | ||
|data= | |data= | ||
{{AttackData-ASBR | {{AttackData-ASBR | ||
|damage= | |damage=36 | ||
|guard= | |guard=Low | ||
|startup= | |startup=13 | ||
|active= | |active= | ||
|recovery= | |recovery= | ||
|blockadv= | |blockadv=-8 | ||
|hitadv= | |hitadv=HKD | ||
|description= | |description= | ||
Crazy Diamond performs a sweeping kick. | |||
*Causes hard knockdown. | |||
*Good range for pokes, but not particularly useful otherwise. | |||
}} | }} | ||
}} | }} | ||
| Line 575: | Line 681: | ||
|image=JJASBR_Josuke_Part_4_Stand_3H.png | |image=JJASBR_Josuke_Part_4_Stand_3H.png | ||
|caption= | |caption= | ||
|name=3H | |name=s.3H | ||
|subtitle=DORA...! | |subtitle=DORA...! | ||
|data= | |data= | ||
{{AttackData-ASBR | {{AttackData-ASBR | ||
|damage= | |damage=25 [35] | ||
|guard= | |guard=Mid | ||
|startup= | |startup=23 | ||
|active= | |active= | ||
|recovery= | |recovery= | ||
|blockadv= | |blockadv=-28 | ||
|hitadv= | |hitadv=KD | ||
|description= | |description= | ||
Josuke and Crazy Diamond slide along the ground, after which Crazy Diamond kicks upwards. | |||
*Launches on hit. | |||
*Landing both hits of s.5H in a juggle guarantees this move will always connect. This is great for helping to prevent combo drops. | |||
*Canceling into s.623L on grounded hit allows a meterless conversion into a combo. | |||
*Can connect a [[JoJo's Bizarre Adventure: All-Star Battle R/Josuke Higashikata (Part 4)#Stand 421X|s.421L/M/H]], [[JoJo's Bizarre Adventure: All-Star Battle R/Josuke Higashikata (Part 4)#Stand 236X|s.236L/M/H]], or [[JoJo's Bizarre Adventure: All-Star Battle R/Josuke Higashikata (Part 4)#Stand 623X|s.623L/M/H]] against grounded opponents, while [[JoJo's Bizarre Adventure: All-Star Battle R/Josuke Higashikata (Part 4)#Stand 214X|s.214L/M/H]] can only combo during a juggle. | |||
}} | }} | ||
}} | }} | ||
| Line 595: | Line 705: | ||
|image=JJASBR_Josuke_Part_4_Stand_Jump_L.png | |image=JJASBR_Josuke_Part_4_Stand_Jump_L.png | ||
|caption= | |caption= | ||
|name= | |name=s.jL | ||
|subtitle= | |subtitle= | ||
|data= | |data= | ||
{{AttackData-ASBR | {{AttackData-ASBR | ||
|damage= | |damage=18 [9] | ||
|guard= | |guard=Overhead | ||
|startup= | |startup=9 | ||
|active= | |active= | ||
|recovery= | |recovery= | ||
| Line 607: | Line 717: | ||
|hitadv= | |hitadv= | ||
|description= | |description= | ||
Crazy Diamond performs a quick punch downwards. | |||
*Good for air-to-airs. | |||
}} | }} | ||
}} | }} | ||
| Line 615: | Line 726: | ||
|image=JJASBR_Josuke_Part_4_Stand_Jump_M.png | |image=JJASBR_Josuke_Part_4_Stand_Jump_M.png | ||
|caption= | |caption= | ||
|name= | |name=s.jM | ||
|subtitle= | |subtitle= | ||
|data= | |data= | ||
{{AttackData-ASBR | {{AttackData-ASBR | ||
|damage= | |damage=28 [14] | ||
|guard= | |guard=Overhead | ||
|startup= | |startup=11 | ||
|active= | |active= | ||
|recovery= | |recovery= | ||
| Line 627: | Line 738: | ||
|hitadv= | |hitadv= | ||
|description= | |description= | ||
Crazy Diamond performs a kick outwards. | |||
*Good for jump-ins and combo filler. | |||
}} | }} | ||
}} | }} | ||
| Line 633: | Line 745: | ||
====== <font style="visibility:hidden" size="0">Stand JH</font> ====== | ====== <font style="visibility:hidden" size="0">Stand JH</font> ====== | ||
{{MoveData | {{MoveData | ||
|image= | |image=JJASBR_Josuke_Part_4_Stand_Jump_H_(1).png | ||
|caption= | |caption= | ||
|name= | |image2=JJASBR_Josuke_Part_4_Stand_Jump_H_(2).png | ||
|caption2= | |||
|name=s.jH | |||
|subtitle= | |subtitle= | ||
|data= | |data= | ||
{{AttackData-ASBR | {{AttackData-ASBR | ||
|damage= | |damage=37 (22, 15) [20 (13, 7)] | ||
|guard= | |guard=Overhead | ||
|startup= | |startup=15 | ||
|active= | |active= | ||
|recovery= | |recovery= | ||
| Line 647: | Line 761: | ||
|hitadv= | |hitadv= | ||
|description= | |description= | ||
Crazy Diamond performs 2 jumping punches downwards. | |||
*Good for jump-ins and combo filler. | |||
}} | }} | ||
}} | }} | ||
| Line 654: | Line 769: | ||
====== <font style="visibility:hidden" size="0">Stand 236X</font> ====== | ====== <font style="visibility:hidden" size="0">Stand 236X</font> ====== | ||
{{MoveData | {{MoveData | ||
|image= | |image=JJASBR_Josuke_Part_4_Stand_236X_(1).png | ||
|caption= | |caption= | ||
|image2=JJASBR_Josuke_Part_4_Stand_236X_(2).png | |||
|caption2= | |||
|name=Rockabye baby! | |name=Rockabye baby! | ||
|input=236L/M/H | |input=s.236L/M/H | ||
|data= | |data= | ||
{{AttackData-ASBR | {{AttackData-ASBR | ||
|version=Light | |version=Light | ||
|damage= | |damage=83 (20, 4*12, 15) | ||
|guard= | |guard=Mid | ||
|startup= | |startup=19 | ||
|active= | |active= | ||
|recovery= | |recovery= | ||
|blockadv= | |blockadv=-6 | ||
|hitadv= | |hitadv=HKD | ||
|description= | |description= | ||
}} | }} | ||
{{AttackData-ASBR | {{AttackData-ASBR | ||
|version=Medium | |version=Medium | ||
|header=no | |header=no | ||
|damage= | |damage=100 (20, 5*13, 15) | ||
|guard= | |guard=Mid | ||
|startup= | |startup=25 | ||
|active= | |active= | ||
|recovery= | |recovery= | ||
|blockadv= | |blockadv=-10 | ||
|hitadv= | |hitadv=HKD | ||
|description= | |description= | ||
}} | }} | ||
{{AttackData-ASBR | {{AttackData-ASBR | ||
|version=Heavy | |version=Heavy | ||
|header=no | |header=no | ||
|damage= | |damage=119 (20, 6*14, 15) | ||
|guard= | |guard=Mid | ||
|startup= | |startup=37 | ||
|active= | |active= | ||
|recovery= | |recovery= | ||
|blockadv= | |blockadv=-16 | ||
|hitadv= | |hitadv=HKD | ||
|description= | |description= | ||
Crazy Diamond backhands the opponent before following up with a barrage of punches. | |||
*Different versions change the distance covered by Crazy Diamond. | |||
*This is a hitgrab. | |||
*Launches the opponent away on a successful hit, and causes hard knockdown. | |||
---- | |||
'''L version:''' | |||
*Crazy Diamond remains right next to Josuke. | |||
*Deals the least damage and builds the least amount of HH Gauge, but compensates by setting up the best oki. | |||
---- | |||
'''M version:''' | |||
*Crazy Diamond attack a bit away from Josuke. | |||
*A middle of the pact, still allowing for a jump-in (but it's harder to time right). | |||
---- | |||
'''H version:''' | |||
*Crazy Diamond attacks very far away from Josuke. | |||
*Deals the most damage and builds the most amount of HH Gauge, but acts as a hard neutral reset. | |||
}} | }} | ||
}} | }} | ||
====== <font style="visibility:hidden" size="0">Stand | ====== <font style="visibility:hidden" size="0">Stand 623X</font> ====== | ||
{{MoveData | {{MoveData | ||
|image= | |image=JJASBR_Josuke_Part_4_Stand_623X.png | ||
|caption= | |caption= | ||
|name= | |name=DORARARARARARARA! | ||
|input= | |input=s.623L/M/H | ||
|data= | |data= | ||
{{AttackData-ASBR | {{AttackData-ASBR | ||
|version=Light | |version=Light | ||
|damage= | |damage=61 (3, 4*12, 10) | ||
|guard= | |guard=Mid | ||
|startup= | |startup=9 | ||
|active= | |active= | ||
|recovery= | |recovery= | ||
|blockadv= | |blockadv=-4 | ||
|hitadv= | |hitadv=KD | ||
|description= | |description= | ||
}} | }} | ||
{{AttackData-ASBR | {{AttackData-ASBR | ||
|version=Medium | |version=Medium | ||
|header=no | |header=no | ||
|damage= | |damage=77 (5, 4*13, 20) | ||
|guard= | |guard=Mid | ||
|startup= | |startup=15 | ||
|active= | |active= | ||
|recovery= | |recovery= | ||
|blockadv= | |blockadv=-8 | ||
|hitadv= | |hitadv=KD | ||
|description= | |description= | ||
}} | }} | ||
{{AttackData-ASBR | {{AttackData-ASBR | ||
|version=Heavy | |version=Heavy | ||
|header=no | |header=no | ||
|damage= | |damage=93 (7, 4*14, 30) | ||
|guard= | |guard=Mid | ||
|startup= | |startup=21 | ||
|active= | |active= | ||
|recovery= | |recovery= | ||
|blockadv= | |blockadv=-12 | ||
|hitadv= | |hitadv=KD | ||
|description= | |description= | ||
Crazy Diamond performs a barrage of punches upwards. | |||
*The version used alters Crazy Diamond's movement. | |||
*The first hit causes crumple, causing the move to restand crouching opponents. Subsequent hits launch the opponent. | |||
*Triggers [[JoJo's Bizarre Adventure: All-Star Battle R/System#Rush Mode|Rush Mode]]. | |||
*Good anti-air. | |||
---- | |||
'''L version:''' | |||
*Josuke stays in place. | |||
*Does not have invul. | |||
*The only version that can be cancelled into [[JoJo's Bizarre Adventure: All-Star Battle R/Josuke Higashikata (Part 4)#Heart Heat Attack|HHA]]. | |||
*Has such low recovery that it can lead into a combo against airborne opponents. | |||
---- | |||
'''M version:''' | |||
*Josuke slides forward slightly. | |||
*This version has invul prior to the first active frame. | |||
*Cannot be Flash Canceled. | |||
---- | |||
'''H version:''' | |||
*Josuke slides forward more. | |||
*This version has invul up until the first active frame. | |||
*Cannot be Flash Canceled. | |||
}} | }} | ||
}} | }} | ||
====== <font style="visibility:hidden" size="0">Stand | ====== <font style="visibility:hidden" size="0">Stand 214X</font> ====== | ||
{{MoveData | {{MoveData | ||
|image= | |image=JJASBR_Josuke_Part_4_Stand_214X_(1).png | ||
|caption= | |caption=Punch | ||
|name= | |image2=JJASBR_Josuke_Part_4_Stand_214X_(2).png | ||
|input= | |caption2=Wall | ||
|image3=JJASBR_Josuke_Part_4_Stand_214X_(3).png | |||
|caption3=Enhanced Wall | |||
|name=He heals pretty quick! | |||
|input=s.214L/M/H | |||
|data= | |data= | ||
{{AttackData-ASBR | {{AttackData-ASBR | ||
|version=Light | |version=Light | ||
|damage= | |damage=15 | ||
|guard= | |guard=Low | ||
|startup= | |startup=16 | ||
|active= | |active= | ||
|recovery= | |recovery= | ||
|blockadv= | |blockadv=-12 | ||
|hitadv= | |hitadv=-10 | ||
|description= | |description= | ||
}} | }} | ||
{{AttackData-ASBR | {{AttackData-ASBR | ||
|version=Medium | |version=Medium | ||
|header=no | |header=no | ||
|damage= | |damage=15 | ||
|guard= | |guard=Low | ||
|startup= | |startup=16 | ||
|active= | |active= | ||
|recovery= | |recovery= | ||
|blockadv= | |blockadv=-12 | ||
|hitadv= | |hitadv=-10 | ||
|description= | |description= | ||
}} | }} | ||
{{AttackData-ASBR | {{AttackData-ASBR | ||
|version=Heavy | |version=Heavy | ||
|header=no | |header=no | ||
|damage= | |damage=15 | ||
|guard= | |guard=Low | ||
|startup= | |startup=16 | ||
|active= | |||
|recovery= | |||
|blockadv=-12 | |||
|hitadv=-10 | |||
|description= | |||
}} | |||
{{AttackData-ASBR | |||
|version=Wall | |||
|header=no | |||
|damage=20 [25] | |||
|guard=Mid | |||
|startup=40 | |||
|active= | |active= | ||
|recovery= | |recovery= | ||
|blockadv= | |blockadv=+14 | ||
|hitadv= | |hitadv=+20 | ||
|description= | |description= | ||
Crazy Diamond punches the ground and repairs the rubble into a wall. | |||
*The different versions of the move place the wall at different distances. | |||
*Stand Rush-compatible. | |||
*The wall remains for about 5 seconds, and will manifest even if the first hit is Flash Canceled. | |||
**Only one wall can be active at a time; attempting to create a second wall will destroy an existing one. | |||
**The wall can block most non-HHA/GHA projectiles, but will disintegrate upon blocking one such projectile. It will also disintegrate if either the opponent or Josuke touch it (Josuke will not be damaged in this instance). | |||
*While in [[JoJo's Bizarre Adventure: All-Star Battle R/Josuke Higashikata (Part 4)#Watch Your Mouth! Mode|Watch Your Mouth! Mode]], Josuke creates larger walls that deal more damage and can absorb a greater amount of projectiles. | |||
---- | |||
'''L version:''' | |||
*Crazy Diamond creates the wall right next to Josuke. | |||
*If not canceled into Stand Rush, the wall touches Crazy Diamond, causing it to disintegrate instantly (therefore not dealing damage). | |||
---- | |||
'''M version:''' | |||
*Crazy Diamond creates the wall away from Josuke. | |||
---- | |||
'''H version:''' | |||
*Crazy Diamond creates the wall very far away from Josuke. | |||
}} | }} | ||
}} | }} | ||
| Line 797: | Line 973: | ||
====== <font style="visibility:hidden" size="0">Stand 421X</font> ====== | ====== <font style="visibility:hidden" size="0">Stand 421X</font> ====== | ||
{{MoveData | {{MoveData | ||
|image= | |image=JJASBR_Josuke_Part_4_Stand_421X.png | ||
|caption= | |caption= | ||
|name=I'm a real Deadeye Dick! | |name=I'm a real Deadeye Dick! | ||
|input=421L/M/H | |input=s.421L/M/H | ||
|data= | |data= | ||
{{AttackData-ASBR | {{AttackData-ASBR | ||
|version=Light | |version=Light | ||
|damage= | |damage=50 | ||
|guard= | |guard=Mid | ||
|startup= | |startup=13 | ||
|active= | |active= | ||
|recovery= | |recovery= | ||
|blockadv= | |blockadv=-8 | ||
|hitadv= | |hitadv=-4 | ||
|description= | |description= | ||
}} | }} | ||
{{AttackData-ASBR | {{AttackData-ASBR | ||
|version=Medium | |version=Medium | ||
|header=no | |header=no | ||
|damage= | |damage=60 | ||
|guard= | |guard=Mid | ||
|startup= | |startup=17 | ||
|active= | |active= | ||
|recovery= | |recovery= | ||
|blockadv= | |blockadv=-16 | ||
|hitadv= | |hitadv=-10 | ||
|description= | |description= | ||
}} | }} | ||
{{AttackData-ASBR | {{AttackData-ASBR | ||
|version=Heavy | |version=Heavy | ||
|header=no | |header=no | ||
|damage= | |damage=70 | ||
|guard= | |guard=Mid | ||
|startup=21 | |||
|active= | |||
|recovery= | |||
|blockadv=-18 | |||
|hitadv=KD | |||
|description= | |||
Crazy Diamond flicks an object at the opponent. | |||
*The version used alters the speed of the projectile. | |||
*Shares IPS with the Stand Off version. | |||
*Reaches very high, so it can be crouched under. | |||
---- | |||
'''L version:''' | |||
*Crazy Diamond fires a bearing. | |||
*Travels at a slow speed. | |||
---- | |||
'''M version:''' | |||
*Crazy Diamond fires a bearing. | |||
*Travels at a fast speed. | |||
---- | |||
'''H version:''' | |||
*Crazy Diamond fires a bullet. | |||
*Travels the fastest. | |||
*Launches the opponent away on hit. | |||
}} | |||
}} | |||
====== <font style="visibility:hidden" size="0">Stand 3M</font> ====== | |||
{{MoveData | |||
|image=JJASBR_Josuke_Part_4_Stand_22H-3M_(1).png | |||
|caption= | |||
|image2=JJASBR_Josuke_Part_4_Stand_22H-3M_(2).png | |||
|caption2= | |||
|name=I'm not done kicking your ass! | |||
|input=s.3M during Watch Your Mouth! Mode | |||
|data= | |||
{{AttackData-ASBR | |||
|damage=0 | |||
|guard=Mid | |||
|startup= | |startup= | ||
|active= | |active= | ||
| Line 838: | Line 1,050: | ||
|hitadv= | |hitadv= | ||
|description= | |description= | ||
Josuke grabs the opponent off the ground, allowing him to continue his enraged assault. | |||
*Identical to the Stand Off version. | |||
*Can only be used when the opponent is downed, but Josuke does not have to be near them to do so. | |||
*Restands the opponent. | |||
}} | }} | ||
}} | }} | ||
</div> | </div> | ||
==System Mechanics== | ==System Mechanics== | ||
====== <font style="visibility:hidden" size="0">Throw</font> ====== | ====== <font style="visibility:hidden" size="0">Throw</font> ====== | ||
{{MoveData | {{MoveData | ||
|image= | |image=JJASBR_Josuke_Part_4_Throw_(1).png | ||
|caption= | |caption= | ||
|image2=JJASBR_Josuke_Part_4_Throw_(2).png | |||
|caption2= | |||
|name=Throw | |name=Throw | ||
|subtitle=Guess I wasn't mad enough | |subtitle=Guess I wasn't mad enough | ||
| Line 853: | Line 1,069: | ||
|data= | |data= | ||
{{AttackData-ASBR | {{AttackData-ASBR | ||
|damage=130 | |||
|guard=Throw | |||
|startup=6 | |||
|damage= | |||
|guard= | |||
|startup= | |||
|active= | |active= | ||
|recovery= | |recovery= | ||
| Line 875: | Line 1,077: | ||
|hitadv= | |hitadv= | ||
|description= | |description= | ||
Josuke grabs the opponent, who Crazy Diamond punches. | |||
*Leaves the opponent next to Josuke, but its high recovery prevents OTG hits from "[[JoJo's Bizarre Adventure: All-Star Battle R/Josuke Higashikata (Part 4)#214X|DORA!]]". | |||
*Regardless of the version used, Josuke's Throws slightly rotate the axis. | |||
*Both Throws are identical besides direction. | |||
}} | }} | ||
}} | }} | ||
| Line 884: | Line 1,089: | ||
|caption= | |caption= | ||
|name=Assist | |name=Assist | ||
|subtitle= | |subtitle=DORARARARARARARA!<br>{{NotationIcon-ASBR|Assault}}{{NotationIcon-ASBR|Burst}}{{NotationIcon-ASBR|Burst}} | ||
|data= | |data= | ||
{{AttackData-ASBR | {{AttackData-ASBR | ||
|damage= | |damage=93 (7, 4*14, 30) | ||
|guard= | |guard=Mid | ||
|startup= | |startup= | ||
|active= | |active= | ||
|recovery= | |recovery= | ||
|blockadv= | |blockadv= | ||
|hitadv= | |hitadv=KD | ||
|description= | |description= | ||
Josuke summons Crazy Diamond, who performs a barrage of punches upwards. | |||
*Assault Assist Stocks: 1 | |||
*Reversal Assist Stocks: 2 | |||
*Based on [[JoJo's Bizarre Adventure: All-Star Battle R/Josuke Higashikata (Part 4)#Stand 623X|s.623H]] | |||
*Launches on hit. | |||
*The first hit causes crumple, causing the move to restand crouching opponents. | |||
}} | }} | ||
}} | }} | ||
====== <font style="visibility:hidden" size="0"> | ====== <font style="visibility:hidden" size="0">5S</font> ====== | ||
{{MoveData | {{MoveData | ||
|image=JJASBR_Josuke_Part_4_Stand_On.png | |image=JJASBR_Josuke_Part_4_Stand_On.png | ||
| Line 917: | Line 1,127: | ||
|hitadv= | |hitadv= | ||
|description= | |description= | ||
(Un)Summons Crazy Diamond, altering Josuke's moveset and abilities | (Un)Summons Crazy Diamond, altering Josuke's moveset and abilities. | ||
}} | }} | ||
}} | }} | ||
| Line 923: | Line 1,133: | ||
==Heart Heat Attack== | ==Heart Heat Attack== | ||
{{MoveData | {{MoveData | ||
|image= | |image=JJASBR_Josuke_Part_4_HHA_(1).png | ||
|caption= | |caption= | ||
|image2=JJASBR_Josuke_Part_4_HHA_(2).png | |||
|caption2= | |||
|image3=JJASBR_Josuke_Part_4_HHA_(3).png | |||
|caption3= | |||
|name=You're in my range... | |name=You're in my range... | ||
|input=236 + Any Two Attack Buttons | |input=236 + Any Two Attack Buttons | ||
|data= | |data= | ||
{{AttackData-ASBR | {{AttackData-ASBR | ||
|damage= | |damage=176 (24+2*33+14+2*6+12+24*2) | ||
|guard= | |guard=Mid | ||
|startup= | |startup=2+10 | ||
|active= | |active= | ||
|recovery= | |recovery= | ||
|blockadv= | |blockadv=-24 | ||
|hitadv= | |hitadv=HKD (+82) | ||
|description= | |description= | ||
Crazy Diamond punches the opponent, following up with a barrage of punches and finishing with an overhead punch followed by an uppercut. | |||
*This is a hitgrab. | |||
*Has enough frame advantage on hit to follow up with 66 > 214H. | |||
*No invincibility, unlike most HHAs. | |||
}} | }} | ||
}} | }} | ||
{{MoveData | {{MoveData | ||
|image= | |image=JJASBR_Josuke_Part_4_HHA_Followup.png | ||
|caption= | |caption= | ||
|name=Meet my homing missile! | |name=Meet my homing missile! | ||
|input=236L/M/H during | |input=236L/M/H during "You're in my range..." | ||
|data= | |data= | ||
{{AttackData-ASBR | {{AttackData-ASBR | ||
|damage= | |damage=250 (24+2*30+8+2*9+27*2+68+18) | ||
|guard= | |guard= | ||
|startup= | |startup= | ||
| Line 954: | Line 1,171: | ||
|recovery= | |recovery= | ||
|blockadv= | |blockadv= | ||
|hitadv= | |hitadv=HKD (+88) | ||
|description= | |description= | ||
Crazy Diamond shoots a piece of glass through the opponent and "repairs" it back to hit a second time. | |||
*Changes the ending of the HHA. | |||
*Costs an additional 0.5 HH Gauge. | |||
}} | }} | ||
}} | }} | ||
| Line 962: | Line 1,181: | ||
==Great Heat Attack== | ==Great Heat Attack== | ||
{{MoveData | {{MoveData | ||
|image= | |image=JJASBR_Josuke_Part_4_GHA_(1).png | ||
|caption= | |caption=''Crazy Diamond!'' | ||
|image2=JJASBR_Josuke_Part_4_GHA_(2).png | |||
|caption2=''If I heal you first...'' | |||
|image3=JJASBR_Josuke_Part_4_GHA_(3).png | |||
|caption3=''Then it's not cheating, is it?!'' | |||
|name=You're already fixed! | |name=You're already fixed! | ||
|input=236L+M+H | |input=236L+M+H | ||
|data= | |data= | ||
{{AttackData-ASBR | {{AttackData-ASBR | ||
|damage= | |damage=316 (60+20+2*90+56) | ||
|guard= | |guard=Mid | ||
|startup= | |startup=2+24 | ||
|active= | |active= | ||
|recovery= | |recovery= | ||
|blockadv= | |blockadv=-26 | ||
|hitadv= | |hitadv=HKD | ||
|description= | |description= | ||
Josuke summons Crazy Diamond, who punches the opponent to the ground, healing them back to full health before beating them down with a barrage of punches. | |||
*Among the lower-damaging GHAs in the game. | |||
*The heal is purely aesthetic and doesn't affect actual damage numbers. | |||
}} | }} | ||
}} | }} | ||
==Costumes== | |||
===Normal=== | |||
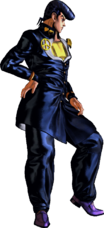
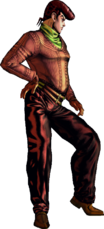
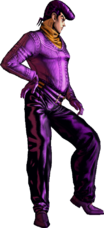
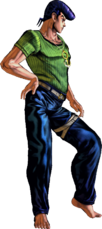
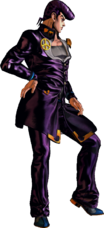
{{ColorGallery | filePrefix=JJASBR_Josuke_Part_4_Color_ | imageFileTypes=png| imageWidths=250 | colors= | |||
{{ColorGallery/Color|1| text=Normal (Color 1) }} | |||
{{ColorGallery/Color|2| text=Normal (Color 2) }} | |||
{{ColorGallery/Color|3| text=Normal (Color 3) }} | |||
{{ColorGallery/Color|4| text=Normal (Color 4) }} | |||
}} | |||
===Special=== | |||
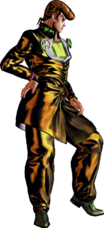
{{ColorGallery | filePrefix=JJASBR_Josuke_Part_4_Color_ | imageFileTypes=png| imageWidths=250 | colors= | |||
{{ColorGallery/Color|Special A 1| text=Special A (Color 1) }} | |||
{{ColorGallery/Color|Special A 2| text=Special A (Color 2) }} | |||
{{ColorGallery/Color|Special B 1| text=Special B (Color 1) }} | |||
{{ColorGallery/Color|Special B 2| text=Special B (Color 2) }} | |||
{{ColorGallery/Color|Special C 1| text=Special C (Color 1) }} | |||
{{ColorGallery/Color|Special C 2| text=Special C (Color 2) }} | |||
{{ColorGallery/Color|Special D 1| text=Special D (Color 1) }} | |||
{{ColorGallery/Color|Special D 2| text=Special D (Color 2) }} | |||
{{ColorGallery/Color|Special E 1| text=Special E (Color 1) }} | |||
{{ColorGallery/Color|Special E 2| text=Special E (Color 2) }} | |||
}} | |||
===Extra=== | |||
{{ColorGallery | filePrefix=JJASBR_Josuke_Part_4_Color_ | imageFileTypes=png| imageWidths=250 | colors= | |||
{{ColorGallery/Color|Extra A 1| text=Extra A (Color 1) }} | |||
{{ColorGallery/Color|Extra A 2| text=Extra A (Color 2) }} | |||
}} | |||
===Stand=== | |||
{{ColorGallery | filePrefix=JJASBR_Josuke_Part_4_Color_ | imageFileTypes=png| imageWidths=250 | colors= | |||
{{ColorGallery/Color|Stand 1| text={{Tooltip|color=purple|text=Crazy Diamond (Color 1)|hovertext=Used for odd-numbered colors.}} }} | |||
{{ColorGallery/Color|Stand 2| text={{Tooltip|color=purple|text=Crazy Diamond (Color 2)|hovertext=Used for even-numbered colors.}} }} | |||
}} | |||
==Notable Players== | |||
:{{Template:PlayerListDisclaimer}} | |||
{| class="wikitable" style="text-align:center;" | |||
!width="95"|Name | |||
!width="90"|Usual Color | |||
!width="125"|Region | |||
!Contact | |||
!Example Play | |||
|- | |||
|やこ (Yako)<br>(ALL-_-f_o_X) | |||
|[[File:JJASBR Josuke Part 4 Color Extra A 1.png|200x200px|Extra A (Color 1)]] | |||
|[[File:Flag_jp.png]]<br>Japan | |||
|[https://twitter.com/__Yac0 @__Yac0] | |||
|[https://www.youtube.com/watch?v=_FoFkuDrh8I Tournament Footage]<br>[https://www.youtube.com/@user-yn4re9ej6u/streams YouTube Channel] | |||
|} | |||
==Navigation== | ==Navigation== | ||
Latest revision as of 21:36, 8 June 2024
Introduction
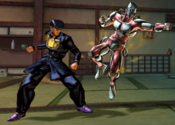
- This article is about the character from Part 4, Diamond is Unbreakable, primarily known as "Josuke 4". For information about the character from Part 8, JoJolion, see Josuke Higashikata (Part 8).
The primary protagonist of Diamond is Unbreakable, the fourth part of JoJo's Bizarre Adventure, Josuke Higashikata is a rushdown character with a variety of powerful tools. He can play at a variety of ranges well and convert just about any hit into a knockdown, allowing him to set up his powerful offense.
On offense, he boasts a strong mixup game with his left-right setups. His Guard Damage also adds an additional threat of guard breaking to his pressure.
|
|
|
| Pros | Cons |
|
|
Watch Your Mouth! Mode
After blocking an attack with "Watch Your Mouth!", Josuke enters a unique state where he receives the following benefits:
- Josuke features a special version of Super Armor that automatically escapes universal Throws and prevents the successful activation of Command Throws, as well as attacks with hitgrab properties, HHAs and GHAs.
- All of Josuke's Normal Attacks have altered speed, damage and Guard Damage.
- None of Josuke's moves will activate Counters.
- Josuke is able to chain his ground attacks together indefinitely, including chaining the same normal repeatedly.
- For the purposes of IPS, each Normal Attack can be used up to 8 times in a single combo.
- Gains access to "I'm not done kicking your ass!".
- "He heals pretty quickly!" is enhanced.
In return, however, Josuke will be forced to walk towards the opponent, becoming unable to stop moving, crouch, run, move backwards, dodge, jump in any direction that isn't forward, or block.
Stats
| Style | Health | Low Health Mode | Hashtag(s) |
|---|---|---|---|
| Stand | 1000 | Rumble | #ASBR_JOS #ASBR_JSK4 |
Move List
Stand Off
- Values in [] apply during Watch Your Mouth! Mode.
Normal Moves
5L
5L
|
|---|
5M
5M
|
|---|
5H
5H
|
|---|
2L
2L
|
|---|
2M
2M
|
|---|
2H
2H
|
|---|
6H
6H
Get closer and pull 300km/h! |
|---|
JL
j.L
|
|---|
JM
j.M
|
|---|
JH
j.H
|
|---|
Special Moves
236X
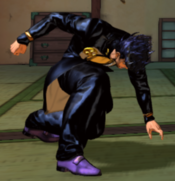
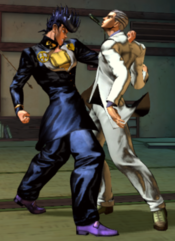
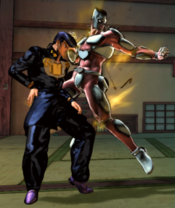
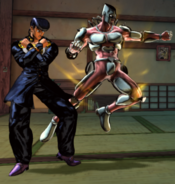
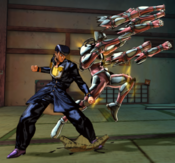
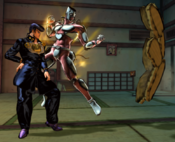
Break through, beat you up! 236L/M/H Start Start Light Light Medium Medium Heavy Heavy
|
|---|
214X
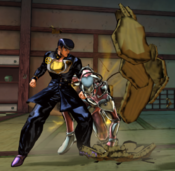
DORA! 214L/M/H Attack Attack Aftermath Aftermath
|
|---|
623X
As you were!
623L/M/H |
|---|
421X
I'm a real Deadeye Dick!
421L/M/H |
|---|
22H
Watch Your Mouth! 22H WHAT DID YOU SAY ABOUT MY HAIR?! WHAT DID YOU SAY ABOUT MY HAIR?!
|
|---|
3M
I'm not done kicking your ass!
3M during Watch Your Mouth! Mode |
|---|
Stand On
- Values in [] apply during Watch Your Mouth! Mode.
Normal Moves
Stand 5L
s.5L
|
|---|
Stand 5M
s.5M
|
|---|
Stand 5H
s.5H
|
|---|
Stand 2L
s.2L
|
|---|
Stand 2M
s.2M
|
|---|
Stand 2H
s.2H
|
|---|
Stand 3H
s.3H
DORA...! |
|---|
Stand JL
s.jL
|
|---|
Stand JM
s.jM
|
|---|
Stand JH
s.jH
|
|---|
Special Moves
Stand 236X
Rockabye baby!
s.236L/M/H |
|---|
Stand 623X
DORARARARARARARA!
s.623L/M/H |
|---|
Stand 214X
He heals pretty quick! s.214L/M/H Punch Punch Wall Wall Enhanced Wall Enhanced Wall
|
|---|
Stand 421X
I'm a real Deadeye Dick!
s.421L/M/H |
|---|
Stand 3M
I'm not done kicking your ass!
s.3M during Watch Your Mouth! Mode |
|---|
System Mechanics
Throw
Throw
Guess I wasn't mad enough 5/4 + Any Two Attack Buttons |
|---|
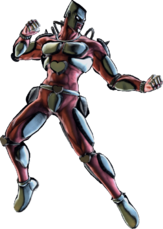
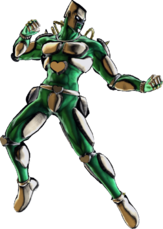
Assist
Assist
DORARARARARARARA! |
|---|
5S
Stand On/Off 5S Stand On Stand On Stand Off Stand Off
|
|---|
Heart Heat Attack
You're in my range...
236 + Any Two Attack Buttons |
|---|
Meet my homing missile!
236L/M/H during "You're in my range..." |
|---|
Great Heat Attack
You're already fixed! 236L+M+H Crazy Diamond! Crazy Diamond! If I heal you first... If I heal you first... Then it's not cheating, is it?! Then it's not cheating, is it?!
|
|---|
Costumes
Normal
Special
Extra
Stand
Notable Players
- Disclaimer: This list is derived from community input and is in no way comprehensive or a form of ranking of any kind. Our community criteria can be found here.
| Name | Usual Color | Region | Contact | Example Play |
|---|---|---|---|---|
| やこ (Yako) (ALL-_-f_o_X) |

|
Japan |
@__Yac0 | Tournament Footage YouTube Channel |
